# Modal llms-full.txt
> Modal is a platform for running Python code in the cloud with minimal
> configuration, especially for serving AI models and high-performance batch
> processing. It supports fast prototyping, serverless APIs, scheduled jobs,
> GPU inference, distributed volumes, and sandboxes.
Important notes:
- Modal's primitives are embedded in Python and tailored for AI/GPU use cases,
but they can be used for general-purpose cloud compute.
- Modal is a serverless platform, meaning you are only billed for resources used
and can spin up containers on demand in seconds.
You can sign up for free at [https://modal.com] and get $30/month of credits.
## Guides
### Functions
#### Functions
# Modal Functions
Modal Functions execute Python code using highly scalable serverless cloud compute.
Preparing a function to run on Modal is as simple as defining an [App](https://modal.com/docs/guide/apps) and registering the function using the [`@app.function()`](https://modal.com/docs/sdk/py/latest/App#function) decorator:
```python
app = modal.App("basic-function")
@app.function()
def f(x: int, exp: int) -> int:
return x**exp
```
The wrapped function becomes a [`modal.Function`](https://modal.com/docs/sdk/py/latest/Function) that can be called from a local script or deployed and invoked on demand from other applications as if it were part of their codebase.
When you invoke the Function, Modal handles all of the operational details: booting a container, routing your inputs, and propagating any exceptions. If you don't send more inputs, the Function will automatically scale to zero so that it incurs no ongoing cost. Information about the Function invocation, any logs it produced, and a rich set of container metrics are automatically captured and presented across a number of observability surfaces.
## Configuring the Function runtime
The Function runtime is configured via arguments to the [`@app.function()`](https://modal.com/docs/sdk/py/latest/App#function) decorator. Everything about the container environment and the resources available to the Function can be defined within your Python codebase, without reference to external configuration files.
Functions receive a baseline allotment of [CPU and memory](https://modal.com/docs/guide/resources). Explicit resource configuration is not necessary for simple tasks, because Functions can opportunistically burst above this baseline when needed. Heavier jobs can be provisioned with additional resources to guarantee availability:
```python
@app.function(cpu=16, memory=32768) # 16 physical cores, 32 GiB of RAM
def f():
...
```
Functions can also be provisioned with one or more [GPUs](https://modal.com/docs/guide/gpu):
```python
@app.function(gpu="H200:8")
def f():
...
```
Functions execute within arbitrary container environments, as defined by the Function's [Image](https://modal.com/docs/guide/images). Each Function in the App can have its own Image. Images can include resources including Python libraries from PyPI or private repositories, binary dependencies like FFmpeg or OpenCV, and data copied from your local system:
```python
image = (
modal.Image.debian_slim()
.uv_sync()
.apt_install("ffmpeg")
.add_local_dir("data", "/data")
)
@app.function(image=image)
def f():
...
```
If the Function is provisioned with a GPU, the [CUDA drivers](https://modal.com/docs/guide/cuda) are automatically included.
Modal includes the Function's source in the container by default. Depending on the [project structure](https://modal.com/docs/guide/project-structure), this will be either the script file or entire package where the Function's implementation is defined. As a consequence, Functions do not need to be self-contained and can reference other resources in their module.
Larger datasets, such as model weights, can be mounted into the container using a Modal [Volume](https://modal.com/docs/guide/volumes) or [CloudBucketMount](https://modal.com/docs/guide/cloud-bucket-mounts):
```python
vol = modal.Volume.from_name("model-weights")
@app.function(volumes={"/models": vol})
def f():
...
```
Environment variables can be defined in the container runtime by passing them as secure [Secrets](https://modal.com/docs/guide/secrets) or by setting them directly:
```python
api_key = modal.Secret.from_name("api-key")
@app.function(secrets=[api_key], env={"LOG_LEVEL": "info"})
def f():
...
```
## Function invocation
Modal Functions are called by one of their [invocation methods](https://modal.com/docs/guide/function-invocation-methods), such as [`f.remote()`](https://modal.com/docs/sdk/py/latest/Function#remote) or [`f.spawn()`](https://modal.com/docs/sdk/py/latest/Function#spawn). When referenced by another Function or local entrypoint in the same App, a Function can be invoked directly:
```python
@app.function()
def f() -> str:
return "Hello from a Modal container"
@app.function()
def g() -> str:
return f.remote()
@app.local_entrypoint()
def main():
print(g.remote())
```
Functions can be invoked from another App or from outside of Modal after a [lookup](https://modal.com/docs/guide/trigger-deployed-functions) using the App and Function names:
```python notest
f = modal.Function.from_name("prod-app", "f")
result = f.remote()
```
Remote lookups and invocations can also be performed via our [JavaScript](https://modal.com/docs/sdk/js/latest) and [Go](https://modal.com/docs/sdk/go/latest) SDKs, allowing you to execute code that leverages Python's AI ecosystem from within applications written in other languages:
{#snippet javascript()}
```javascript notest
const f = await modal.functions.fromName("prod-app", "f");
result = await f.remote();
```
{/snippet}
{#snippet go()}
```go notest
f, _ := mc.Functions.FromName(ctx, "prod-app", "f", nil)
result, err := f.Remote(ctx, nil, nil)
```
{/snippet}
Applying one of the [Web Function](https://modal.com/docs/guide/webhooks) decorators assigns a URL for the Function and allows you to invoke it from anywhere via HTTP:
```python
image = modal.Image.debian_slim().uv_pip_install("fastapi[standard]")
@app.function(image=image)
@modal.fastapi_endpoint()
def f() -> dict[str, str]:
return {"message": "Hello from a Modal container"}
```
Note that Web Functions are open to the internet by default, but they can optionally require authentication via [Proxy Tokens](https://modal.com/docs/guide/webhook-proxy-auth).
Web Functions are designed for conveniently exposing simple Python functions as web services; use Modal's [Server](https://modal.com/docs/guide/servers) primitive instead for high concurrency or latency-sensitive applications.
Functions can also be automatically invoked on a schedule, akin to a cron job:
```python
@app.function(schedule=modal.Cron("0 6 * * *", timezone="America/New_York"))
def f():
...
```
## Execution semantics
Modal Functions abstract several principles of reliable cloud compute orchestration to present an input/output interface that looks like a local Python function call.
Function invocations are automatically authenticated via your Modal token/secret credentials and authorized per your [RBAC](https://modal.com/docs/guide/rbac) configuration. The Function implementation does not need to perform access control.
Modal is responsible for scheduling containers and routing your inputs to them. By default, Function containers can start anywhere in our global fleet, which maximizes availability and minimizes scheduling latency. To constrain container scheduling, e.g. for compliance, [configure the compute and routing regions](https://modal.com/docs/guide/region-selection):
```python
@app.function(region="eu", routing_region="eu-west")
def f():
...
```
Note that compute region selection incurs a [pricing multiplier](https://modal.com/docs/guide/region-selection#pricing); routing region selection does not. Region selection also limits the pool of compute, especially when combined with specific GPUs or large resource requests, which can impact scheduling latency.
Because container scheduling is reactive to input load, a container may not be available at the moment of invocation. Inputs will queue in Modal's I/O system until they can be distributed to available containers. If inputs are enqueued too quickly or the queue fills up, they will be rejected with a [`ResourceExhaustedError`](https://modal.com/docs/sdk/py/latest/exception#resourceexhaustederror). For batch workloads, prefer the durable [`f.spawn()`](https://modal.com/docs/sdk/py/latest/Function#spawn) method, which supports higher invocation rates and substantially deeper input queues.
Modal applies an input [timeout](https://modal.com/docs/guide/timeouts) to each invocation; timeouts do not need to be set in the calling context. Timeouts are short by default (5 minutes), but they can be extended up to 24 hours for long-running processes like model training:
```python
@app.function(timeout=86400) # 24 hours
def f():
...
```
Occasionally, containers will fail while executing inputs, e.g. due to [preemption](https://modal.com/docs/guide/preemption) or out-of-memory (OOM) errors. Modal automatically retries any inputs that a container was running when it failed. As a consequence, Function implementations should be idempotent. CPU functions can opt for non-preemptibility, although this incurs a pricing multiplier:
```python
@app.function(nonpreemptible=True)
def f():
...
```
Exceptions that originate in the Function's implementation are not automatically retried, but input [retries](https://modal.com/docs/guide/retries) can be enabled:
```python
@app.function(retries=3)
def f():
...
```
## Autoscaling and parallelism
Modal Functions autoscale by default. Just as the Function automatically boots a container in response to an initial input, it will boot additional containers if further inputs are received while it is busy. Under ongoing load, the autoscaler will manage the container pool (booting containers or scaling them down) to accommodate fluctuating levels of demand.
Functions expose several options to control the [autoscaling behavior](https://modal.com/docs/guide/scale). Use `min_containers` or `buffer_containers` to reduce cold start penalties by keeping additional idle containers running, and set `max_containers` to limit scaleup under heavy demand:
```python
@app.function(min_containers=1, buffer_containers=1, max_containers=20)
def f():
...
```
After a container finishes handling an input, it is available for reuse. Container reuse reduces average latency, because subsequent inputs will be handled immediately instead of waiting for a new container to boot. As load decreases, Modal will gradually scale down containers that are idle, and Functions will eventually scale to zero if inputs cease altogether. The `scaledown_window` controls the aggressiveness of this behavior:
```python
@app.function(scaledown_window=600) # Idle for longer to better handle sporadic load patterns
def f():
...
```
While most Function configuration requires a redeployment to change, the autoscaler parameters can be dynamically updated using [`f.update_autoscaler()`](https://modal.com/docs/sdk/py/latest/Function#update_autoscaler):
```python notest
f = modal.Function.from_name("prod-app", "f")
f.update_autoscaler(max_containers=50) # Override the Function's decorator configuration
```
Note that any dynamic updates will be reset by a subsequent deployment.
Because Functions autoscale rapidly, they are a good fit for bursty workloads or batch jobs that require fan-out parallelism. The batch-oriented [`f.map()`](https://modal.com/docs/sdk/py/latest/Function#map) and [`f.spawn_map()`](https://modal.com/docs/sdk/py/latest/Function#spawn_map) methods facilitate parallel execution by efficiently pushing an iterable of inputs into Modal:
```python notest
for result in f.map(inputs): # Iterate in parallel and handle each result
...
f.spawn_map(inputs) # Higher parallelism with durable semantics for fire-and-forget batch jobs
```
Parallel execution can also be achieved using concurrency patterns. The [`f.spawn()`](https://modal.com/docs/sdk/py/latest/Function#spawn) method returns a [`modal.FunctionCall`](https://modal.com/docs/sdk/py/latest/FunctionCall), which acts like a Future:
```python notest
fc = f.spawn(x)
result = fc.get()
```
Spawning multiple calls allows them to run in parallel:
```python notest
fcs = [f.spawn(x_i) for x_i in xs]
results = modal.FunctionCall.gather(*fcs)
```
Async codebases can also use Modal's [`aio` interface](https://modal.com/docs/guide/async) to apply concurrency patterns with any invocation method:
```python notest
coros = [f.remote.aio(x_i) for x_i in xs]
results = await asyncio.gather(*coros)
```
## Container lifecycle management
While Modal containers boot in less than a second, your application logic may require expensive additional setup, such as loading model weights from disk. By structuring the Function's code as a class and using the [`@app.cls()`](https://modal.com/docs/sdk/py/latest/App#cls) decorator, you can [separate the startup logic](https://modal.com/docs/guide/lifecycle-functions) from the input handling:
```python
@app.cls()
class InferenceEngine:
@modal.enter()
def setup(self):
self.model = load_model()
@modal.method()
def predict(self, text: str) -> float:
return self.model.predict(text)
```
In this example, the method wrapped with the [`@modal.enter()`](https://modal.com/docs/sdk/py/latest/enter) decorator will run only once, as part of container startup. The container will not be considered "ready" until the startup method or methods complete, and Modal will wait for this event before sending the container any inputs.
A Cls is invoked by "constructing" the class and calling the method decorated with [`@modal.method()`](https://modal.com/docs/sdk/py/latest/method). As with normal Functions, this can be a local reference or a lookup:
```python notest
result = InferenceEngine().predict.remote(text) # Refer to a Cls on the same App
InferenceEngine = modal.Cls.from_name("prod-app", "InferenceEngine")
result = InferenceEngine().predict.remote(text) # Refer to a Cls via a lookup
```
Structuring your code as a class also lets you define container teardown logic in methods wrapped with the [`@modal.exit()`](https://modal.com/docs/sdk/py/latest/exit) decorator. This is useful for cleanup operations like gracefully closing connections to databases. The exit handler can also be used to make your application more resilient to [container preemption](https://modal.com/docs/guide/preemption).
Any state written to the `self` namespace will persist across the calls handled by an individual container, but it will be discarded when the container terminates. State can be shared across containers using Modal's distributed [Dict](https://modal.com/docs/guide/dicts) or [Queue](https://modal.com/docs/guide/queues) primitives.
If the Function produces local state that should not leak across inputs, you can set `single_use_containers=True`. This causes each container to terminate after handling an input. Note that single-use containers add some latency and cost, since they do not benefit from amortizing container startup over multiple inputs.
## Function parametrization
To write templated container lifecycle logic, add [`modal.parameter()`](https://modal.com/docs/sdk/py/latest/parameter) declarations to the class:
```python
@app.cls()
class InferenceEngine:
model_name: str = modal.parameter()
@modal.enter()
def startup(self):
self.model = load_model(self.model_name)
@modal.method()
def predict(self, input: str) -> float:
...
```
This creates a [Parametrized Function](https://modal.com/docs/guide/parametrized-functions). Supply values for the parameters when constructing the Cls in a calling context, which creates a specific instance of the Function:
```python notest
result = InferenceEngine(model_name="tts-large").predict.remote(text)
```
Because the parameters apply to the entire container lifecycle, every distinct set of parameter values corresponds to a separate, independently autoscaling _container pool_. This can also be leveraged to partition a Function's containers, even when the parameter values are not read at startup. For example, you may wish to process data from different customers in separate containers:
```python notest
result = PartitionedInferenceEngine(customer_id="c-024").predict.remote(text)
```
Note that there is a limit on the number of distinct instances each Function can have, so this approach is only suited for partitioning schemes with relatively low cardinality. Prefer using `single_use_containers=` for container isolation when parameter values would not frequently recur and benefit from container reuse.
## Dynamic configuration
Updating configuration values in the [`@app.function()`](https://modal.com/docs/sdk/py/latest/App#function) decorator requires a [redeployment](https://modal.com/docs/guide/managing-deployments), but it's also possible to [dynamically configure](https://modal.com/docs/guide/dynamic-function-config) the Function from a call site using [`f.with_options()`](https://modal.com/docs/sdk/py/latest/Function#with_options). This is useful in cases where specific inputs or parameter values require different resources, such as different GPUs:
```python notest
result = InferenceEngine(model_name="tts-large").predict.remote(text)
InferenceEngineH200 = InferenceEngine.with_options(gpu="H200")
result = InferenceEngineH200(model_name="tts-xlarge").predict.remote(text)
```
As with Parametrized Functions (but unlike updates to the autoscaler configuration), each distinct set of dynamic options corresponds to an independent container pool. If dynamically configuring CPU or memory, use a coarse set of values to benefit from container reuse.
## Concurrency and batching
By default, each Function container will handle one input at a time. Functions support two distinct patterns for handling multiple inputs.
[Input concurrency](https://modal.com/docs/guide/concurrent-inputs), enabled using the [`@modal.concurrent()`](https://modal.com/docs/sdk/py/latest/concurrent) decorator, allows Functions to accept multiple inputs and execute them concurrently using either threads or asyncio tasks:
```python
@app.function()
@modal.concurrent(max_inputs=10)
def f(x):
... # Sync implementation; each input runs in its own thread
@app.function()
@modal.concurrent(max_inputs=10)
async def g(x):
... # Async implementation; each input runs on the main thread in an asyncio task
```
Functions can benefit from input concurrency if they are I/O bound, e.g. because they make network requests or database queries. Some GPU frameworks can also benefit from input concurrency via continuous batching. Input concurrency is less likely to be useful if the Function is CPU bound.
An alternative strategy is [dynamic batching](https://modal.com/docs/guide/dynamic-batching), enabled using the [`@modal.batched()`](https://modal.com/docs/sdk/py/latest/batched) decorator. A batched Function must be defined as accepting a list (or lists) of inputs and returning a list of outputs:
```python
@app.function()
@modal.batched(max_batch_size=4, wait_ms=1000)
def f(x: list[int], y: list[int]) -> list[int]:
return [x_i + y_i for x_i, y_i in zip(x, y)]
```
When calling a batched Function, inputs are sent individually, buffered by Modal until the batch size is filled or the wait period elapses, and then processed in a single function call. From the perspective of any individual caller, this looks no different from a normal Function invocation:
```python notest
xy_sum = f.remote(2, 6)
```
Dynamic batching is especially useful in cases where you can leverage vectorization via tensor or array frameworks like torch or numpy.
#### Invocation methods
# Function invocation methods
Modal [Functions](https://modal.com/docs/guide/functions) expose several different invocation methods. These methods have semantics that vary across multiple dimensions. Understanding how they vary will let you choose the method that is most appropriate for particular use cases.
## Synchronous vs. asynchronous
Function invocations are either synchronous or asynchronous from the perspective of the calling process. Synchronous methods wait for the remote process to complete before returning the result, while asynchronous methods send the input and immediately return a [`modal.FunctionCall`](https://modal.com/docs/sdk/py/latest/FunctionCall) handle. This handle can be used to poll for progress or retrieve the result at a later time.
Note that this synchronous/asynchronous distinction is unrelated to Modal's [`.aio` interface](https://modal.com/docs/guide/async). The `.aio` interface affects only the mechanism of execution in the local process, not how the call is handled by Modal's systems. It also does not matter whether the Function's implementation is written using async Python.
Synchronous and asynchronous invocations differ in terms of their scalability, durability, and latency.
### Scalability
Synchronous invocations are subject to stricter platform limits:
- No more than 2,000 synchronous inputs may be queued and waiting for a container at any one time.
- No more than 25,000 synchronous inputs in total may be in the system (queued or running) at any one time.
In contrast, up to 1 million inputs can be queued for asynchronous execution, so asynchronous methods are a better choice whenever you have a large batch of inputs to process.
Function calls are also subject to _rate_ limits, which are higher for asynchronous invocations. As a baseline, Modal supports synchronous invocations at a rate of 200/s and asynchronous invocations at a rate of 1,500/s.
If a function call exceeds any of these limits, it will be rejected with a [`ResourceExhaustedError`](https://modal.com/docs/sdk/py/latest/exception#resourceexhaustederror). In some cases, the Modal SDK will handle this error and retry with backoff, adding latency. The exception may also be propagated to user code.
### Durability
Inputs sent via asynchronous methods are more durable. Asynchronous function calls are "fire-and-forget" and will continue running if the calling process exits, but synchronous invocations will be cancelled within two minutes after the caller hangs up.
The result payload for asynchronous invocations will be stored for 7 days, although the input payload will be discarded after the call completes successfully. Synchronous invocations are not stored in Modal's systems after being sent back to the caller.
### Latency
Because they are handled more durably, asynchronous invocations have higher latency. For many compute-intensive applications, the difference will be negligible, but latency-sensitive applications should prefer synchronous invocation methods.
Note that the synchronous I/O system still imposes some overhead to support its stateful input queue. Where request latency is at an absolute premium, prefer using Modal's [Server](https://modal.com/docs/guide/servers) primitive instead.
## Singular vs. batched
Several invocation methods accept a _batch_ of inputs rather than a single input payload. These methods abstract away the mechanics involved in efficiently and reliably sending multiple inputs to Modal.
Note that each input in the batch will still be _handled_ separately: this is a distinct concept from [dynamic batching](https://modal.com/docs/guide/dynamic-batching).
## Invocation methods
The primary [`modal.Function`](https://modal.com/docs/sdk/py/latest/Function) invocation methods occupy the following positions in a 2x2 matrix:
| | Synchronous | Asynchronous |
| -------- | ---------------------------------------------------------- | ---------------------------------------------------------------- |
| Singular | [`Function.remote()`](https://modal.com/docs/sdk/py/latest/Function#remote) | [`Function.spawn()`](https://modal.com/docs/sdk/py/latest/Function#spawn) |
| Batched | [`Function.map()`](https://modal.com/docs/sdk/py/latest/Function#map) | [`Function.spawn_map()`](https://modal.com/docs/sdk/py/latest/Function#spawn_map) |
### `Function.remote`
Invoking a Function with [`Function.remote()`](https://modal.com/docs/sdk/py/latest/Function#remote) makes a synchronous call, sending the input payload and waiting for the remote process to complete before returning. It is the most basic method for running compute on Modal because its semantics are closest to a local function call:
```python
@app.function()
def f(x: int) -> int:
return x ** 2
@app.local_entrypoint()
def main():
res = f.remote(2)
assert res == 4
```
The related [`Function.remote_gen()`](https://modal.com/docs/sdk/py/latest/Function#remote_gen) method also sends the input synchronously, but it works when the remote Function is a generator that yields results back to the caller:
```python
@app.function()
def g(x: int) -> int:
for n in range(4):
yield x ** n
@app.local_entrypoint()
def main():
res = g.remote_gen(2)
assert list(res) == [1, 2, 4, 8]
```
### `Function.spawn`
The asynchronous [`Function.spawn()`](https://modal.com/docs/sdk/py/latest/Function#spawn) method sends its input to the Function and immediately returns a [`modal.FunctionCall`](https://modal.com/docs/sdk/py/latest/FunctionCall) object representing that input.
You can retrieve the result by calling [`FunctionCall.get()`](https://modal.com/docs/sdk/py/latest/FunctionCall#get):
```python
def spawn_and_fetch(x):
fc = f.spawn(x)
return fc.get()
```
By default, [`FunctionCall.get()`](https://modal.com/docs/sdk/py/latest/FunctionCall#get) will block until the result is available. This is similar to synchronous invocation, although it trades off some latency for scalability and durability. You can also pass a timeout to implement a polling pattern:
```python
def spawn_and_poll(x):
fc = f.spawn(x)
while True:
try:
return fc.get(timeout=1)
except TimeoutError:
print("Not finished yet")
```
For long-running Functions, you may not want the calling process to wait until the result is available. To facilitate this, you can store the FunctionCall's object ID and use it to fetch the result in another context:
```python
def spawn_input(x):
fc = f.spawn(x)
return fc.object_id
def fetch_result(fc_id):
fc = modal.FunctionCall.from_id(fc_id)
return fc.get()
```
Because it offers increased scalability and durability, [`Function.spawn()`](https://modal.com/docs/sdk/py/latest/Function#spawn) is often a better choice than [`Function.remote()`](https://modal.com/docs/sdk/py/latest/Function#remote) for compute-intensive applications, especially those that require high fan-out or complex orchestration.
### `Function.map`
The batched [`Function.map()`](https://modal.com/docs/sdk/py/latest/Function#map) method makes it easy to leverage Modal's horizontal scalability by consuming an iterable of inputs in a single invocation:
```python
@app.function()
def f(x: int) -> int:
return x ** 2
@app.local_entrypoint()
def main():
res = f.map(range(1, 5))
assert list(res) == [1, 4, 9, 16]
```
Modal will spin up multiple containers to process the map in parallel.
The [`Function.map()`](https://modal.com/docs/sdk/py/latest/Function#map) invocation is synchronous, which has consequences for its scalability. Input submission is subject to the rate limits mentioned [above](#scalability), and each invocation can run at most 1,000 inputs concurrently. For convenience, the Modal SDK internally handles system back-pressure to avoid tripping limits on input submission rate or input queue depth while running a map. But the limits may prevent [`Function.map()`](https://modal.com/docs/sdk/py/latest/Function#map) invocations from immediately scaling up and utilizing available container capacity.
The [`Function.starmap()`](https://modal.com/docs/sdk/py/latest/Function#starmap) method has equivalent semantics, but it consumes an iterable where each entry is a _sequence of arguments_, effectively doing `[f.remote(*args) for args in input_list]` in parallel.
### `Function.spawn_map`
The [`Function.spawn_map()`](https://modal.com/docs/sdk/py/latest/Function#spawn_map) method combines the asynchronous semantics of [`Function.spawn()`](https://modal.com/docs/sdk/py/latest/Function#spawn) with the batched semantics of [`Function.map`](https://modal.com/docs/sdk/py/latest/Function#map). Like [`Function.map`](https://modal.com/docs/sdk/py/latest/Function#map), it applies the Function to each entry in an iterable of inputs:
```python
def load_inputs(filenames):
for fname in filenames:
yield load(fname)
def spawn_batch(filenames):
f.spawn_map(load_inputs(filenames))
```
Because platform limits are higher for asynchronous invocations, [`Function.spawn_map`](https://modal.com/docs/sdk/py/latest/Function#spawn_map) sends the entire iterable of inputs as fast as possible, taking maximum advantage of Modal's elastic compute.
As yet, [`Function.spawn_map()`](https://modal.com/docs/sdk/py/latest/Function#spawn_map) does not return a FunctionCall handle, so it is currently useful only when the Function has side effects like writing its result to durable storage. This will be improved in the future.
### `Function.local`
Unlike the other methods, [`Function.local()`](https://modal.com/docs/sdk/py/latest/Function#local) always executes in the same environment as the caller (whether that is on your system or inside a Modal container). Invoking [`Function.local()`](https://modal.com/docs/sdk/py/latest/Function#local) is equivalent to calling the unwrapped underlying function directly; none of the Modal configuration will apply.
#### Function lookups
# Invoking deployed Functions
Modal Functions in [deployed Apps](https://modal.com/docs/guide/managing-deployments) can be invoked
from outside of the App's source by performing a _Function lookup_:
{#snippet python()}
```python notest
f = modal.Function.from_name("my-app", "f")
result = f.remote()
```
{/snippet}
{#snippet python_async()}
```python notest
f = modal.Function.from_name("my-app", "f")
result = await f.remote.aio()
```
{/snippet}
{#snippet javascript()}
```javascript notest
const f = await modal.functions.fromName("my-app", "f");
result = await f.remote();
```
{/snippet}
{#snippet go()}
```go notest
f, _ := mc.Functions.FromName(ctx, "my-app", "f", nil)
result, err := f.Remote(ctx, nil, nil)
```
{/snippet}
Function lookups are scoped by the name of the App, the Function's name within
that App, and optionally the [environment](https://modal.com/docs/guide/environments) the App is
deployed in. Note that lookups are supported only for _deployed_ Apps. Looking up
a Function will fail if its App is [ephemeral](https://modal.com/docs/guide/apps#ephemeral-apps),
e.g. running via the `modal serve` CLI.
## Use cases
Function lookups are useful when you want to treat your Modal App as a remote
service.
For example, you may wish to organize your Modal codebase into multiple
loosely-coupled Apps with distinct deployment lifecycles. Lookups allow
Functions in these Apps to call each other as if they were members of the same
App.
You may also have a codebase outside of Modal that needs to execute certain
operations that would benefit from Modal's scalable compute. Modal Function
lookups turn that into a simple function call, automatically handling the
serialization and deserialization of arguments, results, and exceptions.
With Modal's [JS and Go SDKs](https://modal.com/docs/guide/sdk-javascript-go), the calling
codebase does not even need to be written in Python.
## Invocation patterns
Any remote invocation method can be used after looking up a Function handle.
For example, you can spawn a background execution and poll its status:
{#snippet python()}
```python notest
f = modal.Function.from_name("my-app", "f")
function_call = f.spawn(42)
# Poll for the result without blocking by passing timeout=0.
try:
result = function_call.get(timeout=0)
except TimeoutError:
result = None # still running
```
{/snippet}
{#snippet python_async()}
```python notest
f = modal.Function.from_name("my-app", "f")
function_call = await f.spawn.aio(42)
# Poll for the result without blocking by passing timeout=0.
try:
result = await function_call.get.aio(timeout=0)
except TimeoutError:
result = None # still running
```
{/snippet}
{#snippet javascript()}
```javascript notest
const f = await modal.functions.fromName("my-app", "f");
const functionCall = await f.spawn([42]);
// Poll for the result without blocking by passing timeoutMs: 0.
let result;
try {
result = await functionCall.get({ timeoutMs: 0 });
} catch (err) {
if (!(err instanceof FunctionTimeoutError)) throw err;
result = null; // still running
}
```
{/snippet}
{#snippet go()}
```go notest
f, _ := mc.Functions.FromName(ctx, "my-app", "f", nil)
functionCall, _ := f.Spawn(ctx, []any{42}, nil)
// Poll for the result without blocking by passing a zero *time.Duration timeout
zero := time.Duration(0)
result, err := functionCall.Get(ctx, &modal.FunctionCallGetParams{Timeout: &zero})
// A non-nil err indicates the call is still running.
```
{/snippet}
Or you can distribute embarrassingly parallel work across multiple containers:
{#snippet python()}
```python notest
f = modal.Function.from_name("my-app", "f")
results = list(f.map(range(5)))
```
{/snippet}
{#snippet python_async()}
```python notest
f = modal.Function.from_name("my-app", "f")
results = [result async for result in f.map.aio(range(5))]
```
{/snippet}
Note: `Function.map()` is currently supported only in Python.
When your Function is defined as a Modal Cls, you can pass
[parameters](https://modal.com/docs/guide/parametrized-functions) and invoke
specific methods after a lookup:
{#snippet python()}
```python notest
Model = modal.Cls.from_name("my-app", "Model")
obj = Model(size="35B")
result = obj.generate.remote("hello")
```
{/snippet}
{#snippet python_async()}
```python notest
Model = modal.Cls.from_name("my-app", "Model")
obj = Model(size="35B")
result = await obj.generate.remote.aio("hello")
```
{/snippet}
{#snippet javascript()}
```javascript notest
const cls = await modal.cls.fromName("my-app", "Model");
const obj = await cls.instance({ size: "35B" });
const generate = obj.method("generate");
const result = await generate.remote(["hello"]);
```
{/snippet}
{#snippet go()}
```go notest
cls, _ := mc.Cls.FromName(ctx, "my-app", "Model", nil)
obj, _ := cls.Instance(ctx, map[string]any{"size": "35B"})
generate, _ := obj.Method("generate")
result, _ := generate.Remote(ctx, []any{"hello"}, nil)
```
{/snippet}
It's also possible to
[dynamically configure](https://modal.com/docs/guide/dynamic-function-config) a Function
or Cls via a remote lookup. For example, you can select a GPU type that
aligns with the specific model you are invoking:
{#snippet python()}
```python notest
Model = modal.Cls.from_name("my-app", "Model")
obj = Model.with_options(gpu="H100")(size="35B")
result = obj.generate.remote("hello")
```
{/snippet}
{#snippet python_async()}
```python notest
Model = modal.Cls.from_name("my-app", "Model")
obj = Model.with_options(gpu="H100")(size="35B")
result = await obj.generate.remote.aio("hello")
```
{/snippet}
{#snippet javascript()}
```javascript notest
const cls = await modal.cls.fromName("my-app", "Model");
const obj = await cls.withOptions({ gpu: "H100" }).instance({ size: "35B" });
const generate = obj.method("generate");
const result = await generate.remote(["hello"]);
```
{/snippet}
{#snippet go()}
```go notest
cls, _ := mc.Cls.FromName(ctx, "my-app", "Model", nil)
gpu := "H100"
obj, _ := cls.
WithOptions(&modal.ClsWithOptionsParams{GPU: &gpu}).
Instance(ctx, map[string]any{"size": "35B"})
generate, _ := obj.Method("generate")
result, _ := generate.Remote(ctx, []any{"hello"}, nil)
```
{/snippet}
## Version-pinned lookups
Version-pinned lookups are available on the Team and Enterprise plans .
Visit workspace settings to upgrade.
All Function invocations will route to the "latest" available version of the
App by default. During a
[rolling deployment](https://modal.com/docs/guide/managing-deployments#deployment-strategies),
this may correspond to an outdated version, but repeated invocation of the
Function handle will eventually reach the most recent deploy without any
need to refresh the handle.
It's also possible to look up a specific version of the App, which returns a
"version-pinned" Function handle:
{#snippet python()}
```python notest
f = modal.Function.from_name("my-app", "f", version=3)
result = f.remote()
```
{/snippet}
{#snippet python_async()}
```python notest
f = modal.Function.from_name("my-app", "f", version=3)
result = await f.remote.aio()
```
{/snippet}
{#snippet javascript()}
```javascript notest
const f = await modal.functions.fromName("my-app", "f", { version: 3 });
result = await f.remote();
```
{/snippet}
{#snippet go()}
```go notest
f, _ := mc.Functions.FromName(ctx, "my-app", "f", &modal.FunctionFromNameParams{Version: 3})
result, err := f.Remote(ctx, nil, nil)
```
{/snippet}
If the version-pinned Function directly calls other Functions in the same App,
those calls will also be guaranteed to run on the same version (which is not
generally the case across deployments, even for calls within the same App).
Version-pinned invocations have a few tradeoffs. Principally, version-pinned
invocations will be handled by a distinct pool of containers with special rules
around autoscaling:
- Containers handling version-pinned invocations are not included in the
Function's main `max_containers` budget. Instead, the limit will be applied at
the level of _individual versions_. You must account for this if each container
consumes a limited resource (e.g., a connection to a database).
- Version-pinned Functions will ignore the `min_containers` configuration in the
Function decorator, and they will not maintain a warm pool by default. If this
is desired, the `Function.update_autoscaler()` method can be used to
dynamically configure a warm pool. It is the user's responsibility to scale the
warm pool down after it is no longer needed.
Version pinning is supported only for App versions within your retention window
(i.e., versions that you could also roll back to). Longer retention windows are
available on the Enterprise plan.
## Authentication
Function lookups are authenticated via Modal [API tokens](https://modal.com/settings/tokens).
These tokens implicitly specify the Workspace targeted by the lookup.
Tokens are automatically read from the active profile in your `~/.modal.toml`
file. They can also be configured via the `MODAL_TOKEN_ID` and
`MODAL_TOKEN_SECRET` environment variables. These take precedence over the
`~/.modal.toml` when set.
## Limitations
While you can use any remote invocation method on a Function handle after a
lookup, `.local()` invocation is not supported, because the implementation
will not be available locally.
Unlike with remote calls between Functions in the same Python App, the
Function interfaces will not be legible to type checkers after a lookup.
Your code will have to explicitly narrow the result to treat it as a
concrete type.
## Invoking with HTTPS
Modal [Web Functions](https://modal.com/docs/guide/webhooks) can be invoked via HTTPS at a
[public URL](https://modal.com/docs/guide/webhook-urls).
Unlike Function lookups via one of our SDKs, Web Functions are not
authenticated by default, and authenticated Web Functions use
[Proxy Tokens](https://modal.com/docs/guide/webhook-proxy-auth) instead of Modal API tokens.
Web Functions can be invoked from web browsers, from Unix tools like
`curl`, or from any language with an HTTPS client.
#### Container lifecycle management
# Container lifecycle hooks
Since Modal will reuse the same container for multiple inputs, sometimes you
might want to run some code exactly once when the container starts or exits.
To accomplish this, you need to use Modal's class syntax and the
[`@app.cls`](https://modal.com/docs/sdk/py/latest/App#cls) decorator. Specifically, you'll
need to:
1. Convert your function to a method by making it a member of a class.
2. Decorate the class with `@app.cls(...)` with same arguments you previously
had for `@app.function(...)`.
3. Instead of the `@app.function` decorator on the original method, use
`@modal.method` or the appropriate decorator for a
[Web Function](#lifecycle-hooks-for-web-functions).
4. Add the correct method "hooks" to your class based on your need:
- `@modal.enter` for one-time initialization (remote)
- `@modal.exit` for one-time cleanup (remote)
## `@modal.enter`
The container entry handler is called when a new container is started. This is
useful for doing one-time initialization, such as loading model weights or
importing packages that are only present in that image.
To use, make your function a member of a class, and apply the `@modal.enter()`
decorator to one or more class methods:
```python
import modal
app = modal.App()
@app.cls(cpu=8)
class Model:
@modal.enter()
def run_this_on_container_startup(self):
import pickle
self.model = pickle.load(open("model.pickle"))
@modal.method()
def predict(self, x):
return self.model.predict(x)
@app.local_entrypoint()
def main():
Model().predict.remote(x=123)
```
When working with an [asynchronous Modal](https://modal.com/docs/guide/async) app, you may use an
async method instead:
```python
import modal
app = modal.App()
@app.cls(memory=1024)
class Processor:
@modal.enter()
async def my_enter_method(self):
self.cache = await load_cache()
@modal.method()
async def run(self, x):
return await do_some_async_stuff(x, self.cache)
@app.local_entrypoint()
async def main():
await Processor().run.remote(x=123)
```
Note: The `@modal.enter()` decorator replaces the earlier `__enter__` syntax, which
has been deprecated.
## `@modal.exit`
The container exit handler is called when a container is about to exit. It is
useful for doing one-time cleanup, such as closing a database connection or
saving intermediate results. To use, make your function a member of a class, and
apply the `@modal.exit()` decorator:
```python
import modal
app = modal.App()
@app.cls()
class ETLPipeline:
@modal.enter()
def open_connection(self):
import psycopg2
self.connection = psycopg2.connect(os.environ["DATABASE_URI"])
@modal.method()
def run(self):
# Run some queries
pass
@modal.exit()
def close_connection(self):
self.connection.close()
@app.local_entrypoint()
def main():
ETLPipeline().run.remote()
```
Exit handlers are also called when a container is [preempted](https://modal.com/docs/guide/preemption).
The exit handler is given a grace period of 30 seconds to finish, and it will be
killed if it takes longer than that to complete.
## Lifecycle hooks for Web Functions
Modal [Web Functions](https://modal.com/docs/guide/webhooks) can be converted to the class syntax
as well. Instead of `@modal.method`, simply use whichever Web Function
decorator (`@modal.fastapi_endpoint`, `@modal.asgi_app` or `@modal.wsgi_app`)
you were using before.
```python
from fastapi import Request
import modal
image = modal.Image.debian_slim().pip_install("fastapi")
app = modal.App("web-function-cls", image=image)
@app.cls()
class Model:
@modal.enter()
def run_this_on_container_startup(self):
self.model = pickle.load(open("model.pickle"))
@modal.fastapi_endpoint()
def predict(self, request: Request):
...
```
#### Parametrized Functions
# Parametrized functions
A single Modal Function can be parametrized by a set of arguments, so that each unique combination of arguments will behave like an individual
Modal Function with its own auto-scaling and lifecycle logic.
For example, you might want to have a separate pool of containers for each unique user that invokes your Function. In this scenario, you would
parametrize your Function by a user ID.
To parametrize a Modal Function, you need to use Modal's [class syntax](https://modal.com/docs/guide/lifecycle-functions) and the
[`@app.cls`](https://modal.com/docs/sdk/py/latest/App#cls) decorator. Specifically, you'll need to:
1. Convert your function to a method by making it a member of a class.
2. Decorate the class with `@app.cls(...)` with the same arguments you previously
had for `@app.function(...)` or your [Web Function decorator](https://modal.com/docs/guide/webhooks).
3. If you previously used the `@app.function()` decorator on your function, replace it with `@modal.method()`.
4. Define dataclass-style, type-annotated instance attributes with `modal.parameter()` and optionally set default values:
```python
import modal
app = modal.App()
@app.cls()
class MyClass:
foo: str = modal.parameter()
bar: int = modal.parameter(default=10)
@modal.method()
def baz(self, qux: str = "default") -> str:
return f"This code is running in container pool ({self.foo}, {self.bar}), with input qux={qux}"
```
The parameters create a keyword-only constructor for your class, and the methods can be called as follows:
```python
@app.local_entrypoint()
def main():
m1 = MyClass(foo="hedgehog", bar=7)
m1.baz.remote()
m2 = MyClass(foo="fox")
m2.baz.remote(qux="override")
```
Function calls for each unique combination of values for `foo` and `bar` will run in their own separate container pools.
If you re-constructed a `MyClass` with the same arguments in a different context, the calls to `baz` would be routed to the same set of containers as before.
Some things to note:
- The total size of the arguments is limited to 16 KiB.
- Modal classes can still annotate types of regular class attributes, which are independent of parametrization, by either omitting `= modal.parameter()` or using `= modal.parameter(init=False)` to satisfy type checkers.
- The support types are these primitives: `str`, `int`, `bool`, and `bytes`.
- The legacy `__init__` constructor method is being removed, see [the 1.0 migration for details.](https://modal.com/docs/guide/modal-1-0-migration#removing-support-for-custom-cls-constructors)
## Looking up a parametrized function
If you want to call your parametrized function from a Python script running
anywhere, you can use `Cls.lookup`:
```python notest
import modal
MyClass = modal.Cls.from_name("parametrized-function-app", "MyClass") # returns a class-like object
m = MyClass(foo="snake", bar=12)
m.baz.remote()
```
## Parametrized Web Functions
Modal [Web Functions](https://modal.com/docs/guide/webhooks) can also be parametrized:
```python
app = modal.App("parametrized-endpoint")
@app.cls()
class MyClass():
foo: str = modal.parameter()
bar: int = modal.parameter(default=10)
@modal.fastapi_endpoint()
def baz(self, qux: str = "default") -> str:
...
```
Parameters are specified in the URL as query parameter values.
```bash
curl "https://parametrized-endpoint.modal.run?foo=hedgehog&bar=7&qux=override"
curl "https://parametrized-endpoint.modal.run?foo=hedgehog&qux=override"
curl "https://parametrized-endpoint.modal.run?foo=hedgehog&bar=7"
curl "https://parametrized-endpoint.modal.run?foo=hedgehog"
```
## Using parametrized functions with lifecycle functions
Parametrized functions can be used with [lifecycle functions](https://modal.com/docs/guide/lifecycle-functions).
For example, here is how you might parametrize the [`@modal.enter`](https://modal.com/docs/guide/lifecycle-functions#enter) lifecycle function to load a specific model:
```python
@app.cls()
class Model:
name: str = modal.parameter()
size: int = modal.parameter(default=100)
@modal.enter()
def load_model(self):
print(f"Loading model {self.name} with size {self.size}")
self.model = load_model_util(self.name, self.size)
@modal.method()
def generate(self, prompt: str) -> str:
return self.model.generate(prompt)
```
## Performance
Currently, parametrized Function creation is rate limited to 1 per second, with the ability to burst to 1000. Please [get in touch](mailto:support@modal.com) if you need higher rate limits.
#### Dynamic configuration
# Dynamic Function configuration
Many aspects of a Modal Function's configuration can be dynamically configured from a specific call site. This is useful in cases where the Function's [compute resources](https://modal.com/docs/guide/resources), [secrets](https://modal.com/docs/guide/secrets), [timeout](https://modal.com/docs/guide/timeouts), or other properties need to vary depending on the specific inputs.
## Basic configuration
Features exposed in the [`@app.function()`](https://modal.com/docs/sdk/py/latest/App#function) decorator can be dynamically configured at runtime with the [`modal.Function.with_options()`](https://modal.com/docs/sdk/py/latest/Function#with_options) method.
Say you have the following definition:
```python
@app.function()
def f(x: int) -> int:
return x ** 2
```
If (for some reason) you wanted to compare this Function's output across several different GPUs, you could invoke it several times with different configurations:
```python continuation
@app.local_entrypoint()
def main():
for gpu in ["T4", "L4", "A10"]:
result = f.with_options(gpu=gpu).remote(2)
print(f"Result with {gpu} GPU: {result}")
```
This example creates three additional variants of the base Function after the App is already running. These variants are _new Functions_ that are created on-demand. The base Function itself is not affected. If you invoked `f.remote()` directly, it would continue to execute without a GPU.
Deployed Functions can also be dynamically configured from a call site after a lookup:
```python notest
deployed_f = modal.Function.from_name("demo-app", "f")
for gpu in ["T4", "L4", "A10"]:
result = deployed_f.with_options(gpu=gpu).remote(2)
print(f"Result with {gpu} GPU: {result}")
```
## Input concurrency and batching
It's also possible to dynamically configure [input concurrency](https://modal.com/docs/guide/concurrent-inputs) or [batching](https://modal.com/docs/guide/dynamic-batching). As these features are enabled with separate decorators ([`@modal.concurrent()`](https://modal.com/docs/sdk/py/latest/concurrent)/[`@modal.batched()`](https://modal.com/docs/sdk/py/latest/batched)), their dynamic configuration runs through separate methods ([`modal.Function.with_concurrency()`](https://modal.com/docs/sdk/py/latest/Function#with_concurrency)/[`modal.Function.with_batching()`](https://modal.com/docs/sdk/py/latest/Function#with_batching)):
```python notest
concurrent_f = modal.Function.from_name("demo-app", "f").with_concurrency(max_inputs=32)
```
If multiple dynamic configuration methods are called in sequence, their arguments will compose and form a single configuration:
```python notest
# This Function uses a GPU with input concurrency
concurrent_f.with_options(gpu="H100").remote(...)
```
## Autoscaling considerations
Each distinct configuration has its own dedicated autoscaling container pool. By default, the container pool will autoscale according to the configuration of the base Function, with separate accounting. For example, if your Function has `@app.function(max_containers=5)` and you dynamically add a GPU using `f.with_options(gpu="H100")`, you'll get up to 5 _additional_ H100 containers regardless of how many CPU containers are currently running.
Try to avoid generating too many fine-grained configurations so that you can benefit from container sharing for higher utilization and reduced cold start latencies. For example, if requesting input-specific `memory=` or `cpu=` resources, it's best to round into coarse buckets.
Functions that have been looked up and dynamically configured in separate processes will still share containers if they apply the same configuration.
If your base Function configuration has `min_containers` set, it will be ignored by the Function variants to avoid creating zombie warm pools. For the same reason, it's not possible to set `min_containers` in `modal.Function.with_options()`.
It is possible to dynamically configure other aspects of autoscaling behavior using `modal.Function.with_options()`. For example, if you don't expect to re-use the variant, you could reduce the `scaledown_window` so that the container shuts down faster. However, if your goal is to use different autoscaling policies over time, it may be simpler to modify the base Function's behavior using [`modal.Function.update_autoscaler`](https://modal.com/docs/sdk/py/latest/Function#update_autoscaler) instead.
## Dynamic Cls configuration
It's also possible to dynamically configure a `modal.Cls`. If the Cls is [parametrized](https://modal.com/docs/guide/parametrized-functions) (which also creates a new Function variant with its own container pool and autoscaling accounting), the dynamic options will compose with the parameter values:
```python notest
ModelCls = modal.Cls.from_name("demo-app", "ModelCls")
model = ModelCls.with_options(gpu="H100")(size="8B")
```
### Sandboxes
#### Sandboxes
# Sandboxes
This page is a high-level guide to Sandboxes,
secure containers for executing untrusted user or agent code on Modal.
For reference documentation on the `modal.Sandbox` interface,
see [this page](https://modal.com/docs/sdk/py/latest/Sandbox).
## What are Sandboxes and why should I use them?
In addition to the Function interface, Modal has a direct
interface for defining containers _at runtime_ and securely running arbitrary code
inside them.
This can be useful if, for example, you want to:
- Execute code generated by a language model.
- Create isolated environments for running untrusted code.
- Check out a git repository and run a command against it, like a test suite, or
`npm lint`.
- Run containers with arbitrary dependencies and setup scripts.
Each individual job is called a **Sandbox** and can be created using the
[`Sandbox.create`](https://modal.com/docs/sdk/py/latest/Sandbox#create) constructor:
{#snippet python()}
```python
sb_app = modal.App.lookup("my-app", create_if_missing=True)
sb = modal.Sandbox.create(app=sb_app)
p = sb.exec("python", "-c", "print('hello')", timeout=3)
print(p.stdout.read())
p = sb.exec("bash", "-c", "for i in {1..10}; do date +%T; sleep 0.5; done", timeout=5)
for line in p.stdout:
# Avoid double newlines by using end="".
print(line, end="")
sb.terminate()
sb.detach()
```
{/snippet}
{#snippet python_async()}
```python
sb_app = await modal.App.lookup.aio("my-app", create_if_missing=True)
sb = await modal.Sandbox.create.aio(app=sb_app)
p = await sb.exec.aio("python", "-c", "print('hello')", timeout=3)
print(await p.stdout.read.aio())
p = await sb.exec.aio("bash", "-c", "for i in {1..10}; do date +%T; sleep 0.5; done", timeout=5)
async for line in p.stdout:
# Avoid double newlines by using end="".
print(line, end="")
await sb.terminate.aio()
await sb.detach.aio()
```
{/snippet}
{#snippet javascript()}
```javascript notest
const modal = new ModalClient();
const app = await modal.apps.fromName("my-app", {
createIfMissing: true,
});
const image = modal.images.fromRegistry("python:3.13-slim");
const sb = await modal.sandboxes.create(app, image);
const p = await sb.exec(["python", "-c", "print('hello')"], {
timeoutMs: 3 * 1000,
});
console.log(await p.stdout.readText());
const p2 = await sb.exec(
["bash", "-c", "for i in {1..10}; do date +%T; sleep 0.5; done"],
{ timeoutMs: 5 * 1000 },
);
for await (const line of p2.stdout) {
process.stdout.write(line);
}
await sb.terminate();
```
{/snippet}
{#snippet go()}
```go notest
package main
import (
"context"
"fmt"
"io"
"os"
"time"
modal "github.com/modal-labs/modal-client/go"
)
func main() {
ctx := context.Background()
mc, _ := modal.NewClient()
app, _ := mc.Apps.FromName(ctx, "my-app", &modal.AppFromNameParams{
CreateIfMissing: true,
})
image := mc.Images.FromRegistry("python:3.13-slim", nil)
sb, _ := mc.Sandboxes.Create(ctx, app, image, nil)
defer sb.Terminate(ctx, nil)
p, _ := sb.Exec(ctx, []string{"python", "-c", "print('hello')"}, &modal.SandboxExecParams{
Timeout: 3 * time.Second,
})
stdout, _ := io.ReadAll(p.Stdout)
fmt.Println(string(stdout))
p2, _ := sb.Exec(ctx, []string{"bash", "-c", "for i in {1..10}; do date +%T; sleep 0.5; done"}, &modal.SandboxExecParams{
Timeout: 5 * time.Second,
})
io.Copy(os.Stdout, p2.Stdout)
}
```
{/snippet}
**Note:** you can run the above example as a script directly with `python my_script.py`. `modal run` is not needed here since there is no [entrypoint](https://modal.com/docs/guide/apps#entrypoints-for-ephemeral-apps).
Sandboxes require an [`App`](https://modal.com/docs/guide/apps) to be passed when spawned from outside
of a Modal container. You may pass in a regular `App` object or look one up by name with
[`App.lookup`](https://modal.com/docs/sdk/py/latest/App#lookup). The `create_if_missing` flag on `App.lookup`
will create an `App` with the given name if it doesn't exist.
## Lifecycle
### Events
Every Sandbox moves through a series of lifecycle events as it progresses from
creation to completion. Understanding these events is useful for monitoring,
debugging, and building automations that react to Sandbox state changes.
The lifecycle events, in order, are:
1. **Created** — The Sandbox has been requested and registered with Modal. At this
point the Sandbox object exists and has an ID, but no compute resources have been
allocated yet. This is the initial state immediately after calling `Sandbox.create`.
2. **Scheduled** — The Sandbox has been scheduled to a specific worker. The
worker is now provisioning the resources the Sandbox needs (CPU, memory, GPU,
volumes, etc.) and preparing the container environment. The Sandbox will
transition to **Started** once the container is fully initialized.
3. **Started** — The Sandbox's container has been launched on a worker and the
entrypoint process (if any) is running. At this point you can begin executing
commands inside the Sandbox with `sandbox.exec(...)`. Network tunnels and volume
mounts are active.
4. **Ready** — If [readiness probes](https://modal.com/docs/guide/sandboxes#readiness-probes) are
enabled for the Sandbox, this event fires once the probe succeeds, indicating that
the service inside the Sandbox is fully initialized and ready to accept traffic.
This is especially useful for Sandboxes running web servers or other services
that need warm-up time before they can handle requests. If readiness probes are
not configured, this event is skipped.
5. **Finished** — The Sandbox has stopped running. This can happen for several
reasons: the entrypoint process exited on its own, the Sandbox was explicitly
terminated (via the dashboard or `sandbox.terminate()`), the timeout or idle timeout
was reached, or an out-of-memory condition occurred. Once finished, no further
commands can be executed inside the Sandbox. You can learn more about why a Sandbox
stopped running in the dashboard or by examining the exit code returned from
`sandbox.poll()`.
### Timeouts
Sandboxes have a default maximum lifetime of 5 minutes. You can change this by passing
a `timeout` of up to 24 hours to the `Sandbox.create(...)` function.
{#snippet python()}
```python fixture:sb_app
sb = modal.Sandbox.create(app=sb_app, timeout=10*60) # 10 minutes
sb.detach()
```
{/snippet}
{#snippet python_async()}
```python fixture:sb_app
sb = await modal.Sandbox.create.aio(app=sb_app, timeout=10*60) # 10 minutes
await sb.detach.aio()
```
{/snippet}
{#snippet javascript()}
```javascript notest
const sb = await modal.sandboxes.create(app, image, {
timeoutMs: 10 * 60 * 1000, // 10 minutes
});
sb.detach();
```
{/snippet}
{#snippet go()}
```go notest
sb, err := mc.Sandboxes.Create(ctx, app, image, &modal.SandboxCreateParams{
Timeout: 10 * time.Minute,
})
defer sb.Detach()
```
{/snippet}
If you need a Sandbox to run for more than 24 hours, we recommend using
[Filesystem Snapshots](https://modal.com/docs/guide/sandbox-snapshots) to preserve its state,
and then restore from that snapshot with a subsequent Sandbox.
### Idle Timeouts
Sandboxes can also be automatically terminated after a period of inactivity - you can do this by setting the `idle_timeout` parameter. A Sandbox is considered active if any of the following are true:
1. It has an active [command](https://modal.com/docs/guide/sandbox-spawn) running (via [`sb.exec(...)`](https://modal.com/docs/sdk/py/latest/Sandbox#exec))
2. Its stdin is being written to (via [`sb.stdin.write()`](https://modal.com/docs/sdk/py/latest/Sandbox#stdin))
3. It has an open TCP connection over one of its [Tunnels](https://modal.com/docs/guide/tunnels)
### Readiness Probes
After a Sandbox starts, you often need to run custom initialization logic before it's
ready for use — pulling code with `git pull`, installing dependencies, starting a server,
writing config files, or other setup that isn't baked into the image. Readiness probes
give you a way to track when that initialization is complete, so you don't have to build
the polling or signaling yourself. Modal also uses probe results to give you
observability into how long this startup phase typically takes.
A readiness probe is a check that Modal runs automatically inside the Sandbox at a
configurable interval. You can then call `wait_until_ready()` to block until the probe
succeeds.
There are two types of readiness probes:
- **TCP probe** — Checks whether a TCP port inside the Sandbox is accepting connections.
This is the most common choice when your startup logic includes launching a server.
- **Exec probe** — Runs an arbitrary command inside the Sandbox and succeeds when the
command exits with status code 0. Use this for any other readiness condition: checking
that a file exists, verifying a setup script has completed, confirming dependencies are
installed, etc.
Both probe types accept an `interval_ms` parameter (default: 100ms) that controls how
frequently the check is retried until it succeeds.
#### TCP readiness probe
Use a TCP probe when your Sandbox starts a server and you want to wait until
it's listening on a port:
{#snippet python()}
```python fixture:sb_app
sb = modal.Sandbox.create(
"python3", "-m", "http.server", "8080",
readiness_probe=modal.Probe.with_tcp(8080),
app=sb_app,
)
# Blocks until port 8080 is accepting connections
sb.wait_until_ready()
# The server is now ready — interact with it via tunnels, exec, etc.
sb.terminate()
sb.detach()
```
{/snippet}
{#snippet python_async()}
```python fixture:sb_app
sb = await modal.Sandbox.create.aio(
"python3", "-m", "http.server", "8080",
readiness_probe=modal.Probe.with_tcp(8080),
app=sb_app,
)
# Blocks until port 8080 is accepting connections
await sb.wait_until_ready.aio()
# The server is now ready — interact with it via tunnels, exec, etc.
await sb.terminate.aio()
await sb.detach.aio()
```
{/snippet}
{#snippet javascript()}
```javascript notest
const modal = new ModalClient();
const app = await modal.apps.fromName("my-app", { createIfMissing: true });
const image = modal.images.fromRegistry("python:3.13-slim");
const sb = await modal.sandboxes.create(app, image, {
command: ["python3", "-m", "http.server", "8080"],
readinessProbe: Probe.withTcp(8080),
});
// Blocks until port 8080 is accepting connections
await sb.waitUntilReady();
// The server is now ready — interact with it via tunnels, exec, etc.
await sb.terminate();
```
{/snippet}
{#snippet go()}
```go notest
package main
import (
"context"
"time"
modal "github.com/modal-labs/modal-client/go"
)
func main() {
ctx := context.Background()
mc, _ := modal.NewClient()
app, _ := mc.Apps.FromName(ctx, "my-app", &modal.AppFromNameParams{
CreateIfMissing: true,
})
image := mc.Images.FromRegistry("python:3.13-slim", nil)
probe, _ := modal.NewTCPProbe(8080, nil)
sb, _ := mc.Sandboxes.Create(ctx, app, image, &modal.SandboxCreateParams{
Command: []string{"python3", "-m", "http.server", "8080"},
ReadinessProbe: probe,
})
defer sb.Detach()
// Blocks until port 8080 is accepting connections
sb.WaitUntilReady(ctx, 5*time.Minute)
// The server is now ready — interact with it via tunnels, exec, etc.
sb.Terminate(ctx, nil)
}
```
{/snippet}
#### Exec readiness probe
Use an exec probe when readiness depends on something other than a TCP port — for
example, waiting for a file to be created or a setup script to complete:
{#snippet python()}
```python fixture:sb_app
sb = modal.Sandbox.create(
"bash", "-c", "sleep 5 && touch /tmp/ready && sleep 3600",
readiness_probe=modal.Probe.with_exec(
"sh", "-c", "test -f /tmp/ready",
interval_ms=250,
),
app=sb_app,
)
# Blocks until "test -f /tmp/ready" exits with code 0
sb.wait_until_ready()
# The sandbox is now ready
p = sb.exec("cat", "/tmp/ready")
sb.terminate()
sb.detach()
```
{/snippet}
{#snippet python_async()}
```python fixture:sb_app
sb = await modal.Sandbox.create.aio(
"bash", "-c", "sleep 5 && touch /tmp/ready && sleep 3600",
readiness_probe=modal.Probe.with_exec(
"sh", "-c", "test -f /tmp/ready",
interval_ms=250,
),
app=sb_app,
)
# Blocks until "test -f /tmp/ready" exits with code 0
await sb.wait_until_ready.aio()
# The sandbox is now ready
p = await sb.exec.aio("cat", "/tmp/ready")
await sb.terminate.aio()
await sb.detach.aio()
```
{/snippet}
{#snippet javascript()}
```javascript notest
const modal = new ModalClient();
const app = await modal.apps.fromName("my-app", { createIfMissing: true });
const image = modal.images.fromRegistry("python:3.13-slim");
const sb = await modal.sandboxes.create(app, image, {
command: ["bash", "-c", "sleep 5 && touch /tmp/ready && sleep 3600"],
readinessProbe: Probe.withExec(["sh", "-c", "test -f /tmp/ready"], {
intervalMs: 250,
}),
});
// Blocks until "test -f /tmp/ready" exits with code 0
await sb.waitUntilReady();
// The sandbox is now ready
await sb.terminate();
```
{/snippet}
{#snippet go()}
```go notest
package main
import (
"context"
"time"
modal "github.com/modal-labs/modal-client/go"
)
func main() {
ctx := context.Background()
mc, _ := modal.NewClient()
app, _ := mc.Apps.FromName(ctx, "my-app", &modal.AppFromNameParams{
CreateIfMissing: true,
})
image := mc.Images.FromRegistry("python:3.13-slim", nil)
probe, _ := modal.NewExecProbe(
[]string{"sh", "-c", "test -f /tmp/ready"},
&modal.ExecProbeParams{Interval: 250 * time.Millisecond},
)
sb, _ := mc.Sandboxes.Create(ctx, app, image, &modal.SandboxCreateParams{
Command: []string{"bash", "-c", "sleep 5 && touch /tmp/ready && sleep 3600"},
ReadinessProbe: probe,
})
defer sb.Detach()
// Blocks until "test -f /tmp/ready" exits with code 0
sb.WaitUntilReady(ctx, 5*time.Minute)
// The sandbox is now ready
sb.Terminate(ctx, nil)
}
```
{/snippet}
**Note:** Readiness probes will run for a maximum of 5 minutes. If the probe does not
succeed within that window, `wait_until_ready()` will raise a
`modal.exception.TimeoutError`. This is Modal's own error class rather than the
builtin `TimeoutError`, so a bare `except TimeoutError` will not catch it. The probe
timeout does **not** automatically terminate the Sandbox — you may want to catch the
error and explicitly terminate the Sandbox if readiness is never achieved:
{#snippet python()}
```python notest
try:
sb.wait_until_ready()
except modal.exception.TimeoutError:
print("Sandbox failed to become ready")
sb.terminate()
sb.detach()
```
{/snippet}
{#snippet python_async()}
```python notest
try:
await sb.wait_until_ready.aio()
except modal.exception.TimeoutError:
print("Sandbox failed to become ready")
await sb.terminate.aio()
await sb.detach.aio()
```
{/snippet}
{#snippet javascript()}
```javascript notest
try {
await sb.waitUntilReady();
} catch (err) {
console.log("Sandbox failed to become ready");
await sb.terminate();
}
```
{/snippet}
{#snippet go()}
```go notest
if err := sb.WaitUntilReady(ctx, 5*time.Minute); err != nil {
fmt.Println("Sandbox failed to become ready")
sb.Terminate(ctx, nil)
}
```
{/snippet}
If you call `wait_until_ready()` on a Sandbox that was not configured with a readiness
probe, an error will be raised. Similarly, calling it after the Sandbox has been
terminated will raise an error. However, calling `wait_until_ready()` after the Sandbox
has already become ready returns immediately.
## Return Codes
[Unix-style exit codes](https://tldp.org/LDP/abs/html/exitcodes.html) are provided to help diagnose conditions such as success, manual termination, or out-of-memory.
They are available on both:
- Processes in the sandbox (via [`ContainerProcess.returncode`](https://modal.com/docs/sdk/py/latest/container_process#returncode) / [`ContainerProcess.poll()`](https://modal.com/docs/sdk/py/latest/container_process#poll))
- The Sandbox itself (via [`Sandbox.returncode`](https://modal.com/docs/sdk/py/latest/Sandbox#returncode) / [`Sandbox.poll()`](https://modal.com/docs/sdk/py/latest/Sandbox#poll))
{#snippet python()}
```python fixture:sb_app
sb = modal.Sandbox.create(app=sb_app)
# Read returncode of individual process
p = sb.exec("sh", "-c", "exit 42")
p.wait()
print(p.returncode) # 42
# Read returncode of finished sandbox
# Terminate sends a SIGKILL, code 137
sb.terminate(wait=True)
print(sb.returncode) # 137
```
{/snippet}
{#snippet python_async()}
```python fixture:sb_app
sb = await modal.Sandbox.create.aio(app=sb_app)
# Read returncode of individual process
p = await sb.exec.aio("sh", "-c", "exit 42")
await p.wait.aio()
print(p.returncode) # 42
# Read returncode of finished sandbox
# Terminate sends a SIGKILL, code 137
await sb.terminate.aio(wait=True)
print(sb.returncode) # 137
```
{/snippet}
{#snippet javascript()}
```javascript notest
const sb = await modal.sandboxes.create(app, image);
// Read returncode of individual process
const p = await sb.exec(["sh", "-c", "exit 42"]);
const returnCode = await p.wait();
console.log(returnCode); // 42
// Read returncode of finished sandbox
// Terminate sends a SIGKILL, code 137
const returnCodeSb = await sb.terminate({ wait: true });
console.log(returnCodeSb); // 137
```
{/snippet}
{#snippet go()}
```go notest
sb, _ := mc.Sandboxes.Create(ctx, app, image, nil)
// Read returncode of individual process
p, _ := sb.Exec(ctx, []string{"sh", "-c", "exit 42"}, nil)
returnCode, _ := p.Wait(ctx)
fmt.Println(returnCode) // 42
// Read returncode of finished sandbox
// Terminate sends a SIGKILL, code 137
returnCodeSb, _ := sb.Terminate(ctx, &modal.SandboxTerminateParams{Wait: true})
fmt.Println(returnCodeSb) // 137
```
{/snippet}
## Configuration
Sandboxes support nearly all configuration options found in regular `modal.Function`s.
Refer to [`Sandbox.create`](https://modal.com/docs/sdk/py/latest/Sandbox#create) for further documentation
on Sandbox configs.
For example, Images and Volumes can be used just as with functions:
{#snippet python()}
```python fixture:sb_app
sb = modal.Sandbox.create(
image=modal.Image.debian_slim().pip_install("pandas"),
volumes={"/data": modal.Volume.from_name("data-volume", create_if_missing=True)},
app=sb_app,
)
sb.detach()
```
{/snippet}
{#snippet python_async()}
```python fixture:sb_app
sb = await modal.Sandbox.create.aio(
image=modal.Image.debian_slim().pip_install("pandas"),
volumes={"/data": modal.Volume.from_name("data-volume", create_if_missing=True)},
app=sb_app,
)
await sb.detach.aio()
```
{/snippet}
{#snippet javascript()}
```javascript notest
const image = modal.images.fromRegistry("python:3.13-slim");
const volume = modal.volumes.fromName("my-volume");
const sb = await modal.sandboxes.create(app, image, {
volumes: { "/data": volume },
workdir: "/repo",
});
sb.detach();
```
{/snippet}
{#snippet go()}
```go notest
image := mc.Images.FromRegistry("python:3.13-slim", nil)
volume := mc.Volumes.FromName("my-volume", nil)
sb, err := mc.Sandboxes.Create(ctx, app, image, &modal.SandboxCreateParams{
Volumes: map[string]*modal.Volume{"/data": volume},
Workdir: "/repo",
})
defer sb.Detach()
```
{/snippet}
## Environments
### Environment variables
You can set environment variables using inline secrets:
{#snippet python()}
```python fixture:sb_app
secret = modal.Secret.from_dict({"MY_SECRET": "hello"})
sb = modal.Sandbox.create(
secrets=[secret],
app=sb_app,
)
p = sb.exec("bash", "-c", "echo $MY_SECRET")
print(p.stdout.read())
sb.detach()
```
{/snippet}
{#snippet python_async()}
```python fixture:sb_app
secret = modal.Secret.from_dict({"MY_SECRET": "hello"})
sb = await modal.Sandbox.create.aio(
secrets=[secret],
app=sb_app,
)
p = await sb.exec.aio("bash", "-c", "echo $MY_SECRET")
print(await p.stdout.read.aio())
await sb.detach.aio()
```
{/snippet}
{#snippet javascript()}
```javascript notest
const secret = modal.secrets.fromObject({ MY_SECRET: "hello" });
const image = modal.images.fromRegistry("python:3.13-slim");
const sb = await modal.sandboxes.create(app, image, {
secrets: [secret],
});
const p = await sb.exec(["bash", "-c", "echo $MY_SECRET"]);
console.log(await p.stdout.readText());
sb.detach();
```
{/snippet}
{#snippet go()}
```go notest
secret, err := mc.Secrets.FromMap(ctx, map[string]string{"MY_SECRET": "hello"}, nil)
image := mc.Images.FromRegistry("python:3.13-slim", nil)
sb, err := mc.Sandboxes.Create(ctx, app, image, &modal.SandboxCreateParams{
Secrets: []*modal.Secret{secret},
})
defer sb.Detach()
p, err := sb.Exec(ctx, []string{"bash", "-c", "echo $MY_SECRET"}, nil)
stdout, err := io.ReadAll(p.Stdout)
fmt.Println(string(stdout))
```
{/snippet}
### OIDC identity tokens
Pass `include_oidc_identity_token=True` to `modal.Sandbox.create` to inject a
`MODAL_IDENTITY_TOKEN` environment variable containing an OIDC token into the
Sandbox. See the [OIDC integration guide](https://modal.com/docs/guide/oidc-integration) for
details.
### Custom Images
Sandboxes support [custom images](https://modal.com/docs/guide/images) just as Functions do. These can be defined using [method chaining](https://modal.com/docs/guide/images) or by referencing an [existing Image in an external container registry](https://modal.com/docs/guide/existing-images).
#### Separating Image builds from Sandbox creation
To avoid blocking creation of new Sandboxes on rebuilding an invalidated Image,
it's recommended to use Modal's named Images with sandboxes, rather than using
inline Image definitions.
Use [`Image.build`](https://modal.com/docs/sdk/py/latest/Image#build) to trigger
Image builds as part of a deployment flow or at a regular interval (e.g., in a
[scheduled job](https://modal.com/docs/guide/cron) or CI pipeline), then publish the result as a
[named image](https://modal.com/docs/guide/named-images)
Sandboxes can then use [`Image.from_name`](https://modal.com/docs/sdk/py/latest/Image#from_name)
to reference the Image in a way that's guaranteed to not block on rebuilds.
{#snippet python()}
```python notest
# build_sandbox_image.py
app = modal.App.lookup("sandbox-app", create_if_missing=True)
# Method-chained image
image = modal.Image.debian_slim().pip_install("pandas")
# Or, for an external registry image with a fixed tag:
# image = modal.Image.from_registry("ubuntu:24.04")
with modal.enable_output():
image.build(app=app).publish("sandbox-runtime")
# sandbox_app.py
app = modal.App.lookup("sandbox-app", create_if_missing=True)
image = modal.Image.from_name("sandbox-runtime")
modal.Sandbox.create(app=app, image=image)
```
{/snippet}
{#snippet python_async()}
```python notest
# build_sandbox_image.py
app = await modal.App.lookup.aio("sandbox-app", create_if_missing=True)
# Method-chained image
image = modal.Image.debian_slim().pip_install("pandas")
# Or, for an external registry image with a fixed tag:
# image = modal.Image.from_registry("ubuntu:24.04")
with modal.enable_output():
await image.build.aio(app)
await image.publish.aio("sandbox-runtime")
# app.py
app = await modal.App.lookup.aio("sandbox-app", create_if_missing=True)
image = modal.Image.from_name("sandbox-runtime")
await modal.Sandbox.create.aio(app=app, image=image)
```
{/snippet}
{#snippet javascript()}
```javascript notest
// build_sandbox_image.ts
const app = await modal.apps.fromName("sandbox-app", {
createIfMissing: true,
});
const image = modal.images
.fromRegistry("python:3.13-slim")
.dockerfileCommands(["RUN pip install pandas"]);
await image.build(app);
await image.publish("sandbox-runtime");
// app.ts
const app = await modal.apps.fromName("sandbox-app", {
createIfMissing: true,
});
const image = await modal.images.fromName("sandbox-runtime");
await modal.sandboxes.create(app, image);
```
{/snippet}
{#snippet go()}
```go notest
// build_sandbox_image.go
app, err := mc.Apps.FromName(ctx, "sandbox-app", &modal.AppFromNameParams{
CreateIfMissing: true,
})
image := mc.Images.FromRegistry("python:3.13-slim", nil).
DockerfileCommands([]string{"RUN pip install pandas"}, nil)
builtImage, err := image.Build(ctx, app, nil)
err = builtImage.Publish(ctx, "sandbox-runtime", nil)
// app.go
app, err = mc.Apps.FromName(ctx, "sandbox-app", &modal.AppFromNameParams{
CreateIfMissing: true,
})
image, err = mc.Images.FromName(ctx, "sandbox-runtime", nil)
sb, err := mc.Sandboxes.Create(ctx, app, image, nil)
defer sb.Detach()
```
{/snippet}
- **Modal treats external Image tags as immutable once pulled.** For [external registry](https://modal.com/docs/guide/existing-images) images, `Image.build` always returns the cached version — Modal does not detect upstream changes to mutable tags like `:latest`.
- To pick up a new version of an external registry image, update the tag in your deploy script (for example, `ubuntu:24.04` → `ubuntu:24.04-20240523`).
#### Image build logs
You may need to manually enable output streaming to see your image build logs:
{#snippet python()}
```python fixture:sb_app
image = modal.Image.debian_slim().pip_install("pandas", "numpy")
with modal.enable_output():
sb = modal.Sandbox.create(image=image, app=sb_app)
sb.detach()
```
{/snippet}
{#snippet python_async()}
```python fixture:sb_app
image = modal.Image.debian_slim().pip_install("pandas", "numpy")
with modal.enable_output():
sb = await modal.Sandbox.create.aio(image=image, app=sb_app)
await sb.detach.aio()
```
{/snippet}
{#snippet javascript()}
```javascript notest
const image = modal.images
.fromRegistry("python:3.13-slim")
.dockerfileCommands(["RUN pip install pandas numpy"]);
const sb = await modal.sandboxes.create(app, image);
sb.detach();
```
{/snippet}
{#snippet go()}
```go notest
image := mc.Images.FromRegistry("python:3.13-slim", nil).
DockerfileCommands([]string{"RUN pip install pandas numpy"}, nil)
// Note: Image build logs are automatically streamed in Go
sb, err := mc.Sandboxes.Create(ctx, app, image, nil)
defer sb.Detach()
```
{/snippet}
## Running a Sandbox with an entrypoint
In most cases, Sandboxes are treated as a generic container that can run arbitrary
commands. However, in some cases, you may want to run a single command or script
as the entrypoint of the Sandbox. You can do this by passing command arguments to the
Sandbox constructor:
{#snippet python()}
```python fixture:sb_app
sb = modal.Sandbox.create("python", "-m", "http.server", "8080", app=sb_app, timeout=10)
for line in sb.stdout:
print(line, end="")
sb.detach()
```
{/snippet}
{#snippet python_async()}
```python fixture:sb_app
sb = await modal.Sandbox.create.aio("python", "-m", "http.server", "8080", app=sb_app, timeout=10)
async for line in sb.stdout:
print(line, end="")
await sb.detach.aio()
```
{/snippet}
{#snippet javascript()}
```javascript notest
const sb = await modal.sandboxes.create(app, image, {
command: ["python", "-m", "http.server", "8080"],
timeoutMs: 10 * 1000,
});
sb.detach();
```
{/snippet}
{#snippet go()}
```go notest
sb, err := mc.Sandboxes.Create(ctx, app, image, &modal.SandboxCreateParams{
Command: []string{"python", "-m", "http.server", "8080"},
Timeout: 10 * time.Second,
})
sb.Detach()
```
{/snippet}
This functionality is most useful for running long-lived services that you want
to keep running in the background. See our [Jupyter notebook example](https://modal.com/docs/examples/jupyter_sandbox)
for a more concrete example of this.
## Referencing Sandboxes from other code
If you have a running Sandbox, you can retrieve it using the `from_id` method.
{#snippet python()}
```python fixture:sb_app
sb = modal.Sandbox.create(app=sb_app)
sb_id = sb.object_id
sb.detach()
# ... later in the program ...
sb2 = modal.Sandbox.from_id(sb_id)
p = sb2.exec("echo", "hello")
print(p.stdout.read())
sb2.terminate()
sb2.detach()
```
{/snippet}
{#snippet python_async()}
```python fixture:sb_app
sb = await modal.Sandbox.create.aio(app=sb_app)
sb_id = sb.object_id
await sb.detach.aio()
# ... later in the program ...
sb2 = await modal.Sandbox.from_id.aio(sb_id)
p = await sb2.exec.aio("echo", "hello")
print(await p.stdout.read.aio())
await sb2.terminate.aio()
await sb2.detach.aio()
```
{/snippet}
{#snippet javascript()}
```javascript notest
const sb = await modal.sandboxes.create(app, image);
const sbId = sb.sandboxId;
await sb.detach();
// ... later in the program ...
const sb2 = await modal.sandboxes.fromId(sbId);
const p = await sb2.exec(["echo", "hello"]);
console.log(await p.stdout.readText());
await sb2.terminate();
```
{/snippet}
{#snippet go()}
```go notest
sb, err := mc.Sandboxes.Create(ctx, app, image, nil)
defer sb.Detach()
sbId := sb.SandboxID
// ... later in the program ...
sb2, err := mc.Sandboxes.FromID(ctx, sbId, nil)
defer sb2.Terminate(ctx, nil)
p, err := sb2.Exec(ctx, []string{"echo", "hello"}, nil)
stdout, err := io.ReadAll(p.Stdout)
fmt.Println(string(stdout))
```
{/snippet}
A common use case for this is keeping a pool of Sandboxes available for executing tasks
as they come in. You can keep a list of `object_id`s of Sandboxes that are "open" and
reuse them, closing over the `object_id` in whatever function is using them.
## Named Sandboxes
You can assign a name to a Sandbox when creating it. Each name must be unique within an App -
only one _running_ Sandbox can use a given name at a time. Note that the associated App must be
a deployed App. Once a Sandbox completely stops running, its name becomes available for reuse.
Some applications find Sandbox Names to be useful for ensuring that no more than one Sandbox is
running per resource or project. If a Sandbox with the given name is already running, `create()`
will raise an error.
{#snippet python()}
```python notest
sb1 = modal.Sandbox.create(app=sb_app, name="my-name")
# This will raise a modal.exception.AlreadyExistsError.
sb2 = modal.Sandbox.create(app=sb_app, name="my-name")
```
{/snippet}
{#snippet python_async()}
```python notest
sb1 = await modal.Sandbox.create.aio(app=sb_app, name="my-name")
# This will raise a modal.exception.AlreadyExistsError.
sb2 = await modal.Sandbox.create.aio(app=sb_app, name="my-name")
```
{/snippet}
{#snippet javascript()}
```javascript notest
const sb1 = await modal.sandboxes.create(app, image, { name: "my-name" });
// this will raise an AlreadyExistsError
const sb2 = await modal.sandboxes.create(app, image, { name: "my-name" });
```
{/snippet}
{#snippet go()}
```go notest
sb1, err := mc.Sandboxes.Create(ctx, app, image, &modal.SandboxCreateParams{
Name: "my-name",
})
// this will return an error
sb2, err := mc.Sandboxes.Create(ctx, app, image, &modal.SandboxCreateParams{
Name: "my-name",
})
```
{/snippet}
A named Sandbox may be fetched from a deployed App using `from_name()` _but only
if the Sandbox is currently running_. If no running Sandbox is found, `from_name()` will raise
an error.
{#snippet python()}
```python notest
sb_app = modal.App.lookup("my-app", create_if_missing=True)
sb1 = modal.Sandbox.create(app=sb_app, name="my-name")
# Returns the currently running Sandbox with the name "my-name" from the
# deployed App named "my-app".
sb2 = modal.Sandbox.from_name("my-app", "my-name")
assert sb1.object_id == sb2.object_id # sb1 and sb2 refer to the same Sandbox
sb1.detach()
sb2.detach()
```
{/snippet}
{#snippet python_async()}
```python notest
sb_app = await modal.App.lookup.aio("my-app", create_if_missing=True)
sb1 = await modal.Sandbox.create.aio(app=sb_app, name="my-name")
# Returns the currently running Sandbox with the name "my-name" from the
# deployed App named "my-app".
sb2 = await modal.Sandbox.from_name.aio("my-app", "my-name")
assert sb1.object_id == sb2.object_id # sb1 and sb2 refer to the same Sandbox
await sb1.detach.aio()
await sb2.detach.aio()
```
{/snippet}
{#snippet javascript()}
```javascript notest
const app = await modal.apps.fromName("my-app", { createIfMissing: true });
const sb1 = await modal.sandboxes.create(app, image, { name: "my-name" });
// returns the currently running Sandbox with the name "my-name" from the
// deployed App named "my-app".
const sb2 = await modal.sandboxes.fromName("my-app", "my-name");
console.assert(sb1.sandboxId === sb2.sandboxId); // sb1 and sb2 refer to the same Sandbox
sb1.detach();
sb2.detach();
```
{/snippet}
{#snippet go()}
```go notest
app, err := mc.Apps.FromName(ctx, "my-app", &modal.AppFromNameParams{
CreateIfMissing: true,
})
sb1, err := mc.Sandboxes.Create(ctx, app, image, &modal.SandboxCreateParams{
Name: "my-name",
})
// returns the currently running Sandbox with the name "my-name" from the
// deployed App named "my-app".
sb2, err := mc.Sandboxes.FromName(ctx, "my-app", "my-name", nil)
// sb1 and sb2 refer to the same Sandbox
fmt.Println(sb1.SandboxID == sb2.SandboxID)
defer sb1.Detach()
defer sb2.Detach()
```
{/snippet}
Sandbox Names may contain only alphanumeric characters, dashes, periods, and underscores, and must
be shorter than 64 characters.
## Tagging
Sandboxes can also be tagged with arbitrary key-value pairs. These tags can be used
to filter results in `Sandbox.list`.
{#snippet python()}
```python fixture:sb_app
sandbox_v1_1 = modal.Sandbox.create("sleep", "10", app=sb_app)
sandbox_v1_2 = modal.Sandbox.create("sleep", "20", app=sb_app)
sandbox_v1_1.set_tags({"major_version": "1", "minor_version": "1"})
sandbox_v1_2.set_tags({"major_version": "1", "minor_version": "2"})
for sandbox in modal.Sandbox.list(app_id=sb_app.app_id): # All sandboxes.
print(sandbox.object_id)
for sandbox in modal.Sandbox.list(
app_id=sb_app.app_id,
tags={"major_version": "1"},
): # Also all sandboxes.
print(sandbox.object_id)
for sandbox in modal.Sandbox.list(
app_id=sb_app.app_id,
tags={"major_version": "1", "minor_version": "2"},
): # Just the latest sandbox.
print(sandbox.object_id)
sandbox_v1_1.detach()
sandbox_v1_2.detach()
```
{/snippet}
{#snippet python_async()}
```python fixture:sb_app
sandbox_v1_1 = await modal.Sandbox.create.aio("sleep", "10", app=sb_app)
sandbox_v1_2 = await modal.Sandbox.create.aio("sleep", "20", app=sb_app)
await sandbox_v1_1.set_tags.aio({"major_version": "1", "minor_version": "1"})
await sandbox_v1_2.set_tags.aio({"major_version": "1", "minor_version": "2"})
async for sandbox in modal.Sandbox.list.aio(app_id=sb_app.app_id): # All sandboxes.
print(sandbox.object_id)
async for sandbox in modal.Sandbox.list.aio(
app_id=sb_app.app_id,
tags={"major_version": "1"},
): # Also all sandboxes.
print(sandbox.object_id)
async for sandbox in modal.Sandbox.list.aio(
app_id=sb_app.app_id,
tags={"major_version": "1", "minor_version": "2"},
): # Just the latest sandbox.
print(sandbox.object_id)
await sandbox_v1_1.detach.aio()
await sandbox_v1_2.detach.aio()
```
{/snippet}
{#snippet javascript()}
```javascript notest
const sandboxV1_1 = await modal.sandboxes.create(app, image, {
command: ["sleep", "10"],
});
const sandboxV1_2 = await modal.sandboxes.create(app, image, {
command: ["sleep", "20"],
});
await sandboxV1_1.setTags({ major_version: "1", minor_version: "1" });
await sandboxV1_2.setTags({ major_version: "1", minor_version: "2" });
// All sandboxes.
for await (const sandbox of modal.sandboxes.list({ appId: app.appId })) {
console.log(sandbox.sandboxId);
}
// Also all sandboxes.
for await (const sandbox of modal.sandboxes.list({
appId: app.appId,
tags: { major_version: "1" },
})) {
console.log(sandbox.sandboxId);
}
// Just the latest sandbox.
for await (const sandbox of modal.sandboxes.list({
appId: app.appId,
tags: { major_version: "1", minor_version: "2" },
})) {
console.log(sandbox.sandboxId);
}
sandboxV1_1.detach();
sandboxV1_2.detach();
```
{/snippet}
{#snippet go()}
```go notest
sandboxV1_1, err := mc.Sandboxes.Create(ctx, app, image, &modal.SandboxCreateParams{
Command: []string{"sleep", "10"},
})
sandboxV1_2, err := mc.Sandboxes.Create(ctx, app, image, &modal.SandboxCreateParams{
Command: []string{"sleep", "20"},
})
defer sandboxV1_1.Detach()
defer sandboxV1_2.Detach()
sandboxV1_1.SetTags(ctx, map[string]string{"major_version": "1", "minor_version": "1"})
sandboxV1_2.SetTags(ctx, map[string]string{"major_version": "1", "minor_version": "2"})
// All sandboxes.
it, _ := mc.Sandboxes.List(ctx, &modal.SandboxListParams{
AppID: app.AppID,
})
for sandbox := range it {
fmt.Println(sandbox.SandboxID)
}
// Also all sandboxes.
it, _ = mc.Sandboxes.List(ctx, &modal.SandboxListParams{
AppID: app.AppID,
Tags: map[string]string{"major_version": "1"},
})
for sandbox := range it {
fmt.Println(sandbox.SandboxID)
}
// Just the latest sandbox.
it, _ = mc.Sandboxes.List(ctx, &modal.SandboxListParams{
AppID: app.AppID,
Tags: map[string]string{"major_version": "1", "minor_version": "2"},
})
for sandbox := range it {
fmt.Println(sandbox.SandboxID)
}
```
{/snippet}
## Cleaning up Client-side Connections
Unlike other Modal objects, the local Sandbox will hold a direct connection to
its compute substrate. While this connection should be automatically closed
during garbage collection, we recommend explicitly cleaning up the resources
once you are finished interacting with the Sandbox by calling its `detach()` method:
{#snippet python()}
```python fixture:sb_app
sb = modal.Sandbox.create(app=sb_app)
sb.detach()
```
{/snippet}
{#snippet python_async()}
```python fixture:sb_app
sb = await modal.Sandbox.create.aio(app=sb_app)
await sb.detach.aio()
```
{/snippet}
{#snippet javascript()}
```javascript notest
const sb = await modal.sandboxes.create(app, image);
sb.detach();
```
{/snippet}
{#snippet go()}
```go notest
sb, err := mc.Sandboxes.Create(ctx, app, image, nil)
defer sb.Detach()
```
{/snippet}
After calling `detach`, any operation using the Sandbox object is not guaranteed to
work. If you want to continue interacting with a running Sandbox, use `Sandbox.from_id`
to get a new Sandbox object that references the original Sandbox. In the Python SDK,
`terminate` leaves your Sandbox attached, so we recommend calling `detach` after you
are done with your terminated Sandbox. In the Go/JS SDK, `Terminate` will also detach
your Sandbox.
#### Running commands
# Running commands in Sandboxes
Once you have created a Sandbox, you can run commands inside it using the
[`Sandbox.exec`](https://modal.com/docs/sdk/py/latest/Sandbox#exec) method.
```python notest
sb = modal.Sandbox.create(app=my_app)
process = sb.exec("echo", "hello", timeout=3)
print(process.stdout.read())
process = sb.exec("python", "-c", "print(1 + 1)", timeout=3)
print(process.stdout.read())
process = sb.exec(
"bash",
"-c",
"for i in $(seq 1 10); do echo foo $i; sleep 0.1; done",
timeout=5,
)
for line in process.stdout:
print(line, end="")
sb.terminate()
sb.detach()
```
`Sandbox.exec` returns a [`ContainerProcess`](https://modal.com/docs/sdk/py/latest/container_process#containerprocess)
object, which allows access to the process's `stdout`, `stderr`, and `stdin`.
The `timeout` parameter ensures that the `exec` command will run for at most
`timeout` seconds.
## Input
The Sandbox and ContainerProcess `stdin` handles are [`StreamWriter`](https://modal.com/docs/sdk/py/latest/io_streams#streamwriter)
objects. This object supports flushing writes with both synchronous and asynchronous APIs:
```python notest
import asyncio
sb = modal.Sandbox.create(app=my_app)
p = sb.exec("bash", "-c", "while read line; do echo $line; done")
p.stdin.write(b"foo bar\n")
p.stdin.write_eof()
p.stdin.drain()
p.wait()
sb.terminate()
sb.detach()
async def run_async():
sb = await modal.Sandbox.create.aio(app=my_app)
p = await sb.exec.aio("bash", "-c", "while read line; do echo $line; done")
p.stdin.write(b"foo bar\n")
p.stdin.write_eof()
await p.stdin.drain.aio()
await p.wait.aio()
await sb.terminate.aio()
await sb.detach.aio()
asyncio.run(run_async())
```
## Output
The Sandbox and ContainerProcess `stdout` and `stderr` handles are [`StreamReader`](https://modal.com/docs/sdk/py/latest/io_streams#streamreader)
objects. These objects support reading from the stream in both synchronous and asynchronous manners.
These handles also respect the timeout given to `Sandbox.exec`.
To read from a stream after the underlying process has finished, you can use the `read`
method, which blocks until the process finishes and returns the entire output stream.
```python notest
sb = modal.Sandbox.create(app=my_app)
p = sb.exec("echo", "hello")
print(p.stdout.read())
sb.terminate()
sb.detach()
```
To stream output, take advantage of the fact that `stdout` and `stderr` are
iterable:
```python notest
import asyncio
sb = modal.Sandbox.create(app=my_app)
p = sb.exec("bash", "-c", "for i in $(seq 1 10); do echo foo $i; sleep 0.1; done")
for line in p.stdout:
# Lines preserve the trailing newline character, so use end="" to avoid double newlines.
print(line, end="")
p.wait()
sb.terminate()
sb.detach()
async def run_async():
sb = await modal.Sandbox.create.aio(app=my_app)
p = await sb.exec.aio("bash", "-c", "for i in $(seq 1 10); do echo foo $i; sleep 0.1; done")
async for line in p.stdout:
# Avoid double newlines by using end="".
print(line, end="")
await p.wait.aio()
await sb.terminate.aio()
await sb.detach.aio()
asyncio.run(run_async())
```
### Stream types
By default, all streams are buffered in memory, waiting to be consumed by the
client. You can control this behavior with the `stdout` and `stderr` parameters.
These parameters are conceptually similar to the `stdout` and `stderr`
parameters of the [`subprocess`](https://docs.python.org/3/library/subprocess.html#subprocess.DEVNULL) module.
```python notest
from modal.stream_type import StreamType
sb = modal.Sandbox.create(app=my_app)
# Default behavior: buffered in memory.
p = sb.exec(
"bash",
"-c",
"echo foo; echo bar >&2",
stdout=StreamType.PIPE,
stderr=StreamType.PIPE,
)
print(p.stdout.read())
print(p.stderr.read())
# Print the stream to STDOUT as it comes in.
p = sb.exec(
"bash",
"-c",
"echo foo; echo bar >&2",
stdout=StreamType.STDOUT,
stderr=StreamType.STDOUT,
)
p.wait()
# Discard all output.
p = sb.exec(
"bash",
"-c",
"echo foo; echo bar >&2",
stdout=StreamType.DEVNULL,
stderr=StreamType.DEVNULL,
)
p.wait()
sb.terminate()
sb.detach()
```
#### Networking and security
# Networking and security
Sandboxes are built to be secure-by-default, meaning that a default Sandbox has
no ability to accept incoming network connections or access your Modal resources.
## Outbound access control
By default, Sandboxes can make outbound connections to any public IP address.
Modal provides three levels of outbound network restriction:
| Level | Parameter | What it controls |
| ----------------------------- | --------------------------- | -------------------------------------------------------------- |
| **Full block** | `block_network=True` | Drops all outbound traffic. |
| **IP-range allowlist** | `outbound_cidr_allowlist` | Only allows traffic to the listed CIDR ranges (any protocol). |
| **Domain allowlist** _(Beta)_ | `outbound_domain_allowlist` | Only allows TLS traffic (port 443) to the listed domain names. |
`outbound_cidr_allowlist` and `outbound_domain_allowlist` can be combined additively - traffic that meets either criteria will be let through.
For advanced HTTPS inspection, the experimental `proxy_traffic_via_sidecar`
option routes outbound TCP traffic on port 443 from the main container through
a Sidecar. Relaying replaces the Sandbox's own controls on that traffic rather
than adding to them: an `outbound_cidr_allowlist` continues to govern every
other port, but stops applying to port 443, which is instead governed by the
Sidecar's egress controls. See [Routing HTTPS traffic through a
Sidecar](https://modal.com/docs/guide/sandbox-sidecars#routing-https-traffic-through-a-sidecar)
for details.
### Blocking all network access
Set `block_network=True` to prevent the Sandbox from making any outbound
connections:
{#snippet python()}
```python notest
sb = modal.Sandbox.create(
"python", "my_script.py",
block_network=True,
app=app,
)
```
{/snippet}
{#snippet javascript()}
```javascript notest
const sb = await modal.sandboxes.create(app, image, {
command: ["python", "my_script.py"],
blockNetwork: true,
});
```
{/snippet}
{#snippet go()}
```go notest
sb, err := mc.Sandboxes.Create(ctx, app, image, &modal.SandboxCreateParams{
Command: []string{"python", "my_script.py"},
BlockNetwork: true,
})
```
{/snippet}
When `block_network` is enabled, `outbound_cidr_allowlist`,
`outbound_domain_allowlist`, and `inbound_cidr_allowlist` cannot be used.
### Restricting by IP range (CIDR allowlist)
Use `outbound_cidr_allowlist` to restrict outbound traffic to a set of IP
ranges. All traffic to IPs outside these ranges (except traffic allowed by `outbound_domain_allowlist`) is blocked.
{#snippet python()}
```python notest
sb = modal.Sandbox.create(
"sleep", "infinity",
outbound_cidr_allowlist=["52.0.0.0/8", "10.0.1.0/24"],
app=app,
)
```
{/snippet}
{#snippet javascript()}
```javascript notest
const sb = await modal.sandboxes.create(app, image, {
command: ["sleep", "infinity"],
outboundCidrAllowlist: ["52.0.0.0/8", "10.0.1.0/24"],
});
```
{/snippet}
{#snippet go()}
```go notest
sb, err := mc.Sandboxes.Create(ctx, app, image, &modal.SandboxCreateParams{
Command: []string{"sleep", "infinity"},
OutboundCIDRAllowlist: &modal.Allowlist{Entries: []string{"52.0.0.0/8", "10.0.1.0/24"}},
})
```
{/snippet}
### Restricting by domain name (domain allowlist)
Use `outbound_domain_allowlist` to restrict outbound TLS traffic to a set of
domain names:
{#snippet python()}
```python notest
sb = modal.Sandbox.create(
"sleep", "infinity",
outbound_domain_allowlist=["api.openai.com", "*.github.com"],
app=app,
)
```
{/snippet}
{#snippet javascript()}
```javascript notest
const sb = await modal.sandboxes.create(app, image, {
command: ["sleep", "infinity"],
outboundDomainAllowlist: ["api.openai.com", "*.github.com"],
});
```
{/snippet}
{#snippet go()}
```go notest
sb, err := mc.Sandboxes.Create(ctx, app, image, &modal.SandboxCreateParams{
Command: []string{"sleep", "infinity"},
OutboundDomainAllowlist: &modal.Allowlist{Entries: []string{"api.openai.com", "*.github.com"}},
})
```
{/snippet}
When a domain allowlist is set:
- **TLS (port 443)** connections are allowed only to the listed domains, or to
IPs on a CIDR allowlist. Other connections are blocked and logged to the
Sandbox's system output stream.
- **Non-TLS traffic** (HTTP, raw TCP, UDP) to IPs that are not on a CIDR
allowlist is **blocked**.
Entries prefixed with `*.` match the parent domain and any subdomain:
| Allowlist entry | Matches | Does not match |
| --------------- | ------------------------------------------------- | ----------------- |
| `example.com` | `example.com` | `sub.example.com` |
| `*.example.com` | `example.com`, `a.example.com`, `a.b.example.com` | `evilexample.com` |
#### How domain filtering works
Domains are matched against the
[SNI](https://en.wikipedia.org/wiki/Server_Name_Indication) in the TLS
handshake, and Modal resolves that hostname itself rather than trusting the
destination IP the Sandbox picked. TLS traffic is not decrypted, so the `Host`
header, URL path, and body are never inspected.
Encrypted Client Hello (ECH) is not supported. Modal only sees the outer public
name, not the real hostname inside it, so an ECH connection is matched against
that public name and is blocked unless the public name is on the allowlist.
Two domains can share a TLS endpoint, such as two tenants of the same CDN. A
Sandbox can reach a non-allowlisted domain there by sending an allowlisted SNI
with the other name in the `Host` header, a technique called _domain fronting_.
Many providers reject mismatched requests, but the allowlist itself does not
prevent the mismatch.
### Updating the network policy at runtime
This API is experimental and has [limitations](#dynamic-policy-limitations) that
will be removed in a future release.
You can replace the outbound network policy of a running Sandbox without
restarting it. This is useful when an agent's trust level changes mid-session —
for example, starting with broad access while installing dependencies and then
locking down to only the domains a tool needs.
{#snippet python()}
```python notest
# Start with all outbound traffic allowed.
sb = modal.Sandbox.create(
"sleep", "infinity",
outbound_domain_allowlist=["*"],
outbound_cidr_allowlist=["0.0.0.0/0"],
app=app,
)
# ... later, narrow the policy to only the domains we need.
sb._experimental_set_outbound_network_policy(
outbound_domain_allowlist=["api.openai.com", "*.github.com"],
)
# Or block all outbound traffic by passing empty allowlists.
sb._experimental_set_outbound_network_policy(
outbound_domain_allowlist=[],
outbound_cidr_allowlist=[],
)
# Widen back to allow-all when needed.
sb._experimental_set_outbound_network_policy(
outbound_domain_allowlist=["*"],
outbound_cidr_allowlist=["0.0.0.0/0"],
)
```
{/snippet}
{#snippet javascript()}
```javascript notest
// Start with all outbound traffic allowed.
const sb = await modal.sandboxes.create(app, image, {
command: ["sleep", "infinity"],
outboundDomainAllowlist: ["*"],
outboundCidrAllowlist: ["0.0.0.0/0"],
});
// ... later, narrow the policy to only the domains we need.
await sb.updateNetworkPolicy({
outboundDomainAllowlist: ["api.openai.com", "*.github.com"],
outboundCidrAllowlist: [],
});
// Or block all outbound traffic by passing empty allowlists.
await sb.updateNetworkPolicy({
outboundDomainAllowlist: [],
outboundCidrAllowlist: [],
});
// Widen back to allow-all when needed.
await sb.updateNetworkPolicy({
outboundDomainAllowlist: ["*"],
outboundCidrAllowlist: ["0.0.0.0/0"],
});
```
{/snippet}
{#snippet go()}
```go notest
// Start with all outbound traffic allowed.
sb, err := mc.Sandboxes.Create(ctx, app, image, &modal.SandboxCreateParams{
Command: []string{"sleep", "infinity"},
OutboundDomainAllowlist: &modal.Allowlist{Entries: []string{"*"}},
OutboundCIDRAllowlist: &modal.Allowlist{Entries: []string{"0.0.0.0/0"}},
})
// ... later, narrow the policy to only the domains we need.
err = sb.UpdateNetworkPolicy(ctx, &modal.SandboxUpdateNetworkPolicyParams{
OutboundDomainAllowlist: &modal.Allowlist{Entries: []string{"api.openai.com", "*.github.com"}},
OutboundCIDRAllowlist: &modal.Allowlist{Entries: []string{}},
})
// Or block all outbound traffic by passing empty allowlists.
err = sb.UpdateNetworkPolicy(ctx, &modal.SandboxUpdateNetworkPolicyParams{
OutboundDomainAllowlist: &modal.Allowlist{Entries: []string{}},
OutboundCIDRAllowlist: &modal.Allowlist{Entries: []string{}},
})
// Widen back to allow-all when needed.
err = sb.UpdateNetworkPolicy(ctx, &modal.SandboxUpdateNetworkPolicyParams{
OutboundDomainAllowlist: &modal.Allowlist{Entries: []string{"*"}},
OutboundCIDRAllowlist: &modal.Allowlist{Entries: []string{"0.0.0.0/0"}},
})
```
{/snippet}
The new policy takes effect immediately. Established connections that the new
policy no longer permits are terminated.
#### Dynamic policy limitations
- Each allowlist type must be set at creation time to be usable later. To
update `outbound_domain_allowlist` at runtime, the Sandbox must be created
with `outbound_domain_allowlist` (e.g. `["*"]`). The same applies to
`outbound_cidr_allowlist` — create with `["0.0.0.0/0"]` if you want to
restrict by CIDR later.
- `block_network=True` is not compatible with this API. Use empty allowlists
(`[]`) to block all traffic instead.
## Inbound access control
Use `inbound_cidr_allowlist` to restrict which IP addresses can connect
**inbound** to the Sandbox through tunnels and Sandbox Connect Tokens:
{#snippet python()}
```python notest
sb = modal.Sandbox.create(
"python", "-m", "http.server", "8080",
encrypted_ports=[8080],
inbound_cidr_allowlist=["203.0.113.0/24"],
app=app,
)
```
{/snippet}
{#snippet javascript()}
```javascript notest
const sb = await modal.sandboxes.create(app, image, {
command: ["python", "-m", "http.server", "8080"],
encryptedPorts: [8080],
inboundCidrAllowlist: ["203.0.113.0/24"],
});
```
{/snippet}
{#snippet go()}
```go notest
sb, err := mc.Sandboxes.Create(ctx, app, image, &modal.SandboxCreateParams{
Command: []string{"python", "-m", "http.server", "8080"},
EncryptedPorts: []int{8080},
InboundCIDRAllowlist: []string{"203.0.113.0/24"},
})
```
{/snippet}
## Connecting to Sandboxes with HTTP and WebSockets
You can make authenticated HTTP and WebSocket requests to a Sandbox by generating
Sandbox Connect Tokens. They work like this:
{#snippet python()}
```python notest
# Start a Sandbox with a server running on port 8080.
sb = modal.Sandbox.create(
"bash", "-c", "python3 -m http.server 8080",
app=my_app,
)
# Create a connect token, optionally including arbitrary user metadata.
# Port 8080 is the default and could be omitted here.
creds = sb.create_connect_token(user_metadata={"user_id": "foo"}, port=8080)
# Make an HTTP request, passing the token in the Authorization header.
requests.get(creds.url, headers={"Authorization": f"Bearer {creds.token}"})
# You can also put the token in a `_modal_connect_token` query param.
url = f"{creds.url}/?_modal_connect_token={creds.token}"
ws_url = url.replace("https://", "wss://")
with websockets.connect(ws_url) as socket:
socket.send("Hello world!")
sb.detach()
```
{/snippet}
{#snippet javascript()}
```javascript notest
// Start a Sandbox with a server running on port 8080.
const sb = await modal.sandboxes.create(app, image, {
command: ["bash", "-c", "python3 -m http.server 8080"],
});
// Create a connect token, optionally including arbitrary user metadata.
// Port 8080 is the default and could be omitted here.
const creds = await sb.createConnectToken({
userMetadata: '{"user_id": "foo"}',
port: 8080,
});
// Make an HTTP request, passing the token in the Authorization header.
const response = await fetch(creds.url, {
headers: { Authorization: `Bearer ${creds.token}` },
});
sb.detach();
```
{/snippet}
{#snippet go()}
```go notest
// Start a Sandbox with a server running on port 8080.
sb, err := mc.Sandboxes.Create(ctx, app, image, &modal.SandboxCreateParams{
Command: []string{"bash", "-c", "python3 -m http.server 8080"},
})
// Create a connect token, optionally including arbitrary user metadata.
// Port 8080 is the default and could be omitted here.
creds, err := sb.CreateConnectToken(ctx, &modal.SandboxCreateConnectTokenParams{
UserMetadata: `{"user_id": "foo"}`,
Port: 8080,
})
// Make an HTTP request, passing the token in the Authorization header.
req, _ := http.NewRequestWithContext(ctx, "GET", creds.URL, nil)
req.Header.Set("Authorization", fmt.Sprintf("Bearer %s", creds.Token))
resp, _ := http.DefaultClient.Do(req)
sb.Detach()
```
{/snippet}
The server running on the specified port in the container will receive an authenticated
request with an unspoofable `X-Verified-User-Data` header whose value is the
JSON-serialized metadata that was passed as `user_metadata` to
`create_connect_token()`. This can be used by the application to
determine access control, for example.
There are a few things to remember with Sandbox Connect Tokens:
1. By default, requests are routed to port 8080 in the container. Pass `port`
to `create_connect_token()` to route to a different port.
2. The token may be sent in an `Authorization` header, in a `_modal_connect_token`
query param, or in a `_modal_connect_token` cookie.
3. If `_modal_connect_token` is set as a query param, the resulting response will
include a `Set-Cookie` header that sets it as a cookie.
4. The `user_metadata` must be JSON-serializable and must be less than 512
characters after serialization.
5. The `user_metadata` is encoded into the connect token itself, so it
should not contain secrets.
### Forwarding ports
While it is recommended to use [Sandbox Connect Tokens](#connecting-to-sandboxes-with-http-and-websockets)
for HTTP requests and WebSocket connections to the container, you can also expose
raw TCP ports to the internet. This is useful if, for example, you want to run a
server inside the Sandbox that expects a raw TCP connection and handles
authentication itself.
Use the `encrypted_ports` and `unencrypted_ports` parameters of `Sandbox.create`
to specify which ports to forward. You can then access the public URL of a tunnel
using the [`Sandbox.tunnels`](https://modal.com/docs/sdk/py/latest/Sandbox#tunnels) method:
```python notest
import requests
import time
sb = modal.Sandbox.create(
"python",
"-m",
"http.server",
"12345",
encrypted_ports=[12345],
app=my_app,
)
tunnel = sb.tunnels()[12345]
time.sleep(1) # Wait for server to start.
print(f"Connecting to {tunnel.url}...")
print(requests.get(tunnel.url, timeout=5).text)
sb.detach()
```
It is also possible to create an encrypted port that uses `HTTP/2` rather than `HTTP/1.1` with the `h2_ports` option. This will return
a URL that you can make H2 (HTTP/2 + TLS) requests to. If you want to run an `HTTP/2` server inside a sandbox, this feature may be useful.
Here is an example:
```python notest
import time
port = 4359
sb = modal.Sandbox.create(
app=my_app,
image=my_image,
h2_ports=[port],
)
p = sb.exec("python", "my_http2_server.py")
tunnel = sb.tunnels()[port]
time.sleep(1)
print(f"Tunnel URL: {tunnel.url}")
sb.detach()
```
For more details on how tunnels work, see the [tunnels guide](https://modal.com/docs/guide/tunnels).
### Custom domains
Custom domains for Sandbox tunnels are available on the Team and Enterprise plans . Visit workspace settings to upgrade.
The infrastructure is production-grade, but onboarding requires a manual setup step.
By default, Sandbox tunnels are served from subdomains of `w.modal.host`.
In some cases, it's necessary to have a tunnel served through a custom domain
for security reasons. This is possible with manual setup.
Note that tunnel custom domains are distinct from other custom domains in Modal.
Other custom domains use `CNAME` forwarding. For tunnels, we need to use an
`NS` record to delegate the domain to Modal's nameservers.
**1. Delegate a (sub)domain to Modal's nameservers.**
Add `NS` records to your DNS zone pointing to Modal's nameservers. For example,
to use `sandbox.example.com`, add the following records in your DNS provider's
control panel:
| Name | Type | Value |
| --------------------- | ---- | -------------------- |
| `sandbox.example.com` | NS | `w-ns-a.modal.host.` |
| `sandbox.example.com` | NS | `w-ns-b.modal.host.` |
| `sandbox.example.com` | NS | `w-ns-c.modal.host.` |
| `sandbox.example.com` | NS | `w-ns-d.modal.host.` |
You can delegate any subdomain depth you like (e.g. `tunnels.a.b.c.example.com`).
**2. Ask Modal to set up the domain.**
Reach out to us on Slack and provide the domain name. We'll enable it for your
workspace.
**3. Pass `custom_domain` to `Sandbox.create`.**
```python notest
import modal
app = modal.App.lookup("my-app", create_if_missing=True)
sb = modal.Sandbox.create(
"python", "-m", "http.server", "8080",
encrypted_ports=[8080],
custom_domain="sandbox.example.com",
app=app,
)
tunnel = sb.tunnels()[8080]
print(tunnel.url) # https://[...].sandbox.example.com
```
Modal will provision a TLS certificate automatically. Sandbox Connect Tokens generated
for this sandbox will also use the custom domain.
## Security model
Sandboxes are built on top of [gVisor](https://gvisor.dev/), a container runtime
by Google that provides strong isolation properties. gVisor has custom logic to
prevent Sandboxes from making malicious system calls, giving you stronger isolation
than most other container runtimes.
Additionally, Sandboxes are not authorized to access other resources in your Modal
workspace the way that Modal Functions are [by default](https://modal.com/docs/guide/restricted-access).
As a result, the blast radius of any malicious code will be limited to the Sandbox
container itself.
#### File access
# Filesystem Access
There are multiple options for uploading files to a Sandbox and accessing them
from outside the Sandbox.
## Filesystem API
The most convenient way to pass data in and out of the Sandbox during
execution is to use our filesystem API:
{#snippet python()}
```python
import modal
app = modal.App.lookup("sandbox-fs-demo", create_if_missing=True)
sb = modal.Sandbox.create(app=app)
# Write text to a file in the Sandbox.
sb.filesystem.write_text("Hello World!\n", "/tmp/test.txt")
# Read the file back from the Sandbox into a string.
contents = sb.filesystem.read_text("/tmp/test.txt")
print(contents)
sb.terminate()
sb.detach()
```
{/snippet}
{#snippet javascript()}
```javascript notest
const modal = new ModalClient();
const app = await modal.apps.fromName("sandbox-fs-demo", {
createIfMissing: true,
});
const image = modal.images.fromRegistry("python:3.13-slim");
const sb = await modal.sandboxes.create(app, image);
// Write text to a file in the Sandbox.
await sb.filesystem.writeText("Hello World!\n", "/tmp/test.txt");
// Read the file back from the Sandbox into a string.
const contents = await sb.filesystem.readText("/tmp/test.txt");
console.log(contents);
await sb.terminate();
```
{/snippet}
{#snippet go()}
```go notest
package main
import (
"context"
"fmt"
modal "github.com/modal-labs/modal-client/go"
)
func main() {
ctx := context.Background()
mc, _ := modal.NewClient()
app, _ := mc.Apps.FromName(ctx, "sandbox-fs-demo", &modal.AppFromNameParams{
CreateIfMissing: true,
})
image := mc.Images.FromRegistry("python:3.13-slim", nil)
sb, _ := mc.Sandboxes.Create(ctx, app, image, nil)
defer sb.Terminate(ctx, nil)
fs := sb.Filesystem
// Write text to a file in the Sandbox.
fs.WriteText(ctx, "Hello World!\n", "/tmp/test.txt", nil)
// Read the file back from the Sandbox into a string.
contents, _ := fs.ReadText(ctx, "/tmp/test.txt", nil)
fmt.Println(contents)
}
```
{/snippet}
It has convenience APIs for streaming file copies in both directions:
{#snippet python()}
```python
from pathlib import Path
import modal
# Write a local file.
with open("local-file.txt", "w") as f:
f.write("Hello World!\n")
app = modal.App.lookup("sandbox-fs-demo", create_if_missing=True)
sb = modal.Sandbox.create(app=app)
# Copy the local file into the Sandbox.
sb.filesystem.copy_from_local("local-file.txt", "/tmp/file-in-sandbox.txt")
# Copy it back to the local filesystem.
sb.filesystem.copy_to_local("/tmp/file-in-sandbox.txt", "local-file-copy.txt")
print(Path("local-file-copy.txt").read_text())
sb.terminate()
sb.detach()
```
{/snippet}
{#snippet javascript()}
```javascript notest
const sb = await modal.sandboxes.create(app, image);
// Write a local file.
await writeFile("local-file.txt", "Hello World!\n", "utf-8");
// Copy the local file into the Sandbox.
await sb.filesystem.copyFromLocal("local-file.txt", "/tmp/file-in-sandbox.txt");
// Copy it back to the local filesystem.
await sb.filesystem.copyToLocal(
"/tmp/file-in-sandbox.txt",
"local-file-copy.txt",
);
console.log(await readFile("local-file-copy.txt", "utf-8"));
await sb.terminate();
```
{/snippet}
{#snippet go()}
```go notest
sb, _ := mc.Sandboxes.Create(ctx, app, image, nil)
defer sb.Terminate(ctx, nil)
fs := sb.Filesystem
// Write a local file.
os.WriteFile("local-file.txt", []byte("Hello World!\n"), 0o644)
// Copy the local file into the Sandbox.
fs.CopyFromLocal(ctx, "local-file.txt", "/tmp/file-in-sandbox.txt", nil)
// Copy it back to the local filesystem.
fs.CopyToLocal(ctx, "/tmp/file-in-sandbox.txt", "local-file-copy.txt", nil)
data, _ := os.ReadFile("local-file-copy.txt")
fmt.Println(string(data))
```
{/snippet}
It also offers APIs for inspecting and managing files:
{#snippet python()}
```python
import modal
app = modal.App.lookup("sandbox-fs-demo", create_if_missing=True)
sb = modal.Sandbox.create(app=app)
# Set up a structured project.
sb.filesystem.make_directory("/tmp/project/results")
# Let the Sandbox do some work and write outputs to files.
sb.filesystem.write_text("42\n", "/tmp/project/results/answer.txt")
sb.filesystem.write_text("debug info\n", "/tmp/project/results/debug.log")
# Inspect what was produced.
for entry in sb.filesystem.list_files("/tmp/project/results"):
print(entry.name, entry.type.value, entry.size)
# Check that the result file has content before downloading it.
info = sb.filesystem.stat("/tmp/project/results/answer.txt")
if info.size > 0:
answer = sb.filesystem.read_text("/tmp/project/results/answer.txt")
print(answer)
# Clean up the whole project.
sb.filesystem.remove("/tmp/project", recursive=True)
sb.terminate()
sb.detach()
```
{/snippet}
{#snippet javascript()}
```javascript notest
const sb = await modal.sandboxes.create(app, image);
// Set up a structured project.
await sb.filesystem.makeDirectory("/tmp/project/results");
// Let the Sandbox do some work and write outputs to files.
await sb.filesystem.writeText("42\n", "/tmp/project/results/answer.txt");
await sb.filesystem.writeText("debug info\n", "/tmp/project/results/debug.log");
// Inspect what was produced.
const entries = await sb.filesystem.listFiles("/tmp/project/results");
for (const entry of entries) {
console.log(entry.name, entry.type, entry.size);
}
// Check that the result file has content before downloading it.
const info = await sb.filesystem.stat("/tmp/project/results/answer.txt");
if (info.size > 0) {
const answer = await sb.filesystem.readText(
"/tmp/project/results/answer.txt",
);
console.log(answer);
}
// Clean up the whole project.
await sb.filesystem.remove("/tmp/project", { recursive: true });
await sb.terminate();
```
{/snippet}
{#snippet go()}
```go notest
sb, _ := mc.Sandboxes.Create(ctx, app, image, nil)
defer sb.Terminate(ctx, nil)
fs := sb.Filesystem
// Set up a structured project.
fs.MakeDirectory(ctx, "/tmp/project/results", nil)
// Let the Sandbox do some work and write outputs to files.
fs.WriteText(ctx, "42\n", "/tmp/project/results/answer.txt", nil)
fs.WriteText(ctx, "debug info\n", "/tmp/project/results/debug.log", nil)
// Inspect what was produced.
entries, _ := fs.ListFiles(ctx, "/tmp/project/results", nil)
for _, entry := range entries {
fmt.Println(entry.Name, entry.Type, entry.Size)
}
// Check that the result file has content before downloading it.
info, _ := fs.Stat(ctx, "/tmp/project/results/answer.txt", nil)
if info.Size > 0 {
answer, _ := fs.ReadText(ctx, "/tmp/project/results/answer.txt", nil)
fmt.Println(answer)
}
// Clean up the whole project.
fs.Remove(ctx, "/tmp/project", &modal.SandboxFilesystemRemoveParams{Recursive: true})
```
{/snippet}
These APIs may be used to read files of up to 5GB and write files of any size.
However, if you have a large dataset that you want to use repeatedly from many sandboxes,
consider [using Volumes](#using-volumes).
Sandbox filesystem access was previously exposed through methods on the `Sandbox` and a `FileIO` object. This API is now deprecated; consult our [migration guide](https://modal.com/docs/guide/migrate-sandbox-filesystem) to update any code still using the legacy API.
## Using Volumes
It's possible to use Modal [Volume](https://modal.com/docs/sdk/py/latest/Volume)s or
[CloudBucketMount](https://modal.com/docs/guide/cloud-bucket-mounts)s with Sandboxes.
Volumes and CloudBucketMounts allow you to upload data once and access that
data efficiently from many sandboxes.
To access a Volume from a Sandbox, you can use the `volumes` parameter of `Sandbox.create`:
```python notest
# Find or create a Volume with the name "my-volume".
vol = modal.Volume.from_name("my-volume", create_if_missing=True)
sb = modal.Sandbox.create(
volumes={"/cache": vol},
app=my_app,
)
# Read a file in the Volume.
p = sb.exec("bash", "-c", "cat /cache/some-file.txt")
print(p.stdout.read())
p.wait()
# Write a file to the Volume.
p = sb.exec("bash", "-c", "echo foo > /cache/a.txt")
p.wait()
sb.terminate(wait=True)
sb.detach()
# Access the Volume file from outside the Sandbox.
for data in vol.read_file("a.txt"):
print(data)
```
File syncing behavior differs between Volumes and CloudBucketMounts. For
Volumes, changes are persisted by [background commits](https://modal.com/docs/guide/volumes#background-commits)
that run every few seconds while the Sandbox executes, with a final commit when
the Sandbox terminates. With Volumes v2, you can also commit explicitly at any point (see
[Committing Volume changes with `sync`](#committing-volume-changes-with-sync-v2-only)
below). For CloudBucketMounts, files are synced automatically.
You need to explicitly reload a Volume to see changes made since it was first mounted, by invoking the [.reload_volumes()](https://modal.com/docs/sdk/py/latest/Sandbox#reload_volumes) method on the sandbox object.
### Mounting a subdirectory
You can mount a subdirectory of a Volume instead of the entire Volume using
[`with_mount_options`](https://modal.com/docs/guide/volumes#mount-options). This is especially
useful when many Sandboxes share a single Volume but each Sandbox should only
access its own data:
{#snippet python()}
```python notest
sb_app = modal.App.lookup("my-app", create_if_missing=True)
vol = modal.Volume.from_name("shared-volume", create_if_missing=True)
# Each Sandbox only sees its own subdirectory of the Volume.
sb = modal.Sandbox.create(
volumes={"/data": vol.with_mount_options(sub_path="/users/user_123")},
app=sb_app,
)
# /data inside the Sandbox maps to /users/user_123 in the Volume.
# The Sandbox cannot see or modify files belonging to other users.
p = sb.exec("bash", "-c", "echo hello > /data/output.txt")
p.wait()
sb.terminate(wait=True)
sb.detach()
```
{/snippet}
{#snippet javascript()}
```javascript notest
const app = await modal.apps.fromName("my-app", {
createIfMissing: true,
});
const vol = await modal.volumes.fromName("shared-volume", {
createIfMissing: true,
});
const image = modal.images.fromRegistry("python:3.13-slim");
// Each Sandbox only sees its own subdirectory of the Volume.
const sb = await modal.sandboxes.create(app, image, {
volumes: { "/data": vol.withMountOptions({ subPath: "/users/user_123" }) },
});
// /data inside the Sandbox maps to /users/user_123 in the Volume.
// The Sandbox cannot see or modify files belonging to other users.
const p = await sb.exec(["bash", "-c", "echo hello > /data/output.txt"]);
await p.wait();
await sb.terminate({ wait: true });
```
{/snippet}
{#snippet go()}
```go notest
app, _ := mc.Apps.FromName(ctx, "volume-subdir-test", &modal.AppFromNameParams{CreateIfMissing: true})
vol, _ := mc.Volumes.FromName(ctx, "shared-volume", &modal.VolumeFromNameParams{
CreateIfMissing: true,
})
image := mc.Images.FromRegistry("python:3.13-slim", nil)
// Each Sandbox only sees its own subdirectory of the Volume.
subPath := "/users/user_123"
sb, _ := mc.Sandboxes.Create(ctx, app, image, &modal.SandboxCreateParams{
Volumes: map[string]*modal.Volume{
"/data": vol.WithMountOptions(&modal.VolumeMountOptions{SubPath: &subPath}),
},
})
defer sb.Terminate(ctx, nil)
// /data inside the Sandbox maps to /users/user_123 in the Volume.
// The Sandbox cannot see or modify files belonging to other users.
p, _ := sb.Exec(ctx, []string{"bash", "-c", "echo hello > /data/output.txt"}, nil)
p.Wait(ctx)
```
{/snippet}
For more details on Volume mount options, see the
[Volumes guide](https://modal.com/docs/guide/volumes#mount-options).
### Committing Volume changes with `sync` (v2 only)
For [Volumes v2](https://modal.com/docs/guide/volumes#volumes-v2-overview), you can explicitly
commit changes at any point during Sandbox execution by running the `sync`
command on the mountpoint. This persists all data and metadata changes to the
Volume's storage without waiting for the Sandbox to terminate:
```python notest
sb = modal.Sandbox.create(
volumes={"/data": modal.Volume.from_name("my-v2-volume")},
app=my_app,
)
# Write files to the volume
sb.exec("bash", "-c", "echo 'hello' > /data/output.txt").wait()
# Commit changes immediately
p = sb.exec("sync", "/data")
p.wait()
if p.returncode != 0:
raise Exception(f"sync failed with exit code {p.returncode}")
# Changes are now persisted and visible to other containers
sb.terminate()
sb.detach()
```
This is particularly useful for long-running Sandboxes where you want to
persist intermediate results, or when you need changes to be visible to other
containers before the Sandbox terminates.
## Adding files to an Image
In some cases, you may want to [add a file to an Image itself](https://modal.com/docs/guide/images#add-local-files-with-add_local_dir-and-add_local_file).
This is useful if the file will be used by many Sandboxes, or if you
want to access that file from the Sandbox's entrypoint command.
This can be done using the
[`add_local_file`](https://modal.com/docs/sdk/py/latest/Image#add_local_file) and
[`add_local_dir`](https://modal.com/docs/sdk/py/latest/Image#add_local_dir) methods on the
[`Image`](https://modal.com/docs/sdk/py/latest/Image) class:
```python notest
# Eagerly build the image - otherwise the Image will lazily build when the
# Sandbox is created.
image = (
modal.Image.debian_slim()
.add_local_dir(
local_path="/home/user/my_dir",
remote_path="/app",
)
.build(my_app)
)
sb = modal.Sandbox.create(app=my_app, image=image)
p = sb.exec("ls", "/app")
print(p.stdout.read())
p.wait()
sb.detach()
```
#### Snapshots
# Snapshots
Sandboxes support snapshotting, allowing you to save your Sandbox's state
and restore it later. This is useful for:
- Reducing startup latency
- Creating custom environments for your Sandboxes to run in
- Backing up your Sandbox's state for debugging
- Running large-scale experiments with the same initial state
- Branching your Sandbox's state to test different code changes independently
Modal currently supports three different kinds of Sandbox snapshots:
1. [Filesystem Snapshots](#filesystem-snapshots)
2. [Directory Snapshots](#directory-snapshots)
3. [Memory Snapshots](#memory-snapshots)
## Snapshot Retention
Different snapshot types have different retention policies:
| Snapshot Type | Default Retention Period |
| ------------------- | ------------------------ |
| Filesystem Snapshot | 30 days after creation |
| Directory Snapshot | 30 days after creation |
| Memory Snapshot | 7 days after creation |
**Breaking change in v1.5 (Python) / v0.8.0 (Go/JS):** Filesystem Snapshots now default to a 30-day TTL. Previously, Filesystem Snapshots persisted indefinitely and Directory Snapshots already defaulted to 30 days. Both `snapshot_filesystem()` and `snapshot_directory()` now accept an explicit TTL parameter that you can use to override the default, including opting out of expiry entirely.
Filesystem Snapshots and Directory Snapshots are [Images](https://modal.com/docs/sdk/py/latest/Image) and are automatically garbage collected after their TTL expires (30 days by default). You can configure a custom TTL when creating a snapshot, or opt out of expiry entirely to retain snapshots indefinitely. Memory Snapshots expire 7 days after creation and cannot currently be extended.
Here is how to configure custom TTLs for each snapshot type:
{#snippet python()}
```python notest
# Filesystem snapshot with custom TTL of 7 days
image = sb.snapshot_filesystem(ttl=7 * 24 * 3600)
# Filesystem snapshot with no expiry (retain indefinitely, like the pre-v1.5 default)
image = sb.snapshot_filesystem(ttl=None)
# Directory snapshot with custom TTL of 7 days
snapshot = sb.snapshot_directory("/project", ttl=7 * 24 * 3600)
# Directory snapshot with no expiry
snapshot = sb.snapshot_directory("/project", ttl=None)
```
{/snippet}
{#snippet javascript()}
```javascript notest
// Filesystem snapshot with custom TTL of 7 days
let image = await sb.snapshotFilesystem({ ttlMs: 7 * 24 * 3600 * 1000 });
// Filesystem snapshot with no expiry (retain indefinitely, like the pre-v0.8.0 default)
image = await sb.snapshotFilesystem({ ttlMs: null });
// Directory snapshot with custom TTL of 7 days
let snapshot = await sb.snapshotDirectory("/project", {
ttlMs: 7 * 24 * 3600 * 1000,
});
// Directory snapshot with no expiry
snapshot = await sb.snapshotDirectory("/project", { ttlMs: null });
```
{/snippet}
{#snippet go()}
```go notest
// Filesystem snapshot with custom TTL of 7 days
image, _ := sb.SnapshotFilesystem(ctx, &modal.SandboxSnapshotFilesystemParams{
TTL: 7 * 24 * time.Hour,
})
// Filesystem snapshot with no expiry (retain indefinitely, like the pre-v0.8.0 default)
image, _ = sb.SnapshotFilesystem(ctx, &modal.SandboxSnapshotFilesystemParams{
TTL: modal.NoExpiryTTL,
})
// Directory snapshot with custom TTL of 7 days
snapshot, _ := sb.SnapshotDirectory(ctx, "/project", &modal.SandboxSnapshotDirectoryParams{
TTL: 7 * 24 * time.Hour,
})
// Directory snapshot with no expiry
snapshot, _ = sb.SnapshotDirectory(ctx, "/project", &modal.SandboxSnapshotDirectoryParams{
TTL: modal.NoExpiryTTL,
})
```
{/snippet}
If you try to use an expired snapshot, Modal will raise a `NotFoundError` — immediately when mounting the Image into a running Sandbox, or upon first interaction (e.g. `exec` or `wait`) when starting a new Sandbox from the expired Image. Note that `Image.from_id()` is itself lazy and will not raise an error on construction even if the provided Image ID has been deleted.
To manage storage for long-lived snapshots, you can delete them programmatically when no longer needed. See [Deleting Snapshots](#deleting-snapshots) for details.
## Filesystem Snapshots
Filesystem Snapshots are copies of the Sandbox's filesystem at a given point in time.
These Snapshots are [Images](https://modal.com/docs/sdk/py/latest/Image) and can be used to create
new Sandboxes.
To create a Filesystem Snapshot, you can use the
[`Sandbox.snapshot_filesystem()`](https://modal.com/docs/sdk/py/latest/Sandbox#snapshot_filesystem) method:
```python notest
import modal
app = modal.App.lookup("sandbox-fs-snapshot-test", create_if_missing=True)
sb = modal.Sandbox.create(app=app)
p = sb.exec("bash", "-c", "echo 'test' > /test")
p.wait()
assert p.returncode == 0, "failed to write to file"
image = sb.snapshot_filesystem()
sb.terminate()
sb2 = modal.Sandbox.create(image=image, app=app)
p2 = sb2.exec("bash", "-c", "cat /test")
assert p2.stdout.read().strip() == "test"
```
Filesystem Snapshots are optimized for performance: they are calculated as the difference
from your base image, so only modified files are stored. Restoring a Filesystem Snapshot
utilizes the same infrastructure we use to get fast cold starts for your Sandboxes.
See [Snapshot Retention](#snapshot-retention) for TTL configuration options and [Deleting Snapshots](#deleting-snapshots) to learn how to manage snapshot storage.
### Forking
Since Filesystem Snapshots are [Images](https://modal.com/docs/reference/modal.Image), you can create multiple Sandboxes from the same snapshot. Each Sandbox starts with an identical copy of the snapshotted filesystem, so you can use this to run parallel workloads or test different changes independently.
{#snippet python()}
```python notest
import modal
app = modal.App.lookup("sandbox-fork-example", create_if_missing=True)
sb = modal.Sandbox.create(app=app)
p = sb.exec("bash", "-c", "pip install numpy && echo 'setup done' > /status")
p.wait()
image = sb.snapshot_filesystem()
sb.terminate()
# Start multiple Sandboxes from the same snapshot
sb2 = modal.Sandbox.create(image=image, app=app)
sb3 = modal.Sandbox.create(image=image, app=app)
# Each fork starts from the snapshotted state
assert sb2.exec("cat", "/status").stdout.read().strip() == "setup done"
assert sb3.exec("cat", "/status").stdout.read().strip() == "setup done"
```
{/snippet}
{#snippet javascript()}
```javascript notest
const sb = await modal.sandboxes.create(app, image);
const p = await sb.exec([
"bash",
"-c",
"pip install numpy && echo 'setup done' > /status",
]);
await p.wait();
const snapshot = await sb.snapshotFilesystem();
await sb.terminate();
// Start multiple Sandboxes from the same snapshot
const sb2 = await modal.sandboxes.create(app, snapshot);
const sb3 = await modal.sandboxes.create(app, snapshot);
// Each fork starts from the snapshotted state
const p2 = await sb2.exec(["cat", "/status"]);
console.assert((await p2.stdout.readText()).trim() === "setup done");
const p3 = await sb3.exec(["cat", "/status"]);
console.assert((await p3.stdout.readText()).trim() === "setup done");
```
{/snippet}
{#snippet go()}
```go notest
sb, _ := mc.Sandboxes.Create(ctx, app, image, nil)
p, _ := sb.Exec(ctx, []string{"bash", "-c", "pip install numpy && echo 'setup done' > /status"}, nil)
p.Wait(ctx, nil)
snapshot, _ := sb.SnapshotFilesystem(ctx, nil)
sb.Terminate(ctx, nil)
// Start multiple Sandboxes from the same snapshot
sb2, _ := mc.Sandboxes.Create(ctx, app, snapshot, nil)
sb3, _ := mc.Sandboxes.Create(ctx, app, snapshot, nil)
// Each fork starts from the snapshotted state
p2, _ := sb2.Exec(ctx, []string{"cat", "/status"}, nil)
stdout2, _ := io.ReadAll(p2.Stdout)
fmt.Println(strings.TrimSpace(string(stdout2))) // "setup done"
p3, _ := sb3.Exec(ctx, []string{"cat", "/status"}, nil)
stdout3, _ := io.ReadAll(p3.Stdout)
fmt.Println(strings.TrimSpace(string(stdout3))) // "setup done"
```
{/snippet}
## Directory Snapshots
Directory Snapshots allow you to snapshot a specific directory within a running Sandbox. The resulting snapshot is an Image that can then be mounted into another already-running Sandbox (typically at a later time), which can be useful for:
- **Updating system dependencies separately from application code**: Base dependencies can be updated by starting a new Sandbox from an updated base Image, and then mounting in previously snapshotted application code.
- **Using warm pools in combination with snapshots**: For use cases that benefit from a [warm pool](https://modal.com/docs/examples/sandbox_pool) of Sandboxes to reduce start-up latency, the first initialization can now happen in the warm pool without losing the ability to restore application-specific code at a later point in time.
- **Speeding up resumptions of previous sessions**: Files in mounted Images are prioritized when containers load files, so mounting a directory can speed up Sandbox resumptions vs. starting from a full file system image.
### Usage
Use `snapshot_directory` to snapshot a directory,
`mount_image` to mount a previous directory snapshot at a directory path,
and `unmount_image` to remove that mounted Image later.
To protect directory snapshots with customer-held key material, see
[Customer Supplied Encryption Keys](https://modal.com/docs/guide/customer-supplied-encryption-keys#directory-snapshots).
{#snippet python()}
```python notest
sb = modal.Sandbox.create(app=app)
# Write some dummy data
sb.exec("bash", "-c", "mkdir /project && echo 'data' > /project/file.txt").wait()
# Snapshot the directory
snapshot = sb.snapshot_directory("/project")
# Ok to throw away the old Sandbox at this point
sb.terminate()
# Mount the snapshot in a new Sandbox
sb2 = modal.Sandbox.create(app=app)
try:
sb2.mount_image("/project", snapshot)
except modal.exception.NotFoundError:
# Handle a potential ttl expiry of the old snapshot here
...
# The Sandbox now has access to the previous project state
assert sb2.exec("cat", "/project/file.txt").stdout.read().strip() == "data"
```
{/snippet}
{#snippet javascript()}
```javascript notest
const sb = await modal.sandboxes.create(app, image);
// Write some dummy data
const p = await sb.exec([
"bash",
"-c",
"mkdir /project && echo 'data' > /project/file.txt",
]);
await p.wait();
// Snapshot the directory
const snapshot = await sb.snapshotDirectory("/project");
// Ok to throw away the old Sandbox at this point
await sb.terminate();
sb.detach();
// Mount the snapshot in a new Sandbox
const sb2 = await modal.sandboxes.create(app, image);
try {
await sb2.mountImage("/project", snapshot);
} catch (e) {
if (e instanceof NotFoundError) {
// Handle a potential ttl expiry of the old snapshot here
}
}
// The Sandbox now has access to the previous project state
const p2 = await sb2.exec(["cat", "/project/file.txt"]);
console.assert((await p2.stdout.readText()).trim() === "data");
sb2.detach();
```
{/snippet}
{#snippet go()}
```go notest
sb, _ := mc.Sandboxes.Create(ctx, app, image, nil)
defer sb.Detach()
// Write some dummy data
p, _ := sb.Exec(ctx, []string{"bash", "-c", "mkdir /project && echo 'data' > /project/file.txt"}, nil)
p.Wait(ctx, nil)
// Snapshot the directory
snapshot, _ := sb.SnapshotDirectory(ctx, "/project", nil)
// Ok to throw away the old Sandbox at this point
sb.Terminate(ctx, nil)
// Mount the snapshot in a new Sandbox
sb2, _ := mc.Sandboxes.Create(ctx, app, image, nil)
defer sb2.Detach()
if err := sb2.MountImage(ctx, "/project", snapshot, nil); err != nil {
var notFound modal.NotFoundError
if errors.As(err, ¬Found) {
// Handle a potential ttl expiry of the old snapshot here
}
}
// The Sandbox now has access to the previous project state
p2, _ := sb2.Exec(ctx, []string{"cat", "/project/file.txt"}, nil)
stdout, _ := io.ReadAll(p2.Stdout)
fmt.Println(strings.TrimSpace(string(stdout))) // "data"
```
{/snippet}
### Unmounting a mounted Image
To unmount a previously mounted Image,
call `unmount_image` on the exact path you passed to `mount_image`.
After unmounting, the underlying Sandbox filesystem at that path becomes visible again.
{#snippet python()}
```python notest
sb2.unmount_image("/project")
```
{/snippet}
{#snippet javascript()}
```javascript notest
await sb2.unmountImage("/project");
```
{/snippet}
{#snippet go()}
```go notest
_ = sb2.UnmountImage(ctx, "/project", nil)
```
{/snippet}
## Memory Snapshots
A number of known [limitations](#limitations) currently apply.
Sandbox memory snapshots are copies of a Sandbox’s entire state, both in memory and on the filesystem. These Snapshots can be restored later to create a new Sandbox, which is an exact clone of the original Sandbox.
To snapshot a Sandbox, create it with `_experimental_enable_snapshot` set to `True`, and use the `_experimental_snapshot` method, which returns a `SandboxSnapshot` object:
```python notest
image = modal.Image.debian_slim().apt_install("curl", "procps")
app = modal.App.lookup("sandbox-snapshot", create_if_missing=True)
with modal.enable_output():
sb = modal.Sandbox.create(
"python3", "-m", "http.server", "8000",
app=app, image=image, _experimental_enable_snapshot=True
)
print(f"Performing snapshot of {sb.object_id} ...")
snapshot = sb._experimental_snapshot()
```
Create a new Sandbox from the returned SandboxSnapshot with `Sandbox._experimental_from_snapshot`:
```python notest
print(f"Restoring from snapshot {sb.object_id} ...")
sb2 = modal.Sandbox._experimental_from_snapshot(snapshot)
print("Let's see that the http.server is still running...")
p = sb2.exec("ps", "aux")
print(p.stdout.read())
# Talk to snapshotted Sandbox http.server
p = sb2.exec("curl", "http://localhost:8000/")
reply = p.stdout.read()
print(reply) #
```python
import modal
# Create an image for the parent Modal Sandbox, with Docker installed.
def create_modal_sandbox_image():
image = (
modal.Image.from_registry("ubuntu:24.04")
.env({"DEBIAN_FRONTEND": "noninteractive"})
.apt_install(["docker.io", "docker-buildx"])
.run_commands("mkdir /build")
)
return image
def main():
print("Looking up modal.Sandbox app")
app = modal.App.lookup("docker-test", create_if_missing=True)
print("Creating sandbox")
with modal.enable_output():
sb = modal.Sandbox.create(
"/usr/bin/dockerd",
"-D",
timeout=60 * 60,
app=app,
image=create_modal_sandbox_image(),
experimental_options={"vm_runtime": True},
)
print(f"sandbox_id: {sb.object_id}")
task_id = sb._get_task_id()
print(f"task_id: {task_id}")
print(f"To shell into the task, run: modal shell {task_id}")
# dockerd is the sandbox entrypoint and takes a moment to bind
# /var/run/docker.sock after the sandbox is created. Poll until the
# daemon answers so the first `docker build` doesn't run before dockerd is ready.
print("Waiting for dockerd to be ready")
wait_p = sb.exec(
"sh",
"-c",
"for i in $(seq 1 120); do "
"if [ -S /var/run/docker.sock ] && docker info >/dev/null 2>&1; then "
"echo ready; exit 0; fi; sleep 1; done; "
"echo 'dockerd not ready after 120s' >&2; exit 1",
)
wait_p.wait()
if wait_p.returncode != 0:
raise Exception(f"dockerd never became ready: {wait_p.stderr.read()}")
# A simple Dockerfile that we'll build and run within Modal.
dockerfile = """
FROM ubuntu
RUN apt-get update
RUN apt-get install -y cowsay curl
RUN mkdir -p /usr/share/cowsay/cows/
RUN curl -o /usr/share/cowsay/cows/docker.cow https://raw.githubusercontent.com/docker/whalesay/master/docker.cow
ENTRYPOINT ["/usr/games/cowsay", "-f", "docker.cow"]
"""
sb.filesystem.write_text(dockerfile, "/build/Dockerfile")
print("Building docker image")
p = sb.exec("docker", "build", "-t", "whalesay", "/build")
for l in p.stdout:
print(l, end="")
p.wait()
print("--------------------------------")
if p.returncode != 0:
print(p.stderr.read())
raise Exception("Docker build failed")
# The Sandbox will run a container from the built image and print this:
#
# ________
# < Hello! >
# --------
# \
# \
# \
# ## .
# ## ## ## ==
# ## ## ## ## ## ===
# /"""""""""""""""""\___/ ===
# { / ===-
# \______ O __/
# \ \ __/
# \____\_______/
print("Running Docker image")
# Note we can't use -it here because we're not in a TTY.
p = sb.exec("docker", "run", "--rm", "whalesay", "Hello!")
print(p.stdout.read())
p.wait()
if p.returncode != 0:
raise Exception(f"Docker run failed: {p.stderr.read()}")
sb.terminate()
if __name__ == "__main__":
main()
```
Additionally, quickly provision a VM Sandbox with a PTY shell via the CLI using:
```
modal shell --experimental-option vm_runtime=1
```
## Running custom init systems
By default, Modal runs and manages the init process (PID 1) inside the VM. Set the `vm_init`
experimental option to an absolute path (typically, `/sbin/init`) to run a conventional init
system such as [`systemd`](https://man7.org/linux/man-pages/man1/systemd.1.html) or
[`openrc`](https://github.com/OpenRC/openrc) as PID 1 instead. Modal's agent runs alongside the
`vm_init`-specified init process.
```python fixture:sb_app
image = modal.Image.from_registry("debian:bookworm-slim").dockerfile_commands(
"RUN apt-get update",
# udev is needed so that getty doesn't block for 90s waiting on device activation.
"RUN apt-get install -y systemd systemd-sysv dbus udev",
# An empty machine-id tells systemd to generate one at first boot.
# systemd won't start if the file is missing entirely.
"RUN rm -f /etc/machine-id && touch /etc/machine-id",
)
sb = modal.Sandbox.create(
app=sb_app,
image=image,
cpu=4,
memory=2048,
readiness_probe=modal.Probe.with_exec(
"systemctl", "is-system-running", interval_ms=250
),
experimental_options={"vm_runtime": True, "vm_init": "/sbin/init"},
)
try:
sb.wait_until_ready()
finally:
sb.terminate()
```
## Improvements over gVisor sandboxes
Docker workloads behave more like they do in a non-container environment. In particular:
- Docker state (e.g. `/var/lib/docker`) is included in [Filesystem Snapshots](https://modal.com/docs/guide/sandbox-snapshots#filesystem-snapshots)
- Docker features that previously needed special treatment on gVisor (e.g. inter-container networking) will also work normally
Features that only make sense in a bona fide Linux environment are now available:
- Custom [init systems](https://arxiv.org/pdf/0706.2748) (such as [`systemd`](https://man7.org/linux/man-pages/man1/systemd.1.html)) are supported
- [eBPF](https://ebpf.io/) is supported
- [FUSE](https://www.kernel.org/doc/html/latest/filesystems/fuse.html) mounts are supported
- Resource isolation within the Sandbox via [cgroups](https://man7.org/linux/man-pages/man7/cgroups.7.html) is supported
Finally, for most workloads, the root filesystem will perform better on a VM Sandbox than in a gVisor Sandbox.
## Resource model
Unlike [resource provisioning](https://modal.com/docs/guide/resources) in other runtimes,
memory provisioning is **static** for VM Sandboxes: you get exactly as much
RAM as you request via `memory` argument to `Sandbox.create`. By default, VM
sandboxes get 1GiB of RAM.
However, CPU provisioning is elastic. You can burst above your requested amount.
Costs for both resources are calculated based on the requested amount, used amount,
the duration of Sandbox execution, and [our rates for `cpu` and `memory`](https://modal.com/pricing).
## Limitations
The following limitations are known and we're tracking them:
- **GPUs are not supported.** VM Sandboxes currently only support CPU workloads.
- **The [Sandbox filesystem API](https://modal.com/docs/guide/sandbox-files#filesystem-api-beta) is only available in new SDK versions**. For the Python SDK, it requires version ≥ 1.4.0 and for the JS/TS/Go SDKs, it requires versions ≥ 0.7.6.
- **[`Sandbox.reload_volumes()`](https://modal.com/docs/sdk/py/latest/Sandbox#reload_volumes) is not supported.** VM Sandboxes do not currently support reloading volumes at runtime.
- **[VM Memory Snapshots](https://modal.com/docs/guide/vm-memory-snapshots) are only available to a set of enabled customers.**
Please reach out to us if you'd like early access.
- **Root images ≥ 512 GiB are not supported.** The VM root filesystem is currently limited to 512 GiB. Sandboxes created from container images exceeding this size will fail to start.
If you hit a rough edge that isn't listed here, please reach out via [Slack](https://modal.com/slack) or email us at [support@modal.com](mailto:support@modal.com).
#### Sidecars (Alpha)
# Sandbox Sidecars
There are currently several [known limitations](#limitations).
## Introduction
Sandbox Sidecars let you run additional containers alongside your main
Sandbox container, on the same host. A sandbox and its sidecars are connected
via an internal bridge network, allowing low latency communication between
containers over TCP/UDP, making them ideal for:
- Separating an agent harness from its execution environment, by running the
agent in one container and its tool calls in another
- Credentials injection, by running a proxy in a separate, trusted container
from the primary application, and letting that proxy inject credentials or
other secrets before passing on network calls to external services.
See the [secrets injection example](https://modal.com/docs/examples/sidecar_secrets_injection)
for a working demonstration
- Splitting out complex multi-service applications over separate containers,
such as databases, caches or worker processes, similar to Docker Compose.
We're still discovering all the ways that Sandbox Sidecars can be used - if you
come up with another use case, please let us know!
Sidecars are managed through the sidecars interface on a Sandbox
(`_experimental_sidecars` in Python, `experimentalSidecars` in JS/Go),
which provides methods to create, list, get, and terminate Sidecar containers.
Each Sidecar container:
- Runs its own image independently from the main Sandbox container.
- Runs in a separate, sandboxed process isolated from the main Sandbox container and other Sidecar containers.
- Can communicate over an internal bridge network with the main Sandbox container and other Sidecar containers.
- Can be created, terminated, and replaced dynamically during the Sandbox's lifetime.
- Supports executing commands just like the main Sandbox container.
## Usage
### Creating a Sidecar container
The main Sandbox container is resolvable as `main`, and each Sidecar container
is resolvable by the `name` you give it at creation time.
{#snippet python()}
```python notest
import modal
app = modal.App.lookup("sidecar-example", create_if_missing=True)
image = modal.Image.debian_slim().build(app)
sb = modal.Sandbox.create("sleep", "600", app=app, image=image, timeout=300)
sidecar = sb._experimental_sidecars.create(
"python",
"-m",
"http.server",
"8080",
name="web",
image=image,
)
# Give the server a moment to start, then call it from the main sandbox.
p = sb.exec(
"python",
"-c",
"import time, urllib.request; time.sleep(1); print(urllib.request.urlopen('http://web:8080').status)",
)
p.wait()
print(p.stdout.read()) # "200"
sb.terminate()
```
{/snippet}
{#snippet javascript()}
```javascript notest
const modal = new ModalClient();
const app = await modal.apps.fromName("sidecar-example", {
createIfMissing: true,
});
const image = await modal.images.fromRegistry("python:3.13-slim").build(app);
const sb = await modal.sandboxes.create(app, image, {
command: ["sleep", "600"],
timeoutMs: 300 * 1000,
});
const sidecar = await sb.experimentalSidecars.create("web", image, {
command: ["python", "-m", "http.server", "8080"],
});
// Give the server a moment to start, then call it from the main sandbox.
const p = await sb.exec([
"python",
"-c",
"import time, urllib.request; time.sleep(1); print(urllib.request.urlopen('http://web:8080').status)",
]);
await p.wait();
console.log(await p.stdout.readText()); // "200"
await sb.terminate();
```
{/snippet}
{#snippet go()}
```go
package main
import (
"context"
"fmt"
"io"
"time"
modal "github.com/modal-labs/modal-client/go"
)
func main() {
ctx := context.Background()
mc, _ := modal.NewClient()
app, _ := mc.Apps.FromName(ctx, "sidecar-example", &modal.AppFromNameParams{
CreateIfMissing: true,
})
image, _ := mc.Images.FromRegistry("python:3.13-slim", nil).Build(ctx, app, nil)
sb, _ := mc.Sandboxes.Create(ctx, app, image, &modal.SandboxCreateParams{
Command: []string{"sleep", "600"},
Timeout: 5 * time.Minute,
})
defer sb.Terminate(ctx, nil)
sidecar, _ := sb.ExperimentalSidecars.Create(ctx, "web", image, &modal.SidecarCreateParams{
Command: []string{"python", "-m", "http.server", "8080"},
})
_ = sidecar
// Give the server a moment to start, then call it from the main sandbox.
p, _ := sb.Exec(ctx, []string{
"python", "-c",
"import time, urllib.request; time.sleep(1); print(urllib.request.urlopen('http://web:8080').status)",
}, nil)
stdout, _ := io.ReadAll(p.Stdout)
fmt.Println(string(stdout)) // "200"
}
```
{/snippet}
Names are resolved using `/etc/hosts` which gets updated when a sidecar is created or terminated.
### Listing and retrieving sidecars
You can list all running Sidecar containers or retrieve a specific one by name:
{#snippet python()}
```python notest
containers = sb._experimental_sidecars.list()
for container in containers:
print(f"{container.name}: {container.object_id}")
sidecar = sb._experimental_sidecars.get(name="web")
```
{/snippet}
{#snippet javascript()}
```javascript notest
const containers = await sb.experimentalSidecars.list();
for (const container of containers) {
console.log(`${container.containerName}: ${container.containerId}`);
}
const sidecar = await sb.experimentalSidecars.get("web");
```
{/snippet}
{#snippet go()}
```go notest
containers, _ := sb.ExperimentalSidecars.List(ctx, nil)
for _, container := range containers {
fmt.Printf("%s: %s\n", container.ContainerName, container.ContainerID)
}
sidecar, _ := sb.ExperimentalSidecars.Get(ctx, "web", nil)
_ = sidecar
```
{/snippet}
### Routing HTTPS traffic through a Sidecar
Sidecars can be used to inspect the outgoing HTTPS traffic from the main Sandbox
container in a different context, for example to perform more advanced request
filtering, inspecting requests for logging, or injecting secrets that the main
Sandbox container should not have access to.
Normally, applications need to support explicit proxy configuration, such as
respecting the `HTTPS_PROXY` environment variable, to route traffic through a Sidecar.
To include HTTPS traffic (TCP on port 443) from **proxy-unaware** applications, you can
set the experimental `proxy_traffic_via_sidecar` option that routes **all** outbound
HTTPS traffic from the main Sandbox container through a Sidecar.
{#snippet python()}
```python notest
sb = modal.Sandbox.create(
"sleep",
"600",
app=app,
image=image,
experimental_options={"proxy_traffic_via_sidecar": "my-proxy-sidecar"},
)
# Until this Sidecar is running, HTTPS from the main container is refused.
sb._experimental_sidecars.create("python", "/proxy.py", name="my-proxy-sidecar", image=proxy_image)
```
{/snippet}
{#snippet javascript()}
```javascript notest
const sb = await modal.sandboxes.create(app, image, {
command: ["sleep", "600"],
experimentalOptions: { proxy_traffic_via_sidecar: "my-proxy-sidecar" },
});
// Until this Sidecar is running, HTTPS from the main container is refused.
await sb.experimentalSidecars.create("my-proxy-sidecar", proxyImage, {
command: ["python", "/proxy.py"],
});
```
{/snippet}
{#snippet go()}
```go notest
sb, _ := mc.Sandboxes.Create(ctx, app, image, &modal.SandboxCreateParams{
Command: []string{"sleep", "600"},
ExperimentalOptions: map[string]any{"proxy_traffic_via_sidecar": "my-proxy-sidecar"},
})
// Until this Sidecar is running, HTTPS from the main container is refused.
sb.ExperimentalSidecars.Create(ctx, "my-proxy-sidecar", proxyImage, &modal.SidecarCreateParams{
Command: []string{"python", "/proxy.py"},
})
```
{/snippet}
The Sidecar receives a raw TLS stream and must read the destination hostname
from the `ClientHello`'s SNI. The original destination IP is not forwarded, so
mechanisms such as `SO_ORIGINAL_DST` do not work. To read or rewrite HTTP
requests, terminate TLS in the proxy using a certificate authority that the
Sandbox trusts. See the [Sidecar traffic routing
example](https://modal.com/docs/examples/sidecar_traffic_routing) for a complete mitmproxy-based
request filter.
Only TCP traffic to port 443 is relayed. The Sandbox's own egress controls are
set aside for it: an `outbound_cidr_allowlist` on the Sandbox still governs every
other port, but relayed traffic passes regardless of what it lists. Non-relayed
traffic is still subject to the egress controls of the Sandbox.
Relayed traffic is instead governed by the egress controls of the Sidecar it is
relayed into. A Sidecar's outbound network policy is independent of the main
container's and defaults to open, so unless you pass `outbound_cidr_allowlist`
or `outbound_domain_allowlist` to the Sidecar itself, relayed traffic reaches
any destination the Sidecar chooses to connect to.
The option cannot be combined with setting `block_network`,
`outbound_domain_allowlist` or `proxy` on the Sandbox.
### Filesystem snapshots
You can snapshot a running Sidecar's filesystem into a reusable Image. The
resulting Image can be used anywhere an existing Image is accepted; the example
below uses it to start another Sidecar. The snapshot is scoped to that Sidecar;
it does not include the main Sandbox filesystem or other Sidecars.
{#snippet python()}
```python notest
sidecar.filesystem.write_text("ready", "/tmp/state")
snapshot = sidecar.snapshot_filesystem()
restored = sb._experimental_sidecars.create(
"sleep", "600", name="restored", image=snapshot
)
assert restored.filesystem.read_text("/tmp/state") == "ready"
```
{/snippet}
{#snippet javascript()}
```javascript notest
await sidecar.filesystem.writeText("ready", "/tmp/state");
const snapshot = await sidecar.snapshotFilesystem();
const restored = await sb.experimentalSidecars.create("restored", snapshot, {
command: ["sleep", "600"],
});
console.assert((await restored.filesystem.readText("/tmp/state")) === "ready");
```
{/snippet}
{#snippet go()}
```go notest
_ = sidecar.Filesystem.WriteText(ctx, "ready", "/tmp/state", nil)
snapshot, _ := sidecar.SnapshotFilesystem(ctx, nil)
restored, _ := sb.ExperimentalSidecars.Create(ctx, "restored", snapshot, &modal.SidecarCreateParams{
Command: []string{"sleep", "600"},
})
state, _ := restored.Filesystem.ReadText(ctx, "/tmp/state", nil)
fmt.Println(state) // "ready"
```
{/snippet}
## Resource configuration
The main Sandbox container and the Sidecar containers share the resource allocation (CPU and memory) of the Sandbox,
and resources are configured only on the Sandbox. When planning your
resource allocation, make sure the Sandbox is configured with enough CPU
and memory for all containers combined.
Bursting is still possible, see the [guide to Sandbox resources and
pricing](https://modal.com/docs/guide/sandbox-resources) for more details.
For example, if you want to run a Sandbox with two Sidecars, and you expect the main
container to use 1 CPU core and 512 MiB of memory, Sidecar A to use 0.5 CPU and 256 MiB,
and Sidecar B to use 0.5 CPU and 256 MiB, you should set the Sandbox's resources to at
least 2 CPUs and 1024 MiB to accommodate all three containers.
The maximum number of Sidecars you can create is also determined by the main Sandbox's
resource reservation. Each container (including the main one) requires a minimum of
32 mCPU and 32 MiB of memory, so the limit is:
max containers = min(cpu_in_milli / 32, memory_in_mib / 32)
There is also a hard limit of **250** concurrent sidecar containers per sandbox,
regardless of the resource reservation.
## Limitations
The main sandbox supports the same features as a regular sandbox, but some features are not yet supported
for sidecars:
- **Pre-built images only**: Sidecar images must be pre-built using `image.build()`, referenced
by ID via `Image.from_id()` or name via `Image.from_name()`, or created from filesystem/directory snapshots. Lazy image
building is not supported for sidecars. See also [Separating Image builds from Sandbox creation](https://modal.com/docs/guide/sandboxes#separating-image-builds-from-sandbox-creation).
- **No Cloud Bucket Mount support**: Sidecar containers do not currently support attaching [Cloud Bucket Mounts](https://modal.com/docs/guide/cloud-bucket-mounts).
- **No memory snapshot support**: A Sidecar's filesystem can be snapshotted
independently, but Sidecar memory state is not captured in
[Sandbox snapshots](https://modal.com/docs/guide/sandbox-snapshots).
- **VM incompatibility**: Sidecars are not compatible with VM Sandboxes.
- **Changes to /etc/hosts are not preserved**: `/etc/hosts` is rewritten on sidecar create/terminate and user changes are not preserved.
- **Maximum of 250 concurrent sidecars**: A sandbox can have at most 250 sidecar containers running at the same time.
- **No [Proxy](https://modal.com/docs/guide/proxy-ips) support**: Traffic from a Sidecar does not exit through a Proxy. Because relayed traffic leaves from the Sidecar, a Sandbox cannot currently combine a Proxy with `proxy_traffic_via_sidecar`.
### Endpoints
#### Endpoints
# Endpoints
Modal Endpoints let you deploy models from the
[Modal Library](https://modal.com/library)—or your own custom weights—as
production-ready inference APIs.
- **Fast inference** — tuned open-source serving engines, with speculative
decoding where supported, behind Modal's low-latency request proxy.
- **Managed infrastructure** — Modal handles provisioning, routing, and
capacity management.
- **Open and inspectable** — use familiar OpenAI- and Anthropic-compatible APIs;
[inspect or adapt the generated source](https://modal.com/docs/guide/dedicated-endpoints#view-the-generated-source)
behind a Dedicated Endpoint.
Choose between two serving modes:
| | [Shared Endpoints](https://modal.com/docs/guide/shared-endpoints) | [Dedicated Endpoints](https://modal.com/docs/guide/dedicated-endpoints) |
| ------------ | ------------------------------------------------ | ------------------------------------------------------ |
| **Best for** | Fast, fully managed inference | Isolated capacity and custom models |
| **Models** | Selected models from the Modal Library | All Modal Library models, plus custom weights |
| **Billing** | Per token | Compute resources |
| **Capacity** | Managed by Modal | Configurable autoscaling, including scale-to-zero |
## Create an endpoint
Browse the [Modal Library](https://modal.com/library) to choose a model and see
which serving modes it supports. Then create an Endpoint from the
[**Endpoints**](https://modal.com/endpoints) tab in the dashboard.
## Proxy tokens
Shared Endpoints always require a
[Proxy Token](https://modal.com/docs/guide/webhook-proxy-auth). Dedicated Endpoints require one
by default. Create one with the CLI:
```bash
modal workspace proxy-tokens create
```
Join the token ID and secret with a period (`.`) and pass them as a bearer token:
```
Authorization: Bearer wk-.ws-
```
The combined value can be used as the API key in an OpenAI-compatible client.
See [Proxy Tokens](https://modal.com/docs/guide/webhook-proxy-auth) for environment scoping and
other authentication options. Dedicated Endpoints can also be created with
`--unauthenticated`.
## Call an endpoint
Text-generation models on both Shared and Dedicated Endpoints can be called
through the OpenAI-compatible Chat Completions and Responses APIs or the
Anthropic-compatible Messages API. Embedding models can be called through the
OpenAI-compatible Embeddings API.
The dashboard shows the Endpoint URL and model name. This example uses the Chat
Completions API and a [proxy token](#proxy-tokens):
```bash
curl "/v1/chat/completions" \
-H "Authorization: Bearer $MODAL_PROXY_TOKEN_ID.$MODAL_PROXY_TOKEN_SECRET" \
-H "Content-Type: application/json" \
-d '{
"model": "",
"messages": [{ "role": "user", "content": "Hello!" }]
}'
```
See [Endpoint integrations](https://modal.com/docs/guide/endpoint-integrations) for connecting
coding agents like OpenCode, Codex, and Claude Code to a Shared Endpoint.
#### Shared Endpoints
# Shared Endpoints
Shared Endpoints serve a subset of models in the
[Modal Library](https://modal.com/library) from Modal-managed pools. Every model
available for Shared Endpoints is also available for
[Dedicated Endpoints](https://modal.com/docs/guide/dedicated-endpoints). The Library shows which
serving modes each model supports. Modal manages the hardware and autoscaling,
and usage is billed per token.
## Create a Shared Endpoint
Create a Shared Endpoint from the
[**Endpoints**](https://modal.com/endpoints) tab in the dashboard.
Once the Endpoint is ready, the dashboard provides its URL, model name, and
request examples. Shared Endpoints always require a
[proxy token](https://modal.com/docs/guide/endpoints#proxy-tokens).
## Concurrency limits
Shared Endpoints have model-specific limits on concurrent in-flight requests.
The limit is shared across all Shared Endpoints using the same model in your
Workspace. Requests above the limit receive an HTTP `429` response; retry them
with exponential backoff and jitter.
Use a [Dedicated Endpoint](https://modal.com/docs/guide/dedicated-endpoints) when you need
isolated or configurable capacity.
## Pricing
Token rates are shown when you create an Endpoint and in its Usage view. Credits
included with your plan cannot be used for Shared Endpoint usage. To cap
out-of-pocket charges, see [spend limits](https://modal.com/docs/guide/budgets#spend-limits).
Shared Endpoint requests route through `us-west` and always require
authentication. Modal manages their infrastructure and capacity.
#### Dedicated Endpoints
# Dedicated Endpoints
Dedicated Endpoints run any model in the
[Modal Library](https://modal.com/library), or custom weights, on isolated,
autoscaling containers. Use them when you need control over autoscaling and
regions, or dedicated capacity.
## Create a Dedicated Endpoint
Create an Endpoint from the CLI:
```bash
modal endpoint create --model Qwen/Qwen3.5-4B
```
Modal resolves the model, selects a compatible serving recipe, and starts
provisioning. The command prints the Endpoint ID and a dashboard link where you
can watch it come online. Dedicated Endpoints can also be created from the
[**Endpoints**](https://modal.com/endpoints) tab in the dashboard.
If you omit `--name`, Modal derives a name from the model.
## View the generated source
A Dedicated Endpoint is a Modal App built with the same primitives available in
the Modal SDK, including [`@app.server()`](https://modal.com/docs/guide/servers). Open the
**Source** view to inspect its generated `serve.py`. You can copy and adapt that
code into your own Modal App when you need full control of the serving stack.
## Serve custom weights
Custom weights use the serving recipe for a compatible Modal Library model. Pass
that model with `--model`, then provide weights from Hugging Face or a Modal
Volume.
From Hugging Face:
```bash
modal endpoint create \
--name my-fine-tune \
--model Qwen/Qwen3.6-27B \
--custom-hf-repo aisingapore/Qwen-SEA-LION-v4.5-27B-IT \
--custom-hf-revision da42f2c0984d716fb2032e4176d81adfac98c630
```
Use `--custom-hf-token` for gated or private repositories.
From a Modal Volume containing a `config.json` file:
```bash
modal endpoint create \
--name my-volume-model \
--model Qwen/Qwen3.5-4B \
--custom-volume-name my-volume \
--custom-volume-path /checkpoints/1234
```
## Configure capacity and placement
By default, Dedicated Endpoints scale up under load and down to zero when idle.
Configure minimum, maximum, and buffer containers from the dashboard.
The routing region controls where requests enter Modal. Compute placement
controls where containers run. Set them independently:
```bash
modal endpoint create \
--model Qwen/Qwen3.5-4B \
--routing-region us-east \
--compute-region us-west
```
Use `--colocate-compute` instead to run compute in the routing region. Pinning
compute to a region incurs a
[region selection multiplier](https://modal.com/docs/guide/region-selection#pricing).
## Metrics
The **Activity** view shows request volume over time. Use **Responses** to inspect
individual requests and **Containers** to inspect the containers serving them.
For text-generation models, **Metrics** separates **Inference metrics**—latency,
throughput, running and queued requests, cache usage, and speculative
decoding—from **Server metrics** such as autoscaling and CPU, memory, network,
and GPU utilization.
## Benchmarks
For text-generation models, the **Benchmark** view can run a repeatable real-time
or agentic workload against the live Endpoint. Benchmarks generate traffic,
trigger autoscaling, and incur the usual compute cost.
Treat results as point-in-time measurements: fleet size, placement, and cold
starts can all affect them.
## Manage a Dedicated Endpoint
List Endpoints in an Environment:
```bash
modal endpoint list --env prod
```
Stop an Endpoint when you no longer need it:
```bash
modal endpoint stop my-endpoint --env prod
```
Stopping an Endpoint is permanent. It tears down the serving application and
deletes its managed model cache; the Endpoint cannot be restarted.
## Pricing
Dedicated Endpoints bill for the GPU, CPU, memory, and other resources used by
their containers at standard Modal compute rates. An Endpoint scaled to zero
does not incur compute charges.
#### Endpoint integrations
# Endpoint integrations
Connect OpenCode, Codex, or Claude Code to your
[Shared Endpoints](https://modal.com/docs/guide/shared-endpoints) through
`https://inference.us-west.modal.direct`. Set the request's `model` to the
Endpoint's hostname, for example `my-endpoint.us-west.modal.direct`.
To see which Shared Endpoints a token can reach, list all model IDs with:
```bash
curl "https://inference.us-west.modal.direct/v1/models" \
-H "Authorization: Bearer $MODAL_PROXY_TOKEN_ID.$MODAL_PROXY_TOKEN_SECRET"
```
## OpenCode
[Install OpenCode](https://opencode.ai/docs/) and create a
[proxy token](https://modal.com/docs/guide/endpoints#proxy-tokens). In the OpenCode CLI, run
`/connect`, select Modal as the
[provider](https://opencode.ai/docs/providers/), and enter the token as the
API key in its combined form, `wk-.ws-`. Then run `/models` and
select your endpoint by hostname.
For CI or other headless use, set the token in the environment instead of
running `/connect`:
```bash
export MODAL_PROXY_TOKEN="wk-.ws-"
```
## Codex
[Install Codex](https://learn.chatgpt.com/docs/codex/cli), create a
[proxy token](https://modal.com/docs/guide/endpoints#proxy-tokens), and define Modal as a model
provider in `~/.codex/config.toml`:
```toml
# ~/.codex/config.toml
[model_providers.modal]
name = "Modal"
base_url = "https://inference.us-west.modal.direct/v1"
env_key = "MODAL_PROXY_TOKEN"
wire_api = "responses"
```
Then you can run Codex via the following command with the endpoint hostname as
the model ID:
```bash
export MODAL_PROXY_TOKEN="$MODAL_PROXY_TOKEN_ID.$MODAL_PROXY_TOKEN_SECRET"
codex \
--model my-endpoint.us-west.modal.direct \
--config model_provider='"modal"'
```
## Claude Code
[Install Claude Code](https://code.claude.com/docs/en/quickstart) and create a
[Proxy Token](https://modal.com/docs/guide/endpoints#proxy-tokens). Set the token in its combined
form, `wk-.ws-`, and replace `my-endpoint.us-west.modal.direct` with
the hostname of an Endpoint whose model supports tool calling:
```bash
export ANTHROPIC_BASE_URL="https://inference.us-west.modal.direct"
export ANTHROPIC_AUTH_TOKEN="wk-.ws-"
export ANTHROPIC_MODEL="my-endpoint.us-west.modal.direct"
export ANTHROPIC_DEFAULT_FABLE_MODEL="$ANTHROPIC_MODEL"
export ANTHROPIC_DEFAULT_OPUS_MODEL="$ANTHROPIC_MODEL"
export ANTHROPIC_DEFAULT_SONNET_MODEL="$ANTHROPIC_MODEL"
export ANTHROPIC_DEFAULT_HAIKU_MODEL="$ANTHROPIC_MODEL"
claude
```
### Images
#### Defining Images
# Images
This guide walks you through how to define a Modal Image, the environment your Modal code runs in.
The typical flow for defining an Image in Modal is
[method chaining](https://jugad2.blogspot.com/2016/02/examples-of-method-chaining-in-python.html)
starting from a base Image, like this:
```python
image = (
modal.Image.debian_slim(python_version="3.13")
.apt_install("git")
.uv_pip_install("torch<3")
.env({"HALT_AND_CATCH_FIRE": "0"})
.run_commands("git clone https://github.com/modal-labs/agi && echo 'ready to go!'")
)
```
If you have your own container image definitions, like a Dockerfile or a registry link, you can use those too!
See [this guide](https://modal.com/docs/guide/existing-images).
This page is a high-level guide to using Modal Images.
For reference documentation on the `modal.Image` object, see
[this page](https://modal.com/docs/sdk/py/latest/Image).
## What are Images?
Your code on Modal runs in _containers_. Containers are like light-weight
virtual machines -- container engines use
[operating system tricks](https://earthly.dev/blog/chroot/) to isolate programs
from each other ("containing" them), making them work as though they were
running on their own hardware with their own filesystem. This makes execution
environments more reproducible, for example by preventing accidental
cross-contamination of environments on the same machine. For added security,
Modal runs containers using the sandboxed
[gVisor container runtime](https://cloud.google.com/blog/products/identity-security/open-sourcing-gvisor-a-sandboxed-container-runtime).
Containers are started up from a stored "snapshot" of their filesystem state
called an _image_. Producing the image for a container is called _building_ the
image.
By default, Modal Functions and Sandboxes run in a
[Debian Linux](https://en.wikipedia.org/wiki/Debian) container with a basic
Python installation of the same minor version `v3.x` as your local Python
interpreter.
To make your Apps and Functions useful, you will probably need some third party system packages
or Python libraries. Modal provides a number of options to customize your container images at
different levels of abstraction and granularity, from high-level convenience
methods like `pip_install` through wrappers of core container image build
features like `RUN` and `ENV`. We'll cover each of these in this guide,
along with tips and tricks for building Images effectively when using each tool.
## Add Python packages
The simplest and most common Image modification is to add a third party
Python package, like [`pandas`](https://pandas.pydata.org/).
You can add Python packages to the environment by passing all the packages you
need to the [`Image.uv_pip_install`](https://modal.com/docs/sdk/py/latest/Image#uv_pip_install) method,
which installs packages with [`uv`](https://docs.astral.sh/uv/):
```python
import modal
datascience_image = (
modal.Image.debian_slim()
.uv_pip_install("pandas==2.2.0", "numpy")
)
@app.function(image=datascience_image)
def my_function():
import pandas as pd
import numpy as np
df = pd.DataFrame()
...
```
You can include
[Python dependency version specifiers](https://peps.python.org/pep-0508/),
like `"torch<3"`, in the arguments. But we recommend pinning dependencies
tightly, like `"torch==2.8.0"`, to improve the reproducibility and robustness
of your builds.
If you run into any issues with
[`Image.uv_pip_install`](https://modal.com/docs/sdk/py/latest/Image#uv_pip_install), then
you can fallback to [`Image.pip_install`](https://modal.com/docs/sdk/py/latest/Image#pip_install) which
uses standard [`pip`](https://pip.pypa.io/en/stable/user_guide/):
```python
datascience_image = (
modal.Image.debian_slim(python_version="3.13")
.pip_install("pandas==2.2.0", "numpy")
)
```
Note that because you can define a different environment for each and every
function if you so choose, you don't need to worry about virtual
environment management. Containers make for much better separation of concerns!
If you want to run a specific version of Python remotely rather than just
matching the one you're running locally, provide the `python_version` as a
string when constructing the base image, like we did above.
## Add local files with `add_local_dir` and `add_local_file`
Sometimes your containers need a dependency that's not available on the Internet,
like configuration files or code on your laptop.
To forward files from your local system use the
`image.add_local_dir` and `image.add_local_file` Image methods.
```python
image = modal.Image.debian_slim().add_local_dir("/user/erikbern/.aws", remote_path="/root/.aws")
```
By default, these files are added to your container as it starts up rather than introducing
a new Image layer. This means that the redeployment after making changes is really quick, but
also means you can't run additional build steps after. You can specify a `copy=True` argument
to the `add_local_` methods to instead force the files to be included in the built Image.
### Add local Python code with `add_local_python_source`
You can add Python code that's importable locally to your container
by providing the module name to
[`Image.add_local_python_source`](https://modal.com/docs/sdk/py/latest/Image#add_local_python_source).
```python
image_with_module = modal.Image.debian_slim().add_local_python_source("local_module")
@app.function(image=image_with_module)
def f():
import local_module
local_module.do_stuff()
```
The difference from `add_local_dir` is that `add_local_python_source` takes module names as arguments
instead of a file system path and looks up the local package's or module's location via Python's importing
mechanism. The files are then added to directories that make them importable in containers in the
same way as they are locally.
This is intended for pure Python auxiliary modules that are part of your project and that your code imports.
Third party packages should be installed via
[`Image.uv_pip_install`](https://modal.com/docs/sdk/py/latest/Image#uv_pip_install) or similar.
### What if I have different Python packages locally and remotely?
You might want to use packages inside your Modal code that you don't have on
your local computer. In the example above, we build a container that uses
`pandas`. But if we don't have `pandas` locally, on the computer building the
Modal App, we can't put `import pandas` at the top of the script, since it would
cause an `ImportError`.
The easiest solution to this is to put `import pandas` in the function body
instead, as you can see above. This means that `pandas` is only imported when
running inside the remote Modal container, which has `pandas` installed.
Be careful about what you return from Modal Functions that have different
packages installed than the ones you have locally! Modal Functions return Python
objects, like `pandas.DataFrame`s, and if your local machine doesn't have
`pandas` installed, it won't be able to handle a `pandas` object (the error
message you see will mention
[serialization](https://hazelcast.com/glossary/serialization/)/[deserialization](https://hazelcast.com/glossary/deserialization/)).
If you have a lot of Functions and a lot of Python packages, you might want to
keep the imports in the global scope so that every function can use the same
imports. In that case, you can use the
[`Image.imports`](https://modal.com/docs/sdk/py/latest/Image#imports) context manager:
```python
pandas_image = modal.Image.debian_slim().pip_install("pandas", "numpy")
with pandas_image.imports():
import pandas as pd
import numpy as np
@app.function(image=pandas_image)
def my_function():
df = pd.DataFrame()
...
```
Because these imports happen before a new container processes its first input,
you can combine this context manager with [Memory Snapshots](https://modal.com/docs/guide/memory-snapshots)
to improve [cold start performance](https://modal.com/docs/guide/cold-start#share-initialization-work-across-cold-starts-with-memory-snapshots)
for Functions that frequently scale up.
## Install system packages with `.apt_install`
You can install Linux packages with the [`apt` package manager](https://www.debian.org/doc/manuals/apt-guide/index.en.html)
using [`Image.apt_install`](https://modal.com/docs/sdk/py/latest/Image#apt_install):
```python
image = modal.Image.debian_slim().apt_install("git", "curl")
```
## Set environment variables with `.env`
You can change the environment variables that your code sees
(in, e.g., [`os.environ`](https://docs.python.org/3/library/os.html#os.environ))
by passing a dictionary to [`Image.env`](https://modal.com/docs/sdk/py/latest/Image#env):
```python
image = modal.Image.debian_slim().env({"PORT": "6443"})
```
Environment variable names and values must be strings.
## Run shell commands with `.run_commands`
You can supply shell commands that should be executed when building the
Image to [`Image.run_commands`](https://modal.com/docs/sdk/py/latest/Image#run_commands):
```python
image_with_repo = (
modal.Image.debian_slim().apt_install("git").run_commands(
"git clone https://github.com/modal-labs/gpu-glossary"
)
)
```
## Run a Python function during your build with `.run_function`
You can run Python code as a build step using the
[`Image.run_function`](https://modal.com/docs/sdk/py/latest/Image#run_function) method.
For example, you can use this to download model parameters from Hugging Face into
your Image:
```python
import os
def download_models() -> None:
import diffusers
model_name = "segmind/small-sd"
pipe = diffusers.StableDiffusionPipeline.from_pretrained(
model_name, use_auth_token=os.environ["HF_TOKEN"]
)
hf_cache = modal.Volume.from_name("hf-cache")
image = (
modal.Image.debian_slim()
.pip_install("diffusers[torch]", "transformers", "ftfy", "accelerate")
.run_function(
download_models,
secrets=[modal.Secret.from_name("huggingface-secret")],
volumes={"/root/.cache/huggingface": hf_cache},
)
)
```
For details on storing model weights on Modal, see
[this guide](https://modal.com/docs/guide/model-weights).
Essentially, this is equivalent to running a Modal Function and snapshotting the
resulting filesystem as a new Image. Any kwargs accepted by [`@app.function`](https://modal.com/docs/sdk/py/latest/App#function)
([`Volume`s](https://modal.com/docs/guide/volumes), [`Secret`s](https://modal.com/docs/guide/secrets), specifications of
resources like [GPUs](https://modal.com/docs/guide/gpu)) can be supplied here.
Whenever you change other features of your Image, like the base Image or the
version of a Python package, the Image will automatically be rebuilt the next
time it is used. This is a bit more complicated when changing the contents of
functions. See the
[reference documentation](https://modal.com/docs/sdk/py/latest/Image#run_function) for details.
## Attach GPUs during setup
If a step in the setup of your Image should be run on an instance with
a GPU (e.g., so that a package can query the GPU to set compilation flags), pass the
desired GPU type when defining that step:
```python
image = (
modal.Image.debian_slim()
.pip_install("bitsandbytes", gpu="H100")
)
```
## Use `mamba` instead of `pip` with `micromamba_install`
`pip` installs Python packages, but some Python workloads require the
coordinated installation of system packages as well. The `mamba` package manager
can install both. Modal provides a pre-built
[Micromamba](https://mamba.readthedocs.io/en/latest/user_guide/micromamba.html)
base image that makes it easy to work with `micromamba`:
```python
app = modal.App("bayes-pgm")
numpyro_pymc_image = (
modal.Image.micromamba()
.micromamba_install("pymc==5.10.4", "numpyro==0.13.2", channels=["conda-forge"])
)
@app.function(image=numpyro_pymc_image)
def sample():
import pymc as pm
import numpyro as np
print(f"Running on PyMC v{pm.__version__} with JAX/numpyro v{np.__version__} backend")
...
```
## Image caching and rebuilds
Modal uses the definition of an Image to determine whether it needs to be
rebuilt. If the definition hasn't changed since the last time you ran or
deployed your App, the previous version will be pulled from the cache.
Images are cached per layer (i.e., per `Image` method call), and breaking
the cache on a single layer will cause cascading rebuilds for all subsequent
layers. You can shorten iteration cycles by defining frequently-changing
layers last so that the cached version of all other layers can be used.
In some cases, you may want to force an Image to rebuild, even if the
definition hasn't changed. You can do this by adding the `force_build=True`
argument to any of the Image building methods.
```python
image = (
modal.Image.debian_slim()
.apt_install("git")
.pip_install("slack-sdk", force_build=True)
.run_commands("echo hi")
)
```
As in other cases where a layer's definition changes, both the `pip_install` and
`run_commands` layers will rebuild, but the `apt_install` will not. Remember to
remove `force_build=True` after you've rebuilt the Image, or it will
rebuild every time you run your code.
Alternatively, you can set the `MODAL_FORCE_BUILD` environment variable (e.g.
`MODAL_FORCE_BUILD=1 modal run ...`) to rebuild all images attached to your App.
But note that when you rebuild a base layer, the cache will be invalidated for _all_
Images that depend on it, and they will rebuild the next time you run or deploy
any App that uses that base. If you're debugging an issue with your Image, a better
option might be using `MODAL_IGNORE_CACHE=1`. This will rebuild the Image from the
top without breaking the Image cache or affecting subsequent builds.
## Image builder updates
Because changes to base images will cause cascading rebuilds, Modal is
conservative about updating the base definitions that we provide. But many
things are baked into these definitions, like the specific versions of the Image
OS, the included Python, and the Modal client dependencies.
We provide a separate mechanism for keeping base images up-to-date without
causing unpredictable rebuilds: the "Image Builder Version". This is a workspace
level-configuration that will be used for every Image built in your workspace.
We release a new Image Builder Version every few months but allow you to update
your workspace's configuration when convenient. After updating, your next
deployment will take longer, because your Images will rebuild. You may also
encounter problems, especially if your Image definition does not pin the version
of the third-party libraries that it installs (as your new Image will get the
latest version of these libraries, which may contain breaking changes).
You can set the Image Builder Version for your workspace by going to your
[workspace settings](https://modal.com/settings/image-builder-version). This page also documents the
important updates in each version.
#### Using existing container images
# Using existing images
This guide walks you through how to use an existing container image as a Modal Image.
```python notest
sklearn_image = modal.Image.from_registry("huanjason/scikit-learn")
custom_image = modal.Image.from_dockerfile("./src/Dockerfile")
```
## Load an image from a public registry with `.from_registry`
To load an image from a public registry, just pass the image name, including any tags, to [`Image.from_registry`](https://modal.com/docs/sdk/py/latest/Image#from_registry):
```python
sklearn_image = modal.Image.from_registry("huanjason/scikit-learn")
@app.function(image=sklearn_image)
def fit_knn():
from sklearn.neighbors import KNeighborsClassifier
...
```
The `from_registry` method can load images from all public registries, such as
[Nvidia's `nvcr.io`](https://catalog.ngc.nvidia.com/containers),
[AWS ECR](https://aws.amazon.com/ecr/), and
[GitHub's `ghcr.io`](https://docs.github.com/en/packages/working-with-a-github-packages-registry/working-with-the-container-registry).
You can further modify the image [just like any other Modal Image](https://modal.com/docs/guide/images):
```python continuation
data_science_image = sklearn_image.uv_pip_install("polars", "datasette")
```
You can use external images so long as
- The image is built for the
[`linux/amd64` platform](https://unix.stackexchange.com/questions/53415/why-are-64-bit-distros-often-called-amd64)
- The image has a [compatible `ENTRYPOINT`](#entrypoint)
Additionally, to be used with a Modal Function, the image needs to have `python` and `pip`
installed and available on the `$PATH`.
If an existing image does not have either `python` or `pip` set up compatibly, you
can still use it. Just provide a version number as the `add_python` argument to
install a reproducible
[standalone build](https://github.com/indygreg/python-build-standalone)
of Python:
```python
ubuntu_image = modal.Image.from_registry("ubuntu:22.04", add_python="3.11")
valhalla_image = modal.Image.from_registry("gisops/valhalla:latest", add_python="3.12")
```
There are some additional restrictions for older versions of the Modal image builder.
Image builder version is set at a workspace level via the settings page [here](https://modal.com/settings/image-builder-version).
See the migration guides on that page for details on any additional restrictions on images.
## Load images from private registries
You can also use images defined in private container registries on Modal.
The exact method depends on the registry you are using.
### Docker Hub (Private)
To pull container images from private Docker Hub repositories,
[create an access token](https://docs.docker.com/security/for-developers/access-tokens/)
with "Read-Only" permissions and use this token value and your Docker Hub
username to create a Modal [Secret](https://modal.com/docs/guide/secrets).
```
REGISTRY_USERNAME=my-dockerhub-username
REGISTRY_PASSWORD=dckr_pat_TS012345aaa67890bbbb1234ccc
```
Use this Secret with the
[`modal.Image.from_registry`](https://modal.com/docs/sdk/py/latest/Image#from_registry) method.
### Elastic Container Registry (ECR)
You can pull images from your AWS ECR account by specifying the full image URI
as follows:
```python
import modal
aws_secret = modal.Secret.from_name("my-aws-secret")
image = (
modal.Image.from_aws_ecr(
"000000000000.dkr.ecr.us-east-1.amazonaws.com/my-private-registry:latest",
secret=aws_secret,
)
.pip_install("torch", "numpy", "huggingface")
)
app = modal.App(image=image)
```
As shown above, you also need to use a [Modal Secret](https://modal.com/docs/guide/secrets)
containing the environment variables `AWS_ACCESS_KEY_ID`,
`AWS_SECRET_ACCESS_KEY`, and `AWS_REGION`. The AWS IAM user account associated
with those keys must have access to the private registry you want to access.
Alternatively, you can use [OIDC token authentication](https://modal.com/docs/guide/oidc-integration#pull-images-from-aws-elastic-container-registry-ecr).
The user needs to have the following read-only policies:
```json
{
"Version": "2012-10-17",
"Statement": [
{
"Action": ["ecr:GetAuthorizationToken"],
"Effect": "Allow",
"Resource": "*"
},
{
"Effect": "Allow",
"Action": [
"ecr:BatchCheckLayerAvailability",
"ecr:GetDownloadUrlForLayer",
"ecr:GetRepositoryPolicy",
"ecr:DescribeRepositories",
"ecr:ListImages",
"ecr:DescribeImages",
"ecr:BatchGetImage",
"ecr:GetLifecyclePolicy",
"ecr:GetLifecyclePolicyPreview",
"ecr:ListTagsForResource",
"ecr:DescribeImageScanFindings"
],
"Resource": ""
}
]
}
```
You can use the IAM configuration above as a template for creating an IAM user.
You can then
[generate an access key](https://aws.amazon.com/premiumsupport/knowledge-center/create-access-key/)
and create a Modal Secret using the AWS integration option. Modal will use your
access keys to generate an ephemeral ECR token. That token is only used to pull
image layers at the time a new image is built. We don't store this token but
will cache the image once it has been pulled.
Images on ECR must be private and follow
[image configuration requirements](https://modal.com/docs/sdk/py/latest/Image#from_aws_ecr).
### Google Artifact Registry and Google Container Registry
For further detail on how to pull images from Google's image registries, see
[`modal.Image.from_gcp_artifact_registry`](https://modal.com/docs/sdk/py/latest/Image#from_gcp_artifact_registry).
### Azure Container Registry (ACR)
Modal doesn't have native Azure support, but you can pull images from a private ACR using
ACR's [token-based repository permissions](https://learn.microsoft.com/en-us/azure/container-registry/container-registry-token-based-repository-permissions)
to generate long-lived Docker credentials. Those credentials (token and password) can then be stored
as a Modal Secret and used with [`modal.Image.from_registry`](https://modal.com/docs/sdk/py/latest/Image#from_registry)
the same way as [Docker Hub private registry](#docker-hub-private) credentials.
## Bring your own image definition with `.from_dockerfile`
You can define an Image from an existing Dockerfile by passing its path to
[`Image.from_dockerfile`](https://modal.com/docs/sdk/py/latest/Image#from_dockerfile):
```python
dockerfile_image = modal.Image.from_dockerfile("Dockerfile")
@app.function(image=dockerfile_image)
def fit():
import sklearn
...
```
Note that you can still extend this Image using image builder methods!
See [the guide](https://modal.com/docs/guide/images) for details.
### Dockerfile command compatibility
Since Modal doesn't use Docker to build containers, we have our own
implementation of the
[Dockerfile specification](https://docs.docker.com/engine/reference/builder/).
Most Dockerfiles should work out of the box, but there are some differences to
be aware of.
First, a few minor Dockerfile commands and flags have not been implemented yet.
These include `EXPOSE`, `HEALTHCHECK`, `LABEL`, `ONBUILD`, `STOPSIGNAL`, and
`VOLUME`.
Please reach out to us if your use case requires any of these.
Next, there are some command-specific things that may be useful when porting a
Dockerfile to Modal.
#### `USER`
Modal containers always run as root (uid 0). The
[`USER`](https://docs.docker.com/engine/reference/builder/#user) instruction is
ignored, whether it appears in your Dockerfile or is inherited from a base image
pulled with [`Image.from_registry`](https://modal.com/docs/sdk/py/latest/Image#from_registry).
To [reduce privileges](https://dwheeler.com/secure-programs/Secure-Programs-HOWTO/minimize-privileges.html)
for programs running inside your Modal containers, use OS user management features
like [`setuid`](https://man7.org/linux/man-pages/man2/setuid.2.html). For instance,
in Python, you can pass in a `user`during [subprocess creation](https://docs.python.org/3/library/subprocess.html).
#### `ENTRYPOINT`
While the
[`ENTRYPOINT`](https://docs.docker.com/engine/reference/builder/#entrypoint)
command is supported, there is an additional constraint to the entrypoint script
provided: when used with a Modal Function, it must also `exec` the arguments passed to it at some point.
This is so the Modal Function runtime's Python entrypoint can run after your own. Most entrypoint
scripts in Docker containers are wrappers over other scripts, so this is likely
already the case.
If you wish to write your own entrypoint script, you can use the following as a
template:
```bash
#!/usr/bin/env bash
# Your custom startup commands here.
exec "$@" # Runs the command passed to the entrypoint script.
```
If the above file is saved as `/usr/bin/my_entrypoint.sh` in your container,
then you can register it as an entrypoint with
`ENTRYPOINT ["/usr/bin/my_entrypoint.sh"]` in your Dockerfile, or with
[`entrypoint`](https://modal.com/docs/sdk/py/latest/Image#entrypoint) as an
Image build step.
```python
import modal
image = (
modal.Image.debian_slim()
.pip_install("foo")
.entrypoint(["/usr/bin/my_entrypoint.sh"])
)
```
#### `ENV`
We currently don't support default values in
[interpolations](https://docs.docker.com/compose/compose-file/12-interpolation/),
such as `${VAR:-default}`
#### `ADD`
`ADD` is limited to fetching from single URLs.
Tar extraction, multiple URLs, and copy operations are currently not supported.
#### Named images
# Named images
Named Images let you publish a Modal Image under a name that you can reference
later to use the Image, akin to a container registry.
This can be useful for stricter Image change management and for avoiding
unintended Image invalidation and rebuilds on latency-sensitive code paths.
Unlike inline Image definitions, referencing an image by name will never
implicitly rebuild an Image. The Image reference for a name is mutable,
and because the reference is typically updated only after a successful
publish, callers keep using the previous working Image while the new build is running.
A typical workflow using named images would be:
1. Define, build, and publish the Image in an independently run Image build script
2. Reference the published Image by name in Sandbox or Function code, getting the latest build of that image at the time
## Publishing an Image from a script
Use [`Image.build`](https://modal.com/docs/sdk/py/latest/Image#build) to build the
Image, then call `.publish()` on the resulting Image:
{#snippet python()}
```python notest
# build_image.py
app = modal.App.lookup("image-builds", create_if_missing=True)
image = (
modal.Image.debian_slim(python_version="3.12")
.apt_install("git")
.uv_pip_install("numpy", "pandas", "scikit-learn")
.run_commands("python -c 'import sklearn; print(sklearn.__version__)'")
)
with modal.enable_output():
image.build(app).publish("analytics-runtime")
```
{/snippet}
{#snippet javascript()}
```javascript
// build_image.ts
const app = await modal.apps.fromName("image-builds", {
createIfMissing: true,
});
const image = modal.images
.fromRegistry("python:3.12-slim")
.dockerfileCommands([
"RUN apt-get update && apt-get install -y git",
"RUN pip install numpy pandas scikit-learn",
"RUN python -c 'import sklearn; print(sklearn.__version__)'",
]);
const builtImage = await image.build(app);
await builtImage.publish("analytics-runtime");
```
{/snippet}
{#snippet go()}
```go
// build_image.go
app, err := mc.Apps.FromName(ctx, "image-builds", &modal.AppFromNameParams{
CreateIfMissing: true,
})
image := mc.Images.FromRegistry("python:3.12-slim", nil).
DockerfileCommands([]string{
"RUN apt-get update && apt-get install -y git",
"RUN pip install numpy pandas scikit-learn",
"RUN python -c 'import sklearn; print(sklearn.__version__)'",
}, nil)
builtImage, err := image.Build(ctx, app, nil)
err = builtImage.Publish(ctx, "analytics-runtime", nil)
```
{/snippet}
## Starting Sandboxes using named Images
Named Images are especially useful for Sandboxes because Sandbox creation often happens
on a latency-sensitive path and you typically never want to block Sandbox creation on
rebuilding an Image.
Use [`Image.from_name`](https://modal.com/docs/sdk/py/latest/Image#from_name) when referencing
a named Image that you have previously built, and start the Sandbox using that:
{#snippet python()}
```python notest
# sandbox_launcher.py
sb = modal.Sandbox.create(
"python",
"-c",
"import pandas, sklearn; print('ready')",
image=modal.Image.from_name("analytics-runtime"),
app=app,
)
print(sb.stdout.read())
```
{/snippet}
{#snippet javascript()}
```javascript
// sandbox_launcher.ts
const image = await modal.images.fromName("analytics-runtime");
const sb = await modal.sandboxes.create(app, image);
const p = await sb.exec([
"python",
"-c",
"import pandas, sklearn; print('ready')",
]);
console.log(await p.stdout.readText());
sb.detach();
```
{/snippet}
{#snippet go()}
```go
// sandbox_launcher.go
image, err := mc.Images.FromName(ctx, "analytics-runtime", nil)
sb, err := mc.Sandboxes.Create(ctx, app, image, nil)
defer sb.Detach()
p, err := sb.Exec(ctx, []string{
"python",
"-c",
"import pandas, sklearn; print('ready')",
}, nil)
stdout, err := io.ReadAll(p.Stdout)
fmt.Println(string(stdout))
```
{/snippet}
## Running Functions using named Images
Named Images can also be used when defining Modal Functions when you want more control over when
a Function starts using a new Image. To use a named Image, point the Function image attribute
to a [`Image.from_name`](https://modal.com/docs/sdk/py/latest/Image#from_name) reference:
```python notest
# app.py
@app.function(image=modal.Image.from_name("analytics-runtime"))
def train():
import pandas as pd
from sklearn.linear_model import LinearRegression
...
```
Note that publishing a new version of this named Image would not automatically
update your deployed Functions to use the updated Image. You still need to redeploy
the App that references that name for the change to propagate.
## Tags
Every named Image is represented using a `{name}:{tag}` name - if you do not specify the tag part, the `:latest` tag is automatically used.
You can publish the same Image using multiple names or tag which can be useful to do things like versioning of images.
#### Fast pull from registry
# Fast pull from registry
The performance of pulling public and private images from registries into Modal
can be significantly improved by adopting the [eStargz](https://github.com/containerd/stargz-snapshotter/blob/main/docs/estargz.md) compression format.
By applying eStargz compression during your image build and push, Modal will be much
more efficient at pulling down your image from the registry.
## How to use estargz
If you have [Buildkit](https://docs.docker.com/build/buildkit/) version greater than `0.10.0`, adopting `estargz` is as simple as
adding some flags to your `docker buildx build` command:
- `type=registry` flag will instruct BuildKit to push the image after building.
- If you do not push the image from immediately after build and instead attempt to push it later with docker push, the image will be converted to a standard gzip image.
- `compression=estargz` specifies that we are using the [eStargz](https://github.com/containerd/stargz-snapshotter/blob/main/docs/estargz.md) compression format.
- `oci-mediatypes=true` specifies that we are using the OCI media types, which is required for eStargz.
- `force-compression=true` will recompress the entire image and convert the base image to eStargz if it is not already.
```bash
docker buildx build --tag "//:" \
--output type=registry,compression=estargz,force-compression=true,oci-mediatypes=true \
.
```
Then reference the container image as normal in your Modal code.
```python notest
app = modal.App(
"example-estargz-pull",
image=modal.Image.from_registry(
"public.ecr.aws/modal/estargz-example-images:text-generation-v1-esgz"
)
)
```
At build time you should see the eStargz-enabled puller activate:
```
Building image im-TinABCTIf12345ydEwTXYZ
=> Step 0: FROM public.ecr.aws/modal/estargz-example-images:text-generation-v1-esgz
Using estargz to speed up image pull (index loaded in 1.86s)...
Progress: 10% complete... (1.11s elapsed)
Progress: 20% complete... (3.10s elapsed)
Progress: 30% complete... (4.18s elapsed)
Progress: 40% complete... (4.76s elapsed)
Progress: 50% complete... (5.51s elapsed)
Progress: 62% complete... (6.17s elapsed)
Progress: 74% complete... (6.99s elapsed)
Progress: 81% complete... (7.23s elapsed)
Progress: 99% complete... (8.90s elapsed)
Progress: 100% complete... (8.90s elapsed)
Copying image...
Copied image in 5.81s
```
## Supported registries
Currently, Modal supports fast estargz pulling images with the following registries:
- AWS Elastic Container Registry (ECR)
- Docker Hub (docker.io)
- Google Artifact Registry (gcr.io, pkg.dev)
We are working on adding support for GitHub Container Registry (ghcr.io).
### GPUs and other resources
#### GPU acceleration
# GPU acceleration
Modal makes it easy to run your code on [GPUs](https://modal.com/gpu-glossary/readme).
## Quickstart
Here's a simple example of a Function running on an A100 in Modal:
```python
import modal
image = modal.Image.debian_slim().pip_install("torch", "numpy")
app = modal.App(image=image)
@app.function(gpu="A100")
def run():
import torch
assert torch.cuda.is_available()
```
## Specifying GPU type
You can pick a specific GPU type for your Function via the `gpu` argument.
Modal supports the following values for this parameter:
- `T4`
- `L4`
- `A10`
- `L40S`
- `A100`
- `A100-40GB`
- `A100-80GB`
- `RTX-PRO-6000`
- `H100`/`H100!`
- `H200`
- `B200`/`B200+`
- `B300`
For instance, to use a B200, you can use `@app.function(gpu="B200")`.
Refer to our [pricing page](https://modal.com/pricing) for the latest pricing on each GPU type.
## Specifying GPU count
You can specify more than 1 GPU per container by appending `:n` to the GPU
argument. For instance, to run a Function with eight H100s:
```python
@app.function(gpu="H100:8")
def run_llama_405b_fp8():
...
```
Currently B300, B200, H200, H100, A100, L4, T4 and L40S instances support up to 8 GPUs (up to 2,304 GB GPU RAM),
and A10 instances support up to 4 GPUs (up to 96 GB GPU RAM). Note that requesting
more than 2 GPUs per container will usually result in larger wait times. These
GPUs are always attached to the same physical machine.
## Picking a GPU
For running, rather than training, neural networks, we recommend starting off
with the [L40S](https://resources.nvidia.com/en-us-l40s/l40s-datasheet-28413),
which offers an excellent trade-off of cost and performance and 48 GB of GPU
RAM for storing model weights and activations.
For more on how to pick a GPU for use with neural networks like LLaMA or Stable
Diffusion, and for tips on how to make that GPU go brrr, check out
[Tim Dettemers' blog post](https://timdettmers.com/2023/01/30/which-gpu-for-deep-learning/)
or the
[Full Stack Deep Learning page on Cloud GPUs](https://fullstackdeeplearning.com/cloud-gpus/).
## B300 GPUs
[B300s](https://www.nvidia.com/en-us/data-center/dgx-b300/) are NVIDIA
Blackwell Ultra GPUs, based on the Blackwell [architecture](https://modal.com/gpu-glossary/device-hardware/streaming-multiprocessor-architecture).
To request a B300, set the `gpu` argument to `"B300"`:
```python
@app.function(gpu="B300:8")
def run_inference():
...
```
B300 requires CUDA version 13.1+. Make sure your container Image and libraries
are compatible with CUDA 13 before requesting a B300.
## B200 GPUs
B200s are [NVIDIA data center GPUs](https://www.nvidia.com/en-us/data-center/dgx-b200/)
based on the Blackwell [architecture](https://modal.com/gpu-glossary/device-hardware/streaming-multiprocessor-architecture).
To request a B200, set the `gpu` argument to `"B200"`
```python
@app.function(gpu="B200:8")
def run_deepseek():
...
```
Check out [this example](https://modal.com/docs/examples/llm_inference) to see how you can use B200s to max out vLLM serving performance for LLaMA 3.1-8B.
Before you jump for this powerful GPU, make sure you understand where the bottlenecks
are in your computations. For example, running language models with small batch sizes
(e.g. one prompt at a time) results in a [bottleneck on memory, not arithmetic](https://kipp.ly/transformer-inference-arithmetic/).
Since arithmetic throughput has risen faster than memory throughput in recent
hardware generations, speedups for memory-bound GPU jobs are not as extreme and
may not be worth the extra cost.
### Opt-in upgrade to B300
Use `gpu="B200+"` to allow Modal to run requests on either B200 or B300 GPUs.
B200+ is billed as B200, regardless of which GPU is used. Use this option only
if your code is compatible with both types of GPUs. B300 requires CUDA version
13.1+. Use this to have access to a greater capacity pool automatically.
## H200 and H100 GPUs
[H200s](https://www.nvidia.com/en-us/data-center/h200/) and [H100s](https://www.nvidia.com/en-us/data-center/h100/) are the previous
generation of top-of-the-line data center chips from NVIDIA, based on the Hopper [architecture](https://modal.com/gpu-glossary/device-hardware/streaming-multiprocessor-architecture).
These GPUs have better software support than do Blackwell GPUs (e.g. popular libraries include pre-compiled kernels for Hopper, but not Blackwell),
and they often get the job done at a competitive cost, so they are a common choice of accelerator, on and off Modal.
All H100 and H200 GPUs on the Modal platform are of the SXM variant, as can be verified by examining the
[power draw](https://modal.com/docs/guide/gpu-metrics) in the dashboard or with `nvidia-smi`.
### Automatic upgrades to H200s
Modal may automatically upgrade a `gpu="H100"` request to run on an H200.
This automatic upgrade does _not_ change the cost of the GPU.
Kernels [compatible](https://modal.com/gpu-glossary/device-software/compute-capability) with H200s are also compatible with H100s,
so your code will still run, just faster, so long as it doesn't make strict assumptions about memory capacity.
An H200’s [HBM3e memory](https://modal.com/gpu-glossary/device-hardware/gpu-ram)
has a capacity of 141 GB and a bandwidth of 4.8TB/s, 1.75x larger and 1.4x faster than an NVIDIA H100 with HBM3.
In cases where an automatic upgrade to H200 would not be helpful (for instance, benchmarking) you can pass
`gpu=H100!` to avoid it.
## A100 GPUs
[A100s](https://www.nvidia.com/en-us/data-center/a100/) are based on NVIDIA's Ampere [architecture](https://modal.com/gpu-glossary/device-hardware/streaming-multiprocessor-architecture).
Modal offers two versions of the A100: one with 40 GB of RAM and another with 80 GB of RAM.
To request an A100 with 40 GB of [GPU memory](https://modal.com/gpu-glossary/device-hardware/gpu-ram), use `gpu="A100"`:
```python
@app.function(gpu="A100")
def qwen_7b():
...
```
Modal may automatically upgrade a `gpu="A100"` request to run on an 80 GB A100.
This automatic upgrade does _not_ change the cost of the GPU.
You can specifically request a 40GB A100 with the string `A100-40GB`.
To specifically request an 80 GB A100, use the string `A100-80GB`:
```python
@app.function(gpu="A100-80GB")
def llama_70b_fp8():
...
```
## GPU fallbacks
Modal allows specifying a list of possible GPU types, suitable for Functions that are
compatible with multiple options. Modal respects the ordering of this list and
will try to allocate the most preferred GPU type before falling back to less
preferred ones.
```python
@app.function(gpu=["H100", "A100-40GB:2"])
def run_on_80gb():
...
```
See [this example](https://modal.com/docs/examples/gpu_fallbacks) for more detail.
## Multi GPU training
Modal currently supports multi-GPU training on a single node, with multi-node training in private Beta (email us at support@modal.com for access).
Depending on which framework you are using, you may need to use different techniques to train on multiple GPUs.
If the framework re-executes the entrypoint of the Python process (like [PyTorch Lightning](https://lightning.ai/docs/pytorch/stable/index.html)) you need to either set the strategy to `ddp_spawn` or `ddp_notebook` if you wish to invoke the training directly. Another option is to run the training script as a subprocess instead.
```python
@app.function(gpu="A100:2")
def run():
import subprocess
import sys
subprocess.run(
["python", "train.py"],
stdout=sys.stdout, stderr=sys.stderr,
check=True,
)
```
## Examples and more resources
For more information about GPUs in general, check out our [GPU Glossary](https://modal.com/gpu-glossary/readme).
Or take a look some examples of Modal Apps using GPUs:
- [Fine-tune a character LoRA for your pet](https://modal.com/docs/examples/diffusers_lora_finetune)
- [Fast LLM inference on big GPUs](https://modal.com/docs/examples/llm_inference)
- [Stable Diffusion with a CLI, API, and web UI](https://modal.com/docs/examples/text_to_image)
- [Rendering Blender videos](https://modal.com/docs/examples/blender_video)
#### Using CUDA on Modal
# Using CUDA on Modal
Modal makes it easy to accelerate your workloads with datacenter-grade NVIDIA GPUs.
To take advantage of the hardware, you need to use matching software: the CUDA stack.
This guide explains the components of that stack and how to install them on Modal.
For more on which GPUs are available on Modal and how to choose a GPU for your use case,
see [this guide](https://modal.com/docs/guide/gpu). For a deep dive on both the
[GPU hardware](https://modal.com/gpu-glossary/device-hardware) and [software](https://modal.com/gpu-glossary/device-software)
and for even more detail on [the CUDA stack](https://modal.com/gpu-glossary/host-software/),
see our [GPU Glossary](https://modal.com/gpu-glossary/readme).
Here's the tl;dr:
- The [NVIDIA Accelerated Graphics Driver for Linux-x86_64](https://docs.nvidia.com/cuda/cuda-installation-guide-linux/#driver-installation), version 580.95.05,
and [CUDA Driver API](https://docs.nvidia.com/cuda/archive/13.0.0/cuda-driver-api/index.html), version 13.0, are already installed.
You can call `nvidia-smi` or run compiled CUDA programs from any Modal Function with access to a GPU.
- That means you can install many popular libraries like `torch` that bundle their other CUDA dependencies [with a simple `pip_install`](#install-gpu-accelerated-torch-and-transformers-with-pip_install).
- For bleeding-edge libraries like `flash-attn`, you may need to install CUDA dependencies manually.
To make your life easier, [use an existing image](#for-more-complex-setups-use-an-officially-supported-cuda-image).
## What is CUDA?
When someone refers to "installing CUDA" or "using CUDA",
they are referring not to a library, but to a
[stack](https://modal.com/gpu-glossary/host-software/cuda-software-platform) with multiple layers.
Your application code (and its dependencies) can interact
with the stack at different levels.

This leads to a lot of confusion. To help clear that up, the following sections explain each component in detail.
### Level 0: Kernel-mode driver components
At the lowest level are the [_kernel-mode driver components_](https://docs.nvidia.com/cuda/cuda-installation-guide-linux/#nvidia-open-gpu-kernel-modules).
The Linux kernel is essentially a single program operating the entire machine and all of its hardware.
To add hardware to the machine, this program is extended by loading new modules into it.
These components communicate directly with hardware -- in this case the GPU.
Because they are kernel modules, these driver components are tightly integrated with the host operating system
that runs your containerized Modal Functions and are not something you can inspect or change yourself.
### Level 1: User-mode driver API
All action in Linux that doesn't occur in the kernel occurs in [user space](https://en.wikipedia.org/wiki/User_space).
To talk to the kernel drivers from our user space programs, we need _user-mode driver components_.
Most prominently, that includes:
- the [CUDA Driver API](https://modal.com/gpu-glossary/host-software/cuda-driver-api),
a [shared object](https://en.wikipedia.org/wiki/Shared_library) called `libcuda.so`.
This object exposes functions like [`cuMemAlloc`](https://docs.nvidia.com/cuda/archive/12.8.0/cuda-driver-api/group__CUDA__MEM.html#group__CUDA__MEM_1gb82d2a09844a58dd9e744dc31e8aa467),
for allocating GPU memory.
- the [NVIDIA management library](https://developer.nvidia.com/management-library-nvml), `libnvidia-ml.so`, and its command line interface [`nvidia-smi`](https://developer.nvidia.com/system-management-interface).
You can use these tools to check the status of the system's GPU(s).
These components are installed on all Modal machines with access to GPUs.
Because they are user-level components, you can use them directly:
```python runner:ModalRunner
import modal
app = modal.App()
@app.function(gpu="any")
def check_nvidia_smi():
import subprocess
output = subprocess.check_output(["nvidia-smi"], text=True)
assert "Driver Version:" in output
assert "CUDA Version:" in output
print(output)
return output
```
### Level 2: CUDA Toolkit
Wrapping the CUDA Driver API is the [CUDA Runtime API](https://modal.com/gpu-glossary/host-software/cuda-runtime-api), the `libcudart.so` shared library.
This API includes functions like [`cudaLaunchKernel`](https://docs.nvidia.com/cuda/archive/12.8.0/cuda-runtime-api/group__CUDART__HIGHLEVEL.html#group__CUDART__HIGHLEVEL_1g7656391f2e52f569214adbfc19689eb3)
and is more commonly used in CUDA programs (see [this HackerNews comment](https://news.ycombinator.com/item?id=20616385) for color commentary on why).
This shared library is _not_ installed by default on Modal.
The CUDA Runtime API is generally installed as part of the larger [NVIDIA CUDA Toolkit](https://docs.nvidia.com/cuda/index.html),
which includes the [NVIDIA CUDA compiler driver](https://modal.com/gpu-glossary/host-software/nvcc) (`nvcc`) and its toolchain
and a number of [useful goodies](https://modal.com/gpu-glossary/host-software/cuda-binary-utilities) for writing and debugging CUDA programs (`cuobjdump`, `cudnn`, profilers, etc.).
Contemporary GPU-accelerated machine learning workloads like LLM inference frequently make use of many components of the CUDA Toolkit,
such as the run-time compilation library [`nvrtc`](https://docs.nvidia.com/cuda/archive/12.8.0/nvrtc/index.html).
So why aren't these components installed along with the drivers?
A compiled CUDA program can run without the CUDA Runtime API installed on the system,
by [statically linking](https://en.wikipedia.org/wiki/Static_library) the CUDA Runtime API into the program binary,
though this is fairly uncommon for CUDA-accelerated Python programs.
Additionally, older versions of these components are needed for some applications
and some application deployments even use several versions at once.
Both patterns are compatible with the host machine driver provided on Modal.
## Install GPU-accelerated `torch` and `transformers` with `pip_install`
The components of the CUDA Toolkit can be installed via `pip`,
via PyPI packages like [`nvidia-cuda-runtime-cu12`](https://pypi.org/project/nvidia-cuda-runtime-cu12/)
and [`nvidia-cuda-nvrtc-cu12`](https://pypi.org/project/nvidia-cuda-nvrtc-cu12/).
These components are listed as dependencies of some popular GPU-accelerated Python libraries, like `torch`.
Because Modal already includes the lower parts of the CUDA stack, you can install these libraries
with [the `pip_install` method of `modal.Image`](https://modal.com/docs/guide/images#add-python-packages-with-pip_install), just like any other Python library:
```python
image = modal.Image.debian_slim().pip_install("torch")
@app.function(gpu="any", image=image)
def run_torch():
import torch
has_cuda = torch.cuda.is_available()
print(f"It is {has_cuda} that torch can access CUDA")
return has_cuda
```
Many libraries for running open-weights models, like `transformers` and `vllm`,
use `torch` under the hood and so can be installed in the same way:
```python
image = modal.Image.debian_slim().pip_install("transformers[torch]")
image = image.apt_install("ffmpeg") # for audio processing
@app.function(gpu="any", image=image)
def run_transformers():
from transformers import pipeline
transcriber = pipeline(model="openai/whisper-tiny.en", device="cuda")
result = transcriber("https://modal-cdn.com/mlk.flac")
print(result["text"]) # I have a dream that one day this nation will rise up live out the true meaning of its creed
```
## For more complex setups, use an officially-supported CUDA image
The disadvantage of installing the CUDA stack via `pip` is that
many other libraries that depend on its components being installed as normal system packages cannot find them.
For these cases, we recommend you use an image that already has the full CUDA stack installed as system packages
and all environment variables set correctly, like the [`nvidia/cuda:*-devel-*` images on Docker Hub](https://hub.docker.com/r/nvidia/cuda).
[TensorRT-LLM](https://nvidia.github.io/TensorRT-LLM/overview.html) is an inference engine that accelerates and optimizes performance for the large language models. It requires the full CUDA toolkit for installation.
```python
cuda_version = "12.8.1" # should be no greater than host CUDA version
flavor = "devel" # includes full CUDA toolkit
operating_sys = "ubuntu24.04"
tag = f"{cuda_version}-{flavor}-{operating_sys}"
HF_CACHE_PATH = "/cache"
image = (
modal.Image.from_registry(f"nvidia/cuda:{tag}", add_python="3.12")
.entrypoint([]) # remove verbose logging by base image on entry
.apt_install("libopenmpi-dev") # required for tensorrt
.pip_install("tensorrt-llm==0.19.0", "pynvml", extra_index_url="https://pypi.nvidia.com")
.pip_install("hf-transfer", "huggingface_hub[hf_xet]")
.env({"HF_HUB_CACHE": HF_CACHE_PATH, "HF_HUB_ENABLE_HF_TRANSFER": "1", "PMIX_MCA_gds": "hash"})
)
app = modal.App("tensorrt-llm", image=image)
hf_cache_volume = modal.Volume.from_name("hf_cache_tensorrt", create_if_missing=True)
@app.function(gpu="A10G", volumes={HF_CACHE_PATH: hf_cache_volume})
def run_tiny_model():
from tensorrt_llm import LLM, SamplingParams
sampling_params = SamplingParams(temperature=0.8, top_p=0.95)
llm = LLM(model="TinyLlama/TinyLlama-1.1B-Chat-v1.0")
output = llm.generate("The capital of France is", sampling_params)
print(f"Generated text: {output.outputs[0].text}")
return output.outputs[0].text
```
Make sure to choose a version of CUDA that is no greater than the version provided by the host machine.
Older versions in the `12.*` and `13.*` series are guaranteed to be compatible with the host machine's driver,
but older major versions (`11.*`, `10.*`, etc.) may not be.
## What next?
For more on accessing and choosing GPUs on Modal, check out [this guide](https://modal.com/docs/guide/gpu).
To dive deep on GPU internals, check out our [GPU Glossary](https://modal.com/gpu-glossary/readme).
To see these installation patterns in action, check out these examples:
- [Fast LLM inference on big GPUs](https://modal.com/docs/examples/llm_inference)
- [Finetune a character LoRA for your pet](https://modal.com/docs/examples/diffusers_lora_finetune)
- [Optimized Flux inference](https://modal.com/docs/examples/flux)
#### Configuring CPU, memory, and disk
# Configuring CPU, memory, and disk
Each Modal Function or Sandbox container has a default request of 0.125 CPU cores and 128 MiB of memory.
Containers can exceed this minimum if the worker has available CPU or memory.
You can also guarantee access to more resources by requesting larger values, [similarly to Kubernetes](https://kubernetes.io/docs/concepts/configuration/manage-resources-containers/).
This guide covers resource configuration for both [Functions](https://modal.com/docs/guide/apps#apps-functions-and-entrypoints)
and [Sandboxes](https://modal.com/docs/guide/sandboxes). For Sandbox-specific guidance on pricing and
cost optimization, see [Sandbox pricing and resources](https://modal.com/docs/guide/sandbox-resources).
## CPU cores
If you have code that must run on a larger number of cores, you can
request that using the `cpu` argument. This allows you to specify a
floating-point number of CPU cores:
```python
import modal
app = modal.App()
@app.function(cpu=8.0)
def my_function():
# code here will have access to at least 8.0 cores
...
```
Note that this value corresponds to physical cores, not vCPUs.
Modal also will set several environment variables that control multi-threading
behavior in linear algebra and inference libraries (e.g.,
`OPENBLAS_NUM_THREADS`, `OMP_NUM_THREADS`, `MKL_NUM_THREADS`,
`ORT_INTRA_OP_NUM_THREADS`) based on your CPU request.
## Memory
If you have code that needs more guaranteed memory, you can request it using the
`memory` argument. This expects an integer number of megabytes:
```python
import modal
app = modal.App()
@app.function(memory=32768)
def my_function():
# code here will have access to at least 32 GiB of RAM
...
```
## How much can I request?
For both CPU and memory, a maximum is enforced at Function or Sandbox creation time to
ensure your containers can be scheduled for execution. Requests exceeding the
maximum will be rejected with an
[`InvalidError`](https://modal.com/docs/sdk/py/latest/exception#invaliderror).
## Billing
For CPU and memory, you'll be charged based on whichever is higher: your request or actual usage.
Disk requests are billed by increasing the memory request at a 20:1 ratio. For example, requesting 500 GiB of disk will increase the memory request to 25 GiB, if it is not already set higher.
## Resource limits
### CPU limits
Modal containers have a default soft CPU limit that is set at 16 physical cores above the CPU request.
Given that the default CPU request is 0.125 cores, the default soft CPU limit is 16.125 cores.
Above this limit, the host will begin to throttle the CPU usage of the container.
You can alternatively set the CPU limit explicitly:
```python
cpu_request = 1.0
cpu_limit = 4.0
@app.function(cpu=(cpu_request, cpu_limit))
def f():
...
```
### Memory limits
Modal containers can have a hard memory limit which will 'Out of Memory' (OOM) kill
containers which attempt to exceed the limit. This functionality is useful when a process
has a serious memory leak. You can set the limit and have the container killed to avoid paying
for the leaked GBs of memory.
Specify this limit using the `memory` parameter on [`@app.function()`](https://modal.com/docs/sdk/py/latest/App#function) or [`Sandbox.create()`](https://modal.com/docs/sdk/py/latest/Sandbox#create):
```python
mem_request = 1024
mem_limit = 2048
@app.function(
memory=(mem_request, mem_limit),
)
def f():
...
```
### Disk limits
Running Modal containers have access to many GBs of SSD disk, but the amount
of writes is limited by:
1. The size of the underlying worker's SSD disk capacity
2. A per-container disk quota that defaults to 512 GiB.
Hitting either limit will cause the container's disk writes to be rejected, which
typically manifests as an `OSError`.
Increased disk sizes can be requested with the `ephemeral_disk` parameter on [`@app.function()`](https://modal.com/docs/sdk/py/latest/App#function). The maximum
disk size is 3.0 TiB (3,145,728 MiB). Larger disks are intended to be used for [dataset processing](https://modal.com/docs/guide/dataset-ingestion).
### Scaling out
#### Scaling out
# Scaling out
Modal makes it easy to scale compute across thousands of containers.
You won't have to worry about your App crashing if it goes viral or need to wait
a long time for your batch jobs to complete.
For the the most part, scaling out will happen automatically, and you won't need
to think about it. But it can be helpful to understand how Modal's autoscaler
works and how you can control its behavior when you need finer control.
## How does autoscaling work on Modal?
Every Modal Function corresponds to an autoscaling pool of containers. The size
of the pool is managed by Modal's autoscaler. The autoscaler will spin up new
containers when there is no capacity available for new inputs, and it will spin
down containers when resources are idling. By default, Modal Functions will
scale to zero when there are no inputs to process.
Autoscaling decisions are made quickly and frequently so that your batch jobs
can ramp up fast and your deployed Apps can respond to any sudden changes in
traffic.
## Configuring autoscaling behavior
Modal exposes a few settings that allow you to configure the autoscaler's
behavior. These settings can be passed to the `@app.function` or `@app.cls`
decorators:
- `max_containers`: The upper limit on containers for the specific Function.
- `min_containers`: The minimum number of containers that should be kept warm,
even when the Function is inactive.
- `buffer_containers`: The size of the buffer to maintain while the Function is
active, so that additional inputs will not need to queue for a new container.
- `scaledown_window`: The maximum duration (in seconds) that individual
containers can remain idle when scaling down.
In general, these settings allow you to trade off cost and latency. Maintaining
a larger warm pool or idle buffer will increase costs but reduce the chance that
inputs will need to wait for a new container to start.
Similarly, a longer scaledown window will let containers idle for longer, which
might help avoid unnecessary churn for Apps that receive regular but infrequent
inputs. Note that containers may not wait for the entire scaledown window before
shutting down if the App is substantially overprovisioned.
## Dynamic autoscaler updates
It's also possible to update the autoscaler settings dynamically (i.e., without redeploying
the App) using the [`Function.update_autoscaler()`](https://modal.com/docs/sdk/py/latest/Function#update_autoscaler)
method:
```python notest
f = modal.Function.from_name("my-app", "f")
f.update_autoscaler(max_containers=100)
```
The autoscaler settings will revert to the configuration in the function
decorator the next time you deploy the App. Or they can be overridden by
further dynamic updates:
```python notest
f.update_autoscaler(min_containers=2, max_containers=10)
f.update_autoscaler(min_containers=4) # max_containers=10 will still be in effect
```
A common pattern is to run this method in a [scheduled function](https://modal.com/docs/guide/cron)
that adjusts the size of the warm pool (or container buffer) based on the time of day:
```python
@app.function()
def inference_server():
...
@app.function(schedule=modal.Cron("0 6 * * *", timezone="America/New_York"))
def increase_warm_pool():
inference_server.update_autoscaler(min_containers=4)
@app.function(schedule=modal.Cron("0 22 * * *", timezone="America/New_York"))
def decrease_warm_pool():
inference_server.update_autoscaler(min_containers=0)
```
When you have a [`modal.Cls`](https://modal.com/docs/sdk/py/latest/Cls), `update_autoscaler`
is a method on an _instance_ and will control the autoscaling behavior of
containers serving the Function with that specific set of parameters:
```python notest
MyClass = modal.Cls.from_name("my-app", "MyClass")
obj = MyClass(model_version="3.5")
obj.update_autoscaler(buffer_containers=2) # type: ignore
```
Note that it's necessary to disable type checking on this line, because the
object will appear as an instance of the class that you defined rather than the
Modal wrapper type.
## Parallel execution of inputs
If your code is running the same function repeatedly with different independent
inputs (e.g., a grid search), the easiest way to increase performance is to run
those function calls in parallel using Modal's
[`Function.map()`](https://modal.com/docs/sdk/py/latest/Function#map) method.
Here is an example if we had a function `evaluate_model` that takes a single
argument:
```python
import modal
app = modal.App()
@app.function()
def evaluate_model(x):
...
@app.local_entrypoint()
def main():
inputs = list(range(100))
for result in evaluate_model.map(inputs): # runs many inputs in parallel
...
```
In this example, `evaluate_model` will be called with each of the 100 inputs
(the numbers 0 - 99 in this case) roughly in parallel and the results are
returned as an iterable with the results ordered in the same way as the inputs.
### Exceptions
By default, if any of the function calls raises an exception, the exception will
be propagated. To treat exceptions as successful results and aggregate them in
the results list, pass in
[`return_exceptions=True`](https://modal.com/docs/sdk/py/latest/Function#map).
```python
@app.function()
def my_func(a):
if a == 2:
raise Exception("ohno")
return a ** 2
@app.local_entrypoint()
def main():
print(list(my_func.map(range(3), return_exceptions=True)))
# [0, 1, Exception('ohno'))]
```
### Starmap
If your function takes multiple variable arguments, you can either use
[`Function.map()`](https://modal.com/docs/sdk/py/latest/Function#map) with one input iterator
per argument, or [`Function.starmap()`](https://modal.com/docs/sdk/py/latest/Function#starmap)
with a single input iterator containing sequences (like tuples) that can be
spread over the arguments. This works similarly to Python's built in `map` and
`itertools.starmap`.
```python
@app.function()
def my_func(a, b):
return a + b
@app.local_entrypoint()
def main():
assert list(my_func.starmap([(1, 2), (3, 4)])) == [3, 7]
```
### Gotchas
Note that `.map()` is a method on the modal function object itself, so you don't
explicitly _call_ the function.
Incorrect usage:
```python notest
results = evaluate_model(inputs).map()
```
Modal's map is also not the same as using Python's builtin `map()`. While the
following will technically work, it will execute all inputs in sequence rather
than in parallel.
Incorrect usage:
```python notest
results = map(evaluate_model, inputs)
```
## Asynchronous usage
All Modal APIs are available in both blocking and asynchronous variants. If you
are comfortable with asynchronous programming, you can use it to create
arbitrary parallel execution patterns, with the added benefit that any Modal
functions will be executed remotely. See the [async guide](https://modal.com/docs/guide/async) or
the examples for more information about asynchronous usage.
## GPU acceleration
Sometimes you can speed up your applications by utilizing GPU acceleration. See
the [GPU section](https://modal.com/docs/guide/gpu) for more information.
## Scaling Limits
Modal enforces various platform limits that affect scalability. Limits on the total number of concurrent containers (and the total number of GPUs in concurrent use) depend on your workspace's [plan level](https://modal.com/pricing). There is also a hard limit of 4,000 concurrent containers running for a single Function. Other limits apply at the level of individual inputs and depend on the specific Function [invocation method](https://modal.com/docs/guide/function-invocation-methods).
#### Input concurrency
# Input concurrency
This guide documents the use of the `modal.concurrent` decorator to
process multiple inputs at the same time in a single Modal container.
This page is a high-level guide to input concurrency. For reference documentation
of the `modal.concurrent` decorator, see [this page](https://modal.com/docs/sdk/py/latest/concurrent).
## Overview
As traffic to your application increases, Modal will automatically scale up the
number of containers running your Function:
By default, each container will be assigned one input at a time. Autoscaling
across containers allows your Function to process inputs in parallel. This is
ideal when the operations performed by your Function are CPU-bound.
For some workloads, though, it is inefficient for containers to process inputs
one-by-one. Modal supports these workloads with its _input concurrency_ feature,
which allows individual containers to process multiple inputs at the same time:
When used effectively, input concurrency can reduce latency and lower costs.
## Use cases
Input concurrency can be especially effective for workloads that are primarily
I/O-bound, e.g.:
- Querying a database
- Making external API requests
- Making remote calls to other Modal Functions
For such workloads, individual containers may be able to concurrently process
large numbers of inputs with minimal additional latency. This means that your
Modal application will be more efficient overall, as it won't need to scale
containers up and down as traffic ebbs and flows.
Another use case is to leverage _continuous batching_ on GPU-accelerated
containers. Frameworks such as [vLLM](https://modal.com/docs/examples/llm_inference) can
achieve the benefits of batching across multiple inputs even when those
inputs do not arrive simultaneously (because new batches are formed for each
forward pass of the model).
Note that for CPU-bound workloads, input concurrency will likely not be as
effective (or will even be counterproductive), and you may want to use
Modal's [_dynamic batching_ feature](https://modal.com/docs/guide/dynamic-batching) instead.
## Enabling input concurrency
To enable input concurrency, add the `@modal.concurrent` decorator:
```python
@app.function()
@modal.concurrent(max_inputs=100)
def my_function(input: str):
...
```
When using the class pattern, the decorator should be applied at the level of
the _class_, not on individual methods:
```python
@app.cls()
@modal.concurrent(max_inputs=100)
class MyCls:
@modal.method()
def my_method(self, input: str):
...
```
Because all methods on a class will be served by the same containers, a class
with input concurrency enabled will concurrently run distinct methods in
addition to multiple inputs for the same method.
## Setting a concurrency target
When using the `@modal.concurrent` decorator, you must always configure the
maximum number of inputs that each container will concurrently process. If
demand exceeds this limit, Modal will automatically scale up more containers.
Additional inputs may need to queue up while these additional containers cold
start. To help avoid degraded latency during scaleup, the `@modal.concurrent`
decorator has a separate `target_inputs` parameter. When set, Modal's autoscaler
will aim for this target as it provisions resources. If demand increases faster
than new containers can spin up, the active containers will be allowed to burst
above the target up to the `max_inputs` limit:
```python
@app.function()
@modal.concurrent(max_inputs=96, target_inputs=80) # Allow a 20% burst
def my_function(input: str):
...
```
It may take some experimentation to find the right settings for these parameters
in your particular application. Our suggestion is to set the `target_inputs`
based on your desired latency and the `max_inputs` based on resource constraints
(i.e., to avoid GPU OOM). You may also consider the relative latency cost of
scaling up a new container versus overloading the existing containers.
## Concurrency mechanisms
Modal uses different concurrency mechanisms to execute your Function depending
on whether it is defined as synchronous or asynchronous. Each mechanism imposes
certain requirements on the Function implementation. Input concurrency is an
advanced feature, and it's important to make sure that your implementation
complies with these requirements to avoid unexpected behavior.
For synchronous Functions, Modal will execute concurrent inputs on separate
threads. _This means that the Function implementation must be thread-safe._
```python
# Each container can execute up to 10 inputs in separate threads
@app.function()
@modal.concurrent(max_inputs=10)
def sleep_sync():
# Function must be thread-safe
time.sleep(1)
```
For asynchronous Functions, Modal will execute concurrent inputs using
separate `asyncio` tasks on a single thread. This does not require thread
safety, but it does mean that the Function needs to participate in
collaborative multitasking (i.e., it should not block the event loop).
```python
# Each container can execute up to 10 inputs with separate async tasks
@app.function()
@modal.concurrent(max_inputs=10)
async def sleep_async():
# Function must not block the event loop
await asyncio.sleep(1)
```
## Gotchas
Input concurrency is a powerful feature, but there are a few caveats that can
be useful to be aware of before adopting it.
### Input cancellations
Synchronous and asynchronous Functions handle input cancellations differently.
Modal will raise a `modal.exception.InputCancellation` exception in synchronous
Functions and an `asyncio.CancelledError` in asynchronous Functions.
When using input concurrency with a synchronous Function, a single input
cancellation will terminate the entire container. If your workflow depends on
graceful input cancellations, we recommend using an asynchronous
implementation.
### Concurrent logging
The separate threads or tasks that are executing the concurrent inputs will
write any logs to the same stream. This makes it difficult to associate logs
with a specific input, and filtering for a specific function call in Modal's web
dashboard will show logs for all inputs running at the same time.
To work around this, we recommend including a unique identifier in the messages
you log (either your own identifier or the `modal.current_input_id()`) so that
you can use the search functionality to surface logs for a specific input:
```python
@app.function()
@modal.concurrent(max_inputs=10)
async def better_concurrent_logging(x: int):
logger.info(f"{modal.current_input_id()}: Starting work with {x}")
```
#### Batch processing
# Batch Processing
Modal is optimized for large-scale batch processing, allowing functions to scale to thousands of parallel containers with zero additional configuration. Function calls can be submitted asynchronously for background execution, eliminating the need to wait for jobs to finish or tune resource allocation.
This guide covers Modal's batch processing capabilities, from basic invocation to integration with existing pipelines.
## Background Execution with `.spawn_map`
The fastest way to submit multiple jobs for asynchronous processing is by invoking a Function with `.spawn_map`. When combined with the [`--detach`](https://modal.com/docs/cli/latest/run) flag, your App continues running until all jobs are completed.
Here's an example of submitting 100,000 videos for parallel embedding. You can disconnect after submission, and the processing will continue to completion in the background:
```python
# Kick off asynchronous jobs with `modal run --detach batch_processing.py`
import modal
app = modal.App("batch-processing-example")
volume = modal.Volume.from_name("video-embeddings", create_if_missing=True)
@app.function(volumes={"/data": volume})
def embed_video(video_id: int):
# Business logic:
# - Load the video from the volume
# - Embed the video
# - Save the embedding to the volume
...
@app.local_entrypoint()
def main():
embed_video.spawn_map(range(100_000))
```
This pattern works best for jobs that store results externally—for example, in a [Modal Volume](https://modal.com/docs/guide/volumes), [Cloud Bucket Mount](https://modal.com/docs/guide/cloud-bucket-mounts), or your own database\*.
_\* For database connections, consider using [Modal Proxy](https://modal.com/docs/guide/proxy-ips) to maintain a static IP across thousands of containers._
## Parallel Processing with `.map`
Using `.map` allows you to offload expensive computations to powerful machines while gathering results. This is particularly useful for pipeline steps with bursty resource demands. Modal handles all infrastructure provisioning and de-provisioning automatically.
Here's how to implement parallel video similarity queries as a single Modal Function call:
```python
# Run jobs and collect results with `modal run gather.py`
import modal
app = modal.App("gather-results-example")
@app.function(gpu="L40S")
def compute_video_similarity(query: str, video_id: int) -> tuple[int, int]:
# Embed video with GPU acceleration & compute similarity with query
return video_id, score
@app.local_entrypoint()
def main():
import itertools
queries = itertools.repeat("Modal for batch processing")
video_ids = range(100_000)
for video_id, score in compute_video_similarity.map(queries, video_ids):
# Process results (e.g., extract top 5 most similar videos)
pass
```
This example runs `compute_video_similarity` on an autoscaling pool of L40S GPUs, returning scores to a local process for further processing.
## Integration with Existing Systems
The recommended way to use Modal Functions within your existing data pipeline is through [deployed Function invocation](https://modal.com/docs/guide/trigger-deployed-functions). After deployment, you can call Modal Functions from external systems:
```python
def external_function(inputs):
compute_similarity = modal.Function.from_name(
"gather-results-example",
"compute_video_similarity"
)
for result in compute_similarity.map(inputs):
# Process results
pass
```
You can invoke Modal Functions from any Python context, gaining access to built-in observability, resource management, and GPU acceleration.
#### Job queues
# Job processing
Modal can be used as a scalable job queue to handle asynchronous tasks submitted
from a web app or any other Python application. This allows you to offload up to 1 million
long-running or resource-intensive tasks to Modal, while your main application
remains responsive.
## Creating jobs with .spawn()
The basic pattern for using Modal as a job queue involves three key steps:
1. Defining and deploying the job processing function using `modal deploy`.
2. Submitting a job using
[`modal.Function.spawn()`](https://modal.com/docs/sdk/py/latest/Function#spawn)
3. Polling for the job's result using
[`modal.FunctionCall.get()`](https://modal.com/docs/sdk/py/latest/FunctionCall#get)
Here's a simple example that you can run with `modal run my_job_queue.py`:
```python
# my_job_queue.py
import modal
app = modal.App("my-job-queue")
@app.function()
def process_job(data):
# Perform the job processing here
return {"result": data}
def submit_job(data):
# Since the `process_job` function is deployed, need to first look it up
process_job = modal.Function.from_name("my-job-queue", "process_job")
call = process_job.spawn(data)
return call.object_id
def get_job_result(call_id):
function_call = modal.FunctionCall.from_id(call_id)
try:
result = function_call.get(timeout=5)
except modal.exception.OutputExpiredError:
result = {"result": "expired"}
except TimeoutError:
result = {"result": "pending"}
return result
@app.local_entrypoint()
def main():
data = "my-data"
# Submit the job to Modal
call_id = submit_job(data)
print(get_job_result(call_id))
```
In this example:
- `process_job` is the Modal Function that performs the actual job processing.
To deploy the `process_job` Function on Modal, run
`modal deploy my_job_queue.py`.
- `submit_job` submits a new job by first looking up the deployed `process_job`
Function, then calling `.spawn()` with the job data. It returns the unique ID
of the spawned Function call.
- `get_job_result` attempts to retrieve the result of a previously submitted job
using [`FunctionCall.from_id()`](https://modal.com/docs/sdk/py/latest/FunctionCall#from_id) and
[`FunctionCall.get()`](https://modal.com/docs/sdk/py/latest/FunctionCall#get).
[`FunctionCall.get()`](https://modal.com/docs/sdk/py/latest/FunctionCall#get) waits indefinitely
by default. It takes an optional timeout argument that specifies the maximum
number of seconds to wait, which can be set to 0 to poll for an output
immediately. Here, if the job hasn't completed yet, we return a pending
response.
- The results of a `.spawn()` are accessible via `FunctionCall.get()` for up to
7 days after completion. After this period, we return an expired response.
[Document OCR Web App](https://modal.com/docs/examples/doc_ocr_webapp) is an example that uses
this pattern.
## Integration with web frameworks
You can easily integrate the job queue pattern with web frameworks like FastAPI.
Here's an example, assuming that you have already deployed `process_job` on
Modal with `modal deploy` as above. This example won't work if you haven't
deployed your app yet.
```python
# my_job_queue_endpoint.py
import modal
image = modal.Image.debian_slim().pip_install("fastapi[standard]")
app = modal.App("fastapi-modal", image=image)
@app.function()
@modal.asgi_app()
@modal.concurrent(max_inputs=20)
def fastapi_app():
from fastapi import FastAPI
web_app = FastAPI()
@web_app.post("/submit")
async def submit_job_endpoint(data):
process_job = modal.Function.from_name("my-job-queue", "process_job")
call = await process_job.spawn.aio(data)
return {"call_id": call.object_id}
@web_app.get("/result/{call_id}")
async def get_job_result_endpoint(call_id: str):
function_call = modal.FunctionCall.from_id(call_id)
try:
result = await function_call.get.aio(timeout=0)
except modal.exception.OutputExpiredError:
return fastapi.responses.JSONResponse(content="", status_code=404)
except TimeoutError:
return fastapi.responses.JSONResponse(content="", status_code=202)
return result
return web_app
```
In this example:
- The `/submit` endpoint accepts job data, submits a new job using
`await process_job.spawn.aio()`, and returns the job's ID to the client.
- The `/result/{call_id}` endpoint allows the client to poll for the job's
result using the job ID. If the job hasn't completed yet, it returns a 202
status code to indicate that the job is still being processed. If the job
has expired, it returns a 404 status code to indicate that the job is not found.
You can try this app by serving it with `modal serve`:
```shell
modal serve my_job_queue_endpoint.py
```
Then interact with its endpoints with `curl`:
```shell
# Make a POST request to your app endpoint with.
$ curl -X POST $YOUR_APP_ENDPOINT/submit?data=data
{"call_id":"fc-XXX"}
# Use the call_id value from above.
$ curl -X GET $YOUR_APP_ENDPOINT/result/fc-XXX
```
## Scaling and reliability
Modal automatically scales the job queue based on the workload, spinning up new
instances as needed to process jobs concurrently. It also provides built-in
reliability features like automatic retries and timeout handling.
You can customize the behavior of the job queue by configuring the
`@app.function()` decorator with options like
[`retries`](https://modal.com/docs/guide/retries#function-retries),
[`timeout`](https://modal.com/docs/guide/timeouts#timeouts), and
[`max_containers`](https://modal.com/docs/guide/scale#configuring-autoscaling-behavior).
#### Dynamic batching
# Dynamic batching
Modal's `@batched` feature allows you to accumulate requests
and process them in dynamically-sized batches, rather than one-by-one.
Batching increases throughput at a potential cost to latency.
Batched requests can share resources and reuse work, reducing the time and cost per request.
Batching is particularly useful for GPU-accelerated machine learning workloads,
as GPUs are designed to maximize throughput and are frequently bottlenecked on shareable resources,
like weights stored in memory.
Static batching can lead to unbounded latency, as the function waits for a fixed number of requests to arrive.
Modal's dynamic batching waits for the lesser of a fixed time _or_ a fixed number of requests before executing,
maximizing the throughput benefit of batching while minimizing the latency penalty.
## Enable dynamic batching with `@batched`
To enable dynamic batching, apply the
[`@modal.batched` decorator](https://modal.com/docs/sdk/py/latest/batched) to the target
Python function. Then, wrap it in `@app.function()` and run it on Modal,
and the inputs will be accumulated and processed in batches.
Here's what that looks like:
```python
import modal
app = modal.App()
@app.function()
@modal.batched(max_batch_size=2, wait_ms=1000)
async def batch_add(xs: list[int], ys: list[int]) -> list[int]:
return [x + y for x, y in zip(xs, ys)]
```
When you invoke a function decorated with `@batched`, you invoke it asynchronously on individual inputs.
Outputs are returned where they were invoked.
For instance, the code below invokes the decorated `batch_add` function above three times, but `batch_add`
only executes twice:
```python continuation
@app.local_entrypoint()
async def main():
inputs = [(1, 300), (2, 200), (3, 100)]
async for result in batch_add.starmap.aio(inputs):
print(f"Sum: {result}")
# Sum: 301
# Sum: 202
# Sum: 103
```
The first time it is executed with `xs` batched to `[1, 2]`
and `ys` batched to `[300, 200]`. After about a one second delay, it is executed with `xs`
batched to `[3]` and `ys` batched to `[100]`.
The result is an iterator that yields `301`, `202`, and `103`.
## Use `@batched` with functions that take and return lists
For a Python function to be compatible with `@modal.batched`, it must adhere to
the following rules:
- ** The inputs to the function must be lists. **
In the example above, we pass `xs` and `ys`, which are both lists of `int`s.
- ** The function must return a list**. In the example above, the function returns
a list of sums.
- ** The lengths of all the input lists and the output list must be the same. **
In the example above, if `L == len(xs) == len(ys)`, then `L == len(batch_add(xs, ys))`.
## Modal `Cls` methods are compatible with dynamic batching
Methods on Modal [`Cls`](https://modal.com/docs/guide/lifecycle-functions)es also support dynamic batching.
```python
import modal
app = modal.App()
@app.cls()
class BatchedClass():
@modal.batched(max_batch_size=2, wait_ms=1000)
async def batch_add(self, xs: list[int], ys: list[int]) -> list[int]:
return [x + y for x, y in zip(xs, ys)]
```
One additional rule applies to classes with Batched Methods:
- If a class has a Batched Method, it **cannot have other Batched Methods or [Methods](https://modal.com/docs/sdk/py/latest/method)**.
## Configure the wait time and batch size of dynamic batches
The `@batched` decorator takes in two required configuration parameters:
- `max_batch_size` limits the number of inputs combined into a single batch.
- `wait_ms` limits the amount of time the Function waits for more inputs after
the first input is received.
The first invocation of the Batched Function initiates a new batch, and subsequent
calls add requests to this ongoing batch. If `max_batch_size` is reached,
the batch immediately executes. If the `max_batch_size` is not met but `wait_ms`
has passed since the first request was added to the batch, the unfilled batch is
executed.
### Selecting a batch configuration
To optimize the batching configurations for your application, consider the following heuristics:
- Set `max_batch_size` to the largest value your function can handle, so you
can amortize and parallelize as much work as possible.
- Set `wait_ms` to the difference between your targeted latency and the execution time. Most applications
have a targeted latency, and this allows the latency of any request to stay
within that limit.
## Serve Web Functions with dynamic batching
Here's a simple example of serving a Function that batches requests dynamically
with a [`@modal.fastapi_endpoint`](https://modal.com/docs/guide/webhooks). Run
[`modal serve`](https://modal.com/docs/cli/latest/serve), submit requests to the endpoint,
and the Function will batch your requests on the fly.
```python
import modal
app = modal.App(image=modal.Image.debian_slim().pip_install("fastapi"))
@app.function()
@modal.batched(max_batch_size=2, wait_ms=1000)
async def batch_add(xs: list[int], ys: list[int]) -> list[int]:
return [x + y for x, y in zip(xs, ys)]
@app.function()
@modal.fastapi_endpoint(method="POST", docs=True)
async def add(body: dict[str, int]) -> dict[str, int]:
result = await batch_add.remote.aio(body["x"], body["y"])
return {"result": result}
```
Now, you can submit requests to the Web Function and process them in batches. For instance, the three requests
in the following example, which might be requests from concurrent clients in a real deployment,
will be batched into two executions:
```python notest
import asyncio
import aiohttp
async def send_post_request(session, url, data):
async with session.post(url, json=data) as response:
return await response.json()
async def main():
# Enter the Web Function URL here
url = "https://workspace--app-name-endpoint-name.modal.run"
async with aiohttp.ClientSession() as session:
# Submit three requests asynchronously
tasks = [
send_post_request(session, url, {"x": 1, "y": 300}),
send_post_request(session, url, {"x": 2, "y": 200}),
send_post_request(session, url, {"x": 3, "y": 100}),
]
results = await asyncio.gather(*tasks)
for result in results:
print(f"Sum: {result['result']}")
asyncio.run(main())
```
#### Multi-node clusters (Beta)
# Multi-node clusters
Modal supports running a training job across several coordinated containers. Each container can saturate the available GPU devices on its host (aka node) and communicate with peer containers which do the same. By scaling a training job from a single GPU to 16 GPUs you can achieve nearly 16x improvements in training time.
### Cluster compute capability
Modal clusters provide:
- A 50 Gbps [IPv6 private network](https://modal.com/docs/guide/private-networking) for orchestration, dataset downloading, etc.
- A 3,200 Gbps RDMA scale-out network ([RoCE](https://en.wikipedia.org/wiki/RDMA_over_Converged_Ethernet)).
- Up to 64 devices.
- At least 1 TB of RAM and 4 TB of local NVMe SSD per node.
- Deep burn-in testing.
- Interoperability with all Modal platform functionality ([Volumes](https://modal.com/docs/guide/volumes), [Dicts](https://modal.com/docs/guide/dicts), [Tunnels](https://modal.com/docs/guide/tunnels), etc.).
The guide will walk you through how the Modal client library enables multi-node training and integrates with `torchrun`.
### `@clustered`
Unlike standard Modal Function containers, containers in a multi-node training job must be able to:
1. Perform fast, direct network communication between each other.
2. Be scheduled together, all or nothing, at the same time.
The `@clustered` decorator enables this behavior.
```python
import modal.experimental
@app.function(
gpu="H100:8",
timeout=60 * 60 * 24,
retries=modal.Retries(initial_delay=0.0, max_retries=10),
)
@modal.experimental.clustered(size=4)
def train_model():
cluster_info = modal.experimental.get_cluster_info()
container_rank = cluster_info.rank
world_size = len(cluster_info.container_ips)
main_addr = cluster_info.container_ips[0]
is_main = "(main)" if container_rank == 0 else ""
print(f"{container_rank=} {is_main} {world_size=} {main_addr=}")
...
```
Applying this decorator under `@app.function` modifies the Function so that remote calls to it are serviced by a multi-node container group. The above configuration creates a group of four containers each having 8 H100 GPU devices, for a total of 32 devices.
Starting May 31st, 2026, clustered functions must use the full number of GPU devices per node (e.g. `H100:4` is invalid but `H100:8` is valid). Clustered functions require GPUs, and CPU-only functions are not supported. If you have a special case that does not fall under above and would like to use clustered functions, please contact [support@modal.com](mailto:support@modal.com).
## Scheduling
A `modal.experimental.clustered` Function runs on multiple nodes in our cloud, but executes like a normal function call. For example, all nodes are scheduled together ([gang scheduling](https://en.wikipedia.org/wiki/Gang_scheduling)) so that your code runs on all of the requested hardware or not at all.
Traditionally this kind of cluster and scheduling management would be handled by SLURM, Kubernetes, or manually. But with Modal it's all provided serverlessly with just a Python decorator!
### Rank & input broadcast

You may notice above that a single `.remote` Function call created three input executions but returned only one output. This is how input-output is structured for multi-node training jobs on Modal. The Function call’s arguments are replicated to each container, but only the rank zero container’s is returned to the caller.
A container’s rank is a key concept in multi-node jobs. Rank zero is the 'leader' rank and typically coordinates the job. Rank zero is also known as the "main" container. Rank zero's output will always be the output of a multi-node training run.
## Networking
Function containers cannot normally make direct network connections to other Function containers, but this is a requirement for multi-node training communication. So, along with gang scheduling, the `@clustered` decorator enables Modal’s workspace-private inter-container networking called [i6pn](https://www.notion.so/Multi-node-docs-1281e7f16949806f966adedfe8b2cb74?pvs=21).
The [cluster networking guide](https://modal.com/docs/guide/private-networking) goes into more detail on i6pn, but the upshot is that each container in the cluster is made aware of the network address of all the other containers in the cluster, enabling them to communicate with each other quickly via [TCP](https://pytorch.org/docs/stable/elastic/rendezvous.html).
### RDMA (Infiniband)
Clusters are equipped with Infiniband providing up to 3,200 Gbps scale-out bandwidth for inter-node communication.
RDMA scale-out networking is enabled with the `rdma` parameter of `modal.experimental.clustered`.
```python notest
@modal.experimental.clustered(size=2, rdma=True)
def train():
...
```
To run a simple Infiniband RDMA performance test see the [this sample code](https://github.com/modal-labs/multinode-training-guide/tree/main/benchmark).
## Cluster Info
`modal.experimental.get_cluster_info()` exposes the following information about the cluster:
- `rank: int` is the current container's order within the cluster, starting from `0`, the leader.
- `cluster_id: str` is the unique identifier for the cluster.
- `container_ips: list[str]` contains the IPv6 addresses of each container in the cluster, sorted by rank.
- `container_ipv4_ips: list[str]` contains the IPv4 addresses of each container in the cluster, sorted by rank.
## Fault Tolerance
For a clustered Function, failures in inputs and containers are handled differently.
If an input fails on any container, this failure **is not propagated** to other containers in the cluster. Containers are responsible for detecting and responding to input failures on other containers.
Only rank 0's output matters: if an input fails on the leader container (rank 0), the input is marked as failed, even if the input succeeds on another container. Similarly, if an input succeeds on the leader container but fails on another container, the input will still be marked as successful.
If a container in the cluster is preempted, or if the leader container (rank 0) fails, Modal will terminate all remaining containers in the cluster, and retry the input.
### Input Synchronization
_**Important:**_ synchronization is not relevant for single training runs, and applies mostly to inference use-cases.
Modal does not synchronize input execution across containers. Containers are responsible for ensuring that they do not process inputs faster than other containers in their cluster.
In particular, it is important that the leader container (rank 0) only starts processing the next input after all other containers have finished processing the current input.
## Examples
To get hands-on with multi-node training you can jump into the [`Modal Training Gym`](https://gym.modal.dev), [`multinode-training-guide` repository](https://github.com/modal-labs/multinode-training-guide), or [`modal-examples` repository](https://github.com/modal-labs/modal-examples/tree/main/14_clusters) and `modal run` something!
- [Simple ‘hello world’ 4 x 1 H100 torch cluster example](https://github.com/modal-labs/modal-examples/blob/main/14_clusters/simple_torch_cluster.py)
- [Infiniband RDMA performance test](https://github.com/modal-labs/multinode-training-guide/tree/main/benchmark)
- [Use 2 x 8 H100s to train a ResNet50 model on the ImageNet dataset](https://github.com/modal-labs/multinode-training-guide/tree/main/resnet50)
- [Speedrun GPT-2 training with modded-nanogpt](https://github.com/modal-labs/multinode-training-guide/tree/main/nanoGPT)
### Torchrun Example
```python
import modal
import modal.experimental
image = (
modal.Image.debian_slim(python_version="3.12")
.pip_install("torch~=2.5.1", "numpy~=2.2.1")
.add_local_dir(
"training", remote_path="/root/training"
)
)
app = modal.App("example-simple-torch-cluster", image=image)
n_nodes = 4
@app.function(gpu=f"H100:8", timeout=60 * 60 * 24)
@modal.experimental.clustered(size=n_nodes, rdma=True)
def launch_torchrun():
# import the 'torchrun' interface directly.
from torch.distributed.run import parse_args, run
cluster_info = modal.experimental.get_cluster_info()
run(
parse_args(
[
f"--nnodes={n_nodes}",
f"--node-rank={cluster_info.rank}",
f"--master-addr={cluster_info.container_ips[0]}",
"--nproc-per-node=8",
"--master-port=1234",
"training/train.py",
]
)
)
```
### Deployment
#### Apps, Functions, and entrypoints
# Apps, Functions, and entrypoints
An [`App`](https://modal.com/docs/sdk/py/latest/App) represents an application running on Modal. It groups one or more Functions for atomic deployment and acts as a shared namespace. All Functions and Clses are associated with an
App.
A [`Function`](https://modal.com/docs/sdk/py/latest/Function) acts as an independent unit once it is deployed, and [scales up and down](https://modal.com/docs/guide/scale) independently from other Functions. If there are no live inputs to the Function then by default, no containers will run and your account will not be charged for compute resources, even if the App it belongs to is deployed.
An App can be ephemeral or deployed. You can view a list of all currently running Apps on the [`apps`](https://modal.com/apps) page.
The code for a Modal App defining two separate Functions might look something like this:
```python
import modal
app = modal.App(name="my-modal-app")
@app.function()
def f():
print("Hello world!")
@app.function()
def g():
print("Goodbye world!")
```
## Ephemeral Apps
An ephemeral App is created when you use the
[`modal run`](https://modal.com/docs/cli/latest/run) CLI command, or the
[`app.run`](https://modal.com/docs/sdk/py/latest/App#run) method. This creates a temporary
App that only exists for the duration of your script.
Ephemeral Apps are stopped automatically when the calling program exits, or when
the server detects that the client is no longer connected.
You can use
[`--detach`](https://modal.com/docs/cli/latest/run) in order to keep an ephemeral App running even
after the client exits.
By using `app.run` you can run your Modal Apps from within your Python scripts:
```python
def main():
...
with app.run():
some_modal_function.remote()
```
By default, running your App in this way won't propagate Modal logs and progress bar messages. To enable output, use the [`modal.enable_output`](https://modal.com/docs/sdk/py/latest/enable_output) context manager:
```python
def main():
...
with modal.enable_output():
with app.run():
some_modal_function.remote()
```
## Deployed Apps
A deployed App is created using the [`modal deploy`](https://modal.com/docs/cli/latest/deploy)
CLI command. The App is persisted indefinitely until you stop it via the
[web UI](https://modal.com/apps) or the [`modal app stop`](https://modal.com/docs/cli/latest/app#modal-app-stop) command. Functions in a deployed App that have an attached
[schedule](https://modal.com/docs/guide/cron) will be run on a schedule. Otherwise, you can
invoke them manually using
[Web Functions or Python](https://modal.com/docs/guide/trigger-deployed-functions).
Deployed Apps are named via the [`App`](https://modal.com/docs/sdk/py/latest/App)
constructor. Re-deploying an existing `App` (based on the name) will update it
in place.
## Entrypoints for ephemeral Apps
The code that runs first when you `modal run` an App is called the "entrypoint".
You can register a local entrypoint using the
[`@app.local_entrypoint()`](https://modal.com/docs/sdk/py/latest/App#local_entrypoint)
decorator. You can also use a regular Modal Function as an entrypoint, in which
case only the code in global scope is executed locally.
### Argument parsing
If your entrypoint function takes arguments with primitive types, `modal run`
automatically parses them as CLI options. For example, the following function
can be called with `modal run script.py --foo 1 --bar "hello"`:
```python
# script.py
@app.local_entrypoint()
def main(foo: int, bar: str):
some_modal_function.remote(foo, bar)
```
If you wish to use your own argument parsing library, such as `argparse`, you can instead accept a variable-length argument list for your entrypoint or your function. In this case, Modal skips CLI parsing and forwards CLI arguments as a tuple of strings. For example, the following function can be invoked with `modal run my_file.py --foo=42 --bar="baz"`:
```python
import argparse
@app.function()
def train(*arglist):
parser = argparse.ArgumentParser()
parser.add_argument("--foo", type=int)
parser.add_argument("--bar", type=str)
args = parser.parse_args(args = arglist)
```
### Manually specifying an entrypoint
If there is only one `local_entrypoint` registered,
[`modal run script.py`](https://modal.com/docs/cli/latest/run) will automatically use it. If
you have no entrypoint specified, and just one decorated Modal Function, that
will be used as a remote entrypoint instead. Otherwise, you can direct
`modal run` to use a specific entrypoint.
For example, if you have a function decorated with
[`@app.function()`](https://modal.com/docs/sdk/py/latest/App#function) in your file:
```python
# script.py
@app.function()
def f():
print("Hello world!")
@app.function()
def g():
print("Goodbye world!")
@app.local_entrypoint()
def main():
f.remote()
```
Running [`modal run script.py`](https://modal.com/docs/cli/latest/run) will execute the `main`
function locally, which would call the `f` function remotely. However you can
instead run `modal run script.py::app.f` or `modal run script.py::app.g` to
execute `f` or `g` directly.
## Apps were once Stubs
The `modal.App` class in the client was previously called `modal.Stub`. The
old name was kept as an alias for some time, but from Modal 1.0.0 onwards,
using `modal.Stub` will result in an error.
#### Managing deployments
# Managing deployments
Once you've finished using `modal run` or `modal serve` to iterate on your Modal
code, it's time to deploy. A Modal deployment creates and then persists an
App and its objects, providing the following benefits:
- Repeated executions of the App's Functions will be grouped under the Deployment,
aiding observability and usage tracking. Programmatically triggering lots of
ephemeral App runs can clutter your web and CLI interfaces.
- Function calls are much faster because deployed Functions are persistent and
reused, not created on-demand by calls. Learn how to trigger deployed
Functions in
[Invoking deployed Functions](https://modal.com/docs/guide/trigger-deployed-functions).
- [Scheduled Functions](https://modal.com/docs/guide/cron) will continue scheduling separate from
any local iteration you do, and will notify you on failure.
- [Web Functions](https://modal.com/docs/guide/webhooks) keep running when you close your laptop,
and their URL address matches the deployment name.
## Creating deployments
Deployments are created using the [`modal deploy`](https://modal.com/docs/cli/latest/deploy) command.
```
% modal deploy -m whisper_pod_transcriber.main
✓ Initialized. View app page at https://modal.com/apps/ap-PYc2Tb7JrkskFUI8U5w0KG.
✓ Created objects.
├── 🔨 Created populate_podcast_metadata.
├── 🔨 Mounted /home/ubuntu/whisper_pod_transcriber at /root/whisper_pod_transcriber
├── 🔨 Created fastapi_app => https://modal-labs-whisper-pod-transcriber-fastapi-app.modal.run
├── 🔨 Mounted /home/ubuntu/whisper_pod_transcriber/whisper_frontend/dist at /assets
├── 🔨 Created search_podcast.
├── 🔨 Created refresh_index.
├── 🔨 Created transcribe_segment.
├── 🔨 Created transcribe_episode..
└── 🔨 Created fetch_episodes.
✓ App deployed! 🎉
View Deployment: https://modal.com/apps/modal-labs/whisper-pod-transcriber
```
Running this command on an existing deployment will redeploy the App,
incrementing its version. For detail on how live deployed Apps transition
between versions, see the [Updating deployments](#updating-deployments) section.
Deployments can also be created programmatically using the
[`app.deploy()`](https://modal.com/docs/sdk/py/latest/App#deploy) method in Modal's Python SDK.
## Viewing deployments
Deployments can be viewed in the [web UI](https://modal.com/apps) on an App's "Deployment History"
page, or from the command line using the
[`modal app list`](https://modal.com/docs/cli/latest/app#modal-app-list) command.
### Deployment events on charts
You can overlay deployment history information on your Function's metric charts by enabling
the **Show Deployments** toggle. Each marker represents one or more deployments
that occurred within a time bucket.
Hovering over a marker shows the version number and timestamp of each deployment, plus a link to the full "Deployment History" page.
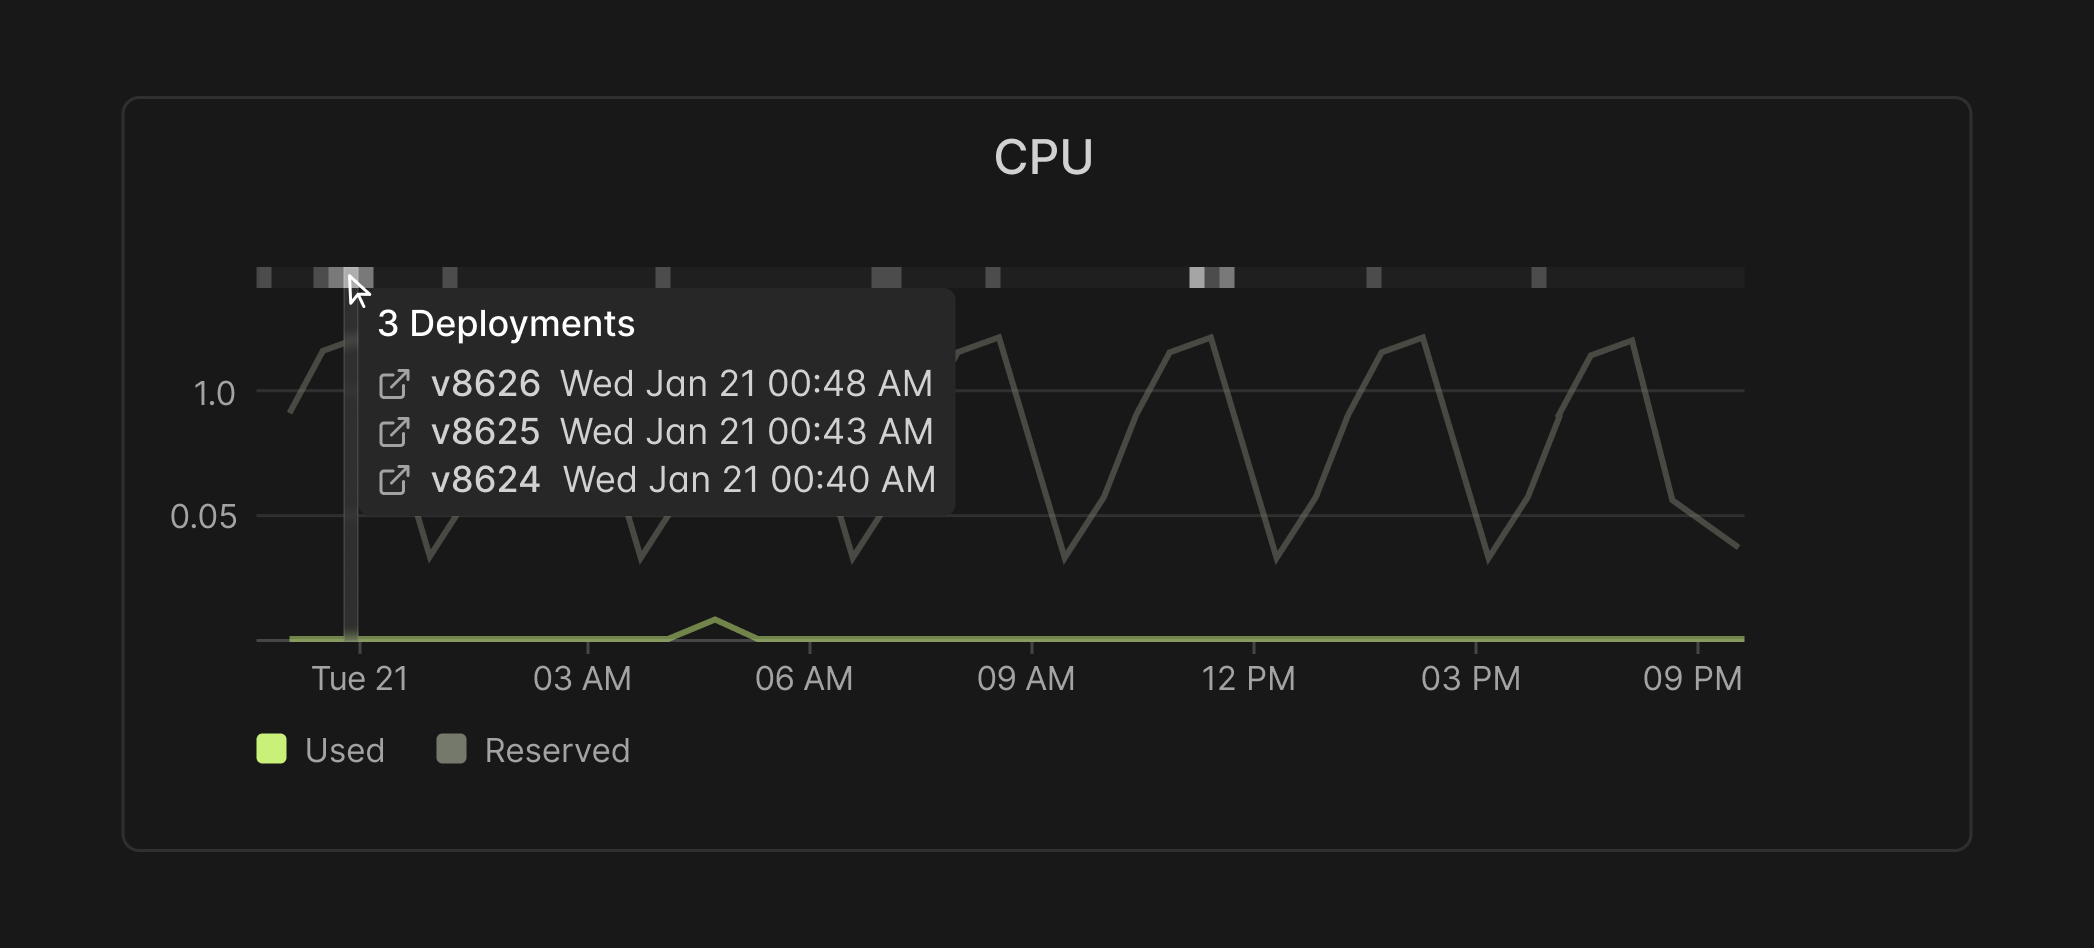
## Updating deployments
A deployment can create a new App or redeploy an existing deployed App with
a new version. It's useful to understand how Modal handles the transition between
versions when an App is redeployed. In general, Modal aims to support
zero-downtime deployments by gradually transitioning traffic to the new version,
but it is also possible to opt into a sharp cutover between versions.
If the deployment involves building new versions of the Images used by the App,
the build process will need to complete successfully before any new containers
are started. The existing version of the App will continue to handle inputs
during this time. Errors during the build will abort the deployment with no
change to the status of the App.
### Deployment strategies
After the build completes, Modal will start to bring up new containers running
the latest version of the App. The exact mechanics depend on the choice of
deployment strategy, configured with `--strategy` in the
[`modal deploy`](https://modal.com/docs/cli/latest/deploy) CLI or `strategy=` in the
[`app.deploy()`](https://modal.com/docs/sdk/py/latest/App#deploy) method.
With the default `rolling` strategy, existing containers will continue handling
inputs (using the previous version of the App) until new containers have
completed their cold start. Traffic will shift over to these new containers as
they come online, but old containers will not shut down until they finish
processing any inputs they were assigned.
With the opt-in `recreate` strategy, the transition between versions will be
more abrupt. Existing containers will be terminated as soon as the new version
is active, and inputs will queue until new containers come online (including
inputs that were running on old containers, which will be retried on new ones).
The `rolling` strategy avoids downtime and is recommended for any production
Apps. The `recreate` strategy is primarily useful during development, because
you can be certain that new containers will be used for any inputs sent after
the deployment command returns.
## No-op deployments and rollovers
The App is the unit of deployment. If nothing in the App configuration has
changed, the deployment command will be a no-op, and the App version will not
increment. However, changes to any Function will cause all Functions to update.
It's possible to cycle the containers serving an App without any changes to the
code or configuration by using the [`modal app
rollover`](https://modal.com/docs/cli/latest/app#modal-app-rollover) command. This may be
necessary if the App depends on a Secret or some other external resource that is
loaded at container startup and has become invalidated. A rollover event will
appear in the deployment history as a new version. As with a normal deployment,
a rollover can be performed with either a `rolling` or `recreate` strategy.
## Deployment rollbacks
Deployment rollbacks are available on the Team and Enterprise plans . Visit workspace settings to upgrade.
To quickly reset an App back to a previous version (e.g., if you discover that a
new version has a serious defect), you can perform a deployment _rollback_.
Rollbacks can be triggered from the Deployment History tab in the App dashboard
or using the [`modal app rollback`](https://modal.com/docs/cli/latest/app#modal-app-rollback)
CLI. Rollback deployments look like new deployments: they increment the version
number and are attributed to the user who triggered the rollback. But the App's
Functions and metadata will be reset to their previous state independently of
your current App codebase.
## Stopping deployments
Deployed Apps can be stopped in the web UI by clicking the red "Stop app" button on
the App's "Overview" page, or alternatively from the command line using the
[`modal app stop`](https://modal.com/docs/cli/latest/app#modal-app-stop) command.
Stopping an App is a destructive action. Apps cannot be restarted from this state;
a new App will need to be deployed from the same source files. Objects associated
with stopped deployments will eventually be garbage collected.
#### Continuous deployment
# Continuous deployment
It's a common pattern to auto-deploy your Modal App as part of a CI/CD pipeline.
To get you started, below is a guide to doing continuous deployment of a Modal
App in GitHub.
## GitHub Actions
Here's a sample GitHub Actions workflow that deploys your App on every push to
the `main` branch.
This requires you to create a [Modal token](https://modal.com/settings/tokens) and add it as a
[secret for your Github Actions workflow](https://docs.github.com/en/actions/how-tos/write-workflows/choose-what-workflows-do/use-secrets).
After setting up secrets, create a new workflow file in your repository at
`.github/workflows/ci-cd.yml` with the following contents:
```yaml
name: CI/CD
on:
push:
branches:
- main
jobs:
deploy:
name: Deploy
runs-on: ubuntu-latest
env:
MODAL_TOKEN_ID: ${{ secrets.MODAL_TOKEN_ID }}
MODAL_TOKEN_SECRET: ${{ secrets.MODAL_TOKEN_SECRET }}
steps:
- name: Checkout Repository
uses: actions/checkout@v6
- name: Install Python
uses: actions/setup-python@v5
with:
python-version: "3.10"
- name: Install Modal
run: |
python -m pip install --upgrade pip
pip install modal
- name: Deploy job
run: |
modal deploy -m my_package.my_file
```
Be sure to replace `my_package.my_file` with your actual entrypoint.
If you use multiple Modal [Environments](https://modal.com/docs/guide/environments), you can
additionally specify the target environment in the YAML using
`MODAL_ENVIRONMENT=xyz`.
#### Scheduled Functions
# Scheduling remote cron jobs
A common requirement is to perform some task at a given time every day or week
automatically. Modal facilitates this through function schedules.
## Basic scheduling
Let's say we have a Python module `heavy.py` with a function,
`perform_heavy_computation()`.
```python
# heavy.py
def perform_heavy_computation():
...
if __name__ == "__main__":
perform_heavy_computation()
```
To schedule this function to run once per day, we create a Modal App and attach
our function to it with the `@app.function` decorator and a schedule parameter:
```python
# heavy.py
import modal
app = modal.App()
@app.function(schedule=modal.Period(days=1))
def perform_heavy_computation():
...
```
To activate the schedule, deploy your App, either through the CLI:
```shell
modal deploy --name daily_heavy heavy.py
```
Or programmatically:
```python
if __name__ == "__main__":
app.deploy()
```
Now the function will run every day, at the time of the initial deployment,
without any further interaction on your part.
When you make changes to your Function, just rerun the deploy command to
overwrite the old deployment.
Note that when you redeploy your Function, `modal.Period` resets, and the
schedule will run X hours after this most recent deployment.
If you want to run your Function at a regular schedule not disturbed by deploys,
`modal.Cron` (see below) is a better option.
## Monitoring your scheduled runs
To see past execution logs for the scheduled Function, go to the
[Apps](https://modal.com/apps) section on the Modal web site.
Schedules currently cannot be paused. Instead the schedule should be removed and
the App redeployed. Schedules can be started manually on the App's dashboard
page, using the "run now" button.
## Schedule types
There are two kinds of base schedule values -
[`modal.Period`](https://modal.com/docs/sdk/py/latest/Period) and
[`modal.Cron`](https://modal.com/docs/sdk/py/latest/Cron).
[`modal.Period`](https://modal.com/docs/sdk/py/latest/Period) lets you specify an interval
between function calls, e.g. `Period(days=1)` or `Period(hours=5)`:
```python
# runs once every 5 hours
@app.function(schedule=modal.Period(hours=5))
def perform_heavy_computation():
...
```
[`modal.Cron`](https://modal.com/docs/sdk/py/latest/Cron) gives you finer control using
[cron](https://en.wikipedia.org/wiki/Cron) syntax:
```python
# runs at 8 am (UTC) every Monday
@app.function(schedule=modal.Cron("0 8 * * 1"))
def perform_heavy_computation():
...
# runs daily at 6 am (New York time)
@app.function(schedule=modal.Cron("0 6 * * *", timezone="America/New_York"))
def send_morning_report():
...
```
For more details, see the API reference for
[Period](https://modal.com/docs/sdk/py/latest/Period), [Cron](https://modal.com/docs/sdk/py/latest/Cron) and
[Function](https://modal.com/docs/sdk/py/latest/Function)
### HTTP Applications
#### Servers
# Servers
Modal Servers are a serverless compute primitive optimized for low-latency HTTP communication between external clients and a process running in a container on Modal.
```python
@app.server(unauthenticated=True)
class Server:
@modal.enter()
def startup(self):
import subprocess
subprocess.Popen("python -m http.server -d / 8000", shell=True)
```
The Modal Server primitive provides the underlying infrastructure for [Endpoints](https://modal.com/docs/guide/endpoints). They can also be deployed directly with fully customized application logic.
Modal Servers share many features with [Modal Functions](https://modal.com/docs/guide/functions). They are members of a Modal App and are [deployed](https://modal.com/docs/guide/managing-deployments) through the normal [`modal deploy`](https://modal.com/docs/cli/latest/deploy) workflow. Server resource configuration has the same [baseline request + burst semantics](https://modal.com/docs/guide/resources) as Functions, and of course they can use [GPUs](https://modal.com/docs/guide/gpu) too. Server containers can [run anywhere](https://modal.com/docs/guide/region-selection) in our global fleet, using [fully customized](https://modal.com/docs/guide/images) Images, and they benefit from the same snappy cold boot performance (including [memory snapshots](https://modal.com/docs/guide/memory-snapshots)). They can mount [Secrets](https://modal.com/docs/guide/secrets) and [Volumes](https://modal.com/docs/guide/volumes) and have a stable [outbound IP address](https://modal.com/docs/guide/proxy-ips).
This is a high-level guide to Modal Servers. For reference documentation, see the [`@app.server()`](https://modal.com/docs/sdk/py/latest/App#server) decorator and [`modal.Server`](https://modal.com/docs/sdk/py/latest/Server) object reference pages.
This guide emphasizes the _differences_ between Servers and Functions. Servers were designed from the ground up to provide ultra-low latency for processes that listen on a port and speak HTTP natively. This motivates some important differences around autoscaling, load-leveling, authentication, and container lifecycle. It also means that Servers lack some operational features of Modal Functions that depend on the stateful Function input system.
## Defining a Server
A Modal Server is defined with a class that uses Modal’s [lifecycle decorators](https://modal.com/docs/guide/lifecycle-functions) on methods that specify container startup (and, optionally, shutdown) logic. The class itself is registered with an App using the `@app.server()` decorator, which takes the main set of Server configuration parameters.
The startup logic must initialize a server process that binds to 0.0.0.0 and listens on a port (`8000` by default).
Unlike a Modal Cls, Server definitions cannot use `@modal.method()` or Web Function decorators like `@modal.fastapi_endpoint`. The request handling is performed by the process listening on the port, not a method on the class.
A Modal Server is most directly analogous to a Modal Function using the `@modal.web_server()` decorator, and most web server Functions can be directly migrated to a Server, so long as the migration accounts for the different behaviors and configuration models discussed in this guide.
Every Server is assigned a URL as its public interface. A Server’s URL can be retrieved programmatically using `modal.Server.get_url()`.
## Concurrency and autoscaling
Modal Function containers process one input at a time unless they explicitly opt into [input concurrency](https://modal.com/docs/guide/concurrent-inputs), and Modal will [autoscale](https://modal.com/docs/guide/scale) additional Function containers to meet demand. Servers invert this: Server processes are expected to handle concurrent requests, and the Server configuration must explicitly opt into container autoscaling when desired.
To enable autoscaling, provide a `target_concurrency=` value in the `@app.server()` decorator. Modal will use this target to manage the Server’s container pool, scaling towards a desired number of containers based on each container’s concurrent request load. Note that it provides only a soft limit. If the Server process cannot handle a given level of request concurrency, the process must perform its own load-leveling or load-shedding.
Servers can use the standard `min_containers=`, `max_containers=`, and `buffer_containers=` parameters to bound the autoscaler or to [keep additional containers warm](https://modal.com/docs/guide/cold-start). They can also use `scaleup_window=` and `scaledown_window=` to tune the autoscaler’s responsiveness to fluctuations in request rates. The Server autoscaling configuration can be dynamically tuned using `modal.Server.update_autoscaler()`. As with Functions, any dynamic configuration will be reset by a subsequent deployment.
If the Server configuration leaves `target_concurrency=` unset but provisions multiple containers via `min_containers=`, requests will be distributed across the pool. If a singleton container is desired, it is preferable to leave `target_concurrency=` unset over setting `max_containers=1`, as the latter will prevent Modal from bringing up a replacement to gracefully shift traffic during a [rolling redeployment](https://modal.com/docs/guide/managing-deployments#deployment-strategies).
## Zero-to-one scaling
Because Servers use a stateless reverse proxy between clients and containers, requests do not queue while waiting for a container like Function inputs would. This has a significant consequence for zero-to-one scaling. When a Server has no active containers, requests will be rejected with a 503 Service Unavailable status, which clients must handle. Zero-to-one scaling is still automatic, so the first request will trigger a container cold start, and the Server will handle additional incoming requests as soon as it is ready.
## Container lifecycle
Server containers are not considered ready until the Server process is listening on the configured port, even if the startup methods have returned. Requests will be sent to other containers (or rejected with a 503) until the container is ready. Containers that do not become ready within `startup_timeout=` seconds will be terminated and marked as failed.
While a Server container is active, Modal will send health checks to verify that its port is still listening. If the container fails too many consecutive health checks, it will be terminated and replaced.
When containers are scaled down, they will stop receiving new requests, but they may continue processing any inflight requests for up to `exit_grace_period=` seconds. Subsequently, the container will be sent a SIGTERM to gracefully terminate all running processes and run any exit handlers (`@modal.exit()`). The process termination and exit handlers are given an additional 30s to complete, after which the container will receive a hard SIGKILL signal if it is still running.
## Request authentication
Unlike Web Functions, Servers require [authentication](https://modal.com/docs/guide/webhook-proxy-auth) in requests by default, and the Server configuration must set `unauthenticated=True` to accept public web traffic. Without this setting, unauthenticated requests will be denied by Modal’s proxy with a 401 code and will not contribute to autoscaler accounting.
To authenticate a request, pass a Proxy Token as a single `Authorization: Bearer wk-.ws-` header, or as separate `Modal-Key` and `Modal-Secret` headers.
For Workspaces with [RBAC](https://modal.com/docs/guide/rbac) enabled, the Proxy Tokens must additionally be scoped to the Environment where the Server’s App is deployed. Valid tokens that are not scoped to the relevant Environment will be denied with a 403 code.
## Request routing
The Server configuration includes a region specification for the proxy that routes requests to containers (`routing_region=`). The following routing regions are supported: `us-east` (default), `us-west`, `ca-central`, `eu-west`, `ap-south`, and `ap-southeast-2`. As a general rule, select the routing region that will be closest to your clients. It’s also possible to constrain container scheduling within the same region using `compute_region=`, although note that this incurs a [cost multiplier](https://modal.com/docs/guide/region-selection#pricing).
The routing proxy additionally supports “sticky sessions”. If requests include a `Modal-Session-ID` header (which can be an arbitrary string), distinct requests that share a session ID will be handled by the same container.
## Operational features
Beyond request queueing, Servers lack several other operational features afforded by the stateful input system used for Modal Functions, and they require the user’s client or server application layer to implement those features when desired. Serialization and deserialization of request data must be handled at the application layer. There are no built-in [retries](https://modal.com/docs/guide/retries) for failed requests (including requests that fail when their container is [preempted](https://modal.com/docs/guide/preemption) or crashes). Request [timeouts](https://modal.com/docs/guide/timeouts) cannot be customized within Modal and must be set by the client or server code.
#### Web Functions
# Web Functions
This guide explains how to set up Web Functions with Modal.
All deployed Modal Functions can be [invoked from any other Python application](https://modal.com/docs/guide/trigger-deployed-functions)
using the Modal client library. We additionally provide multiple ways to expose
your Functions over the web for non-Python clients.
You can [turn any Python function into a Web Function](#simple-endpoints) with a single line
of code, you can [serve a full app](#serving-asgi-and-wsgi-apps) using
frameworks like FastAPI, Django, or Flask, or you can
[serve anything that speaks HTTP and listens on a port](#non-asgi-web-servers).
Below we walk through each method, assuming you're familiar with web applications outside of Modal.
For a detailed walkthrough of basic Web Functions on Modal aimed at developers new to web applications,
see [this tutorial](https://modal.com/docs/examples/basic_web).
## Simple endpoints
The easiest way to make a Python function addressable over the web uses the
[`@modal.fastapi_endpoint` decorator](https://modal.com/docs/sdk/py/latest/fastapi_endpoint):
```python
image = modal.Image.debian_slim().pip_install("fastapi[standard]")
@app.function(image=image)
@modal.fastapi_endpoint()
def f():
return "Hello world!"
```
This decorator wraps the Modal Function in a
[FastAPI application](#how-do-web-functions-run-in-the-cloud).
_Note: Prior to v0.73.82, this function was named `@modal.web_endpoint`_.
### Developing with `modal serve`
You can run this code as an ephemeral App, by running the command
```shell
modal serve server_script.py
```
Where `server_script.py` is the file name of your code. This will create an
ephemeral App for the duration of your script (until you hit Ctrl-C to stop it).
It creates a temporary URL that you can use like any other REST endpoint. This
URL is on the public internet.
The `modal serve` command will live-update an App when any of its supporting
files change.
Live updating is particularly useful when working with apps containing web
endpoints, as any changes made to Web Function handlers will show up almost
immediately, without requiring a manual restart of the app.
### Deploying with `modal deploy`
You can also deploy your App and create a persistent Web Function in the cloud
by running `modal deploy`:
### Passing arguments
When using `@modal.fastapi_endpoint`, you can add
[query parameters](https://fastapi.tiangolo.com/tutorial/query-params/) which
will be passed to your Function as arguments. For instance
```python
image = modal.Image.debian_slim().pip_install("fastapi[standard]")
@app.function(image=image)
@modal.fastapi_endpoint()
def square(x: int):
return {"square": x**2}
```
If you hit this with a URL-encoded query string with the `x` parameter present,
the Function will receive the value as an argument:
```
$ curl https://modal-labs--web-function-square-dev.modal.run?x=42
{"square":1764}
```
If you want to use a `POST` request, you can use the `method` argument to
`@modal.fastapi_endpoint` to set the HTTP verb. To accept any valid JSON object,
[use `dict` as your type annotation](https://fastapi.tiangolo.com/tutorial/body-nested-models/?h=dict#bodies-of-arbitrary-dicts)
and FastAPI will handle the rest.
```python
image = modal.Image.debian_slim().pip_install("fastapi[standard]")
@app.function(image=image)
@modal.fastapi_endpoint(method="POST")
def square(item: dict):
return {"square": item['x']**2}
```
This creates an endpoint that takes a JSON body:
```
$ curl -X POST -H 'Content-Type: application/json' --data-binary '{"x": 42}' https://modal-labs--web-function-square-dev.modal.run
{"square":1764}
```
This is often the easiest way to get started, but note that FastAPI recommends
that you use
[typed Pydantic models](https://fastapi.tiangolo.com/tutorial/body/) in order to
get automatic validation and documentation. FastAPI also lets you pass data to
Web Functions in other ways, for instance as
[form data](https://fastapi.tiangolo.com/tutorial/request-forms/) and
[file uploads](https://fastapi.tiangolo.com/tutorial/request-files/).
## How do Web Functions run in the cloud?
Note that Web Functions, like everything else on Modal, only run when they need
to. When you hit the URL the first time, it will boot up the container,
which might take a few seconds. Modal keeps the container alive for a short
period in case there are subsequent requests. If there are a lot of requests,
Modal might scale up more containers running in parallel.
For the shortcut `@modal.fastapi_endpoint` decorator, Modal wraps your function in a
[FastAPI](https://fastapi.tiangolo.com/) application. This means that the
[Image](https://modal.com/docs/guide/images)
your Function uses must have FastAPI installed, and the Functions that you write
need to follow its request and response
[semantics](https://fastapi.tiangolo.com/tutorial). Web Functions can use
all of FastAPI's powerful features, such as Pydantic models for automatic validation,
typed query and path parameters, and response types.
Here's everything together, combining Modal's abilities to run functions in
user-defined containers with the expressivity of FastAPI:
```python
import modal
from fastapi.responses import HTMLResponse
from pydantic import BaseModel
image = modal.Image.debian_slim().pip_install("fastapi[standard]", "boto3")
app = modal.App(image=image)
class Item(BaseModel):
name: str
qty: int = 42
@app.function()
@modal.fastapi_endpoint(method="POST")
def f(item: Item):
import boto3
# do things with boto3...
return HTMLResponse(f"Hello, {item.name}!")
```
This Function would be called like so:
```bash
curl -d '{"name": "Erik", "qty": 10}' \
-H "Content-Type: application/json" \
-X POST https://ecorp--web-demo-f-dev.modal.run
```
Or in Python with the [`requests`](https://pypi.org/project/requests/) library:
```python
import requests
data = {"name": "Erik", "qty": 10}
requests.post("https://ecorp--web-demo-f-dev.modal.run", json=data, timeout=10.0)
```
## Serving ASGI and WSGI apps
You can also serve any app written in an
[ASGI](https://asgi.readthedocs.io/en/latest/) or
[WSGI](https://en.wikipedia.org/wiki/Web_Server_Gateway_Interface)-compatible
web framework on Modal.
ASGI provides support for async web frameworks. WSGI provides support for
synchronous web frameworks.
### ASGI apps - FastAPI, FastHTML, Starlette
For ASGI apps, you can create a function decorated with
[`@modal.asgi_app`](https://modal.com/docs/sdk/py/latest/asgi_app) that returns a reference to
your web app:
```python
image = modal.Image.debian_slim().pip_install("fastapi[standard]")
@app.function(image=image)
@modal.concurrent(max_inputs=100)
@modal.asgi_app()
def fastapi_app():
from fastapi import FastAPI, Request
web_app = FastAPI()
@web_app.post("/echo")
async def echo(request: Request):
body = await request.json()
return body
return web_app
```
Now, as before, when you deploy this script as a Modal App, you get a URL for
your app that you can hit:
The `@modal.concurrent` decorator enables a single container
to process multiple inputs at once, taking advantage of the asynchronous
event loops in ASGI applications. See [this guide](https://modal.com/docs/guide/concurrent-inputs)
for details.
#### ASGI Lifespan
While we recommend using [`@modal.enter`](https://modal.com/docs/guide/lifecycle-functions#enter) for defining container lifecycle hooks, we also support the [ASGI lifespan protocol](https://asgi.readthedocs.io/en/latest/specs/lifespan.html). Lifespans begin when containers start, typically at the time of the first request. Here's an example using [FastAPI](https://fastapi.tiangolo.com/advanced/events/#lifespan):
```python
import modal
app = modal.App("fastapi-lifespan-app")
image = modal.Image.debian_slim().pip_install("fastapi[standard]")
@app.function(image=image)
@modal.asgi_app()
def fastapi_app_with_lifespan():
from fastapi import FastAPI, Request
def lifespan(wapp: FastAPI):
print("Starting")
yield
print("Shutting down")
web_app = FastAPI(lifespan=lifespan)
@web_app.get("/")
async def hello(request: Request):
return "hello"
return web_app
```
### WSGI apps - Django, Flask
You can serve WSGI apps using the
[`@modal.wsgi_app`](https://modal.com/docs/sdk/py/latest/wsgi_app) decorator:
```python
image = modal.Image.debian_slim().pip_install("flask")
@app.function(image=image)
@modal.concurrent(max_inputs=100)
@modal.wsgi_app()
def flask_app():
from flask import Flask, request
web_app = Flask(__name__)
@web_app.post("/echo")
def echo():
return request.json
return web_app
```
See [Flask's docs](https://flask.palletsprojects.com/en/2.1.x/deploying/asgi/)
for more information on using Flask as a WSGI app.
Because WSGI apps are synchronous, concurrent inputs will be run on separate
threads. See [this guide](https://modal.com/docs/guide/concurrent-inputs) for details.
## Non-ASGI web servers
Not all web frameworks offer an ASGI or WSGI interface. For example,
[`aiohttp`](https://docs.aiohttp.org/) and [`tornado`](https://www.tornadoweb.org/)
use their own asynchronous network binding, while others like
[`text-generation-inference`](https://github.com/huggingface/text-generation-inference)
actually expose a Rust-based HTTP server running as a subprocess.
For these cases, you can use the
[`@modal.web_server`](https://modal.com/docs/sdk/py/latest/web_server) decorator to "expose" a
port on the container:
```python
@app.function()
@modal.concurrent(max_inputs=100)
@modal.web_server(8000)
def my_file_server():
import subprocess
subprocess.Popen("python -m http.server -d / 8000", shell=True)
```
Just like all Functions on Modal, this is only run on-demand. The function is
executed on container startup, creating a file server at the root directory.
When you hit the URL, your request will be routed to the file server listening on
port `8000`.
For `@modal.web_server` Functions, you need to make sure that the application binds to
the external network interface, not just localhost. This usually means binding
to `0.0.0.0` instead of `127.0.0.1`.
See, for instance, our examples of how to serve [Streamlit](https://modal.com/docs/examples/serve_streamlit) and
[vLLM](https://modal.com/docs/examples/vllm_inference) on Modal.
## Serve many configurations with parametrized functions
Python functions that launch ASGI/WSGI apps or web servers on Modal
cannot take arguments.
One simple pattern for allowing client-side configuration is to use
[Parametrized Functions](https://modal.com/docs/guide/parametrized-functions). Each different
choice for the values of the parameters will create a distinct auto-scaling
container pool.
```python
@app.cls()
@modal.concurrent(max_inputs=100)
class Server:
root: str = modal.parameter(default=".")
@modal.web_server(8000)
def files(self):
import subprocess
subprocess.Popen(f"python -m http.server -d {self.root} 8000", shell=True)
```
The values are provided in URLs as query parameters:
```bash
curl https://ecorp--server-files.modal.run # use the default value
curl https://ecorp--server-files.modal.run?root=.cache # use a different value
curl https://ecorp--server-files.modal.run?root=%2F # don't forget to URL encode!
```
For details, see [this guide to parametrized functions](https://modal.com/docs/guide/parametrized-functions).
## WebSockets
Functions annotated with `@modal.web_server`, `@modal.asgi_app`, or `@modal.wsgi_app` also support
the WebSocket protocol. Consult your web framework for appropriate documentation
on how to use WebSockets with that library.
WebSockets on Modal maintain a single function call per connection, which can be
useful for keeping state around. Most of the time, you will want to set your
handler function to [allow concurrent inputs](https://modal.com/docs/guide/concurrent-inputs),
which allows multiple simultaneous WebSocket connections to be handled by the
same container.
We support the full WebSocket protocol as per
[RFC 6455](https://www.rfc-editor.org/rfc/rfc6455), but we do not yet have
support for [RFC 8441](https://www.rfc-editor.org/rfc/rfc8441) (WebSockets over
HTTP/2) or [RFC 7692](https://datatracker.ietf.org/doc/html/rfc7692)
(`permessage-deflate` extension). WebSocket messages can be up to 2 MiB each.
## Performance and scaling
If you have no active containers when the Web Function receives a request, it will
experience a "cold start". Consult the guide page on
[cold start performance](https://modal.com/docs/guide/cold-start) for more information on when
Functions will cold start and advice how to mitigate the impact.
If your Function uses `@modal.concurrent`, multiple requests to the same
URL may be handled by the same container. Beyond this limit, additional
containers will start up to scale your App horizontally. When you reach the
Function's limit on containers, requests will queue for handling.
Each workspace on Modal has a rate limit on total operations. For a new account,
this is set to 200 Function calls or HTTP requests per second, with a
burst multiplier of 5 seconds. If you reach the rate limit, excess requests will return a
[429 status code](https://developer.mozilla.org/en-US/docs/Web/HTTP/Status/429),
and you'll need to [get in touch](mailto:support@modal.com) with us about
raising the limit.
Web Function request bodies can be up to 4 GiB, and their response bodies are
unlimited in size.
## Authentication
Modal offers first-class Web Function protection via [proxy
tokens](https://modal.com/docs/guide/webhook-proxy-auth). Proxy tokens
protect Web Functions by requiring a key and secret combination to be passed in
the `Modal-Key` and `Modal-Secret` headers. Modal works as a proxy, rejecting
requests that aren't authorized to access your endpoint.
We also support conventional techniques for securing web servers.
### Token-based authentication
This is easy to implement in whichever framework you're using. For example, if
you're using `@modal.fastapi_endpoint` or `@modal.asgi_app` with FastAPI, you
can validate a Bearer token like this:
```python
from fastapi import Depends, HTTPException, status, Request
from fastapi.security import HTTPBearer, HTTPAuthorizationCredentials
import modal
image = modal.Image.debian_slim().pip_install("fastapi[standard]")
app = modal.App("auth-example", image=image)
auth_scheme = HTTPBearer()
@app.function(secrets=[modal.Secret.from_name("my-web-auth-token")])
@modal.fastapi_endpoint()
async def f(request: Request, token: HTTPAuthorizationCredentials = Depends(auth_scheme)):
import os
print(os.environ["AUTH_TOKEN"])
if token.credentials != os.environ["AUTH_TOKEN"]:
raise HTTPException(
status_code=status.HTTP_401_UNAUTHORIZED,
detail="Incorrect bearer token",
headers={"WWW-Authenticate": "Bearer"},
)
# Function body
return "success!"
```
This assumes you have a [Modal Secret](https://modal.com/secrets) named
`my-web-auth-token` created, with contents `{AUTH_TOKEN: secret-random-token}`.
Now, the URL will return a 401 status code, except when you hit it with the
correct `Authorization` header set (note that you have to prefix the token with
`Bearer `):
```bash
curl --header "Authorization: Bearer secret-random-token" https://modal-labs--auth-example-f.modal.run
```
### Client IP address
You can access the IP address of the client making the request. This can be used
for geolocation, whitelists, blacklists, and rate limits.
```python
from fastapi import Request
import modal
image = modal.Image.debian_slim().pip_install("fastapi[standard]")
app = modal.App(image=image)
@app.function()
@modal.fastapi_endpoint()
def get_ip_address(request: Request):
return f"Your IP address is {request.client.host}"
```
#### Streaming endpoints
# Streaming endpoints
Modal `fastapi_endpoint`s support streaming responses using FastAPI's
[`StreamingResponse`](https://fastapi.tiangolo.com/advanced/custom-response/#streamingresponse)
class. This class accepts asynchronous generators, synchronous generators, or
any Python object that implements the
[_iterator protocol_](https://docs.python.org/3/library/stdtypes.html#typeiter),
and can be used with Modal Functions!
## Simple example
This simple example combines Modal's `@modal.fastapi_endpoint` decorator with a
`StreamingResponse` object to produce a real-time SSE response.
```python
import time
def fake_event_streamer():
for i in range(10):
yield f"data: some data {i}\n\n".encode()
time.sleep(0.5)
@app.function(image=modal.Image.debian_slim().pip_install("fastapi[standard]"))
@modal.fastapi_endpoint()
def stream_me():
from fastapi.responses import StreamingResponse
return StreamingResponse(
fake_event_streamer(), media_type="text/event-stream"
)
```
If you serve this Web Function and hit it with `curl`, you will see the ten SSE
events progressively appear in your terminal over a ~5 second period.
```shell
curl --no-buffer https://modal-labs--example-streaming-stream-me.modal.run
```
The MIME type of `text/event-stream` is important in this example, as it tells
the downstream web server to return responses immediately, rather than buffering
them in byte chunks (which is more efficient for compression).
You can still return other content types like large files in streams, but they
are not guaranteed to arrive as real-time events.
## Streaming responses with `.remote`
A Modal Function wrapping a generator function body can have its response passed
directly into a `StreamingResponse`. This is particularly useful if you want to
do some GPU processing in one Modal Function that is called by a CPU-based web
endpoint Modal Function.
```python
@app.function(gpu="any")
def fake_video_render():
for i in range(10):
yield f"data: finished processing some data from GPU {i}\n\n".encode()
time.sleep(1)
@app.function(image=modal.Image.debian_slim().pip_install("fastapi[standard]"))
@modal.fastapi_endpoint()
def hook():
from fastapi.responses import StreamingResponse
return StreamingResponse(
fake_video_render.remote_gen(), media_type="text/event-stream"
)
```
## Streaming responses with `.map` and `.starmap`
You can also combine Modal Function parallelization with streaming responses,
enabling applications to service a request by farming out to dozens of
containers and iteratively returning result chunks to the client.
```python
@app.function()
def map_me(i):
return f"segment {i}\n"
@app.function(image=modal.Image.debian_slim().pip_install("fastapi[standard]"))
@modal.fastapi_endpoint()
def mapped():
from fastapi.responses import StreamingResponse
return StreamingResponse(map_me.map(range(10)), media_type="text/plain")
```
This snippet will spread the ten `map_me(i)` executions across containers, and
return each string response part as it completes. By default the results will be
ordered, but if this isn't necessary pass `order_outputs=False` as keyword
argument to the `.map` call.
### Asynchronous streaming
The example above uses a synchronous generator, which automatically runs on its
own thread, but in asynchronous applications, a loop over a `.map` or `.starmap`
call can block the event loop. This will stop the `StreamingResponse` from
returning response parts iteratively to the client.
To avoid this, you can use the `.aio()` method to convert a synchronous `.map`
into its async version. Also, other blocking calls should be offloaded to a
separate thread with `asyncio.to_thread()`. For example:
```python
@app.function(gpu="any", image=modal.Image.debian_slim().pip_install("fastapi[standard]"))
@modal.fastapi_endpoint()
async def transcribe_video(request):
from fastapi.responses import StreamingResponse
segments = await asyncio.to_thread(split_video, request)
return StreamingResponse(wrapper(segments), media_type="text/event-stream")
# Notice that this is an async generator.
async def wrapper(segments):
async for partial_result in transcribe_video.map.aio(segments):
yield "data: " + partial_result + "\n\n"
```
## Further examples
- Complete code for the simple examples given above is available
[in our modal-examples Github repository](https://github.com/modal-labs/modal-examples/blob/main/07_web_endpoints/streaming.py).
- [An end-to-end example of streaming Youtube video transcriptions with OpenAI's whisper model.](https://github.com/modal-labs/modal-examples/blob/main/06_gpu_and_ml/openai_whisper/streaming/main.py)
#### Web Function URLs
# Web Function URLs
This guide documents the behavior of URLs for [Web Functions](https://modal.com/docs/guide/webhooks)
on Modal: automatic generation, configuration, programmatic retrieval, and more.
## Determine the Web Function URL from code
Modal Functions with the
[`fastapi_endpoint`](https://modal.com/docs/sdk/py/latest/fastapi_endpoint),
[`asgi_app`](https://modal.com/docs/sdk/py/latest/asgi_app),
[`wsgi_app`](https://modal.com/docs/sdk/py/latest/wsgi_app),
or [`web_server`](https://modal.com/docs/sdk/py/latest/web_server) decorator
are made available over the Internet when they are
[`serve`d](https://modal.com/docs/cli/latest/serve) or [`deploy`ed](https://modal.com/docs/cli/latest/deploy)
and so they have a URL.
This URL is displayed in the `modal` CLI output
and is available in the Modal [dashboard](https://modal.com/apps) for the Function.
To determine a Function's URL programmatically,
check its [`get_web_url()`](https://modal.com/docs/sdk/py/latest/Function#get_web_url)
property:
```python
@app.function(image=modal.Image.debian_slim().pip_install("fastapi[standard]"))
@modal.fastapi_endpoint(docs=True)
def show_url() -> str:
return show_url.get_web_url()
```
For deployed Functions, this also works from other Python code!
You just need to do a [`from_name`](https://modal.com/docs/sdk/py/latest/Function#from_name)
based on the name of the Function and its [App](https://modal.com/docs/guide/apps):
```python notest
import requests
remote_function = modal.Function.from_name("app", "show_url")
remote_function.get_web_url() == requests.get(handle.get_web_url()).json()
```
## Auto-generated URLs
By default, Modal Functions
will be served from the `modal.run` domain.
The full URL will be constructed from a number of pieces of information
to uniquely identify the endpoint.
At a high-level, Web Function URLs for deployed Apps have the
following structure: `https://--.modal.run`.
The `source` component represents the Workspace and Environment where the App is
deployed. If your Workspace has only a single Environment, the `source` will
just be the Workspace name. Multiple Environments are disambiguated by an
["Environment suffix"](https://modal.com/docs/guide/environments#environment-web-suffixes), so
the full source would be `-`. However, one Environment per
Workspace is allowed to have a null suffix, in which case the source would just
be ``.
The `label` component represents the specific App and Function that the URL
routes to. By default, these are concatenated with a hyphen, so the label would
be `-`.
These components are normalized to contain only lowercase letters, numerals, and dashes.
To put this all together, consider the following example. If a member of the
`ECorp` Workspace uses the `main` Environment (which has `prod` as its web
suffix) to deploy the `text_to_speech` App with a webhook for the `flask-app`
Function, the URL will have the following components:
- _Source_:
- _Workspace name slug_: `ECorp` → `ecorp`
- _Environment web suffix slug_: `main` → `prod`
- _Label_:
- _App name slug_: `text_to_speech` → `text-to-speech`
- _Function name slug_: `flask_app` → `flask-app`
The full URL will be `https://ecorp-prod--text-to-speech-flask-app.modal.run`.
## User-specified labels
It's also possible to customize the `label` used for each Function
by passing a parameter to the relevant Web Function decorator:
```python
import modal
image = modal.Image.debian_slim().pip_install("fastapi")
app = modal.App(name="text_to_speech", image=image)
@app.function()
@modal.fastapi_endpoint(label="speechify")
def web_endpoint_handler():
...
```
Building on the example above, this code would produce the following URL:
`https://ecorp-prod--speechify.modal.run`.
User-specified labels are not automatically normalized, but labels with
invalid characters will be rejected.
## Ephemeral Apps
To support development workflows, webhooks for ephemeral Apps (i.e., Apps
created with `modal serve`) will have a `-dev` suffix appended to their URL
label (regardless of whether the label is auto-generated or user-specified).
This prevents development work from interfering with deployed versions of the
same App.
If an ephemeral App is serving a Web Function while another ephemeral App
is created seeking the same label, the new Function will _steal_ the running
Function's label.
This ensures that the latest iteration of the ephemeral Function is
serving requests and that older ones stop receiving web traffic.
## Truncation
If a generated subdomain label is longer than 63 characters, it will be
truncated.
For example, the following subdomain label is too long, 67 characters:
`ecorp--text-to-speech-really-really-realllly-long-function-name-dev`.
The truncation happens by calculating a SHA-256 hash of the overlong label, then
taking the first 6 characters of this hash. The overlong subdomain label is
truncated to 56 characters, and then joined by a dash to the hash prefix. In
the above example, the resulting URL would be
`ecorp--text-to-speech-really-really-rea-1b964b-dev.modal.run`.
The combination of the label hashing and truncation provides a unique list of 63
characters, complying with both DNS system limits and uniqueness requirements.
## Custom domains
Custom domains are available on the Team and Enterprise plans . Visit Workspace settings to upgrade.
For more customization, you can use your own domain names with Web Functions.
If your [plan](https://modal.com/pricing) supports custom domains, visit the [Custom Domains
tab](https://modal.com/settings/custom-domains) in your Workspace settings to add a domain name to your
Workspace.
You can use three kinds of domains with Modal:
- **Apex:** root domain names like `example.com`
- **Subdomain:** single subdomain entries such as `my-app.example.com`,
`api.example.com`, etc.
- **Wildcard domain:** either in a subdomain like `*.example.com`, or in a
deeper level like `*.modal.example.com`
Adding a custom domain does not disable the auto-generated .modal.run URL. Both the custom domain and the original URL will continue to work.
You'll be asked to update your domain DNS records with your domain name
registrar and then validate the configuration in Modal. Once the records have
been properly updated and propagated, your custom domain will be ready to use.
You can assign any Modal Web Function to any registered domain in your Workspace
with the `custom_domains` argument.
```python
import modal
app = modal.App("custom-domains-example")
@app.function()
@modal.fastapi_endpoint(custom_domains=["api.example.com"])
def hello(message: str):
return {"message": f"hello {message}"}
```
You can then run `modal deploy` to put your Web Functions online, live.
```shell
$ curl -s https://api.example.com?message=world
{"message": "hello world"}
```
Note that Modal automatically generates and renews TLS certificates for your
custom domains. Since we do this when your domain is first accessed, there may
be an additional 1-2s latency on the first request. Additional requests use a
cached certificate.
You can also register multiple domain names and associate them with the same Web
Function.
```python
import modal
app = modal.App("custom-domains-example-2")
@app.function()
@modal.fastapi_endpoint(custom_domains=["api.example.com", "api.example.net"])
def hello(message: str):
return {"message": f"hello {message}"}
```
For **Wildcard** domains, Modal will automatically resolve arbitrary custom
endpoints (and issue TLS certificates). For example, if you add the wildcard
domain `*.example.com`, then you can create any custom domains under
`example.com`:
```python
import random
import modal
app = modal.App("custom-domains-example-2")
random_domain_name = random.choice(range(10))
@app.function()
@modal.fastapi_endpoint(custom_domains=[f"{random_domain_name}.example.com"])
def hello(message: str):
return {"message": f"hello {message}"}
```
Custom domains can also be used with
[ASGI](https://modal.com/docs/sdk/py/latest/asgi_app) or
[WSGI](https://modal.com/docs/sdk/py/latest/wsgi_app) apps using the same
`custom_domains` argument.
#### Request timeouts
# Request timeouts
Web Function requests should complete quickly, ideally within a
few seconds. All Web Function types
([`modal.fastapi_endpoint`](https://modal.com/docs/sdk/py/latest/fastapi_endpoint),
[`modal.asgi_app`](https://modal.com/docs/sdk/py/latest/asgi_app),
[`modal.wsgi_app`](https://modal.com/docs/sdk/py/latest/wsgi_app),
and [`modal.web_server`](https://modal.com/docs/sdk/py/latest/web_server))
have a maximum HTTP request timeout of 150 seconds enforced. However, the
underlying Modal Function can have a longer [timeout](https://modal.com/docs/guide/timeouts).
In case the Function takes more than 150 seconds to complete, an HTTP status 303
redirect response is returned pointing at the original URL with a special query
parameter linking it that request. This is the _result URL_ for your function.
Most web browsers allow for up to 20 such redirects, effectively allowing up to
50 minutes (20 \* 150 s) for Web Functions before the request times out.
(**Note:** This does not work with requests that require
[CORS](https://developer.mozilla.org/en-US/docs/Web/HTTP/CORS), since the
response will not have been returned from your code in time for the server to
populate CORS headers.)
Some libraries and tools might require you to add a flag or option in order to
follow redirects automatically, e.g. `curl -L ...` or `http --follow ...`.
The _result URL_ can be reloaded without triggering a new request. It will block
until the request completes.
(**Note:** As of March 2025, the Python standard library's `urllib` module has the
maximum number of redirects to any single URL set to 4 by default ([source](https://github.com/python/cpython/blob/main/Lib/urllib/request.py)), which would limit the total timeout to 12.5 minutes (5 \* 150 s = 750 s) unless this setting is overridden.)
## Polling solutions
Sometimes it can be useful to be able to poll for results rather than wait for a
long running HTTP request. The easiest way to do this is to have your web
endpoint spawn a `modal.Function` call and return the function call id that
another endpoint can use to poll the submitted function's status. Here is an
example:
```python
import fastapi
import modal
image = modal.Image.debian_slim().pip_install("fastapi[standard]")
app = modal.App(image=image)
web_app = fastapi.FastAPI()
@app.function()
@modal.asgi_app()
def fastapi_app():
return web_app
@app.function()
def slow_operation():
...
@web_app.post("/accept")
async def accept_job(request: fastapi.Request):
call = slow_operation.spawn()
return {"call_id": call.object_id}
@web_app.get("/result/{call_id}")
async def poll_results(call_id: str):
function_call = modal.FunctionCall.from_id(call_id)
try:
return function_call.get(timeout=0)
except TimeoutError:
http_accepted_code = 202
return fastapi.responses.JSONResponse({}, status_code=http_accepted_code)
```
[_Document OCR Web App_](https://modal.com/docs/examples/doc_ocr_webapp) is an example that uses
this pattern.
#### Proxy Tokens
# Proxy Tokens
Use Proxy Tokens to prevent unauthorized clients from reaching your [Endpoints](https://modal.com/docs/guide/endpoints), [Servers](https://modal.com/docs/guide/servers), and [Web Functions](https://modal.com/docs/guide/webhooks). Proxy Tokens can be created in the [Dashboard settings](https://modal.com/settings/proxy-auth-tokens) or with the [`modal workspace proxy-tokens`](https://modal.com/docs/cli/latest/workspace#modal-workspace-proxy-tokens) CLI.
## Authentication models
Endpoints and Servers require authentication by default. To accept public traffic instead, pass `--unauthenticated` to `modal endpoint create` or set `unauthenticated=True` in the [`@app.server()`](https://modal.com/docs/sdk/py/latest/App#server) decorator:
```python notest
@app.server()
class Private:
...
@app.server(unauthenticated=True)
class Public:
...
```
In contrast, Web Functions are **publicly available** by default. Enable authentication by setting `requires_proxy_auth=True` in the [`fastapi_endpoint`](https://modal.com/docs/sdk/py/latest/fastapi_endpoint), [`asgi_app`](https://modal.com/docs/sdk/py/latest/asgi_app), [`wsgi_app`](https://modal.com/docs/sdk/py/latest/wsgi_app), or [`web_server`](https://modal.com/docs/sdk/py/latest/web_server) decorators:
```python
@app.function()
@modal.fastapi_endpoint()
def public():
return "hello world"
@app.function()
@modal.fastapi_endpoint(requires_proxy_auth=True)
def private():
return "hello friend"
```
The `public` endpoint can be hit by any client over the Internet:
```bash
curl https://public-url--goes-here.modal.run
```
The `private` endpoint cannot:
```bash
curl --fail-with-body https://private-url--goes-here.modal.run
# modal-http: missing credentials for proxy authorization
# curl: (22) The requested URL returned error: 401
# https://developer.mozilla.org/en-US/docs/Web/HTTP/Status/401
```
## Authenticating requests
A Proxy Token comprises a Token ID / Token Secret pair. Requests are authenticated by passing the pair in HTTP headers. They can be sent as separate `Modal-Key` and `Modal-Secret` headers:
```bash
export TOKEN_ID=wk-1234abcd
export TOKEN_SECRET=ws-1234abcd
curl -H "Modal-Key: $TOKEN_ID" \
-H "Modal-Secret: $TOKEN_SECRET" \
https://private-url--goes-here.modal.run
```
Alternatively, they can be joined with a period (`.`) and passed as a single `Authorization: Bearer` header:
```bash
export TOKEN_ID=wk-1234abcd
export TOKEN_SECRET=ws-1234abcd
curl -H "Authorization: Bearer $TOKEN_ID.$TOKEN_SECRET" \
https://private-url--goes-here.modal.run
```
This is the same scheme the OpenAI API uses (`Authorization: Bearer `), so the combined value can be used as the API key in any OpenAI-compatible client or gateway.
## Environment scoping
On Workspaces with RBAC enabled, tokens are scoped to specific Environments. See the [RBAC guide](https://modal.com/docs/guide/rbac#proxy-tokens) for more information.
### Networking
#### Tunnels
# Tunnels
Modal allows you to expose live TCP ports on a Modal container. This is done by
creating a _tunnel_ that forwards the port to the public Internet.
```python
import modal
app = modal.App()
@app.function()
def start_app():
# Inside this `with` block, port 8000 on the container can be accessed by
# the address at `tunnel.url`, which is randomly assigned.
with modal.forward(8000) as tunnel:
print(f"tunnel.url = {tunnel.url}")
print(f"tunnel.tls_socket = {tunnel.tls_socket}")
# ... start some web server at port 8000, using any framework
```
Tunnels are direct connections and terminate TLS automatically. Within a few
milliseconds of container startup, this function prints a message such as:
```
tunnel.url = https://wtqcahqwhd4tu0.r5.modal.host
tunnel.tls_socket = ('wtqcahqwhd4tu0.r5.modal.host', 443)
```
You can also create tunnels on a [Sandbox](https://modal.com/docs/guide/sandbox-networking#forwarding-ports)
to directly expose the container's ports.
## Build with tunnels
Tunnels are the fastest way to get a low-latency, direct connection to a running
container. You can use them to run live browser applications with **interactive
terminals**, **Jupyter notebooks**, **VS Code servers**, and more.
As a quick example, here is how you would expose a Jupyter notebook:
```python
import os
import secrets
import subprocess
import modal
image = modal.Image.debian_slim().pip_install("jupyterlab")
app = modal.App(image=image)
@app.function()
def run_jupyter():
token = secrets.token_urlsafe(13)
with modal.forward(8888) as tunnel:
url = tunnel.url + "/?token=" + token
print(f"Starting Jupyter at {url}")
subprocess.run(
[
"jupyter",
"lab",
"--no-browser",
"--allow-root",
"--ip=0.0.0.0",
"--port=8888",
"--LabApp.allow_origin='*'",
"--LabApp.allow_remote_access=1",
],
env={**os.environ, "JUPYTER_TOKEN": token, "SHELL": "/bin/bash"},
stderr=subprocess.DEVNULL,
)
```
When you run the function, it starts Jupyter and gives you the public URL. It's
as simple as that.
All Modal features are supported. If you
[need GPUs](https://modal.com/docs/guide/gpu), pass `gpu=` to the
`@app.function()` decorator. If you
[need more CPUs, RAM](https://modal.com/docs/guide/resources), or to attach
[volumes](https://modal.com/docs/guide/volumes), those
also just work.
### Programmable startup
The tunnel API is completely on-demand, so you can start them as the result of a
web request.
For example, you could make something like Jupyter Hub without leaving Modal,
giving your users their own Jupyter notebooks when they visit a URL:
```python
import modal
image = modal.Image.debian_slim().pip_install("fastapi[standard]")
app = modal.App(image=image)
@app.function(timeout=900) # 15 minutes
def run_jupyter(q):
... # as before, but return the URL on app.q
@app.function()
@modal.fastapi_endpoint(method="POST")
def jupyter_hub():
from fastapi import HTTPException
from fastapi.responses import RedirectResponse
... # do some validation on the secret or bearer token
if is_valid:
with modal.Queue.ephemeral() as q:
run_jupyter.spawn(q)
url = q.get()
return RedirectResponse(url, status_code=303)
else:
raise HTTPException(401, "Not authenticated")
```
This gives every user who sends a POST request to the Web Function their own
Jupyter notebook server, on a fully isolated Modal container.
You could do the same with VS Code and get some basic version of an instant,
serverless IDE!
### Advanced: Unencrypted TCP tunnels
By default, tunnels are only exposed to the Internet at a secure random URL, and
connections have automatic TLS (the "S" in HTTPS). However, sometimes you might
need to expose a protocol like an SSH server that goes directly over TCP. In
this case, we have support for _unencrypted_ tunnels:
```python notest
with modal.forward(8000, unencrypted=True) as tunnel:
print(f"tunnel.tcp_socket = {tunnel.tcp_socket}")
```
Might produce an output like:
```
tunnel.tcp_socket = ('r3.modal.host', 23447)
```
You can then connect over TCP, for example with `nc r3.modal.host 23447`. Unlike
encrypted TLS sockets, these cannot be given a non-guessable, cryptographically
random URL due to how the TCP protocol works, so they are assigned a random port
number instead.
## Pricing
Modal only charges for containers based on
[the resources you use](https://modal.com/pricing). There is no additional
charge for having an active tunnel.
For example, if you start a Jupyter notebook on port 8888 and access it via
tunnel, you can use it for an hour for development (with 0.01 CPUs) and then
actually run an intensive job with 16 CPUs for one minute. The amount you would
be billed for in that hour is 0.01 + 16 \* (1/60) = **0.28 CPUs**, even though
you had access to 16 CPUs without needing to restart your notebook.
## Security
Tunnels are run on Modal's private global network of Internet relays. On
startup, your container will connect to the nearest tunnel so you get the
minimum latency, very similar in performance to a direct connection with the
machine.
This makes them ideal for live debugging sessions, using web-based terminals
like [ttyd](https://github.com/tsl0922/ttyd).
The generated URLs are cryptographically random, but they are also public on the
Internet, so anyone can access your application if they are given the URL.
We do not currently do any detection of requests above L4, so if you are running
a web server, we will not add special proxy HTTP headers or translate HTTP/2.
You're just getting the TLS-encrypted TCP stream directly!
#### Proxies (Beta)
# Proxies
You can securely connect with resources in your private network
using a Modal Proxy. Proxies are a secure tunnel between
Apps and exit nodes with static IPs. You can allow-list those static IPs
in your network firewall, making sure that only traffic originating from these
IP addresses is allowed into your network.
Proxies are unique and not shared between workspaces. All traffic
between your Apps and the Proxy server is encrypted using
[WireGuard](https://www.wireguard.com/).
Modal Proxies are built on top of [vprox](https://github.com/modal-labs/vprox),
a Modal open-source project used to create highly available proxy servers
using WireGuard.
## Creating a Proxy
Proxies are available on the Team and Enterprise plans . Visit workspace settings to upgrade.
You can create Proxies in your workspace [Settings](https://modal.com/settings) page.
Team Plan users can create one Proxy and Enterprise users three Proxies. Each Proxy
can have a maximum of five static IP addresses.
Please reach out to [support@modal.com](mailto:support@modal.com) if you need greater limits.
You can select which region the Proxy should live in when creating it.
This allows you to control where in the world the traffic will be routed through.
Placing it closer to the resources you want to connect with can reduce overall latency.
## Using a Proxy
After a Proxy is online, add it to a Modal Function with the argument
`proxy=Proxy.from_name("")`. For example:
```python
import modal
import subprocess
app = modal.App(image=modal.Image.debian_slim().apt_install("curl"))
@app.function(proxy=modal.Proxy.from_name(""))
def my_ip():
subprocess.run(["curl", "-s", "ifconfig.me"])
@app.local_entrypoint()
def main():
my_ip.remote()
```
All network traffic from your Function will now use the Proxy as a tunnel.
The program above will always print the same IP address independent
of where it runs in Modal's infrastructure. If that same program
were to run without a Proxy, it would print a different IP
address depending on where it runs.
## Proxy performance
All traffic that goes through a Proxy is encrypted by WireGuard. This adds
latency to your Function's networking. If you are experiencing networking issues
with Proxies related to performance, first add more IP addresses to your
Proxy (see [Adding more IP addresses to a Proxy](#adding-more-ip-addresses-to-a-proxy)).
Placing your Proxy geographically closer to a target may also improve overall performance.
See [Creating a Proxy](#creating-a-proxy) for selecting the Proxy region when creating it.
## Adding more IP addresses to a Proxy
Proxies support up to five static IP addresses. Adding IP addresses improves
throughput linearly.
You can add an IP address to your workspace in [Settings](https://modal.com/settings) > Proxies.
Select the desired Proxy and add a new IP.
If a Proxy has multiple IPs, Modal will randomly pick one when running your Function.
## Proxies and Sandboxes
Proxies can also be used with [Sandboxes](https://modal.com/docs/guide/sandboxes). For example:
```python notest
import modal
app = modal.App.lookup("sandbox-proxy", create_if_missing=True)
sb = modal.Sandbox.create(
app=app,
image=modal.Image.debian_slim().apt_install("curl"),
proxy=modal.Proxy.from_name(""))
process = sb.exec("curl", "-s", "https://ifconfig.me")
stdout = process.stdout.read()
print(stdout)
sb.terminate()
```
Similarly to our Function implementation, this Sandbox program will
always print the same IP address.
A Proxy covers the Sandbox's main container. Traffic from a
[Sidecar](https://modal.com/docs/guide/sandbox-sidecars) does not currently exit through it, so a
Proxy cannot be combined with the experimental `proxy_traffic_via_sidecar`
option, which would relay the main container's HTTPS out through a Sidecar.
#### Cluster networking
# Cluster networking
i6pn (IPv6 private networking) is Modal's private container-to-container networking solution. It allows users to create clusters of Modal containers which can send network traffic to each other with low latency and high bandwidth (≥ 50Gbps).
Normally, `modal.Function` containers can initiate outbound network connections to the internet but they are not directly addressable by other containers. i6pn-enabled containers, on the other hand, can be directly connected to by other i6pn-enabled containers and this is a key enabler of Modal's Beta `@modal.experimental.clustered` functionality.
You can enable i6pn on any `modal.Function`:
```python
@app.function(i6pn=True)
def hello_private_network():
import socket
i6pn_addr = socket.getaddrinfo("i6pn.modal.local", None, socket.AF_INET6)[0][4][0]
print(i6pn_addr) # fdaa:5137:3ebf:a70:1b9d:3a11:71f2:5f0f
```
In this snippet we see that the i6pn-enabled container is able to retrieve its own IPv6 address by
resolving `i6pn.modal.local`. For this Function container to discover the addresses of _other_ containers,
address sharing must be implemented using an auxiliary data structure, such as a shared `modal.Dict` or `modal.Queue`.
## Private networking
All i6pn network traffic is _Workspace private_.

In the image above, Workspace A has subnet `fdaa:1::/48`, while Workspace B has subnet `fdaa:2::/48`.
You'll notice they share the first 16 bits. This is because the `fdaa::/16` prefix contains all of our private network IPv6 addresses, while each workspace is assigned a random 32-bit identifier when it is created. Together, these form the 48-bit subnet.
The upshot of this is that only containers in the same Workspace can see each other and send each other network packets. i6pn networking is secure by default.
## Region boundaries
Modal operates a [global fleet](https://modal.com/docs/guide/region-selection) and allows containers to run on multiple cloud providers and in many regions. i6pn networking is however region-scoped functionality, meaning that only i6pn-enabled containers in the same region can perform network communication.
Modal's i6pn-enabled primitives such as `@modal.experimental.clustered` automatically restrict container geographic placement and cloud placement to ensure inter-container connectivity.
## Public network access to cluster networking
For cluster networked containers that need to be publicly accessible, you need to expose ports with [modal.Tunnel](https://modal.com/docs/guide/tunnels) because i6pn addresses are not publicly exposed.
Consider having a container setup a Tunnel and act as the gateway to the private cluster networking.
### Data sharing and storage
#### Passing local data
# Passing local data
If you have a function that needs access to some data not present in your Python
files themselves you have a few options for bundling that data with your Modal
App.
## Passing function arguments
The simplest and most straight-forward way is to read the data from your local
script and pass the data to the outermost Modal Function call:
```python
import json
@app.function()
def foo(a):
print(sum(a["numbers"]))
@app.local_entrypoint()
def main():
data_structure = json.load(open("blob.json"))
foo.remote(data_structure)
```
Any data of reasonable size that is serializable through
[cloudpickle](https://github.com/cloudpipe/cloudpickle) is passable as an
argument to Modal Functions. Small payloads (≤ 2 MiB) are stored inline in our metadata store;
larger payloads are stored in object storage.
Refer to the section on [global variables](https://modal.com/docs/guide/global-variables) for how
to work with objects in global scope that can only be initialized locally.
## Including local files
For including local files for your Modal Functions to access, see [Defining Images](https://modal.com/docs/guide/images).
#### Volumes
# Volumes
Volumes are a high-performance distributed file system for Modal applications. They are optimized for write-once, read-many I/O workloads, like creating machine learning model weights and distributing them for inference.
Key benefits:
- Volumes are distributed by default, so you can use them alongside Modal’s global compute pool without needing to manage replicas across regions.
- Volumes have caching and chunking optimizations built-in to maximize throughput.
- Volumes come with a fully-featured filesystem interface for easy integration into your favorite ML tools and frameworks.
- Volumes are backed by multiple underlying cloud providers to guarantee high availability.
This page is a high-level guide to using Modal Volumes.
For reference documentation on the `modal.Volume` object, see
[this page](https://modal.com/docs/sdk/py/latest/Volume).
For reference documentation on the `modal volume` CLI command, see
[this page](https://modal.com/docs/cli/latest/volume).
## Pricing
Please refer to our [pricing page](https://modal.com/pricing) for up-to-date prices. We calculate usage by snapshotting your total storage once a day. When you delete data, you may still be billed for that storage for up to four days, to reflect our underlying processing costs.
## Volumes v2
Instructions specific to v2 Volumes will be annotated with 🌱 below.
Read more about [Volumes v2](#volumes-v2-overview) below.
## Creating a Volume
The easiest way to create a Volume and use it as a part of your App is to use
the [`modal volume create`](https://modal.com/docs/cli/latest/volume#modal-volume-create) CLI command. This will create the Volume and output
some sample code:
```bash
% modal volume create my-volume
Created volume 'my-volume' in environment 'main'.
```
> 🌱 To create a v2 Volume, pass `--version=2` in the command above.
## Using a Volume on Modal
To attach an existing Volume to a Modal Function, use [`Volume.from_name`](https://modal.com/docs/sdk/py/latest/Volume#from_name):
```python
vol = modal.Volume.from_name("my-volume")
@app.function(volumes={"/data": vol})
def run():
with open("/data/xyz.txt", "w") as f:
f.write("hello")
vol.commit() # Needed to make sure all changes are persisted before exit
```
You can also browse and manipulate Volumes from an ad hoc Modal Shell:
```bash
% modal shell --volume my-volume --volume another-volume
```
Volumes will be mounted under `/mnt`.
Volumes are designed to provide up to 2.5 GB/s of bandwidth.
Actual throughput is not guaranteed and may be lower depending on network conditions.
## Mount options
When attaching a Volume to a Function or Sandbox, you can configure mount options using
[`Volume.with_mount_options`](https://modal.com/docs/sdk/py/latest/Volume#with_mount_options).
These options are not stored on the Volume itself — they apply per container mount,
so the same Volume can be mounted differently for distinct containers.
### Read-only mounts
To prevent a container from writing to a Volume, mount it in read-only mode:
```python notest
import modal
volume = modal.Volume.from_name("my-volume")
sb = modal.Sandbox.create(
volumes={"/data": volume.with_mount_options(read_only=True)},
app=app,
)
sb.exec("cat", "/data/config.json").wait() # ok!
sb.exec("touch", "/data/new-file").wait() # error!
```
### Mounting a sub-path
You can mount a subdirectory of a Volume instead of the entire Volume using the `sub_path` mount option.
If the subdirectory doesn't exist yet, it will be created when the container starts.
```python notest
import modal
volume = modal.Volume.from_name("my-volume")
sb = modal.Sandbox.create(
volumes={"/user_data": volume.with_mount_options(sub_path="/users/user_123")},
app=app,
)
# /user_data inside of the contianer is now referencing /users/user_123 in the Volume
sb.exec("ls", "/user_data").wait()
```
Sub-path mounting is especially useful when you want a single Volume to serve
multiple end user sessions, but don't want a session to access or even see
files for other sessions in the Volume.
**Note:** Sub-path is currently restricted to directories - you can not mount an individual file.
## Downloading a file from a Volume
While there’s no file size limit for individual files in a volume, the frontend only supports downloading files up to 16 MB. For larger files, please use the CLI:
```bash
% modal volume get my-volume xyz.txt xyz-local.txt
```
### Creating Volumes lazily from code
You can also create Volumes lazily from code using:
```python
vol = modal.Volume.from_name("my-volume", create_if_missing=True)
```
> 🌱 To create a v2 Volume, pass `version=2` to the call to `from_name()` in the code above.
This will create the Volume if it doesn't exist.
## Using a Volume from outside of Modal
Volumes can also be used outside Modal via the [Python SDK](https://modal.com/docs/sdk/py/latest/Volume) or our [CLI](https://modal.com/docs/cli/latest/volume).
### Using a Volume from local code
You can interact with Volumes from anywhere you like using the `modal` Python client library.
```python notest
vol = modal.Volume.from_name("my-volume")
with vol.batch_upload() as batch:
batch.put_file("local-path.txt", "/remote-path.txt")
batch.put_directory("/local/directory/", "/remote/directory")
batch.put_file(io.BytesIO(b"some data"), "/foobar")
```
For more details, see the [reference documentation](https://modal.com/docs/sdk/py/latest/Volume).
### Using a Volume via the command line
You can also interact with Volumes using the command line interface. You can run
`modal volume` to get a full list of its subcommands:
```bash
% modal volume
Usage: modal volume [OPTIONS] COMMAND [ARGS]...
Read and edit modal.Volume volumes.
Note: users of modal.NetworkFileSystem should use the modal nfs command instead.
╭─ Options ──────────────────────────────────────────────────────────────────────────────────────────────────────────────────────────────────────────────────────────────────────────────────────────────╮
│ --help Show this message and exit. │
╰────────────────────────────────────────────────────────────────────────────────────────────────────────────────────────────────────────────────────────────────────────────────────────────────────────╯
╭─ File operations ──────────────────────────────────────────────────────────────────────────────────────────────────────────────────────────────────────────────────────────────────────────────────────╮
│ cp Copy within a modal.Volume. Copy source file to destination file or multiple source files to destination directory. │
│ get Download files from a modal.Volume object. │
│ ls List files and directories in a modal.Volume volume. │
│ put Upload a file or directory to a modal.Volume. │
│ rm Delete a file or directory from a modal.Volume. │
╰────────────────────────────────────────────────────────────────────────────────────────────────────────────────────────────────────────────────────────────────────────────────────────────────────────╯
╭─ Management ───────────────────────────────────────────────────────────────────────────────────────────────────────────────────────────────────────────────────────────────────────────────────────────╮
│ create Create a named, persistent modal.Volume. │
│ delete Delete a named, persistent modal.Volume. │
│ list List the details of all modal.Volume volumes in an Environment. │
╰────────────────────────────────────────────────────────────────────────────────────────────────────────────────────────────────────────────────────────────────────────────────────────────────────────╯
```
For more details, see the [reference documentation](https://modal.com/docs/cli/latest/volume).
## Volume commits and reloads
Unlike a normal filesystem, you need to explicitly reload the Volume to see
changes made since it was first mounted. This reload is handled by invoking the
[`.reload()`](https://modal.com/docs/sdk/py/latest/Volume#reload) method on a Volume object.
Similarly, any Volume changes made within a container need to be committed for
those the changes to become visible outside the current container. This is handled
periodically by [background commits](#background-commits) and directly by invoking
the [`.commit()`](https://modal.com/docs/sdk/py/latest/Volume#commit)
method on a `modal.Volume` object.
At container creation time the latest state of an attached Volume is mounted. If
the Volume is then subsequently modified by a commit operation in another
running container, that Volume modification won't become available until the
original container does a [`.reload()`](https://modal.com/docs/sdk/py/latest/Volume#reload).
Consider this example which demonstrates the effect of a reload:
```python
import pathlib
import modal
app = modal.App()
volume = modal.Volume.from_name("my-volume")
p = pathlib.Path("/root/foo/bar.txt")
@app.function(volumes={"/root/foo": volume})
def f():
p.write_text("hello")
print(f"Created {p=}")
volume.commit() # Persist changes
print(f"Committed {p=}")
@app.function(volumes={"/root/foo": volume})
def g(reload: bool = False):
if reload:
volume.reload() # Fetch latest changes
if p.exists():
print(f"{p=} contains '{p.read_text()}'")
else:
print(f"{p=} does not exist!")
@app.local_entrypoint()
def main():
g.remote() # 1. container for `g` starts
f.remote() # 2. container for `f` starts, commits file
g.remote(reload=False) # 3. reuses container for `g`, no reload
g.remote(reload=True) # 4. reuses container, but reloads to see file.
```
The output for this example is this:
```
p=PosixPath('/root/foo/bar.txt') does not exist!
Created p=PosixPath('/root/foo/bar.txt')
Committed p=PosixPath('/root/foo/bar.txt')
p=PosixPath('/root/foo/bar.txt') does not exist!
p=PosixPath('/root/foo/bar.txt') contains hello
```
This code runs two containers, one for `f` and one for `g`. Only the last
function invocation reads the file created and committed by `f` because it was
configured to reload.
### Background commits
Modal Volumes run background commits:
every few seconds while your Function or Sandbox executes,
the contents of attached Volumes will be committed
without your application code calling `.commit`.
A final snapshot and commit is also automatically performed on container shutdown.
Being able to persist changes to Volumes without changing your application code
is especially useful when [training or fine-tuning models using frameworks](#model-checkpointing).
## Model serving
A single ML model can be served by simply baking it into a `modal.Image` at
build time using [`run_function`](https://modal.com/docs/sdk/py/latest/Image#run_function). But
if you have dozens of models to serve, or otherwise need to decouple image
builds from model storage and serving, use a `modal.Volume`.
Volumes can be used to save a large number of ML models and later serve any one
of them at runtime with great performance. This snippet below shows the
basic structure of the solution.
```python
import modal
app = modal.App()
volume = modal.Volume.from_name("model-store")
model_store_path = "/vol/models"
@app.function(volumes={model_store_path: volume}, gpu="any")
def run_training():
model = train(...)
save(model_store_path, model)
volume.commit() # Persist changes
@app.function(volumes={model_store_path: volume})
def inference(model_id: str, request):
try:
model = load_model(model_store_path, model_id)
except NotFound:
volume.reload() # Fetch latest changes
model = load_model(model_store_path, model_id)
return model.run(request)
```
For more details, see our [guide to storing model weights on Modal](https://modal.com/docs/guide/model-weights).
## Model checkpointing
Checkpoints are snapshots of an ML model and can be configured by the callback
functions of ML frameworks. You can use saved checkpoints to restart a training
job from the last saved checkpoint. This is particularly helpful in managing
[preemption](https://modal.com/docs/guide/preemption).
For more, see our [example code for long-running training](https://modal.com/docs/examples/long-training).
### Hugging Face `transformers`
To periodically checkpoint into a `modal.Volume`, just set the `Trainer`'s
[`output_dir`](https://huggingface.co/docs/transformers/main/en/main_classes/trainer#transformers.TrainingArguments.output_dir)
to a directory in the Volume.
```python
import pathlib
volume = modal.Volume.from_name("my-volume")
VOL_MOUNT_PATH = pathlib.Path("/vol")
@app.function(
gpu="A10G",
timeout=2 * 60 * 60, # run for at most two hours
volumes={VOL_MOUNT_PATH: volume},
)
def finetune():
from transformers import Seq2SeqTrainer
...
training_args = Seq2SeqTrainingArguments(
output_dir=str(VOL_MOUNT_PATH / "model"),
# ... more args here
)
trainer = Seq2SeqTrainer(
model=model,
args=training_args,
train_dataset=tokenized_xsum_train,
eval_dataset=tokenized_xsum_test,
)
```
## Volume performance
Volumes work best when they contain less than 50,000 files and directories. The
latency to attach or modify a Volume scales linearly with the number of files in
the Volume, and past a few tens of thousands of files the linear component
starts to dominate the fixed overhead.
There is currently a hard limit of 500,000 inodes (files, directories and
symbolic links) per Volume. If you reach this limit, any further attempts to
create new files or directories will error with
[`ENOSPC` (No space left on device)](https://pubs.opengroup.org/onlinepubs/9799919799/).
If you need to work with a large number of files, consider using Volumes v2!
It is currently in Beta. See below for more info.
## Filesystem consistency
### Concurrent modification
Concurrent modification from multiple containers is supported, but concurrent
modifications of the same files should be avoided. Last write wins in case of
concurrent modification of the same file — any data the last writer didn't have
when committing changes will be lost!
The number of commits you can run concurrently is limited. If you run too many
concurrent commits each commit will take longer due to contention. If you are
committing small changes, avoid doing more than 5 concurrent commits (the number
of concurrent commits you can make is proportional to the size of the changes
being committed).
As a result, Volumes are typically not a good fit for use cases where you need
to make concurrent modifications to the same file (nor is distributed file
locking supported).
While a reload is in progress the Volume will appear empty to the container that
initiated the reload. That means you cannot read from or write to a Volume in a
container where a reload is ongoing (note that this only applies to the
container where the reload was issued, other containers remain unaffected).
### Busy Volume errors
You can only reload a Volume when there no open files on the Volume. If you have
open files on the Volume the [`.reload()`](https://modal.com/docs/sdk/py/latest/Volume#reload)
operation will fail with "volume busy". The following is a simple example of how
a "volume busy" error can occur:
```python
volume = modal.Volume.from_name("my-volume")
@app.function(volumes={"/vol": volume})
def reload_with_open_files():
f = open("/vol/data.txt", "r")
volume.reload() # Cannot reload when files in the Volume are open.
```
### Can't find file on Volume errors
When accessing files in your Volume, don't forget to pre-pend where your Volume
is mounted in the container.
In the example below, where the Volume has been mounted at `/data`, "hello" is
being written to `/data/xyz.txt`.
```python
import modal
app = modal.App()
vol = modal.Volume.from_name("my-volume")
@app.function(volumes={"/data": vol})
def run():
with open("/data/xyz.txt", "w") as f:
f.write("hello")
vol.commit()
```
If you instead write to `/xyz.txt`, the file will be saved to the local disk of the Modal Function.
When you dump the contents of the Volume, you will not see the `xyz.txt` file.
## Disk usage reporting
Modal Volumes are not block devices and do not have a fixed capacity.
Additionally, used space is not currently reported at the filesystem level.
As a result, tools that query disk usage via the `statfs` syscall
(e.g. `shutil.disk_usage()`, `os.statvfs()`, `df`) will return placeholder
values.
If you need to check the size of a Volume, refer to the size shown in the Modal
dashboard, or use `du` on the mounted Volume within a container.
## Volumes v2 overview
Volumes v2 generally behave just like Volumes v1, and most of the existing APIs
and CLI commands that you are used to will work the same between versions.
Because the file system implementation is completely different, there will be
some significant performance characteristics that can differ from version 1
Volumes. Below is an outline of the key differences you should be aware of.
### Volumes v2 are still in Beta
We cannot yet guarantee that no data will be lost, so we don't recommend using Volumes v2 for mission-critical data at this time.
You can still reap the benefits of v2 for
data that isn't precious, or that is easy to rebuild, such as log files,
regularly updated training data and model weights, caches, and more.
### Volumes v2 are HIPAA compliant
If you delete the volume, the data is guaranteed to be lost according to HIPAA requirements.
### Volumes v2 is more scaleable
Volumes v2 support more files, higher throughput, and more irregular access
patterns. Commits and reloads are also faster.
Additionally, Volumes v2 supports hard-linking of files, where multiple paths
can point to the same inode.
### In v2, you can store as many files as you want
There is no limit on the number of files in Volumes v2.
By contrast, in Volumes v1, there is a limit on the number of files of 500,000,
and we recommend keeping the count to 50,000 or less.
### In v2, you can write concurrently from hundreds of containers
The file system should not experience any performance degradation as more
containers write to distinct files simultaneously.
By contrast, in Volumes v1, we recommend no more than five writers access the
Volume at once.
Note, however, that concurrent access to a particular _file_ in a Volume still
has last-write-wins semantics in many circumstances. These semantics are
unacceptable for most applications, so any particular file should only be
written to by a single container at a time.
### In v2, random accesses have improved performance
In v1, writes to locations inside a file would sometimes incur substantial
overhead, like a rewrite of the entire file.
In v2, this overhead is removed, and only changes are written.
### In v2, you can commit using `sync`
For Volumes v2, you can trigger a commit from within a Sandbox or modal shell
by running the `sync` command on the mountpoint:
```bash
sync /path/to/mountpoint
```
This is useful when you don't have access to the Python SDK's
[`.commit()`](https://modal.com/docs/sdk/py/latest/Volume#commit) method, such as when running
shell commands in a Sandbox or during an interactive `modal shell` session.
Running `sync` on the mountpoint will flush any pending writes to the kernel
and then persist all data and metadata changes to the Volume's persistent
storage.
For example, to commit changes in a modal shell session:
```bash
% modal shell --volume my-v2-volume
root / → echo "hello" > /mnt/my-v2-volume/test.txt
root / → sync /mnt/my-v2-volume # Persist changes before exiting
```
Or to commit from within a Sandbox:
```python notest
sb = modal.Sandbox.create(
volumes={"/data": modal.Volume.from_name("my-v2-volume")},
app=my_app,
)
sb.exec("bash", "-c", "echo 'hello' > /data/test.txt").wait()
# Persist changes and check for errors
p = sb.exec("sync", "/data")
p.wait()
if p.returncode != 0:
raise Exception(f"sync failed with exit code {p.returncode}")
```
> ⚠️ This feature is only available for Volumes v2.
### Volumes v2 has a few limits in place
While we work out performance trade-offs and listen to user feedback, we have
put some artificial limits in place.
- Files must be less than 1 TiB.
- At most 262,144 files can be stored in a single directory.
Directory depth is unbounded, so the total file count is unbounded.
- Traversing the filesystem can be slower in v2 than in v1, due to demand
loading of the filesystem tree.
### Upgrading v1 Volumes
Currently, there is no automated tool for upgrading v1 Volumes to v2. v1 Volumes
need to be manually migrated by creating a new v2 Volume and either copying files
over from the v1 Volume or writing new files.
To reuse the name of an existing v1 Volume for a new v2 Volume, first stop all
Apps that are utilizing the v1 Volume before deleting it. If this is not
feasible, e.g. due to wanting to avoid downtime, use a new name for the v2
Volume.
**Warning:** When deleting an existing Volume, any deployed Apps or running
Functions utilizing that Volume will cease to function, even if a new Volume is
created with the same name. This is because Volumes are identified with opaque
unique IDs that are resolved at application deployment or start time. A newly
created Volume with the same name as a deleted Volume will have a new Volume ID
and any deployed or running Apps will still be referring to the old ID until
these Apps are re-deployed or restarted.
In order to create a new Volume and copy data over from the old Volume, you can
use a tool like `cp` if you intend to copy all the data in one go, or `rsync`
if you want to incrementally copy the data across a longer time span:
```shell
$ modal volume create --version=2 2files2furious
$ modal shell --volume files-and-furious --volume 2files2furious
Welcome to Modal's debug shell!
We've provided a number of utilities for you, like `curl` and `ps`.
# Option 1: use `cp`
root / → cp -rp /mnt/files-and-furious/. /mnt/2files2furious/.
root / → sync /mnt/2files2furious # Ensure changes are persisted before exiting
# Option 2: use `rsync`
root / → apt install -y rsync
root / → rsync -a /mnt/files-and-furious/. /mnt/2files2furious/.
root / → sync /mnt/2files2furious # Ensure changes are persisted before exiting
```
## Further examples
- [Character LoRA fine-tuning](https://modal.com/docs/examples/diffusers_lora_finetune) with model storage on a Volume
- [Protein folding](https://modal.com/docs/examples/chai1) with model weights and output files stored on Volumes
- [Dataset visualization with Datasette](https://modal.com/docs/examples/cron_datasette) using a SQLite database on a Volume
#### Storing model weights
# Storing model weights on Modal
Efficiently managing the weights of large models is crucial for optimizing the
build times and startup latency of many ML and AI applications.
Our recommended method for working with model weights is to store them in a Modal [Volume](https://modal.com/docs/guide/volumes),
which acts as a distributed file system, a "shared disk" all of your Modal Functions can access.
## Storing weights in a Modal Volume
To store your model weights in a Volume, you need to either
make the Volume available to a Modal Function that saves the model weights
or upload the model weights into the Volume from a client.
### Saving model weights into a Modal Volume from a Modal Function
If you're already generating the weights on Modal, you just need to
attach the Volume to your Modal Function, making it available for reading and writing:
```python
from pathlib import Path
volume = modal.Volume.from_name("model-weights-vol", create_if_missing=True)
MODEL_DIR = Path("/models")
@app.function(gpu="any", volumes={MODEL_DIR: volume}) # attach the Volume
def train_model(data, config):
import run_training
model = run_training(config, data)
model.save(config, MODEL_DIR)
```
Volumes are attached by including them in a dictionary that maps
a path on the remote machine to a `modal.Volume` object.
They look just like a normal file system, so model weights can be saved to them
without adding any special code.
If the model weights are generated outside of Modal and made available
over the Internet, for example by an open-weights model provider
or your own training job on a dedicated cluster,
you can also download them into a Volume from a Modal Function:
```python continuation
@app.function(volumes={MODEL_DIR: volume})
def download_model(model_id):
import model_hub
model_hub.download(model_id, local_dir=MODEL_DIR / model_id)
```
Add [Modal Secrets](https://modal.com/docs/guide/secrets) to access weights that require authentication.
See [below](#storing-weights-from-the-hugging-face-hub-on-modal) for
more on downloading from the popular Hugging Face Hub.
### Uploading model weights into a Modal Volume
Instead of pulling weights into a Modal Volume from inside a Modal Function,
you might wish to push weights into Modal from a client,
like your laptop or a dedicated training cluster.
For that, you can use the `batch_upload` method of
[`modal.Volume`](https://modal.com/docs/sdk/py/latest/Volume)s
via the Modal Python client library:
```python continuation
volume = modal.Volume.from_name("model-weights-vol", create_if_missing=True)
@app.local_entrypoint()
def main(local_path: str, remote_path: str):
with volume.batch_upload() as upload:
upload.put_directory(local_path, remote_path)
```
Alternatively, you can upload model weights using the
[`modal volume`](https://modal.com/docs/cli/latest/volume) CLI command:
```bash
modal volume put model-weights-vol path/to/model path/on/volume
```
### Mounting cloud buckets as Modal Volumes
If your model weights are already in cloud storage,
for example in an S3 bucket, you can connect them
to Modal Functions with a `CloudBucketMount`.
See [the guide](https://modal.com/docs/guide/cloud-bucket-mounts) for details.
## Reading model weights from a Modal Volume
You can read weights from a Volume as you would normally read them
from disk, so long as you attach the Volume to your Function.
```python continuation
@app.function(gpu="any", volumes={MODEL_DIR: volume})
def inference(prompt, model_id):
import load_model
model = load_model(MODEL_DIR / model_id)
model.run(prompt)
```
## Storing weights in the Modal Image
It is also possible to store weights in your Function's Modal [Image](https://modal.com/docs/guide/images),
the private file system state that a Function sees when it starts up.
The weights might be downloaded via shell commands with [`Image.run_commands`](https://modal.com/docs/guide/images)
or downloaded using a Python function with [`Image.run_function`](https://modal.com/docs/guide/images).
We recommend storing model weights in a Modal [Volume](https://modal.com/docs/guide/volumes),
as described [above](#storing-weights-in-a-modal-volume). Performance is similar
for the two methods. Volumes are more flexible.
Images are rebuilt when their definition changes, starting from the changed layer,
which increases reproducibility for some builds but leads to unnecessary extra downloads
in most cases.
## Optimizing model weight reads with `@modal.enter`
In the above code samples, weights are loaded from disk into memory each time
the `inference` function is run. This isn't so bad if inference is much
slower than model loading (e.g. it is run on very large datasets)
or if the model loading logic is smart enough to skip reloading.
To guarantee a particular model's weights are only loaded once, you can use the `@modal.enter`
[container lifecycle hook](https://modal.com/docs/guide/lifecycle-functions)
to load the weights only when a new container starts.
```python continuation
MODEL_ID = "some-model-id"
@app.cls(gpu="any", volumes={MODEL_DIR: volume})
class Model:
@modal.enter()
def setup(self, model_id=MODEL_ID):
import load_model
self.model = load_model(MODEL_DIR, model_id)
@modal.method()
def inference(self, prompt):
return self.model.run(prompt)
```
Note that methods decorated with `@modal.enter` can't be passed dynamic arguments.
If you need to load a single but possibly different model on each container start, you can
[parametrize](https://modal.com/docs/guide/parametrized-functions) your Modal Cls.
Below, we use the `modal.parameter` syntax.
```python continuation
@app.cls(gpu="any", volumes={MODEL_DIR: volume})
class ParametrizedModel:
model_id: str = modal.parameter()
@modal.enter()
def setup(self):
import load_model
self.model = load_model(MODEL_DIR, self.model_id)
@modal.method()
def inference(self, prompt):
return self.model.run(prompt)
```
## Storing weights from the Hugging Face Hub on Modal
The [Hugging Face Hub](https://huggingface.co/models) has over 1,000,000 models
with weights available for download.
The snippet below shows some additional tricks for downloading models
from the Hugging Face Hub on Modal.
```python
from typing import Optional
from pathlib import Path
import modal
# create a Volume, or retrieve it if it exists
volume = modal.Volume.from_name("model-weights-vol", create_if_missing=True)
MODEL_DIR = Path("/models")
# define dependencies for downloading model
download_image = (
modal.Image.debian_slim()
.pip_install("huggingface_hub")
.env({"HF_XET_HIGH_PERFORMANCE": "1"}) # enable fast data transfer
)
app = modal.App()
@app.function(
volumes={MODEL_DIR.as_posix(): volume}, # "mount" the Volume, sharing it with your function
image=download_image, # only download dependencies needed here
)
def download_model(
repo_id: str = "hf-internal-testing/tiny-random-GPTNeoXForCausalLM",
revision: Optional[str] = None, # include a revision to prevent surprises!
):
from huggingface_hub import snapshot_download
snapshot_download(repo_id=repo_id, local_dir=MODEL_DIR / repo_id, revision=revision)
print(f"Model downloaded to {MODEL_DIR / repo_id}")
```
#### Cloud bucket mounts
# Cloud bucket mounts
The [`modal.CloudBucketMount`](https://modal.com/docs/sdk/py/latest/CloudBucketMount) is a
mutable volume that allows for both reading and writing files from a cloud
bucket. It supports AWS S3, Cloudflare R2, and Google Cloud Storage buckets.
Cloud bucket mounts are built on top of AWS'
[`mountpoint`](https://github.com/awslabs/mountpoint-s3) technology and inherits
its limitations. See the [Limitations and troubleshooting](#limitations-and-troubleshooting) section for more details.
## Mounting Cloudflare R2 buckets
`CloudBucketMount` enables Cloudflare R2 buckets to be mounted as file system
volumes. Because Cloudflare R2 is
[S3-Compatible](https://developers.cloudflare.com/r2/api/s3/api/) the setup is
very similar between R2 and S3. See
[modal.CloudBucketMount](https://modal.com/docs/sdk/py/latest/CloudBucketMount)
for usage instructions.
When creating the R2 API token for use with the mount, you need to have the
ability to read, write, and list objects in the specific buckets you will mount.
You do _not_ need admin permissions, and you should _not_ use "Client IP Address
Filtering".
## Mounting Google Cloud Storage buckets
`CloudBucketMount` enables Google Cloud Storage (GCS) buckets to be mounted as file system
volumes. See [modal.CloudBucketMount](https://modal.com/docs/sdk/py/latest/CloudBucketMount)
for GCS setup instructions.
## Mounting S3 buckets
`CloudBucketMount` enables S3 buckets to be mounted as file system volumes. To
interact with a bucket, you must have the appropriate IAM permissions configured
(refer to the section on [IAM Permissions](#iam-permissions)).
```python
import modal
import subprocess
app = modal.App()
s3_bucket_name = "s3-bucket-name" # Bucket name not ARN.
s3_access_credentials = modal.Secret.from_dict({
"AWS_ACCESS_KEY_ID": "...",
"AWS_SECRET_ACCESS_KEY": "...",
"AWS_REGION": "..."
})
@app.function(
volumes={
"/my-mount": modal.CloudBucketMount(s3_bucket_name, secret=s3_access_credentials)
}
)
def f():
subprocess.run(["ls", "/my-mount"])
```
### Specifying S3 bucket region
Amazon S3 buckets are associated with a single AWS Region. [`Mountpoint`](https://github.com/awslabs/mountpoint-s3) attempts to automatically detect the region for your S3 bucket at startup time and directs all S3 requests to that region. However, in certain scenarios, like if your container is running on an AWS worker in a certain region, while your bucket is in a different region, this automatic detection may fail.
To avoid this issue, you can specify the region of your S3 bucket by adding an `AWS_REGION` key to your Modal Secrets, as in the code example above.
### Using AWS temporary security credentials
`CloudBucketMount`s also support AWS temporary security credentials by passing
the additional environment variable `AWS_SESSION_TOKEN`. Temporary credentials
will expire and will not get renewed automatically. You will need to update
the corresponding Modal Secret in order to prevent failures.
You can get temporary credentials with the [AWS CLI](https://aws.amazon.com/cli/) with:
```shell
$ aws configure export-credentials --format env
export AWS_ACCESS_KEY_ID=XXX
export AWS_SECRET_ACCESS_KEY=XXX
export AWS_SESSION_TOKEN=XXX...
```
All these values are required.
### Using OIDC identity tokens
Modal provides [OIDC integration](https://modal.com/docs/guide/oidc-integration) and will automatically generate identity tokens to authenticate to AWS.
OIDC eliminates the need for manual token passing through Modal Secrets and is based on short-lived tokens, which limits the window of exposure if a token is compromised.
To use this feature, you must [configure AWS to trust Modal's OIDC provider](https://modal.com/docs/guide/oidc-integration#step-1-configure-aws-to-trust-modals-oidc-provider)
and [create an IAM role that can be assumed by Modal Functions](https://modal.com/docs/guide/oidc-integration#step-2-create-an-iam-role-that-can-be-assumed-by-modal-functions).
Then, you specify the IAM role that your Modal Function should assume to access the S3 bucket.
```python
import modal
app = modal.App()
s3_bucket_name = "s3-bucket-name"
role_arn = "arn:aws:iam::123456789abcd:role/s3mount-role"
@app.function(
volumes={
"/my-mount": modal.CloudBucketMount(
bucket_name=s3_bucket_name,
oidc_auth_role_arn=role_arn
)
}
)
def f():
subprocess.run(["ls", "/my-mount"])
```
### Mounting a path within a bucket
To mount only the files under a specific subdirectory, you can specify a path prefix using `key_prefix`.
Since this prefix specifies a directory, it must end in a `/`.
The entire bucket is mounted when no prefix is supplied.
```python
import modal
import subprocess
app = modal.App()
s3_bucket_name = "s3-bucket-name"
prefix = 'path/to/dir/'
s3_access_credentials = modal.Secret.from_dict({
"AWS_ACCESS_KEY_ID": "...",
"AWS_SECRET_ACCESS_KEY": "...",
})
@app.function(
volumes={
"/my-mount": modal.CloudBucketMount(
bucket_name=s3_bucket_name,
key_prefix=prefix,
secret=s3_access_credentials
)
}
)
def f():
subprocess.run(["ls", "/my-mount"])
```
This will only mount the files in the bucket `s3-bucket-name` that are prefixed by `path/to/dir/`.
### Read-only mode
To mount a bucket in read-only mode, set `read_only=True` as an argument.
```python
import modal
import subprocess
app = modal.App()
s3_bucket_name = "s3-bucket-name" # Bucket name not ARN.
s3_access_credentials = modal.Secret.from_dict({
"AWS_ACCESS_KEY_ID": "...",
"AWS_SECRET_ACCESS_KEY": "...",
})
@app.function(
volumes={
"/my-mount": modal.CloudBucketMount(s3_bucket_name, secret=s3_access_credentials, read_only=True)
}
)
def f():
subprocess.run(["ls", "/my-mount"])
```
While S3 mounts support both write and read operations, they are optimized for
reading large files sequentially. Certain file operations, such as renaming
files, are not supported. For a comprehensive list of supported operations,
consult the
[Mountpoint documentation](https://github.com/awslabs/mountpoint-s3/blob/main/doc/SEMANTICS.md).
### IAM permissions
To utilize `CloudBucketMount` for reading and writing files from S3 buckets,
your IAM policy must include permissions for `s3:PutObject`,
`s3:AbortMultipartUpload`, and `s3:DeleteObject`. These permissions are not
required for mounts configured with `read_only=True`.
```json
{
"Version": "2012-10-17",
"Statement": [
{
"Sid": "ModalListBucketAccess",
"Effect": "Allow",
"Action": ["s3:ListBucket"],
"Resource": ["arn:aws:s3:::"]
},
{
"Sid": "ModalBucketAccess",
"Effect": "Allow",
"Action": [
"s3:GetObject",
"s3:PutObject",
"s3:AbortMultipartUpload",
"s3:DeleteObject"
],
"Resource": ["arn:aws:s3:::/*"]
}
]
}
```
## Limitations and troubleshooting
Cloud Bucket Mounts have certain limitations that do not apply to [Volumes](https://modal.com/docs/guide/volumes).
These limitations are primarily around the way that files can be opened and edited in Cloud Bucket Mounts. For
a comprehensive list of limitations, see the [Mountpoint troubleshooting documentation](https://github.com/awslabs/mountpoint-s3/blob/a6179c72bfc237a1fdd06eb4a0863ca537f8d8a7/doc/TROUBLESHOOTING.md)
and the [Mountpoint semantics documentation](https://github.com/awslabs/mountpoint-s3/blob/main/doc/SEMANTICS.md).
The most common issues that users encounter are:
- Files cannot be opened in append mode.
- Files cannot be written to at arbitrary offsets i.e. `seek` and write are not supported together.
- To write to a file, you must open it in `truncate` mode.
These operations typically result in a `PermissionError: [Errno 1] Operation not permitted` error.
If you need these features, give [Volumes](https://modal.com/docs/guide/volumes) a try! If you need these features in S3
and are willing to pay extra for your bucket, you may be able to use [S3 Express](https://aws.amazon.com/s3/storage-classes/express-one-zone/).
Contact us [in our Slack](https://modal.com/slack) if you're interested in using S3 Express.
### Writing files in append mode
If you're using a library which must open a file in append mode, it's best to write to a temporary file
and then move it to your bucket's mount path. A similar approach can be used to write to a file at an arbitrary offset.
```python notest
import tempfile
import shutil
@app.function(
volumes={"/bucket": modal.CloudBucketMount("my-bucket", secret=s3_credentials)}
)
def append_to_log():
# Write to a temporary file that supports append mode
with tempfile.NamedTemporaryFile(mode='a', delete=False) as temp_file:
temp_file.write("Log entry 1\n")
temp_file.write("Log entry 2\n")
temp_path = temp_file.name
# Move the completed file to the bucket mount
shutil.move(temp_path, "/bucket/logfile.txt")
```
### Creating a file without a parent directory
If you try to create a file in a directory that doesn't exist, you'll get a `Operation not permitted` error.
To fix this, create the parent directory first with `Path(dst).parent.mkdir(exist_ok=True, parents=True)`.
### Using `np.savez`
`np.savez` seeks to random offsets in a file, making it unsafe for Cloud Bucket Mounts. If your file is large,
you can write it to a temporary file and then move it to your bucket's mount path. If it's small, however,
you can solve this with an in-memory buffer:
```python notest
import io
import numpy as np
import shutil
data = np.random.rand(1000, 512)
# 1. Build the archive entirely in memory
tmp = io.BytesIO()
np.savez_compressed(tmp, array=data)
# 2. Copy it once, sequentially, to the mount point
dest = "/bucket/data.npz"
with open(dest, "wb") as f:
shutil.copyfileobj(tmp, f)
```
### Torchtune writing checkpoint files
Old versions of [Torchtune](https://github.com/pytorch/torchtune) are incompatible with Cloud Bucket Mounts.
Upgrade to a version greater than or equal to `0.6.1` to ensure checkpoints can be written to the bucket.
### Using the TensorBoard `SummaryWriter`
The TensorBoard `SummaryWriter` opens log files in append mode. These files are quite small, though,
so we recommend writing to a temporary directory and using the [Watchdog](https://github.com/gorakhargosh/watchdog)
Python library to copy the files to the bucket mount path as they come in.
This is a case where it may be worth it to use [Volumes](https://modal.com/docs/guide/volumes) instead - in particular,
training logs are sometimes not subject to the same compliance requirements that force something like checkpoints
or model weights to be stored in a secure location. We even have an example of
[how to use TensorBoard on Volumes](https://modal.com/docs/examples/torch_profiling#serving-tensorboard-on-modal-to-view-pytorch-profiles-and-traces).
#### Dicts
# Dicts
Modal Dicts provide distributed key-value storage to your Modal Apps.
```python runner:ModalRunner
import modal
app = modal.App()
kv = modal.Dict.from_name("kv", create_if_missing=True)
@app.local_entrypoint()
def main(key="cloud", value="dictionary", put=True):
if put:
kv[key] = value
print(f"{key}: {kv[key]}")
```
This page is a high-level guide to using Modal Dicts.
For reference documentation on the `modal.Dict` object, see
[this page](https://modal.com/docs/sdk/py/latest/Dict).
For reference documentation on the `modal dict` CLI command, see
[this page](https://modal.com/docs/cli/latest/dict).
## Modal Dicts are Python dicts in the cloud
Dicts provide distributed key-value storage to your Modal Apps.
Much like a standard Python dictionary, a Dict lets you store and retrieve
values using keys. However, unlike a regular dictionary, a Dict in Modal is
accessible from anywhere, concurrently and in parallel.
```python
# create a remote Dict
dictionary = modal.Dict.from_name("my-dict", create_if_missing=True)
dictionary["key"] = "value" # set a value from anywhere
value = dictionary["key"] # get a value from anywhere
```
Dicts are persisted, which means that the data in the dictionary is
stored and can be retrieved even after the application is redeployed.
## You can access Modal Dicts asynchronously
Modal Dicts live in the cloud, which means reads and writes
against them go over the network. That has some unavoidable latency overhead,
relative to just reading from memory, of a few dozen ms.
Reads from Dicts via `["key"]`-style indexing are synchronous,
which means that latency is often directly felt by the application.
But like all Modal objects, you can also interact with Dicts asynchronously
by putting the `.aio` suffix on methods -- in this case, `put` and `get`,
which are synonyms for bracket-based indexing.
Just add the `async` keyword to your `local_entrypoint`s or remote Functions
and `await` the method calls.
```python runner:ModalRunner
import modal
app = modal.App()
dictionary = modal.Dict.from_name("async-dict", create_if_missing=True)
@app.local_entrypoint()
async def main():
await dictionary.put.aio("key", "value") # setting a value asynchronously
assert await dictionary.get.aio("key") # getting a value asynchronously
```
See the guide to [asynchronous functions](https://modal.com/docs/guide/async) for more
information.
## Modal Dicts are not _exactly_ Python dicts
Python dicts can have keys of any hashable type and values of any type.
You can store Python objects of any serializable type within Dicts as keys or values.
Objects are serialized using [`cloudpickle`](https://github.com/cloudpipe/cloudpickle),
so precise support is inherited from that library. `cloudpickle` can serialize a surprising variety of objects,
like `lambda` functions or even Python modules, but it can't serialize a few things that don't
really make sense to serialize, like live system resources (sockets, writable file descriptors).
Note that you will need to have the library defining the type installed in the environment
where you retrieve the object so that it can be deserialized.
Unlike with normal Python dictionaries, updates to mutable value types will not
be reflected in other containers unless the updated object is explicitly put
back into the Dict. As a consequence, patterns like chained updates
(`my_dict["outer_key"]["inner_key"] = value`) cannot be used the same way as
they would with a local dictionary.
Currently, the per-object size limit is 100 MiB and the maximum number of entries
per update is 10,000. It's recommended to use Dicts for smaller objects (under 5 MiB).
Each object in the Dict will expire after 7 days of inactivity (no reads or writes).
Dicts also provide a locking primitive. See
[this blog post](https://modal.com/blog/cache-dict-launch) for details.
#### Queues
# Queues
Modal Queues provide distributed FIFO queues to your Modal Apps.
```python runner:ModalRunner retry:2
import modal
app = modal.App()
queue = modal.Queue.from_name("simple-queue", create_if_missing=True)
def producer(x):
queue.put(x) # adding a value
@app.function()
def consumer():
return queue.get() # retrieving a value
@app.local_entrypoint()
def main(x="some object"):
# produce and consume tasks from local or remote code
producer(x)
print(consumer.remote())
```
This page is a high-level guide to using Modal Queues.
For reference documentation on the `modal.Queue` object, see
[this page](https://modal.com/docs/sdk/py/latest/Queue).
For reference documentation on the `modal queue` CLI command, see
[this page](https://modal.com/docs/cli/latest/queue).
## Modal Queues are Python queues in the cloud
Like [Python `Queue`s](https://docs.python.org/3/library/queue.html),
Modal Queues are multi-producer, multi-consumer first-in-first-out (FIFO) queues.
Queues are particularly useful when you want to handle tasks or process
data asynchronously, or when you need to pass messages between different
components of your distributed system.
Queues are cleared 24 hours after the last `put` operation and are backed by
a replicated in-memory database, so persistence is likely, but not guaranteed.
As such, `Queue`s are best used for communication between active functions and
not relied on for persistent storage.
[Please get in touch](mailto:support@modal.com) if you need durability for Queue objects.
## Queues are partitioned by key
Queues are split into separate FIFO partitions via a string key. By default, one
partition (corresponding to an empty key) is used.
A single `Queue` can contain up to 100,000 partitions, each with up to 5,000
items. Each item can be up to 1 MiB. These limits also apply to the default
partition.
Each partition has an independent TTL, by default 24 hours.
Lower TTLs can be specified by the `partition_ttl` argument in the `put` or
`put_many` methods.
```python
with modal.Queue.ephemeral() as q:
q.put("some value") # first in
q.put(123)
assert q.get() == "some value" # first out
assert q.get() == 123
q.put(0)
q.put(1, partition="foo")
q.put(2, partition="bar")
# Default and "foo" partition are ignored by the get operation.
assert q.get(partition="bar") == 2
# Set custom 10s expiration time on "foo" partition.
q.put(3, partition="foo", partition_ttl=10)
# Iterate through items in place (read immutably)
q.put(1)
assert [v for v in q.iterate()] == [0, 1]
```
## You can access Modal Queues synchronously or asynchronously, blocking or non-blocking
Queues are synchronous and blocking by default. Consumers will block and wait
on an empty Queue and producers will block and wait on a full Queue,
both with an `Optional`, configurable `timeout`. If the `timeout` is `None`,
they will wait indefinitely. If a `timeout` is provided, `get` methods will raise
[`queue.Empty`](https://docs.python.org/3/library/queue.html#queue.Empty)
exceptions and `put` methods will raise
[`queue.Full`](https://docs.python.org/3/library/queue.html#queue.Full)
exceptions, both from the Python standard library.
The `get` and `put` methods can be made non-blocking by setting the `block` argument to `False`.
They raise `queue` exceptions without waiting on the `timeout`.
Queues are stored in the cloud, so all interactions require communication over the network.
This adds some extra latency to calls, apart from the `timeout`, on the order of tens of milliseconds.
To avoid this latency impacting application latency, you can asynchronously interact with Queues
by adding the `.aio` function suffix to access methods.
```python notest
@app.local_entrypoint()
async def main(value=None):
await my_queue.put.aio(value or 200)
assert await my_queue.get.aio() == value
```
See the guide to [asynchronous functions](https://modal.com/docs/guide/async) for more
information.
## Modal Queues are not _exactly_ Python Queues
Python Queues can have values of any type.
Modal Queues can store Python objects of any serializable type.
Objects are serialized using [`cloudpickle`](https://github.com/cloudpipe/cloudpickle),
so precise support is inherited from that library. `cloudpickle` can serialize a surprising variety of objects,
like `lambda` functions or even Python modules, but it can't serialize a few things that don't
really make sense to serialize, like live system resources (sockets, writable file descriptors).
Note that you will need to have the library defining the type installed in the environment
where you retrieve the object so that it can be deserialized.
#### Dataset ingestion
# Large dataset ingestion
This guide provides best practices for downloading, transforming, and storing large datasets within
Modal. A dataset is considered large if it contains hundreds of thousands of files and/or is over
100 GiB in size.
These guidelines ensure that large datasets can be ingested fully and reliably.
## Configure your Function for heavy disk usage
Large datasets should be downloaded and transformed using a `modal.Function` and stored
into a [Volume](https://modal.com/docs/guide/volumes).
This `modal.Function` should specify a large `timeout` because large dataset processing can take hours,
and it should request a larger ephemeral disk in cases where the dataset being downloaded and processed
is hundreds of GiBs.
```python
volume = modal.Volume.from_name("datasets", create_if_missing=True)
@app.function(
volumes={"/mnt/datasets": volume},
ephemeral_disk=1000 * 1000, # 1 TiB
timeout=60 * 60 * 12, # 12 hours
)
def download_and_transform() -> None:
...
volume.commit()
```
### Prefer sharded or archived outputs for tiny-file datasets
Volumes can store large datasets, but datasets made up of millions of tiny files are
still usually easier to ingest and consume when they are first grouped into larger artifacts such as
tar shards, WebDataset archives, Parquet files, or other batched formats.
See the [transforming](#transforming) section below for more details.
## Experimentation
Downloading and transforming large datasets can be fiddly. While iterating on a reliable ingestion program
you may want an interactive environment so you can inspect downloaded files, validate credentials,
and benchmark transforms before automating the full ingestion job. [Modal Notebooks](https://modal.com/docs/guide/notebooks)
work well for this. Attach the same Volume that your ingestion Functions use, keep transient scratch
data in `/tmp`, and persist intermediate artifacts under `/mnt/...`.
## Downloading
The raw dataset data should be first downloaded into the container at `/tmp/` and not placed
directly into the mounted volume. This serves a couple purposes.
1. Download tools often create temporary files, partial files, or rename targets while writing, and local SSD handles that more efficiently.
2. The raw dataset data may need to be transformed before use, in which case it is wasteful to store it permanently.
This snippet shows the basic download-and-copy procedure:
```python notest
import pathlib
import shutil
import subprocess
tmp_path = pathlib.Path("/tmp/imagenet/")
vol_path = pathlib.Path("/mnt/datasets/imagenet/")
filename = "imagenet-object-localization-challenge.zip"
# 1. Download into /tmp/
subprocess.run(
f"kaggle competitions download -c imagenet-object-localization-challenge --path {tmp_path}",
shell=True,
check=True
)
vol_path.mkdir(parents=True, exist_ok=True)
# 2. Copy (without transform) into mounted volume.
shutil.copy2(tmp_path / filename, vol_path / filename)
volume.commit()
```
## Transforming
When ingesting a large dataset it is sometimes necessary to transform it before storage, so that it is in
an optimal format for loading at runtime. A common kind of necessary transform is gzip decompression. Very large
datasets are often gzipped for storage and network transmission efficiency, but gzip decompression (80 MiB/s)
is hundreds of times slower than reading from a solid state drive (SSD)
and should be done once before storage to avoid decompressing on every read against the dataset.
Transformations should be performed after storing the raw dataset in `/tmp/`. Performing transformations almost always increases container disk usage and this is where the [`ephemeral_disk` parameter](https://modal.com/docs/sdk/py/latest/App#function) parameter becomes important. For example, a
100 GiB raw, compressed dataset may decompress to into 500 GiB, occupying 600 GiB of container disk space.
Transformations should also typically be performed against `/tmp/`. This is because
1. transforms can be IO intensive and IO latency is lower against local SSD.
2. transforms can create temporary data which is wasteful to store permanently.
Once the transform is complete, write the final dataset layout to the attached Volume and commit it so
subsequent Functions and Notebooks can reload and use the same data.
## Examples
The best practices offered in this guide are demonstrated in the [`modal-examples` repository](https://github.com/modal-labs/modal-examples/tree/main/12_datasets).
The examples include these popular large datasets:
- [ImageNet](https://www.image-net.org/), the image labeling dataset that kicked off the deep learning revolution
- [COCO](https://cocodataset.org/#download), the Common Objects in COntext dataset of densely-labeled images
- [LAION-400M](https://laion.ai/blog/laion-400-open-dataset/), the Stable Diffusion training dataset
- Data derived from the [Big "Fantastic" Database](https://bfd.mmseqs.com/),
[Protein Data Bank](https://www.wwpdb.org/), and [UniProt Database](https://www.uniprot.org/)
used in training the [RoseTTAFold](https://github.com/RosettaCommons/RoseTTAFold) protein structure model
### Secrets and environment variables
#### Secrets
# Secrets
Securely provide credentials and other sensitive information to your Modal Functions with Secrets.
You can create and edit Secrets via
the [dashboard](https://modal.com/secrets),
the command line interface ([`modal secret`](https://modal.com/docs/cli/latest/secret)), and
programmatically from Python code ([`modal.Secret`](https://modal.com/docs/sdk/py/latest/Secret)).
To inject Secrets into the container running your Function, add the
`secrets=[...]` argument to your `app.function` or `app.cls` decoration.
## Limits
Each key-value pair in a Secret is subject to the following limits:
- **Key names** can be at most **16,384 characters** long. They must contain only letters, digits, and underscores, and cannot start with a digit.
- **Values** can be at most **32,768 characters** long.
If you need to provide larger values to your containers, consider writing the data to a [Volume](https://modal.com/docs/guide/volumes) and reading it at runtime.
## Deploy Secrets from the Modal Dashboard
The most common way to create a Modal Secret is to use the
[Secrets panel of the Modal dashboard](https://modal.com/secrets),
which also shows any existing Secrets.
When you create a new Secret, you'll be prompted with a number of templates to help you get started.
These templates demonstrate standard formats for credentials for everything from Postgres and MongoDB
to Weights & Biases and Hugging Face.
## Use Secrets in your Modal Apps
You can then use your Secret by constructing it `from_name` when defining a Modal App
and then accessing its contents as environment variables.
For example, if you have a Secret called `secret-keys` containing the key
`MY_PASSWORD`:
```python
@app.function(secrets=[modal.Secret.from_name("secret-keys")])
def some_function():
import os
secret_key = os.environ["MY_PASSWORD"]
...
```
Each Secret can contain multiple keys and values but you can also inject
multiple Secrets, allowing you to separate Secrets into smaller reusable units:
```python
@app.function(secrets=[
modal.Secret.from_name("my-secret-name"),
modal.Secret.from_name("other-secret"),
])
def other_function():
...
```
The Secrets are applied in order, so key-values from later `modal.Secret`
objects in the list will overwrite earlier key-values in the case of a clash.
For example, if both `modal.Secret` objects above contained the key `FOO`, then
the value from `"other-secret"` would always be present in `os.environ["FOO"]`.
## Create Secrets programmatically
In addition to defining Secrets on the web dashboard, you can
programmatically create a Secret directly in your script and send it along to
your Function using `Secret.from_dict(...)`. This can be useful if you want to
send Secrets from your local development machine to the remote Modal App.
```python
import os
if modal.is_local():
local_secret = modal.Secret.from_dict({"FOO": os.environ["LOCAL_FOO"]})
else:
local_secret = modal.Secret.from_dict({})
@app.function(secrets=[local_secret])
def some_function():
import os
print(os.environ["FOO"])
```
If you have [`python-dotenv`](https://pypi.org/project/python-dotenv/) installed,
you can also use `Secret.from_dotenv()` to create a Secret from the variables in a `.env`
file
```python
@app.function(secrets=[modal.Secret.from_dotenv()])
def some_other_function():
print(os.environ["USERNAME"])
```
## Interact with Secrets from the command line
You can create, list, and delete your Modal Secrets with the `modal secret` command line interface.
View your Secrets and their timestamps with
```bash
modal secret list
```
Create a new Secret by passing `{KEY}={VALUE}` pairs to `modal secret create`:
```bash
modal secret create database-secret PGHOST=uri PGPORT=5432 PGUSER=admin PGPASSWORD=hunter2
```
or using environment variables (assuming below that the `PGPASSWORD` environment variable is set
e.g. by your CI system):
```bash
modal secret create database-secret PGHOST=uri PGPORT=5432 PGUSER=admin PGPASSWORD="$PGPASSWORD"
```
Remove Secrets by passing their name to `modal secret delete`:
```bash
modal secret delete database-secret
```
#### Environment variables
# Environment variables
The Modal runtime sets several environment variables during initialization. The
keys for these environment variables are reserved and cannot be overridden by
your Function or Sandbox configuration.
These variables provide information about the container's runtime
environment.
## Container runtime environment variables
The following variables are present in every Modal container:
- **`MODAL_CLOUD_PROVIDER`** — Modal executes containers across a number of cloud
providers ([AWS](https://aws.amazon.com/), [GCP](https://cloud.google.com/),
[OCI](https://www.oracle.com/cloud/)). This variable specifies which cloud
provider the Modal container is running within.
- **`MODAL_IMAGE_ID`** — The ID of the
[`modal.Image`](https://modal.com/docs/sdk/py/latest/Image) used by the Modal container.
- **`MODAL_REGION`** — This will correspond to a geographic area identifier from
the cloud provider associated with the Modal container (see above). For AWS, the
identifier is a "region". For GCP it is a "zone", and for OCI it is an
"availability domain". Example values are `us-east-1` (AWS), `us-central1`
(GCP), `us-ashburn-1` (OCI). See the [full list here](https://modal.com/docs/guide/region-selection#container-region-options).
- **`MODAL_TASK_ID`** — The ID of the container running the Modal Function or Sandbox.
## Function runtime environment variables
The following variables are present in containers running Modal Functions:
- **`MODAL_ENVIRONMENT`** — The name of the
[Modal Environment](https://modal.com/docs/guide/environments) the container is running within.
- **`MODAL_IS_REMOTE`** - Set to '1' to indicate that Modal Function code is running in
a remote container.
- **`MODAL_IDENTITY_TOKEN`** — An [OIDC token](https://modal.com/docs/guide/oidc-integration)
encoding the identity of the Modal Function.
## Sandbox environment variables
The following variables are present within [`modal.Sandbox`](https://modal.com/docs/sdk/py/latest/Sandbox) instances.
- **`MODAL_SANDBOX_ID`** — The ID of the Sandbox.
## Container image environment variables
The container image layers used by a `modal.Image` may set
environment variables. These variables will be present within your container's runtime
environment. For example, the
[`debian_slim`](https://modal.com/docs/sdk/py/latest/Image#debian_slim) image sets the
`GPG_KEY` variable.
To override image variables or set new ones, use the
[`.env`](https://modal.com/docs/sdk/py/latest/Image#env) method provided by
`modal.Image`.
### Performance
#### Cold start performance
# Cold start performance
This guide page details the techniques and Modal features used to improve cold start performance.
## What is a cold start?
Modal Functions are run in [containers](https://modal.com/docs/guide/images).
If a container is already ready to run your Function, it will be reused.
If not, Modal spins up a new container.
This is known as a _cold start_,
and it is often associated with higher latency.
There are two sources of increased latency during cold starts:
1. inputs may **spend more time waiting** in a queue for a container
to become ready or "warm".
2. when an input is handled by the container that just started,
there may be **extra work that only needs to be done on the first invocation**
("initialization").
If you are invoking Functions with no warm containers
or if you otherwise see inputs spending too much time in the "pending" state,
you should
[target queueing time for optimization](#reduce-time-spent-queueing-for-warm-containers).
If you see some Function invocations taking much longer than others,
and those invocations are the first handled by a new container,
you should
[target initialization for optimization](#reduce-latency-from-initialization).
## Reduce time spent queueing for warm containers
New containers are booted when there are not enough other warm containers to
to handle the current number of inputs.
For example, the first time you send an input to a Function,
there are zero warm containers and there is one input,
so a single container must be booted up.
The total latency for the input will include
the time it takes to boot a container.
If you send another input right after the first one finishes,
there will be one warm container and one pending input,
and no new container will be booted.
Generalizing, there are two factors that affect the time inputs spend queueing:
the time it takes for a container to boot and become warm (which we solve by booting faster)
and the time until a warm container is available to handle an input (which we solve by having more warm containers).
### Warm up containers faster
The time taken for a container to become warm
and ready for inputs can range from seconds to minutes.
Modal's custom container stack has been heavily optimized to reduce this time.
You can read about some of our optimizations [here](https://modal.com/blog/jono-containers-talk).
Containers boot in about one second.
But before a container is considered warm and ready to handle inputs,
we need to execute any logic in your code's global scope (such as imports)
or in any
[`modal.enter` methods](https://modal.com/docs/guide/lifecycle-functions).
So if your boots are slow, these are the first places to work on optimization.
For example, you might be downloading a large model from a model server
during the boot process.
You can instead
[download the model ahead of time](https://modal.com/docs/guide/model-weights),
so that it only needs to be downloaded once.
For models in the tens of gigabytes,
this can reduce boot times from minutes to seconds.
### Run more warm containers
It is not always possible to speed up boots sufficiently.
For example, seconds of added latency to load a model may not
be acceptable in an interactive setting.
In this case, the only option is to have more warm containers running.
This increases the chance that an input will be handled by a warm container,
for example one that finishes an input while another container is booting.
Modal currently exposes [three parameters](https://modal.com/docs/guide/scale) that control how
many containers will be warm: `scaledown_window`, `min_containers`,
and `buffer_containers`.
All of these strategies can increase the resources consumed by your Function
and so introduce a trade-off between cold start latencies and cost.
#### Keep containers warm for longer with `scaledown_window`
Modal containers will remain idle for a short period before shutting down. By
default, the maximum idle time is 60 seconds. You can configure this by setting
the `scaledown_window` on the [`@function`](https://modal.com/docs/sdk/py/latest/App#function)
decorator. The value is measured in seconds, and it can be set anywhere between
two seconds and twenty minutes.
```python
import modal
app = modal.App()
@app.function(scaledown_window=300)
def my_idle_greeting():
return {"hello": "world"}
```
Increasing the `scaledown_window` reduces the chance that subsequent requests
will require a cold start, although you will be billed for any resources used
while the container is idle (e.g., GPU reservation or residual memory
occupancy). Note that containers will not necessarily remain alive for the
entire window, as the autoscaler will scale down more aggressively when the
Function is substantially over-provisioned.
#### Overprovision resources with `min_containers` and `buffer_containers`
Keeping already warm containers around longer doesn't help if there are no warm
containers to begin with, as when Functions scale from zero.
To keep some containers warm and running at all times, set the `min_containers`
value on the [`@function`](https://modal.com/docs/sdk/py/latest/App#function) decorator. This
puts a floor on the the number of containers so that the Function doesn't scale
to zero. Modal will still scale up and spin down more containers as the
demand for your Function fluctuates above the `min_containers` value, as usual.
While `min_containers` overprovisions containers while the Function is idle,
`buffer_containers` provisions extra containers while the Function is active.
This "buffer" of extra containers will be idle and ready to handle inputs if
the rate of requests increases. This parameter is particularly useful for
bursty request patterns, where the arrival of one input predicts the arrival of more inputs,
like when a new user or client starts hitting the Function.
```python
import modal
app = modal.App(image=modal.Image.debian_slim().pip_install("fastapi"))
@app.function(min_containers=3, buffer_containers=3)
def my_warm_greeting():
return "Hello, world!"
```
## Reduce latency from initialization
Some work is done the first time that a function is invoked
but can be used on every subsequent invocation.
This is
[_amortized work_](https://www.cs.cornell.edu/courses/cs312/2006sp/lectures/lec18.html)
done at initialization.
For example, you may be using a large pre-trained model
whose weights need to be loaded from disk to memory the first time it is used.
This results in longer latencies for the first invocation of a warm container,
which shows up in the application as occasional slow calls: high tail latency or elevated p9Xs.
### Move initialization work out of the first invocation
Some work done on the first invocation can be moved up and completed ahead of time.
Any work that can be saved to disk, like
[downloading model weights](https://modal.com/docs/guide/model-weights),
should be done as early as possible. The results can be included in the
[container's Image](https://modal.com/docs/guide/images)
or saved to a
[Modal Volume](https://modal.com/docs/guide/volumes).
Some work is tricky to serialize, like spinning up a network connection or an inference server.
If you can move this initialization logic out of the function body and into the global scope or a
[container `enter` method](https://modal.com/docs/guide/lifecycle-functions#enter),
you can move this work into the warm up period.
Containers will not be considered warm until all `enter` methods have completed,
so no inputs will be routed to containers that have yet to complete this initialization.
For more on how to use `enter` with machine learning model weights, see
[this guide](https://modal.com/docs/guide/model-weights).
Note that `enter` doesn't get rid of the latency --
it just moves the latency to the warm up period,
where it can be handled by
[running more warm containers](#run-more-warm-containers).
### Share initialization work across cold starts with Memory Snapshots
Cold starts can also be made faster by using Modal
[Memory Snapshots](https://modal.com/docs/guide/memory-snapshots).
Invocations of a Function after the first
are faster in part because the memory is already populated
with values that otherwise need to be computed or read from disk,
like the contents of imported libraries.
Memory snapshotting captures the state of a container's memory
at user-controlled points after it has been warmed up
and reuses that state in future boots, which can substantially
reduce cold start latency penalties and warm up period duration.
Refer to the [Memory Snapshots guide](https://modal.com/docs/guide/memory-snapshots)
for details.
### Optimize initialization code
Sometimes, there is nothing to be done but to speed this work up.
Here, we share specific patterns that show up in optimizing initialization
in Modal Functions.
#### Load multiple large files concurrently
Often Modal applications need to read large files into memory (eg. model
weights) before they can process inputs. Where feasible these large file
reads should happen concurrently and not sequentially. Concurrent IO takes
full advantage of our platform's high disk and network bandwidth
to reduce latency.
One common example of slow sequential IO is loading multiple independent
Huggingface `transformers` models in series.
```python notest
from transformers import CLIPProcessor, CLIPModel, BlipProcessor, BlipForConditionalGeneration
model_a = CLIPModel.from_pretrained("openai/clip-vit-base-patch32")
processor_a = CLIPProcessor.from_pretrained("openai/clip-vit-base-patch32")
model_b = BlipProcessor.from_pretrained("Salesforce/blip-image-captioning-large")
processor_b = BlipForConditionalGeneration.from_pretrained("Salesforce/blip-image-captioning-large")
```
The above snippet does four `.from_pretrained` loads sequentially.
None of the components depend on another being already loaded in memory, so they
can be loaded concurrently instead.
They could instead be loaded concurrently using a function like this:
```python notest
from concurrent.futures import ThreadPoolExecutor, as_completed
from transformers import CLIPProcessor, CLIPModel, BlipProcessor, BlipForConditionalGeneration
def load_models_concurrently(load_functions_map: dict) -> dict:
model_id_to_model = {}
with ThreadPoolExecutor(max_workers=len(load_functions_map)) as executor:
future_to_model_id = {
executor.submit(load_fn): model_id
for model_id, load_fn in load_functions_map.items()
}
for future in as_completed(future_to_model_id.keys()):
model_id_to_model[future_to_model_id[future]] = future.result()
return model_id_to_model
components = load_models_concurrently({
"clip_model": lambda: CLIPModel.from_pretrained("openai/clip-vit-base-patch32"),
"clip_processor": lambda: CLIPProcessor.from_pretrained("openai/clip-vit-base-patch32"),
"blip_model": lambda: BlipProcessor.from_pretrained("Salesforce/blip-image-captioning-large"),
"blip_processor": lambda: BlipForConditionalGeneration.from_pretrained("Salesforce/blip-image-captioning-large")
})
```
If performing concurrent IO on large file reads does _not_ speed up your cold
starts, it's possible that some part of your function's code is holding the
Python [GIL](https://wiki.python.org/moin/GlobalInterpreterLock) and reducing
the efficacy of the multi-threaded executor.
#### Memory Snapshots
# Memory Snapshots
Modal Memory Snapshots can dramatically reduce the [cold start](https://modal.com/docs/guide/cold-start) latency of Modal Functions by skipping initialization work on most container boots.
For instance, during initialization, your code might issue many file read operations sequentially,
like the >20,000 file operations required to load `torch`.
It might then run a JIT compiler that takes several minutes or more,
like the one in PyTorch.
Memory Snapshots replace this initialization work with direct restoration of the memory state that work created.
The relative speedup is unbounded: the more work you do to create fewer bytes, the greater it becomes.
In our experience, practical initialization-heavy Functions often start up
[3-10x faster from Memory Snapshots](https://modal.com/blog/gpu-mem-snapshots).
There are two variants of Memory Snapshots.
[CPU Memory Snapshots](#cpu-memory-snapshots) capture the state of CPU memory.
[GPU Memory Snapshots](#gpu-memory-snapshots), an [alpha feature](https://modal.com/docs/guide/feature-maturity), also capture the state of GPU memory.
## CPU Memory Snapshots
CPU Memory Snapshots capture the state of a container and save it to disk.
This saved snapshot can then be used to put new containers directly into the exact same state.
You can enable Memory Snapshots for your Function with the `enable_memory_snapshot=True` parameter:
```python
@app.function(enable_memory_snapshot=True)
def my_func():
...
```
Then deploy the App, e.g. with `modal deploy`. Memory Snapshots are created only for deployed Apps.
Any code executed in global scope, such as imports, will be captured in the Memory Snapshot.
Use the [`Image.imports` context manager](https://modal.com/docs/sdk/py/latest/Image#imports)
to import remote-only dependencies in the global scope.
```python
image = modal.Image.debian_slim().uv_pip_install("pandas")
with image.imports():
import pandas as pd
@app.function(enable_memory_snapshot=True, image=image)
def my_func():
print(f"pandas v{pd.__version__}")
```
## Container lifecycle hooks and Memory Snapshots
Modal's [container lifecycle hooks](https://modal.com/docs/guide/lifecycle-functions)
provide additional control over what parts of container initialization work
are included in Memory Snapshots. Put initialization code that you want to run
before snapshotting inside methods decorated with `@modal.enter(snap=True)`.
```python
@app.cls(enable_memory_snapshot=True)
class MyCls:
@modal.enter(snap=True)
def load(self):
... # will be snapshot
@modal.enter()
def load_more(self):
... # will not be snapshot
```
## GPU Memory Snapshots
GPU Memory Snapshots build on CPU Memory Snapshots and additionally capture GPU state.
In addition to `enable_memory_snapshot=True`,
pass `experimental_options={"enable_gpu_snapshot": True}` to your Function or Cls
to enable GPU Memory Snapshots.
```python
@app.function(
gpu="a10",
enable_memory_snapshot=True,
experimental_options={"enable_gpu_snapshot": True}
)
def my_gpu_func():
...
```
You'll generally want to include any expensive initialization work that
requires the GPU in the Memory Snapshot.
Use a Modal [Cls](https://modal.com/docs/guide/lifecycle-functions)
and put that work inside a `@modal.enter` method,
like so:
```python
image = modal.Image.debian_slim().uv_pip_install("transformers[torch]")
with image.imports():
import torch
from transformers import pipeline
@app.cls(
gpu="h100",
enable_memory_snapshot=True,
experimental_options={"enable_gpu_snapshot": True},
image=image,
)
class Llm:
@modal.enter(snap=True)
def init(self):
self.pipeline = pipeline(model="Qwen/Qwen3-1.7B", device_map="cuda")
self.pipeline.model = torch.compile(self.pipeline.model, mode="reduce-overhead")
context = [{"role": "user", "content": DEFAULT_PROMPT}]
self.pipeline(context)
```
You can find a complete code sample [here](https://modal.com/docs/examples/gpu_snapshot).
We recommend warming up your model by running a few forward passes on sample data
in the `@modal.enter(snap=True)` method to move more initialization work into the snapshotting phase.
Without warmup, this work is generally done on the first few requests after container start
(regardless of whether Memory Snapshots are used),
which shows up as tail latency.
### Limitations of GPU Memory Snapshots
[We've seen](https://modal.com/blog/gpu-mem-snapshots) that GPU Memory Snapshots can massively reduce cold start time,
but they are subject to certain limitations.
The underlying checkpoint/restore technology in the device drivers
is still quite new. We expect these limitations to be resolved as the drivers update.
We recommend reviewing the material below
before adding GPU Memory Snapshots to your Modal Functions.
#### You may need to rewrite code for compatibility or to improve performance
While most GPU-accelerated Modal Functions can take advantage of GPU Memory Snapshots,
apart from the limitations described below,
most Functions will need some of their code rewritten to ensure compatibility with GPU Memory Snapshots
or to deliver performance improvements.
This is particularly true for more complex inference engines,
like those used to maximize [LLM inference performance](https://modal.com/docs/guide/high-performance-llm-inference).
For instance, it is often better to discard the initial, unfilled KV cache before the snapshot is taken,
then recreate it on restore, rather than writing and then reading the KV cache's meaningless pages in a snapshot.
See [this example with vLLM](https://modal.com/docs/examples/vllm_snapshot)
and [this example with SGLang](https://modal.com/docs/examples/sglang_snapshot)
for sample code, patterns, and other guidance.
#### GPU Memory Snapshots are generally incompatible with multi-GPU code
Though a few simple programs interacting with multiple GPUs can be successfully snapshot,
there are known issues with most practical uses of multiple GPUs,
stemming from multi-process and multi-GPU resource management concerns.
We anticipate improvements here in future drivers.
#### GPU Memory Snapshots are generally incompatible with non-CUDA GPU code
For instance, use of graphics capabilities prior to snapshotting will generally cause failures.
#### GPU Memory Snapshots do not speed up model loading from storage
Memory Snapshots use the same high-performance distributed filesystem
that delivers Modal [Images](https://modal.com/docs/guide/images)
and Modal [Volumes](https://modal.com/docs/guide/volumes)
to our worldwide fleet of containers at minimum latency and maximum throughput.
That means that if the majority of your initialization latency is spent loading weights,
GPU Memory Snapshots will generally not improve your cold start times --
and may even worsen them, by adding overhead.
Instead, Memory Snapshots should primarily be used to "skip past" work
that is not bottlenecked by storage bandwidth, like library initialization (imports)
and JIT compilation (Torch, DeepGEMM, Triton, etc.).
#### GPU Memory Snapshots can interact poorly with `torch.compile`
In certain cases, running the Torch Compiler can cause Memory Snapshot creation to fail.
Some of these failures can be fixed by setting the environment variable `TORCHINDUCTOR_COMPILE_THREADS` to `1` before compiling.
## Memory Snapshots FAQs
### How do I know whether Memory Snapshots are being created or used?
You can see Memory Snapshots in action in your Function's "Containers" tab. Containers that created a memory snapshot are marked with a icon in the Startup column. Containers that restored from a snapshot are marked with a icon. In the below screenshot, the container startup times when restoring from a memory snapshot are significantly faster.
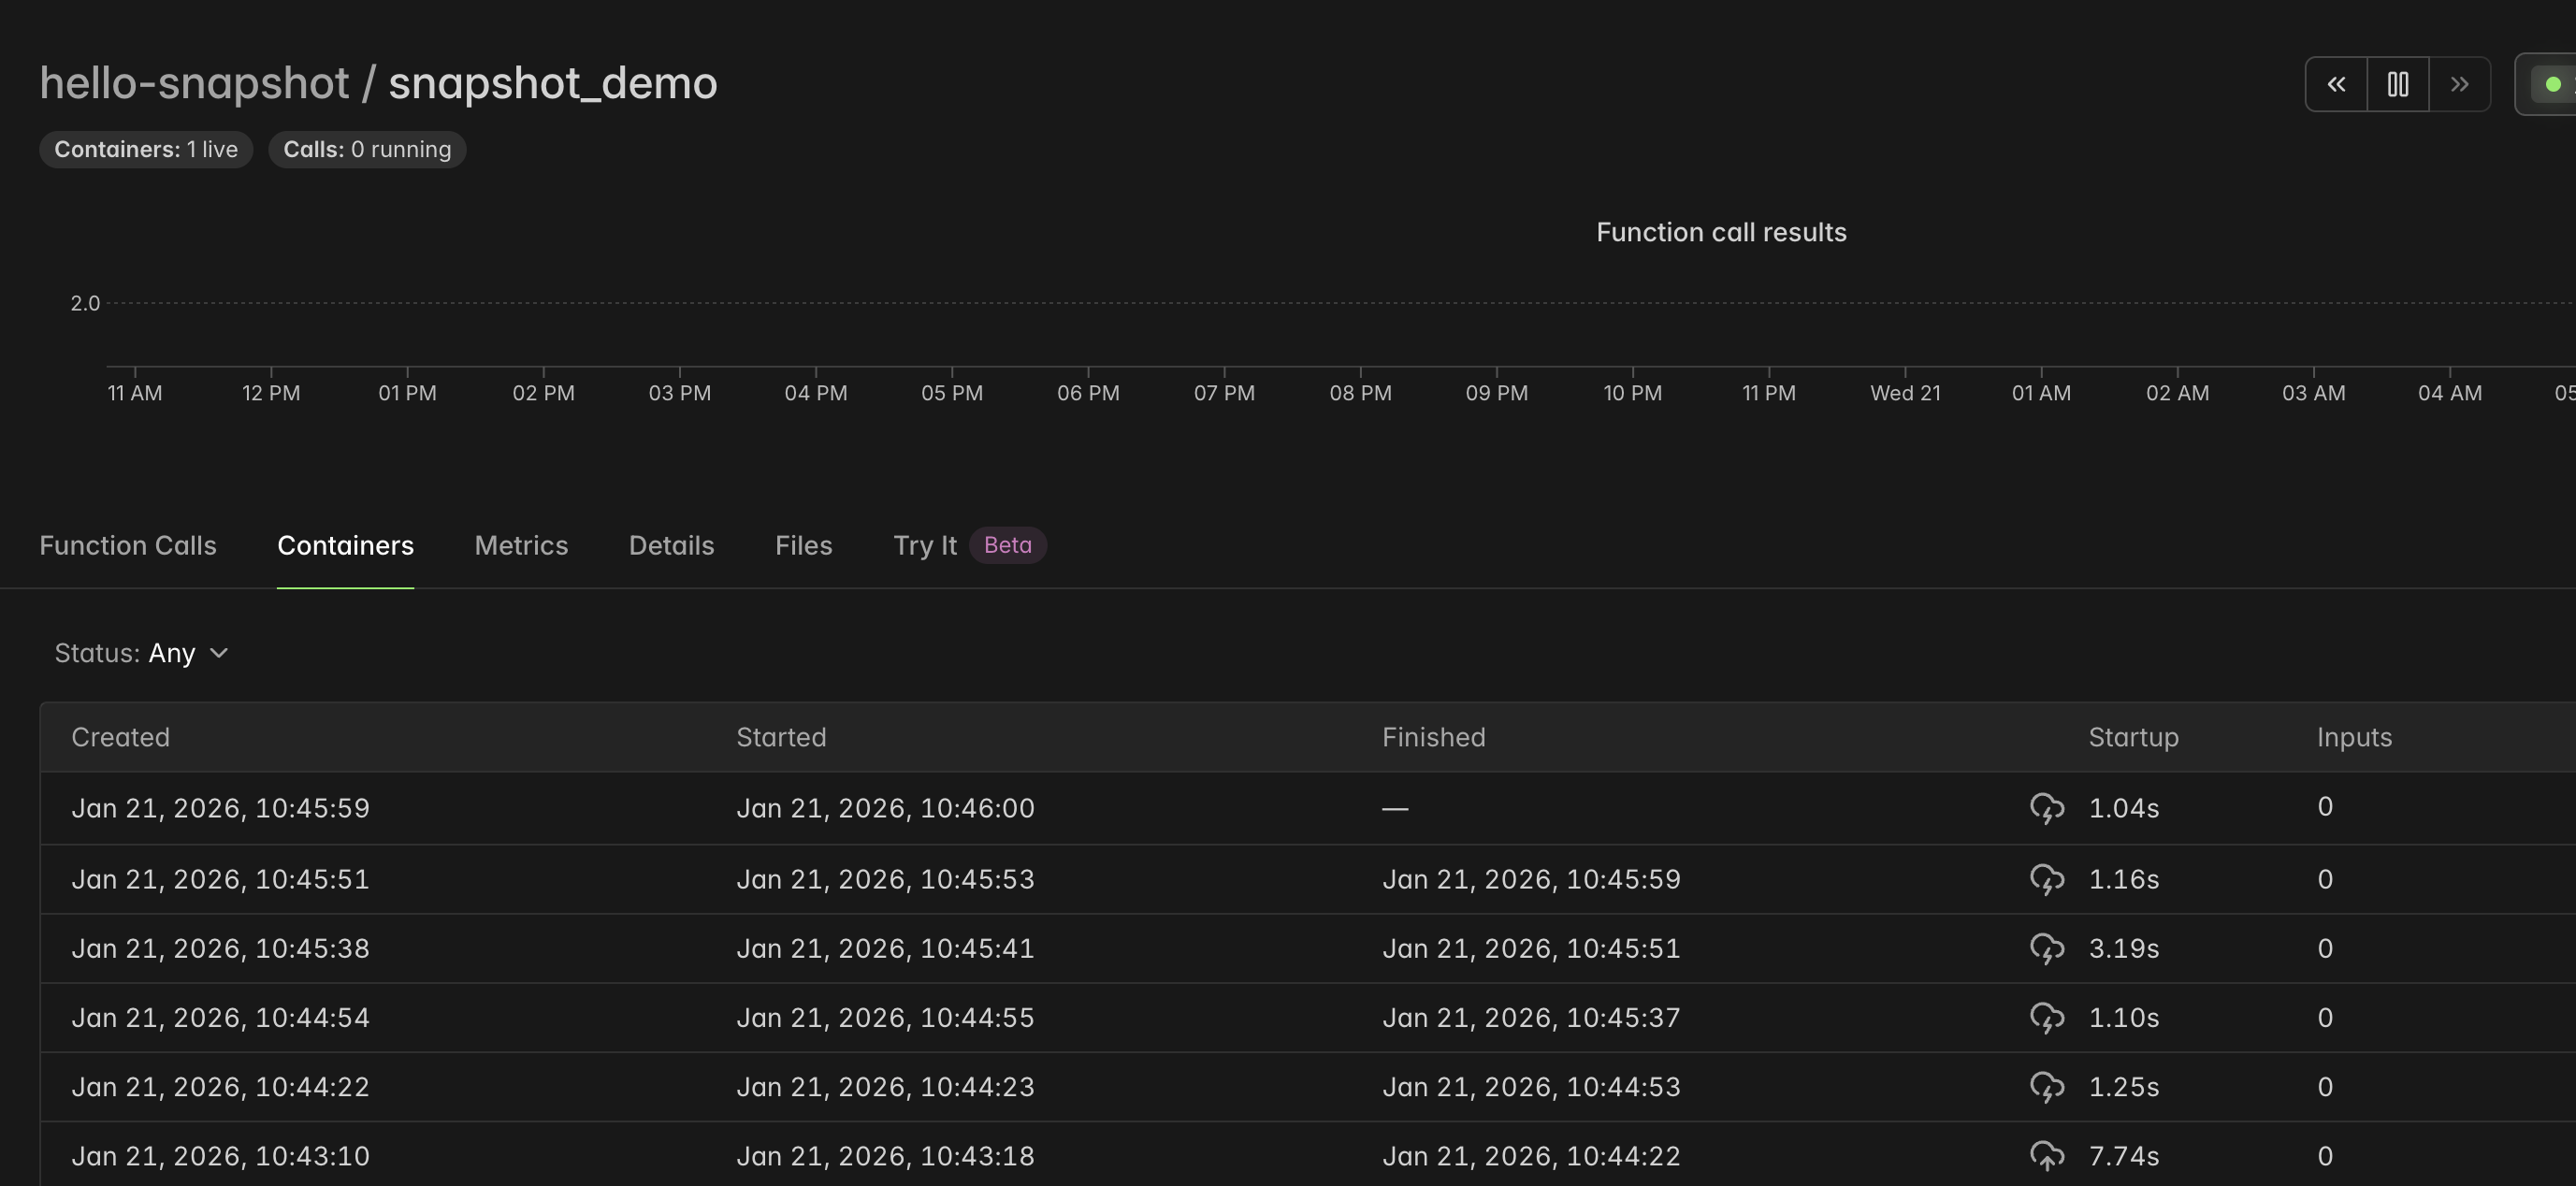
You can also search your Modal App's logs for the line `Snapshot created. Restoring Function from memory snapshot.`
### When are Memory Snapshots updated?
Redeploying your Function with new configuration (e.g. a [new GPU type](https://modal.com/docs/guide/gpu))
or new code will cause previous Memory Snapshots to become obsolete.
Subsequent invocations to the new Function version will automatically create new Memory Snapshots with the new configuration and code.
Changes to [Modal Volumes](https://modal.com/docs/guide/volumes) do not cause Memory Snapshots to update.
Deleting files in a Volume used during restore will cause restore failures.
### I haven't changed my Function. Why do I still see Memory Snapshots being created sometimes?
Modal recaptures Memory Snapshots to keep up with the platform's latest runtime and security changes.
Additionally, you may observe your Function being snapshot multiple times during its first few invocations.
This happens because Memory Snapshots are specific to the underlying worker type that created them
(e.g. CPU flags), and Modal Functions run across a handful of worker types.
Snapshot creation may add some latency to Function initialization.
- CPU-only Functions need around 6 snapshots for full coverage.
- GPU Functions need 2-3 snapshots per GPU type.
### How do Memory Snapshots handle randomness?
If your application depends on uniqueness of state, you must evaluate your
Function code and verify that it is resilient to snapshotting operations. For
example, if a variable is randomly initialized and that value included in a Memory Snapshot,
that variable will be identical after every restore, possibly breaking uniqueness expectations
of later code.
## Advanced usage of Memory Snapshots
### Using GPUs without using GPU Memory Snapshots
CPU Memory Snapshots on their own block GPU access,
but GPU Functions can still benefit from Memory Snapshots.
This involves refactoring your initialization code to run across two separate `@modal.enter` functions:
one that runs before creating the snapshot (`snap=True`),
and one that runs after restoring from the snapshot (`snap=False`).
For instance, you might load model weights into CPU memory in the `snap=True` method,
then move the weights onto GPU memory in the `snap=False` method.
Even without GPU snapshotting, this technique reduces the startup time for `Embedder.run`
in the below example by about 3x, from ~6 seconds down to just ~2 seconds.
```python
import modal
image = modal.Image.debian_slim().uv_pip_install("sentence-transformers")
app = modal.App("sentence-transformers", image=image)
with image.imports():
from sentence_transformers import SentenceTransformer
model_vol = modal.Volume.from_name("sentence-transformers-models", create_if_missing=True)
@app.cls(gpu="a10", volumes={"/models": model_vol}, enable_memory_snapshot=True)
class Embedder:
model_id = "BAAI/bge-small-en-v1.5"
@modal.enter(snap=True)
def load(self):
# Create a memory snapshot with the model loaded in CPU memory.
self.model = SentenceTransformer(f"/models/{self.model_id}", device="cpu")
@modal.enter(snap=False)
def setup(self):
self.model.to("cuda") # Move the model to the GPU!
@modal.method()
def run(self, sentences:list[str]):
embeddings = self.model.encode(sentences, normalize_embeddings=True)
print(embeddings)
@app.local_entrypoint()
def main():
Embedder().run.remote(sentences=["what is the meaning of life?"])
if __name__ == "__main__":
cls = modal.Cls.from_name("sentence-transformers", "Embedder")
cls().run.remote(sentences=["what is the meaning of life?"])
```
#### GPUs are not available in CPU-only Memory Snapshots
If you are using the GPU Memory Snapshot feature (`enable_gpu_snapshot`), then
GPUs are available within `@modal.enter(snap=True)`.
If you are using memory snapshots _without_ `enable_gpu_snapshot`, then it's important
to note that GPUs will not be available within the `@modal.enter(snap=True)` method.
```python
image = modal.Image.debian_slim().uv_pip_install("torch", "numpy")
@app.cls(enable_memory_snapshot=True, gpu="a10", image=image)
class GPUAvailability:
@modal.enter(snap=True)
def no_gpus_available_during_snapshots(self):
import torch
print(f"GPUs available: {torch.cuda.is_available()}") # False
@modal.enter(snap=False)
def gpus_available_following_restore(self):
import torch
print(f"GPUs available: {torch.cuda.is_available()}") # True
@modal.method()
def demo(self):
print(f"GPUs available: {torch.cuda.is_available()}") # True
```
#### Watch out for accidental GPU initialization during CPU-only Memory Snapshots
The `torch.cuda` module has multiple functions which, if called during
snapshotting, will initialize CUDA as having zero GPU devices. Such functions
include `torch.cuda.is_available` and `torch.cuda.get_device_capability`.
If you're using a framework that calls these methods during its import phase,
it may not be compatible with memory snapshots. The problem can manifest as
confusing "cuda not available" or "no CUDA-capable device is detected" errors.
We have found that importing PyTorch twice solves the problem in some cases:
```python
@app.cls(enable_memory_snapshot=True, gpu="A10")
class GPUAvailability:
@modal.enter(snap=True)
def pre_snap(self):
import torch
...
@modal.enter(snap=False)
def post_snap(self):
import torch # re-import to re-init GPU availability state
...
```
In particular, `xformers` is known to call `torch.cuda.get_device_capability` on
import, so if it is imported during snapshotting it can unhelpfully initialize
CUDA with zero GPUs. The
[workaround](https://github.com/facebookresearch/xformers/issues/1030) for this
is to set the `XFORMERS_ENABLE_TRITON` environment variable to `1` in your `modal.Image`.
```python
image = modal.Image.debian_slim().pip_install("xformers>=0.28") # for instance
image = image.env({"XFORMERS_ENABLE_TRITON": "1"})
```
#### High-performance LLM inference
# High-performance LLM inference
This high-level guide documents the key techniques used to achieve high performance
when running LLM inference on Modal.
Open weights models and open source inference engines have
closed much of the gap with proprietary models and proprietary engines
and continue to improve as they attract work from a broad community.
It is now and will increasingly be economical to run many generative AI applications in-house,
rather than relying on external providers.
Achieving competitive performance and cost is not instantaneous, however.
It requires some thought and tuning.
And LLM inference is in many ways quite different to the web serving and database workloads
that engineers are used to deploying and optimizing.
This guide collects techniques we have seen work in production inference deployments.
We include code samples so that you can try high-performance LLM inference for yourself.
We split the guide by the key performance criterion that matters for the workload:
- **[throughput](#achieving-high-throughput-llm-inference-tps)**,
for large "jobs" made of many parallel requests that are only finished when they all finish,
- **[latency](#minimizing-llm-inference-latency-ttfttpotttlt)**,
for serving each individual request as fast as possible, usually on human-interactive timescales,
- **[cold start time](#high-performance-llm-inference-for-bursty-workloads-cold-start-time)**,
for bursty workloads that mix latency- and throughput-sensitive components.
This high-level guide and the attendant code samples are intended to kick-start
your own process of inference deployment and performance optimization.
You can find [baseline benchmarks](https://modal.com/llm-almanac/advisor)
and [benchmarking recommendations](https://modal.com/llm-almanac/how-to-benchmark)
in our [LLM Engineer's Almanac](https://modal.com/llm-almanac/workloads).
If you just want to get started running a basic LLM server on Modal, see
[this example](https://modal.com/docs/examples/llm_inference).
If you just want to dive into code, see
[this example for high throughput](https://modal.com/docs/examples/vllm_throughput),
[this example for low latency](https://modal.com/docs/examples/sglang_low_latency),
and [this example for low cold start time](https://modal.com/docs/examples/sglang_snapshot).
## Achieving high throughput LLM inference (TPS)
The quintessential "high throughput" LLM inference workload is a database backfill:
on a trigger, a large number (100s or more) of rows need to be processed,
e.g. to produce a sentiment score as part of an analytics pipeline
or to produce a generation that will be scored as part of offline evals.
No person or system is waiting on the result from any particular row.
Performance is defined by _throughput_, the rate at which tasks are completed,
which translates to end-to-end latency for the entire job.
For most deployments, this in turn directly determines cost.
It is measured in tokens per second (TPS).
Many, but not all, high throughput LLM inference applications have large contexts and small outputs,
which means they are dominated by prefill/prompt processing time, rather than decode/token generation time.
Combined with batching that increases
[arithmetic intensity](https://modal.com/gpu-glossary/perf/arithmetic-intensity),
throughput-oriented LLM inference jobs are generally
[compute-bound](https://modal.com/gpu-glossary/perf/compute-bound).
In general, high throughput is easier to achieve than low latency.
GPUs are inherently [designed for maximum throughput](https://modal.com/gpu-glossary/perf/latency-hiding).
Additionally, LLM training is a throughput-sensitive workload, so good kernels
are typically made available open source earlier.
For instance, the [Flash Attention 4 kernel](https://modal.com/blog/reverse-engineer-flash-attention-4)
that extends the Flash Attention kernel series to [Blackwell GPUs](https://modal.com/blog/introducing-b200-h200)
is, at time of writing months after its initial release,
primarily suitable for throughput-sensitive applications -- but watch this space!
For related reasons, we don't recommend using 4bit floating point (FP4) for these jobs.
FP4 is only supported in [Blackwell or later GPUs](https://modal.com/gpu-glossary/device-software/compute-capability).
Instead, we recommend the more mature 8bit floating point (FP8),
supported in Hopper or later GPUs (one generation back).
On Modal, the [rates](https://modal.com/pricing) for 16bit FLOP/$ are roughly the same across
A100s, H100s, and B200s -- newer GPUs run faster but cost more to match.
So peak throughput per _dollar_ per replica is roughly the same,
even though throughput per _second_ per replica is lower.
But older GPUs running at lower rates offer a few advantages:
- any time spent [underutilizing the GPUs](https://modal.com/blog/gpu-utilization-guide) is less expensive
- GPUs a generation or two back are generally available in larger quantities from hyperscalers
Throughput-oriented jobs don't necessarily benefit from scaling up each replica to more GPUs.
The aggregate throughput is the same as more replicas with fewer GPUs,
but fewer GPUs means reduced communication overhead and
reduced complexity, especially for single GPU-per-replica deployments.
Importantly, you must be able to fit a large enough batch of sequences
into the [GPU RAM](https://modal.com/gpu-glossary/device-hardware/gpu-ram)
that you are compute-bound, or else efficiency will decrease.
We recommend the [vLLM](https://vllm.ai/) inference server for this use case.
It is better able to schedule a mix of prefill and decode work,
which leads to higher throughput.
### High throughput LLM inference on Modal
The lack of latency constraints opens up a large number
of architectural choices for high throughput LLM inference.
For instance, values can be retrieved from an external datastore
or a [Modal Volume](https://modal.com/docs/guide/volumes)
based on identifiers or other information in the datastore.
This is particularly useful for
[cronjob deployments on Modal](https://modal.com/docs/guide/cron).
Results can then be placed back in that datastore.
Modal provides primitives for building a
[job queue](https://modal.com/docs/guide/job-queue)
that can scale to millions of pending inputs
and jobs that last up to a week.
In this case, the underlying LLM inference is provided by a
[Modal Cls](https://modal.com/docs/guide/lifecycle-functions)
invoked via
[`.spawn`](https://modal.com/docs/guide/job-queue).
Each call gets a string
[`modal.FunctionCall` identifier](https://modal.com/docs/sdk/py/latest/FunctionCall)
that can be used to query the result for up to a week.
The primary scaling limit from Modal in this case is the rate at which these calls can be queued.
If the inference system can complete more than 400 tasks per second,
we recommend batching multiple tasks into a single Function input until peak throughput
in tasks per second is serviced by 400 inputs per second.
See [this code sample](https://modal.com/docs/examples/vllm_throughput)
for a system that implements these recommendatons and
achieves maximal per-replica throughput.
## Minimizing LLM inference latency (TTFT/TPOT/TTLT)
The quintessential "low latency" LLM inference workload is a chatbot:
each request represents a waiting user, and users operate at the scale of a few hundred milliseconds.
Generating a token of usefully intelligent text often also takes on the order of milliseconds,
and users want many tokens in responses, so latency budgets are tight.
Performance is defined by _latency_, the time a given task spends waiting.
It is measured in time-to-first-token (TTFT) and time-per-output-token (TPOT)
or in time-to-last-token (TTLT),
depending on to what degree the application supports streaming responses.
For streaming applications, like most chatbots, TTFT matters most.
To whatever degree the application does support streaming, it is strongly recommended
to improve perceived latency by users.
Contemporary Transformer language models are sequential and so generate their responses
serially, leading to long gaps between the creation of the first token in a response and the last.
These long decode or token generation phases demand quite different performance
from hardware than long prefills do.
They are typically [memory-bound](https://modal.com/gpu-glossary/perf/memory-bound)
and so benefit from techniques that reduce the amount of memory loaded per token into the
[Streaming Multiprocessors](https://modal.com/gpu-glossary/device-hardware/streaming-multiprocessor)
or increase the amount of available
[memory bandwidth](https://modal.com/gpu-glossary/perf/memory-bandwidth).
Several techniques can reduce the amount of memory loaded per token:
- smaller and more aggressively [quantized](https://quant.exposed) models require less memory
- [speculative decoding](https://huggingface.co/docs/text-generation-inference/en/conceptual/speculation)
generates multiple tokens at once via draft models
For memory-bound workloads, quantizing a model to a format not natively supported by the hardware
can still sometimes lead to gains.
The reduced demand on memory bandwidth cuts memory latency and there is generally sufficient unused
[arithmetic bandwidth](https://modal.com/gpu-glossary/perf/arithmetic-bandwidth)
to perform extra numerical conversions.
There are a wide variety of speculative decoding techniques, ranging from simple n-gram speculation
to stacks of models drafting tokens for each other in sequence.
We have generally found that the [EAGLE-3 method](https://arxiv.org/abs/2503.01840)
provides the best performance improvement for the least overhead --
computationally and operationally.
Generic draft models are available on Hugging Face,
but we have also seen major improvements from custom draft models
trained on sample production data using tools like
[SpecForge](https://lmsys.org/blog/2025-07-25-spec-forge/).
Additionally, using multiple GPUs to generate a single token increases the aggregate memory bandwidth,
at the cost of some extra communication.
Critically, multiple accelerators need to be used to load model weights in parallel,
or latency will not be reduced.
That means the usual form of parallelism used to reduce latency is _tensor parallelism_,
which splits up individual matrix multiplications across GPUs,
rather than _pipeline parallelism_,
which splits the entire model across GPUs.
There are few models below 70B parameters that work well in 4bit floating point
(with exceptions like [GPT-OSS](https://modal.com/docs/examples/gpt_oss_inference)).
Additionally, at time of writing in early 2026, there are not high-quality open source
Blackwell-optimized kernels for latency-sensitive LLM inference.
Therefore, we generally recommend FP8-quantized models on H100s or H200s.
Finally, we recommend the [SGLang](https://docs.sglang.io/)
inference engine for these workloads.
SGLang generally exhibits lower host overhead --
time when the GPU idles waiting on the CPU --
for decode-heavy workloads, especially for smaller models.
You can read more about host overhead and its solutions in
[this blog post](https://modal.com/blog/host-overhead-inference-efficiency).
### Low latency LLM inference on Modal
For latency budgets in the few hundreds of milliseconds,
network latencies and proxy/load-balancing overhead matter --
communicating with clients across an ocean takes dozens of milliseconds,
due to speed-of-light constraints.
Modal offers ultra-low-latency, regionalized web server deployment with
[Modal Servers](https://modal.com/docs/guide/servers#servers)
to reduce network overhead below 100ms.
You can find an example demonstrating all the pieces of
low latency LLM inference on Modal together
[here](https://modal.com/docs/examples/sglang_low_latency).
## High performance LLM inference for bursty workloads (cold start time)
The final major class of workloads sits between pure throughput and pure latency.
The quintessential application is a "workflow" where LLM inference is one workflow step,
and the workflow is sometimes run interactively by a human and at other times run asynchronously in bulk.
For these applications, the primary concern is handling the high
[peak-to-average load ratio](https://brooker.co.za/blog/2023/03/23/economics.html).
For instance, a pipeline might serve zero requests per second most of the time,
then ten for a bit, then one hundred, then back down to zero.
Statically provisioning enough resources to handle one hundred requests is clearly wasteful,
but spinning up new resources on demand incurs latency.
The key performance criterion, then, is
[_cold start time_](https://modal.com/docs/guide/cold-start):
how long does it take for a new replica to spin up and start handling requests.
On a typical cloud deployment, that includes instance requisition, machine boot, and container setup.
We've written about the resource allocation challenges [here](https://modal.com/blog/gpu-utilization-guide).
Approaches based on requesting resources from clouds directly take minutes to tens of minutes.
Modal has been designed from the kernel up to provide sub-second latencies
all the way through to container start.
From there, the primary performance concern is speeding up server startup.
- **Use small models and quantize aggressively**.
Models can be loaded from a [Modal Volume](https://modal.com/docs/guide/volumes)
at a rate of 1-2 GB/s. That means you're incurring nearly a second of cold start latency
per gigabyte of model weights. More exotic compression formats, like integer quantization
or even ternary quantization, are particularly helpful here, even when they don't improve
latency during inference.
- **Skip compilation steps**.
Optimizations like CUDA Graph capture, JIT-compiled kernels, and Torch compilation
are great for improving latency and throughput but they are generally quite tricky to cache
and cache hits sometimes take nearly as long as cache misses.
That often means a large latency penalty from compilation on each boot,
and latencies can easily range into the tens of seconds or even tens of minutes.
- **Restore from snapshots**.
In some cases, startup-time work like JIT compilation is unavoidable.
For these workloads, Modal provides
[Memory Snapshots](https://modal.com/docs/guide/memory-snapshots):
the full in-memory state of a container just before it is ready to
handle requests is serialized to disk and future container starts
only need to deserialize this back into memory.
Modal includes support for
[GPU Memory Snapshots](https://modal.com/blog/gpu-mem-snapshots)
so that GPU-accelerated LLM inference servers can be snapshot as well.
Memory snapshotting is powerful
([we've observed 10x reductions in cold start time](https://modal.com/blog/gpu-mem-snapshots)),
but it requires some code modification, described below.
Which optimizations discussed above apply
depend on the balance of the workload between low latency and high throughput.
But a few general statements can be made.
For instance, speculative decoding is generally a bad choice,
since it harms performance in the high throughput regime.
Relatedly, we don't have a particular recommendation between vLLM and SGLang here.
Besides the points made above about host overhead latency vs bulk throughput,
the primary difference we have seen is that vLLM is a bit faster to market with new models
and new features, but SGLang is a bit easier to hack on and extend.
### Serving bursty LLM inference workloads on Modal
Modal's rapid autoscaling infrastructure,
from [the custom container runtime and filesystem](https://modal.com/blog/jono-containers-talk),
to [memory snapshot support](https://modal.com/blog/gpu-mem-snapshots),
is particularly well-suited
to bursty LLM inference workloads.
These workloads can either be served by vanilla
[Functions](https://modal.com/docs/guide/apps)
invoked via remote Python calls or as
[Web Functions](https://modal.com/docs/guide/webhooks)
invoked via HTTP.
Web Functions are better for integrating with a variety
of producers and consumers.
The tradeoff of lower overhead for increased complexity
with [Modal Servers](https://modal.com/docs/guide/servers#servers) is generally not worth it.
The [`@modal.concurrent` decorator](https://modal.com/docs/guide/concurrent-inputs)
supports setting both a limit (`max_inputs`)
and a target (`target_inputs`).
Set the limit higher than the target to absorb load increases into
existing capacity (typically at the expense of longer latency).
Make sure that the inference server is configured to handle batches as large as `max_inputs`
without internal queueing!
Almost all GPU programs can be snapshot, but most GPU programs
require some code changes to be snapshot.
For instance, both the vLLM and SGLang inference servers require
manual offloading of weights/KV cache to CPU memory before snapshotting.
For details, see our full sample code for running bursty workloads on Modal
with vLLM [here](https://modal.com/docs/examples/vllm_snapshot)
and with SGLang [here](https://modal.com/docs/examples/sglang_snapshot).
### Reliability and robustness
#### Failures and retries
# Failures and retries
Failure is part of life. Sometimes you just have to retry. This guide page documents how to do this on Modal.
For reference documentation on the `modal.Retries` object, see [this page](https://modal.com/docs/sdk/py/latest/Retries).
## Automatically recover from flakes with `retries`
You can configure Modal to automatically retry Function failures if you set the
`retries` option when declaring your Function:
```python
@app.function(retries=3)
def my_flaky_function():
pass
```
The basic configuration shown provides a fixed 1s delay between retry attempts.
For fine-grained control over retry delays, including exponential backoff
configuration, use [`modal.Retries`](https://modal.com/docs/sdk/py/latest/Retries).
## Handle failures in `Function.map`
By default, failures are propagated back to the caller.
To treat exceptions like successful results and aggregate them in the results list instead,
pass in [`return_exceptions=True`](https://modal.com/docs/guide/scale#exceptions).
When used with [`Function.map()`](https://modal.com/docs/guide/scale#parallel-execution-of-inputs),
each input is retried independently.
## Container crashes
If a `modal.Function` container crashes (either on start-up, e.g. while handling imports in global scope, or during execution, e.g. an out-of-memory error),
Modal will reschedule the container and any work it was currently assigned.
For [ephemeral Apps](https://modal.com/docs/guide/apps#ephemeral-apps), container crashes will be retried until a failure rate is exceeded,
after which all pending inputs will be failed and the exception will be propagated to the caller.
For [deployed Apps](https://modal.com/docs/guide/apps#deployed-apps), container crashes will be retried indefinitely, so as to not disrupt service.
Modal will instead apply a crash-loop backoff and the rate of new container creation for the Function will be slowed down.
Crash-looping containers are displayed in the [App dashboard](https://modal.com/apps).
#### Preemption
# Preemption
All Modal Functions are subject to preemption by default.
If a preemption event interrupts a running Function, Modal will gracefully terminate
the Function and restart it on the same input.
Preemptions are rare, but it is always possible that your Function is
interrupted. Long-running Functions such as model training Functions should take
particular care to tolerate interruptions, as likelihood of interruption increases
with Function run duration.
## Preparing for interruptions
Design your applications to be fault and preemption tolerant. Modal will send an
interrupt signal to your container when preemption occurs. This will cause the
Function's [exit handler](https://modal.com/docs/guide/lifecycle-functions#exit) to run, which
can perform any cleanup within its grace period.
Other best practices for handling preemptions include:
- Divide long-running operations into small tasks or use checkpoints so that you
can save your work frequently. See our [long training example](https://modal.com/docs/examples/long-training)
for a practical demonstration of checkpointing.
- Ensure preemptible operations are safely retryable (ie. idempotent).
## Non-preemptible Functions
If you require Functions that are guaranteed not to be preempted, you may set the `nonpreemptible`
parameter (available starting in client version v1.2.3) to `True` in the `@app.function()` or `@app.cls()` decorator.
Note that a 3x multiplier will be applied to the [list price](https://modal.com/pricing) for CPU and Memory usage when
`nonpreemptible` is set to `True`.
**Note:** The `nonpreemptible` parameter is not supported for GPU Functions.
## Non-preemptible Sandboxes
Modal Sandboxes are not subject to preemption, except in the case where a `gpu`
requirement is specified. This is because of availability and scheduling latency constraints.
#### Timeouts
# Timeouts
All Modal [Function](https://modal.com/docs/sdk/py/latest/Function) executions have a default
execution timeout of 300 seconds (5 minutes), but users may specify timeout
durations between 1 second and 24 hours.
```python
import time
@app.function()
def f():
time.sleep(599) # Timeout!
@app.function(timeout=600)
def g():
time.sleep(599)
print("*Just* made it!")
```
The timeout duration is a measure of a Function's _execution_ time. It does not
include scheduling time or any other period besides the time your code is
executing in Modal. This duration is also per execution attempt, meaning
Functions configured with [`modal.Retries`](https://modal.com/docs/sdk/py/latest/Retries) will
start new execution timeouts on each retry. For example, an infinite-looping
Function with a 100 second timeout and 3 allowed retries will run for least 400
seconds within Modal.
### Container startup timeout
A Function's `startup_timeout` configures the container's _startup_ time. Your container
may be taking a long time to startup because it is loading large data, initializing a
large model or importing many packages. In these cases, you can extend the
`startup_timeout` of your Function.
```python
@app.cls(startup_timeout=30, timeout=10)
class MyFunction:
@modal.enter()
def startup(self):
time.sleep(20)
@modal.method()
def f(self):
time.sleep(1)
```
`startup_timeout` was added in v1.1.4. Prior to v1.1.4, `timeout` configures the
_execution_ time and _startup_ time. If `startup_timeout` is not set, `timeout` will
still configure both times.
## Handling timeouts
After exhausting any specified retries, a timeout in a Function will produce a
`modal.exception.FunctionTimeoutError` which you may catch in your code.
```python
import modal.exception
@app.function(timeout=100)
def f():
time.sleep(200) # Timeout!
@app.local_entrypoint()
def main():
try:
f.remote()
except modal.exception.FunctionTimeoutError:
... # Handle the timeout.
```
## Timeout accuracy
Functions will run for _at least_ as long as their timeout allows, but they may
run a handful of seconds longer. If you require accurate and precise timeout
durations on your Function executions, it is recommended that you implement
timeout logic in your user code.
#### GPU health
# GPU Health
Modal constantly monitors host GPU health, draining Workers with critical issues
and surfacing warnings for customer triage.
Application level observability of GPU health is facilitated by [metrics](https://modal.com/docs/guide/gpu-metrics) and event logging to container log streams.
## `[gpu-health]` logging
Containers with attached NVIDIA GPUs are connected to our `gpu-health` monitoring system
and receive event logs which originate from either application software behavior, system software behavior, or hardware failure.
These logs are in the following format: `[gpu-health] [LEVEL] GPU-[UUID]: EVENT_TYPE: MSG`
- `gpu-health`: Name indicating the source is Modal's observability system.
- `LEVEL`: Represents the severity level of the log message.
- `GPU_UUID`: A unique identifier for the GPU device associated with the event, if any.
- `EVENT_TYPE`: The type of event source. Modal monitors for multiple types of errors,
including Xid, SXid, and uncorrectable ECC. See below for more details.
- `MSG`: The message component is either the original message taken from the event source, or a description provided by Modal of the problem.
## Level
The severity level may be `CRITICAL` or `WARN`. Modal automatically responds to `CRITICAL` level events by draining the underlying Worker and migrating customer containers.
`WARN` level logs may be benign or indication of an application or library bug. No automatic action is taken by our system for warnings.
## Handling Application-level health issues
As noted above, Modal will automatically respond to critical GPU events, but warning level events can still
be associated with application exceptions. Applications should catch exceptions caused by GPU-related faults
and call `modal.experimental.stop_fetching_inputs()`:
```python
import modal.experimental
...
@app.function(gpu="H100")
def demo():
try:
... # code which may hit GPU fault (e.g. illegal memory access)
except RuntimeError:
modal.experimental.stop_fetching_inputs()
return
```
## Xid & SXid
The Xid message is an error report from the NVIDIA driver. The SXid, or "Switch Xid" is a report for the NVSwitch component used in GPU-to-GPU communication, and is thus only relevant in multi-GPU containers.
A classic critical Xid error is the 'fell off the bus' report, code 79. The `gpu-health` event log looks like this:
```
[gpu-health] [CRITICAL] GPU-1234: XID: NVRM: Xid (PCI:0000:c6:00): 79, pid=1101234, name=nvc:[driver], GPU has fallen off the bus.
```
There are over 100 Xid codes and they are of highly varying frequency, severity, and specificity.
[NVIDIA's official documentation](https://docs.nvidia.com/deploy/xid-errors/index.html) provides limited information, so
we maintain our own tabular information below.
#### Troubleshooting
# Troubleshooting
This guide page documents solutions for common Modal issues.
For tips on troubleshooting your own code running on Modal,
see [this guide page](https://modal.com/docs/guide/developing-debugging).
## "Command not found" errors
If you installed Modal but you're seeing an error like
`modal: command not found` when trying to run the CLI, this means that the
installation location of Python package executables ("binaries") are not present
on your system path. This is a common problem; you need to reconfigure your
system's environment variables to fix it.
One workaround is to use `python -m modal` instead of `modal`. However, this
is just a patch. There's no single solution for the problem, because Python
installs dependencies on different locations depending on your environment. See
this [popular StackOverflow question](https://stackoverflow.com/q/35898734) for
pointers on how to resolve your system path issue.
## Function side effects
The same container _can_ be reused for multiple invocations of the same Function
within an App. This means that if your Function has side effects like modifying
files on disk, they may or may not be present for subsequent calls to that
Function. You should not rely on the side effects to be present, but you might
have to be careful so they don't cause problems.
For example, if you create a disk-backed database using sqlite3:
```python
import modal
import sqlite3
app = modal.App()
@app.function()
def db_op():
db = sqlite3("db_file.sqlite3")
db.execute("CREATE TABLE example (col_1 TEXT)")
...
```
This Function _can_ (but will not necessarily) fail on the second invocation
with an `OperationalError: table foo already exists` error.
To get around this, take care to either clean up your side effects (e.g.
deleting the db file at the end your function call above) or make your Functions
take them into consideration (e.g. adding an
`if os.path.exists("db_file.sqlite")` condition or randomize the filename
above). Alternatively, you can set `single_use_containers=True` so that every
Function call will spin up a new container; however, note that this will result
in higher cost and worse latency as every invocation will require a cold start.
## Heartbeat timeout
The Modal client in `modal.Function` containers runs a heartbeat loop that the host uses to healthcheck the container's main process.
If the container stops heartbeating for a long period (minutes), the container will be terminated due to a `heartbeat timeout`, which is displayed in logs.
Container heartbeat timeouts are rare, and they are typically caused by one of two application-level sources:
- [Global Interpreter Lock](https://wiki.python.org/moin/GlobalInterpreterLock) is held for a long time, stopping the heartbeat thread from making progress. [py-spy](https://github.com/benfred/py-spy?tab=readme-ov-file#how-does-gil-detection-work) can detect GIL holding. We include `py-spy` [automatically in `modal shell`](https://modal.com/docs/guide/developing-debugging#debug-shells) for convenience. A quick fix for GIL holding is to run the code which holds the GIL [in a subprocess](https://docs.python.org/3/library/multiprocessing.html#the-process-class).
- Container process initiates shutdown, intentionally stopping the heartbeats, but it does not complete shutdown.
In both cases [turning on debug logging](https://modal.com/docs/guide/developing-debugging#debug-logs) will help diagnose the issue.
## `413 Content Too Large` errors
If you receive a `413 Content Too Large` error, this might be because you are
hitting our gRPC payload size limits.
The size limit is currently 100MB.
## Outdated kernel version (4.4.0)
Our secure runtime [reports a misleadingly old](https://github.com/google/gvisor/issues/11117) kernel version, 4.4.0.
Certain software libraries will detect this and report a warning. These warnings can be ignored because the runtime
actually implements Linux kernel features from versions 5.15+.
If the outdated kernel version reporting creates errors in your application please contact us [in our Slack](https://modal.com/slack).
## CUDA driver initialization failed on L4 GPU type
Certain L4 instance types within Modal's fleet have a flaky issue in the NVIDIA driver which causes
the following CUDA context initialization error:
```
RuntimeError: CUDA driver initialization failed, you might not have a CUDA gpu.
```
A workaround to ensure reliable container startup is given below:
```python
@modal.enter()
def warmup_cuda(self):
import ctypes
import time
import modal
cu = ctypes.CDLL("libcuda.so.1")
max_retries = 10
retry_delay_secs = 0.5
for attempt in range(max_retries):
rc = cu.cuInit(0)
if rc == 0:
break
else:
if attempt < max_retries - 1:
print(f"cuInit failed on attempt {attempt + 1}/{max_retries} with code {rc}, retrying...")
time.sleep(retry_delay_secs)
else:
print(f"CUDA initialization failed after {max_retries} attempts; stopping container")
modal.experimental.stop_fetching_inputs()
```
We are investigating a root cause fix for this problem.
Multi-cloud GPU reliability at the scale of many thousands of GPUs is a tough technical challenge!
Read more about our solution [here](https://modal.com/blog/gpu-health).
## Connection issues in forked processes
When a process is forked, the child may inherit stale network state from
the parent. If you're using Modal from a forked process (e.g. Celery prefork
workers, `multiprocessing`), create a fresh client after the fork and pass it
explicitly:
```python
import multiprocessing
import modal
def child():
client = modal.Client.from_credentials(token_id, token_secret)
fc = modal.FunctionCall.from_id(call_id, client=client)
result = fc.get(timeout=0)
p = multiprocessing.Process(target=child)
p.start()
```
### Security and privacy
#### Security and privacy
# Security and privacy at Modal
The document outlines Modal's security and privacy commitments.
## Application security (AppSec)
AppSec is the practice of building software that is secure by design, secured
during development, secured with testing and review, and deployed securely.
- We build our software using memory-safe programming languages, including Rust
(for our worker runtime and storage infrastructure) and Python (for our API
servers and Modal client).
- Software dependencies are audited by Github's Dependabot.
- We make decisions that minimize our attack surface. Most interactions with
Modal are well-described in a gRPC API, and occur through
[`modal`](https://pypi.org/project/modal), our open-source command-line tool
and Python client library.
- We have automated synthetic monitoring test applications that continuously
check for network and application isolation within our runtime.
- We use HTTPS for secure connections. Modal forces HTTPS for all services using
TLS (SSL), including our public website and the Dashboard to ensure secure
connections. Modal's [client library](https://pypi.org/project/modal) connects
to Modal's servers over TLS and verify TLS certificates on each connection.
- All user data is encrypted in transit and at rest.
- All public Modal APIs use
[TLS 1.3](https://datatracker.ietf.org/doc/html/rfc8446), the latest and
safest version of the TLS protocol.
- Internal code reviews are performed using a modern, PR-based development
workflow (Github), and engage external penetration testing firms to assess our
software security.
## Corporate security (CorpSec)
CorpSec is the practice of making sure Modal employees have secure access to
Modal company infrastructure, and also that exposed channels to Modal are
secured. CorpSec controls are the primary concern of standards such as SOC2.
- Access to our services and applications is gated on a SSO Identity Provider
(IdP).
- We mandate phishing-resistant multi-factor authentication (MFA) in all
enrolled IdP accounts.
- We regularly audit access to internal systems.
- Employee laptops are protected by full disk encryption using FileVault2, and
managed by Secureframe MDM.
## Network and infrastructure security (InfraSec)
InfraSec is the practice of ensuring a hardened, minimal attack surface for
components we deploy on our network.
- Modal uses logging and metrics observability providers, including Datadog and
Sentry.io.
- Compute jobs at Modal are containerized and virtualized using
[gVisor](https://github.com/google/gvisor), the sandboxing technology
developed at Google and used in their _Google Cloud Run_ and _Google
Kubernetes Engine_ cloud services.
- We conduct annual business continuity and security incident exercises.
## Vulnerability remediation
Security vulnerabilities directly affecting Modal's systems and services will be
patched or otherwise remediated within a timeframe appropriate for the severity
of the vulnerability, subject to the public availability of a patch or other
remediation mechanisms.
If there is a CVSS severity rating accompanying a vulnerability disclosure, we
rely on that as a starting point, but may upgrade or downgrade the severity
using our best judgement.
### Severity timeframes
- **Critical:** 24 hours
- **High:** 1 week
- **Medium:** 1 month
- **Low:** 3 months
- **Informational:** 3 months or longer
## Shared responsibility model
Modal prioritizes the integrity, security, and availability of customer data. Under our shared responsibility model, customers also have certain responsibilities regarding data backup, recovery, and availability.
1. **Data backup**: Customers are responsible for maintaining backups of their data. Performing daily backups is recommended. Customers must routinely verify the integrity of their backups.
2. **Data recovery**: Customers should maintain a comprehensive data recovery plan that includes detailed procedures for data restoration in the event of data loss, corruption, or system failure. Customers must routinely test their recovery process.
3. **Availability**: While Modal is committed to high service availability, customers must implement contingency measures to maintain business continuity during service interruptions. Customers are also responsible for the reliability of their own IT infrastructure.
4. **Security measures**: Customers must implement appropriate security measures, such as encryption and access controls, to protect their data throughout the backup, storage, and recovery processes. These processes must comply with all relevant laws and regulations.
## SOC 2
We have successfully completed a [System and Organization Controls (SOC) 2 Type 2
audit](https://modal.com/blog/soc2type2). Go to our [Security Portal](https://trust.modal.com) to request access to the report.
## HIPAA
HIPAA, which stands for the Health Insurance Portability and Accountability Act, establishes a set of standards that protect health information, including individuals’ medical records and other individually identifiable health information. HIPAA guidelines apply to both covered entities and business associates—of which Modal is the latter if you are processing PHI on Modal.
Modal's services can be used in a HIPAA compliant manner. It is important to note that unlike other security standards, there is no officially recognized certification process for HIPAA compliance. Instead, we demonstrate our compliance with regulations such as HIPAA via the practices outlined in this doc, our technical and operational security measures, and through official audits for standards compliance such as SOC 2 certification.
To use Modal services for HIPAA-compliant workloads, a Business Associate Agreement (BAA) should be established with us prior to submission of any PHI. This is available on our Enterprise plan. Contact us at security@modal.com to get started. At the moment, [Volumes v1](https://modal.com/docs/guide/volumes), [Images](https://modal.com/docs/guide/images) (excluding [Filesystem and Directory Snapshots](https://modal.com/docs/guide/sandbox-snapshots)), [Memory Snapshots](https://modal.com/docs/guide/memory-snapshots), and user code are out of scope of the commitments within our BAA, so PHI should not be used in those areas of the product.
[Volumes v2](https://modal.com/docs/guide/volumes#volumes-v2) are HIPAA compliant.
## PCI
_Payment Card Industry Data Security Standard_ (PCI) is a standard that defines
the security and privacy requirements for payment card processing.
Modal uses [Stripe](https://stripe.com) to securely process transactions and
trusts their commitment to best-in-class security. We do not store personal
credit card information for any of our customers. Stripe is certified as "PCI
Service Provider Level 1", which is the highest level of certification in the
payments industry.
## Bug bounty program
Keeping user data secure is a top priority at Modal. We welcome contributions
from the security community to identify vulnerabilities in our product and
disclose them to us in a responsible manner. We currently run a private bug
bounty program through HackerOne. If you have found a vulnerability and
wish to participate, please send an email to security@modal.com with your
HackerOne username or email and we will invite you to the program.
## Data privacy
Modal will never access or use:
- your source code.
- the inputs (function arguments) or outputs (function return values) to your Modal Functions.
- any data you store in Modal, such as in Images or Volumes.
App logs and metadata are stored on Modal. Modal will not access this data
unless permission is granted by the user to help with troubleshooting.
### Data retention
Different Modal products have different retention policies for the data they
handle. The table below summarizes how long each type of data is retained.
| Data | Product | Retention |
| ------------------------------------- | -------------------------------------------------------------------------------------------------------------------- | ------------------------------------------------------------------------------------------------------- |
| Inputs and outputs | [Functions](https://modal.com/docs/guide) (`.remote`, `.spawn`, `.map`, [Web Functions](https://modal.com/docs/guide/webhooks), Scheduled Functions) | Up to 7 days, then deleted |
| Request and response payloads | [Server](https://modal.com/docs/guide/servers) and [Auto Endpoints](https://modal.com/docs/guide/endpoints) | Not stored — proxied directly to your container |
| App and container logs | [Functions](https://modal.com/docs/guide), [Sandboxes](https://modal.com/docs/guide/sandboxes) | Plan-dependent: 1 day on Starter, 30 days on Team, configurable on Enterprise (see [pricing](https://modal.com/pricing)) |
| Audit logs | Workspace (Enterprise) | Per Enterprise contract (see [Audit logs](https://modal.com/docs/guide/audit-logs)) |
| Files | [Volumes](https://modal.com/docs/guide/volumes), [Images](https://modal.com/docs/guide/images) | Persistent until you delete them |
| Memory snapshots | [Function memory snapshots](https://modal.com/docs/guide/memory-snapshots), [Sandbox memory snapshots](https://modal.com/docs/guide/sandbox-snapshots) | 7 days after creation |
| Filesystem snapshots | [Sandbox filesystem snapshots](https://modal.com/docs/guide/sandbox-snapshots) | 30 days after creation (configurable; stored as Images) |
| Directory snapshots | [Sandbox directory snapshots](https://modal.com/docs/guide/sandbox-snapshots) | 30 days after creation (configurable) |
| Entries | [Dicts](https://modal.com/docs/guide/dicts) | 7 days after last read or write |
| Partitions | [Queues](https://modal.com/docs/guide/queues) | Configurable per-partition TTL (default 24 hours) |
| App, Function, and container metadata | All products | Stored for the lifetime of your account |
#### Function inputs and outputs
Function inputs and outputs are stored encrypted at rest. Small payloads
(≤ 2 MiB) are stored inline in our metadata store; larger payloads are stored
in object storage. Both are deleted within a maximum TTL of 7 days.
#### Modal Inference endpoints
Modal Inference endpoints are zero data retention: request and response payloads
are never written to disk and pass through Modal's infrastructure only as
in-flight network traffic. Inference endpoints terminate TLS at Modal's edge
proxy and forward requests directly to your containers over an internal tunnel.
## Questions?
[Email us!](mailto:security@modal.com)
#### Data residency
# Data residency on Modal
This page explains how to control where your Modal workloads run, under what circumstances customer data may leave your region, and when additional data containing customer data may be created and stored outside of your region. It also outlines general strategies for meeting your regional compliance requirements.
## Region selection
You can select the container and routing regions for most Modal services.
- **Container region**‡ is where workload containers run and application code processes data.
- **Routing region** is where requests enter Modal's network before being forwarded to your containers. As a general rule, we recommend choosing the routing region closest to your clients.
For a full list of available regions, please visit our [region selection documentation](https://modal.com/docs/guide/region-selection) page.
‡ _Functions and Sandboxes set the container region with `region=`; Servers use `compute_region=`, and Endpoints use `--compute-region`._
| **Service** | **Selectable container region?** | **Selectable routing region?** |
| -------------------------------------------------------- | ----------------------------------------------------------------------- | ----------------------------------------------------------------------- |
| [Endpoints (Dedicated)](https://modal.com/docs/guide/dedicated-endpoints) | [Yes](https://modal.com/docs/guide/dedicated-endpoints#configure-capacity-and-placement) | [Yes](https://modal.com/docs/guide/dedicated-endpoints#configure-capacity-and-placement) |
| [Endpoints (Shared)](https://modal.com/docs/guide/shared-endpoints)\* | No | No |
| [Functions](https://modal.com/docs/guide/functions) | [Yes](https://modal.com/docs/guide/region-selection#specifying-a-container-region) | [Yes](https://modal.com/docs/guide/region-selection#regional-routing) |
| [Sandboxes](https://modal.com/docs/guide/sandboxes) | [Yes](https://modal.com/docs/guide/region-selection#specifying-a-container-region) | N/A† |
| [Servers](https://modal.com/docs/guide/servers) | [Yes](https://modal.com/docs/guide/servers#request-routing) | [Yes](https://modal.com/docs/guide/servers#request-routing) |
\* _Shared Endpoints route through `us-west`, and containers are distributed across Modal's global compute pool._
† _Sandboxes don't use a routing region: data-plane requests (including encrypted tunnels, Sandbox Connect Tokens, `exec` input/output) go directly to the container in your selected region. Sandbox lifecycle requests (e.g. create and terminate) are routed through our control plane in `us-east`._
### Region pinning is strict
Workloads pinned to a routing region route traffic only through that region, and workloads pinned to a container region run only on compute in that region; neither is ever moved elsewhere, even if the region runs out of capacity.
Pinning your containers to fewer regions gives you certainty about where your workloads run, but at the cost of a smaller pool of capacity to scale into. In addition, pinning a container region will apply a multiplier on top of our base usage pricing; see [region selection pricing](https://modal.com/docs/guide/region-selection#pricing) for more details.
Before pinning the region of your containers, we recommend assessing which workloads require strict data residency. Workloads that do not can take advantage of Modal's global pool of compute for higher availability.
## Where data is stored
In this section, we'll outline where logs and other data may be stored for different Modal products. For relevant retention policies, please refer to the data retention table in our [security and privacy documentation](https://modal.com/docs/guide/security#data-retention).
Dedicated Endpoints, Shared Endpoints, and Servers do not [store request and response payloads](https://modal.com/docs/guide/security#modal-inference-endpoints).
| Product | Data type | Where | Recommended controls for strict residency requirements |
| --------------------------------- | ------------------------------------------------------------------------- | ----------------------------------------------------------- | ----------------------------------------------------------------------------------------------------------------------------------------------------------------------------------------------------------------------------------------------------------------------------------------------------- |
| Functions, Sandboxes, and Servers | Application logs (`stderr` and `stdout`) | United States | Ensure that production code is not writing sensitive customer data to application logs. |
| Functions | Synchronous payloads 2 MiB or smaller | Routing region (`us-east` if no routing region is selected) | Ensure that you select a routing region when creating your Functions. |
| Functions | Payloads over 2 MiB, and spawned (asynchronous) call payloads of any size | United States | Reduce the size of Function I/O, or use Cloud bucket mounts to read and write inputs and outputs. |
| Sandboxes | Snapshots you explicitly create | United States | Create snapshots before introducing customer data. |
| Storage products | Data written to Volumes, Images, Dicts, Queues, and Secrets | United States | Use Cloud bucket mounts as an alternative durable storage location for Volumes. For Dicts and Queues, use comparable technologies hosted in your own region, such as a managed key-value store or message queue. Avoid storing customer data with strict residency requirements in Images or Secrets. |
### Data at rest in durable storage products
Durable storage for Images, Volumes, Dicts, Queues, and Secrets resides in object storage located in the United States.
For durable storage, such as Volumes, you can opt to bring your own storage via [Cloud bucket mounts](https://modal.com/docs/guide/cloud-bucket-mounts), which support various cloud provider buckets in the region of your choice.
## Compliance
Modal allows you to meet your regional data residency and privacy requirements by giving you control over how your customer data flows through the platform. This includes controlling where your Modal workloads run, under what circumstances your customer data may leave your region, and when additional data containing customer data may be created and stored outside of your region.
Per our [shared responsibility model](https://modal.com/docs/guide/security#shared-responsibility-model), it is your responsibility to set the configuration to meet your obligations, such as General Data Protection Regulation (GDPR) compliance.
For more information, please see our Security Portal at [trust.modal.com](https://trust.modal.com/).
### Meeting your regional compliance requirements
We recommend starting by understanding your compliance requirements in relation to how you use Modal. Regulations like GDPR apply based on how and where you use Modal, so it's important to work out your obligations for data storage, processing, and transfer before designing your workloads, and to ask your legal or compliance team how those obligations map to your data flows.
Below, we outline strategies for controlling where your workloads run, what data leaves your region, and what new customer data is created.
### Controlling where your workloads run
- **Pin container and routing regions when you have strict residency requirements.** Select container and routing regions for supported products at creation time. Region selection is strict: workloads pinned to a region will only run there. For the capacity and pricing tradeoffs, see [Region pinning is strict](#region-pinning-is-strict) above.
### Controlling what customer data leaves your region
- **Bring your own storage.** You can mount your own object storage, such as an Amazon S3 bucket in your region, into your containers with a [Cloud bucket mount](https://modal.com/docs/guide/cloud-bucket-mounts). Data at rest then stays in your region, under your own retention and access policies.
- **Use synchronous calls and keep Function inputs and outputs 2 MiB or smaller so payloads are persisted in your routing region.** On Functions, synchronous payloads (those sent via `.remote()` / `.map()` or Web Functions) 2 MiB or smaller stay in the routing region. Larger payloads, and all spawned (asynchronous) call payloads regardless of size, are kept in Modal's centralized US storage.
- If you need payloads to stay in a specific region, we recommend passing a reference (such as an object key) instead of the data itself, and reading and writing the actual data via your own mounted storage as described above. This keeps input and output data out of regional data stores and central storage entirely.
- **Use regional proxies if your use case requires static egress IPs.** If you use [Modal Proxies](https://modal.com/docs/guide/proxy-ips) for static egress IPs, that traffic routes through the proxy region regardless of your container region. Data is encrypted in transit.
- **Use encrypted tunnels when tunnel traffic must stay in your region.** Encrypted tunnels are served directly from your selected container region. Unencrypted tunnels route through relay servers in various geographical regions, so avoid them for traffic with residency requirements.
### Controlling what new customer data gets created
- **Sanitize sensitive data from logs.** Anything your code writes to `stdout`/`stderr` is stored as logs in Modal's centralized US data stores and retained based on our published data retention table. For applications processing customer data, ensure the data is never logged and never leaked through error handling. Unhandled exception tracebacks, for example, are written to `stderr` and end up in logs.
- **Account for snapshots in your data flows.** Sandbox snapshots are only created when you explicitly request them, but when you do, they are stored in the United States regardless of where your workloads run. A memory snapshot captures a Sandbox's entire state, including any sensitive data held in memory at snapshot time. Filesystem snapshots are stored as Modal Images under the hood, so the same US-residency considerations apply to any Image used to boot Modal containers.
#### Customer-supplied encryption keys (Alpha)
# Customer Supplied Encryption Keys
Customer Supplied Encryption Keys (CSEK) let you provide your own key material
when creating supported Modal resources. Modal uses the key as part of the
resource encryption flow, but does not persist the key.
Use CSEK when you need customer-held key material for data that Modal stores.
You are responsible for generating, storing, backing up, and providing the key
again when the protected resource is used.
If you lose the CSEK for a protected resource, Modal cannot recover it for you.
Store the key in a durable key management system outside Modal.
## How CSEK works
For each supported resource, the same basic flow applies:
1. Generate key material with a cryptographically secure random source.
2. Pass the key when creating the resource.
3. Store the resource ID and key in your own system.
4. Pass the same key again when reading, mounting, or restoring the resource.
The key material must not be empty and must be between 16 and 512 bytes long.
{#snippet python()}
```python notest
import secrets
encryption_key = secrets.token_bytes(32)
```
{/snippet}
{#snippet javascript()}
```javascript notest
const encryptionKey = randomBytes(32);
```
{/snippet}
{#snippet go()}
```go notest
encryptionKey := make([]byte, 32)
if _, err := rand.Read(encryptionKey); err != nil {
// Handle key generation errors.
}
```
{/snippet}
Do not commit CSEK material to source control, bake it into Images, print it in
logs, or store it next to the data it protects. Prefer a dedicated key
management system or secrets manager with access controls and backup policies
that match your security requirements.
## Supported resources
This page documents CSEK for the currently supported resources. As CSEK support
becomes available for more Modal resources, additional sections will be added.
| Resource | SDK support |
| ------------------------------------------- | -------------------------- |
| [Directory Snapshots](#directory-snapshots) | Python, JavaScript, Go SDK |
## Directory Snapshots
[Directory Snapshots](https://modal.com/docs/guide/sandbox-snapshots#directory-snapshots) let
you capture a directory from a running Sandbox as an
[Image](https://modal.com/docs/sdk/py/latest/Image). With CSEK, you pass key material when
creating the snapshot and pass the same key again when mounting it.
### Create a CSEK-protected directory snapshot
{#snippet python()}
```python notest
import secrets
import modal
app = modal.App.lookup("csek-directory-snapshots", create_if_missing=True)
encryption_key = secrets.token_bytes(32)
sb = modal.Sandbox.create(app=app)
sb.exec(
"bash",
"-c",
"mkdir -p /project && echo 'private data' > /project/state.txt",
).wait()
snapshot = sb.snapshot_directory(
"/project",
_experimental_encryption_key=encryption_key,
)
sb.terminate()
# Store both values in your own durable systems.
snapshot_id = snapshot.object_id
```
{/snippet}
{#snippet javascript()}
```javascript notest
const modal = new ModalClient();
const app = await modal.apps.fromName("csek-directory-snapshots", {
createIfMissing: true,
});
const image = modal.images.fromRegistry("debian:12-slim");
const encryptionKey = randomBytes(32);
const sb = await modal.sandboxes.create(app, image);
await (
await sb.exec([
"bash",
"-c",
"mkdir -p /project && echo 'private data' > /project/state.txt",
])
).wait();
const snapshot = await sb.snapshotDirectory("/project", {
experimentalEncryptionKey: encryptionKey,
});
await sb.terminate();
// Store both values in your own durable systems.
const snapshotId = snapshot.imageId;
```
{/snippet}
{#snippet go()}
```go notest
package main
import (
"context"
"crypto/rand"
modal "github.com/modal-labs/modal-client/go"
)
func main() {
ctx := context.Background()
mc, _ := modal.NewClient()
app, _ := mc.Apps.FromName(ctx, "csek-directory-snapshots", &modal.AppFromNameParams{
CreateIfMissing: true,
})
image := mc.Images.FromRegistry("debian:12-slim", nil)
encryptionKey := make([]byte, 32)
if _, err := rand.Read(encryptionKey); err != nil {
panic(err) // Handle this error.
}
sb, _ := mc.Sandboxes.Create(ctx, app, image, nil)
process, _ := sb.Exec(ctx, []string{
"bash",
"-c",
"mkdir -p /project && echo 'private data' > /project/state.txt",
}, nil)
process.Wait(ctx, nil)
snapshot, _ := sb.SnapshotDirectory(ctx, "/project", &modal.SandboxSnapshotDirectoryParams{
ExperimentalEncryptionKey: encryptionKey,
})
sb.Terminate(ctx, nil)
// Store both values in your own durable systems.
snapshotID := snapshot.ImageID
_ = snapshotID
}
```
{/snippet}
The encryption key parameter is currently exposed as an experimental SDK API.
See [Feature maturity](https://modal.com/docs/guide/feature-maturity#experimental-sdk) for how
Modal treats experimental SDK surfaces.
### Mount a CSEK-protected directory snapshot
To use the snapshot later, rehydrate the Image by ID and pass the same key to
the mount operation.
{#snippet python()}
```python notest
import modal
app = modal.App.lookup("csek-directory-snapshots")
snapshot = modal.Image.from_id(snapshot_id)
sb = modal.Sandbox.create(app=app)
sb.mount_image(
"/project",
snapshot,
_experimental_encryption_key=encryption_key,
)
contents = sb.exec("cat", "/project/state.txt").stdout.read().strip()
assert contents == "private data"
sb.terminate()
```
{/snippet}
{#snippet javascript()}
```javascript notest
const modal = new ModalClient();
const app = await modal.apps.fromName("csek-directory-snapshots");
const snapshot = await modal.images.fromId(snapshotId);
const image = modal.images.fromRegistry("debian:12-slim");
const sb = await modal.sandboxes.create(app, image);
await sb.mountImage("/project", snapshot, {
experimentalEncryptionKey: encryptionKey,
});
const contents = await (
await sb.exec(["cat", "/project/state.txt"])
).stdout.readText();
console.assert(contents.trim() === "private data");
await sb.terminate();
```
{/snippet}
{#snippet go()}
```go notest
package main
import (
"context"
"io"
"strings"
modal "github.com/modal-labs/modal-client/go"
)
func main() {
ctx := context.Background()
mc, _ := modal.NewClient()
app, _ := mc.Apps.FromName(ctx, "csek-directory-snapshots", nil)
snapshot, _ := mc.Images.FromID(ctx, snapshotID, nil)
image := mc.Images.FromRegistry("debian:12-slim", nil)
sb, _ := mc.Sandboxes.Create(ctx, app, image, nil)
sb.MountImage(ctx, "/project", snapshot, &modal.SandboxMountImageParams{
ExperimentalEncryptionKey: encryptionKey,
})
process, _ := sb.Exec(ctx, []string{"cat", "/project/state.txt"}, nil)
contents, _ := io.ReadAll(process.Stdout)
if strings.TrimSpace(string(contents)) != "private data" {
panic("unexpected contents")
}
sb.Terminate(ctx, nil)
}
```
{/snippet}
If the key is missing or incorrect, Modal cannot mount the encrypted snapshot.
### Re-snapshotting encrypted directories
After mounting a CSEK-protected directory snapshot, you can create another
directory snapshot from that mounted path:
- Pass the encryption key parameter to protect the new snapshot with CSEK.
- Omit the encryption key parameter to create the new snapshot with Modal-managed
encryption.
Each CSEK-protected snapshot is tied to the key used when that snapshot was
created. If you create a new CSEK-protected snapshot with a different key, use
the new key when mounting the new snapshot.
### Retention
CSEK does not change Directory Snapshot retention. Directory Snapshots are
retained for 30 days after creation. See [Snapshot Retention](https://modal.com/docs/guide/sandbox-snapshots#snapshot-retention)
for details.
#### Audit logs
# Audit Logs
Audit logs are available on the Enterprise plan . Contact sales@modal.com for more information.
Audit logs give your workspace an append-only record of the sensitive
actions that change its state — who did what, when, to which resource, and
from where. They are designed for compliance reviews, incident
investigation, and answering questions like _"did anyone delete this Secret
last Thursday?"_ without asking Modal support.
Audit logs are viewable within the settings page .
## Fields
Every audit event captures the same shape alongside the time it occurred:
| Field | What it is |
| --------------------- | ---------------------------------------------------------------------------------------------------------------------------------- |
| `action` | The kind of change that happened — e.g. `secret.create`, `app.deploy`. See the full list [below](#actions). |
| `actor` | The user or service user that initiated the action. |
| `targets` | The resource(s) the action affected, each recorded by ID so the event stays attributable after a rename or delete. |
| `context.environment` | The environment the action was scoped to. |
| `context.ip_address` | The client IP address. |
| `context.source` | `web` for the dashboard, `sdk` for the Modal CLI and client libraries. |
| `status` | Whether the action succeeded or failed. |
| `metadata` | Action-specific extra fields — e.g. the old and new budget values for `workspace.set_budget`, or the requested region for a Proxy. |
## Filtering
Filters are entered in the search bar above the table as `key:value`
pairs, separated by spaces. Any filter can be **negated** by prefixing it
with `-` to exclude matching events. The search bar autocompletes keys
and values as you type.
For example:
| Filter | Matches |
| -------------------------------------------- | ------------------------------------------------ |
| `action:secret.create` | Every Secret created in the selected time range. |
| `-status:success` | All actions that did not succeed. |
| `action:volume.delete` `-actor_type:service` | Volume deletions by non-service users. |
## Actions
The table below lists every action currently recorded. New actions will be
added as additional workspace operations are instrumented.
> Note: **container runtime activity is not audited.** Audit logs record
> workspace-level actions (deploying an App, creating a Volume, revoking a
> token) — not individual Function invocations or Sandbox `exec` calls,
> which are captured in Function and Sandbox logs.
.
The generated tokens are [JWTs](https://jwt.io/) signed by Modal using the keys described in the
discovery document. These tokens contain the full identity of the Function
in the `sub` claim, and they use custom claims to make this information more
easily accessible. See our [discovery document](https://oidc.modal.com/.well-known/openid-configuration)
for a full list of claims.
Generated tokens are automatically injected into your Function's containers via the `MODAL_IDENTITY_TOKEN`
environment variable. Below is an example of what claims might be included in a token:
```json
{
"sub": "modal:workspace_id:ac-12345abcd:environment_name:modal-examples:app_name:oidc-token-test:function_name:jwt_return_func:container_id:ta-12345abcd",
"aud": "oidc.modal.com",
"exp": 1732137751,
"iat": 1731964951,
"iss": "https://oidc.modal.com",
"jti": "31f92dca-e847-4bc9-8d15-9f234567a123",
"workspace_id": "ac-12345abcd",
"environment_id": "en-12345abcd",
"environment_name": "modal-examples",
"app_id": "ap-12345abcd",
"app_name": "oidc-token-test",
"function_id": "fu-12345abcd",
"function_name": "jwt_return_func",
"container_id": "ta-12345abcd"
}
```
### Sandboxes
Unlike Functions, [Sandboxes](https://modal.com/docs/guide/sandboxes) don't receive an identity
token by default. To opt in, pass `include_oidc_identity_token=True` when
creating the Sandbox:
```python notest
sb = modal.Sandbox.create(app=app, include_oidc_identity_token=True)
```
The token is then available inside the Sandbox via the same
`MODAL_IDENTITY_TOKEN` environment variable.
### App name format
By default, Modal Apps can be created with arbitrary names. However, when using
OIDC, the App name has a stricter character set. Specifically, it must be 64
characters or less and can only include alphanumeric characters, dashes, periods,
and underscores. If these constraints are violated, the OIDC token will not be
injected into the container.
Note that these are the same constraints that are applied to [Deployed Apps](https://modal.com/docs/guide/managing-deployments).
This means that if an App is deployable, it will also be compatible with OIDC.
## Demo usage with AWS S3
To see how OIDC tokens can be used, we'll demo a simple Function that lists
objects in an S3 bucket.
### Step 0: Understand your OIDC claims
Before we can configure OIDC policies, we need to know what claims we can match
against. We can run a Function and inspect its claims to find out.
```python notest
app = modal.App("oidc-token-test")
jwt_image = modal.Image.debian_slim().pip_install("pyjwt")
@app.function(image=jwt_image)
def jwt_return_func():
import jwt
token = os.environ["MODAL_IDENTITY_TOKEN"]
claims = jwt.decode(token, options={"verify_signature": False})
print(json.dumps(claims, indent=2))
@app.local_entrypoint()
def main():
jwt_return_func.remote()
```
Run the function locally to see its claims:
```bash
$ modal run oidc-token-test.py
{
"sub": "modal:workspace_id:ac-12345abcd:environment_name:modal-examples:app_name:oidc-token-test:function_name:jwt_return_func:container_id:ta-12345abcd",
"aud": "oidc.modal.com",
"exp": 1732137751,
"iat": 1731964951,
"iss": "https://oidc.modal.com",
"jti": "31f92dca-e847-4bc9-8d15-9f234567a123",
"workspace_id": "ac-12345abcd",
"environment_id": "en-12345abcd",
"environment_name": "modal-examples",
"app_id": "ap-12345abcd",
"app_name": "oidc-token-test",
"function_id": "fu-12345abcd",
"function_name": "jwt_return_func",
"container_id": "ta-12345abcd"
}
```
Now we can match off these claims to configure our OIDC policies.
### Step 1: Configure AWS to trust Modal's OIDC provider
We need to make AWS accept Modal identity tokens. To do this, we need to add
Modal's OIDC provider as a trusted entity in our AWS account.
```bash
aws iam create-open-id-connect-provider \
--url https://oidc.modal.com \
--client-id-list oidc.modal.com
```
This will trigger AWS to pull down our [JSON Web Key Set (JWKS)](https://auth0.com/docs/secure/tokens/json-web-tokens/json-web-key-sets)
and use it to verify the signatures of any tokens signed by Modal.
### Step 2: Create an IAM policy that can be used by Modal Functions
Let's create a simple IAM policy that allows listing objects in an S3 bucket.
Take the policy below and replace the bucket name with your own.
```json
{
"Version": "2012-10-17",
"Statement": [
{
"Effect": "Allow",
"Action": ["s3:PutObject", "s3:GetObject", "s3:ListBucket"],
"Resource": ["arn:aws:s3:::fun-bucket", "arn:aws:s3:::fun-bucket/*"]
}
]
}
```
### Step 3: Create an IAM role that can be assumed by Modal Functions
Now, we can create an IAM role that uses this policy. Visit the IAM console
to create this role. If you add this policy using the CLI, update the
OIDC provider ARN to match the one created in [Step 1](#step-1-configure-aws-to-trust-modals-oidc-provider).
Be sure to replace the Workspace ID placeholder with your own. You can find your Workspace ID
at https://modal.com/settings/workspaces or through the `modal token info` CLI.
```json
{
"Version": "2012-10-17",
"Statement": [
{
"Effect": "Allow",
"Principal": {
"Federated": "arn:aws:iam::123456789abcd:oidc-provider/oidc.modal.com"
},
"Action": "sts:AssumeRoleWithWebIdentity",
"Condition": {
"StringEquals": {
"oidc.modal.com:aud": "oidc.modal.com"
},
"StringLike": {
"oidc.modal.com:sub": "modal:workspace_id:ac-12345abcd:*"
}
}
}
]
}
```
Note how we use `workspace_id` to limit the scope of the role. This means that
the IAM role can only be assumed by Functions in your Workspace. You can further
limit this by specifying an Environment, App, or Function name.
Ideally, we would use the custom claims for role limiting. Unfortunately, AWS
does not support [matching on custom claims](https://docs.aws.amazon.com/IAM/latest/UserGuide/reference_policies_iam-condition-keys.html#condition-keys-wif),
so we use the `sub` claim instead.
### Step 4: Use the OIDC token in your Function
The AWS SDKs have built-in support for OIDC tokens, so you can use them as
follows:
```python notest
import boto3
app = modal.App("oidc-token-test")
boto3_image = modal.Image.debian_slim().pip_install("boto3")
# Trade a Modal OIDC token for AWS credentials
def get_s3_client(role_arn):
sts_client = boto3.client("sts")
# Assume role with Web Identity
credential_response = sts_client.assume_role_with_web_identity(
RoleArn=role_arn, RoleSessionName="OIDCSession", WebIdentityToken=os.environ["MODAL_IDENTITY_TOKEN"]
)
# Extract credentials
credentials = credential_response["Credentials"]
return boto3.client(
"s3",
aws_access_key_id=credentials["AccessKeyId"],
aws_secret_access_key=credentials["SecretAccessKey"],
aws_session_token=credentials["SessionToken"],
)
# List the contents of an S3 bucket
@app.function(image=boto3_image)
def list_bucket_contents(bucket_name, role_arn):
s3_client = get_s3_client(role_arn)
response = s3_client.list_objects_v2(Bucket=bucket_name)
for obj in response["Contents"]:
print(f"- {obj['Key']} (Size: {obj['Size']} bytes)")
@app.local_entrypoint()
def main():
# Replace with the role ARN and bucket name from step 2
list_bucket_contents.remote("fun-bucket", "arn:aws:iam::123456789abcd:role/oidc_test_role")
```
Run the function locally to see the contents of the bucket:
```bash
$ modal run oidc-token-test.py
- test-file.txt (Size: 10 bytes)
```
## Demo usage with AWS Elastic Container Registry (ECR)
You can also use OIDC to authenticate [Private Registries](https://modal.com/docs/guide/existing-images) on AWS.
### Prerequisites
1. Configure AWS to trust Modal's OIDC provider ([Step 1 above](#step-1-configure-aws-to-trust-modals-oidc-provider))
2. [Create an AWS Policy with read-only ECR access](https://modal.com/docs/guide/existing-images#elastic-container-registry-ecr)
3. Create an IAM role that uses this policy ([Step 3 above](#step-3-create-an-iam-role-that-can-be-assumed-by-modal-functions))
### Test with a sample image
Create sample Dockerfile:
```dockerfile
FROM python:3.11-slim
WORKDIR /app
CMD ["python3"]
```
Build and push the image to ECR:
```bash
# Login with the AWS CLI
aws ecr get-login-password --region [ECR_REGION] | docker login --username AWS --password-stdin [ECR_REPO_ARN]
# Build the Docker Image
docker build -t modal-oidc-test-image .
# Push the image to ECR
docker tag modal-oidc-test-image:latest [ECR_REPO_ARN]:latest
docker push [ECR_REPO_ARN]:latest
```
Test pulling the image from ECR:
```python
import modal
app = modal.App("image-from-ecr-test")
sample_image = modal.Image.from_aws_ecr(
"[ECR_IMAGE_URI]", #eg. "12345678.dkr.ecr.us-east-1.amazonaws.com/repository:latest"
secret=modal.Secret.from_dict(
{
"AWS_ROLE_ARN": "[IAM_ROLE_ARN]", # eg. "arn:aws:iam::123456789abcd:role/oidc_test_role"
"AWS_REGION": "[ECR_REGION]", # eg. "us-east-1"
}
),
)
@app.function(image=sample_image)
def hello():
print("Hello, World!")
```
## Next steps
The OIDC integration can be used for much more than just AWS. With this same pattern,
you can configure automatic access to [Vault](https://developer.hashicorp.com/vault/docs/auth/jwt),
[GCP](https://cloud.google.com/identity-platform/docs/web/oidc), [Azure](https://learn.microsoft.com/en-us/entra/identity-platform/v2-protocols-oidc), and more.
At this time, OIDC-authenticated container image pulling is only support with AWS ECR.
#### Connecting Modal to your Datadog account
# Connecting Modal to your Datadog account
You can use the [Modal + Datadog Integration](https://docs.datadoghq.com/integrations/modal/)
to export Modal Function logs to Datadog. You'll find the Modal Datadog
Integration available for install in the Datadog marketplace.
## What this integration does
This integration allows you to:
1. Export Modal audit logs in Datadog
2. Export Modal Function logs to Datadog
3. Export container metrics to Datadog
## Installing the integration
Connecting this integration creates an API key in your Datadog account, which
requires Datadog org owner permissions. If you aren't an org owner, ask one to
complete the connection.
1. Open the [Modal Tile](https://app.datadoghq.com/integrations?integrationId=modal) (or the EU tile [here](https://app.datadoghq.eu/integrations?integrationId=modal))
in the Datadog integrations page
2. Click "Install Integration"
3. Click Connect Accounts to begin authorization of this integration.
You will be redirected to log into Modal, and once logged in, you’ll
be redirected to the Datadog authorization page.
4. Click "Authorize" to complete the integration setup
## Metrics
The Modal Datadog Integration will forward the following metrics to Datadog:
- `modal.cpu.utilization`
- `modal.memory.usage`
- `modal.gpu.memory.usage`
- `modal.gpu.compute.utilization`
- `modal.gpu.power.usage`
- `modal.gpu.power.utilization`
- `modal.gpu.temperature`
- `modal.container.running`
- `modal.input_events.elapsed_time_us`
- `modal.input_events.input_queue_time_us`
- `modal.input_events.coldstart_time_us`
- `modal.input_events.successes`
- `modal.input_events.total_inputs`
- `modal.function.pending_inputs`
- `modal.function.running_inputs`
All metrics are tagged with `container_id`, `environment_name`, `app_name`, `app_id`,
`function_name`, `function_id`, `workspace_name`, and `workspace_id`.
Deprecated metrics:
- `modal.memory.utilization` (use `modal.memory.usage`)
- `modal.gpu.memory.utilization` (use `modal.gpu.memory.usage`)
`modal.input_events.successes` and `modal.input_events.total_inputs` can be used
to measure the success rate of a certain function or app.
As an [official Datadog integration](https://docs.datadoghq.com/integrations/modal/),
Modal metrics are free on Datadog while logs are charged.
## Log attributes
Logs forwarded to Datadog include the following attributes:
- `container_id`
- `app_id`
- `app_name`
- `function_id`
- `function_name`
- `function_call_id`
- `input_id`
- `sandbox_id`
- `environment`
- `workspace`
- `workspace_id`
These are [log attributes](https://docs.datadoghq.com/logs/log_configuration/attributes_naming_convention/),
not tags. You can filter and search by them in Datadog's
[Log Explorer](https://docs.datadoghq.com/logs/explorer/) using the `@` prefix
(for example, `@container_id:`).
## Structured logging
Logs from Modal are sent to Datadog in plaintext without any structured
parsing. This means that if you have custom log formats, you'll need to
set up a [log processing pipeline](https://docs.datadoghq.com/logs/log_configuration/pipelines/?tab=source)
in Datadog to parse them.
Modal passes log messages in the `.message` field of the log record. To
parse logs, you should operate over this field. Note that the Modal Integration
does set up some basic pipelines. In order for your pipelines to work, ensure
that your pipelines come before Modal's pipelines in your log settings.
## Cost Savings
The Modal Datadog Integration will forward all logs to Datadog which could be
costly for verbose apps. We recommend using either [Log Pipelines](https://docs.datadoghq.com/logs/log_configuration/pipelines/?tab=source)
or [Index Exclusion Filters](https://docs.datadoghq.com/logs/indexes/?tab=ui#exclusion-filters)
to filter logs before they are sent to Datadog.
All logs include the `environment` attribute. The simplest way to filter
logs is to create a pipeline that filters on this attribute and to isolate
verbose apps in a separate environment.
## Uninstalling the integration
Once the integration is uninstalled, all logs will stop being sent to
Datadog, and authorization will be revoked.
1. Navigate to the [Modal metrics settings page](http://modal.com/settings/metrics)
and select "Delete Datadog Integration".
2. On the Configure tab in the Modal integration tile in Datadog,
click Uninstall Integration.
3. Confirm that you want to uninstall the integration.
4. Ensure that all API keys associated with this integration have been
disabled by searching for the integration name on the [API Keys](https://app.datadoghq.com/organization-settings/api-keys?filter=Modal)
page.
#### Connecting Modal to your OpenTelemetry provider
# Connecting Modal to your OpenTelemetry Provider
You can export Modal logs to your [OpenTelemetry](https://opentelemetry.io/docs/what-is-opentelemetry/)
provider using the Modal OpenTelemetry integration. This integration is compatible with
any observability provider that supports the OpenTelemetry HTTP APIs.
## What this integration does
This integration allows you to:
1. Export Modal audit logs to your provider
2. Export Modal Function logs to your provider
3. Export container metrics to your provider
## Metrics
The Modal OpenTelemetry Integration will forward the following metrics to your provider:
- `modal.cpu.utilization`
- `modal.memory.usage`
- `modal.gpu.memory.usage`
- `modal.gpu.compute.utilization`
- `modal.container.running`
- `modal.input_events.elapsed_time_us`
- `modal.input_events.input_queue_time_us`
- `modal.input_events.coldstart_time_us`
- `modal.input_events.successes`
- `modal.input_events.total_inputs`
- `modal.function.pending_inputs`
- `modal.function.running_inputs`
Deprecated metrics:
- `modal.memory.utilization` (use `modal.memory.usage`)
- `modal.gpu.memory.utilization` (use `modal.gpu.memory.usage`)
`modal.input_events.successes` and `modal.input_events.total_inputs` can be used to measure the success rate of a certain function or app.
These metrics are tagged with `container_id`, `environment_name`, `app_name`,
`app_id`, `function_name`, `function_id`, `workspace_name`, and `workspace_id`.
## Custom metrics
Contact us to enable custom metrics for your workspace.
The Modal OpenTelemetry Integration allows you to send custom metrics and spans to your provider. You will
then need to export our collector environment variables. These configure the OpenTelemetry SDK
to send messages to our collector in HTTP format. You don't need to do this to get the
out-of-the-box metrics above, only for your own custom metrics.
```python
@app.function(
secrets=[modal.Secret.from_dict({
"OTEL_EXPORTER_OTLP_ENDPOINT": "otlp-collector.modal.local:4317",
"OTEL_EXPORTER_OTLP_INSECURE": "true",
"OTEL_EXPORTER_OTLP_PROTOCOL": "http/protobuf",
})],
)
def custom_metrics():
...
```
All OpenTelemetry SDKs should pick this configuration up, and your custom metrics and spans will be
sent to your configured provider.
## Installing the integration
1. Find out the endpoint URL for your OpenTelemetry provider. This is the URL that
the Modal integration will send logs to. Note that this should be the base URL
of the OpenTelemetry provider, and not a specific endpoint. For example, for the
[US New Relic instance](https://docs.newrelic.com/docs/opentelemetry/best-practices/opentelemetry-otlp/#configure-endpoint-port-protocol),
the endpoint URL is `https://otlp.nr-data.net`, not `https://otlp.nr-data.net/v1/logs`.
2. Find out the API key or other authentication method required to send logs to your
OpenTelemetry provider. This is the key that the Modal integration will use to authenticate
with your provider. Modal can provide any key/value HTTP header pairs. For example, for
[New Relic](https://docs.newrelic.com/docs/opentelemetry/best-practices/opentelemetry-otlp/#api-key),
the header is `api-key`.
3. Create a new OpenTelemetry Secret in Modal with one key per header. These keys should be
prefixed with `OTEL_HEADER_`, followed by the name of the header. The value of this
key should be the value of the header. For example, for New Relic, an example Secret
might look like `OTEL_HEADER_api-key: YOUR_API_KEY`. If you use the OpenTelemetry Secret
template, this will be pre-filled for you.
4. Navigate to the [Modal metrics settings page](http://modal.com/settings/metrics) and configure
the OpenTelemetry push URL from step 1 and the Secret from step 3.
5. Save your changes and use the test button to confirm that logs are being sent to your provider.
If it's all working, you should see a `Hello from Modal! 🚀` log from the `modal.test_logs` service.
## Uninstalling the integration
Once the integration is uninstalled, all logs will stop being sent to
your provider.
1. Navigate to the [Modal metrics settings page](http://modal.com/settings/metrics)
and disable the OpenTelemetry integration.
#### Okta SSO
# Okta SSO
Okta SSO is available on the Enterprise plan . Contact sales@modal.com for more information.
## Prerequisites
- A Workspace that's on an [Enterprise](https://modal.com/pricing) plan
- Admin access to the Workspace you want to configure with Okta Single-Sign-On (SSO)
- Admin privileges for your Okta Organization
## Supported features
- Identity Provider (IdP) initiated SSO
- Service Provider (SP) initiated SSO
- Just-In-Time account provisioning
For more information on the listed features, visit the
[Okta Glossary](https://help.okta.com/okta_help.htm?type=oie&id=ext_glossary).
## Configuration
### Read this before you enable "Require SSO"
Enabling "Require SSO" will force all users to sign in via Okta. Ensure that you
have admin access to your Modal Workspace through an Okta account before
enabling.
### Configuration steps
#### Step 1: Add Modal app to Okta Applications
1. Sign in to your Okta admin dashboard
2. Navigate to the Applications tab and click "Browse App Catalog".

3. Select "Modal" and click "Done".
4. Select the "Sign On" tab and click "Edit".

5. Fill out Workspace field to configure for your specific Modal Workspace. See
[Step 2](https://modal.com/docs/guide/okta-sso#step-2-link-your-workspace-to-okta-modal-application)
if you're unsure what this is.

#### Step 2: Link your Workspace to Okta Modal application
1. Navigate to your application on the Okta Admin page.
2. Copy the Metadata URL from the Okta Admin Console (It's under the "Sign On"
tab). 
3. Sign in to https://modal.com and visit your [Workspace Management](https://modal.com/settings/workspace-management/identity-and-provisioning) page's `Identity and Provisioning` tab.
4. Paste the Metadata URL in the input and click "Save Changes"
#### Step 3: Assign users / groups and test the integration
1. Navigate back to your Okta application on the Okta Admin dashboard.
2. Click on the "Assignments" tab and add the appropriate people or groups.

3. To test the integration, sign in as one of the users you assigned in the previous step.
4. Click on the Modal application on the Okta Dashboard to initiate Single Sign-On.
#### Notes
The following SAML attributes are used by the integration:
| Name | Value |
| --------- | -------------- |
| email | user.email |
| firstName | user.firstName |
| lastName | user.lastName |
## SP-initiated SSO
The sign-in process is initiated from https://modal.com/login/sso
1. Enter your workspace name in the input
2. Click "continue with SSO" to authenticate with Okta
#### Microsoft Entra SSO
# Microsoft Entra SSO
Microsoft Entra SSO is available on the Enterprise plan . Contact sales@modal.com for more information.
## Prerequisites
- A Workspace that's on an [Enterprise](https://modal.com/pricing) plan
- Admin access to the Workspace you want to configure with
Microsoft Entra Single-Sign-On (SSO)
- Admin privileges for your Microsoft Entra organization, such as the Cloud
Application Administrator or Application Administrator role
## Supported features
- Identity Provider (IdP) initiated SSO
- Service Provider (SP) initiated SSO
- Just-In-Time account provisioning
## Configuration
### Read this before you enable "Require SSO"
Enabling "Require SSO" will force all users to sign in via Microsoft Entra.
Ensure that you have admin access to your Modal Workspace through a
Microsoft Entra account before enabling.
### Configuration steps
#### Step 1: Add Modal app to Microsoft Entra Applications
1. Sign in to the [Microsoft Entra admin center](https://entra.microsoft.com/).
2. Navigate to "Entra ID > Enterprise apps > All applications" and select
"New application".
3. Select "Create your own application".
4. Name the application `Modal`, select "Integrate any other application you
don't find in the gallery (Non-gallery)", and create the application.
5. Open "Single sign-on" for the application and select "SAML".
For more information, see Microsoft's guides to
[adding an enterprise application](https://learn.microsoft.com/en-us/entra/identity/enterprise-apps/add-application-portal)
and
[enabling SAML SSO](https://learn.microsoft.com/en-us/entra/identity/enterprise-apps/add-application-portal-setup-sso).
#### Step 2: Configure the Modal SAML settings
In "Basic SAML Configuration", enter the following values. Replace
`` with your Modal Workspace name.
| Setting | Value |
| ---------------------------------- | --------------------------------------------------- |
| Identifier (Entity ID) | `https://www.modal.com` |
| Reply URL (Assertion Consumer URL) | `https://modal.com/api/okta/saml/sso/` |
| Sign on URL | `https://modal.com/login/sso?workspace=` |
Save the configuration. The sign-on URL gives users an SP-initiated login path
for the configured Workspace.
#### Step 3: Configure SAML attributes and claims
In "Attributes & Claims", add or edit claims so the SAML assertion includes
the following attributes. Enter each attribute name exactly as shown and leave
its "Namespace" blank.
| Name | Value |
| --------- | -------------- |
| email | user.mail |
| firstName | user.givenname |
| lastName | user.surname |
If `user.mail` isn't populated for every user, map `email` from the Microsoft
Entra attribute that contains the email address your users use with Modal. For
example, some organizations use `user.userprincipalname` as their email source.
See Microsoft's documentation on
[adding attributes to token claims](https://learn.microsoft.com/en-us/entra/external-id/customers/how-to-add-attributes-to-token)
for details about configuring attributes and claims.
#### Step 4: Link your Workspace to Microsoft Entra Modal application
1. Navigate back to your Modal application in the Microsoft Entra admin center.
2. In the application's SAML configuration, find "SAML
Certificates" and copy the "App Federation Metadata URL".
3. Sign in to https://modal.com and visit your [Workspace Management](https://modal.com/settings/workspace-management/identity-and-provisioning) page's "Identity and Provisioning" tab.
4. Paste the App Federation Metadata URL in the input and click "Save Changes".
#### Step 5: Assign users / groups and test the integration
1. Navigate back to your Modal application in the Microsoft Entra admin center.
2. Open "Users and groups" and assign the appropriate people or groups. See
Microsoft's guide to
[assigning users and groups](https://learn.microsoft.com/en-us/entra/identity/enterprise-apps/assign-user-or-group-access-portal)
for detailed steps.
3. To test the integration, sign in as one of the users you assigned in the
previous step.
4. Click on the Modal application in the
[My Apps portal](https://myapps.microsoft.com/) to initiate Single Sign-On.
5. Confirm that the user is added to the expected Modal Workspace before
enabling "Require SSO".
## SP-initiated SSO
The sign-in process is initiated from https://modal.com/login/sso
1. Enter your workspace name in the input
2. Click "continue with SSO" to authenticate with Microsoft Entra
## Troubleshooting
### Modal reports a missing SAML attribute
Confirm that the assertion contains `email`, `firstName`, and `lastName` with
the exact capitalization shown above. Each claim must have an empty namespace,
and its source attribute must contain a value for the affected user.
### A user can't open the application
Confirm that the user is assigned directly or through a supported group. Group
assignment requires Microsoft Entra ID P1 or P2, and assignments don't include
members of nested groups.
### Modal can't load the identity provider metadata
Confirm that you copied the "App Federation Metadata URL", rather than the
Login URL, Microsoft Entra Identifier, or a local certificate file.
#### Custom SAML SSO
# Custom SAML SSO
Custom SAML SSO is available on the Enterprise plan . Contact sales@modal.com for more information.
If you use an identity provider (IdP) other than Okta, you can configure custom SAML SSO for your Modal Workspace.
For provider-specific setup, see our [Okta SSO documentation](https://modal.com/docs/guide/okta-sso)
or [Microsoft Entra SSO documentation](https://modal.com/docs/guide/entra-sso).
## Prerequisites
- A Workspace that's on an [Enterprise](https://modal.com/pricing) plan
- Admin access to the Workspace you want to configure with SSO
- Admin privileges for your identity provider
## Supported features
- Identity Provider (IdP) initiated SSO
- Service Provider (SP) initiated SSO
- Just-In-Time account provisioning
## Configuration
### Modal SAML settings
Configure your IdP with the following settings:
| Setting | Value |
| --------- | ------------------------------------------------- |
| Entity ID | `https://www.modal.com` |
| ACS URL | `https://modal.com/api/okta/saml/sso/` |
Replace `` with your Modal Workspace name.
### Required SAML attributes
Your IdP must send the following SAML attributes:
| Attribute | Description |
| --------- | -------------------- |
| email | User's email address |
| firstName | User's first name |
| lastName | User's last name |
### Configuration steps
#### Step 1: Configure your IdP
1. Create a new SAML application in your identity provider
2. Set the Entity ID to `https://www.modal.com`
3. Set the ACS URL to `https://modal.com/api/okta/saml/sso/` (replace `` with your Workspace name)
4. Configure the required SAML attributes (email, firstName, lastName)
5. Ensure your IdP signs SAML assertions
#### Step 2: Link your Workspace to your IdP
1. Obtain the SAML Metadata URL from your IdP
2. Sign in to https://modal.com and visit your [Workspace Management](https://modal.com/settings/workspace-management/identity-and-provisioning) page's `Identity and Provisioning` tab
3. Paste the Metadata URL in the input and click "Save Changes"
#### Step 3: Test the integration
1. Assign users in your IdP
2. Test IdP-initiated SSO by clicking the Modal application in your IdP dashboard
3. Test SP-initiated SSO by visiting the login URL below
#### Step 4: Read this before you enable "Require SSO"
Enabling "Require SSO" will force all users to sign in via SSO. Ensure that you
have admin access to your Modal Workspace through your identity provider before
enabling.
## Login URL
This URL can be used so that users can sign-in to the correct workspace from your IdP.
`https://modal.com/login/sso?workspace=` (replace `` with your workspace name)
#### SCIM Integration (Beta)
# SCIM Integration
SCIM support is available on the Enterprise plan . Contact sales@modal.com for more information.
[SCIM (System for Cross-domain Identity Management)](https://datatracker.ietf.org/doc/html/rfc7643) is a protocol that Identity Providers (IdPs) can use to automate user management in connected apps.
Modal supports SCIM for automatic provisioning and deprovisioning of users.
## Connecting an IdP
### Step 1: Generate a SCIM token
1. Sign in to https://modal.com and visit your [Workspace Management](https://modal.com/settings/workspace-management/identity-and-provisioning) page's "Identity and Provisioning" tab. If SCIM is enabled for your Workspace, there will be a "SCIM Tokens" section on the page below the SSO configuration settings. If you do not see a section for SCIM tokens, contact Modal support about enabling SCIM support for your Workspace.
2. Click on "New SCIM Token" then "Create Token".
3. A new token will be generated and displayed to you. Copy the value from the "Token Secret" box and store it somewhere secure. You can also copy the exact url that the IdP will require to integrate with your Modal Workspace. Once you click "Done", you will not be able to view the token secret again and will have to generate a new one if you can't otherwise access it.
### Step 2: IdP Configuration
#### Okta
1. Create a private SCIM integration.
The SCIM integration must be separate from the Modal catalog app used for
SAML SSO. Your existing Modal app can continue to handle SSO; do not add SSO
to the SCIM integration.
In the Okta Admin Console:
1. Go to "Applications > Applications".
2. Click "Create a new app integration".
3. Select "Okta Integration Wizard".
4. Choose "Provisioning" as the capability.
5. Choose "SCIM 2.0" as the provisioning method.
2. Configure the integration with your Modal SCIM credentials.
In the wizard's provisioning settings, enter:
| Okta setting | Modal value |
| --------------------------------- | ----------------------------------------------------- |
| SCIM connector base URL | `https://modal.com/api//scim/v2` |
| Unique identifier field for users | `userName` |
| Authentication mode | HTTP Header |
| Authorization | The full SCIM token generated in step 1 |
| Supported provisioning actions | Push New Users, Push Profile Updates, and Push Groups |
Test the API credentials, then review and deploy the integration. When
prompted, add an app instance from your organization's "Private apps"
catalog.
In the app instance's "Provisioning > To App" settings, enable "Create
Users", "Update User Attributes", and "Deactivate Users". Assign the
people and groups that Okta should provision to Modal.
For more information, see Okta's
[Okta Integration Wizard documentation](https://help.okta.com/en-us/Content/Topics/Apps/oiw/create-app-integration.htm).
#### Microsoft Entra ID
1. Create or select an Enterprise Application.
In the [Microsoft Entra admin center](https://entra.microsoft.com/):
- If you already have a Modal Enterprise Application that you use for SSO,
you can reuse it for SCIM provisioning. Go to "Entra ID > Enterprise apps"
and select the application.
- Otherwise, go to "Entra ID > Enterprise apps" and create an application:
1. Select "New application > Create your own application".
2. Enter a name such as `Modal SCIM`.
3. Select "Integrate any other application you don't find in the gallery
(Non-gallery)" and create the application.
2. Configure the application with your Modal SCIM credentials.
Open the Enterprise Application, select "Provisioning > New configuration",
and enter:
| Entra setting | Modal value |
| ------------- | ------------------------------------------------ |
| Tenant URL | `https://modal.com/api//scim/v2` |
| Secret Token | The full SCIM token generated in step 1 |
Select "Test Connection", then create the provisioning configuration.
Review the user attribute mappings and ensure that an email address is mapped
to `userName`. Assign the users and groups that Entra should provision, then
select "Start provisioning".
For more information, see Microsoft's
[SCIM provisioning documentation](https://learn.microsoft.com/en-us/entra/identity/app-provisioning/use-scim-to-provision-users-and-groups#integrate-your-scim-endpoint-with-the-microsoft-entra-provisioning-service).
#### Other IdPs
1. Create a custom SCIM integration.
Create a custom or non-gallery application that supports outbound SCIM 2.0
provisioning. Name it something recognizable, such as `Modal SCIM`. An
existing SSO integration can continue to handle authentication; whether the
SCIM integration must be a separate app depends on your IdP.
2. Configure the integration with your Modal SCIM credentials.
Find your IdP's equivalent settings and enter:
| Setting | Modal value |
| ---------------------- | ------------------------------------------------ |
| SCIM version | 2.0 |
| SCIM base URL | `https://modal.com/api//scim/v2` |
| Authorization method | Bearer token |
| Token | The full SCIM token generated in step 1 |
| Unique user identifier | Email address in `userName` |
Enable creating, updating, and deactivating users. You can also enable group
provisioning. Test the connection, assign the users and groups that your IdP
should provision, and start provisioning.
Modal supports the following SCIM capabilities:
| Capability | Supported | Notes |
| ---------------------------------- | --------- | ----------------------------- |
| SCIM 2.0 | Yes | |
| Pagination | Yes | |
| Create, update, and remove users | Yes | |
| Create, update, and delete groups | Yes | |
| Update group membership with PATCH | Yes | |
| Generate temporary passwords | No | Modal authentication uses SSO |
The IdP may also ask you to specify which user attributes are supported.
| SCIM user attribute | Modal support | Notes |
| ------------------- | ------------- | ----------------------------------------------- |
| externalId | Yes | |
| userName | Yes | Required; must contain the user's email address |
| displayName | Yes | |
| name.familyName | Yes | |
| name.givenName | Yes | |
| emails | Read only | The primary email is derived from `userName` |
| active | Yes | |
| addresses | No | |
| profileUrl | No | |
## Managing Tokens
Token management is restricted to only workspace owners and managers.
Up to two SCIM tokens may be active at any time. It may be useful to generate a second token to facilitate seamless token rotation - a workspace admin can generate a new token, use it to replace the old one in the connected IdP, and finally revoke the old token to ensure that no updates are dropped during the rotation process. Except during the process of rotation we recommend having only one SCIM token active at a time as a security best practice.
## Troubleshooting
If your IdP indicates that it is unable to authenticate with Modal, first double check that the token was copied correctly - the full token will have the form `si-XXXXXXXXXXXXXXXXXXXXXX:ss-XXXXXXXXXXXXXXXXXXXXXX`.
If you experience any issues with or have any questions about SCIM integration, please reach out via [Slack](https://modal.com/slack) or email us at [support@modal.com](mailto:support@modal.com).
#### Slack notifications (Beta)
# Slack notifications
You can integrate your Modal Workspace with Slack to receive timely essential notifications.
## Prerequisites
- You are a [Workspace Manager](https://modal.com/docs/guide/workspaces#administrating-workspace-members) in the Modal Workspace you're installing the Slack integration in.
- You have permissions to install apps in your Slack workspace.
## Supported notifications
- Alerts for failed scheduled function runs.
- Alerts for crash-looping containers in a function.
- Alerts for Functions whose warm containers have run no inputs for weeks.
- Alerts when any of your apps have client versions that are out of date.
- Alerts when you hit your GPU resource limits.
- Alerts when your Workspace approaches or reaches its usage limit or budget.
- Alerts when an Environment approaches or reaches its budget.
- Notices when credits are added to your Workspace.
## Slack Permissions
The Modal Slack app requests the following permissions to integrate with Slack:
- Start direct messages with people
- Send messages as @modal
- Add shortcuts and/or slash commands that people can use
- View basic information about public channels in a workspace
- View basic information about private channels that Modal has been added to
- View basic information about direct messages that Modal has been added to
- View basic information about group direct messages that Modal has been added to
- View people in a workspace
## Configuration
### Step 1: Install the Slack integration
Visit the _Slack Notifications_ section on your [settings](https://modal.com/settings/slack-notifications) page in your Modal Workspace and click the **Add to Slack** button.
### Step 2: Invite the Modal app to your Slack channel
Navigate to the Slack channel and `/invite` the Modal app so that the app can post messages to the channel.
### Step 3: Add the Modal app to your Slack channel
Navigate to the Slack channel you want to add the Modal app to and click on the channel header. On the integrations tab you can add the Modal app.

### Step 4: Use `/modal link` to link the Slack channel to your Modal Workspace
You'll be prompted to select the Workspace you want to link to the Slack channel. You can always unlink the Slack channel by visiting the _Slack Notifications_ section on your [settings](https://modal.com/settings/slack-notifications) page in your Modal Workspace.
### Workspace & account settings
#### Workspaces
# Workspaces
This page is a high-level guide to Modal Workspaces,
the primary unit of organization for Modal resources
and authentication.
A **Workspace** is an area where a user can deploy Modal Apps and other
resources. When you sign up to Modal, a Workspace is automatically created for
you. Its name is based on your GitHub username, but may be randomly generated
if that name is taken or invalid.
Every Workspace is shared, meaning you can invite others by email to
collaborate with you.
Older accounts may have a single-member "personal" Workspace which did not
support inviting additional members. Moving forward, all new signups start with
a normal Workspace that supports inviting teammates as soon as you verify your
account by adding a payment method.
.
## What GitHub permissions does signing up require?
- `user:email` — gives us the emails associated with the GitHub account.
- `read:org` (invites only) — needed for Modal Workspace invites. Note: this
only allows us to see what organization memberships you have
([GitHub docs](https://docs.github.com/en/apps/oauth-apps/building-oauth-apps/scopes-for-oauth-apps)).
We won't be able to access any code repositories or other details.
## How can I change my email?
You can change your email on the [settings](https://modal.com/settings) page.
#### Service users
# Service Users
Service users are available on the Team and Enterprise plans . Visit Workspace settings to upgrade.
Service users are programmatic accounts that allow automated systems to interact with Modal. They're ideal for CI/CD pipelines, automated deployments, and other workflows that need to authenticate.
## Create a Service User
Service users are only available for shared workspaces. You will need workspace owner or manager privileges to create service users.
To create a service user:
1. Go to your workspace [tokens settings page](https://modal.com/settings/tokens/service-users)
2. Click **New Service User**
3. Enter a name for your service user (must be lowercase alphanumeric, can contain hyphens or underscores)
4. Click **Create**
5. Copy the `MODAL_TOKEN_ID` and `MODAL_TOKEN_SECRET`. **This is the only time you can view the token secret** for security reasons.
6. Click **Configure environments** to grant the service user access. A new service user has **No Access** to every Environment, so it can't be used until you assign it the **Viewer** or **Contributor** role on at least one Environment.
## Use Service User Tokens
Set the service user credentials as environment variables in your automated environment:
```bash
export MODAL_TOKEN_ID=your-token-id
export MODAL_TOKEN_SECRET=your-token-secret
```
Once configured, you can use Modal's CLI and Python SDK as usual:
```bash
modal deploy your_app.py
```
## Delete a Service User
To remove a service user:
1. Go to the [tokens settings page](https://modal.com/settings/tokens/service-users)
2. Find the service user in the table
3. Click **Delete** when you hover over the row
## Permissions
Service users default to **No Access** on every Environment — they cannot read or write to an Environment until you grant them a Role. This differs from Workspace Members, who default to **Contributor**.
Grant a service user the **Viewer** or **Contributor** role on the specific Environments it needs, either:
- from the service user: on the [tokens settings page](https://modal.com/settings/tokens/service-users), open the **⋯** menu on the service user's row and select **Manage environments**, or
- from an Environment: on the [Environment settings page](https://modal.com/settings/workspace-management/environments), click **Manage** on the Environment, then open the **Access Restrictions** tab.
See [Role-Based Access Control](https://modal.com/docs/guide/rbac) for what each Environment Role allows.
## Securing Service Users
Because service user tokens are long-lived and used in automated environments, it's important to limit their access to only what's necessary:
- **Store tokens securely.** Use a secrets manager or your CI/CD platform's built-in secrets storage rather than hardcoding tokens in source code or configuration files.
- **Grant least-privilege access.** Because service users start with **No Access**, assign the **Viewer** or **Contributor** role only on the Environments they actually need, keeping production isolated from development and staging.
#### User groups (Beta)
# User groups
User groups require Role-Based Access Control
(RBAC) , which is available on the Team and Enterprise
plans . Creating and managing groups requires the Workspace Owner or
Workspace Manager Role. Visit Workspace settings
to upgrade.
User groups let you manage access for multiple Workspace Members at once. Add
members to a group, then assign the group an Environment Role in each
[Restricted Environment](https://modal.com/docs/guide/rbac#setting-up-restricted-environments)
it needs to access.
## Group types
Modal supports two types of user groups:
| Group type | Created in | Name and membership managed in |
| ---------- | ---------- | ------------------------------ |
| Custom | Modal | Modal |
| SCIM | Your IdP | Your IdP |
You can assign Environment Roles to either type of group from Modal. SCIM only
controls the group's name and membership; Modal remains the source of truth for
its Environment access.
## Create a custom group
To create and populate a custom group:
1. Open the **Groups** tab on the [Workspace Management settings
page](https://modal.com/settings/workspace-management/groups).
2. Click **Create Group**.
3. Enter a group name and select the Workspace Members to add.
4. Click **Create**.
A group can be created without any members or Environment access. Assigning an
Environment Role later applies that Role to every current and future member of
the group.
## Update a custom group
On the **Groups** settings page, expand a custom group and click **Edit Group**
to rename it or change its membership. You can also remove a member directly
from the group's member list.
Changes to group membership update the members' access to every Environment
assigned to that group.
## Manage groups with SCIM
When [SCIM](https://modal.com/docs/guide/scim) group provisioning is enabled, groups pushed by
your identity provider (IdP) appear automatically on the **Groups** settings
page with a **SCIM** label.
Manage the name and membership of a SCIM group in the IdP. These fields cannot
be edited in Modal, so the IdP remains their source of truth. You can still
assign, change, and remove the group's Environment Roles in Modal.
Removing a user from a group in the IdP removes the access they received from
that group after the change syncs to Modal. Deactivating or removing the user
through SCIM also removes their Workspace access according to your SCIM
configuration.
## Assign an Environment Role to a group
User groups work with [Role-Based Access Control
(RBAC)](https://modal.com/docs/guide/rbac) at the Environment level. Groups do not receive a
Workspace Role and do not change who can manage Workspace settings or billing.
To assign a group to an Environment:
1. Open [Environment settings](https://modal.com/settings/workspace-management/environments).
2. Click **Manage** for a Restricted Environment, then open **Access
Restrictions**.
3. Select the **Groups** tab and click **Add Group**.
4. Select a custom or SCIM group and choose an Environment Role:
- **Contributor** — can view and modify resources in the Environment.
- **Viewer** — can view resources but cannot modify them.
- **No Access** — cannot discover or access the Environment.
5. Click **Confirm**.
Group Roles can only be assigned in Restricted Environments. From the same
**Groups** tab, you can change a group's Role or remove the group from the
Environment. The **Groups** settings page also lists every Environment and Role
assigned to each group.
## How group Roles combine with other RBAC settings
A Workspace Member can receive an Environment Role directly, through one or
more groups, or from the Restricted Environment's default member Role. Modal
resolves these sources as follows:
- Any direct or group Role takes precedence over the default member Role.
- If a member has multiple direct or group Roles, the most permissive Role
applies: **Contributor**, then **Viewer**, then **No Access**.
- Workspace Owners and Managers always have **Contributor** access, regardless
of group assignments.
For example, a member assigned **Viewer** directly and **Contributor** through a
group has Contributor access. A **No Access** group assignment does not revoke a
more permissive direct or group assignment, but it does override an Environment
default of Viewer or Contributor when no other explicit assignment applies.
To keep access predictable, assign each team to the smallest set of groups it
needs and review both direct and group Roles when troubleshooting a member's
effective access.
#### Role-Based Access Control (RBAC)
# Role-Based Access Control (RBAC)
RBAC is available on the Team and Enterprise plans . Visit Workspace settings to upgrade.
Role-Based Access Control (RBAC) gives Workspace administrators more granular control over who can access and modify resources.
This is especially useful for protecting production while allowing broader access to development and staging.
Modal's RBAC system operates at two levels:
- **Workspace Roles** control overall Workspace permissions.
- **Environment Roles** control access to individual Environments.
## Workspace Roles
Modal [Workspaces](https://modal.com/docs/guide/workspaces) organize Modal Apps and other resources for a group of users. These roles control access at the level of the entire Workspace.
All Workspace Members have one of three Roles that determine their overall permissions:
- **Owner** — Full read-write access to everything in the Workspace, including billing, Workspace management, and all Environments. Can assign any Role to other members.
- **Manager** — Same as Owner, but cannot modify the Owner Role.
- **Member** — Can deploy and manage Apps, but cannot access billing, Workspace management, or other Workspace settings.
## Environment Roles
Modal [Environments](https://modal.com/docs/guide/environments) isolate Modal Apps and other resources from one another within a Workspace.
Every Environment has three Environment Roles that determine access to it:
- **Contributor** — Full read and write access to the Environment. Workspace Owners and Managers always have Contributor access.
- **Viewer** — Read-only access to resources in the Environment, including dashboards, logs, metrics, app and function configuration.
- **No Access** — No read or write access to the Environment.
Workspace Members default to **Contributor** in regular Environments. In a **Restricted** Environment, Members other than Workspace Owners and Managers use the Environment's default member Role, which can be **Contributor**, **Viewer**, or **No Access**. Workspace Owners and Managers always have **Contributor** access.
You can assign a **Contributor**, **Viewer**, or **No Access** Role directly to a Workspace Member in a Restricted Environment. A directly assigned Role takes precedence over the default. Service users do not use the member default: they default to **No Access** in every Environment and must be assigned a Role for each Environment they need.
## Setting up Restricted Environments
Create and manage Restricted Environments from [Environment settings](https://modal.com/settings/workspace-management/environments).
You can also create a Restricted Environment with [`modal environment create --restricted NAME`](https://modal.com/docs/cli/latest/environment#modal-environment-create).
Changing the default updates access only for Members who use it. Roles assigned directly to Members and service-user Roles are unchanged.
### Default access by actor
| Workspace Role | Unrestricted Environment Default | Restricted with Contributor default | Restricted with Viewer default | Restricted with No Access default |
| ---------------------------- | -------------------------------- | ----------------------------------- | ------------------------------ | --------------------------------- |
| Workspace Owner | Contributor | Contributor | Contributor | Contributor |
| Workspace Manager | Contributor | Contributor | Contributor | Contributor |
| Workspace Member | Contributor | Contributor | Viewer | No Access |
| Service user / service token | No Access | No Access | No Access | No Access |
Workspace Members can only be assigned an Environment Role in Restricted Environments. Service users can be given a Role on **any** Environment — Restricted or not — from their [tokens settings](https://modal.com/settings/tokens/service-users) or an Environment's Roles.
### No Access and Workspace defaults
Environments where a Member has **No Access** are omitted from Environment listings and selectors. Attempts to access the Environment directly are rejected.
A Restricted Environment with a **No Access** default can still be the Workspace's default Environment. Modal does not automatically choose another accessible Environment. Operations that use an inaccessible default fail, so the Member must explicitly select an Environment they can access.
## Service users and service tokens
[Service users](https://modal.com/docs/guide/service-users) are programmatic identities authenticated with API tokens. They are useful for CI/CD pipelines, deployment bots, and other machine-to-machine communication needs.
Unlike human users, service users do not have a Workspace-level role; their access is controlled entirely through Environment Roles.
| Use case | Recommended identity | How access works |
| -------------------------------------------- | -------------------------------------------------- | --------------------------------------------------------------------------------------------------------------------------------------- |
| Interactive development or manual management | Human user | Access is based on the user's Workspace Role, plus any Environment Role for restricted Environments |
| Automation in CI/CD or deployment workflows | Service user authenticated with a service token | Access is based only on the service user's Environment Role |
| Deploying to an Environment | Human user or service user with Contributor access | Deploying requires **Contributor** access to the target Environment; grant the service user that Role on each Environment it deploys to |
This makes service users the recommended way to let automation deploy to a specific Environment without granting broad Workspace permissions.
## Proxy Tokens
HTTP interfaces on [Endpoints](https://modal.com/docs/guide/endpoints), [Servers](https://modal.com/docs/guide/servers), and [Web Functions](https://modal.com/docs/guide/webhooks) can be protected with [Proxy Tokens](https://modal.com/docs/guide/webhook-proxy-auth), which authenticate inbound HTTP requests before they reach your containers.
On workspaces with RBAC enabled, Proxy Tokens are **scoped** — each token is explicitly associated with one or more Environments, and will only be accepted for endpoints deployed in those Environments. This prevents a token intended for a staging endpoint from being used to call a production one.
### Creating a scoped proxy token
1. Navigate to **Settings → Proxy Tokens** and click **New Token**.
2. Copy the token ID and secret — the secret is only shown once.
3. You will be prompted to select the Environments this token should be valid for.
4. Use the **Manage Environments** button on any existing scoped token to update its Environment associations. Changes take effect immediately, so removing an Environment will instantly revoke access for any clients using that token to call endpoints in that Environment.
Alternatively, you can create and manage Proxy Tokens via the [CLI](https://modal.com/docs/cli/latest/workspace#modal-workspace-proxy-tokens) or [Python SDK](https://modal.com/docs/sdk/py/latest/Workspace#proxy_tokens).
### Scoped vs. workspace-wide tokens
| Token type | Who gets it | Valid for |
| -------------- | ---------------------------- | ---------------------------------------------------------- |
| Scoped | Workspaces with RBAC enabled | Only the Environments explicitly associated with the token |
| Workspace-wide | Workspaces without RBAC | Any Web Function in the workspace |
Existing workspace-wide tokens continue to work as-is. New tokens created on workspaces with RBAC enabled are scoped by default.
If RBAC is disabled on a workspace, scoped tokens fall back to workspace-wide access.
## Cross-Environment access
Restricted Environments prevent app and task identities in other Environments from accessing resources inside the restricted Environment. For more detail, see [Cross-Environment Lookups](https://modal.com/docs/guide/environments#cross-environment-lookups).
In practice, this means a task can access objects in its own Environment and other unrestricted Environments, but code running in another Environment cannot use APIs such as `modal.App.lookup()`, `Secret.from_name()`, or `Volume.lookup()` to reach into a restricted Environment.
This prevents privilege escalation from a less trusted Environment into a more sensitive one.
### Cross-Environment behavior for app and task identities
Access checks are evaluated against the **target** Environment. That means workloads running inside a restricted Environment can still access objects in an **unrestricted** Environment, but workloads running outside a restricted Environment cannot reach into it.
| Source Environment | Target Environment | Cross-Environment access |
| ------------------ | ------------------ | ------------------------ |
| Unrestricted | Unrestricted | Allowed |
| Unrestricted | Restricted | Denied |
| Restricted | Unrestricted | Allowed |
| Restricted | Restricted | Denied |
Same-Environment access is unaffected by these cross-Environment rules.
### Example: inbound vs. outbound access
Suppose you have two Environments:
- `prod` — restricted
- `test` — unrestricted
A task running in `test` cannot look up secrets, volumes, or Apps in `prod`.
A task running in `prod` can still access objects in `test`, because `test` is not restricted.
If both `prod` and `test` are restricted, then tasks in one cannot access objects in the other.
## Protecting production secrets with restricted Environments
A common RBAC setup is to place production secrets in a restricted production Environment and grant **Contributor** access only to the human users and service users that should be allowed to deploy or manage production.
| Scenario | Result |
| ------------------------------------------------------------------------------ | ------- |
| Developer in `dev` tries to edit a secret in restricted `prod` | Denied |
| CI service user with Contributor access to restricted `prod` deploys to `prod` | Allowed |
| Task running in `prod` reads a secret in `prod` | Allowed |
| Task running in `prod` accesses objects in unrestricted `test` | Allowed |
This setup lets you keep development and testing more open while protecting production resources, including secrets, from accidental or unauthorized access.
## Common access patterns
| Pattern | Allowed? | Notes |
| ------------------------------------------------------------------------- | ---------------------------- | ------------------------------------------------------------------------------------------- |
| Workspace Member views logs in a Restricted Environment | If Viewer or Contributor | A Member whose effective Role is No Access cannot discover the Environment |
| Workspace Member deploys to a Restricted Environment | If Contributor | Contributor access is required to deploy or modify resources |
| Workspace Owner or Manager deploys to a Restricted Environment | Yes | Owners and Managers automatically have Contributor access |
| Service user deploys to a Restricted Environment | Yes, if assigned Contributor | Service users have No Access by default and must be assigned Contributor to deploy |
| Task running in `dev` reads a Secret in Restricted `prod` | No | Cross-Environment access into a Restricted Environment is denied |
| Task running in Restricted `prod` accesses objects in unrestricted `test` | Yes | Cross-Environment access is allowed when the target Environment is unrestricted |
| User views dashboards or App details in a Restricted Environment | If Viewer or Contributor | Viewer access includes read-only views such as dashboards, logs, metrics, and configuration |
| Task accesses resources in its own Environment | Yes | Same-Environment access is unaffected by cross-Environment restrictions |
| Scoped proxy token used on a Web Function in an associated Environment | Yes | Token must be explicitly associated with the target Environment |
| Scoped proxy token used on a Web Function in a non-associated Environment | No | Token is not valid for Environments it has not been associated with |
## FAQ
**Can I make Environments completely private?**
Yes. Set a Restricted Environment's default member Role to **No Access**, then assign **Viewer** or **Contributor** only to the Workspace Members and service users who need it. Other Members cannot discover the Environment. Workspace Owners and Managers always retain **Contributor** access.
**How do service tokens work with restricted Environments?**
Service tokens authenticate service users. Service users default to **No Access** on every Environment, restricted or not, and cannot read or write to an Environment until you assign them the **Viewer** or **Contributor** Role. This lets automated systems and CI/CD pipelines deploy and manage production without granting broad Workspace permissions.
**Can I use `modal.App.lookup()` across different restricted Environments?**
No. Apps cannot look up, read from, or write to objects in a different restricted Environment.
**Can code running in a restricted Environment access other Environments?**
Yes, but only when the target Environment is not restricted. A restricted Environment blocks access **into** it from other Environments.
#### Billing
# Billing
Modal is serverless, which means you only pay for the compute you use or [request](https://modal.com/docs/guide/resources). Reservations are not required, and there are no minimum usage-time increments. Up-to-date unit pricing for all of our products is available on our [Pricing page](https://modal.com/pricing).
## Billing frequency and incremental billing
All Workspaces are billed monthly. At the end of each billing cycle, you are auto-charged for the Modal usage incurred during that cycle (less any credits and incremental usage charges), as well as any subscription fees (non-Starter plans only) for the following billing cycle.
In addition to monthly billing, you will be auto-charged for incremental usage the first time you exceed certain thresholds. These charges occur within the billing cycle.
Team and Enterprise plans . Visit workspace settings to upgrade.
Environment budgets cap **compute usage** for a single Environment within the same billing cycle. Note that this means it does not include all Workspace-level charges (for example, storage and reservations), so Environment budget usage is not a full invoice total by itself.
You can set, edit, or remove Environment budgets on the [Workspace Management → Environments](https://modal.com/settings/workspace-management/environments) page.
### Other topics
#### Feature maturity
# Feature Maturity
New features at Modal evolve through several stages. To help you understand their stability, we use two separate concepts:
- [Release phases](#release-phases) ([Alpha](#alpha), [Beta](#beta) or [GA](#general-availability-ga)): signals the stability of a feature's underlying infrastructure
- [Experimental SDK](#experimental-sdk): signals API stability in the code interface
This separation allows the SDK to remain stable even while we are still refining the performance or scaling of a backend feature.
## Release Phases
We use the following release phases to signal the maturity of a feature's underlying design and infrastructure:
### Alpha
Alpha is reserved for features that might still be fragile and have known limitations. We provide these early so you can experiment with them, but you should expect significant changes to how the feature works. The documentation will clearly state their limitations.
Some Alpha features are private, meaning you need to contact us to get access.
### Beta
Beta is our default phase for new features. Beta features are generally self-serve, functional, and mostly stable. Beta features are often suitable for production use, though we may still be refining the final behavior, pricing, or scale limits.
Some Beta features are private, meaning you need to contact us to get access.
### General Availability (GA)
GA features are stable and fully ready for production grade usage. No breaking changes are planned. Any feature not marked as Alpha or Beta in the Modal docs can be considered GA.
## Experimental SDK
In addition to the release phases described above, you may see certain parts of the Modal SDK marked as experimental (e.g., `_experimental_snapshot()`).
This is strictly an SDK concept which indicates API stability, not infrastructure maturity. It often correlates with the Alpha → Beta → GA progression, but not always. Some features stabilize their API early while the backend is still maturing, but experimental APIs may also be introduced later in a feature's lifecycle to provide additional depth of configuration.
An experimental tag means we're still gathering feedback and iterating on the interface: method names, parameters, or return types may change. Once we're confident in the design, we remove the experimental marker and commit to backwards compatibility.
## SDK Deprecations
Features that are exposed via stable API in the SDK may become _deprecated_, either because we are discontinuing support for the associated platform feature, or because the API is being adjusted, e.g. to reduce a persistent confusion or to accommodate unanticipated extensions.
Deprecated API will remain functional and will issue deprecation warnings. We recommend heeding these warnings, since deprecations will eventually be enforced and code that exercises the deprecated API will break. Breaking changes are limited to increments of the `Y` version in our `X.Y.Z` versioning scheme.
## Other interfaces
Only the official SDKs are currently considered to be stable. Any other public interfaces are undocumented, subject to change without warning, and use-at-your-own risk.
## Providing Feedback
We value your feedback on Alpha and Beta features! If you're using a feature at any release phase and have suggestions or encounter issues:
- Join our [Slack community](https://modal.com/slack) to discuss with the team and other users
- Reach out to support@modal.com with specific feedback or bug reports
#### Notebooks
# Modal Notebooks
Notebooks allow you to write and execute Python code in Modal's cloud, within your browser. It's a hosted Jupyter notebook with:
- Serverless pricing and automatic idle shutdown
- Access to Modal GPUs and compute
- Real-time collaborative editing
- Python Intellisense/LSP support and AI autocomplete
- Support for rich and interactive outputs like images, widgets, and plots
## Getting started
Open [modal.com/notebooks](https://modal.com/notebooks) in your browser and create a new notebook. You can also upload an `.ipynb` file from your computer.
Once you create a notebook, you can start running cells. Try a simple statement like
```python
print("Hello, Modal!")
```
Or, import a library and create a plot:
```python notest
import matplotlib.pyplot as plt
import numpy as np
x = np.linspace(-20, 20, 500)
plt.plot(np.cos(x / 3.7 + 0.3), x * np.sin(x))
```
The default notebook image comes with a number of Python packages pre-installed, so you can get started right away. Popular ones include PyTorch, NumPy, Pandas, JAX, Transformers, and Matplotlib. You can find the full image definition [here](https://github.com/modal-labs/modal-client/blob/v1.1.3/modal/experimental/__init__.py#L234-L342). If you need another package, just install it:
```shell
%uv pip install [my-package]
```
All output types work out-of-the-box, including rich HTML, images, [Jupyter Widgets](https://ipywidgets.readthedocs.io/en/latest/), and interactive plots.
## Kernel resources
Just like with Modal Functions, notebooks run in serverless containers. This means you pay only for the CPU cores and memory you use.
If you need more resources, you can change kernel settings in the sidebar. This lets you set the number of CPU cores, memory, and GPU type for your notebook. You can also set a timeout for idle shutdown, which defaults to 10 minutes.
Use any GPU type available in Modal, including up to 8 Nvidia A100s or H100s. You can switch the kernel configuration in seconds!
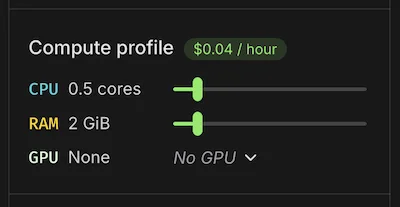
Note that the CPU and memory requests configure the _minimum_ amount of resources allocated, but you can usually burst above the request. For example, if you've set the Notebook to have 0.5 CPU cores, you'll be billed for that continuously, but you can use up to any available cores on the machine (e.g., 32 CPUs) and will be billed for only the time you use them.
### Notebook pricing
Modal Notebooks are priced simply, by compute usage while the kernel is running. See the [pricing page](https://modal.com/pricing) for rates. Currently the CPU and Memory costs are priced according to Sandboxes. They appear in your [usage dashboard](https://modal.com/settings/usage) under “Notebooks”.
Inactive notebooks do not incur any cost. You are only billed for time the notebook is actively running.
## Custom images, volumes, secrets, and cloud storage
Modal Notebooks supports custom images, volumes, and secrets, just like Modal Functions. You can use these to install additional packages, mount persistent storage, or access secrets.
- To use a custom image, you need to have a [deployed Modal Function](https://modal.com/docs/guide/managing-deployments) using that image. Then, search for that function in the sidebar.
- To use a Secret, simply create a [Modal Secret](https://modal.com/secrets) using our wizard and attach it to the notebook, so it can be injected as an environment variable automatically.
- To use a Volume, create a [Modal Volume](https://modal.com/docs/guide/volumes) and attach it to the notebook. This lets you mount high-performance, persistent storage that can be shared across multiple notebooks or functions. They will appear as folders in the `/mnt` directory by default.
### Creating a Custom Image
If you don't have a suitable deployed Modal App already, you can set up your environment to deploy custom images in under a minute using the Modal CLI. First, run `pip install modal`, and define your image in a file like:
```python
import modal
# Image definition here:
image = (
modal.Image.from_registry("python:3.13-slim")
.pip_install("requests", "numpy")
.apt_install("curl", "wget")
.run_commands(
"echo 'foo' > /root/hello.txt",
# ... other commands
)
)
app = modal.App("notebook-images")
@app.function(image=image) # You need a Function object to reference the image.
def notebook_image():
pass
```
Then, make sure you have the Modal CLI (`pip install modal`) and run this command to build and deploy the image:
```bash
modal deploy notebook_images.py
```
For more information on custom images in Modal, see our [guide on defining images](https://modal.com/docs/guide/images).
(Advanced) Note that if you use the [`add_local_file()` or `add_local_dir()` functions](https://modal.com/docs/guide/images#add-local-files-with-add_local_dir-and-add_local_file), you'll need to pass `copy=True` for them to work in Modal Notebooks. This is because they skip creating a custom image and instead mount the files into the function at startup, which won't work in notebooks.
### Creating a Secret
Secrets can be created from the dashboard at [modal.com/secrets](https://modal.com/secrets). We have templates for common credential types, and they are saved as encrypted objects until container startup.
Attached secrets become available as environment variables in your notebook.
### Creating a Volume
[Volumes](https://modal.com/docs/guide/volumes) can be created via the files panel on the filesystem tab. This panel can also be used to attach existing Volumes from your Apps or Functions, including those created via the Modal CLI.
Any volumes are attached in the `/mnt` folder in your notebook, and files saved there will be persisted across kernel startups and elsewhere on Modal.
### Mounting Cloud Buckets
Modal Notebooks now support mounting cloud storage buckets, initially S3 buckets, directly to your notebook filesystem. This allows you to access large datasets stored in cloud storage easily on your notebooks.
To mount an S3 bucket:
1. Create a [Modal Secret](https://modal.com/secrets) containing your AWS credentials (AWS Access Key ID and Secret Access Key)
2. In the notebook sidebar's Files panel, use the Cloud Buckets section to attach your bucket
3. Specify:
- The S3 bucket name
- Mount path (e.g., `/mnt/s3/my-data`)
- The AWS credentials secret stored in that environment
- Optional: A key prefix to mount only a subset of objects (e.g., `datasets/`)
- Optional: Set the mount as read-only
Once attached, your S3 bucket will be mounted at the specified path and accessible just like any other directory in your notebook.
For more information on using cloud bucket mounts with Modal, see the [CloudBucket mounts guide](https://modal.com/docs/guide/cloud-bucket-mounts).
## Access and sharing
Need a colleague—or the whole internet—to see your work? Just click **Share** in the top‑right corner of the notebook editor.
Notebooks are editable by you and teammates in your workspace. To make the notebook view-only to collaborators, the creator of the notebook can change access settings in the "Share" menu. Workspace managers are also allowed to change this setting.
You can also turn on sharing by public, unlisted link. If you toggle this, it allows _anyone with the link_ to open the notebook, even if they are not logged in. Pick **Can view** (default) or **Can view and run** based on your preference. Viewers don’t need a Modal account, so this is perfect for collaborating with stakeholders outside your workspace.
No matter how the notebook is shared, anyone with access can fork and run their own version of it.
## Interactive file viewer
The panel on the left-hand side of the notebook shows a **live view of the container’s filesystem**:
| Feature | Details |
| ----------------------- | -------------------------------------------------------------------------------------------------------------------------------------------------------------------------- |
| **Browse & preview** | Click through folders to inspect any file that your code has created or downloaded. |
| **Upload & download** | Drag-and-drop files from your desktop, or click the **⬆** / **⬇** icons to add new data sets, notebooks, or models—or to save results back to your machine. |
| **One-click refresh** | Changes made by your code (for example, writing a CSV) appear instantly; hit the refresh icon if you want to force an update. |
| **Context-aware paths** | The viewer always reflects _exactly_ what your code sees (e.g. `/root`, `/mnt/…`), so you can double-check that that file you just wrote really landed where you expected. |
**Important:** the underlying container is **ephemeral**. Anything stored outside an attached [Volume](https://modal.com/docs/guide/volumes) disappears when the kernel shuts down (after your idle-timeout or when you hit **Stop kernel**). Mount a Volume for data you want to keep across sessions.
The viewer itself is only active while the kernel is running—if the notebook is stopped you’ll see an “empty” state until you start it again.
## Editor features
Modal Notebooks bundle the same productivity tooling you’d expect from a modern IDE.
With Pyright, you get autocomplete, signature help, and on-hover documentation for every installed library.
We also implemented AI-powered code completion using Anthropic's **Claude Sonnet 4.6** model. This keeps you in the flow for everything from small snippets to multi-line functions. Just press `Tab` to accept suggestions or `Esc` to dismiss them.
Familiar Jupyter shortcuts (`A`, `B`, `X`, `Y`, `M`, etc.) all work within the notebook, so you can quickly add new cells, delete existing ones, or change cell types.
Finally, we have real-time collaborative editing, so you can work with your team in the same notebook. You can see other users' cursors and edits in real-time, and you can see when others are running cells with you. This makes it easy to pair program or review code together.
## Widgets
Modal Notebooks support [Jupyter Widgets](https://ipywidgets.readthedocs.io/en/latest/), which can be used to create interactive components living in the browser. Currently, Notebooks support all the widgets in the base `ipywidgets` package, except the following:
- Media Widgets (`Audio`, `Video`), try using `IPython.display` outputs instead.
- `Play`
- Controllers (`ControllerAxis`, `ControllerButton`, `Controller`)
Modal Notebooks do not support custom widget packages.
## Cell magic
Modal Notebooks have built-in support for the `%modal` cell magic. This lets you run code in any [deployed Modal Function or Cls](https://modal.com/docs/guide/trigger-deployed-functions), right from your notebook.
For example, if you have previously run `modal deploy` for an app like:
```python notest
import modal
app = modal.App("my-app")
@app.function()
def my_function(s: str):
return len(s)
```
Then you could access this function from your notebook:
```python notest
%modal from my-app import my_function
my_function.remote("hello, world!") # returns 13
```
Run `%modal` to see all options. This works for Cls as well, and you can import from different environments or alias them with the `as` keyword.
## Roadmap
Some bigger features on mind:
- **Modal cloud integrations**
- Expose ports with [Tunnels](https://modal.com/docs/guide/tunnels)
- Memory snapshots to restore from past notebook sessions
- Create notebooks from the `modal` CLI
- Custom image registry
- **Notebook editor**
- Interactive outline, collapsing sections by headings
- Reactive cell execution
- Edit history
- Integrated debugger (pdb and `%debug`)
- **Documents and sharing**
- Restore recently deleted notebooks
- Folders and tags for grouping notebooks
- Sync with Git repositories
Let us know via [Slack](https://modal.com/slack) if you have any feedback.
#### Restricted Functions
# Run untrusted code with Restricted Functions
This guide page documents Restricted Functions, which can be used to safely execute untrusted code in Modal Functions.
## Create a Restricted Function
To create a Restricted Function, set `restrict_modal_access=True` in the Function definition:
```python
@app.function(restrict_modal_access=True)
def run_untrusted_code(code_input: str):
# This code cannot access Modal resources
return eval(code_input)
```
When `restrict_modal_access` is enabled, the Function cannot
- access Modal resources (Queues, Dicts, etc.)
- call other Functions
- access Modal's internal APIs
## Sandboxes offer an alternative interface for untrusted code
Modal provides two primitives for running untrusted code: Restricted Functions and [Sandboxes](https://modal.com/docs/guide/sandboxes).
While both can be used for running untrusted code, they provide different interfaces:
Sandboxes provide a process interface,
while Restricted Functions provide a function-calling interface.
Process interfaces are especially useful for stateful, multi-stage communication,
while function-calling interfaces are especially useful for stateless, input/output communication.
These differences are summarized in the table below.
| Feature | Restricted Function | Sandbox |
| --------- | ------------------------------ | ---------------------------------------------- |
| State | Stateless | Stateful |
| Interface | Function-like | Container-like |
| Setup | Simple decorator | Requires explicit creation/termination |
| Use case | Quick, isolated code execution | Interactive development, long-running sessions |
## Best Practices
When running untrusted code, consider these additional security measures:
1. Use `single_use_containers=True` to ensure each container only handles one request. Containers that get reused could cause information leakage between users.
```python
@app.function(restrict_modal_access=True, single_use_containers=True)
def isolated_function(input_data):
# Each input gets a fresh container
return process(input_data)
```
Note: Prior to v1.3.0, single-use containers were configured by setting `max_inputs=1`.
2. Set appropriate timeouts to prevent long-running operations:
```python
@app.function(
restrict_modal_access=True,
timeout=30, # 30 second timeout
single_use_containers=True
)
def time_limited_function(input_data):
return process(input_data)
```
3. Consider using `block_network=True` to prevent the container from making outbound network requests:
```python
@app.function(
restrict_modal_access=True,
block_network=True,
single_use_containers=True
)
def network_isolated_function(input_data):
return process(input_data)
```
4. Minimize the App source that's included in the container
A restricted Modal Function will have read access to its source files in the
container, so you'll want to avoid including anything that would be harmful
if exfiltrated by the untrusted process.
If deploying an App from within a [larger package](https://modal.com/docs/guide/project-structure),
the entire package source may be automatically included by default. A best
practice would be to make the untrusted Function part of a standalone App that
includes the minimum necessary files to run:
```python
restricted_app = modal.App("restricted-app", include_source=False)
image = (
modal.Image.debian_slim()
.add_local_file("restricted_executor.py", "/root/restricted_executor.py")
)
@restricted_app.function(
restrict_modal_access=True,
block_network=True,
single_use_containers=True
)
def isolated_function(input_data):
return process(input_data)
```
## Example: Running LLM-generated Code
Below is a complete example of running code generated by a language model:
```python
import modal
app = modal.App("restricted-access-example")
@app.function(restrict_modal_access=True, single_use_containers=True, timeout=30, block_network=True)
def run_llm_code(generated_code: str):
try:
# Create a restricted environment
execution_scope = {}
# Execute the generated code
exec(generated_code, execution_scope)
# Return the result if it exists
return execution_scope.get("result", None)
except Exception as e:
return f"Error executing code: {str(e)}"
@app.local_entrypoint()
def main():
# Example LLM-generated code
code = """
def calculate_fibonacci(n):
if n <= 1:
return n
return calculate_fibonacci(n-1) + calculate_fibonacci(n-2)
result = calculate_fibonacci(10)
"""
result = run_llm_code.remote(code)
print(f"Result: {result}")
```
This example locks down the container to ensure that the code is safe to execute by:
- Restricting Modal access
- Using a fresh container for each execution
- Setting a timeout
- Blocking network access
- Catching and handling potential errors
## Error Handling
When a Restricted Function attempts to access Modal resources, it will raise an `AuthError`:
```python
@app.function(restrict_modal_access=True)
def restricted_function(q: modal.Queue):
try:
# This will fail because the Function is restricted
return q.get()
except modal.exception.AuthError as e:
return f"Access denied: {e}"
```
The error message will indicate that the operation is not permitted due to restricted Modal access.
#### JavaScript/Go SDKs (Beta)
# Modal SDKs for JavaScript and Go
Modal also provides SDKs that enable using Modal Functions and Sandboxes from JavaScript/TypeScript and Go projects.
While Python is the primary language for building Modal applications and implementing Modal Functions, these SDKs enable use cases like:
- Using Sandboxes in JS/Go projects, to safely execute arbitrary commands, run untrusted user code, or as a safe environment for AI agents.
- Directly calling Modal Functions without having to define it as a public Web Function and address it via HTTP requests
- Interacting with Modal resources like Volumes, Secrets, Queues, etc. directly from JS/Go.
We're working towards feature parity with the main Modal Python SDK, although defining Modal Functions will likely remain exclusive to Python.
## Installation
For installation instructions, see the READMEs for [JavaScript](https://github.com/modal-labs/modal-client/tree/main/js) and [Go](https://github.com/modal-labs/modal-client/tree/main/go) on GitHub.
## JavaScript/TypeScript
The `modal` package is [distributed via npm](https://www.npmjs.org/package/modal). See the [JS API reference documentation](https://modal-labs.github.io/libmodal/) for details.
### Simple JavaScript Example
```ts
const modal = new ModalClient();
const app = await modal.apps.fromName("libmodal-example", {
createIfMissing: true,
});
// Create a Sandbox with the specified Image, and mount a Volume
const volume = await modal.volumes.fromName("libmodal-example-volume", {
createIfMissing: true,
});
const image = modal.images.fromRegistry("alpine:3.21");
const sb = await modal.sandboxes.create(app, image, {
volumes: { "/mnt/volume": volume },
});
const p = await sb.exec(["cat", "/mnt/volume/message.txt"]);
console.log(`Message: ${await p.stdout.readText()}`);
await sb.terminate();
// Call a previously deployed Modal Function
const echo = await modal.functions.fromName("libmodal-example", "echo");
console.log(await echo.remote(["Hello world!"]));
```
There are [many more examples available on GitHub](https://github.com/modal-labs/modal-client/blob/main/js/README.md#documentation).
## Go
The `modal-go` package is [installed via go get](https://pkg.go.dev/github.com/modal-labs/modal-client/go). See the [Go API reference documentation](https://pkg.go.dev/github.com/modal-labs/modal-client/go#section-documentation) for details.
### Simple Go Example
```go
package main
import (
"context"
"fmt"
"io"
modal "github.com/modal-labs/modal-client/go"
)
func main() {
// Skipping err handling throughout for brevity
ctx := context.Background()
mc, _ := modal.NewClient()
app, _ := mc.Apps.FromName(ctx, "libmodal-example", &modal.AppFromNameParams{CreateIfMissing: true})
// Create a Sandbox with the specified Image, and mount a Volume
volume, _ := mc.Volumes.FromName(ctx, "libmodal-example-volume", &modal.VolumeFromNameParams{CreateIfMissing: true})
image := mc.Images.FromRegistry("alpine:3.21", nil)
sb, _ := mc.Sandboxes.Create(ctx, app, image, &modal.SandboxCreateParams{
Volumes: map[string]*modal.Volume{"/mnt/volume": volume},
})
defer sb.Terminate(context.Background(), nil)
p, _ := sb.Exec(ctx, []string{"cat", "/mnt/volume/message.txt"}, nil)
stdout, _ := io.ReadAll(p.Stdout)
fmt.Printf("Message: %s\n", stdout)
// Call a previously deployed Modal Function
echo, _ := mc.Functions.FromName(ctx, "libmodal-example", "echo", nil)
result, _ := echo.Remote(ctx, []any{"Hello world!"}, nil)
fmt.Println(result)
}
```
There are [many more examples available on GitHub](https://github.com/modal-labs/modal-client/blob/main/go/README.md#documentation).
## Support
The JS and Go Modal SDKs are in active development, and we love to hear your feedback. If you have questions or suggestions, please reach out on the [Modal Community Slack](https://modal.com/slack).
#### Modal 1.0 migration guide
# Modal 1.0 migration guide
We released version 1.0 of the Modal Python SDK in May 2025.
This release signifies an increased commitment to API stability and implies
some changes to our development workflow.
Preceding the 1.0 release, we introduced a number of deprecations and changes
based on feedback that we received from early users. These changes were intended
to address pain points and reduce confusion about some aspects of the Modal API.
While adapting to them requires some changes to existing code, we believe that
they’ll make it easier to use Modal going forward.
This page highlights the major changes for 1.0 and provides some advice for how
to migrate your code to the new stable APIs. Most deprecations introduced prior
to the release of v1.0 will not be enforced (actually cause breaking changes)
until a subsequent minor (v1.x) release, but we recommend updating your code so
that you can take advantage of new features and avoid any future issues.
## Deprecating `Image.copy_*` methods
_Introduced in: v0.72.11_
We recently introduced new `Image` methods — `Image.add_local_dir` and
`Image.add_local_file` — to replace the existing `Image.copy_local_dir` and
`Image.copy_local_file`.
The new methods subsume the functionality of the old ones, but their default
behavior is different and more performant. By default, files will be mounted to
the container at runtime rather than copied into a new `Image` layer. This can
speed up development substantially when iterating on the contents of the files.
Building a new `Image` layer should be necessary only when subsequent build
steps will use the added files. In that case, you can pass `copy=True` in
`Image.add_local_file` or `Image.add_local_dir`.
The `Image.add_local_dir` method also has an `ignore=` parameter, which you can
use to pass file-matching patterns (using dockerignore rules) or predicate
functions to exclude files.
## Deprecating `Mount` as part of the public API
_Introduced in: v0.72.4_ | _Enforced in: v1.0.0_
Currently, local files can be mounted to the container filesystem either by
including them in the `Image` definition or by passing a `modal.Mount` object
directly to the `App.function` or `App.cls` decorators. As part of the 1.0
release, we are simplifying the container filesystem configuration to be defined
only by the `Image` used for each Function. This implies deprecation of the
following:
- The `mount=` parameter of `App.function` and `App.cls`
- The `context_mount=` parameter of several `modal.Image` methods
- The `Image.copy_mount` method
- The `Mount` object
Code that uses the `mount=` parameter of `App.function` and `App.cls` should be
migrated to pass those files / directories to the `Image` used by that Function
or Cls, i.e. using the `Image.add_local_file`, `Image.add_local_dir`, or
`Image.add_local_python_source` methods:
```python notest
# Mounting local files
# Old way (deprecated)
mount = modal.Mount.from_local_dir("data").add_local_file("config.yaml")
@app.function(image=image, mount=mount)
def f():
...
# New way
image = image.add_local_dir("data", "/root/data").add_local_file("config.yaml", "/root/config.yaml")
@app.function(image=image)
def f():
...
## Mounting local Python source code
# Old way (deprecated)
mount = modal.Mount.from_local_python_packages("my-lib"))
@app.function(image=image, mount=mount)
def f()
...
# New way
image = image.add_local_python_source("my-lib")
@app.function(image=image)
def f(...):
...
## Using Image.copy_mount
# Old way (deprecated)
mount = modal.Mount.from_local_dir("data").add_local_file("config.yaml")
image.copy_mount(mount)
# New way
image.add_local_dir("data", "root/data").add_local_file("config.yaml", "/root/config.yaml")
```
Code that uses the `context_mount=` parameter of `Image.from_dockerfile` and
`Image.dockerfile_commands` methods can delete that parameter; we now
automatically infer the files that need to be included in the context.
## Deprecating the `@modal.build` decorator
_Introduced in: v0.72.17_
As part of consolidating the filesystem configuration API, we are also
deprecating the `modal.build` decorator.
For use cases where `modal.build` would previously have been the suggested
approach (e.g., downloading model weights or other large assets to the
container filesystem), we now recommend using a `modal.Volume` instead. The
main advantage of storing weights in a `Volume` instead of an `Image` is that
the weights do not need to be re-downloaded every time you change something else
about the `Image` definition.
Many frameworks, such as Hugging Face, automatically cache downloaded model
weights. When using these frameworks, you just need to ensure that you mount a
`modal.Volume` to the expected location of the framework’s cache:
```python notest
cache_vol = modal.Volume.from_name("hf-hub-cache")
@app.cls(
image=image.env({"HF_HUB_CACHE": "/cache"}),
volumes={"/cache": cache_vol},
...
)
class Model:
@modal.enter()
def load_model(self):
self.model = ModelClass.from_pretrained(...)
```
For frameworks that don’t support automatic caching, you could write a separate
function to download the weights and write them directly to the Volume, then
`modal run` against this function before you deploy.
In some cases (e.g., if the step runs very quickly), you may wish for the logic
currently decorated with `@modal.build` to continue modifying the Image
filesystem. In that case, you can extract the method as a standalone function
and pass it to `Image.run_function`:
```python notest
def download_weights():
...
image = image.run_function(download_weights)
```
## Requiring explicit inclusion of local Python dependencies
_Introduced in: 0.73.11_ | _Enforced in: 1.0.0_
Prior to 1.0, Modal will inspect the modules that are imported when running
your App code and automatically include any "local" modules in the remote
container environment. This behavior is referred to as "automounting".
While convenient, this approach has a number of edge cases and surprising
behaviors, such as ignoring modules with imports that are deferred using
`Image.imports`. Additionally, it is difficult to configure the automounting
behavior to, e.g., ignore large data files that are stored within your local
Python project directories.
Going forward, it will be necessary to explicitly include the local dependencies
of your Modal App. The easiest way to do this is with
[`Image.add_local_python_source`](https://modal.com/docs/sdk/py/latest/Image#add_local_python_source):
```python notest
import modal
import helpers
image = modal.Image.debian_slim().add_local_python_source("helpers")
```
In the period leading up to the change in default behavior, the Modal client
will issue deprecation warnings when automounted modules are not included
in the Image. Updating the Image definition will remove these warnings.
Note that Modal will continue to automatically include the source module or
package defining the App itself. We're introducing a new App or Function-level
parameter, `include_source`, which can be set to `False` in cases where this is
not desired (i.e., because your Image definition already includes the App
source).
## Renaming autoscaler parameters
_Introduced in: v0.73.76_
We're renaming several parameters that configure autoscaling behavior:
- `keep_warm` is now `min_containers`
- `concurrency_limit` is now `max_containers`
- `container_idle_timeout` is now `scaledown_window`
The renaming is intended to address some persistent confusion about
the meaning of these parameters. The migration path is a simple
find-and-replace operation.
Additionally, we're promoting a fourth parameter, `buffer_containers`,
from experimental status (previously `_experimental_buffer_containers`).
Like `min_containers`, `buffer_containers` can help mitigate cold-start
penalties by overprovisioning containers while the Function is active.
## Renaming `modal.web_endpoint` to `modal.fastapi_endpoint`
_Introduced in: v0.73.89_
We're renaming the `modal.web_endpoint` decorator to `modal.fastapi_endpoint`
so that the implicit dependency on FastAPI is more clear. This can be a
simple name substitution in your code as the semantics are otherwise identical.
We may reintroduce a lightweight `modal.web_endpoint` without external
dependencies in the future.
## Replacing `allow_concurrent_inputs` with `@modal.concurrent`
_Introduced in: v0.73.148_
The `allow_concurrent_inputs` parameter is being replaced with a new decorator,
`@modal.concurrent`. The decorator can be applied either to a Function or a Cls.
We're moving the input concurrency feature out of "Beta" status as part of this
change.
The new decorator exposes two distinct parameters: `max_inputs` (the limit
on the number of inputs the Function will concurrently accept) and
`target_inputs` (the level of concurrency targeted by the Modal autoscaler).
The simplest migration path is to replace `allow_concurrent_inputs=N` with
`@modal.concurrent(max_inputs=N)`:
```python notest
# Old way, with a function (deprecated)
@app.function(allow_concurrent_inputs=1000)
def f(...):
...
# New way, with a function
@app.function()
@modal.concurrent(max_inputs=1000)
def f(...):
...
# Old way, with a class (deprecated)
@app.cls(allow_concurrent_inputs=1000)
class MyCls:
...
# New way, with a class
@app.cls()
@modal.concurrent(max_inputs=1000)
class MyCls:
...
```
Setting `target_inputs` along with `max_inputs` may benefit performance by
reducing latency during periods where the container pool is scaling up. See the
[input concurrency guide](https://modal.com/docs/guide/concurrent-inputs) for more information.
## Deprecating the `.lookup` method on Modal objects
_Introduced in: v0.72.56_
Most Modal objects can be instantiated through two distinct methods:
`.from_name` and `.lookup`. The redundancy between these methods is a persistent
source of confusion.
The `.from_name` method is lazy: it operates entirely locally and instantiates
only a shell for the object. The local object won’t be associated with its
identity on the Modal server until you interact with it. In contrast, the
`.lookup` method is eager: it triggers a remote call to the Modal server, and it
returns a fully-hydrated object.
Because Modal objects can now be hydrated on-demand, when they are first
used, there is rarely any need to eagerly hydrate. Therefore, we’re deprecating
`.lookup` so that there’s only one obvious way to instantiate objects.
In most cases, the migration is a simple find-and-replace of `.lookup` →
`.from_name`.
One exception is when your code needs to access object metadata, such as its ID,
or a Web Function URL. In that case, you can explicitly force hydration of the
object by calling its `.hydrate()` method. There may be other subtle consequences,
such as errors being raised at a different location if no object exists with the
given name.
## Removing support for custom Cls constructors
_Introduced in: v0.74.0_
Classes decorated with `App.cls` are no longer allowed to have a custom constructor
(`__init__` method). Instead, class parameterization should be exposed using
dataclass-style [`modal.parameter`](https://modal.com/docs/sdk/py/latest/parameter) annotations:
```python notest
# Old way (deprecated)
@app.cls()
class MyCls:
def __init__(self, name: str = "Bert"):
self.name = name
# New way
@app.cls()
class MyCls:
name: str = modal.parameter(default="Bert")
```
Modal will provide a synthetic constructor for classes that use `modal.parameter`.
Arguments to the synthetic constructor must be passed using keywords, so you may
need to update your calling code as well:
```python notest
obj = MyCls(name="Bert") # name= is now required
```
We're making this change to address some persistent confusion about when
constructors execute for remote calls and what operations are allowed to run in
them. If your custom constructor performs any setup logic beyond storing the
parameter values, you should move it to a method decorated with
`@modal.enter()`.
Additionally, we're reducing the types that we support as class parameters to
a small number of primitives (`str`, `int`, `bool`, and `bytes`).
Limiting class parameterization to primitive types will also allow us to provide
better observability over parameterized class instances in the web dashboard,
CLI, and other contexts where it is not possible to represent arbitrary Python
objects.
If you need to parameterize classes across more complex types, you can implement
your own serialization logic, e.g. using strings as the wire format:
```python notest
@app.cls()
class MyCls:
param_str: str = modal.parameter()
@modal.enter()
def deserialize_parameters(self):
self.param_obj = SomeComplexType.from_str(self.param_str)
```
We recommend adopting interpretable constructor arguments (i.e., prefer
meaningful strings over pickled bytes) so that you will be able to get the most
benefit from future improvements to parameterized class observability.
## Simplifying Cls lookup patterns
_Introduced in: v0.73.26_
Modal previously supported several different patterns for looking up a `modal.Cls`
and remotely invoking one of its methods:
```python notest
# Documented pattern
MyCls = modal.Cls.from_name("my-app", "MyCls")
obj = MyCls()
obj.some_method.remote(...)
# Alternate pattern: skipping the object instantiation
MyCls = modal.Cls.from_name("my-app", "MyCls")
MyCls.some_method.remote(...)
# Alternate pattern: looking up the method as a Function
f = modal.Function.lookup("my-app", "MyCls.some_method")
f.remote(...)
```
While each pattern could successfully trigger a remote function call, there were
a number of subtle differences in behavior between them.
Going forward, we will only support the first pattern. Making remote calls to a
method on a deployed Cls will require you to (a) look up the object using
`modal.Cls` and (b) instantiate the object before calling its methods.
## Deprecating `modal.gpu` objects
_Introduced in: v0.73.31_
The `modal.gpu` objects are being deprecated; going forward, all GPU resource
configuration should be accomplished using strings.
This should be an easy code substitution, e.g. `gpu=modal.gpu.H100()` can be
replaced with `gpu="H100"`. When using the `count=` parameter of the GPU class,
simply append it to the name with a colon (e.g. `gpu="H100:8"`). In the case of
the `modal.gpu.A100(size="80GB")` variant, the name of the corresponding gpu is
`"A100-80GB"`.
Note that string arguments are case-insensitive, so `"H100"` and `"h100"` are
both accepted.
The main rationale for this change is that it will allow us to introduce new
GPU models in the future without requring users to upgrade their SDK.
## Requiring explicit invocation for module mode
_Introduced in: 0.73.58_
The Modal CLI allows you to reference the source code for your App as either
a file path (e.g. `src/my_app.py`) or as a module name (e.g. `src.my_app`).
As in Python, the choice has some implications for how relative imports are
resolved. To make this more salient, Modal will mirror Python going forwared
and require that you explicitly invoke module mode by passing `-m` on your
command line (e.g., `modal deploy -m src.my_app`).
#### File and project structure
# Project structure
## Apps spanning multiple files
When your project spans multiple files, more care is required to package the
full structure for running or deploying on Modal.
There are two main considerations: (1) ensuring that all of your Functions get
registered to the App, and (2) ensuring that any local dependencies get included
in the Modal container.
Say that you have a simple project that's distributed across three files:
```
src/
├── app.py # Defines the `modal.App` as a variable named `app`
├── llm.py # Imports `app` and decorates some functions
└── web.py # Imports `app` and decorates other functions
```
With this structure, if you deploy using `modal deploy src/app.py`, Modal won't
discover the Functions defined in the other two modules, because they never get
imported.
If you instead run `modal deploy src/llm.py`, Modal will deploy the App with
just the Functions defined in that module.
One option would be to ensure that one module in the project transitively
imports all of the other modules and to point the `modal deploy` CLI at it, but
this approach can lead to an awkward project structure.
### Defining your project as a Python package
A better approach would be to define your project as a Python _package_ and to
use the Modal CLI's "module mode" invocation pattern.
In Python, a package is a directory containing an `__init__.py` file (and
usually some other Python modules). If you have a `src/__init__.py` that
imports all of the member modules, it will ensure that any decorated Functions
contained within them get registered to the App:
```python notest
# Contents of __init__.py
import .app
import .llm
import .web
```
_Important: use *relative* imports (`import .app`) between member modules._
Unfortunately, it's not enough just to set this up and make your deploy command
`modal deploy src/app.py`. Instead, you need to invoke Modal in _module mode_:
`modal deploy -m src.app`. Note the use of the `-m` flag and the module path
(`src.app` instead of `src/app.py`). Akin to `python -m ...`, this incantation
treats the target as a package rather than just a single script.
### App composition
As your project grows in scope, it may become helpful to organize it into
multiple component Apps, rather than having the project defined as one large
monolith. That way, as you iterate during development, you can target a specific
component, which will build faster and avoid any conflicts with concurrent work
on other parts of the project.
Projects set up this way can still be deployed as one unit by using `App.include`.
Say our project from above defines separate Apps in `llm.py` and `web.py` and then
adds a new `deploy.py` file:
```python notest
# Contents of deploy.py
import modal
from .llm import llm_app
from .web import web_app
app = modal.App("full-app").include(llm_app).include(web_app)
```
This lets you run `modal deploy -m src.deploy` to package everything in one
step.
**Note:** Since the multi-file App still has a single namespace for all
Functions, it's important to name your Modal Functions uniquely across the
project even when splitting it up across files: otherwise you risk some
Functions "shadowing" others with the same name.
## Including local dependencies
Another factor to consider is whether Modal will package all of the local
dependencies that your App requires.
Even if your Modal App itself can be contained to a single file, any local
modules that file imports (like, say, a `helpers.py`) also need to be available
in the Modal container.
By default, Modal will automatically include the module or package where a
Function is defined in all containers that run that Function. So if the project
is set up as a package and the helper modules are part of that package, you
should be all set. If you're not using a package setup, or if the local
dependencies are external to your project's package, you'll need to explicitly
include them in the Image, i.e. with `modal.Image.add_local_python_source`.
**Note:** This behavior changed in Modal 1.0. Previously, Modal would
"automount" any local dependencies that were imported by your App source into a
container. This was changed to be more selective to avoid unnecessary inclusion
of large local packages.
#### Developing and debugging
# Developing and debugging
Modal makes it easy to run apps in the cloud, try code changes in the cloud, and
debug remotely executing code as if it were right there on your laptop. To speed
boost your inner dev loop, this guide provides a rundown of tools and techniques
for developing and debugging software in Modal.
## Interactivity
You can launch a Modal App interactively and have it drop you right into the
middle of the action, at an interesting callsite or the site of a runtime
detonation.
### Interactive functions
It is possible to start the interactive Python debugger or start an `IPython`
REPL right in the middle of your Modal App.
To do so, you first need to run your App in "interactive" mode by using the
`--interactive` / `-i` flag. In interactive mode, you can establish a connection
to the calling terminal by calling `interact()` from within your function.
For a simple example, you can accept user input with the built-in Python `input`
function:
```python
@app.function()
def my_fn(hidden):
modal.interact()
x = input("Enter a number: ")
if hidden == x:
print(f"Your number is {x}, which is the hidden value!")
else:
print(f"Your number is {x}, which is not the hidden value")
```
Now when you run your app with the `--interactive` flag, you're able to send
inputs to your app, even though it's running in a remote container!
```shell
modal run -i guess_number.py::my_fn --hidden 5
Enter a number: 5
Your number is 5, which is the hidden value!
```
For a more interesting example, you can [`pip_install("ipython")`](https://modal.com/docs/sdk/py/latest/Image#pip_install)
and start an `IPython` REPL dynamically anywhere in your code:
```python
@app.function()
def f():
model = expensive_function()
# play around with model
modal.interact()
import IPython
IPython.embed()
```
The built-in Python debugger can be initiated with the language's `breakpoint()`
function. For convenience, breakpoints call `interact` automatically.
```python
@app.function()
def f():
x = "10point3"
breakpoint()
answer = float(x)
```
### Debugging Running Containers
#### Debug Shells
Modal also lets you run interactive commands on your running Containers from the
terminal -- much like `ssh`-ing into a traditional machine or cloud VM.
To run a command inside a running Container, you first need to get the Container
ID. You can view all running Containers and their Container IDs with
[`modal container list`](https://modal.com/docs/cli/latest/container).
After you obtain the Container ID, you can connect to the Container with `modal shell [container-id]`. This launches a "Debug Shell" that comes with some preinstalled tools:
- `vim`
- `nano`
- `ps`
- `strace`
- `curl`
- `py-spy`
- and more!
You can use a debug shell to examine or terminate running processes, modify the Container filesystem, run commands, and more. You can also install additional packages using your Container's package manager (ex. `apt`).
Note that debug shells will terminate immediately once your Container has finished running.
#### `modal container exec`
You can also execute a specific command in a running Container with `modal container exec [container-id] [command...]`. For example, to see what files are in `/root`, you can run `modal container exec [container-id] ls /root`.
```
❯ modal container list
Active Containers in environment: nathan-dev
┏━━━━━━━━━━━━━━━━━━━━━━━━━━━━━━━┳━━━━━━━━━━━━━━━━━━━━━━━━━━━┳━━━━━━━━━━┳━━━━━━━━━━━━━━━━━━━━━━┓
┃ Container ID ┃ App ID ┃ App Name ┃ Start Time ┃
┡━━━━━━━━━━━━━━━━━━━━━━━━━━━━━━━╇━━━━━━━━━━━━━━━━━━━━━━━━━━━╇━━━━━━━━━━╇━━━━━━━━━━━━━━━━━━━━━━┩
│ ta-01JK47GVDMWMGPH8MQ0EW30Y25 │ ap-FSuhQ4LpvNAt5b6mKi1CDw │ my-app │ 2025-02-02 16:02 EST │
└───────────────────────────────┴───────────────────────────┴──────────┴──────────────────────┘
❯ modal container exec ta-01JK47GVDMWMGPH8MQ0EW30Y25 ls /root
__pycache__ test00.py
```
Note that your executed command will terminate immediately once your Container
has finished running.
By default, commands will be run within a
[pseudoterminal (PTY)](https://en.wikipedia.org/wiki/Pseudoterminal), but this
can be disabled with the `--no-pty` flag.
#### Live container profiling
When a container or input is seemingly stuck or not making progress,
you can use the Modal web dashboard to find out what code that's executing in the
container in real time. To do so, look for **Live Profiling** in the **Containers** tab in your
function dashboard.

### Debugging Container Images
You can also launch an interactive shell in a new Container with the same
environment as your Function. This is handy for debugging issues with your
Image, interactively refining build commands, and exploring the contents of
[`Volume`](https://modal.com/docs/sdk/py/latest/Volume)s and
[`NetworkFileSystem`](https://modal.com/docs/sdk/py/latest/NetworkFileSystem)s.
The primary interface for accessing this feature is the
[`modal shell`](https://modal.com/docs/cli/latest/shell) CLI command, which accepts a Function
name in your App (or prompts you to select one, if none is provided), and runs
an interactive command on the same image as the Function, with the same
[`Secret`](https://modal.com/docs/sdk/py/latest/Secret)s and
[`NetworkFileSystem`](https://modal.com/docs/sdk/py/latest/NetworkFileSystem)s attached as the selected Function.
The default command is `/bin/bash`, but you can override this with any other
command of your choice using the `--cmd` flag.
Note that `modal shell [filename].py` does not attach a shell to a running Container of the
Function, but instead creates a fresh instance of the underlying Image. To attach a shell to a running Container, use `modal shell [container-id]` instead.
## Live updating
### Hot reloading with `modal serve`
Modal has the command `modal serve `, which creates a loop that
live updates an App when any of the supporting files change.
Live updating works with Web Functions, syncing your changes as you make them,
and it also works well with cron schedules and job queues.
```python
import modal
app = modal.App(image=modal.Image.debian_slim().pip_install("fastapi"))
@app.function()
@modal.fastapi_endpoint()
def f():
return "I update on file edit!"
@app.function(schedule=modal.Period(seconds=5))
def run_me():
print("I also update on file edit!")
```
If you edit this file, the `modal serve` command will detect the change and
update the code, without having to restart the command.
### Developing deployed Apps with `--strategy=recreate`
Generally, we recommend developing Apps with `modal serve`.
But if your development flow involves running `modal deploy`,
we recommend you use the flag `--strategy=recreate`.
This will terminate all running containers from previous deployments
so that all subsequent inputs will go to new containers.
## Observability
Each running Modal App, including all ephemeral Apps, streams logs and resource
metrics back to you for viewing.
On start, an App will log a dashboard link that will take you its App page.
```shell
$ python3 main.py
✓ Initialized. View app page at https://modal.com/apps/ap-XYZ1234.
...
```
From this page you can access the following:
- logs, both from your application and system-level logs from Modal
- compute resource metrics (CPU, RAM, GPU)
- function call history, including historical success/failure counts
### Debug logs
You can enable Modal's client debug logs by setting the `MODAL_LOGLEVEL` environment variable to `DEBUG`.
Running the following will show debug logging from the Modal client running locally.
```bash
MODAL_LOGLEVEL=DEBUG modal run hello.py
```
To enable debug logs in the Modal client running in the remote container, you can set `MODAL_LOGLEVEL` using
a Modal [`Secret`](https://modal.com/docs/sdk/py/latest/Secret).
```python
@app.function(secrets=[modal.Secret.from_dict({"MODAL_LOGLEVEL": "DEBUG"})])
def f():
print("Hello, world!")
```
### Client tracebacks
To see a traceback (a.k.a [stack trace](https://en.wikipedia.org/wiki/Stack_trace)) for a client-side exception, you can set the `MODAL_TRACEBACK` environment variable to `1`.
```bash
MODAL_TRACEBACK=1 modal run my_app.py
```
We encourage you to report cases where you need to enable this functionality, as it's indication of an issue in Modal.
#### Jupyter notebooks
# Jupyter notebooks
This guide page documents integrations between Jupyter notebooks and Modal.
For our hosted notebooks product with real-time collaboration, see [Modal Notebooks](https://modal.com/docs/guide/notebooks).
## Modal inside Jupyter
You can use the Modal client library in notebook environments like Jupyter! Just
`import modal` and use as normal. You will likely need to use [`app.run`](https://modal.com/docs/guide/apps#ephemeral-apps) to create an ephemeral App to run your Functions:
```python,notest
# Cell 1
import modal
app = modal.App()
@app.function()
def my_function(x):
...
# Cell 2
with modal.enable_output():
with app.run():
my_function.remote(42)
```
### Known issues
- **Interactive shell and interactive functions are not supported.**
These can only be run within a live terminal session, so they are not
supported in notebooks.
- **Local and remote Python versions must match.**
When defining Modal Functions in a Jupyter notebook, the Function automatically
has `serialized=True` set. This implies that the versions of Python and any third-
party libraries used in your Modal container must match the version you have locally,
so that the Function can be deserialized remotely without errors.
If you encounter issues not documented above, try restarting the notebook kernel, as it may be
in a broken state, which is common in notebook development.
If the issue persists, contact us [in our Slack](https://modal.com/slack).
We are working on removing these known issues so that writing Modal applications
in a notebook feels just like developing in regular Python modules and scripts.
## Jupyter inside Modal
You can run Jupyter in Modal using the `modal launch` command. For example:
```
$ modal launch jupyter --gpu a10g
```
That will start a Jupyter instance with an A10G GPU attached. You'll be able to
access the app with via a
[Modal Tunnel URL](https://modal.com/docs/guide/tunnels). Jupyter
will stop running whenever you stop Modal call in your terminal.
See `--help` for additional options.
## Further examples
- [Basic demonstration of running Modal in a notebook](https://github.com/modal-labs/modal-examples/blob/main/11_notebooks/basic.ipynb)
- [Running Jupyter server within a Modal Function](https://github.com/modal-labs/modal-examples/blob/main/11_notebooks/jupyter_inside_modal.py)
#### Asynchronous API usage
# Asynchronous API usage
All of the functions in Modal are available in both standard (blocking) and
asynchronous variants. The async interface can be accessed by appending `.aio`
to any function in the Modal API.
For example, instead of `my_modal_function.remote("hello")` in a blocking
context, you can use `await my_modal_function.remote.aio("hello")` to get an
asynchronous coroutine response, for use with Python's `asyncio` library.
```python
import asyncio
import modal
app = modal.App()
@app.function()
async def myfunc():
...
@app.local_entrypoint()
async def main():
# execute 100 remote calls to myfunc in parallel
await asyncio.gather(*[myfunc.remote.aio() for i in range(100)])
```
This is an advanced feature. If you are comfortable with asynchronous
programming, you can use this to create arbitrary parallel execution patterns,
with the added benefit that any Modal Functions will be executed remotely.
## Async functions
Regardless if you use an async runtime (like `asyncio`) in your usage of _Modal
itself_, you are free to define your `app.function`-decorated function bodies
as either async or blocking. Both kinds of definitions will work for remote
Modal Function calls from both any context.
An async function can call a blocking function, and vice versa.
```python
@app.function()
def blocking_function():
return 42
@app.function()
async def async_function():
x = await blocking_function.remote.aio()
return x * 10
@app.local_entrypoint()
def blocking_main():
print(async_function.remote()) # => 420
```
If a function is configured to support multiple concurrent inputs per container,
the behavior varies slightly between blocking and async contexts:
- In a blocking context, concurrent inputs will run on separate Python threads.
These are subject to the GIL, but they can still lead to race conditions if
used with non-threadsafe objects.
- In an async context, concurrent inputs are simply scheduled as coroutines on
the executor thread. Everything remains single-threaded.
#### Global variables
# Global variables
There are cases where you might want objects or data available in **global**
scope. For example:
- You need to use the data in a scheduled function (scheduled functions don't
accept arguments)
- You need to construct objects (e.g. Secrets) in global scope to use as
function annotations
- You don't want to clutter many function signatures with some common arguments
they all use, and pass the same arguments through many layers of function
calls.
For these cases, you can use the `modal.is_local` function, which returns `True`
if the app is running locally (initializing) or `False` if the app is executing
in the cloud.
For instance, to create a [`modal.Secret`](https://modal.com/docs/guide/secrets) that you can pass
to your function decorators to create environment variables, you can run:
```python
import os
if modal.is_local():
pg_password = modal.Secret.from_dict({"PGPASS": os.environ["MY_LOCAL_PASSWORD"]})
else:
pg_password = modal.Secret.from_dict({})
@app.function(secrets=[pg_password])
def get_secret_data():
connection = psycopg2.connect(password=os.environ["PGPASS"])
...
```
## Warning about regular module globals
If you try to construct a global in module scope using some local data _without_
using something like `modal.is_local`, it might have unexpected effects since
your Python modules will be not only be loaded on your local machine, but also
on the remote worker.
E.g., this will typically not work:
```python notest
# blob.json doesn't exist on the remote worker, so this will cause an error there
data_blob = open("blob.json", "r").read()
@app.function()
def foo():
print(data_blob)
```
#### Region selection
# Region selection
Modal runs containers globally across multiple different clouds. By default, all inputs to Modal Functions are routed through our servers in Virginia, USA (`us-east`) before being sent to a container for execution.
You can observe the location identifier of a container [via an environment variable](https://modal.com/docs/guide/environment_variables). Logging this environment variable alongside latency information can reveal when geography is impacting your application performance.
## Specifying a container region
To run your Modal Function containers in a specific region, pass a `region=` argument to the `function` decorator:
```python
@app.function(region=["us-west"])
def f():
...
```
Sandboxes accept the same `region=` argument on `Sandbox.create`:
```python notest
sb = modal.Sandbox.create(region=["us-west"], app=app)
```
This can be particularly useful when running a latency-sensitive app that needs to run near an external DB.
### Pricing
A multiplier on top of our [base usage pricing](https://modal.com/pricing) will be applied to any Function or Sandbox that has a container region defined.
| **Region type** | **Multiplier** |
| ----------------------- | -------------- |
| Broad (e.g. `us`) | 1.15x |
| Narrow (e.g. `us-west`) | 1.75x |
Here's an example: let's say you have a Function or Sandbox container that uses 1 T4, 1 CPU core, and 1GB memory. You've specified that it should run in `us-west`. The cost to run it for 1 hour would be `((T4 hourly cost) + (CPU hourly cost for one core) + (Memory hourly cost for one GB)) * 1.75`.
If you specify multiple container regions and they span the two categories above, we will apply the smaller of the two multipliers.
### Container region options
Modal offers different levels of granularity for container regions. Use broader regions when possible, as this increases the pool of available resources your Function or Sandbox containers can be assigned to, which improves cold-start time and availability.
```
Broad Narrow Notes
===========================================================
"us" United States
"us-east"
"us-central"
"us-south"
"us-west"
------------------------------------------------------------
"eu" European Economic Area
"eu-west"
"eu-north"
"eu-south"
------------------------------------------------------------
"ap" Asia-Pacific
"ap-northeast"
"ap-southeast"
"ap-south"
"ap-melbourne"
"jp" Japan
"au" Australia
------------------------------------------------------------
"uk" United Kingdom
------------------------------------------------------------
"ca" Canada
------------------------------------------------------------
"me" Middle East
------------------------------------------------------------
"sa" South America
------------------------------------------------------------
"af" Africa
------------------------------------------------------------
"mx" Mexico
```
Need access to more granular region definitions? Contact [sales@modal.com](mailto:sales@modal.com).
## Regional routing
In addition to letting you specify the region a Function's containers run in, Modal also allows you to specify which region your inputs and outputs will be routed through to reduce network overhead. By default, this is `us-east` (Virginia, USA).
This doesn't apply to Sandboxes, as most operations go directly to the container (with some minor exceptions that are routed through `us-east`).
### Specifying a routing region
To have your Modal Function's traffic route through a specific region, pass a `routing_region=` argument to the `function` decorator.
```python
@app.function(routing_region="us-west")
def f():
...
```
The valid options for `routing_region=` are:
- `us-east` (Virginia, USA)
- `us-west` (Oregon, USA)
- `ca-central` (Montreal, Canada)
- `eu-west` (Dublin, Ireland)
- `ap-south` (Mumbai, India)
- `ap-southeast-2` (Sydney, Australia)
### Current restrictions
`routing_region=` can only be set during the initial deployment of a Function and cannot be changed in a subsequent redeployment. To change the routing region, a new Function should be created. Functions specifying a routing region outside of `us-east` can only be invoked with `.remote()` or `.map()` or via HTTP for [Web Functions](https://modal.com/docs/guide/webhooks).
[Inputs and outputs larger than 2 MiB](https://modal.com/docs/guide/security#function-inputs-and-outputs) are still uploaded to object storage in `us-east`.
## Optimizing latency
Modal has a variety of tools to optimize network latency--even down to ~10ms in extreme cases like real-time robotics. Using container region selection in conjunction with a nearby routing region can eliminate significant network overhead.
[Cloudping.co](https://www.cloudping.co) provides good estimates of the latency between regions. For example, the round-trip latency between AWS `us-east` (Virginia, USA) and `us-west` (Oregon, USA) is around 60ms.
Splitting out regional deployments with separate Functions can be done like so:
```python
def f():
...
@app.function(region=["us-central", "us-west"], routing_region="us-west")
def f_us_west():
return f()
@app.function(region="ap", routing_region="ap-south")
def f_ap_south():
return f()
```
To optimize latency further, please contact us on [Slack](https://modal.com/slack) or at [support@modal.com](mailto:support@modal.com).
#### GPU Metrics
# GPU Metrics
Modal exposes a number of GPU metrics that help monitor the health and utilization of the GPUs you're using.
- **GPU utilization %** is the percentage of time that the GPU was executing at least one CUDA kernel. This is the same metric reported as utilization by [`nvidia-smi`](https://modal.com/gpu-glossary/host-software/nvidia-smi). GPU utilization is helpful for determining the amount of time GPU work is blocked on CPU work, like PyTorch compute graph construction or input processing. However, it is far from indicating what fraction of the GPU's computing firepower (FLOPS or memory throughput, [CUDA Cores](https://modal.com/gpu-glossary/device-hardware/cuda-core), [SMs](https://modal.com/gpu-glossary/device-hardware/streaming-multiprocessor)) is being used. See [this blog post](https://arthurchiao.art/blog/understanding-gpu-performance) for details.
- **GPU power utilization %** is the percentage of the maximum power draw that the device is currently drawing. When aggregating across containers, we also report **Total GPU power usage** in Watts. Because high-performance GPUs are [fundamentally limited by power draw](https://www.thonking.ai/p/strangely-matrix-multiplications), both for computation and memory access, the power usage can be used as a proxy of how much work the GPU is doing. A fully-saturated GPU should draw at or near its entire power budget (which can also be found by running `nvidia-smi`).
- **GPU temperature** is the temperature measured on the die of the GPU. Like power draw, which is the source of the thermal energy, the ability to efflux heat is a fundamental limit on GPU performance: continuing to draw full power without removing the waste heat would damage the system. At the highest temperatures readily observed in proper GPU deployments (i.e. mid-70s Celsius for an H100), increased error correction from thermal noise can already reduce performance. Generally, power utilization is a better proxy for performance, but we report temperature for completeness.
- **GPU memory used** is the amount of memory allocated on the GPU, in bytes.
In general, these metrics are useful signals or correlates of performance, but can't be used to directly debug performance issues. Instead, we (and [the manufacturers!](https://docs.nvidia.com/cuda/cuda-c-best-practices-guide/#assess-parallelize-optimize-deploy)) recommend tracing and profiling workloads. See [this example](https://modal.com/docs/examples/torch_profiling) of profiling PyTorch applications on Modal.
## API Reference
### Python API Reference
#### App
# App
```python
class App(object)
```
A Modal App is a group of functions and classes that are deployed together.
The app serves at least three purposes:
* A unit of deployment for functions and classes.
* Syncing of identities of (primarily) functions and classes across processes
(your local Python interpreter and every Modal container active in your application).
* Manage log collection for everything that happens inside your code.
**Registering functions with an app**
The most common way to explicitly register an Object with an app is through the
`@app.function()` decorator. It both registers the annotated function itself and
other passed objects, like schedules and secrets, with the app:
```python
import modal
app = modal.App()
@app.function(
secrets=[modal.Secret.from_name("some_secret")],
schedule=modal.Period(days=1),
)
def foo():
pass
```
In this example, the secret and schedule are registered with the app.
```python
__init__(self, name=None, *, tags=None, image=None, secrets=[], volumes={},
include_source=True)
```
Construct a new app, optionally with default image, mounts, secrets, or volumes.
**Parameters**
.r2.cloudflarestorage.com",
secret=secret,
read_only=True
)
}
)
def f():
subprocess.run(["ls", "/my-mount"], check=True)
```
GCS:
Google Cloud Storage (GCS) is [S3-compatible](https://cloud.google.com/storage/docs/interoperability).
GCS Buckets also require a secret with Google-specific key names (see below) populated with
a [HMAC key](https://cloud.google.com/storage/docs/authentication/managing-hmackeys#create).
```python
import subprocess
app = modal.App()
gcp_hmac_secret = modal.Secret.from_name(
"gcp-secret",
required_keys=["GOOGLE_ACCESS_KEY_ID", "GOOGLE_ACCESS_KEY_SECRET"]
)
@app.function(
volumes={
"/my-mount": modal.CloudBucketMount(
bucket_name="my-gcs-bucket",
bucket_endpoint_url="https://storage.googleapis.com",
secret=gcp_hmac_secret,
)
}
)
def f():
subprocess.run(["ls", "/my-mount"], check=True)
```
```python
__init__(self, bucket_name, bucket_endpoint_url=None, key_prefix=None,
secret=None, oidc_auth_role_arn=None, read_only=False, requester_pays=False,
force_path_style=False)
```
#### Cls
# Cls
```python
class Cls(modal.object.Object)
```
Cls adds method pooling and [lifecycle hook](https://modal.com/docs/guide/lifecycle-functions) behavior
to [modal.Function](https://modal.com/docs/sdk/py/latest/Function).
Generally, you will not construct a Cls directly.
Instead, use the [`@app.cls()`](https://modal.com/docs/sdk/py/latest/App#cls) decorator on the App object.
## hydrate
```python
hydrate(self, client=None)
```
Synchronize the local object with its identity on the Modal server.
It is rarely necessary to call this method explicitly, as most operations
will lazily hydrate when needed. The main use case is when you need to
access object metadata, such as its ID.
*Added in v0.72.39*: This method replaces the deprecated `.resolve()` method.
## from_name
```python
from_name(cls, app_name, name, *, version=None, environment_name=None,
client=None)
```
Reference a Cls from a deployed App by its name.
This is a lazy method that defers hydrating the local
object with metadata from Modal servers until the first
time it is actually used.
**Parameters**
`.
Client processes can authenticate in two ways:
1. Modal API tokens use `MODAL_TOKEN_ID` and `MODAL_TOKEN_SECRET`. The
`modal token set` command stores these values in `.modal.toml`.
2. Third-party OAuth integrations typically inject `MODAL_OAUTH_REFRESH_TOKEN`,
`MODAL_OAUTH_CLIENT_ID`, and `MODAL_OAUTH_CLIENT_SECRET` into the process.
The two authentication methods cannot be combined, and all values for the
selected method must be provided.
.modal.toml
---------------
The `.modal.toml` file is generally stored in your home directory.
It should look like this::
```toml
[default]
token_id = "ak-12345..."
token_secret = "as-12345..."
```
You can create this file manually, or you can run the `modal token set ...`
command (see below).
Setting tokens using the CLI
----------------------------
You can set a token by running the command::
```
modal token set \
--token-id \
--token-secret
```
This will write the token id and secret to `.modal.toml`.
If the token id or secret is provided as the string `-` (a single dash),
then it will be read in a secret way from stdin instead.
Other configuration options
---------------------------
Other possible configuration options are:
* `loglevel` (in the .toml file) / `MODAL_LOGLEVEL` (as an env var).
Defaults to `WARNING`. Set this to `DEBUG` to see internal messages.
* `logs_timeout` (in the .toml file) / `MODAL_LOGS_TIMEOUT` (as an env var).
Defaults to 10.
Number of seconds to wait for logs to drain when closing the session,
before giving up.
* `max_throttle_wait` (in the .toml file) / `MODAL_MAX_THROTTLE_WAIT` (as an env var).
Defaults to None (no limit).
Maximum number of seconds to wait when requests are being throttled (i.e., due
to rate limiting or other cases that can normally be resolved through backoff).
* `force_build` (in the .toml file) / `MODAL_FORCE_BUILD` (as an env var).
Defaults to False.
When set, ignores the Image cache and builds all Image layers. Note that this
will break the cache for all images based on the rebuilt layers, so other images
may rebuild on subsequent runs / deploys even if the config is reverted.
* `ignore_cache` (in the .toml file) / `MODAL_IGNORE_CACHE` (as an env var).
Defaults to False.
When set, ignores the Image cache and builds all Image layers. Unlike `force_build`,
this will not overwrite the cache for other images that have the same recipe.
Subsequent runs that do not use this option will pull the *previous* Image from
the cache, if one exists. It can be useful for testing an App's robustness to
Image rebuilds without clobbering Images used by other Apps.
* `traceback` (in the .toml file) / `MODAL_TRACEBACK` (as an env var).
Defaults to False. Enables printing full tracebacks on unexpected CLI
errors, which can be useful for debugging client issues.
* `log_pattern` (in the .toml file) / `MODAL_LOG_PATTERN` (as an env var).
Defaults to `"[modal-client] %(asctime)s %(message)s"`
The log formatting pattern that will be used by the modal client itself.
See https://docs.python.org/3/library/logging.html#logrecord-attributes for available
log attributes.
* `dev_suffix` (in the .toml file) / `MODAL_DEV_SUFFIX` (as an env var).
Overrides the default `-dev` suffix added to URLs generated for Web Functions
when the App is ephemeral (i.e., created via `modal serve`). Must be a short
alphanumeric string.
Meta-configuration
------------------
Some "meta-options" are set using environment variables only:
* `MODAL_CONFIG_PATH` lets you override the location of the .toml file,
by default `~/.modal.toml`.
* `MODAL_PROFILE` lets you use multiple sections in the .toml file
and switch between them. It defaults to "default".
## Config
```python
class Config(object)
```
Singleton that holds configuration used by Modal internally.
```python
__init__(self)
```
### get
```python
get(self, key, *, profile=None, use_env=True)
```
Look up a configuration value.
Resolution order (highest priority first):
1. Environment variable ``MODAL_`` (underscore-separated, uppercased), when ``use_env`` is True.
2. The named profile in ``.modal.toml``.
3. The built-in default for that setting.
**Parameters**
print("TCP tunnel listening at:", tunnel.tcp_socket)
run_echo_server(8000)
```
**SSH example:**
This assumes you have a rsa keypair in `~/.ssh/id_rsa{.pub}`, this is a bare-bones example
letting you SSH into a Modal container.
```python
import subprocess
import time
import modal
app = modal.App()
image = (
modal.Image.debian_slim()
.apt_install("openssh-server")
.run_commands("mkdir /run/sshd")
.add_local_file("~/.ssh/id_rsa.pub", "/root/.ssh/authorized_keys", copy=True)
)
@app.function(image=image, timeout=3600)
def some_function():
subprocess.Popen(["/usr/sbin/sshd", "-D", "-e"])
with modal.forward(port=22, unencrypted=True) as tunnel:
hostname, port = tunnel.tcp_socket
connection_cmd = f'ssh -p {port} root@{hostname}'
print(f"ssh into container using: {connection_cmd}")
time.sleep(3600) # keep alive for 1 hour or until killed
```
If you intend to use this more generally, a suggestion is to put the subprocess and port
forwarding code in an `@enter` lifecycle method of an @app.cls, to only make a single
ssh server and port for each container (and not one for each input to the function).
#### interact
# interact
```python
interact()
```
Enable interactivity with user input inside a Modal container.
See the [interactivity guide](https://modal.com/docs/guide/developing-debugging#interactivity)
for more information on how to use this function.
#### intro
---
description: Complete API reference for the Modal Python SDK. Documentation for App, Function, Image, Sandbox, Volume, and other Modal primitives.
---
# Python SDK Reference
This is the API reference for the [`modal`](https://pypi.org/project/modal/)
Python SDK, which allows you to programmatically interact with Modal.
## Application construction
| | |
| --- | --- |
| [`App`](/docs/sdk/py/latest/App) | The main unit of deployment for code on Modal |
| [`App.function`](/docs/sdk/py/latest/App#function) | Decorator for registering a function with an App |
| [`App.cls`](/docs/sdk/py/latest/App#cls) | Decorator for registering a class with an App |
| [`App.server`](/docs/sdk/py/latest/App#server) | Decorator for registering a server with an App |
## Serverless execution
| | |
| --- | --- |
| [`Function`](/docs/sdk/py/latest/Function) | A serverless function backed by an autoscaling container pool |
| [`Cls`](/docs/sdk/py/latest/Cls) | A serverless class supporting parametrization and lifecycle hooks |
| [`Server`](/docs/sdk/py/latest/Server) | A serverless HTTP application with low-latency request routing |
## Extended Function configuration
### Class parametrization
| | |
| --- | --- |
| [`parameter`](/docs/sdk/py/latest/parameter) | Used to define class parameters, akin to a Dataclass field |
### Lifecycle hooks
| | |
| --- | --- |
| [`enter`](/docs/sdk/py/latest/enter) | Decorator for a method that will be executed during container startup |
| [`exit`](/docs/sdk/py/latest/exit) | Decorator for a method that will be executed during container shutdown |
| [`method`](/docs/sdk/py/latest/method) | Decorator for exposing a method as an invokable function |
### Web integrations
| | |
| --- | --- |
| [`fastapi_endpoint`](/docs/sdk/py/latest/fastapi_endpoint) | Decorator for exposing a simple FastAPI-based endpoint |
| [`asgi_app`](/docs/sdk/py/latest/asgi_app) | Decorator for functions that construct an ASGI web application |
| [`wsgi_app`](/docs/sdk/py/latest/wsgi_app) | Decorator for functions that construct a WSGI web application |
| [`web_server`](/docs/sdk/py/latest/web_server) | Decorator for functions that construct an HTTP web server |
### Function semantics
| | |
| --- | --- |
| [`batched`](/docs/sdk/py/latest/batched) | Decorator that enables [dynamic input batching](/docs/guide/dynamic-batching) |
| [`concurrent`](/docs/sdk/py/latest/concurrent) | Decorator that enables [input concurrency](/docs/guide/concurrent-inputs) |
### Scheduling
| | |
| --- | --- |
| [`Cron`](/docs/sdk/py/latest/Cron) | A schedule that runs based on cron syntax |
| [`Period`](/docs/sdk/py/latest/Period) | A schedule that runs at a fixed interval |
### Exception handling
| | |
| --- | --- |
| [`Retries`](/docs/sdk/py/latest/Retries) | Function retry policy for input failures |
## Sandboxed execution
| | |
| --- | --- |
| [`Sandbox`](/docs/sdk/py/latest/Sandbox) | An interface for restricted code execution |
| [`ContainerProcess`](/docs/sdk/py/latest/container_process#containerprocess) | An object representing a sandboxed process |
## Container configuration
| | |
| --- | --- |
| [`Image`](/docs/sdk/py/latest/Image) | An API for specifying container images |
| [`Secret`](/docs/sdk/py/latest/Secret) | A pointer to secrets that will be exposed as environment variables |
## Data primitives
### Persistent storage
| | |
| --- | --- |
| [`Volume`](/docs/sdk/py/latest/Volume) | Distributed storage supporting highly performant parallel reads |
| [`CloudBucketMount`](/docs/sdk/py/latest/CloudBucketMount) | Storage backed by a third-party cloud bucket (S3, etc.) |
### In-memory storage
| | |
| --- | --- |
| [`Dict`](/docs/sdk/py/latest/Dict) | A distributed key-value store |
| [`Queue`](/docs/sdk/py/latest/Queue) | A distributed FIFO queue |
## Account configuration
| | |
| --- | --- |
| [`Workspace`](/docs/sdk/py/latest/Workspace) | Workspace-level configuration and observability |
| [`Environment`](/docs/sdk/py/latest/Environment) | Manage workspace subdivisions |
## Networking
| | |
| --- | --- |
| [`Proxy`](/docs/sdk/py/latest/Proxy) | An object that provides a static outbound IP address for containers |
| [`forward`](/docs/sdk/py/latest/forward) | A context manager for publicly exposing a port from a container |
#### io streams
# io_streams
## StreamReader
```python
class StreamReader(typing.Generic)
```
Retrieve logs from a stream (`stdout` or `stderr`).
As an asynchronous iterable, the object supports the `for` and `async for`
statements. Just loop over the object to read in chunks.
### file_descriptor
```python
file_descriptor(self)
```
Possible values are `1` for stdout and `2` for stderr.
### read
```python
read(self)
```
Fetch the entire contents of the stream until EOF.
## StreamWriter
```python
class StreamWriter(object)
```
Provides an interface to buffer and write logs to a sandbox or container process stream (`stdin`).
### write
```python
write(self, data)
```
Write data to the stream but does not send it immediately.
This is non-blocking and queues the data to an internal buffer. Must be
used along with the `drain()` method, which flushes the buffer.
**Usage**
```python fixture:sandbox
proc = sandbox.exec(
"bash",
"-c",
"while read line; do echo $line; done",
)
proc.stdin.write(b"foo\n")
proc.stdin.write(b"bar\n")
proc.stdin.write_eof()
proc.stdin.drain()
```
### write_eof
```python
write_eof(self)
```
Close the write end of the stream after the buffered data is drained.
If the process was blocked on input, it will become unblocked after
`write_eof()`. This method needs to be used along with the `drain()`
method, which flushes the EOF to the process.
### drain
```python
drain(self)
```
Flush the write buffer and send data to the running process.
This is a flow control method that blocks until data is sent. It returns
when it is appropriate to continue writing data to the stream.
**Usage**
```python notest
writer.write(data)
writer.drain()
```
Async usage:
```python notest
writer.write(data) # not a blocking operation
await writer.drain.aio()
```
#### is local
# is_local
```python
is_local()
```
Indicate the execution context of the current process.
Note: this function specifically returns False when the current process is
running a Modal Function and True in all other cases. It will return True
when called from a child process of a Function or inside a Modal Sandbox,
even though those processes are running on Modal hardware.
#### method
# method
```python
method(*, is_generator=None)
```
Decorator for methods that should be transformed into a Modal Function registered against this class's App.
**Usage**
```python
@app.cls(cpu=8)
class MyCls:
@modal.method()
def f(self):
...
```
#### parameter
# parameter
```python
parameter(*, default=_no_default, init=True)
```
Used to specify options for modal.cls parameters, similar to dataclass.field for dataclasses
```
class A:
a: str = modal.parameter()
```
If `init=False` is specified, the field is not considered a parameter for the
Modal class and not used in the synthesized constructor. This can be used to
optionally annotate the type of a field that's used internally, for example values
being set by @enter lifecycle methods, without breaking type checkers, but it has
no runtime effect on the class.
#### types
# types
Public data types returned by Modal APIs.
## AppInfo
Information about a modal App, including its lifecycle and member functions and servers.
**Attributes**
logs/april-12-1.txt
modal volume get / volume_data_dump
```
Use "-" as LOCAL_DESTINATION to write file contents to standard output.
**Usage**:
```shell
modal volume get [OPTIONS] VOLUME_NAME REMOTE_PATH [LOCAL_DESTINATION]
```
**Options**:
* `--force`
* `-e, --env TEXT`: Environment to interact with. If unspecified, defers to `MODAL_ENVIRONMENT`, your active local profile, or your workspace default, in that order.
* `--help`: Show this message and exit.
## `modal volume list`
List the details of all modal.Volume volumes in an Environment.
**Usage**:
```shell
modal volume list [OPTIONS]
```
**Options**:
* `-e, --env TEXT`: Environment to interact with. If unspecified, defers to `MODAL_ENVIRONMENT`, your active local profile, or your workspace default, in that order.
* `--json`
* `--help`: Show this message and exit.
## `modal volume ls`
List files and directories in a modal.Volume volume.
**Usage**:
```shell
modal volume ls [OPTIONS] VOLUME_NAME [PATH]
```
**Options**:
* `--json`
* `-e, --env TEXT`: Environment to interact with. If unspecified, defers to `MODAL_ENVIRONMENT`, your active local profile, or your workspace default, in that order.
* `--help`: Show this message and exit.
## `modal volume put`
Upload a file or directory to a modal.Volume.
Remote parent directories will be created as needed.
Ending the REMOTE_PATH with a forward slash (/), it's assumed to be a directory
and the file will be uploaded with its current name under that directory.
**Usage**:
```shell
modal volume put [OPTIONS] VOLUME_NAME LOCAL_PATH [REMOTE_PATH]
```
**Options**:
* `-f, --force`: Overwrite existing files.
* `-e, --env TEXT`: Environment to interact with. If unspecified, defers to `MODAL_ENVIRONMENT`, your active local profile, or your workspace default, in that order.
* `--help`: Show this message and exit.
## `modal volume rename`
Rename a modal.Volume.
**Usage**:
```shell
modal volume rename [OPTIONS] OLD_NAME NEW_NAME
```
**Options**:
* `-y, --yes`: Run without pausing for confirmation.
* `-e, --env TEXT`: Environment to interact with. If unspecified, defers to `MODAL_ENVIRONMENT`, your active local profile, or your workspace default, in that order.
* `--help`: Show this message and exit.
## `modal volume rm`
Delete a file or directory from a modal.Volume.
**Usage**:
```shell
modal volume rm [OPTIONS] VOLUME_NAME REMOTE_PATH
```
**Options**:
* `-r, --recursive`: Delete directory recursively
* `-e, --env TEXT`: Environment to interact with. If unspecified, defers to `MODAL_ENVIRONMENT`, your active local profile, or your workspace default, in that order.
* `--help`: Show this message and exit.
### modal workspace
# `modal workspace`
Interact with the current Modal Workspace.
A Workspace is the top-level account that owns your Modal resources. Use these commands
to manage workspace-level settings such as proxy tokens.
**Usage**:
```shell
modal workspace [OPTIONS] COMMAND [ARGS]...
```
**Options**:
* `--help`: Show this message and exit.
**Commands**:
* `members`: View the members of the current Workspace.
* `proxy-tokens`: Manage the proxy tokens of the current Workspace.
* `settings`: Manage workspace settings.
## `modal workspace members`
View the members of the current Workspace.
**Usage**:
```shell
modal workspace members [OPTIONS] COMMAND [ARGS]...
```
**Options**:
* `--help`: Show this message and exit.
**Commands**:
* `list`: List the members of the current Workspace.
### `modal workspace members list`
List the members of the current Workspace.
**Usage**:
```shell
modal workspace members list [OPTIONS]
```
**Options**:
* `--json`
* `--help`: Show this message and exit.
## `modal workspace proxy-tokens`
Manage the proxy tokens of the current Workspace.
Proxy tokens provide authentication to Modal Endpoints, Servers, and Web Functions.
Proxy tokens and secrets have `wk-` and `ws-` prefixes, respectively. They cannot be
interchanged with API tokens (which use `ak-` and `as-` prefixes).
Proxy tokens are passed as request headers, either as a key / secret pair:
```
Modal-Key: wk-123
Modal-Secret: ws-456
```
Or as a single Bearer token:
```
Authorization: Bearer wk-123.ws-456
```
See https://modal.com/docs/guide/webhook-proxy-auth for more information.
On workspaces with RBAC enabled, tokens are scoped to specific environments;
use the `allow` and `revoke` commands to manage environment associations.
**Usage**:
```shell
modal workspace proxy-tokens [OPTIONS] COMMAND [ARGS]...
```
**Options**:
* `--help`: Show this message and exit.
**Commands**:
* `allow`: Allow a proxy token to authenticate to an environment.
* `create`: Create a proxy token in the current Workspace.
* `delete`: Delete a proxy token from the current Workspace.
* `list`: List the proxy tokens of the current Workspace.
* `revoke`: Revoke a proxy token's access to an environment.
### `modal workspace proxy-tokens allow`
Allow a proxy token to authenticate to an environment.
**Usage**:
```shell
modal workspace proxy-tokens allow [OPTIONS] TOKEN_ID ENVIRONMENT_NAME
```
**Options**:
* `--help`: Show this message and exit.
### `modal workspace proxy-tokens create`
Create a proxy token in the current Workspace.
**Usage**:
```shell
modal workspace proxy-tokens create [OPTIONS]
```
**Options**:
* `--json`
* `--help`: Show this message and exit.
### `modal workspace proxy-tokens delete`
Delete a proxy token from the current Workspace.
**Usage**:
```shell
modal workspace proxy-tokens delete [OPTIONS] TOKEN_ID
```
**Options**:
* `-y, --yes`: Run without pausing for confirmation.
* `--help`: Show this message and exit.
### `modal workspace proxy-tokens list`
List the proxy tokens of the current Workspace.
**Usage**:
```shell
modal workspace proxy-tokens list [OPTIONS]
```
**Options**:
* `-e, --environment TEXT`: Only list tokens associated with this environment. Lists all tokens when omitted.
* `--json`
* `--help`: Show this message and exit.
### `modal workspace proxy-tokens revoke`
Revoke a proxy token's access to an environment.
**Usage**:
```shell
modal workspace proxy-tokens revoke [OPTIONS] TOKEN_ID ENVIRONMENT_NAME
```
**Options**:
* `--help`: Show this message and exit.
## `modal workspace settings`
Manage workspace settings. Must be workspace manager or owner.
**Usage**:
```shell
modal workspace settings [OPTIONS] COMMAND [ARGS]...
```
**Options**:
* `--help`: Show this message and exit.
**Commands**:
* `list`: View the current settings for the workspace.
* `set`: Update a workspace setting.
### `modal workspace settings list`
View the current settings for the workspace.
**Usage**:
```shell
modal workspace settings list [OPTIONS]
```
**Options**:
* `--json`
* `--help`: Show this message and exit.
### `modal workspace settings set`
Update a workspace setting. Must be workspace manager or owner.
The following settings can be updated:
- `image-builder-version`: The image builder version determines the software included in our base images.
- `default-environment`: The default environment to use when the environment is omitted from SDK or CLI methods.
Usage:
- `modal workspace settings set image-builder-version 2025.06`
- `modal workspace settings set default-environment main`
**Usage**:
```shell
modal workspace settings set [OPTIONS] SETTING VALUE
```
**Options**:
* `--help`: Show this message and exit.
# Python SDK Release Notes
## Latest
### 1.5.5 (2026-08-28)
- We've added a [`modal.Sandbox.logs`](/docs/sdk/py/latest/Sandbox#logs) API, allowing you to `fetch()` logs from a specific date/time range or to `tail()` the most recent logs. Note that only logs from the entrypoint process of a Sandbox are currently stored, and streaming logs via this interface is not currently supported.
- It's now possible to configure the default role when creating a new Restricted Environment via the CLI or SDK. See the [RBAC Guide](https://modal.com/docs/guide/rbac) for more details on default environment roles.
- The `modal` CLI now accepts a global `--profile` option for simpler ad hoc profile selection.
- We are deprecating a number of undocumented APIs on object types in the Modal SDK. These APIs have no intended user-facing functionality and will be removed in version 1.6.0. To be safe, check for deprecation warnings on this version before upgrading.
### 1.5.4 (2026-08-12)
With this release, it's now possible to opt into a [more performant Sandbox backend](/blog/scaling-to-1-million-concurrent-sandboxes-in-seconds), which affords substantially higher creation rates and concurrency. Set `MODAL_SANDBOX_V2=1` as an environment variable and your Sandboxes will use this new system without any code changes. This will become the default behavior in version 1.6.0 of the Python SDK. Note that the new backend does not support the deprecated FileIO-based Sandbox filesystem API; please [migrate](/docs/guide/migrate-sandbox-filesystem) any code that is currently issuing deprecation warnings before enabling the feature flag.
- We've added logs APIs to the `modal.App` and `modal.Image` objects:
- The [`App.logs`](/docs/sdk/py/latest/App#logs) API allows you to `fetch()`, `tail()`, or `stream()` all logs from an App.
- The [`Image.logs`](/docs/sdk/py/latest/Image#logs) API supports `fetch()` and `tail()` on Image build logs. Streaming build logs is not supported at this time.
- We've also added a [`modal image logs`](/docs/cli/latest/image#modal-image-logs) CLI command with equivalent functionality.
- We now support querying basic information about your Workspace's current pricing structure via the [`Workspace.billing.rates()`](/docs/sdk/py/latest/Workspace#billingrates) API and [`modal billing rates`](/docs/cli/latest/billing#modal-billing-rates) CLI.
- The [`Function.update_autoscaler()`](/docs/sdk/py/latest/Function#update_autoscaler) and [`Server.update_autoscaler()`](/docs/sdk/py/latest/Server#update_autoscaler) methods now return the complete state of the autoscaler configuration after applying the update.
- The `target_concurrency` parameter in [`@app.server()`](/docs/sdk/py/latest/App#server) and [`Server.update_autoscaler()`](/docs/sdk/py/latest/Server#update_autoscaler) now supports fractional values for more fine-grained control over autoscaling behavior.
### 1.5.3 (2026-07-23)
- We've added new APIs for programmatically retrieving logs on several object types: [`Function`](/docs/sdk/py/latest/Function#logs), [`Server`](/docs/sdk/py/latest/Server#logs), and [`FunctionCall`](/docs/sdk/py/latest/FunctionCall#logs). Each object exposes three different methods, allowing you to `stream()` logs as they are generated, `fetch()` logs from a specific date/time range, or `tail()` the most recent logs.
- It's now possible to retrieve a summary of billing information across billing cycles:
- Use the [`modal.Workspace.billing.summary()`](/docs/sdk/py/latest/Workspace#billingsummary) method or the [`modal billing summary`](/docs/cli/latest/billing#modal-billing-summary) CLI to see workspace-level spend (broken down by category), credit usage, and the impact of any compute reservations.
- Use the [`modal.Environment.billing.summary()`](/docs/sdk/py/latest/Environment#billingsummary) method or the [`modal environment billing summary`](/docs/cli/latest/environment#modal-environment-billing-summary) CLI to see environment-level spend.
- We've made some changes to the interfaces for managing [RBAC](/docs/guide/rbac) permissions:
- We now explicitly represent all workspace member and service user roles in each Environment instead of having separate concepts for Environment membership and role.
- We've accordingly introduced a [`modal.Environment.roles`](/docs/sdk/py/latest/Environment#roles) interface (and [`modal environment roles`](/docs/cli/latest/environment#modal-environment-roles) CLI), replacing the `modal.Environment.members` interface and `modal environment members` CLI, which are now deprecated.
- It's now possible to specify one or more `--compute-region` options in [`modal endpoint create`](/docs/cli/latest/endpoint#modal-endpoint-create) to configure the region where Endpoint containers run.
- We've improved performance for large writes by ≈2.5x in several Sandbox filesystem methods ([`copy_from_local()`](/docs/sdk/py/latest/Sandbox#filesystemcopy_from_local), [`write_bytes()`](/docs/sdk/py/latest/Sandbox#filesystemwrite_bytes), and [`write_text()`](/docs/sdk/py/latest/Sandbox#filesystemwrite_text)).
### 1.5.2 (2026-07-10)
- We've added new interfaces for programmatic management of workspace settings:
- Use the [`modal.Workspace.settings.list()`](/docs/sdk/py/latest/Workspace#settingslist) method or [`modal workspace settings list`](/docs/cli/latest/workspace#modal-workspace-settings-list) CLI to see current workspace-level settings.
- Use the [`modal.Workspace.settings.set()`](/docs/sdk/py/latest/Workspace#settingsset) method or [`modal workspace settings set`](/docs/cli/latest/workspace#modal-workspace-settings-set) CLI to configure new values.
- We've added a [`modal.types`](/docs/sdk/py/latest/types) module for exposing dataclasses returned from public methods as public API. The types in this module are not typically constructed by user code, but it may be useful to reference them for, e.g., adding type annotations to code that wraps the relevant Modal API.
- The [`modal.Function.with_options()`](/docs/sdk/py/latest/Function#with_options) method now accepts a `routing_region` argument to dynamically configure [regional routing](/docs/guide/region-selection#regional-routing) at the time of invocation.
- The [`modal container stop`](/docs/cli/latest/container#modal-container-stop) CLI now accepts a `--graceful` flag. With it, the container stops fetching new inputs but finishes the inputs it is currently running before exiting, instead of having them cancelled and rescheduled. Graceful stops are only supported for containers running a Modal Function or Modal Server.
- The [`modal container logs`](/docs/cli/latest/container#modal-container-logs) CLI now includes logs from the startup phase of the container.
- The [`modal.Workspace.members.list()`](/docs/sdk/py/latest/Workspace#memberslist) method now uses `"member"` instead of `"user"` for the lowest-privilege Workspace role, matching the UI and documentation.
- The [`modal.Sandbox.reload_volumes()`](/docs/sdk/py/latest/Sandbox#reload_volumes) method now blocks until the Volumes have been reloaded, bounded by a new `timeout` argument (55 seconds by default). If the reload does not complete within `timeout`, [`modal.exception.TimeoutError`](/docs/sdk/py/latest/exception#timeouterror) is raised.
### 1.5.1 (2026-06-23)
This release includes several major new features, including the debut of a new serverless compute primitive for low-latency HTTP applications ([`@app.server()`](/docs/sdk/py/latest/App#server)) and a new CLI for deploying production-ready LLM inference endpoints with minimal configuration ([`modal endpoint`](/docs/cli/latest/endpoint)).
- We're introducing a new [`@app.server()`](/docs/sdk/py/latest/App#server) decorator (and [`modal.Server`](/docs/sdk/py/latest/Server) object), representing a serverless compute primitive that shares many features with Modal Functions while being optimized for serving HTTP-based applications with ultra-low latency. Read the [guide](/docs/guide/servers) for more information.
- We're also introducing the [`modal endpoint`](/docs/cli/latest/endpoint) CLI, providing programmatic access to our new [Endpoints](/docs/guide/endpoints) product. Endpoints let you deploy production-ready LLM inference servers with minimal configuration.
- We've added several new SDK features for workspace configuration and observability:
- We've added new billing API methods on the [`modal.Workspace`](/docs/sdk/py/latest/Workspace) and [`modal.Environment`](/docs/sdk/py/latest/Environment) objects ([`workspace.billing.report()`](/docs/sdk/py/latest/Workspace#billingreport) and [`environment.billing.report()`](/docs/sdk/py/latest/Environment#billingreport), respectively). The new APIs include a resource-level cost breakdown (CPU, memory, and specific GPU types). We've also added a [`modal environment billing`](/docs/cli/latest/environment#modal-environment-billing) CLI for generating environment-scoped billing reports. The new workspace-level API replaces the existing [`modal.billing.workspace_billing_report`](/docs/sdk/py/latest/billing#workspace_billing_report) function.
- We've added support for creating and managing [proxy tokens](/docs/guide/webhook-proxy-auth) via the [`modal.Workspace`](/docs/sdk/py/latest/Workspace) object ([`workspace.proxy_tokens.create()`](/docs/sdk/py/latest/Workspace#proxy_tokenscreate), [`workspace.proxy_tokens.list()`](/docs/sdk/py/latest/Workspace#proxy_tokenslist), etc.) and a new [`modal workspace proxy-tokens`](/docs/cli/latest/workspace#modal-workspace-proxy-tokens) CLI. Modal Servers and Endpoints are authenticated via proxy tokens by default.
- We've added a new [`modal workspace members`](/docs/cli/latest/workspace#modal-workspace-members) CLI for querying information about workspace membership.
- The new [`modal curl`](/docs/cli/latest/curl) CLI command allows you to make requests to authenticated endpoints without explicitly passing proxy token headers. This is an experimental feature and may change in the future.
- The [`modal app rollback`](/docs/cli/latest/app#modal-app-rollback) command now accepts a `--strategy` (`rolling` or `recreate`), like [`modal deploy`](/docs/cli/latest/deploy) and [`modal app rollover`](/docs/cli/latest/app#modal-app-rollover).
- Sandbox connect tokens can now be scoped to a custom port ([`modal.Sandbox.create_connect_token(port=...)`](/docs/sdk/py/latest/Sandbox#create_connect_token)).
- It is now possible to call [`image.publish()`](/docs/sdk/py/latest/Image#publish) on an Image constructed using [`modal.Image.from_id()`](/docs/sdk/py/latest/Image#from_id) without first calling [`image.build()`](/docs/sdk/py/latest/Image#build).
- The Modal Python client now respects standard environment variables for HTTP CONNECT and SOCKS4/5 proxies (`HTTPS_PROXY` and `ALL_PROXY`). Proxy support requires installing extra dependencies, i.e. using `uv pip install 'modal[api-proxy-support]'`. To opt out of proxy support, set `MODAL_DISABLE_API_PROXY=1` or put `disable_api_proxy = true` in your `.modal.toml` profile.
### 1.5.0 (2026-06-09)
This is a major release that includes several new features ([named Images](/docs/guide/named-images), version-pinned Function lookups, [Sandbox domain allowlists](/docs/guide/sandbox-networking)), a new [`modal skills`](/docs/cli/latest/skills) CLI, and a small number of breaking changes.
- We're introducing a "named Image" concept, akin to a Modal-native Image registry. This feature allows you to decouple Image builds from App deployment or Sandbox creation, and it simplifies the process of sharing a canonical Image across a large number of unrelated Apps.
- The new SDK method [`modal.Image.publish()`](/docs/sdk/py/latest/Image#publish) assigns a name to an existing Image. Names can optionally include a "tag" suffix (`"{name}:{tag}"`) to specify variants of an Image, e.g. to apply a versioning system.
- The new SDK method [`modal.Image.from_name()`](/docs/sdk/py/latest/Image#from_name) refers directly to that Image by its name. Unlike with Image methods that specify parts of a build recipe, the [`modal.Image.from_name()`](/docs/sdk/py/latest/Image#from_name) lookup will either succeed or fail with a [`modal.exception.NotFoundError`](/docs/sdk/py/latest/exception#notfounderror) error, but it will never trigger a build.
- The new [`modal image names`](/docs/cli/latest/image#modal-image-names) CLI can be used to see the current name assignments.
- We're introducing a "version-pinning" concept for Function lookups. By passing `version=` to [`modal.Function.from_name()`](/docs/sdk/py/latest/Function#from_name) or [`modal.Cls.from_name()`](/docs/sdk/py/latest/Cls#from_name), you can retrieve an instance that will send all inputs to the same version of the Function, even after a subsequent redeployment of its App. Additionally, any transitive invocations of other Functions in the same App will also be pinned on that version. This feature makes it easy to execute workflows that involve multiple Functions when those Functions might change in incompatible ways across deployments.
- It's now possible to restrict the *domains* that processes inside of a Sandbox can connect to. When you provide a list of domains to `outbound_domain_allowlist=[...]` in [`modal.Sandbox.create()`](/docs/sdk/py/latest/Sandbox#create), requests outside of the allowlist will be blocked by Modal infrastructure, and the denial will be recorded in the App logs.
- We've added a new [`modal skills`](/docs/cli/latest/skills) CLI for installing a foundational Modal agent skill ([`modal skills install`](/docs/cli/latest/skills#modal-skills-install)) and keeping it up to date over time ([`modal skills update`](/docs/cli/latest/skills#modal-skills-update)). Please help us improve it by sharing any feedback you have about its impact on agentic development with Modal.
- We've added a new [`modal.Workspace`](/docs/sdk/py/latest/Workspace) object for programmatic interaction with your Workspace configuration. The initial release offers a [`workspace.members.list()`](/docs/sdk/py/latest/Workspace#memberslist) method; expect more features soon.
- The [`modal`](/docs/cli/latest) CLI now normalizes the keys of its `--json` output by lowercasing and substituting underscores for non-alphanumeric characters.
- We've added a new [`sandbox.filesystem.watch()`](/docs/sdk/py/latest/Sandbox#filesystemwatch) method to the Sandbox Filesystem API, and we've deprecated the alpha [`modal.Sandbox.watch()`](/docs/sdk/py/latest/Sandbox#watch) method. The new method has a different implementation and offers significantly improved latency and reliability.
- We've made two small breaking changes around Sandbox snapshots:
- [`modal.Sandbox.snapshot_filesystem()`](/docs/sdk/py/latest/Sandbox#snapshot_filesystem) and [`modal.Sandbox.snapshot_directory()`](/docs/sdk/py/latest/Sandbox#snapshot_directory) now accept an explicit `ttl=` keyword argument that configures a retention interval (in seconds) for the resulting Image. Both methods default to 30 days (`ttl=30 * 24 * 3600`). **Note:** this alters the default behavior of these methods, because snapshot Images were previously persisted indefinitely. Pass an explicit `ttl=None` to retain the previous behavior.
- [`modal.Sandbox.snapshot_directory()`](/docs/sdk/py/latest/Sandbox#snapshot_directory) now also accepts a `timeout=` keyword argument (defaulting to `55` seconds), which brings it to parity with [`modal.Sandbox.snapshot_filesystem()`](/docs/sdk/py/latest/Sandbox#snapshot_filesystem). If the snapshot does not return before the deadline, a [`modal.exception.TimeoutError`](/docs/sdk/py/latest/exception#timeouterror) will be raised. **Note:** this alters the default behavior, which previously waited indefinitely, but you can set an arbitrarily long timeout.
- We've removed several deprecated static methods (`.delete()` and `.create_deployed()`) on Modal storage objects ([`modal.Volume`](/docs/sdk/py/latest/Volume), etc.). Use the [`.objects.delete()`](/docs/sdk/py/latest/Volume#objectsdelete) and [`.objects.create()`](/docs/sdk/py/latest/Volume#objectscreate) methods instead.
## 1.4
### 1.4.3 (2026-05-18)
- This release introduces a new ["regional routing"](https://modal.com/docs/guide/region-selection#regional-routing) concept for Function inputs, which is now in Public Beta. By setting `routing_region="..."` in the `@app.function()` or `@app.cls()` decorators, you can configure the Function to route its inputs through servers in `us-west`, `eu-west`, or `ap-south` instead of `us-east`. This can reduce network latency and help you meet data residency obligations. While in Beta, this feature has a few constraints:
- `routing_region=` can only be set during the initial deployment of a Function and cannot be changed in a subsequent redeployment.
- Functions using regional routing outside of `us-east` can only be invoked with the `.remote()` and `.map()` methods.
- We've added a new `modal.Environment` object for programmatically managing Environments, and we've expanded the `modal environment` CLI to support [RBAC](https://modal.com/docs/guide/rbac) configuration.
- It is now possible to dynamically configure `modal.Function` behavior using `Function.with_options()`, `Function.with_concurrency()`, and `Function.with_batching()`.
- The new `modal.Volume.with_mount_options()` method allows you to configure a Volume mount as read-only (`read_only=True`) and / or limit the mount to a subdirectory of the Volume (`sub_path="/some/path"`).
- It's now possible to pass a custom App name for ephemeral Apps using the `--name` option in `modal run`/`modal serve` or by setting `name=` in `App.run()`.
- We've added two new methods to the `modal.Sandbox` [Filesystem API](https://modal.com/docs/guide/sandbox-files):
- `sandbox.filesystem.list_files(path)` lists entries (with metadata) in a given directory on the Sandbox filesystem. This replaces the alpha `modal.Sandbox.ls` method.
- `sandbox.filesystem.stat(path)` returns metadata for a specific file/symlink/directory on the Sandbox's filesystem.
- It's now possible to place restrictions on *inbound* Sandbox connections by setting `inbound_cidr_allowlist=[...]` in `modal.Sandbox.create()`. We are also adding a new `outbound_cidr_allowlist=[...]` parameter and deprecating the existing `cidr_allowlist=[...]` to avoid confusion.
- We've improved the reliability of the `modal.Sandbox.snapshot_filesystem()` operation, especially for large snapshots, and we now support setting a `timeout=` longer than 55s when necessary.
- Images returned by `modal.Sandbox.snapshot_directory()` can now be passed to `modal.Sandbox.create()` to use as a root filesystem for the new Sandbox.
- We've added a `modal.Image.pipe()` method to let you define reusable Image recipes that compose well with the fluent Image builder interface.
- It's now possible to assign Sandbox tags at creation with `modal.Sandbox.create(..., tags=tags)`.
- It's now possible to use `--chmod` and `--chown` flags on `COPY` commands within `modal.Image.from_dockerfile()`.
- We've improved the reliability and latency for `modal shell` and `modal container exec` CLI commands.
### 1.4.2 (2026-04-16)
- We've added a new `modal app rollover` CLI command for triggering a redeployment of an App without making any code or configuration changes. A rollover replaces existing containers with fresh ones. As with `modal deploy`, there are two strategies for switching between deployments:
- `--strategy=rolling` (the default) will smoothly migrate traffic from old containers to new containers
- `--strategy=recreate` will terminate all running containers so that any subsequent inputs will go to new containers
- We've added a new `modal bootstrap` CLI command, which fetches deployable starter code for common AI applications (e.g., text generation, text-to-image, speech-to-text). This is an experiment: try it out and give us feedback!
- We've added two methods to the new Sandbox filesystem API:
- `sandbox.filesystem.make_directory()` creates a new directory on the Sandbox filesystem
- `sandbox.filesystem.remove()` deletes a file or directory from the Sandbox filesystem
- The new Sandbox filesystem methods replace the `modal.Sandbox.mkdir` and `modal.Sandbox.rm` methods, which are now deprecated.
- Sandboxes also now support `sb.unmount_image(path)` to remove a previously mounted Image from a path and reveal the underlying Sandbox filesystem there again.
- The `modal app stop` and `modal container stop` CLI commands now prompt for confirmation (pass `--yes` to skip).
- Several other `modal app` CLI commands will now map a name-based argument to a recently-stopped App that used that name. This is useful for, e.g., fetching logs from an App after it has been stopped.
- We've added a `build_args` parameter to `modal.Image.dockerfile_commands()`.
### 1.4.1 (2026-03-30)
- We're introducing a concept of "readiness probes" for `modal.Sandbox`. This feature lets you configure a readiness check on a TCP port (`modal.Probe.with_tcp()`) or by executing a process (`modal.Probe.with_exec()`). Calling `sb.wait_until_ready()` will block until the Probe succeeds:
```python notest
app = modal.App.lookup('sandbox-app', create_if_missing=True)
probe = modal.Probe.with_tcp(8080)
sb = modal.Sandbox.create(
"python3", "-m", "http.server", "8080",
readiness_probe=probe,
app=app,
)
sb.wait_until_ready()
```
- We fixed a longstanding bug that could cause WebSocket performance to degrade after handling hundreds of connections from the same container.
- We improved the performance of `modal container logs` when fetching logs for an old container.
- We fixed a bug introduced in 1.4.0 that made the `modal` CLI crash on `typer<0.19.0`.
### 1.4.0 (2026-03-25)
We've made significant CLI enhancements so that Modal logs can be more accessible to coding agents:
- The `modal app logs` and `modal container logs` commands now have the ability to fetch historical logs using counting (e.g. `--tail 1000`) or time-based (e.g., `--since 4h`, `--until 2026-03-15`, etc.) configuration. Note that historical log access is subject to plan-level retention limits.
- The `modal container logs` command also accepts `--all` to fetch the complete set of logs for that Container or Sandbox.
- Both CLI commands now accept a `--search` filter, and they can also filter by `--source` (`stdout`/`stderr`/`system`).
- The `modal app logs` command additionally accepts `--function`, `--function-call`, and `--container` filters.
- The `modal app logs` command can prefix each line with the ID of the Function, FunctionCall, or Container where it originated (e.g. `--show-function-id`).
- Note that the default behavior of these commands has changed. Previously, they would follow (i.e., stream) logs by default, but you now must pass `--follow` to get this behavior. The new default will always show the most recent 100 log entries.
We're releasing a new [Sandbox filesystem API](https://modal.com/docs/guide/sandbox-files) (currently in Beta) with significantly improved reliability and ergonomics:
- Use `sb.filesystem.copy_from_local` / `sb.filesystem.copy_to_local` to transfer file contents between your local filesystem and the Sandbox filesystem.
- Use `sb.filesystem.write_text` / `sb.filesystem.read_text` or `sb.filesystem.write_bytes` / `sb.filesystem.read_bytes` to transfer file contents between local memory and the Sandbox filesystem.
- These new APIs replace the `modal.Sandbox.open` method and the `modal.file_io.FileIO` type that it returns; the old APIs are now deprecated.
We're introducing the concept of "deployment strategies" to give you more flexibility over what happens when redeploying your App:
- By passing `modal deploy --strategy recreate` (or `app.deploy(strategy="recreate")` in the SDK), you can immediately terminate any containers that are running when the deployment completes. This is most useful for development workflows, as it guarantees that any subsequent input will be handled by containers running the new version of the App. This trades off some downtime for certainty about when the new version will be in use.
- The disruptive "recreate" strategy is also useful when your App runs at its `max_containers` limit, as otherwise we are unable to bring up replacement capacity.
- The `modal serve` command now uses a "recreate" strategy during code updates.
- The default "rolling" strategy is unchanged. This strategy prioritizes uptime, but means that old containers may still continue handling inputs for some time.
We've also included a number of smaller new features and improvements:
- Sandboxes now accept an `include_oidc_identity_token` parameter in `modal.Sandbox.create`. When set to `True`, a `MODAL_IDENTITY_TOKEN` environment variable will be injected into the Sandbox, enabling OIDC-based authentication (e.g., for AWS federation). See the [OIDC integration guide](https://modal.com/docs/guide/oidc-integration) for more details.
- The new `modal.Image.from_scratch()` constructor creates an empty Image, equivalent to `FROM scratch` in Docker. This is primarily useful as a lightweight filesystem to mount into a Sandbox via `modal.Sandbox.mount_image`.
- The `modal container list` command now accepts an `--app-id` filter to return containers for a specific App.
- We've addressed an issue where `modal.Sandbox.exec` could hang if the Sandbox had terminated immediately after creation.
- An exception is now raised if the *same* Volume or CloudBucketMount is mounted at multiple paths in a container.
- The client will now error faster (≈60s) if it cannot establish an initial connection the Modal servers.
Finally, we are introducing a small number of breaking changes and enforcing some deprecations of pre-1.0 APIs:
- Exceptions returned by `modal.Function.map()` are no longer wrapped in a `UserCodeException` type, and we're deprecating the transitional `wrap_returned_exceptions=` parameter.
- The `modal.enable_output()` context manager no longer yields a value; this had briefly leaked an internal type.
- We've removed unused `namespace` parameters from a number of APIs.
- It's now required to pass `-m` on the CLI when using a module path spelling of the Function reference (e.g. `modal deploy -m project.app`)
- We've removed backwards compatibility for the old autoscaler configuration (`keep_warm`, `concurrency_limit`, etc.).
- It's no longer possible to look up a specific method on a Cls using `modal.Function.from_name`; use `modal.Cls.from_name` instead.
## 1.3
### 1.3.5 (2026-03-03)
- We've added a `modal changelog` CLI for retrieving changelog entries with a flexible query interface (e.g. `modal changelog --since=1.2`, `modal changelog --since=2025-12-01`, `modal changelog --newer`). We expect that this will be a useful way to surface information about new features to coding agents.
- We've added a new `modal.Secret.update` method, which allows you to programmatically modify the environment variables within a Secret. This method has the semantics of Python's `dict.update`: Secret contents can be overwritten or extended when using it. Note that Secret updates will take effect only for containers that start up after the modification.
- The dataclass returned by `modal.Function.get_current_stats()` now includes a `num_running_inputs` field that reports the number of inputs the Function is currently handling.
### 1.3.4 (2026-02-23)
- We're introducing "Directory Snapshots": a new beta feature for persisting specific directories past the lifetime of an individual Sandbox. Using the new methods `modal.Sandbox.snapshot_directory()` and `modal.Sandbox.mount_image()`, you can capture the state of a directory and then later include it in a different Sandbox:
```python notest
sb = modal.Sandbox.create(app=app)
snapshot = sb.snapshot_directory("/project")
sb2 = modal.Sandbox.create(app=app)
sb2.mount_image("/project", snapshot)
```
This feature can be useful for separating the lifecycle of application code in the Sandbox's main Image from project code that changes in each Sandbox session. Files in the mounted snapshot also benefit from several optimizations that allow them to be read faster. See the [Sandbox Snapshot guide](https://modal.com/docs/guide/sandbox-snapshots) for more information.
- We've added a new `modal.Sandbox.detach()` method that we recommend calling after you are done interacting with a Sandbox. This method disconnects your local client from the Sandbox and cleans up resources associated with the connection. After calling `detach`, operations on the Sandbox object may raise and are otherwise not guaranteed to work.
- The `modal.Sandbox.terminate()` method now accepts a `wait` parameter. With `wait=True`, `terminate` will block until the Sandbox is finished and return the exit code. The default `wait=False` maintains the previous behavior.
- Throughput for writing to the `stdin` of a `modal.Sandbox.exec` process has been increased by 8x.
- We've added a new `modal.Volume.from_id()` method for referencing a Volume by its object id.
### 1.3.3 (2026-02-12)
- We've added a new `modal billing report` CLI and promoted the `modal.billing.workspace_billing_report` API to General Availability for all Team and Enterprise plan workspaces.
- We've added `modal.Queue.from_id()` and `modal.Dict.from_id()` methods to support referencing a Queue or Dict by its object id.
- Modal's async usage warnings are now enabled by default. These warnings will fire when using a [blocking interface on a Modal object](https://modal.com/docs/guide/async) in an async context. We've aimed to provide detailed and actionable suggestions for how to modify the code, which makes the warnings verbose. While we recommend addressing any warnings that pop up, as they can point to significant performance issues or bugs, we also provide a configuration option to disable them (`MODAL_ASYNC_WARNINGS=0` or `async_warnings = false` in the `.modal.toml`). Please report any apparent false positives or incorrect suggested fixes.
- We've fixed a bug where the ASGI scope's `state` contents could leak between requests when using `@modal.asgi_app`.
### 1.3.2 (2026-01-30)
- Modal objects now have a `.get_dashboard_url()` method. This method will return a URL for viewing that object on the Modal dashboard:
```python
fc = f.spawn()
print(fc.get_dashboard_url()) # Easy access to logs, etc.
```
- There is also a new `modal dashboard` CLI and new `modal app dashboard` / `modal volume dashboard` CLI subcommands:
```bash
modal dashboard # Opens up the Apps homepage for the current environment
modal dashboard # Opens up a view of this object
modal app dashboard # Opens up the dashboard for this deployed App
modal volume dashboard # Opens up the file browser for this persistent Volume
```
- You can now pass a Sandbox ID (`sb-xxxxx`) directly to the `modal container logs` CLI.
- The `modal token info` CLI will now include the token name, if provided at token creation.
- We've fixed an issue where `modal.Cls.with_options()` (or the `with_concurrency()` / `with_batching()` methods) could sometimes use stale argument values when called repeatedly.
### 1.3.1 (2026-01-22)
- We've improved our experimental support for Python 3.14t (free-threaded Python) inside Modal containers.
- The container environment will now use the Python implementation of the Protobuf runtime rather than the incompatible `upb` implementation.
- As 3.14t images are not being published to the official source for our prebuilt `modal.Image.debian_slim()` images, we recommend using `modal.Image.from_registry` to build a 3.14t Image:
```python
modal.Image.from_registry("debian:bookworm-slim", add_python="3.14t")
```
- Note that 3.14t support is available only on the 2025.06 [Image Builder Version](https://modal.com/settings/image-config).
- Support is still experimental, so please share any issues that you encounter running 3.14t in Modal containers.
- It's now possible to provide a `custom_domain` for a `modal.Sandbox`:
```python
sb = modal.Sandbox.create(..., custom_domain="sandboxes.mydomain.com")
```
Note that Sandbox custom domains work differently from Function custom domains and must currently be set up manually by Modal; please get in touch if this feature interests you.
- We added a new `modal token info` CLI command to retrieve information about the credentials that are currently in use.
- We added a `--timestamps` flag to a number of CLI entrypoints (`modal run`, `modal serve`, `modal deploy`, and `modal container logs`) to show timestamps in the logging output.
- The automatic CLI creation for `modal run` entrypoints now supports `Literal` type annotations, provided that the literal type contains either all `str` or all `int` values.
- We've fixed a bug that could cause App builds to fail with an uninformative `CancelledError` when the App was misconfigured.
- We've improved client resource management when running `modal.Sandbox.exec`, which avoids a rare thread race condition.
### 1.3.0 (2025-12-19)
Modal now supports Python 3.14. Python 3.14t (the free-threading build) support is currently a work in progress, because we are waiting for dependencies to be updated with free-threaded support. Additionally, Modal no longer supports Python 3.9, which has reached [end-of-life](https://devguide.python.org/versions).
We are adding experimental support for detecting cases where Modal's blocking APIs are used in async contexts (which can be a source of bugs or performance issues). You can opt into runtime warnings by setting `MODAL_ASYNC_WARNINGS=1` as an environment variable or `async_warnings = true` as a config field. We will enable these warnings by default in the future; please report any apparent false positives or other issues while support is experimental.
This release also includes a small number of deprecations and behavioral changes:
- The Modal SDK will no longer propagate `grpclib.GRPCError` types out to the user; our own `modal.Error` subtypes will be used instead. To avoid disrupting user code that has relied on `GRPCError` exceptions for control flow, we are temporarily making some exception types inherit from `GRPCError` so that they will also be caught by `except grpclib.GRPCError` statements. Accessing the `.status` attribute of the exception will issue a deprecation warning, but warnings cannot be issued if the exception object is only caught and there is no other interaction with it. We advise proactively migrating any exception handling to use Modal types, as we will remove the dependency on `grpclib` types entirely in the future. See the [`modal.exception`](https://modal.com/docs/sdk/py/latest/exception) docs for the mapping from gRPC status codes to Modal exception types.
- The `max_inputs` parameter in the `@app.function()` and `@app.cls` decorators has been renamed to `single_use_containers` and now takes a boolean value rather than an integer. Note that only `max_inputs=1` has been supported, so this has no functional implications. This change is being made to reduce confusion with `@modal.concurrent(max_inputs=...)` and so that Modal's autoscaler can provide better performance for Functions with single-use containers.
- The async (`.aio`) interface has been deprecated from `modal.FunctionCall.from_id`, `modal.Image.from_id`, and `modal.SandboxSnapshot.from_id`, because these methods do not perform I/O.
- The `replace_bytes` and `delete_bytes` methods have been removed from the `modal.file_io` filesystem interface.
- Images built with `modal.Image.micromamba()` using the 2023.12 [Image Builder Version](https://modal.com/docs/guide/images#image-builder-updates) will now use a Python version that matches their local environment by default, rather than defaulting to Python 3.9.
## 1.2
### 1.2.6 (2025-12-16)
- Fixed bug where iterating on a `modal.Sandbox.exec` output stream could raise unauthenticated errors.
### 1.2.5 (2025-12-12)
- It is now possible to set a custom `name=` for a Function without using `serialized=True`. This can be useful when decorating a function multiple times, e.g. applying multiple Modal configurations to the same implementation.
- It is now possible to start `modal shell` with a Modal Image ID (`modal shell im-abc123`). Additionally, `modal shell` will now warn if you pass invalid combinations of arguments (like `--cpu` together with the ID of an already running Sandbox, etc.).
- Fixed a bug in `modal shell` that caused e.g. `vi` to fail with unicode decode errors.
- Fixed a thread-safety issue in `modal.Sandbox` resource cleanup.
- Improved performance when adding large local directories to an Image.
- Improved async Sandbox performance by not blocking the event loop while reading from `stdout` or `stderr`.
### 1.2.4 (2025-11-21)
- Fixed a bug in `modal.Sandbox.exec` when using `stderr=StreamType.STDOUT` (introduced in v1.2.3).
- Added a new `h2_enabled` option in `modal.forward`, which enables HTTP/2 advertisement in TLS establishment.
### 1.2.3 (2025-11-20)
- CPU Functions can now be configured to run on non-preemptible capacity by setting `nonpreemptible=True` in the `@app.function()` or `@app.cls()` decorator. This feature is not currently available when requesting a GPU. Note that non-preemptibility incurs a 3x multiplier on CPU and memory pricing. See the [Guide](https://modal.com/docs/guide/preemption) for more information on preemptions.
- The Modal client can now respond more gracefully to server throttling (e.g., rate limiting) by backing off and automatically retrying. This behavior can be controlled with a new `MODAL_MAX_THROTTLE_WAIT` config variable. Setting the config to `0` will preserve the previous behavior and treat rate limits as an exception; setting it to a nonzero number (the unit is seconds) will allow a limited duration of retries.
- The `modal.Sandbox.exec` implementation has been rewritten to be more reliable and efficient.
- Added a new `--add-local` flag to `modal shell`, allowing local files and directories to be included in the shell's container.
- Fixed a bug introduced in v1.2.2 where some Modal objects (e.g., `modal.FunctionCall`) were not usable after being captured in a Memory Snapshot. The bug would result in a `has no loader function` error when the object was used.
### 1.2.2 (2025-11-10)
- `modal.Image.run_commands` now supports `modal.Volume` mounts. This can be helpful for accelerating builds by keeping a package manager cache on the Volume:
```python
cache_vol = modal.Volume.from_name("cache-mount")
cmd_using_cache = "..."
image = modal.Image.debian_slim().run_commands(cmd_using_cache, volumes={"/cache": cache_vol})
```
- All Modal objects now accept an optional `modal.Client` object in their constructor methods. Passing an explicit client can be helpful in cases where Modal credentials are retrieved from within the Python process that is making requests.
- The `name=` passed to `modal.Sandbox.create` and `modal.Sandbox.from_name` is now required to follow other Modal object naming rules (must contain only alphanumeric characters, dashes, periods, or underscores and cannot exceed 64 characters). Passing an invalid name will now error.
- `modal.CloudBucketMount` now supports `force_path_style=True` to disable virtual-host-style addressing. See [mountpoint-s3 endpoints docs](https://github.com/awslabs/mountpoint-s3/blob/main/doc/CONFIGURATION.md#endpoints-and-aws-privatelink) for details.
- The output from `modal config show` is now valid JSON and can be parsed by CLI tools such as `jq`.
- Fixed a bug where App tags were not attached to Image builds that occur when first deploying the App.
### 1.2.1 (2025-10-22)
- It's now possible to override the default `-dev` suffix applied to the autogenerated URLs for ephemeral Apps (i.e., when using `modal serve`) via a new `dev_suffix` field in the `.modal.toml` config file, or equivalently with the `MODAL_DEV_SUFFIX` environment variable. This can help avoid collisions when multiple users of a workspace are working on the same codebase simultaneously.
- Fixed a bug where reading long stdout/stderr from `modal.Sandbox.exec()` could break in `text=True` mode.
- Fixed a bug where the status code was not checked when downloading a file from a Volume.
- `modal run --detach ...` will now exit more gracefully if you lose internet connection while your App is running.
### 1.2.0 (2025-10-09)
In this release, we're introducing the concept of "App tags", which are simple key-value metadata that can be included to provide additional organizational context. Tags can be defined as part of the `modal.App` constructor:
```python
app = modal.App("llm-inference-server", tags={"team": "genai-platform"})
```
Tags can also be added to an active App via the new `modal.App.set_tags()` method, and current tags can be retrieved with the new `modal.App.get_tags()`.
This release also introduces a new API for generating a tabular billing report: `modal.billing.workspace_billing_report()`. The billing API will report the cost incurred by each App, aggregated over time intervals (currently supporting a daily or hourly resolution). The report can optionally include App tags, allowing you to perform cost allocation using your own organizational schema.
Note that the initial release of the billing API is a private beta. Please get in touch to discuss access.
This release also includes some internal changes to Function input/output serialization. These changes will provide better support for calling into Modal Functions from our `modal-js` and `modal-go` SDKs. Versions 0.4 or later of `modal-js` and `modal-go` will only be able to invoke Functions in Apps deployed with version 1.2 or later of the Python SDK.
Other new features and improvements:
- The new `modal.Sandbox.create_connect_token()` method facilitates authentication for making HTTP / Websocket requests to a server running in a Sandbox:
```python notest
sb = modal.Sandbox.create(...)
# Create a connect token, optionally including arbitrary user metadata
creds = sb.create_connect_token(user_metadata={"user_id": "user123"})
# Make an http request, passing the token in the authorization header
requests.get(creds.url, headers={"Authorization": f"Bearer {creds.token}"})
```
See the [Sandbox Networking guide](https://modal.com/docs/guide/sandbox-networking) for more information.
- The new `modal.Image.build()` method allows you to eagerly trigger an Image build. This is particularly helpful when working with Sandboxes, as otherwise the Image build would happen lazily inside `modal.Sandbox.create()`:
```python notest
app = modal.App.lookup("sandbox-app")
image = modal.Image.from_registry("ubuntu")
# This step will block until the build completes
image.build(app)
# Now the Sandbox will be created and scheduled immediately
sb = modal.Sandbox.create(app=app, image=image)
```
- We've added an `env` parameter to a number of methods that configure Function, Sandbox, or Image execution. This parameter accepts a dictionary and adds the contents as environment variables in the relevant Modal container. This allows for simpler inclusion of non-sensitive information compared to using a `modal.Secret`.
- It's now possible to pass a `modal.CloudBucketMount` instance to the `volumes=` parameter of `modal.Cls.with_options` (previously, only dynamic addition of `modal.Volume` mounts was supported).
- The new `modal.Sandbox.get_tags()` method will fetch the tags currently in use by the Sandbox (i.e., after calling `modal.Sandbox.set_tags()`). Note that Sandbox tags are distinct from the new concept of App tags.
- `modal.Dict.pop()` now accepts an optional `default` parameter, akin to Python's `dict.pop()`.
- It's now possible to `modal shell` into a running Sandbox by passing its Sandbox ID (`modal shell sb-123`).
- Sandboxes can now be configured to expose a PTY device via `Sandbox.create(..., pty=True)` and `Sandbox.exec(..., pty=True)`. This provides better support for Claude Code.
- The new `modal.experimental.image_delete()` function can be used to delete the final layer of an Image given its ID, which can be particularly useful for cleaning up Sandbox Filesystem Snapshots.
- Using `modal run --interactive` (or `-i`) will now suppress Modal's status spinner to avoid interfering with breakpoints in local entrypoint functions. We've also improved support for printing large objects when attached to a debugger.
- We've improved support for Protobuf 5+ when using the Python implementation of the Protobuf runtime.
This release also introduces a small number of new deprecations:
- We deprecated the `client` parameter from `Sandbox.set_tags()`. To use an explicit Client when interacting with the Sandbox, pass it into `modal.Sandbox.create()` instead.
- We deprecated the `pty_info` parameter from `Sandbox.create()` and `Sandbox.exec()`. This was a private parameter accepting an internal Protobuf type. See the new boolean `pty` parameter instead.
- We replaced the `--no-confirm` option with `--yes` in the `modal environment delete` CLI to align with other CLI commands that normally require confirmation.
Finally, some functionality that began issuing deprecation warnings prior to v0.73 has now been completely removed:
- It is now required to "instantiate" a `modal.Cls` before invoking one of its methods.
- The eager `.lookup()` method has been removed from most Modal object classes (but not from `modal.App.lookup`, which remains supported). The lazy `.from_name()` method is recommended for accessing deployed objects going forward.
- The public constructors on the `modal.mount.Mount` object have been removed; this is now an entirely internal class.
- The `context_mount=` parameter has accordingly been removed from Docker-oriented `modal.Image` methods.
- The unused `allow_cross_region_volumes` parameter has been removed from the function decorators.
- The `modal.experimental.update_autoscaler()` function has been removed; this functionality now has a stable API as `modal.Function.update_autoscaler()`.
## 1.1
### 1.1.4 (2025-09-03)
- Added a `startup_timeout` parameter to the `@app.function()` and `@app.cls()` decorators. When used, this configures the timeout applied to each container's startup period separately from the input `timeout`. For backwards compatibility, `timeout` still applies to the startup phase when `startup_timeout` is unset.
- Added an optional `idle_timeout` parameter to `modal.Sandbox.create()`. When provided, Sandboxes will terminate after `idle_timeout` seconds of idleness.
- The dataclass returned by `modal.experimental.get_cluster_info()` now includes a `cluster_id` field to identify the clustered set of containers.
- When `block_network=True` is set in `modal.Sandbox.create()`, we now raise an error if any of `encrypted_ports`, `h2_ports`, or `unencrypted_ports` are also set.
- Functions decorated with `@modal.asgi_app()` now return an HTTP 408 (request timeout) error code instead of a 502 (gateway timeout) in rare cases when an input fails to arrive at the container, e.g. due to cancellation.
- `modal.Sandbox.create()` now warns when an invalid `name=` is passed, applying the same rules as other Modal object names: names must be alphanumeric and not longer than 64 characters. This will become an error in the future.
### 1.1.3 (2025-08-19)
- Fixed a bug introduced in `v1.1.2` that causes invocation of `modal.FunctionCall.get`, `modal.FunctionCall.get_call_graph`, `modal.FunctionCall.cancel`, and `modal.FunctionCall.gather` to fail when the `FunctionCall` object is retrieved via `modal.FunctionCall.from_id`.
- Added retries to improve the robustness of `modal volume get`
### 1.1.2 (2025-08-14)
We're introducing a new API pattern for imperative management of Modal resource types (`modal.Volume`, `modal.Secret`, `modal.Dict`, and `modal.Queue`). The API is accessible through the `.objects` namespace on each class. The object management namespace has methods for the following operations:
- `.objects.create(name)` creates an object on our backend. E.g., with [`modal.Volume.objects.create`](https://modal.com/docs/sdk/py/latest/Volume#create):
```python notest
modal.Volume.objects.create("huggingface-cache", environment_name="dev")
```
- `.objects.delete(name)` deletes the object with that name. E.g., with [`modal.Secret.objects.delete`](https://modal.com/docs/sdk/py/latest/Secret#delete):
```python notest
modal.Secret.objects.delete("aws-token")
```
- `.objects.list()` returns a list of object instances. E.g., with [`modal.Queue.objects.list`](https://modal.com/docs/sdk/py/latest/Queue#list):
```python notest
for queue in modal.Queue.objects.list():
queue_info = queue.info()
print(queue_info.name, queue_info.created_at, queue.len())
```
With the introduction of these APIs, we're replacing a few older methods with similar functionality:
- Static `.delete()` methods on the resource types themselves are being deprecated, because they are too easily confused with operations on the _contents_ of a resource (i.e., calling `modal.Dict.delete(key_name)` is an easy mistake that can have significant adverse consequences).
- The undocumented `.create_deployed()` methods of `modal.Volume` and `modal.Secret` are being deprecated in favor of this consistent API for imperative management.
Other changes:
- `modal.Cls.with_options` now supports `region` and `cloud` keyword arguments to support runtime constraints on scheduling.
- Fixed a bug that could cause Image builds to fail with `'FilePatternMatcher' object has no attribute 'patterns'` when using a `modal.FilePatternMatcher.from_file` ignore pattern.
- Fixed a bug where `rdma=True` was ignored when using `@modal.experimental.clustered()` with a `modal.Cls`.
### 1.1.1 (2025-08-01)
We're introducing the concept of "named Sandboxes" for usecases where Sandboxes need to have unique ownership over a resource. A named Sandbox can be created by passing `name=` to `modal.Sandbox.create()`, and it can be retrieved with the new `modal.Sandbox.from_name()` constructor. Only one running Sandbox can use a given name (scoped within the App that is managing the Sandbox) at any time, so trying to create a Sandbox with a name that is already taken will fail. Sandboxes release their name when they terminate. See the [guide](https://modal.com/docs/guide/sandbox#named-sandboxes) for more information about using this new feature.
Other changes:
- We've made an internal change to the `modal.Image.uv_pip_install` method to make it more portable across different base Images. As a consequence, Images built with this method on 1.1.0 will need to rebuild the next time they are used.
- We've added a `.name` property and `.info()` method to `modal.Dict`, `modal.Queue`, `modal.Volume`, and `modal.Secret` objects.
- Sandboxes now support `experimental_options` configuration for enabling preview functionality.
- We've Improved Modal's rich output when used in a Jupyter notebook.
### 1.1.0 (2025-07-17)
This release introduces support for the `2025.06` [Image Builder Version](https://modal.com/docs/guide/images#image-builder-updates), which is in a "preview" state. The new image builder includes several major changes to how the Modal client dependencies are included in Modal Images. These improvements should greatly reduce the risk of conflicts with user code dependencies. They also allow Modal Sandboxes to easily be used with existing Images or Dockerfiles that are not themselves compatible with the Modal client library. You can see more details and update your Workspace on its [Image Config](https://modal.com/settings/image-config) page. Please share any issues that you encounter as we work to make the version stable.
We're also introducing first-class support for building Modal Images with the [uv package manager](https://docs.astral.sh/uv/) through the new [`modal.Image.uv_pip_install`](https://modal.com/docs/sdk/py/latest/Image#uv_pip_install) and [`modal.Image.uv_sync`](https://modal.com/docs/sdk/py/latest/Image#uv_sync) methods:
```python
import modal
# uv_pip_install accepts a list of packages, like pip_install, but up to 50% faster
image = modal.Image.debian_slim().uv_pip_install("torch==2.7.1", "numpy==2.3.1")
# uv_sync accepts a local `uv_project_dir` (defaulting to the local working directory)
# and uses the pyproject.toml and uv.lock files to specify the environment
image = modal.Image.debian_slim().uv_sync()
```
Please note that, as these methods are new, there is some chance that future releases will need to fix bugs or address edge cases in ways that break the cache for existing Images. When using `modal.Image.uv_pip_install`, we recommend pinning dependency versions so that any necessary rebuilds produce a consistent environment.
This release also includes a number of other new features and bug fixes:
- Optimized handling of the `ignore` parameter in `Image.add_local_dir` and similar methods for cases where entire directories are ignored.
- Added a `poetry_version` parameter to `modal.Image.poetry_install_from_file`, which supports installing a specific version of `poetry`. It's also possible to set `poetry_version=None` to skip the install step, i.e. when poetry is already available in the Image.
- Added a [`modal.Sandbox.reload_volumes`](https://modal.com/docs/sdk/py/latest/Sandbox#reload_volumes) method, which triggers a reload of all Volumes currently mounted inside a running Sandbox.
- Added a `build_args` parameter to `modal.Image.from_dockerfile` for passing arguments through to `ARG` instructions in the Dockerfile.
- It's now possible to use `@modal.experimental.clustered` and `i6pn` networking with `modal.Cls`.
- Fixed a bug where `Cls.with_options` would fail when provided with a `modal.Secret` object that was already hydrated.
- Fixed a bug where the timeout specified in `modal.Sandbox.exec()` was not respected by `ContainerProcess.wait()` or `ContainerProcess.poll()`.
- Fixed retry handling when using `modal run --detach` directly against a remote Function.
Finally, this release introduces a small number of deprecations and potentially-breaking changes:
- We now raise `modal.exception.NotFoundError` in all cases where Modal object lookups fail; previously some methods could leak an internal `GRPCError` with a `NOT_FOUND` status.
- We're enforcing pre-1.0 deprecations on `modal.build`, `modal.Image.copy_local_file`, and `modal.Image.copy_local_dir`.
- We're deprecating the `environment_name` parameter in `modal.Sandbox.create()`. A Sandbox's environment association will now be determined by its parent App. This should have no user-facing effects.
- We've deprecated the `namespace` parameter in the `.from_name` methods of `Function`, `Cls`, `Dict`, `Queue`, `Volume`, `NetworkFileSystem`, and `Secret`, along with `modal.runner.deploy_app`. These object types do not have a concept of distinct namespaces.
## 1.0
### 1.0.5 (2025-06-27)
- Added a [`modal.Volume.read_only`](/docs/sdk/py/latest/Volume#read_only) method, which will configure a Volume instance to disallow writes:
```python notest
vol = modal.Volume.from_name("models")
read_only_vol = vol.read_only()
@app.function(volumes={"/models": read_only_vol})
def f():
with open("/models/weights.pt", "w") as fid: # Raises an OSError
...
@app.local_entrypoint()
def main():
with read_only_vol.batch_upload() as batch: # Raises a modal.exceptions.InvalidError
...
with vol.batch_upload() as batch: # This instance is still writeable
...
```
- Introduced a gradual fix for a bug where `Function.map` and `Function.starmap` leak an internal exception wrapping type (`modal.exceptions.UserCodeException`) when `return_exceptions=True` is set. To avoid breaking any user code that depends on the specific types in the return list, these functions will continue returning the wrapper type by default, but they now issue a deprecation warning. To opt into the future behavior and silence the warning, you can set `wrap_returned_exceptions=False` in the call to `.map` or `.starmap`.
- When an `@app.cls()`-decorated class inherits from a class (or classes) with `modal.parameter()` annotations, the parent parameters will now be inherited and included in the parameter set for the modal Cls.
- Redeployments that migrate parameterized functions from an explicit constructor to `modal.parameter()` annotations will now handle requests from outdated clients more gracefully, avoiding a problem where new containers would crashloop on a deserialization error.
- The Modal client will now retry its initial connection to the Modal server, improving stability on flaky networks.
### 1.0.4 (2025-06-13)
- When `modal.Cls.with_options` is called multiple times on the same instance, the overrides will now be merged. For example, the following configuration will use an H100 GPU and request 16 CPU cores:
```python
Model.with_options(gpu="A100", cpu=16).with_options(gpu="H100")
```
- Added a `--secret` option to `modal shell` for including environment variables defined by named Secret(s) in the shell session:
```
modal shell --secret huggingface --secret wandb
```
- Added a `verbose: bool` option to `modal.Sandbox.create()`. When this is set to `True`, execs and file system operations will appear in the Sandbox logs.
- Updated `modal.Sandbox.watch()` so that exceptions are now raised in (and can be caught by) the calling task.
### 1.0.3 (2025-06-05)
- Added support for specifying a timezone on `Cron` schedules, which allows you to run a Function at a specific local time regardless of daylight savings:
```python
import modal
app = modal.App()
@app.function(schedule=modal.Cron("* 6 * * *"), timezone="America/New_York") # Use tz database naming conventions
def f():
print("This function will run every day at 6am New York time.")
```
- Added an `h2_ports` parameter to `Sandbox.create`, which exposes encrypted ports using HTTP/2. The following example will create an H2 port on 5002 and a port using HTTPS over HTTP/1.1 on 5003:
```python
sb = modal.Sandbox.create(app=app, h2_ports = [5002], encrypted_ports = [5003])
```
- Added `--from-dotenv` and `--from-json` options to `modal secret create`, which will read from local files to populate Secret contents.
- `Sandbox.terminate` no longer waits for container shutdown to complete before returning. It still ensures that a terminated container will shutdown imminently. To restore the previous behavior (i.e., to wait until the Sandbox is actually terminated), call `sb.wait(raise_on_termination=False)` after calling `sb.terminate()`.
- Improved performance and stability for `modal volume get`.
- Fixed a rare race condition that could sometimes make `Function.map` and similar calls deadlock.
- Fixed an issue where `Function.map` and similar methods would stall for 55 seconds when passed an empty iterator as input instead of completing immediately.
- We now raise an error during App setup when using interactive mode without the `modal.enable_output` context manager. Previously, this would run the App but raise when `modal.interact()` was called.
### 1.0.2 (2025-05-26)
- Fixed an incompatibility with breaking changes in `aiohttp` v3.12.0, which caused issues with Volume and large input uploads. The issues typically manifest as `Local data and remote data checksum mismatch` or `'_io.BufferedReader' object has no attribute 'getbuffer'` errors.
### 1.0.1 (2025-05-19)
- Added a `--timestamps` flag to `modal app logs` that prepends a timestamp to each log line.
- Fixed a bug where objects returned by `Sandbox.list` had `returncode == 0` for _running_ Sandboxes. Now the return code for running Sandboxes will be `None`.
- Fixed a bug affecting systems where the `sys.platform.node` name includes unicode characters.
### 1.0.0 (2025-05-16)
With this release, we're beginning to enforce the deprecations discussed in the [1.0 migration guide](https://modal.com/docs/guide/modal-1-0-migration). Going forward, we'll include breaking changes for outstanding deprecations in `1.Y.0` releases, so we recommend pinning Modal on a minor version (`modal~=1.0.0`) if you have not addressed the existing warnings. While we'll continue to make improvements to the Modal API, new deprecations will be introduced at a substantially reduced rate, and support windows for older client versions will lengthen.
⚠️ In this release, we've made some breaking changes to Modal's "automounting" behavior.️ If you've not already adapted your source code in response to warnings about automounting, Apps built with 1.0+ will have different files included and may not run as expected:
- Previously, Modal containers would automatically include the source for local Python packages that were imported by your Modal App. Going forward, it will be necessary to explicitly include such packages in the Image (i.e., with `modal.Image.add_local_python_source`).
- Support for the `automount` configuration (`MODAL_AUTOMOUNT`) has been removed; this environment variable will no longer have any effect.
- Modal will continue to automatically include the Python module or package where the Function is defined. If the Function is defined within a package, the entire directory tree containing the package will be mounted. This limited automounting can also be disabled in cases where your Image definition already includes the package defining the Function: set `include_source=False` in the `modal.App` constructor or `@app.function` decorator.
Additionally, we have enforced a number of previously-introduced deprecations:
- Removed `modal.Mount` as a public object, along with various `mount=` parameters where Mounts could be passed into the Modal API. Usage can be replaced with `modal.Image` methods, e.g.:
```python
@app.function(image=image, mounts=[modal.Mount.from_local_dir("data", "/root/data")]) # This is now an error!
@app.function(image=image.add_local_dir("data", "/root/data")) # Correct spelling
```
- Removed the `show_progress` parameter from `modal.App.run`. This parameter has been replaced by the `modal.enable_output` context manager:
```python
with modal.enable_output(), app.run():
... # Will produce verbose Modal output
```
- Passing flagged options to the `Image.pip_install` package list will now raise an error. Use the `extra_options` parameter to specify options that aren't exposed through the `Image.pip_install` signature:
```python
image.pip_install("flash-attn", "--no-build-isolation") # This is now an error!
image.pip_install("flash-attn", extra_options="--no-build-isolation") # Correct spelling
```
- Removed backwards compatibility for using `label=` or `tag=` keywords in object lookup methods. We standardized these methods to use `name=` as the parameter name, but we recommend using positional arguments:
```python
f = modal.Function.from_name("my-app", tag="f") # No longer supported! Will raise an error!
f = modal.Function.from_name("my-app", "f") # Preferred spelling
```
- It's no longer possible to invoke a generator Function with `Function.spawn`; previously this warned, now it raises an `InvalidError`. Additionally, the `FunctionCall.get_gen` method has been removed, and it's no longer possible to set `is_generator` when using `FunctionCall.from_id`.
- Removed the `.resolve()` method on Modal objects. This method had not been publicly documented, but where used it can be replaced straightforwardly with `.hydrate()`. Note that explicit hydration should rarely be necessary: in most cases you can rely on lazy hydration semantics (i.e., objects will be hydrated when the first method that requires server metadata is called).
- Functions decorated with `@modal.asgi_app` or `@modal.wsgi_app` are now required to be nullary. Previously, we warned in the case where a function was defined with parameters that all had default arguments.
- Referencing the deprecated `modal.Stub` object will now raise an `AttributeError`, whereas previously it was an alias for `modal.App`. This is a simple name change.
## Examples
Source: https://github.com/modal-labs/modal-examples
### Agent
# Build a coding agent with Modal Sandboxes and LangGraph
This example demonstrates how to build an LLM coding "agent" that can generate and execute Python code, using
documentation from the web to inform its approach.
Naturally, we use the agent to generate code that runs language models.
The agent is built with [LangGraph](https://github.com/langchain-ai/langgraph), a library for building
directed graphs of computation popular with AI agent developers,
and uses models from the OpenAI API.
## Setup
```python
import modal
from .src import edges, nodes, retrieval
from .src.common import COLOR, PYTHON_VERSION, image
```
You will need two [Modal Secrets](https://modal.com/docs/guide/secrets) to run this example:
one to access the OpenAI API and another to access the LangSmith API for logging the agent's behavior.
To create them, head to the [Secrets dashboard](https://modal.com/secrets), select "Create new secret",
and use the provided templates for OpenAI and LangSmith.
```python
app = modal.App(
"example-agent",
image=image,
secrets=[
modal.Secret.from_name("openai-secret", required_keys=["OPENAI_API_KEY"]),
modal.Secret.from_name("langsmith-secret", required_keys=["LANGCHAIN_API_KEY"]),
],
)
```
## Creating a Sandbox
We execute the agent's code in a Modal [Sandbox](https://modal.com/docs/guide/sandbox), which allows us to
run arbitrary code in a safe environment. In this example, we will use the [`transformers`](https://huggingface.co/docs/transformers/index)
library to generate text with a pre-trained model. Let's create a Sandbox with the necessary dependencies.
```python
def create_sandbox(app) -> modal.Sandbox:
# Change this image (and the retrieval logic in the retrieval module)
# if you want the agent to give coding advice on other libraries!
agent_image = modal.Image.debian_slim(python_version=PYTHON_VERSION).uv_pip_install(
"torch==2.5.0",
"transformers==4.46.0",
)
return modal.Sandbox.create(
image=agent_image,
timeout=60 * 10, # 10 minutes
app=app,
# Modal sandboxes support GPUs!
gpu="T4",
# you can also pass secrets here -- note that the main app's secrets are not shared
)
```
We also need a way to run our code in the sandbox. For this, we'll write a simple wrapper
around the Modal Sandbox `exec` method. We use `exec` because it allows us to run code without spinning up a
new container. And we can reuse the same container for multiple runs, preserving state.
```python
def run(code: str, sb: modal.Sandbox) -> tuple[str, str]:
print(
f"{COLOR['HEADER']}📦: Running in sandbox{COLOR['ENDC']}",
f"{COLOR['GREEN']}{code}{COLOR['ENDC']}",
sep="\n",
)
exc = sb.exec("python", "-c", code)
exc.wait()
stdout = exc.stdout.read()
stderr = exc.stderr.read()
if exc.returncode != 0:
print(
f"{COLOR['HEADER']}📦: Failed with exitcode {sb.returncode}{COLOR['ENDC']}"
)
return stdout, stderr
```
## Constructing the agent's graph
Now that we have the sandbox to execute code in, we can construct our agent's graph. Our graph is
defined in the `edges` and `nodes` modules
[associated with this example](https://github.com/modal-labs/modal-examples/tree/main/13_sandboxes/codelangchain).
Nodes are actions that change the state. Edges are transitions between nodes.
The idea is simple: we start at the node `generate`, which invokes the LLM to generate code based off documentation.
The generated code is executed (in the sandbox) as part of an edge called `check_code_execution`
and then the outputs are passed to the LLM for evaluation (the `evaluate_execution` node).
If the LLM determines that the code has executed correctly -- which might mean that the code raised an exception! --
we pass along the `decide_to_finish` edge and finish.
```python
def construct_graph(sandbox: modal.Sandbox, debug: bool = False):
from langgraph.graph import StateGraph
from .src.common import GraphState
# Crawl the transformers documentation to inform our code generation
context = retrieval.retrieve_docs(debug=debug)
graph = StateGraph(GraphState)
# Attach our nodes to the graph
graph_nodes = nodes.Nodes(context, sandbox, run, debug=debug)
for key, value in graph_nodes.node_map.items():
graph.add_node(key, value)
# Construct the graph by adding edges
graph = edges.enrich(graph)
# Set the starting and ending nodes of the graph
graph.set_entry_point(key="generate")
graph.set_finish_point(key="finish")
return graph
```
We now set up the graph and compile it. See the `src` module for details
on the content of the graph and the nodes we've defined.
```python
DEFAULT_QUESTION = "How do I generate Python code using a pre-trained model from the transformers library?"
@app.function()
def go(
question: str = DEFAULT_QUESTION,
debug: bool = False,
):
"""Compiles the Python code generation agent graph and runs it, returning the result."""
sb = create_sandbox(app)
graph = construct_graph(sb, debug=debug)
runnable = graph.compile()
result = runnable.invoke(
{"keys": {"question": question, "iterations": 0}},
config={"recursion_limit": 50},
)
sb.terminate()
return result["keys"]["response"]
```
## Running the Graph
Now let's call the agent from the command line!
We define a `local_entrypoint` that runs locally and triggers execution on Modal.
You can invoke it by executing following command from a folder that contains the `codelangchain` directory
[from our examples repo](https://github.com/modal-labs/modal-examples/tree/main/13_sandboxes/codelangchain):
```bash
modal run -m codelangchain.agent --question "How do I run a pre-trained model from the transformers library?"
```
```python
@app.local_entrypoint()
def main(
question: str = DEFAULT_QUESTION,
debug: bool = False,
):
"""Sends a question to the Python code generation agent.
Switch to debug mode for shorter context and smaller model."""
if debug:
if question == DEFAULT_QUESTION:
question = "hi there, how are you?"
print(go.remote(question, debug=debug))
```
If things are working properly, you should see output like the following:
```bash
$ modal run -m codelangchain.agent --question "generate some cool output with transformers"
---DECISION: FINISH---
---FINISHING---
To generate some cool output using transformers, we can use a pre-trained language model from the Hugging Face Transformers library. In this example, we'll use the GPT-2 model to generate text based on a given prompt. The GPT-2 model is a popular choice for text generation tasks due to its ability to produce coherent and contextually relevant text. We'll use the pipeline API from the Transformers library, which simplifies the process of using pre-trained models for various tasks, including text generation.
from transformers import pipeline
# Initialize the text generation pipeline with the GPT-2 model
generator = pipeline('text-generation', model='gpt2')
# Define a prompt for the model to generate text from
prompt = "Once upon a time in a land far, far away"
# Generate text using the model
output = generator(prompt, max_length=50, num_return_sequences=1)
# Print the generated text
print(output[0]['generated_text'])
Result of code execution:
Once upon a time in a land far, far away, and still inhabited even after all the human race, there would be one God: a perfect universal God who has always been and will ever be worshipped. All His acts and deeds are immutable,
```
### Algolia Indexer
# Algolia docsearch crawler
This tutorial shows you how to use Modal to run the [Algolia docsearch
crawler](https://docsearch.algolia.com/docs/legacy/run-your-own/) to index your
website and make it searchable. This is not just example code - we run the same
code in production to power search on this page (`Ctrl+K` to try it out!).
## Basic setup
Let's get the imports out of the way.
```python
import json
import os
import subprocess
import modal
```
Modal lets you [use and extend existing Docker images](https://modal.com/docs/guide/custom-container#use-an-existing-container-image-with-from_registry),
as long as they have `python` and `pip` available. We'll use the official crawler image built by Algolia, with a small
adjustment: since this image has `python` symlinked to `python3.6` and Modal is not compatible with Python 3.6, we
install Python 3.11 and symlink that as the `python` executable instead.
```python
algolia_image = modal.Image.from_registry(
"algolia/docsearch-scraper:v1.16.0",
add_python="3.11",
setup_dockerfile_commands=["ENTRYPOINT []"],
)
app = modal.App("example-algolia-indexer")
```
## Configure the crawler
Now, let's configure the crawler with the website we want to index, and which
CSS selectors we want to scrape. Complete documentation for crawler configuration is available
[here](https://docsearch.algolia.com/docs/legacy/config-file).
```python
CONFIG = {
"index_name": "modal_docs",
"custom_settings": {
"separatorsToIndex": "._",
"synonyms": [["cls", "class"]],
},
"stop_urls": [
"https://modal.com/gpu-glossary",
"https://modal.com/docs/sdk/py/changelog",
],
"start_urls": [
{
"url": "https://modal.com/docs/guide",
"selectors_key": "default",
"page_rank": 2,
},
{
"url": "https://modal.com/docs/examples",
"selectors_key": "examples",
"page_rank": 1,
},
{
"url": "https://modal.com/docs/sdk/py/latest",
"selectors_key": "reference",
"page_rank": 1,
},
{
"url": "https://modal.com/docs/sdk/js/latest",
"selectors_key": "reference",
"page_rank": 1,
},
{
"url": "https://modal.com/docs/sdk/go/latest",
"selectors_key": "reference",
"page_rank": 1,
},
{
"url": "https://modal.com/docs/cli/latest",
"selectors_key": "reference",
"page_rank": 1,
},
],
"selectors": {
"default": {
"lvl0": {
"selector": "header .navlink-active",
"global": True,
},
"lvl1": "article h1",
"lvl2": "article h2",
"lvl3": "article h3",
"text": "article p,article ol,article ul",
},
"examples": {
"lvl0": {
"selector": "header .navlink-active",
"global": True,
},
"lvl1": "article h1",
"text": "article p,article ol,article ul",
},
"reference": {
"lvl0": {
"selector": "//div[contains(@class, 'sidebar')]//a[contains(@class, 'active')]//preceding::a[contains(@class, 'header')][1]",
"type": "xpath",
"global": True,
"default_value": "",
"skip": {"when": {"value": ""}},
},
"lvl1": "article h1",
"lvl2": "article h2",
"lvl3": "article h3",
"text": "article p,article ol,article ul",
},
},
}
```
## Create an API key
If you don't already have one, sign up for an account on [Algolia](https://www.algolia.com/). Set up
a project and create an API key with `write` access to your index, and with the ACL permissions
`addObject`, `editSettings` and `deleteIndex`. Now, create a Secret on the Modal [Secrets](https://modal.com/secrets)
page with the `API_KEY` and `APPLICATION_ID` you just created. You can name this anything you want,
but we named it `algolia-secret` and so that's what the code below expects.
## The actual function
We want to trigger our crawler from our CI/CD pipeline, so we're serving it as a
[Web Function](https://modal.com/docs/guide/webhooks) that can be triggered by a `GET` request during deploy.
You could also consider running the crawler on a [schedule](https://modal.com/docs/guide/cron).
The Algolia crawler is written for Python 3.6 and needs to run in the `pipenv` created for it,
so we're invoking it using a subprocess.
```python
@app.function(
image=algolia_image,
secrets=[modal.Secret.from_name("algolia-secret")],
)
def crawl():
# Installed with a 3.6 venv; Python 3.6 is unsupported by Modal, so use a subprocess instead.
subprocess.run(
["pipenv", "run", "python", "-m", "src.index"],
env={**os.environ, "CONFIG": json.dumps(CONFIG)},
)
```
We want to be able to trigger this function through a webhook.
```python
@app.function(image=modal.Image.debian_slim().uv_pip_install("fastapi[standard]"))
@modal.fastapi_endpoint()
def crawl_webhook():
crawl.remote()
return "Finished indexing docs"
```
## Deploy the indexer
That's all the code we need! To deploy your application, run
```shell
modal deploy algolia_indexer.py
```
If successful, this will print a URL for your new webhook, that you can hit using
`curl` or a browser. Logs from webhook invocations can be found from the [apps](https://modal.com/apps)
page.
The indexed contents can be found at https://www.algolia.com/apps/APP_ID/explorer/browse/, for your
APP_ID. Once you're happy with the results, you can [set up the `docsearch` package with your
website](https://docsearch.algolia.com/docs/docsearch-v3/), and create a search component that uses this index.
## Entrypoint for development
To make it easier to test this, we also have an entrypoint for when you run
`modal run algolia_indexer.py`
```python
@app.local_entrypoint()
def run():
crawl.remote()
```
### Amazon Embeddings
# Embed 30 million Amazon reviews at 575k tokens per second with Qwen2-7B
This example demonstrates how to create embeddings for a large text dataset. This is
often necessary to enable semantic search, translation, and other language
processing tasks. Modal makes it easy to deploy large, capable embedding models and handles
all of the scaling to process very large datasets in parallel on many cloud GPUs.
We create a Modal Function that will handle all of the data loading and submit inputs to an
inference Cls that will automatically scale up to handle hundreds of large
batches in parallel.
Between the time a batch is submitted and the time it is fetched, it is stored via
Modal's `spawn` system, which can hold onto up to one million inputs for up to a week.
```python
import json
import subprocess
from pathlib import Path
import modal
app = modal.App(name="example-amazon-embeddings")
MINUTES = 60 # seconds
HOURS = 60 * MINUTES
```
We define our `main` function as a `local_entrypoint`. This is what we'll call locally
to start the job on Modal.
You can run it with the command
```bash
modal run --detach amazon_embeddings.py
```
By default we `down-scale` to 1/100th of the data for demonstration purposes.
To launch the full job, set the `--down-scale` parameter to `1`.
But note that this will cost you!
The entrypoint starts the job and gets back a `f`unction `c`all ID for each batch.
We can use these IDs to retrieve the embeddings once the job is finished.
Modal will keep the results around for up to 7 days after completion. Take a look at our
[job processing guide](https://modal.com/docs/guide/job-queue)
for more details.
```python
@app.local_entrypoint()
def main(
dataset_name: str = "McAuley-Lab/Amazon-Reviews-2023",
dataset_subset: str = "raw_review_Books",
down_scale: float = 0.001,
):
out_path = Path("/tmp") / "embeddings-example-fc-ids.json"
function_ids = launch_job.remote(
dataset_name=dataset_name, dataset_subset=dataset_subset, down_scale=down_scale
)
out_path.write_text(json.dumps(function_ids, indent=2) + "\n")
print(f"output handles saved to {out_path}")
```
## Load the data and start the inference job
Next we define the Function that will do the data loading and feed it to our embedding model.
We define a container [Image](https://modal.com/docs/guide/images)
with the data loading dependencies.
In it, we download the data we need and cache it to the container's local disk,
which will disappear when the job is finished. We will be saving the review data
along with the embeddings, so we don't need to keep the dataset around.
Embedding a large dataset like this can take some time, but we don't need to wait
around for it to finish. We use `spawn` to invoke our embedding Function
and get back a handle with an ID that we can use to get the results later.
This can bottleneck on just sending data over the network for processing, so
we speed things up by using `ThreadPoolExecutor` to submit batches using multiple threads.
Once all of the batches have been sent for inference, we can return the function IDs
to the local client to save.
```python
@app.function(
image=modal.Image.debian_slim().uv_pip_install("datasets==3.5.1"), timeout=2 * HOURS
)
def launch_job(dataset_name: str, dataset_subset: str, down_scale: float):
import time
from concurrent.futures import ThreadPoolExecutor, as_completed
from datasets import load_dataset
from tqdm import tqdm
print("Loading dataset...")
dataset = load_dataset(
dataset_name,
dataset_subset,
split="full",
trust_remote_code=True,
)
data_subset = dataset.select(range(int(len(dataset) * down_scale)))
tei = TextEmbeddingsInference()
batches = generate_batches_of_chunks(data_subset)
start = time.perf_counter()
with ThreadPoolExecutor() as executor:
futures = [executor.submit(tei.embed.spawn, batch) for batch in tqdm(batches)]
function_ids = []
for future in tqdm(as_completed(futures), total=len(futures)):
function_ids.append(future.result().object_id)
print(f"Finished submitting job: {time.perf_counter() - start:.2f}s")
return function_ids
```
## Massively scaling up and scaling out embedding inference on many beefy GPUs
We're going to spin up many containers to run inference, and we don't want each
one to have to download the embedding model from Hugging Face. We can download and save it to a
Modal [Volume](https://modal.com/docs/guide/volumes)
during the image build step using `run_function`.
We'll use the
[GTE-Qwen2-7B-instruct](https://huggingface.co/Alibaba-NLP/gte-Qwen2-7B-instruct)
model from Alibaba, which performs well on the
[Massive Text Embedding Benchmark](https://huggingface.co/spaces/mteb/leaderboard).
```python
MODEL_ID = "Alibaba-NLP/gte-Qwen2-7B-instruct"
MODEL_DIR = "/model"
MODEL_CACHE_VOLUME = modal.Volume.from_name(
"embeddings-example-model-cache", create_if_missing=True
)
def download_model():
from huggingface_hub import snapshot_download
snapshot_download(MODEL_ID, cache_dir=MODEL_DIR)
```
For inference, we will use Hugging Face's
[Text Embeddings Inference](https://github.com/huggingface/text-embeddings-inference)
framework for embedding model deployment.
Running lots of separate machines is "scaling out". But we can also "scale up"
by running on large, high-performance machines.
We'll use L40S GPUs for a good balance between cost and performance. Hugging Face has
prebuilt Docker images we can use as a base for our Modal Image.
We'll use the one built for the L40S's
[SM89/Ada Lovelace architecture](https://modal.com/gpu-glossary/device-hardware/streaming-multiprocessor-architecture)
and install the rest of our dependencies on top.
```python
tei_image = "ghcr.io/huggingface/text-embeddings-inference:89-1.7"
inference_image = (
modal.Image.from_registry(tei_image, add_python="3.12")
.dockerfile_commands("ENTRYPOINT []")
.uv_pip_install(
"httpx==0.28.1",
"huggingface-hub==0.36.0",
"numpy==2.2.5",
"tqdm==4.67.1",
)
.env({"HF_XET_HIGH_PERFORMANCE": "1", "HF_HOME": MODEL_DIR})
.run_function(download_model, volumes={MODEL_DIR: MODEL_CACHE_VOLUME})
)
```
Next we define our inference class. Modal will auto-scale the number of
containers ready to handle inputs based on the parameters we set in the `@app.cls`
and `@modal.concurrent` decorators. Here we limit the total number of containers to
100 and the maximum number of concurrent inputs to 10, which caps us at 1000 concurrent batches.
On Modal's Starter (free) and Team plans, the maximum number of concurrent GPUs is lower,
reducing the total number of concurrent batches and so the throughput.
Customers on Modal's Enterprise Plan regularly scale up another order of magnitude above this.
If you're interested in running on thousands of GPUs,
[get in touch](https://form.fillout.com/t/onUBuQZ5vCus).
Here we also specify the GPU type and attach the Modal Volume where we saved the
embedding model.
This class will spawn a local Text Embeddings Inference server when the container
starts, and process each batch by receiving the text data over HTTP, returning a list of
tuples with the batch text data and embeddings.
```python
@app.cls(
image=inference_image,
gpu="L40S",
volumes={MODEL_DIR: MODEL_CACHE_VOLUME},
max_containers=100,
scaledown_window=5 * MINUTES, # idle for 5 min without inputs before scaling down
retries=3, # handle transient failures and storms in the cloud
timeout=2 * HOURS, # run for at most 2 hours
)
@modal.concurrent(max_inputs=10)
class TextEmbeddingsInference:
@modal.enter()
def open_connection(self):
from httpx import AsyncClient
print("Starting text embedding inference server...")
self.process = spawn_server()
self.client = AsyncClient(base_url="http://127.0.0.1:8000", timeout=30)
@modal.exit()
def terminate_connection(self):
self.process.terminate()
@modal.method()
async def embed(self, batch):
texts = [chunk[-1] for chunk in batch]
res = await self.client.post("/embed", json={"inputs": texts})
return [chunk + (embedding,) for chunk, embedding in zip(batch, res.json())]
```
## Helper Functions
The book review dataset contains ~30M reviews with ~12B total characters,
indicating an average review length of ~500 characters. Some are much longer.
Embedding models have a limit on the number of tokens they can process in a single
input. We will need to split each review into chunks that are under this limit.
The proper way to split text data is to use a tokenizer to ensure that any
single request is under the models token limit, and to overlap chunks to provide
semantic context and preserve information. For the sake of this example, we're going
just to split by a set character length (`CHUNK_SIZE`).
While the embedding model has a limit on the number of input tokens for a single
embedding, the number of chunks that we can process in a single batch is limited by
the VRAM of the GPU. We set the `BATCH_SIZE` accordingly.
```python
BATCH_SIZE = 256
CHUNK_SIZE = 512
def generate_batches_of_chunks(
dataset, chunk_size: int = CHUNK_SIZE, batch_size: int = BATCH_SIZE
):
"""Creates batches of chunks by naively slicing strings according to CHUNK_SIZE."""
batch = []
for entry_index, data in enumerate(dataset):
product_id = data["asin"]
user_id = data["user_id"]
timestamp = data["timestamp"]
title = data["title"]
text = data["text"]
for chunk_index, chunk_start in enumerate(range(0, len(text), chunk_size)):
batch.append(
(
entry_index,
chunk_index,
product_id,
user_id,
timestamp,
title,
text[chunk_start : chunk_start + chunk_size],
)
)
if len(batch) == batch_size:
yield batch
batch = []
if batch:
yield batch
def spawn_server(
model_id: str = MODEL_ID,
port: int = 8000,
max_client_batch_size: int = BATCH_SIZE,
max_batch_tokens: int = BATCH_SIZE * CHUNK_SIZE,
huggingface_hub_cache: str = MODEL_DIR,
):
"""Starts a text embedding inference server in a subprocess."""
import socket
LAUNCH_FLAGS = [
"--model-id",
model_id,
"--port",
str(port),
"--max-client-batch-size",
str(max_client_batch_size),
"--max-batch-tokens",
str(max_batch_tokens),
"--huggingface-hub-cache",
huggingface_hub_cache,
]
process = subprocess.Popen(["text-embeddings-router"] + LAUNCH_FLAGS)
# Poll until webserver at 127.0.0.1:8000 accepts connections before running inputs.
while True:
try:
socket.create_connection(("127.0.0.1", port), timeout=1).close()
print("Inference server ready!")
return process
except (socket.timeout, ConnectionRefusedError):
retcode = process.poll() # Check if the process has terminated.
if retcode is not None:
raise RuntimeError(f"Launcher exited unexpectedly with code {retcode}")
```
### App
## Demo Streamlit application.
This application is the example from https://docs.streamlit.io/library/get-started/create-an-app.
Streamlit is designed to run its apps as Python scripts, not functions, so we separate the Streamlit
code into this module, away from the Modal application code.
```python
def main():
import numpy as np
import pandas as pd
import streamlit as st
st.title("Uber pickups in NYC!")
DATE_COLUMN = "date/time"
DATA_URL = (
"https://s3-us-west-2.amazonaws.com/"
"streamlit-demo-data/uber-raw-data-sep14.csv.gz"
)
@st.cache_data
def load_data(nrows):
data = pd.read_csv(DATA_URL, nrows=nrows)
def lowercase(x):
return str(x).lower()
data.rename(lowercase, axis="columns", inplace=True)
data[DATE_COLUMN] = pd.to_datetime(data[DATE_COLUMN])
return data
data_load_state = st.text("Loading data...")
data = load_data(10000)
data_load_state.text("Done! (using st.cache_data)")
if st.checkbox("Show raw data"):
st.subheader("Raw data")
st.write(data)
st.subheader("Number of pickups by hour")
hist_values = np.histogram(data[DATE_COLUMN].dt.hour, bins=24, range=(0, 24))[0]
st.bar_chart(hist_values)
# Some number in the range 0-23
hour_to_filter = st.slider("hour", 0, 23, 17)
filtered_data = data[data[DATE_COLUMN].dt.hour == hour_to_filter]
st.subheader("Map of all pickups at %s:00" % hour_to_filter)
st.map(filtered_data)
if __name__ == "__main__":
main()
```
### Asr Utils
```python
import math
import os
import sys
import tempfile
import wave
from pathlib import Path
from typing import Callable, Sequence
from urllib.request import urlopen
import nemo.collections.asr as nemo_asr
import numpy as np
import torch
from omegaconf import DictConfig
def preprocess_audio(audio: bytes | str, target_sample_rate: int = 16000) -> bytes:
import array
import io
import wave
if isinstance(audio, str):
audio = get_bytes_from_wav(audio)
with wave.open(io.BytesIO(audio), "rb") as wav_in:
n_channels = wav_in.getnchannels()
sample_width = wav_in.getsampwidth()
frame_rate = wav_in.getframerate()
n_frames = wav_in.getnframes()
frames = wav_in.readframes(n_frames)
# Convert frames to array based on sample width
if sample_width == 1:
audio_data = array.array("B", frames) # unsigned char
elif sample_width == 2:
audio_data = array.array("h", frames) # signed short
elif sample_width == 3:
audio_data = array.array("b", frames) # signed byte
elif sample_width == 4:
audio_data = array.array("i", frames) # signed int
else:
raise ValueError(f"Unsupported sample width: {sample_width}")
# Downmix to mono if needed
if n_channels > 1:
mono_data = array.array(audio_data.typecode)
for i in range(0, len(audio_data), n_channels):
chunk = audio_data[i : i + n_channels]
mono_data.append(sum(chunk) // n_channels)
audio_data = mono_data
# Resample to 16kHz if needed
if frame_rate != target_sample_rate:
ratio = target_sample_rate / frame_rate
new_length = int(len(audio_data) * ratio)
resampled_data = array.array(audio_data.typecode)
for i in range(new_length):
# Linear interpolation
pos = i / ratio
pos_int = int(pos)
pos_frac = pos - pos_int
if pos_int >= len(audio_data) - 1:
sample = audio_data[-1]
else:
sample1 = audio_data[pos_int]
sample2 = audio_data[pos_int + 1]
sample = int(sample1 + (sample2 - sample1) * pos_frac)
resampled_data.append(sample)
audio_data = resampled_data
return audio_data.tobytes()
def get_bytes_from_wav(location: str) -> bytes:
if location.startswith("http"):
bytes = urlopen(location).read()
else:
bytes = Path(location).read_bytes()
return bytes
def identity(data):
return data
def batch_seq(
data: Sequence, chunk_size: int, transform: Callable = None
) -> list[bytes]:
if transform is None:
transform = identity
return [
transform(data[i : i + chunk_size]) for i in range(0, len(data), chunk_size)
]
SHUTDOWN_SIGNAL = (
b"END_OF_STREAM_8f13d09" # byte sequence indicating a stream is finished
)
def int2float(audio_data):
import numpy as np
abs_max = np.abs(audio_data).max()
audio_data = audio_data.astype("float32")
if abs_max > 0:
audio_data *= 1 / 32768
audio_data = audio_data.squeeze() # depends on the use case
return audio_data
def bytes_to_torch(data, device="cuda"):
import numpy as np
import torch
data = np.frombuffer(data, dtype=np.int16)
data = torch.from_numpy(int2float(data)).to(device)
return data
class NoStdStreams(object):
def __init__(self):
self.devnull = open(os.devnull, "w")
def __enter__(self):
self._stdout, self._stderr = sys.stdout, sys.stderr
self._stdout.flush(), self._stderr.flush()
sys.stdout, sys.stderr = self.devnull, self.devnull
def __exit__(self, exc_type, exc_value, traceback):
sys.stdout, sys.stderr = self._stdout, self._stderr
self.devnull.close()
def write_wav_file(args):
idx, data = args
temp_file = tempfile.NamedTemporaryFile(delete=False, suffix=".wav")
with wave.open(temp_file, "wb") as wav_out:
wav_out.setnchannels(1)
wav_out.setsampwidth(2) # 16-bit
wav_out.setframerate(16000)
wav_out.writeframes(data)
temp_file.close()
return temp_file.name
LOG_MEL_ZERO = -16.635
class AudioBufferer:
def __init__(self, sample_rate: int, buffer_size_in_secs: float):
self.buffer_size = int(buffer_size_in_secs * sample_rate)
self.sample_buffer = torch.zeros(self.buffer_size, dtype=torch.float32)
def reset(self) -> None:
"""
Reset the buffer to zero
"""
self.sample_buffer.zero_()
def update(self, audio: np.ndarray) -> None:
"""
Update the buffer with the new frame
Args:
frame (Frame): frame to update the buffer with
"""
if not isinstance(audio, torch.Tensor):
audio = torch.from_numpy(audio)
audio_size = audio.shape[0]
if audio_size > self.buffer_size:
raise ValueError(
f"Frame size ({audio_size}) exceeds buffer size ({self.buffer_size})"
)
shift = audio_size
self.sample_buffer[:-shift] = self.sample_buffer[shift:].clone()
self.sample_buffer[-shift:] = audio.clone()
def get_buffer(self) -> torch.Tensor:
"""
Get the current buffer
Returns:
torch.Tensor: current state of the buffer
"""
return self.sample_buffer.clone()
def is_buffer_empty(self) -> bool:
"""
Check if the buffer is empty
Returns:
bool: True if the buffer is empty, False otherwise
"""
return self.sample_buffer.sum() == 0
class CacheFeatureBufferer:
def __init__(
self,
sample_rate: int,
buffer_size_in_secs: float,
chunk_size_in_secs: float,
preprocessor_cfg: DictConfig,
device: torch.device,
fill_value: float = LOG_MEL_ZERO,
):
if buffer_size_in_secs < chunk_size_in_secs:
raise ValueError(
f"Buffer size ({buffer_size_in_secs}s) should be no less than chunk size ({chunk_size_in_secs}s)"
)
self.sample_rate = sample_rate
self.buffer_size_in_secs = buffer_size_in_secs
self.chunk_size_in_secs = chunk_size_in_secs
self.device = device
if hasattr(preprocessor_cfg, "log") and preprocessor_cfg.log:
self.ZERO_LEVEL_SPEC_DB_VAL = (
LOG_MEL_ZERO # Log-Mel spectrogram value for zero signals
)
else:
self.ZERO_LEVEL_SPEC_DB_VAL = fill_value
self.n_feat = preprocessor_cfg.features
self.timestep_duration = preprocessor_cfg.window_stride
self.n_chunk_look_back = int(self.timestep_duration * self.sample_rate)
self.chunk_size = int(self.chunk_size_in_secs * self.sample_rate)
self.sample_buffer = AudioBufferer(sample_rate, buffer_size_in_secs)
self.feature_buffer_len = int(buffer_size_in_secs / self.timestep_duration)
self.feature_chunk_len = int(chunk_size_in_secs / self.timestep_duration)
self.feature_buffer = torch.full(
[self.n_feat, self.feature_buffer_len],
self.ZERO_LEVEL_SPEC_DB_VAL,
dtype=torch.float32,
device=self.device,
)
self.preprocessor = nemo_asr.models.ASRModel.from_config_dict(preprocessor_cfg)
self.preprocessor.to(self.device)
def is_buffer_empty(self) -> bool:
"""
Check if the buffer is empty
Returns:
bool: True if the buffer is empty, False otherwise
"""
return self.sample_buffer.is_buffer_empty()
def reset(self) -> None:
"""
Reset the buffer to zero
"""
self.sample_buffer.reset()
self.feature_buffer.fill_(self.ZERO_LEVEL_SPEC_DB_VAL)
def _update_feature_buffer(self, feat_chunk: torch.Tensor) -> None:
"""
Add an extracted feature to `feature_buffer`
"""
self.feature_buffer[:, : -self.feature_chunk_len] = self.feature_buffer[
:, self.feature_chunk_len :
].clone()
self.feature_buffer[:, -self.feature_chunk_len :] = feat_chunk.clone()
def preprocess(self, audio_signal: torch.Tensor) -> torch.Tensor:
"""
Preprocess the audio signal using the preprocessor
Args:
audio_signal (torch.Tensor): audio signal
Returns:
torch.Tensor: preprocessed features
"""
audio_signal = audio_signal.unsqueeze_(0).to(self.device)
audio_signal_len = torch.tensor([audio_signal.shape[1]], device=self.device)
features, _ = self.preprocessor(
input_signal=audio_signal,
length=audio_signal_len,
)
features = features.squeeze()
return features
def update(self, audio: np.ndarray) -> None:
"""
Update the sample anf feature buffers with the new frame
Args:
frame (Frame): frame to update the buffer with
"""
# Update the sample buffer with the new frame
self.sample_buffer.update(audio)
if math.isclose(self.buffer_size_in_secs, self.chunk_size_in_secs):
# If the buffer size is equal to the chunk size, just take the whole buffer
samples = self.sample_buffer.sample_buffer.clone()
else:
# Add look_back to have context for the first feature
samples = self.sample_buffer.sample_buffer[
-(self.n_chunk_look_back + self.chunk_size) :
]
# Get the mel spectrogram
features = self.preprocess(samples)
# If the features are longer than supposed to be, drop the last frames
# Drop the last diff frames because they might be incomplete
if (diff := features.shape[1] - self.feature_chunk_len - 1) > 0:
features = features[:, :-diff]
# Update the feature buffer with the new features
self._update_feature_buffer(features[:, -self.feature_chunk_len :])
def get_buffer(self) -> torch.Tensor:
"""
Get the current sample buffer
Returns:
torch.Tensor: current state of the buffer
"""
return self.sample_buffer.get_buffer()
def get_feature_buffer(self) -> torch.Tensor:
"""
Get the current feature buffer
Returns:
torch.Tensor: current state of the feature buffer
"""
return self.feature_buffer.clone()
```
### Badges
# Serve a dynamic SVG badge
In this example, we use Modal's [webhook](https://modal.com/docs/guide/webhooks) capability to host a dynamic SVG badge that shows
you the current number of downloads for a Python package.
First let's start off by creating a Modal app, and defining an image with the Python packages we're going to be using:
```python
import modal
image = modal.Image.debian_slim().uv_pip_install(
"fastapi[standard]", "pybadges", "pypistats"
)
app = modal.App("example-badges", image=image)
```
## Defining the Web Function
In addition to using `@app.function()` to decorate our function, we use the
[`@modal.fastapi_endpoint` decorator](https://modal.com/docs/guide/webhooks)
which instructs Modal to create a REST endpoint that serves this function.
Note that the default method is `GET`, but this can be overridden using the `method` argument.
```python
@app.function()
@modal.fastapi_endpoint()
async def package_downloads(package_name: str):
import json
import pypistats
from fastapi import Response
from pybadges import badge
stats = json.loads(pypistats.recent(package_name, format="json"))
svg = badge(
left_text=f"{package_name} downloads",
right_text=str(stats["data"]["last_month"]),
right_color="blue",
)
return Response(content=svg, media_type="image/svg+xml")
```
In this function, we use `pypistats` to query the most recent stats for our package, and then
use that as the text for a SVG badge, rendered using `pybadges`.
Since Modal Web Functions are FastAPI path operation functions under the hood, we return this SVG wrapped in a FastAPI response with the correct media type.
Also note that FastAPI automatically interprets `package_name` as a [query param](https://fastapi.tiangolo.com/tutorial/query-params/).
## Running and deploying
We can now run an ephemeral app on the command line using:
```shell
modal serve badges.py
```
This will create a short-lived web url that exists until you terminate the script.
It will also hot-reload the code if you make changes to it.
If you want to create a persistent URL, you have to deploy the script.
To deploy using the Modal CLI by running `modal deploy badges.py`,
Either way, as soon as we run this command, Modal gives us the link to our brand new
Web Function in the output:

We can now visit the link using a web browser, using a `package_name` of our choice in the URL query params.
For example:
- `https://YOUR_SUBDOMAIN.modal.run/?package_name=synchronicity`
- `https://YOUR_SUBDOMAIN.modal.run/?package_name=torch`
### Basic Grid Search
# Hyperparameter search
This example showcases a simple grid search in one dimension, where we try different
parameters for a model and pick the one with the best results on a holdout set.
## Defining the image
First, let's build a custom image and install scikit-learn in it.
```python
import modal
app = modal.App(
"example-basic-grid-search",
image=modal.Image.debian_slim().uv_pip_install("scikit-learn~=1.5.0"),
)
```
## The Modal function
Next, define the function. Note that we use the custom image with scikit-learn in it.
We also take the hyperparameter `k`, which is how many nearest neighbors we use.
```python
@app.function()
def fit_knn(k):
from sklearn.datasets import load_digits
from sklearn.model_selection import train_test_split
from sklearn.neighbors import KNeighborsClassifier
X, y = load_digits(return_X_y=True)
X_train, X_test, y_train, y_test = train_test_split(X, y, random_state=42)
clf = KNeighborsClassifier(k)
clf.fit(X_train, y_train)
score = float(clf.score(X_test, y_test))
print("k = %3d, score = %.4f" % (k, score))
return score, k
```
## Parallel search
To do a hyperparameter search, let's map over this function with different values
for `k`, and then select for the best score on the holdout set:
```python
@app.local_entrypoint()
def main():
# Do a basic hyperparameter search
best_score, best_k = max(fit_knn.map(range(1, 100)))
print("Best k = %3d, score = %.4f" % (best_k, best_score))
```
### Basic Web
# Hello world wide web!
Modal makes it easy to turn your Python functions into serverless web services:
access them via a browser or call them from any client that speaks HTTP, all
without having to worry about setting up servers or managing infrastructure.
This tutorial shows the path with the shortest ["time to 200"](https://shkspr.mobi/blog/2021/05/whats-your-apis-time-to-200/):
[`modal.fastapi_endpoint`](https://modal.com/docs/reference/modal.fastapi_endpoint).
On Modal, Web Functions have all the superpowers of Modal Functions:
they can be [accelerated with GPUs](https://modal.com/docs/guide/gpu),
they can access [Secrets](https://modal.com/docs/guide/secrets) or [Volumes](https://modal.com/docs/guide/volumes),
and they [automatically scale](https://modal.com/docs/guide/cold-start) to handle more traffic.
Under the hood, we use the [FastAPI library](https://fastapi.tiangolo.com/),
which has [high-quality documentation](https://fastapi.tiangolo.com/tutorial/),
linked throughout this tutorial.
## Turn a Modal Function into an API endpoint with a single decorator
Modal Functions are already accessible remotely -- when you add the `@app.function` decorator to a Python function
and run `modal deploy`, you make it possible for your [other Python functions to call it](https://modal.com/docs/guide/trigger-deployed-functions).
That's great, but it's not much help if you want to share what you've written with someone running code in a different language --
or not running code at all!
And that's where most of the power of the Internet comes from: sharing information and functionality across different computer systems.
So we provide the `fastapi_endpoint` decorator to wrap your Modal Functions in the lingua franca of the web: HTTP.
Here's what that looks like:
```python
import modal
image = modal.Image.debian_slim().uv_pip_install("fastapi[standard]")
app = modal.App(name="example-basic-web", image=image)
@app.function()
@modal.fastapi_endpoint(
docs=True # adds interactive documentation in the browser
)
def hello():
return "Hello world!"
```
You can expose this Web Function to the internet by running `modal serve basic_web.py`.
In the output, you should see a URL that ends with `hello-dev.modal.run`.
If you navigate to this URL, you should see the `"Hello world!"` message appear in your browser.
You can also find interactive documentation, powered by OpenAPI and Swagger,
if you add `/docs` to the end of the URL.
From this documentation, you can interact with your endpoint, sending HTTP requests and receiving HTTP responses.
For more details, see the [FastAPI documentation](https://fastapi.tiangolo.com/features/#automatic-docs).
By running the App with `modal serve`, you created a temporary endpoint that will disappear if you interrupt your terminal.
These temporary endpoints are great for debugging -- when you save a change to any of your dependent files, the endpoint will redeploy.
Try changing the message to something else, hitting save, and then hitting refresh in your browser or re-sending
the request from `/docs` or the command line. You should see the new message, along with logs in your terminal showing the redeploy and the request.
When you're ready to deploy the Web Function persistently, run `modal deploy basic_web.py`.
Now, your Function will be available even when you've closed your terminal or turned off your computer.
## Send data to a Web Function
The function above was a bit silly: it always returns the same message.
Most functions need an input to be useful. There are two ways to send data to a Web Function:
- in the URL as a [query parameter](#sending-data-in-query-parameters)
- in the [body of the request](#sending-data-in-the-request-body) as JSON
### Sending data in query parameters
By default, your function's arguments are treated as query parameters:
they are extracted from the end of the URL, where they should be added in the form
`?arg1=foo&arg2=bar`.
From the Python side, there's hardly anything to do:
```python
@app.function()
@modal.fastapi_endpoint(docs=True)
def greet(user: str) -> str:
return f"Hello {user}!"
```
If you are already running `modal serve basic_web.py`, this Function will be available at a URL, printed in your terminal, that ends with `greet-dev.modal.run`.
We provide Python type-hints to get type information in the docs and
[automatic validation](https://fastapi.tiangolo.com/tutorial/query-params-str-validations/).
For example, if you navigate directly to the URL for `greet`, you will get a detailed error message
indicating that the `user` parameter is missing. Navigate instead to `/docs` to see how to structure the request.
You can read more about query parameters in the [FastAPI documentation](https://fastapi.tiangolo.com/tutorial/query-params/).
### Sending data in the request body
For larger and more complex data, it is generally preferable to send data in the body of the HTTP request.
This body is formatted as [JSON](https://developer.mozilla.org/en-US/docs/Learn/JavaScript/Objects/JSON),
the most common data interchange format on the web.
To set up a Web Function that accepts JSON data, add an argument with a `dict` type-hint to your function.
This argument will be populated with the data sent in the request body.
```python
@app.function()
@modal.fastapi_endpoint(method="POST", docs=True)
def goodbye(data: dict) -> str:
name = data.get("name") or "world"
return f"Goodbye {name}!"
```
Note that we gave a value of `"POST"` for the `method` argument here.
This argument defines the HTTP request method that the function will respond to,
and it defaults to `"GET"`.
If you head to the URL for the `goodbye` function in your browser,
you will get a 405 Method Not Allowed error, because browsers only send GET requests by default.
While this is technically a separate concern from query parameters versus request bodies
and you can define a function that accepts GET requests and uses data from the body,
it is [considered bad form](https://stackoverflow.com/a/983458).
Navigate to `/docs` for more on how to call the function.
You will need to send a POST request with a JSON body containing a `name` key.
To get the same typing and validation benefits as with query parameters,
use a [Pydantic model](https://fastapi.tiangolo.com/tutorial/body/)
for this argument.
You can read more about request bodies in the [FastAPI documentation](https://fastapi.tiangolo.com/tutorial/body/).
## Handle expensive startup with `modal.Cls`
Sometimes your function needs to do something before it can handle its first request,
like get a value from a database or set the value of a variable.
If that step is expensive, like [loading a large ML model](https://modal.com/docs/guide/model-weights),
it'd be a shame to have to do it every time a request comes in!
Web Functions can be methods on a [`modal.Cls`](https://modal.com/docs/guide/lifecycle-functions#container-lifecycle-functions-and-parameters),
which allows you to manage the container's lifecycle independently from processing individual requests.
This example will only set the `start_time` instance variable once, on container startup.
```python
@app.cls()
class WebApp:
@modal.enter()
def startup(self):
from datetime import datetime, timezone
print("🏁 Starting up!")
self.start_time = datetime.now(timezone.utc)
@modal.fastapi_endpoint(docs=True)
def web(self):
from datetime import datetime, timezone
current_time = datetime.now(timezone.utc)
return {"start_time": self.start_time, "current_time": current_time}
```
## Protect Web Functions with proxy authentication
Sharing your Python functions on the web is great, but it's not always a good idea
to make those functions available to just anyone.
For example, you might have a function like the one below that
is more expensive to run than to call (and so might be abused by your enemies)
or reveals information that you would rather keep secret.
To protect your Modal Web Functions so that they can't be triggered except
by members of your [Modal workspace](https://modal.com/docs/guide/workspaces),
add the `requires_proxy_auth=True` flag to the `fastapi_endpoint` decorator.
```python
@app.function(gpu="h100")
@modal.fastapi_endpoint(requires_proxy_auth=True, docs=False)
def expensive_secret():
return "I didn't care for 'The Godfather'. It insists upon itself."
```
The `expensive-secret` endpoint URL will still be printed to the output when you `modal serve` or `modal deploy`,
along with a "🔑" emoji indicating that it is secured with proxy authentication.
If you head to that URL via the browser, you will get a
[`401 Unauthorized`](https://developer.mozilla.org/en-US/docs/Web/HTTP/Status/401) error code in response.
You should also check the dashboard page for this app (at the URL printed at the very top of the `modal` command output)
so you can see that no containers were spun up to handle the request -- this authorization is handled entirely inside Modal's infrastructure.
You can trigger the Web Function by [creating a Proxy Auth Token](https://modal.com/settings/proxy-auth-tokens)
and then including the token ID and secret in the `Modal-Key` and `Modal-Secret` headers.
From the command line, that might look like
```shell
export TOKEN_ID=wk-1234abcd
export TOKEN_SECRET=ws-1234abcd
curl -H "Modal-Key: $TOKEN_ID" \
-H "Modal-Secret: $TOKEN_SECRET" \
https://your-workspace-name--expensive-secret.modal.run
```
For more details, see the
[guide to proxy authentication](https://modal.com/docs/guide/webhook-proxy-auth).
## What next?
Modal's `fastapi_endpoint` decorator is opinionated and designed for relatively simple web applications --
one or a few independent Python functions that you want to expose to the web.
Three additional decorators allow you to serve more complex web applications with greater control:
- [`asgi_app`](https://modal.com/docs/guide/webhooks#asgi) to serve applications compliant with the ASGI standard,
like [FastAPI](https://fastapi.tiangolo.com/)
- [`wsgi_app`](https://modal.com/docs/guide/webhooks#wsgi) to serve applications compliant with the WSGI standard,
like [Flask](https://flask.palletsprojects.com/)
- [`web_server`](https://modal.com/docs/guide/webhooks#non-asgi-web-servers) to serve any application that listens on a port
### Batched Whisper
# Fast Whisper inference using dynamic batching
In this example, we demonstrate how to run [dynamically batched inference](https://modal.com/docs/guide/dynamic-batching)
for OpenAI's speech recognition model, [Whisper](https://openai.com/index/whisper/), on Modal.
Batching multiple audio samples together or batching chunks of a single audio sample can help to achieve a 2.8x increase
in inference throughput on an A10G!
We will be running the [Whisper Large V3](https://huggingface.co/openai/whisper-large-v3) model.
To run [any of the other HuggingFace Whisper models](https://huggingface.co/models?search=openai/whisper),
simply replace the `MODEL_NAME` and `MODEL_REVISION` variables.
## Setup
Let's start by importing the Modal client and defining the model that we want to serve.
```python
from typing import Optional
import modal
MODEL_DIR = "/model"
MODEL_NAME = "openai/whisper-large-v3"
MODEL_REVISION = "afda370583db9c5359511ed5d989400a6199dfe1"
```
## Define a container image
We’ll start with Modal's baseline `debian_slim` image and install the relevant libraries.
```python
image = (
modal.Image.debian_slim(python_version="3.11")
.uv_pip_install(
"torch==2.5.1",
"transformers==4.47.1",
"huggingface-hub==0.36.0",
"librosa==0.10.2",
"soundfile==0.12.1",
"accelerate==1.2.1",
"datasets==3.2.0",
)
.env({"HF_XET_HIGH_PERFORMANCE": "1", "HF_HUB_CACHE": MODEL_DIR})
)
model_cache = modal.Volume.from_name("hf-hub-cache", create_if_missing=True)
app = modal.App(
"example-batched-whisper",
image=image,
volumes={MODEL_DIR: model_cache},
)
```
## Caching the model weights
We'll define a function to download the model and cache it in a volume.
You can `modal run` against this function prior to deploying the App.
```python
@app.function()
def download_model():
from huggingface_hub import snapshot_download
from transformers.utils import move_cache
snapshot_download(
MODEL_NAME,
ignore_patterns=["*.pt", "*.bin"], # Using safetensors
revision=MODEL_REVISION,
)
move_cache()
```
## The model class
The inference function is best represented using Modal's [class syntax](https://modal.com/docs/guide/lifecycle-functions).
We define a `@modal.enter` method to load the model when the container starts, before it picks up any inputs.
The weights will be loaded from the Hugging Face cache volume so that we don't need to download them when
we start a new container. For more on storing model weights on Modal, see
[this guide](https://modal.com/docs/guide/model-weights).
We also define a `transcribe` method that uses the `@modal.batched` decorator to enable dynamic batching.
This allows us to invoke the function with individual audio samples, and the function will automatically batch them
together before running inference. Batching is critical for making good use of the GPU, since GPUs are designed
for running parallel operations at high throughput.
The `max_batch_size` parameter limits the maximum number of audio samples combined into a single batch.
We used a `max_batch_size` of `64`, the largest power-of-2 batch size that can be accommodated by the 24 A10G GPU memory.
This number will vary depending on the model and the GPU you are using.
The `wait_ms` parameter sets the maximum time to wait for more inputs before running the batched transcription.
To tune this parameter, you can set it to the target latency of your application minus the execution time of an inference batch.
This allows the latency of any request to stay within your target latency.
```python
@app.cls(
gpu="a10g", # Try using an A100 or H100 if you've got a large model or need big batches!
max_containers=10, # default max GPUs for Modal's free tier
)
class Model:
@modal.enter()
def load_model(self):
import torch
from transformers import (
AutoModelForSpeechSeq2Seq,
AutoProcessor,
pipeline,
)
self.processor = AutoProcessor.from_pretrained(MODEL_NAME)
self.model = AutoModelForSpeechSeq2Seq.from_pretrained(
MODEL_NAME,
torch_dtype=torch.float16,
low_cpu_mem_usage=True,
use_safetensors=True,
).to("cuda")
self.model.generation_config.language = "<|en|>"
# Create a pipeline for preprocessing and transcribing speech data
self.pipeline = pipeline(
"automatic-speech-recognition",
model=self.model,
tokenizer=self.processor.tokenizer,
feature_extractor=self.processor.feature_extractor,
torch_dtype=torch.float16,
device="cuda",
)
@modal.batched(max_batch_size=64, wait_ms=1000)
def transcribe(self, audio_samples):
import time
start = time.monotonic_ns()
print(f"Transcribing {len(audio_samples)} audio samples")
transcriptions = self.pipeline(audio_samples, batch_size=len(audio_samples))
end = time.monotonic_ns()
print(
f"Transcribed {len(audio_samples)} samples in {round((end - start) / 1e9, 2)}s"
)
return transcriptions
```
## Transcribe a dataset
In this example, we use the [librispeech_asr_dummy dataset](https://huggingface.co/datasets/hf-internal-testing/librispeech_asr_dummy)
from Hugging Face's Datasets library to test the model.
We use [`map.aio`](https://modal.com/docs/reference/modal.Function#map) to asynchronously map over the audio files.
This allows us to invoke the batched transcription method on each audio sample in parallel.
```python
@app.function()
async def transcribe_hf_dataset(dataset_name):
from datasets import load_dataset
print("📂 Loading dataset", dataset_name)
ds = load_dataset(dataset_name, "clean", split="validation")
print("📂 Dataset loaded")
batched_whisper = Model()
print("📣 Sending data for transcription")
async for transcription in batched_whisper.transcribe.map.aio(ds["audio"]):
yield transcription
```
## Run the model
We define a [`local_entrypoint`](https://modal.com/docs/guide/apps#entrypoints-for-ephemeral-apps)
to run the transcription. You can run this locally with `modal run batched_whisper.py`.
```python
@app.local_entrypoint()
async def main(dataset_name: Optional[str] = None):
if dataset_name is None:
dataset_name = "hf-internal-testing/librispeech_asr_dummy"
async for result in transcribe_hf_dataset.remote_gen.aio(dataset_name):
print(result["text"])
```
### Blender Video
# Render a video with Blender on many GPUs or CPUs in parallel
This example shows how you can render an animated 3D scene using
[Blender](https://www.blender.org/)'s Python interface.
You can run it on CPUs to scale out on one hundred containers
or run it on GPUs to get higher throughput per node.
Even for this simple scene, GPUs render >10x faster than CPUs.
The final render looks something like this:
## Defining a Modal app
```python
from pathlib import Path
import modal
```
Modal runs your Python functions for you in the cloud.
You organize your code into apps, collections of functions that work together.
```python
app = modal.App("example-blender-video")
```
We need to define the environment each function runs in -- its container image.
The block below defines a container image, starting from a basic Debian Linux image
adding Blender's system-level dependencies
and then installing the `bpy` package, which is Blender's Python API.
```python
rendering_image = (
modal.Image.debian_slim(python_version="3.11")
.apt_install("xorg", "libxkbcommon0") # X11 (Unix GUI) dependencies
.uv_pip_install("bpy==4.5.0") # Blender as a Python package
)
```
## Rendering a single frame
We define a function that renders a single frame. We'll scale this function out on Modal later.
Functions in Modal are defined along with their hardware and their dependencies.
This function can be run with GPU acceleration or without it, and we'll use a global flag in the code to switch between the two.
```python
WITH_GPU = (
True # try changing this to False to run rendering massively in parallel on CPUs!
)
```
We decorate the function with `@app.function` to define it as a Modal function.
Note that in addition to defining the hardware requirements of the function,
we also specify the container image that the function runs in (the one we defined above).
The details of the scene aren't too important for this example, but we'll load
a .blend file that we created earlier. This scene contains a rotating
Modal logo made of a transmissive ice-like material, with a generated displacement map. The
animation keyframes were defined in Blender.
```python
@app.function(
gpu="L40S" if WITH_GPU else None,
# default limits on Modal free tier
max_containers=10 if WITH_GPU else 100,
image=rendering_image,
)
def render(blend_file: bytes, frame_number: int = 0) -> bytes:
"""Renders the n-th frame of a Blender file as a PNG."""
import bpy
input_path = "/tmp/input.blend"
output_path = f"/tmp/output-{frame_number}.png"
# Blender requires input as a file.
Path(input_path).write_bytes(blend_file)
bpy.ops.wm.open_mainfile(filepath=input_path)
bpy.context.scene.frame_set(frame_number)
bpy.context.scene.render.filepath = output_path
configure_rendering(bpy.context, with_gpu=WITH_GPU)
bpy.ops.render.render(write_still=True)
# Blender renders image outputs to a file as well.
return Path(output_path).read_bytes()
```
### Rendering with acceleration
We can configure the rendering process to use GPU acceleration with NVIDIA CUDA.
We select the [Cycles rendering engine](https://www.cycles-renderer.org/), which is compatible with CUDA,
and then activate the GPU.
```python
def configure_rendering(ctx, with_gpu: bool):
# configure the rendering process
ctx.scene.render.engine = "CYCLES"
ctx.scene.render.resolution_x = 3000
ctx.scene.render.resolution_y = 2000
ctx.scene.render.resolution_percentage = 50
ctx.scene.cycles.samples = 128
cycles = ctx.preferences.addons["cycles"]
# Use GPU acceleration if available.
if with_gpu:
cycles.preferences.compute_device_type = "CUDA"
ctx.scene.cycles.device = "GPU"
# reload the devices to update the configuration
cycles.preferences.get_devices()
for device in cycles.preferences.devices:
device.use = True
else:
ctx.scene.cycles.device = "CPU"
# report rendering devices -- a nice snippet for debugging and ensuring the accelerators are being used
for dev in cycles.preferences.devices:
print(f"ID:{dev['id']} Name:{dev['name']} Type:{dev['type']} Use:{dev['use']}")
```
## Combining frames into a video
Rendering 3D images is fun, and GPUs can make it faster, but rendering 3D videos is better!
We add another function to our app, running on a different, simpler container image
and different hardware, to combine the frames into a video.
```python
combination_image = modal.Image.debian_slim(python_version="3.11").apt_install("ffmpeg")
```
The function to combine the frames into a video takes a sequence of byte sequences, one for each rendered frame,
and converts them into a single sequence of bytes, the MP4 file.
```python
@app.function(image=combination_image)
def combine(frames_bytes: list[bytes], fps: int = 60) -> bytes:
import subprocess
import tempfile
with tempfile.TemporaryDirectory() as tmpdir:
for i, frame_bytes in enumerate(frames_bytes):
frame_path = Path(tmpdir) / f"frame_{i:05}.png"
frame_path.write_bytes(frame_bytes)
out_path = Path(tmpdir) / "output.mp4"
subprocess.run(
f"ffmpeg -framerate {fps} -pattern_type glob -i '{tmpdir}/*.png' -c:v libx264 -pix_fmt yuv420p {out_path}",
shell=True,
)
return out_path.read_bytes()
```
## Rendering in parallel in the cloud from the comfort of the command line
With these two functions defined, we need only a few more lines to run our rendering at scale on Modal.
First, we need a function that coordinates our functions to `render` frames and `combine` them.
We decorate that function with `@app.local_entrypoint` so that we can run it with `modal run blender_video.py`.
In that function, we use `render.map` to map the `render` function over the range of frames.
We give the `local_entrypoint` two parameters to control the render -- the number of frames to render and how many frames to skip.
These demonstrate a basic pattern for controlling Functions on Modal from a local client.
We collect the bytes from each frame into a `list` locally and then send it to `combine` with `.remote`.
The bytes for the video come back to our local machine, and we write them to a file.
The whole rendering process (for four seconds of 1080p 60 FPS video) takes about three minutes to run on 10 L40S GPUs,
with a per-frame latency of about six seconds, and about five minutes to run on 100 CPUs, with a per-frame latency of about one minute.
```python
@app.local_entrypoint()
def main(frame_count: int = 250, frame_skip: int = 1):
output_directory = Path("/tmp") / "render"
output_directory.mkdir(parents=True, exist_ok=True)
input_path = Path(__file__).parent / "IceModal.blend"
blend_bytes = input_path.read_bytes()
args = [(blend_bytes, frame) for frame in range(1, frame_count + 1, frame_skip)]
images = list(render.starmap(args))
for i, image in enumerate(images):
frame_path = output_directory / f"frame_{i + 1}.png"
frame_path.write_bytes(image)
print(f"Frame saved to {frame_path}")
video_path = output_directory / "output.mp4"
video_bytes = combine.remote(images)
video_path.write_bytes(video_bytes)
print(f"Video saved to {video_path}")
```
### Boltz Predict
# Fold proteins with Boltz-2
Example of Boltz-2 protein structure prediction
of a protein-ligand complex
Boltz-2 is an open source molecular structure prediction model.
In contrast to previous models like Boltz-1, [Chai-1](https://modal.com/docs/examples/chai1), and AlphaFold-3, it not only predicts protein structures but also the [binding affinities](https://en.wikipedia.org/wiki/Ligand_(biochemistry)#Receptor/ligand_binding_affinity) between proteins and [ligands](https://en.wikipedia.org/wiki/Ligand_(biochemistry)).
It was created by the [MIT Jameel Clinic](https://jclinic.mit.edu/boltz-2/).
For details, see [their technical report](https://jeremywohlwend.com/assets/boltz2.pdf).
Here, we demonstrate how to run Boltz-2 on Modal.
## Setup
```python
from pathlib import Path
from typing import Optional
import modal
here = Path(__file__).parent # the directory of this file
MINUTES = 60 # seconds
app = modal.App(name="example-boltz-predict")
```
## Fold a protein from the command line
The logic for running Boltz-2 is encapsulated in the function below,
which you can trigger from the command line by running
```shell
modal run boltz_predict.py
```
This will set up the environment for running Boltz-2 inference in Modal's cloud,
run it, and then save the results locally as a [tarball](https://computing.help.inf.ed.ac.uk/FAQ/whats-tarball-or-how-do-i-unpack-or-create-tgz-or-targz-file).
That tarball archive contains, among other things, the predicted structure as a
[Crystallographic Information File](https://en.wikipedia.org/wiki/Crystallographic_Information_File),
which you can render with the online [Molstar Viewer](https://molstar.org/viewer).
You can pass any options for the [`boltz predict` command line tool](https://github.com/jwohlwend/boltz/blob/main/docs/prediction.md)
as a string, like
``` shell
modal run boltz_predict.py --args "--sampling_steps 10"
```
To see more options, run the command with the `--help` flag.
To learn how it works, read on!
```python
@app.local_entrypoint()
def main(
force_download: bool = False, input_yaml_path: Optional[str] = None, args: str = ""
):
print("🧬 loading model remotely")
download_model.remote(force_download)
if input_yaml_path is None:
input_yaml_path = here / "data" / "boltz_affinity.yaml"
else:
input_yaml_path = Path(input_yaml_path)
input_yaml = input_yaml_path.read_text()
print(f"🧬 running boltz with input from {input_yaml_path}")
output = boltz_inference.remote(input_yaml)
output_path = Path("/tmp") / "boltz" / "boltz_result.tar.gz"
output_path.parent.mkdir(exist_ok=True, parents=True)
print(f"🧬 writing output to {output_path}")
output_path.write_bytes(output)
```
## Installing Boltz-2 Python dependencies on Modal
Code running on Modal runs inside containers built from [container images](https://modal.com/docs/guide/images)
that include that code's dependencies.
Because Modal images include [GPU drivers](https://modal.com/docs/guide/cuda) by default,
installation of higher-level packages like `boltz` that require GPUs is painless.
Here, we do it in a few lines, using the `uv` package manager for extra speed.
```python
image = modal.Image.debian_slim(python_version="3.12").uv_pip_install("boltz==2.1.1")
```
## Storing Boltz-2 model weights on Modal with Volumes
Not all "dependencies" belong in a container image. Boltz-2, for example, depends on
the weights of the model and a [Chemical Component Dictionary](https://www.wwpdb.org/data/ccd) (CCD) file.
Rather than loading them dynamically at run-time (which would add several minutes of GPU time to each inference),
or installing them into the image (which would require they be re-downloaded any time the other dependencies changed),
we load them onto a [Modal Volume](https://modal.com/docs/guide/volumes).
A Modal Volume is a file system that all of your code running on Modal (or elsewhere!) can access.
For more on storing model weights on Modal, see [this guide](https://modal.com/docs/guide/model-weights).
For details on how we download the weights in this case, see the [Addenda](#addenda).
```python
boltz_model_volume = modal.Volume.from_name("boltz-models", create_if_missing=True)
models_dir = Path("/models/boltz")
```
## Running Boltz-2 on Modal
To run inference on Modal we wrap our function in a decorator, `@app.function`.
We provide that decorator with some arguments that describe the infrastructure our code needs to run:
the Volume we created, the Image we defined, and of course a fast GPU!
Note that the `boltz` command-line tool we use takes the path to a
[specially-formatted YAML file](https://github.com/jwohlwend/boltz/blob/main/docs/prediction.md#yaml-format)
that includes definitions of molecules to predict the structures of and optionally paths to
[Multiple Sequence Alignment](https://en.wikipedia.org/wiki/Multiple_sequence_alignment) (MSA) files
for any protein molecules. We pass the [--use_msa_server](https://github.com/jwohlwend/boltz/blob/main/docs/prediction.md) flag to auto-generate the MSA using the mmseqs2 server.
```python
@app.function(
image=image,
volumes={models_dir: boltz_model_volume},
timeout=10 * MINUTES,
gpu="H100",
)
def boltz_inference(boltz_input_yaml: str, args="") -> bytes:
import shlex
import subprocess
input_path = Path("input.yaml")
input_path.write_text(boltz_input_yaml)
args = shlex.split(args)
print(f"🧬 predicting structure using boltz model from {models_dir}")
subprocess.run(
["boltz", "predict", input_path, "--use_msa_server", "--cache", str(models_dir)]
+ args,
check=True,
)
print("🧬 packaging up outputs")
output_bytes = package_outputs(f"boltz_results_{input_path.with_suffix('').name}")
return output_bytes
```
## Addenda
Above, we glossed over just how we got hold of the model weights --
the `local_entrypoint` just called a function named `download_model`.
Here's the implementation of that function. For details, see our
[guide to storing model weights on Modal](https://modal.com/docs/guide/model-weights).
```python
download_image = (
modal.Image.debian_slim()
.uv_pip_install("huggingface-hub==0.36.0")
.env({"HF_XET_HIGH_PERFORMANCE": "1"})
)
@app.function(
volumes={models_dir: boltz_model_volume},
timeout=20 * MINUTES,
image=download_image,
)
def download_model(
force_download: bool = False,
revision: str = "6fdef46d763fee7fbb83ca5501ccceff43b85607",
):
from huggingface_hub import snapshot_download
snapshot_download(
repo_id="boltz-community/boltz-2",
revision=revision,
local_dir=models_dir,
force_download=force_download,
)
boltz_model_volume.commit()
print(f"🧬 model downloaded to {models_dir}")
```
We package the outputs into a tarball which contains the predicted structure as a
[Crystallographic Information File](https://en.wikipedia.org/wiki/Crystallographic_Information_File)
and the binding affinity as a JSON file.
You can render the structure with the online [Molstar Viewer](https://molstar.org/viewer).
```python
def package_outputs(output_dir: str) -> bytes:
import io
import tarfile
tar_buffer = io.BytesIO()
with tarfile.open(fileobj=tar_buffer, mode="w:gz") as tar:
tar.add(output_dir, arcname=output_dir)
return tar_buffer.getvalue()
```
### Cache Aware Buffer
# Example (cache_aware_buffer.py)
This is the source code for **06_gpu_and_ml.speech-to-text.cache_aware_buffer**.
```python
import copy
import torch
from nemo.collections.asr.parts.mixins.streaming import StreamingEncoder
from nemo.collections.asr.parts.preprocessing.features import normalize_batch
from nemo.collections.asr.parts.preprocessing.segment import get_samples
from omegaconf import OmegaConf
class CacheAwareStreamingAudioBuffer:
"""
A buffer to be used for cache-aware streaming. It can load a single or multiple audio
files/processed signals, split them in chunks and return one on one. It can be used to
simulate streaming audio or audios.
"""
def __init__(self, model, online_normalization=None, pad_and_drop_preencoded=False):
"""
Args:
model: An ASR model.
online_normalization (bool): whether to perform online normalization per chunk or
normalize the whole audio before chunking
pad_and_drop_preencoded (bool): if true pad first audio chunk and always drop preencoded
"""
self.model = model
self.buffer = None
self.buffer_idx = 0
self.streams_length = None
self.step = 0
self.pad_and_drop_preencoded = pad_and_drop_preencoded
self.online_normalization = online_normalization
if not isinstance(model.encoder, StreamingEncoder):
raise ValueError(
"The model's encoder is not inherited from StreamingEncoder, and likely not to support streaming!"
)
if model.encoder.streaming_cfg is None:
model.encoder.setup_streaming_params()
self.streaming_cfg = model.encoder.streaming_cfg
self.input_features = model.encoder._feat_in
self.preprocessor = self.extract_preprocessor()
if hasattr(model.encoder, "pre_encode") and hasattr(
model.encoder.pre_encode, "get_sampling_frames"
):
self.sampling_frames = model.encoder.pre_encode.get_sampling_frames()
else:
self.sampling_frames = None
def get_next_chunk(self):
"""
Get the next audio chunk for streaming processing.
This method can be called repeatedly after appending audio via append_audio()
to process the audio in a streaming fashion.
Returns:
tuple: (audio_chunk, chunk_lengths) if there's data to process, None if buffer is exhausted
- audio_chunk: tensor containing the audio chunk with pre-encode cache prepended
- chunk_lengths: tensor containing the valid lengths for each stream in the batch
"""
if self.buffer is None or self.buffer_idx >= self.buffer.size(-1):
return None
# Determine chunk size based on position (first chunk may be different)
if self.buffer_idx == 0 and isinstance(self.streaming_cfg.chunk_size, list):
if self.pad_and_drop_preencoded:
chunk_size = self.streaming_cfg.chunk_size[1]
else:
chunk_size = self.streaming_cfg.chunk_size[0]
else:
chunk_size = (
self.streaming_cfg.chunk_size[1]
if isinstance(self.streaming_cfg.chunk_size, list)
else self.streaming_cfg.chunk_size
)
# Determine shift size based on position (first chunk may be different)
if self.buffer_idx == 0 and isinstance(self.streaming_cfg.shift_size, list):
if self.pad_and_drop_preencoded:
shift_size = self.streaming_cfg.shift_size[1]
else:
shift_size = self.streaming_cfg.shift_size[0]
else:
shift_size = (
self.streaming_cfg.shift_size[1]
if isinstance(self.streaming_cfg.shift_size, list)
else self.streaming_cfg.shift_size
)
# Check if we have enough valid data available for a full chunk
# We need at least chunk_size frames of valid data from buffer_idx onwards
available_valid_frames = self.streams_length - self.buffer_idx
if available_valid_frames.min() < chunk_size:
# Not enough data accumulated yet, wait for more audio
return None
# Extract the current audio chunk
audio_chunk = self.buffer[:, :, self.buffer_idx : self.buffer_idx + chunk_size]
# Check if we have enough frames for downsampling (if applicable)
if self.sampling_frames is not None:
if self.buffer_idx == 0 and isinstance(self.sampling_frames, list):
cur_sampling_frames = self.sampling_frames[0]
else:
cur_sampling_frames = (
self.sampling_frames[1]
if isinstance(self.sampling_frames, list)
else self.sampling_frames
)
if audio_chunk.size(-1) < cur_sampling_frames:
return None
# Add the pre-encode cache to the chunk
zeros_pads = None
if self.buffer_idx == 0 and isinstance(
self.streaming_cfg.pre_encode_cache_size, list
):
if self.pad_and_drop_preencoded:
cache_pre_encode_num_frames = self.streaming_cfg.pre_encode_cache_size[
1
]
else:
cache_pre_encode_num_frames = self.streaming_cfg.pre_encode_cache_size[
0
]
cache_pre_encode = torch.zeros(
(audio_chunk.size(0), self.input_features, cache_pre_encode_num_frames),
device=audio_chunk.device,
dtype=audio_chunk.dtype,
)
else:
if isinstance(self.streaming_cfg.pre_encode_cache_size, list):
pre_encode_cache_size = self.streaming_cfg.pre_encode_cache_size[1]
else:
pre_encode_cache_size = self.streaming_cfg.pre_encode_cache_size
start_pre_encode_cache = self.buffer_idx - pre_encode_cache_size
if start_pre_encode_cache < 0:
start_pre_encode_cache = 0
cache_pre_encode = self.buffer[
:, :, start_pre_encode_cache : self.buffer_idx
]
if cache_pre_encode.size(-1) < pre_encode_cache_size:
zeros_pads = torch.zeros(
(
audio_chunk.size(0),
audio_chunk.size(-2),
pre_encode_cache_size - cache_pre_encode.size(-1),
),
device=audio_chunk.device,
dtype=audio_chunk.dtype,
)
added_len = cache_pre_encode.size(-1)
audio_chunk = torch.cat((cache_pre_encode, audio_chunk), dim=-1)
# Apply online normalization if enabled
if self.online_normalization:
audio_chunk, x_mean, x_std = normalize_batch(
x=audio_chunk,
seq_len=torch.tensor([audio_chunk.size(-1)] * audio_chunk.size(0)),
normalize_type=self.model_normalize_type,
)
# Add zero padding if needed
if zeros_pads is not None:
audio_chunk = torch.cat((zeros_pads, audio_chunk), dim=-1)
added_len += zeros_pads.size(-1)
# Calculate valid chunk lengths for each stream
max_chunk_lengths = self.streams_length - self.buffer_idx
max_chunk_lengths = max_chunk_lengths + added_len
chunk_lengths = torch.clamp(max_chunk_lengths, min=0, max=audio_chunk.size(-1))
# Update buffer position and step counter
print(
f"[get_next_chunk] BEFORE: buffer_idx={self.buffer_idx}, shift_size={shift_size}, streams_length={self.streams_length}, chunk_lengths={chunk_lengths}"
)
self.buffer_idx += shift_size
self.step += 1
print(
f"[get_next_chunk] AFTER: buffer_idx={self.buffer_idx}, buffer.size(-1)={self.buffer.size(-1)}"
)
return audio_chunk, chunk_lengths
def __iter__(self):
"""
Iterator interface for batch processing.
Yields chunks by repeatedly calling get_next_chunk().
"""
while True:
result = self.get_next_chunk()
if result is None:
return
yield result
def is_buffer_empty(self):
if self.buffer_idx >= self.buffer.size(-1):
return True
else:
return False
def has_next_chunk(self):
"""
Check if there are more chunks available to process.
Returns:
bool: True if get_next_chunk() will return data, False otherwise
"""
if self.buffer is None or self.streams_length is None:
return False
# Determine the required chunk size for the next chunk
if self.buffer_idx == 0 and isinstance(self.streaming_cfg.chunk_size, list):
if self.pad_and_drop_preencoded:
chunk_size = self.streaming_cfg.chunk_size[1]
else:
chunk_size = self.streaming_cfg.chunk_size[0]
else:
chunk_size = (
self.streaming_cfg.chunk_size[1]
if isinstance(self.streaming_cfg.chunk_size, list)
else self.streaming_cfg.chunk_size
)
# Check if we have enough valid data available
available_valid_frames = self.streams_length - self.buffer_idx
return available_valid_frames.min() >= chunk_size
def __len__(self):
return len(self.buffer)
def reset_buffer(self):
self.buffer = None
self.buffer_idx = 0
self.streams_length = None
self.step = 0
def reset_buffer_pointer(self):
self.buffer_idx = 0
self.step = 0
def extract_preprocessor(self):
cfg = copy.deepcopy(self.model._cfg)
self.model_normalize_type = cfg.preprocessor.normalize
OmegaConf.set_struct(cfg.preprocessor, False)
cfg.preprocessor.dither = 0.0
cfg.preprocessor.pad_to = 0
if self.online_normalization:
cfg.preprocessor.normalize = "None"
preprocessor = self.model.from_config_dict(cfg.preprocessor)
return preprocessor.to(self.get_model_device())
def append_audio_file(self, audio_filepath, stream_id=-1):
audio = get_samples(audio_filepath)
processed_signal, processed_signal_length, stream_id = self.append_audio(
audio, stream_id
)
return processed_signal, processed_signal_length, stream_id
def append_audio(self, audio, stream_id=-1):
processed_signal, processed_signal_length = self.preprocess_audio(audio)
print(
f"[append_audio] Audio samples: {len(audio)}, Preprocessed to {processed_signal_length} frames"
)
processed_signal, processed_signal_length, stream_id = (
self.append_processed_signal(processed_signal, stream_id)
)
print(
f"[append_audio] After append: stream_id={stream_id}, streams_length={self.streams_length}, buffer_idx={self.buffer_idx}"
)
return processed_signal, processed_signal_length, stream_id
def append_processed_signal(self, processed_signal, stream_id=-1):
processed_signal_length = torch.tensor(
processed_signal.size(-1), device=processed_signal.device
)
if stream_id >= 0 and (
self.streams_length is not None and stream_id >= len(self.streams_length)
):
raise ValueError("Not valid stream_id!")
if self.buffer is None:
if stream_id >= 0:
raise ValueError(
"stream_id can not be specified when there is no stream."
)
self.buffer = processed_signal
self.streams_length = torch.tensor(
[processed_signal_length], device=processed_signal.device
)
else:
if self.buffer.size(1) != processed_signal.size(1):
raise ValueError(
"Buffer and the processed signal have different dimensions!"
)
if stream_id < 0:
self.buffer = torch.nn.functional.pad(
self.buffer, pad=(0, 0, 0, 0, 0, 1)
)
self.streams_length = torch.cat(
(
self.streams_length,
torch.tensor([0], device=self.streams_length.device),
),
dim=-1,
)
stream_id = len(self.streams_length) - 1
needed_len = self.streams_length[stream_id] + processed_signal_length
if needed_len > self.buffer.size(-1):
self.buffer = torch.nn.functional.pad(
self.buffer, pad=(0, needed_len - self.buffer.size(-1))
)
self.buffer[
stream_id,
:,
self.streams_length[stream_id] : self.streams_length[stream_id]
+ processed_signal_length,
] = processed_signal
self.streams_length[stream_id] = self.streams_length[
stream_id
] + processed_signal.size(-1)
if self.online_normalization:
processed_signal, x_mean, x_std = normalize_batch(
x=processed_signal,
seq_len=torch.tensor([processed_signal_length]),
normalize_type=self.model_normalize_type,
)
return processed_signal, processed_signal_length, stream_id
def get_model_device(self):
return self.model.device
def preprocess_audio(self, audio, device=None):
if device is None:
device = self.get_model_device()
audio_signal = torch.from_numpy(audio).unsqueeze_(0).to(device)
audio_signal_len = torch.Tensor([audio.shape[0]]).to(device)
processed_signal, processed_signal_length = self.preprocessor(
input_signal=audio_signal, length=audio_signal_len
)
return processed_signal, processed_signal_length
def get_all_audios(self):
processed_signal = self.buffer
if self.online_normalization:
processed_signal, x_mean, x_std = normalize_batch(
x=processed_signal,
seq_len=torch.tensor(self.streams_length),
normalize_type=self.model_normalize_type,
)
return processed_signal, self.streams_length
```
### Chai1
# Fold proteins with Chai-1
In biology, function follows form quite literally:
the physical shapes of proteins dictate their behavior.
Measuring those shapes directly is difficult
and first-principles physical simulation prohibitively expensive.
And so predicting protein shape from content --
determining how the one-dimensional chain of amino acids encoded by DNA _folds_ into a 3D object --
has emerged as a key application for machine learning and neural networks in biology.
In this example, we demonstrate how to run the open source [Chai-1](https://github.com/chaidiscovery/chai-lab/)
protein structure prediction model on Modal's flexible serverless infrastructure.
For details on how the Chai-1 model works and what it can be used for,
see the authors' [technical report on bioRxiv](https://www.biorxiv.org/content/10.1101/2024.10.10.615955).
This simple script is meant as a starting point showing how to handle fiddly bits
like installing dependencies, loading weights, and formatting outputs so that you can get on with the fun stuff.
To experience the full power of Modal, try scaling inference up and running on hundreds or thousands of structures!
## Setup
```python
import hashlib
import json
from pathlib import Path
from typing import Optional
from uuid import uuid4
import modal
here = Path(__file__).parent # the directory of this file
MINUTES = 60 # seconds
app = modal.App(name="example-chai1")
```
## Fold a protein from the command line
The logic for running Chai-1 is encapsulated in the function below,
which you can trigger from the command line by running
```shell
modal run chai1
```
This will set up the environment for running Chai-1 inference in Modal's cloud,
run it, and then save the results remotely and locally. The results are returned in the
[Crystallographic Information File](https://en.wikipedia.org/wiki/Crystallographic_Information_File) format,
which you can render with the online [Molstar Viewer](https://molstar.org/).
To see more options, run the command with the `--help` flag.
To learn how it works, read on!
```python
@app.local_entrypoint()
def main(
force_redownload: bool = False,
fasta_file: Optional[str] = None,
inference_config_file: Optional[str] = None,
output_dir: Optional[str] = None,
run_id: Optional[str] = None,
):
print("🧬 checking inference dependencies")
download_inference_dependencies.remote(force=force_redownload)
if fasta_file is None:
fasta_file = here / "data" / "chai1_default_input.fasta"
print(f"🧬 running Chai inference on {fasta_file}")
fasta_content = Path(fasta_file).read_text()
if inference_config_file is None:
inference_config_file = here / "data" / "chai1_default_inference.json"
print(f"🧬 loading Chai inference config from {inference_config_file}")
inference_config = json.loads(Path(inference_config_file).read_text())
if run_id is None:
run_id = hashlib.sha256(uuid4().bytes).hexdigest()[:8] # short id
print(f"🧬 running inference with {run_id=}")
results = chai1_inference.remote(fasta_content, inference_config, run_id)
if output_dir is None:
output_dir = Path("/tmp/chai1")
output_dir.mkdir(parents=True, exist_ok=True)
print(f"🧬 saving results to disk locally in {output_dir}")
for ii, (scores, cif) in enumerate(results):
(Path(output_dir) / f"{run_id}-scores.model_idx_{ii}.npz").write_bytes(scores)
(Path(output_dir) / f"{run_id}-preds.model_idx_{ii}.cif").write_text(cif)
```
## Installing Chai-1 Python dependencies on Modal
Code running on Modal runs inside containers built from [container images](https://modal.com/docs/guide/images)
that include that code's dependencies.
Because Modal images include [GPU drivers](https://modal.com/docs/guide/cuda) by default,
installation of higher-level packages like `chai_lab` that require GPUs is painless.
Here, we do it with one line, using the `uv` package manager for extra speed.
```python
image = (
modal.Image.debian_slim(python_version="3.12")
.uv_pip_install(
"chai_lab==0.5.0",
"huggingface-hub==0.36.0",
)
.uv_pip_install(
"torch==2.7.1",
index_url="https://download.pytorch.org/whl/cu128",
)
)
```
## Storing Chai-1 model weights on Modal with Volumes
Not all "dependencies" belong in a container image. Chai-1, for example, depends on
the weights of several models.
Rather than loading them dynamically at run-time (which would add several minutes of GPU time to each inference),
or installing them into the image (which would require they be re-downloaded any time the other dependencies changed),
we load them onto a [Modal Volume](https://modal.com/docs/guide/volumes).
A Modal Volume is a file system that all of your code running on Modal (or elsewhere!) can access.
For more on storing model weights on Modal, see [this guide](https://modal.com/docs/guide/model-weights).
```python
chai_model_volume = (
modal.Volume.from_name( # create distributed filesystem for model weights
"chai1-models",
create_if_missing=True,
)
)
models_dir = Path("/models/chai1")
```
The details of how we handle the download here (e.g. running concurrently for extra speed)
are in the [Addenda](#addenda).
```python
image = image.env( # update the environment variables in the image to...
{
"CHAI_DOWNLOADS_DIR": str(models_dir), # point the chai code to it
"HF_XET_HIGH_PERFORMANCE": "1", # speed up downloads
}
)
```
## Storing Chai-1 outputs on Modal Volumes
Chai-1 produces its outputs by writing to disk --
the model's scores for the structure and the structure itself along with rich metadata.
But Modal is a _serverless_ platform, and the filesystem your Modal Functions write to
is not persistent. Any file can be converted into bytes and sent back from a Modal Function
-- and we mean any! You can send files that are gigabytes in size that way.
So we do that below.
But for larger jobs, like folding every protein in the PDB, storing bytes on a local client
like a laptop won't cut it.
So we again lean on Modal Volumes, which can store thousands of files each.
We attach a Volume to a Modal Function that runs Chai-1 and the inference code
saves the results to distributed storage, without any fuss or source code changes.
```python
chai_preds_volume = modal.Volume.from_name("chai1-preds", create_if_missing=True)
preds_dir = Path("/preds")
```
## Running Chai-1 on Modal
Now we're ready to define a Modal Function that runs Chai-1.
We put our function on Modal by wrapping it in a decorator, `@app.function`.
We provide that decorator with some arguments that describe the infrastructure our code needs to run:
the Volumes we created, the Image we defined, and of course a fast GPU!
Note that Chai-1 takes a file path as input --
specifically, a path to a file in the [FASTA format](https://en.wikipedia.org/wiki/FASTA_format).
We pass the file contents to the function as a string and save them to disk so they can be picked up by the inference code.
Because Modal is serverless, we don't need to worry about cleaning up these resources:
the disk is ephemeral and the GPU only costs you money when you're using it.
```python
@app.function(
timeout=15 * MINUTES,
gpu="H100",
volumes={models_dir: chai_model_volume, preds_dir: chai_preds_volume},
image=image,
)
def chai1_inference(
fasta_content: str, inference_config: dict, run_id: str
) -> list[(bytes, str)]:
from pathlib import Path
import torch
from chai_lab import chai1
N_DIFFUSION_SAMPLES = 5 # hard-coded in chai-1
fasta_file = Path("/tmp/inputs.fasta")
fasta_file.write_text(fasta_content.strip())
output_dir = Path("/preds") / run_id
chai1.run_inference(
fasta_file=fasta_file,
output_dir=output_dir,
device=torch.device("cuda"),
**inference_config,
)
print(
f"🧬 done, results written to /{output_dir.relative_to('/preds')} on remote volume"
)
results = []
for ii in range(N_DIFFUSION_SAMPLES):
scores = (output_dir / f"scores.model_idx_{ii}.npz").read_bytes()
cif = (output_dir / f"pred.model_idx_{ii}.cif").read_text()
results.append((scores, cif))
return results
```
## Addenda
Above, we glossed over just how we got hold of the model weights --
the `local_entrypoint` just called a function named `download_inference_dependencies`.
Here's that function's implementation.
A few highlights:
- This Modal Function can access the model weights Volume, like the inference Function,
but it can't access the model predictions Volume.
- This Modal Function has a different Image (the default!) and doesn't use a GPU. Modal helps you
separate the concerns, and the costs, of your infrastructure's components.
- We use the `async` keyword here so that we can run the download for each model file
as a separate task, concurrently. We don't need to worry about this use of `async`
spreading to the rest of our code -- Modal launches just this Function in an async runtime.
```python
@app.function(volumes={models_dir: chai_model_volume})
async def download_inference_dependencies(force=False):
import asyncio
import aiohttp
base_url = "https://chaiassets.com/chai1-inference-depencencies/" # sic
inference_dependencies = [
"conformers_v1.apkl",
"models_v2/trunk.pt",
"models_v2/token_embedder.pt",
"models_v2/feature_embedding.pt",
"models_v2/diffusion_module.pt",
"models_v2/confidence_head.pt",
]
headers = {
"User-Agent": "Mozilla/5.0 (Windows NT 10.0; Win64; x64) AppleWebKit/537.36 (KHTML, like Gecko) Chrome/58.0.3029.110 Safari/537.3"
}
# launch downloads concurrently
async with aiohttp.ClientSession(headers=headers) as session:
tasks = []
for dep in inference_dependencies:
local_path = models_dir / dep
if force or not local_path.exists():
url = base_url + dep
print(f"🧬 downloading {dep}")
tasks.append(download_file(session, url, local_path))
# run all of the downloads and await their completion
await asyncio.gather(*tasks)
chai_model_volume.commit() # ensures models are visible on remote filesystem before exiting, otherwise takes a few seconds, racing with inference
async def download_file(session, url: str, local_path: Path):
async with session.get(url) as response:
response.raise_for_status()
local_path.parent.mkdir(parents=True, exist_ok=True)
with open(local_path, "wb") as f:
while chunk := await response.content.read(8192):
f.write(chunk)
```
### Chat With Pdf Vision
# Chat with PDF: RAG with ColQwen2
In this example, we demonstrate how to use the the [ColQwen2](https://huggingface.co/vidore/colqwen2-v0.1) model to build a simple
"Chat with PDF" retrieval-augmented generation (RAG) app.
The ColQwen2 model is based on [ColPali](https://huggingface.co/blog/manu/colpali) but uses the
[Qwen2-VL-2B-Instruct](https://huggingface.co/Qwen/Qwen2-VL-2B-Instruct) vision-language model.
ColPali is in turn based on the late-interaction embedding approach pioneered in [ColBERT](https://dl.acm.org/doi/pdf/10.1145/3397271.3401075).
Vision-language models with high-quality embeddings obviate the need for complex pre-processing pipelines.
See [this blog post from Jo Bergum of Vespa](https://blog.vespa.ai/announcing-colbert-embedder-in-vespa/) for more.
## Setup
First, we’ll import the libraries we need locally and define some constants.
```python
from pathlib import Path
from typing import Optional
from urllib.request import urlopen
from uuid import uuid4
import modal
MINUTES = 60 # seconds
app = modal.App("example-chat-with-pdf-vision")
```
## Setting up dependencies
In Modal, we define [container images](https://modal.com/docs/guide/custom-container) that run our serverless workloads.
We install the packages required for our application in those images.
```python
CACHE_DIR = "/hf-cache"
model_image = (
modal.Image.debian_slim(python_version="3.12")
.apt_install("git")
.uv_pip_install(
[
"colpali-engine==0.3.5",
"transformers>=4.45.0",
"torch>=2.0.0",
"huggingface-hub==0.36.0",
"qwen-vl-utils==0.0.8",
"torchvision==0.19.1",
]
)
.env({"HF_XET_HIGH_PERFORMANCE": "1", "HF_HUB_CACHE": CACHE_DIR})
)
```
These dependencies are only installed remotely, so we can't import them locally.
Use the `.imports` context manager to import them only on Modal instead.
```python
with model_image.imports():
import torch
from colpali_engine.models import ColQwen2, ColQwen2Processor
from qwen_vl_utils import process_vision_info
from transformers import AutoProcessor, Qwen2VLForConditionalGeneration
```
## Specifying the ColQwen2 model
Vision-language models (VLMs) for embedding and generation add another layer of simplification
to RAG apps based on vector search: we only need one model.
```python
MODEL_NAME = "Qwen/Qwen2-VL-2B-Instruct"
MODEL_REVISION = "aca78372505e6cb469c4fa6a35c60265b00ff5a4"
```
## Managing state with Modal Volumes and Dicts
Chat services are stateful:
the response to an incoming user message depends on past user messages in a session.
RAG apps add even more state:
the documents being retrieved from and the index over those documents,
e.g. the embeddings.
Modal Functions are stateless in and of themselves.
They don't retain information from input to input.
That's what enables Modal Functions to automatically scale up and down
[based on the number of incoming requests](https://modal.com/docs/guide/cold-start).
### Managing chat sessions with Modal Dicts
In this example, we use a [`modal.Dict`](https://modal.com/docs/guide/dicts-and-queues)
to store state information between Function calls.
Modal Dicts behave similarly to Python dictionaries,
but they are backed by remote storage and accessible to all of your Modal Functions.
They can contain any Python object
that can be serialized using [`cloudpickle`](https://github.com/cloudpipe/cloudpickle).
A Dict can hold a few gigabytes across keys of size up to 100 MiB,
so it works well for our chat session state, which is a few KiB per session,
and for our embeddings, which are a few hundred KiB per PDF page,
up to about 100,000 pages of PDFs.
At a larger scale, we'd need to replace this with a database, like Postgres,
or push more state to the client.
```python
sessions = modal.Dict.from_name("colqwen-chat-sessions", create_if_missing=True)
class Session:
def __init__(self):
self.images = None
self.messages = []
self.pdf_embeddings = None
```
### Storing PDFs on a Modal Volume
Images extracted from PDFs are larger than our session state or embeddings
-- low tens of MiB per page.
So we store them on a [Modal Volume](https://modal.com/docs/guide/volumes),
which can store terabytes (or more!) of data across tens of thousands of files.
Volumes behave like a remote file system:
we read and write from them much like a local file system.
```python
pdf_volume = modal.Volume.from_name("colqwen-chat-pdfs", create_if_missing=True)
PDF_ROOT = Path("/vol/pdfs/")
```
### Caching the model weights
We'll also use a Volume to cache the model weights.
```python
cache_volume = modal.Volume.from_name("hf-hub-cache", create_if_missing=True)
```
Running this function will download the model weights to the cache volume.
Otherwise, the model weights will be downloaded on the first query. For more on storing model weights on Modal, see
[this guide](https://modal.com/docs/guide/model-weights).
```python
@app.function(
image=model_image, volumes={CACHE_DIR: cache_volume}, timeout=20 * MINUTES
)
def download_model():
from huggingface_hub import snapshot_download
result = snapshot_download(
MODEL_NAME,
revision=MODEL_REVISION,
ignore_patterns=["*.pt", "*.bin"], # using safetensors
)
print(f"Downloaded model weights to {result}")
```
## Defining a Chat with PDF service
To deploy an autoscaling "Chat with PDF" vision-language model service on Modal,
we just need to wrap our Python logic in a [Modal App](https://modal.com/docs/guide/apps):
It uses [Modal `@app.cls`](https://modal.com/docs/guide/lifecycle-functions) decorators
to organize the "lifecycle" of the app:
loading the model on container start (`@modal.enter`) and running inference on request (`@modal.method`).
We include in the arguments to the `@app.cls` decorator
all the information about this service's infrastructure:
the container image, the remote storage, and the GPU requirements.
```python
@app.cls(
image=model_image,
gpu="A100-80GB",
scaledown_window=10 * MINUTES, # spin down when inactive
volumes={"/vol/pdfs/": pdf_volume, CACHE_DIR: cache_volume},
)
class Model:
@modal.enter()
def load_models(self):
self.colqwen2_model = ColQwen2.from_pretrained(
"vidore/colqwen2-v0.1",
torch_dtype=torch.bfloat16,
device_map="cuda:0",
)
self.colqwen2_processor = ColQwen2Processor.from_pretrained(
"vidore/colqwen2-v0.1"
)
self.qwen2_vl_model = Qwen2VLForConditionalGeneration.from_pretrained(
MODEL_NAME,
revision=MODEL_REVISION,
torch_dtype=torch.bfloat16,
)
self.qwen2_vl_model.to("cuda:0")
self.qwen2_vl_processor = AutoProcessor.from_pretrained(
"Qwen/Qwen2-VL-2B-Instruct", trust_remote_code=True
)
@modal.method()
def index_pdf(self, session_id, target: bytes | list):
# We store concurrent user chat sessions in a modal.Dict
# For simplicity, we assume that each user only runs one session at a time
session = sessions.get(session_id)
if session is None:
session = Session()
if isinstance(target, bytes):
images = convert_pdf_to_images.remote(target)
else:
images = target
# Store images on a Volume for later retrieval
session_dir = PDF_ROOT / f"{session_id}"
session_dir.mkdir(exist_ok=True, parents=True)
for ii, image in enumerate(images):
filename = session_dir / f"{str(ii).zfill(3)}.jpg"
image.save(filename)
# Generated embeddings from the image(s)
BATCH_SZ = 4
pdf_embeddings = []
batches = [images[i : i + BATCH_SZ] for i in range(0, len(images), BATCH_SZ)]
for batch in batches:
batch_images = self.colqwen2_processor.process_images(batch).to(
self.colqwen2_model.device
)
pdf_embeddings += list(self.colqwen2_model(**batch_images).to("cpu"))
# Store the image embeddings in the session, for later retrieval
session.pdf_embeddings = pdf_embeddings
# Write embeddings back to the modal.Dict
sessions[session_id] = session
@modal.method()
def respond_to_message(self, session_id, message):
session = sessions.get(session_id)
if session is None:
session = Session()
pdf_volume.reload() # make sure we have the latest data
images = (PDF_ROOT / str(session_id)).glob("*.jpg")
images = list(sorted(images, key=lambda p: int(p.stem)))
# Nothing to chat about without a PDF!
if not images:
return "Please upload a PDF first"
elif session.pdf_embeddings is None:
return "Indexing PDF..."
# RAG, Retrieval-Augmented Generation, is two steps:
# _Retrieval_ of the most relevant data to answer the user's query
relevant_image = self.get_relevant_image(message, session, images)
# _Generation_ based on the retrieved data
output_text = self.generate_response(message, session, relevant_image)
# Update session state for future chats
append_to_messages(message, session, user_type="user")
append_to_messages(output_text, session, user_type="assistant")
sessions[session_id] = session
return output_text
# Retrieve the most relevant image from the PDF for the input query
def get_relevant_image(self, message, session, images):
import PIL
batch_queries = self.colqwen2_processor.process_queries([message]).to(
self.colqwen2_model.device
)
query_embeddings = self.colqwen2_model(**batch_queries)
# This scores our query embedding against the image embeddings from index_pdf
scores = self.colqwen2_processor.score_multi_vector(
query_embeddings, session.pdf_embeddings
)[0]
# Select the best matching image
max_index = max(range(len(scores)), key=lambda index: scores[index])
return PIL.Image.open(images[max_index])
# Pass the query and retrieved image along with conversation history into the VLM for a response
def generate_response(self, message, session, image):
chatbot_message = get_chatbot_message_with_image(message, image)
query = self.qwen2_vl_processor.apply_chat_template(
[*session.messages, chatbot_message],
tokenize=False,
add_generation_prompt=True,
)
image_inputs, _ = process_vision_info([chatbot_message])
inputs = self.qwen2_vl_processor(
text=[query],
images=image_inputs,
padding=True,
return_tensors="pt",
)
inputs = inputs.to("cuda:0")
generated_ids = self.qwen2_vl_model.generate(**inputs, max_new_tokens=512)
generated_ids_trimmed = [
out_ids[len(in_ids) :]
for in_ids, out_ids in zip(inputs.input_ids, generated_ids)
]
output_text = self.qwen2_vl_processor.batch_decode(
generated_ids_trimmed,
skip_special_tokens=True,
clean_up_tokenization_spaces=False,
)[0]
return output_text
```
## Loading PDFs as images
Vision-Language Models operate on images, not PDFs directly,
so we need to convert our PDFs into images first.
We separate this from our indexing and chatting logic --
we run on a different container with different dependencies.
```python
pdf_image = (
modal.Image.debian_slim(python_version="3.12")
.apt_install("poppler-utils")
.uv_pip_install("pdf2image==1.17.0", "pillow==10.4.0")
)
@app.function(image=pdf_image)
def convert_pdf_to_images(pdf_bytes):
from pdf2image import convert_from_bytes
images = convert_from_bytes(pdf_bytes, fmt="jpeg")
return images
```
## Chatting with a PDF from the terminal
Before deploying in a UI, we can test our service from the terminal.
Just run
```bash
modal run chat_with_pdf_vision.py
```
and optionally pass in a path to or URL of a PDF with the `--pdf-path` argument
and specify a question with the `--question` argument.
Continue a previous chat by passing the session ID printed to the terminal at start
with the `--session-id` argument.
```python
@app.local_entrypoint()
def main(
question: Optional[str] = None,
pdf_path: Optional[str] = None,
session_id: Optional[str] = None,
):
model = Model()
if session_id is None:
session_id = str(uuid4())
print("Starting a new session with id", session_id)
if pdf_path is None:
pdf_path = "https://arxiv.org/pdf/1706.03762" # all you need
if pdf_path.startswith("http"):
pdf_bytes = urlopen(pdf_path).read()
else:
pdf_bytes = Path(pdf_path).read_bytes()
print("Indexing PDF from", pdf_path)
model.index_pdf.remote(session_id, pdf_bytes)
else:
if pdf_path is not None:
raise ValueError("Start a new session to chat with a new PDF")
print("Resuming session with id", session_id)
if question is None:
question = "What is this document about?"
print("QUESTION:", question)
print(model.respond_to_message.remote(session_id, question))
```
## A hosted Gradio interface
With the [Gradio](https://gradio.app) library, we can create a simple web interface around our class in Python,
then use Modal to host it for anyone to try out.
To deploy your own, run
```bash
modal deploy chat_with_pdf_vision.py
```
and navigate to the URL that appears in your teriminal.
If you’re editing the code, use `modal serve` instead to see changes hot-reload.
```python
web_image = pdf_image.uv_pip_install(
"fastapi[standard]==0.115.4",
"pydantic==2.9.2",
"starlette==0.41.2",
"gradio==4.44.1",
"pillow==10.4.0",
"gradio-pdf==0.0.15",
"pdf2image==1.17.0",
)
@app.function(
image=web_image,
# gradio requires sticky sessions
# so we limit the number of concurrent containers to 1
# and allow it to scale to 1000 concurrent inputs
max_containers=1,
)
@modal.concurrent(max_inputs=100)
@modal.asgi_app()
def ui():
import uuid
import gradio as gr
from fastapi import FastAPI
from gradio.routes import mount_gradio_app
from gradio_pdf import PDF
from pdf2image import convert_from_path
web_app = FastAPI()
# Since this Gradio app is running from its own container,
# allowing us to run the inference service via .remote() methods.
model = Model()
def upload_pdf(path, session_id):
if session_id == "" or session_id is None:
# Generate session id if new client
session_id = str(uuid.uuid4())
images = convert_from_path(path)
# Call to our remote inference service to index the PDF
model.index_pdf.remote(session_id, images)
return session_id
def respond_to_message(message, _, session_id):
# Call to our remote inference service to run RAG
return model.respond_to_message.remote(session_id, message)
with gr.Blocks(theme="soft") as demo:
session_id = gr.State("")
gr.Markdown("# Chat with PDF")
with gr.Row():
with gr.Column(scale=1):
gr.ChatInterface(
fn=respond_to_message,
additional_inputs=[session_id],
retry_btn=None,
undo_btn=None,
clear_btn=None,
)
with gr.Column(scale=1):
pdf = PDF(
label="Upload a PDF",
)
pdf.upload(upload_pdf, [pdf, session_id], session_id)
return mount_gradio_app(app=web_app, blocks=demo, path="/")
```
## Addenda
The remainder of this code consists of utility functions and boiler plate used in the
main code above.
```python
def get_chatbot_message_with_image(message, image):
return {
"role": "user",
"content": [
{"type": "image", "image": image},
{"type": "text", "text": message},
],
}
def append_to_messages(message, session, user_type="user"):
session.messages.append(
{
"role": user_type,
"content": {"type": "text", "text": message},
}
)
```
### Chatterbox Tts
# Create a Chatterbox TTS API on Modal
This example demonstrates how to deploy a text-to-speech (TTS) API using the open source model Chatterbox Turbo on Modal.
Chatterbox Turbo is a state-of-the-art TTS model that can generate natural, expressive speech that rivals proprietary models.
Prompts can include paralinguistic tags like `[chuckle]`, `[sigh]`, and `[gasp]`. Chatterbox also support voice cloning by passing
a short (about 10 seconds) audio prompt of the target voice.
Check out [Resemble AI's website](https://www.resemble.ai/) or
the [Chatterbox Github](https://github.com/resemble-ai/chatterbox) repo for more details.
## Setup
Import `modal`, the only required local dependency.
```python
import modal
```
## Define a container image
We start with Modal's baseline `debian_slim` image and install the required packages.
- `chatterbox-tts`: The TTS model library
- `fastapi`: Web framework for creating the API endpoint
- "peft": Required for properly loading the model
```python
image = modal.Image.debian_slim(python_version="3.10").uv_pip_install(
"chatterbox-tts==0.1.6",
"fastapi[standard]==0.124.4",
"peft==0.18.0",
)
```
We'll also use Chatterbox's provided set of voice prompts which you can download [here](https://modal-cdn.com/blog/audio/chatterbox-tts-voices.zip).
Unzip the file and upload it to a `modal.Volume` called `chatterbox-tts-voices` with the following CLI commands:
```shell
modal volume create chatterbox-tts-voices
modal volume put chatterbox-tts-voices
```
Now we can instantiate the volume and use it with our app.
```python
chatterbox_tts_voices_vol = modal.Volume.from_name("chatterbox-tts-voices")
VOICE_PROMPTS_DIR = "/chatterbox-tts/prompts"
app = modal.App("example-chatterbox-tts", image=image)
```
Import the required libraries within the image context to ensure they're available
when the container runs. This includes audio processing modules and the Chatterbox TTS module itself.
```python
with image.imports():
import io
import torchaudio as ta
from chatterbox.tts_turbo import ChatterboxTurboTTS
from fastapi.responses import StreamingResponse
```
## The TTS model class
The TTS service is implemented using Modal's class syntax with GPU acceleration.
We configure the class to use an A10G GPU with additional parameters:
- `scaledown_window=60 * 5`: Keep containers alive for 5 minutes after last request
- `@modal.concurrent(max_inputs=10)`: Allow up to 10 concurrent requests per container
We'll also need to provide a Hugging Face token using a `modal.Secret` to access the model weights,
and attach the `chatterbox-tts-voices` volume to the container.
```python
@app.cls(
gpu="a10g",
scaledown_window=60 * 5,
secrets=[modal.Secret.from_name("hf-token")],
volumes={VOICE_PROMPTS_DIR: chatterbox_tts_voices_vol},
)
@modal.concurrent(max_inputs=10)
class Chatterbox:
@modal.enter()
def load(self):
self.model = ChatterboxTurboTTS.from_pretrained(device="cuda")
@modal.fastapi_endpoint(docs=True, method="POST")
def api_endpoint(self, prompt: str):
# Get the audio bytes from the generate method
audio_bytes = self.generate.local(prompt)
# Return the audio as a streaming response with appropriate MIME type.
# This allows for browsers to playback audio directly.
return StreamingResponse(
io.BytesIO(audio_bytes),
media_type="audio/wav",
)
@modal.method()
def generate(self, prompt: str) -> bytes:
# Generate audio waveform from the input text
wav = self.model.generate(
prompt,
audio_prompt_path=VOICE_PROMPTS_DIR
+ "/chatterbox-tts-voices"
+ "/prompts"
+ "/Lucy.wav",
)
# Convert the waveform to bytes
buffer = io.BytesIO()
ta.save(buffer, wav, self.model.sr, format="wav")
buffer.seek(0)
return buffer.read()
@app.local_entrypoint()
def test(
prompt: str = "Chatterbox running on Modal [chuckle].",
output_path: str = "/tmp/chatterbox-tts/output.wav",
):
chatterbox = Chatterbox()
audio_bytes = chatterbox.generate.remote(prompt=prompt)
# Save the audio bytes to a file
import pathlib
output_path = pathlib.Path(output_path)
output_path.parent.mkdir(parents=True, exist_ok=True)
output_path.write_bytes(audio_bytes)
print(f"Audio saved to {output_path}")
```
Now deploy the Chatterbox API from this file's directory:
```shell
modal deploy -m 06_gpu_and_ml.text-to-audio.chatterbox_tts
```
And query the endpoint with:
```shell
mkdir -p /tmp/chatterbox-tts # create tmp directory
curl -X POST --get "" \
--data-urlencode "prompt=Chatterbox running on Modal [chuckle]." \
--output /tmp/chatterbox-tts/output.wav
```
You'll receive a WAV file named `/tmp/chatterbox-tts/output.wav` containing the generated audio.
### Cls With Options
# Override Modal resource options (GPU, scaling) at runtime with `Cls.with_options`
[`Cls.with_options`](https://modal.com/docs/reference/modal.Cls#with_options)
lets you override the resource configuration of a
Modal [Cls](https://modal.com/docs/guide/lifecycle-functions) at runtime.
This is useful when the same code needs to run
with different resource allocations -- say, with a GPU or with out,
or with a large [warm pool of containers](https://modal.com/docs/guide/cold-start)
-- at different times -- say, when iterating on code and when in production.
Each call to `with_options` returns a new class handle that scales
independently from the original.
## Setup
```python
import modal
app = modal.App("example-cls-with-options")
```
## Defining the class
We define a simple class with a method that performs a
CPU-bound computation. The class is configured with modest defaults.
```python
@app.cls(cpu=1, memory=128, timeout=60)
class Worker:
@modal.method()
def compute(self, n: int) -> int:
import subprocess
# if GPU available, prints details
subprocess.Popen("nvidia-smi", shell=True)
return sum(i * i for i in range(n))
```
## Using `with_options` to override configuration
We can call `with_options` on the class to get a new handle
with different resource settings.
```python
@app.local_entrypoint()
def main():
# Use the default configuration for a light workload
default_worker = Worker()
result = default_worker.compute.remote(1_000)
print(f"Default worker result: {result}")
# Create a GPU-accelerated variant
GpuWorker = Worker.with_options(gpu="T4", memory=512)
gpu_worker = GpuWorker()
result = gpu_worker.compute.remote(10_000_000)
print(f"GPU worker result: {result}")
```
### Coco
This script demonstrates ingestion of the [COCO](https://cocodataset.org/#download) (Common Objects in Context)
dataset.
It is recommended to iterate on this code from a modal.Function running Jupyter server.
This better supports experimentation and maintains state in the face of errors:
11_notebooks/jupyter_inside_modal.py
```python
import os
import pathlib
import shutil
import subprocess
import sys
import threading
import time
import zipfile
import modal
bucket_creds = modal.Secret.from_name(
"aws-s3-modal-examples-datasets", environment_name="main"
)
bucket_name = "modal-examples-datasets"
volume = modal.CloudBucketMount(
bucket_name,
secret=bucket_creds,
)
image = modal.Image.debian_slim().apt_install("wget").uv_pip_install("tqdm")
app = modal.App(
"example-coco",
image=image,
secrets=[],
)
def start_monitoring_disk_space(interval: int = 120) -> None:
"""Start monitoring the disk space in a separate thread."""
task_id = os.environ["MODAL_TASK_ID"]
def log_disk_space(interval: int) -> None:
while True:
statvfs = os.statvfs("/")
free_space = statvfs.f_frsize * statvfs.f_bavail
print(
f"{task_id} free disk space: {free_space / (1024**3):.2f} GB",
file=sys.stderr,
)
time.sleep(interval)
monitoring_thread = threading.Thread(target=log_disk_space, args=(interval,))
monitoring_thread.daemon = True
monitoring_thread.start()
def extractall(fzip, dest, desc="Extracting"):
from tqdm.auto import tqdm
from tqdm.utils import CallbackIOWrapper
dest = pathlib.Path(dest).expanduser()
with (
zipfile.ZipFile(fzip) as zipf,
tqdm(
desc=desc,
unit="B",
unit_scale=True,
unit_divisor=1024,
total=sum(getattr(i, "file_size", 0) for i in zipf.infolist()),
) as pbar,
):
for i in zipf.infolist():
if not getattr(i, "file_size", 0): # directory
zipf.extract(i, os.fspath(dest))
else:
full_path = dest / i.filename
full_path.parent.mkdir(exist_ok=True, parents=True)
with zipf.open(i) as fi, open(full_path, "wb") as fo:
shutil.copyfileobj(CallbackIOWrapper(pbar.update, fi), fo)
def copy_concurrent(src: pathlib.Path, dest: pathlib.Path) -> None:
from multiprocessing.pool import ThreadPool
class MultithreadedCopier:
def __init__(self, max_threads):
self.pool = ThreadPool(max_threads)
def copy(self, source, dest):
self.pool.apply_async(shutil.copy2, args=(source, dest))
def __enter__(self):
return self
def __exit__(self, exc_type, exc_val, exc_tb):
self.pool.close()
self.pool.join()
with MultithreadedCopier(max_threads=48) as copier:
shutil.copytree(src, dest, copy_function=copier.copy, dirs_exist_ok=True)
```
This script uses wget to download ZIP files over HTTP because while the official
website recommends using gsutil to download from a bucket (https://cocodataset.org/#download)
that bucket no longer exists.
```python
@app.function(
volumes={"/vol/": volume},
timeout=60 * 60 * 5, # 5 hours
ephemeral_disk=600 * 1024, # 600 GiB,
)
def _do_part(url: str) -> None:
start_monitoring_disk_space()
part = url.replace("http://images.cocodataset.org/", "")
name = pathlib.Path(part).name.replace(".zip", "")
zip_path = pathlib.Path("/tmp/") / pathlib.Path(part).name
extract_tmp_path = pathlib.Path("/tmp", name)
dest_path = pathlib.Path("/vol/coco/", name)
print(f"Downloading {name} from {url}")
command = f"wget {url} -O {zip_path}"
subprocess.run(command, shell=True, check=True)
print(f"Download of {name} completed successfully.")
extract_tmp_path.mkdir()
extractall(
zip_path, extract_tmp_path, desc=f"Extracting {name}"
) # extract into /tmp/
zip_path.unlink() # free up disk space by deleting the zip
print(f"Copying extract {name} data to volume.")
copy_concurrent(extract_tmp_path, dest_path) # copy from /tmp/ into mounted volume
```
We can process each part of the dataset in parallel, using a 'parent' Function just to execute
the map and wait on completion of all children.
```python
@app.function(
timeout=60 * 60 * 5, # 5 hours
)
def import_transform_load() -> None:
print("Starting import, transform, and load of COCO dataset")
list(
_do_part.map(
[
"http://images.cocodataset.org/zips/train2017.zip",
"http://images.cocodataset.org/zips/val2017.zip",
"http://images.cocodataset.org/zips/test2017.zip",
"http://images.cocodataset.org/zips/unlabeled2017.zip",
"http://images.cocodataset.org/annotations/annotations_trainval2017.zip",
"http://images.cocodataset.org/annotations/stuff_annotations_trainval2017.zip",
"http://images.cocodataset.org/annotations/image_info_test2017.zip",
"http://images.cocodataset.org/annotations/image_info_unlabeled2017.zip",
]
)
)
print("✅ Done")
```
### Computer Use Vnc
# Watch a Browser Use agent drive Chromium over VNC
Computer-use agents are LLMs that can interact with a web browser in a loop.
Rather than calling a fixed set of APIs, they look at a rendered page or screen,
decide what to click or type next, take that action, and look again.
This example builds one with [Browser Use](https://docs.browser-use.com/).
An open-weights model served from a Modal
[Endpoint](https://modal.com/docs/guide/endpoints) powers the agent. The agent
drives Chromium inside a Modal
[VM Sandbox](https://modal.com/docs/guide/vm-sandboxes),
while a small web UI embeds a noVNC desktop so you can watch it work in real-time.
## Run the example
To programmatically test the example:
```bash
modal run 13_sandboxes/cua/computer_use_vnc.py
```
You can also start the interactive UI:
```bash
modal serve 13_sandboxes/cua/computer_use_vnc.py
```
## Set up
```python
import asyncio
import json
import subprocess
import sys
import textwrap
import time
import urllib.request
from pathlib import Path
import fastapi
import modal
from fastapi.responses import HTMLResponse
app = modal.App("example-computer-use-vnc")
MINUTES = 60
```
We could point Browser Use at a hosted provider like OpenAI or Anthropic using
your API key. For our purposes, however, we serve an open-weights model
ourselves via a Modal [Endpoint](https://modal.com/docs/guide/endpoints).
It takes one command to create an OpenAI-compatible server for the agent to
call. No external API key is needed, and the whole demo runs on Modal.
```python
ENDPOINT_MODEL = "Qwen/Qwen3.6-27B-FP8"
ENDPOINT_NAME = "example-computer-use-vnc"
ENDPOINT_ROUTING_REGION = "us-west"
ENDPOINT_WARMUP_TIME = 5 * MINUTES
endpoint_server = modal.Server.from_name(f"ep-{ENDPOINT_NAME}", "Server")
VNC_PORT = 6080
SESSION_START_TIMEOUT = 2 * MINUTES
SANDBOX_TIMEOUT = 60 * MINUTES
PAGE_PATH = Path(__file__).parent / "computer_use_vnc.html"
PAGE_REMOTE = "/root/computer_use_vnc.html"
RESULT_PREFIX = "__BROWSER_USE_RESULT__="
DESKTOP_READY_PATH = "/tmp/desktop_ready"
```
## Set up a shareable virtual desktop
By default, Browser Use launches Chromium headless. However, we want to watch the
browser in real time. In each Sandbox, Xvfb provides a virtual display,
x11vnc serves it over VNC, and websockify bridges the stream into the noVNC
page that the UI embeds.
```python
base_image = modal.Image.debian_slim(python_version="3.12")
web_image = base_image.uv_pip_install("fastapi[standard]==0.139.2").add_local_file(
PAGE_PATH, remote_path=PAGE_REMOTE
)
sandbox_image = (
base_image.apt_install("novnc", "websockify", "x11vnc", "xvfb")
.uv_pip_install("browser-use==0.13.6", "playwright==1.61.0")
.run_commands("playwright install --with-deps chromium")
)
SANDBOX_COMMAND = textwrap.dedent(
"""
set -euo pipefail
export DISPLAY=:99
Xvfb :99 -screen 0 1280x720x24 >/tmp/xvfb.log 2>&1 &
sleep 1
x11vnc -display :99 -forever -shared -nopw -listen 0.0.0.0 -rfbport 5900 -xkb >/tmp/x11vnc.log 2>&1 &
websockify --web=/usr/share/novnc/ 6080 localhost:5900 >/tmp/websockify.log 2>&1 &
exec python -c "$AGENT_SCRIPT"
"""
).strip()
```
## Driving the browser with an agent loop
The agent loop is the core of the agent. At each step, it looks at the current
page, picks an action such as click, type, or navigate, and executes it with
Browser Use. The loop repeats until the model decides the task is done.
```python
AGENT_SCRIPT = textwrap.dedent(
"""
import asyncio
import json
import os
import time
import urllib.parse
import urllib.request
from pathlib import Path
from browser_use import Agent, Browser, ChatOpenAI, Tools
model = os.environ["ENDPOINT_MODEL"]
base_url = os.environ["ENDPOINT_BASE_URL"]
start_page = "data:text/html," + urllib.parse.quote(
"Starting desktop..."
)
def wait_for_endpoint() -> None:
deadline = time.monotonic() + int(os.environ["ENDPOINT_WARMUP_TIME"])
while True:
try:
urllib.request.urlopen(f"{base_url}/health", timeout=5).close()
return
except Exception:
pass
if time.monotonic() >= deadline:
raise TimeoutError("Timed out waiting for the model Endpoint.")
time.sleep(1)
async def main() -> None:
browser = Browser(
headless=False,
window_size={"width": 1280, "height": 720},
chromium_sandbox=False,
args=["--no-sandbox", "--disable-gpu", "--disable-dev-shm-usage"],
)
await browser.start()
await browser.navigate_to(start_page)
Path(os.environ["DESKTOP_READY_PATH"]).write_text("1", encoding="utf-8")
await asyncio.to_thread(wait_for_endpoint)
llm = ChatOpenAI(
model=model,
api_key="unused",
base_url=f"{base_url}/v1",
reasoning_effort="none",
reasoning_models=[model],
timeout=3 * 60,
)
agent = Agent(
task=os.environ["AGENT_TASK"],
llm=llm,
tools=Tools(),
browser=browser,
use_thinking=False,
llm_timeout=3 * 60,
)
history = await agent.run()
result = history.final_result() or "Agent stopped without a final result."
print(os.environ["RESULT_PREFIX"] + json.dumps(result), flush=True)
asyncio.run(main())
"""
).strip()
```
## Creating the shared Endpoint
The Endpoint can take time to become ready because its containers scale to zero.
Startup waits in two places:
1. `start_session` waits for a new Endpoint to register its Server and expose a URL.
2. The Sandbox waits until the endpoint is ready before starting the agent.
```python
def create_endpoint_if_missing() -> None:
command = [sys.executable, "-m", "modal", "endpoint"]
endpoints = json.loads(
subprocess.check_output([*command, "list", "--json"], text=True)
)
if any(endpoint["name"] == ENDPOINT_NAME for endpoint in endpoints):
print(f"Using existing Endpoint {ENDPOINT_NAME!r}.")
return
subprocess.run(
[
*command,
"create",
"--name",
ENDPOINT_NAME,
"--model",
ENDPOINT_MODEL,
"--routing-region",
ENDPOINT_ROUTING_REGION,
"--unauthenticated",
],
check=True,
)
print(f"Created Endpoint {ENDPOINT_NAME!r}.")
async def wait_for_endpoint_url(deadline: float) -> str:
while True:
try:
url = await endpoint_server.get_url.aio()
except modal.exception.NotFoundError:
url = None
if url:
return url
if time.monotonic() >= deadline:
raise TimeoutError(f"Timed out waiting for Endpoint {ENDPOINT_NAME!r}.")
await asyncio.sleep(1)
def is_server_up(url: str) -> bool:
try:
with urllib.request.urlopen(url, timeout=5) as response:
return response.status == 200
except Exception:
return False
```
## Running the agent
A request from the UI creates one Sandbox for one task. Its entrypoint starts
the virtual desktop, paints Chromium, then runs Browser Use. `start_session`
waits until the desktop-ready marker exists and the noVNC page responds, then
returns the Sandbox ID and watch URL.
The browser embeds that URL and polls the status route with the ID. When the
agent exits, the Sandbox terminates and the status route returns its final
result. A failed startup terminates the Sandbox before returning the error.
```python
@app.function(image=web_image, timeout=SESSION_START_TIMEOUT + 30)
async def start_session(task: str):
sandbox = None
try:
deadline = time.monotonic() + SESSION_START_TIMEOUT
await asyncio.to_thread(create_endpoint_if_missing)
endpoint_url = await wait_for_endpoint_url(deadline)
sandbox = await modal.Sandbox.create.aio(
"bash",
"-lc",
SANDBOX_COMMAND,
app=app,
image=sandbox_image,
experimental_options={"vm_runtime": True},
env={
"AGENT_SCRIPT": AGENT_SCRIPT,
"AGENT_TASK": task,
"DESKTOP_READY_PATH": DESKTOP_READY_PATH,
"ENDPOINT_BASE_URL": endpoint_url,
"ENDPOINT_MODEL": ENDPOINT_MODEL,
"ENDPOINT_WARMUP_TIME": str(ENDPOINT_WARMUP_TIME),
"RESULT_PREFIX": RESULT_PREFIX,
},
encrypted_ports=[VNC_PORT],
timeout=SANDBOX_TIMEOUT,
readiness_probe=modal.Probe.with_exec("test", "-f", DESKTOP_READY_PATH),
)
remaining = max(1, int(deadline - time.monotonic()))
await sandbox.wait_until_ready.aio(timeout=remaining)
remaining = max(1, int(deadline - time.monotonic()))
tunnel = (await sandbox.tunnels.aio(timeout=remaining))[VNC_PORT]
watch_url = (
f"{tunnel.url.rstrip('/')}/vnc.html?autoconnect=1&resize=scale&reconnect=1"
)
while not is_server_up(watch_url):
if time.monotonic() >= deadline:
raise TimeoutError("Timed out waiting for noVNC.")
await asyncio.sleep(1)
return {"sandbox_id": sandbox.object_id, "watch_url": watch_url}
except Exception:
if sandbox is not None:
await sandbox.terminate.aio()
raise
finally:
if sandbox is not None:
await sandbox.detach.aio()
```
## Serve the web UI
The code below is a simple FastAPI app that serves the web UI and the API.
```python
web_app = fastapi.FastAPI()
@web_app.get("/")
async def index():
return HTMLResponse(Path(PAGE_REMOTE).read_text())
@web_app.post("/api/session")
async def create_session(body: dict):
task = str(body.get("task", "")).strip()
if not task:
raise fastapi.HTTPException(status_code=400, detail="Task must not be empty.")
try:
return await start_session.remote.aio(task)
except Exception as exc:
raise fastapi.HTTPException(500, f"Starting Sandbox: {exc}") from exc
@web_app.get("/api/session/{sandbox_id}")
async def session_status(sandbox_id: str):
try:
sandbox = await modal.Sandbox.from_id.aio(sandbox_id)
except modal.exception.NotFoundError as exc:
raise fastapi.HTTPException(404, "Session not found.") from exc
try:
returncode = await sandbox.poll.aio()
if returncode is None:
return {"state": "running"}
stdout = await sandbox.stdout.read.aio()
stderr = await sandbox.stderr.read.aio()
finally:
await sandbox.detach.aio()
if returncode == 0:
result = None
for line in reversed(stdout.splitlines()):
if line.startswith(RESULT_PREFIX):
result = json.loads(line.removeprefix(RESULT_PREFIX))
break
if result is None:
result = "Agent finished without a result."
return {"state": "succeeded", "result": result}
message = (stderr or stdout).strip()[-4000:]
return {
"state": "failed",
"result": message or f"Agent exited with code {returncode}.",
}
@app.function(image=web_image)
@modal.concurrent(max_inputs=100)
@modal.asgi_app()
def web():
return web_app
```
## Test the session API
We can test this example programmatically without the web UI.
The entrypoint below hits `POST /api/session` on the ephemeral web App,
asserts the Sandbox and noVNC URL came back,
checks that `GET /api/session/{id}` reports a live session, and
terminates the Sandbox.
```python
@app.local_entrypoint()
def test_session(
task: str = "Open https://example.com and report the page title in one line.",
):
url: str | None = web.get_web_url()
if not url:
raise RuntimeError("web App has no URL.")
print(f"web url: {url}")
payload = json.dumps({"task": task}).encode()
request = urllib.request.Request(
f"{url.rstrip('/')}/api/session",
data=payload,
headers={"Content-Type": "application/json"},
method="POST",
)
with urllib.request.urlopen(
request, timeout=SESSION_START_TIMEOUT + 60
) as response:
session = json.loads(response.read().decode())
sandbox_id = session.get("sandbox_id")
watch_url = session.get("watch_url")
if not sandbox_id or not watch_url:
raise RuntimeError(f"Session response missing fields: {session}")
print(f"sandbox_id={sandbox_id}")
print(f"watch_url={watch_url}")
if not is_server_up(watch_url):
raise RuntimeError(f"noVNC not reachable at {watch_url}")
status_url = f"{url.rstrip('/')}/api/session/{sandbox_id}"
with urllib.request.urlopen(status_url, timeout=30) as response:
status = json.loads(response.read().decode())
print(f"status={status}")
if status.get("state") not in ("running", "succeeded"):
raise RuntimeError(f"Unexpected session state: {status}")
sandbox = modal.Sandbox.from_id(sandbox_id)
try:
sandbox.terminate()
finally:
sandbox.detach()
print("session start ok")
```
## Cleaning up
Each Sandbox uses the agent process as its entrypoint, so it stops when the
task finishes or its timeout expires. Startup failures terminate it
immediately, and every code path detaches its local Sandbox handle.
`test_session` also terminates the Sandbox after the API check.
Stop `modal serve` with `Ctrl-C`. The shared Endpoint scales to zero when idle,
but remains available for later prompts. Shut it down when you are done:
```bash
modal endpoint stop example-computer-use-vnc
```
### Controlnet Gradio Demos
# Play with the ControlNet demos
This example allows you to play with all 10 demonstration Gradio apps from the new and amazing ControlNet project.
ControlNet provides a minimal interface allowing users to use images to constrain StableDiffusion's generation process.
With ControlNet, users can easily condition the StableDiffusion image generation with different spatial contexts
including a depth maps, segmentation maps, scribble drawings, and keypoints!
## Imports and config preamble
```python
import importlib
import os
import pathlib
from dataclasses import dataclass, field
import modal
from fastapi import FastAPI
```
Below are the configuration objects for all **10** demos provided in the original [lllyasviel/ControlNet](https://github.com/lllyasviel/ControlNet) repo.
The demos each depend on their own custom pretrained StableDiffusion model, and these models are 5-6GB each.
We can only run one demo at a time, so this module avoids downloading the model and 'detector' dependencies for
all 10 demos and instead uses the demo configuration object to download only what's necessary for the chosen demo.
Even just limiting our dependencies setup to what's required for one demo, the resulting container image is *huge*.
```python
@dataclass(frozen=True)
class DemoApp:
"""Config object defining a ControlNet demo app's specific dependencies."""
name: str
model_files: list[str]
detector_files: list[str] = field(default_factory=list)
demos = [
DemoApp(
name="canny2image",
model_files=[
"https://huggingface.co/lllyasviel/ControlNet/resolve/main/models/control_sd15_canny.pth"
],
),
DemoApp(
name="depth2image",
model_files=[
"https://huggingface.co/lllyasviel/ControlNet/resolve/main/models/control_sd15_depth.pth"
],
detector_files=[
"https://huggingface.co/lllyasviel/ControlNet/resolve/main/annotator/ckpts/dpt_hybrid-midas-501f0c75.pt"
],
),
DemoApp(
name="fake_scribble2image",
model_files=[
"https://huggingface.co/lllyasviel/ControlNet/resolve/main/models/control_sd15_scribble.pth"
],
detector_files=[
"https://huggingface.co/lllyasviel/ControlNet/resolve/main/annotator/ckpts/network-bsds500.pth"
],
),
DemoApp(
name="hed2image",
model_files=[
"https://huggingface.co/lllyasviel/ControlNet/resolve/main/models/control_sd15_hed.pth"
],
detector_files=[
"https://huggingface.co/lllyasviel/ControlNet/resolve/main/annotator/ckpts/network-bsds500.pth"
],
),
DemoApp(
name="hough2image",
model_files=[
"https://huggingface.co/lllyasviel/ControlNet/resolve/main/models/control_sd15_mlsd.pth"
],
detector_files=[
"https://huggingface.co/lllyasviel/ControlNet/resolve/main/annotator/ckpts/mlsd_large_512_fp32.pth",
"https://huggingface.co/lllyasviel/ControlNet/resolve/main/annotator/ckpts/mlsd_tiny_512_fp32.pth",
],
),
DemoApp(
name="normal2image",
model_files=[
"https://huggingface.co/lllyasviel/ControlNet/resolve/main/models/control_sd15_normal.pth"
],
),
DemoApp(
name="pose2image",
model_files=[
"https://huggingface.co/lllyasviel/ControlNet/resolve/main/models/control_sd15_openpose.pth"
],
detector_files=[
"https://huggingface.co/lllyasviel/ControlNet/resolve/main/annotator/ckpts/body_pose_model.pth",
"https://huggingface.co/lllyasviel/ControlNet/resolve/main/annotator/ckpts/hand_pose_model.pth",
],
),
DemoApp(
name="scribble2image",
model_files=[
"https://huggingface.co/lllyasviel/ControlNet/resolve/main/models/control_sd15_scribble.pth"
],
),
DemoApp(
name="scribble2image_interactive",
model_files=[
"https://huggingface.co/lllyasviel/ControlNet/resolve/main/models/control_sd15_scribble.pth"
],
),
DemoApp(
name="seg2image",
model_files=[
"https://huggingface.co/lllyasviel/ControlNet/resolve/main/models/control_sd15_seg.pth"
],
detector_files=[
"https://huggingface.co/lllyasviel/ControlNet/resolve/main/annotator/ckpts/upernet_global_small.pth"
],
),
]
demos_map: dict[str, DemoApp] = {d.name: d for d in demos}
```
## Pick a demo, any demo
Simply by changing the `DEMO_NAME` below, you can change which ControlNet demo app is setup
and run by this Modal script.
```python
DEMO_NAME = "scribble2image" # Change this value to change the active demo app.
selected_demo = demos_map[DEMO_NAME]
```
## Setting up the dependencies
ControlNet requires *a lot* of dependencies which could be fiddly to setup manually, but Modal's programmatic
container image building Python APIs handle this complexity straightforwardly and automatically.
To run any of the 10 demo apps, we need the following:
1. a base Python 3 Linux image (we use Debian Slim)
2. a bunch of third party PyPi packages
3. `git`, so that we can download the ControlNet source code (there's no `controlnet` PyPi package)
4. some image process Linux system packages, including `ffmpeg`
5. and demo specific pre-trained model and detector `.pth` files
That's a lot! Fortunately, the code below is already written for you that stitches together a working container image
ready to produce remarkable ControlNet images.
**Note:** a ControlNet model pipeline is [now available in Huggingface's `diffusers` package](https://huggingface.co/blog/controlnet). But this does not contain the demo apps.
```python
def download_file(url: str, output_path: pathlib.Path):
import httpx
from tqdm import tqdm
with open(output_path, "wb") as download_file:
with httpx.stream("GET", url, follow_redirects=True) as response:
total = int(response.headers["Content-Length"])
with tqdm(
total=total, unit_scale=True, unit_divisor=1024, unit="B"
) as progress:
num_bytes_downloaded = response.num_bytes_downloaded
for chunk in response.iter_bytes():
download_file.write(chunk)
progress.update(
response.num_bytes_downloaded - num_bytes_downloaded
)
num_bytes_downloaded = response.num_bytes_downloaded
def download_demo_files() -> None:
"""
The ControlNet repo instructs: 'Make sure that SD models are put in "ControlNet/models".'
'ControlNet' is just the repo root, so we place in /root/models.
The ControlNet repo also instructs: 'Make sure that... detectors are put in "ControlNet/annotator/ckpts".'
'ControlNet' is just the repo root, so we place in /root/annotator/ckpts.
"""
demo = demos_map[os.environ["DEMO_NAME"]]
models_dir = pathlib.Path("/root/models")
for url in demo.model_files:
filepath = pathlib.Path(url).name
download_file(url=url, output_path=models_dir / filepath)
print(f"download complete for {filepath}")
detectors_dir = pathlib.Path("/root/annotator/ckpts")
for url in demo.detector_files:
filepath = pathlib.Path(url).name
download_file(url=url, output_path=detectors_dir / filepath)
print(f"download complete for {filepath}")
print("🎉 finished baking demo file(s) into image.")
image = (
modal.Image.debian_slim(python_version="3.10")
.uv_pip_install(
"fastapi[standard]==0.115.4",
"pydantic==2.9.1",
"starlette==0.41.2",
"gradio==3.16.2",
"albumentations==1.3.0",
"opencv-contrib-python",
"imageio==2.9.0",
"imageio-ffmpeg==0.4.2",
"pytorch-lightning==1.5.0",
"omegaconf==2.1.1",
"test-tube>=0.7.5",
"streamlit==1.12.1",
"einops==0.3.0",
"transformers==4.19.2",
"webdataset==0.2.5",
"kornia==0.6",
"open_clip_torch==2.0.2",
"invisible-watermark>=0.1.5",
"streamlit-drawable-canvas==0.8.0",
"torchmetrics==0.6.0",
"timm==0.6.12",
"addict==2.4.0",
"yapf==0.32.0",
"prettytable==3.6.0",
"safetensors==0.2.7",
"basicsr==1.4.2",
"tqdm~=4.64.1",
)
# xformers library offers performance improvement.
.uv_pip_install("xformers", pre=True)
.apt_install("git")
# Here we place the latest ControlNet repository code into /root.
# Because /root is almost empty, but not entirely empty, `git clone` won't work,
# so this `init` then `checkout` workaround is used.
.run_commands(
"cd /root && git init .",
"cd /root && git remote add --fetch origin https://github.com/lllyasviel/ControlNet.git",
"cd /root && git checkout main",
)
.apt_install("ffmpeg", "libsm6", "libxext6")
.run_function(
download_demo_files,
secrets=[modal.Secret.from_dict({"DEMO_NAME": DEMO_NAME})],
)
)
app = modal.App(name="example-controlnet-gradio-demos", image=image)
web_app = FastAPI()
```
## Serving the Gradio web UI
Each ControlNet gradio demo module exposes a `block` Gradio interface running in queue-mode,
which is initialized in module scope on import and served on `0.0.0.0`. We want the block interface object,
but the queueing and launched webserver aren't compatible with Modal's serverless Web Function interface,
so in the `import_gradio_app_blocks` function we patch out these behaviors.
```python
def import_gradio_app_blocks(demo: DemoApp):
from gradio import blocks
# The ControlNet repo demo scripts are written to be run as
# standalone scripts, and have a lot of code that executes
# in global scope on import, including the launch of a Gradio web server.
# We want Modal to control the Gradio web app serving, so we
# monkeypatch the .launch() function to be a no-op.
blocks.Blocks.launch = lambda self, server_name: print(
"launch() has been monkeypatched to do nothing."
)
# each demo app module is a file like gradio_{name}.py
module_name = f"gradio_{demo.name}"
mod = importlib.import_module(module_name)
blocks = mod.block
# disable queueing mode, which is incompatible with our Modal web app setup.
blocks.enable_queue = False
return blocks
```
Because the ControlNet gradio apps are so time and compute intensive to cold-start,
the web app function is limited to running just 1 warm container (max_containers=1).
This way, while playing with the demos we can pay the cold-start cost once and have
all web requests hit the same warm container.
Spinning up extra containers to handle additional requests would not be efficient
given the cold-start time.
We set the scaledown_window to 600 seconds so the container will be kept
running for 10 minutes after the last request, to keep the app responsive in case
of continued experimentation.
```python
@app.function(
gpu="A10G",
max_containers=1,
scaledown_window=600,
)
@modal.asgi_app()
def run():
from gradio.routes import mount_gradio_app
# mount for execution on Modal
return mount_gradio_app(
app=web_app,
blocks=import_gradio_app_blocks(demo=selected_demo),
path="/",
)
```
## Have fun!
Serve your chosen demo app with `modal serve controlnet_gradio_demos.py`. If you don't have any images ready at hand,
try one that's in the `06_gpu_and_ml/controlnet/demo_images/` folder.
StableDiffusion was already impressive enough, but ControlNet's ability to so accurately and intuitively constrain
the image generation process is sure to put a big, dumb grin on your face.
### Count Faces
# Run OpenCV face detection on an image
This example shows how you can use OpenCV on Modal to detect faces in an image. We use
the `opencv-python` package to load the image and the `opencv` library to
detect faces. The function `count_faces` takes an image as input and returns
the number of faces detected in the image.
The code below also shows how you can create wrap this function
in a simple FastAPI server to create a web interface.
```python
import os
import modal
app = modal.App("example-count-faces")
open_cv_image = (
modal.Image.debian_slim(python_version="3.11")
.apt_install("python3-opencv")
.uv_pip_install(
"fastapi[standard]==0.115.4",
"opencv-python~=4.10.0",
"numpy<2",
)
)
@app.function(image=open_cv_image)
def count_faces(image_bytes: bytes) -> int:
import cv2
import numpy as np
# Example borrowed from https://towardsdatascience.com/face-detection-in-2-minutes-using-opencv-python-90f89d7c0f81
# Load the cascade
face_cascade = cv2.CascadeClassifier(
os.path.join(cv2.data.haarcascades, "haarcascade_frontalface_default.xml")
)
# Read the input image
np_bytes = np.frombuffer(image_bytes, dtype=np.uint8)
img = cv2.imdecode(np_bytes, cv2.IMREAD_COLOR)
# Convert into grayscale
gray = cv2.cvtColor(img, cv2.COLOR_BGR2GRAY)
# Detect faces
faces = face_cascade.detectMultiScale(gray, 1.1, 4)
return len(faces)
@app.function(
image=modal.Image.debian_slim(python_version="3.11").uv_pip_install("inflect")
)
@modal.asgi_app()
def web():
import inflect
from fastapi import FastAPI, File, HTTPException, UploadFile
from fastapi.responses import HTMLResponse
app = FastAPI()
@app.get("/", response_class=HTMLResponse)
async def index():
"""
Render an HTML form for file upload.
"""
return """
Face Counter
Upload an Image to Count Faces
"""
@app.post("/process", response_class=HTMLResponse)
async def process(file: UploadFile = File(...)):
"""
Process the uploaded image and return the number of faces detected.
"""
try:
file_content = await file.read()
num_faces = await count_faces.remote.aio(file_content)
return f"""
Face Counter Result
{inflect.engine().number_to_words(num_faces).title()} {"Face" if num_faces == 1 else "Faces"} Detected
{"😀" * num_faces}
Go back
"""
except Exception as e:
raise HTTPException(
status_code=400, detail=f"Error processing image: {str(e)}"
)
return app
```
### Cron Datasette
# Publish interactive datasets with Datasette

Build and deploy an interactive movie database that automatically updates daily with the latest IMDb data.
This example shows how to serve a Datasette application on Modal with millions of movie and TV show records.
Try it out for yourself [here](https://modal-labs-examples--example-cron-datasette-ui.modal.run).
Along the way, we will learn how to use the following Modal features:
* [Volumes](https://modal.com/docs/guide/volumes): a persisted volume lets us store and grow the published dataset over time.
* [Scheduled functions](https://modal.com/docs/guide/cron): the underlying dataset is refreshed daily, so we schedule a function to run daily.
* [Web Functions](https://modal.com/docs/guide/webhooks): exposes the Datasette application for web browser interaction and API requests.
## Basic setup
Let's get started writing code.
For the Modal container image we need a few Python packages.
```python
import asyncio
import gzip
import pathlib
import shutil
import tempfile
from datetime import datetime
from urllib.request import urlretrieve
import modal
app = modal.App("example-cron-datasette")
cron_image = modal.Image.debian_slim(python_version="3.12").uv_pip_install(
"datasette==0.65.1", "sqlite-utils==3.38", "tqdm~=4.67.1", "setuptools<80"
)
```
## Persistent dataset storage
To separate database creation and maintenance from serving, we'll need the underlying
database file to be stored persistently. To achieve this we use a
[Volume](https://modal.com/docs/guide/volumes).
```python
volume = modal.Volume.from_name(
"example-cron-datasette-cache-vol", create_if_missing=True
)
DB_FILENAME = "imdb.db"
VOLUME_DIR = "/cache-vol"
DATA_DIR = pathlib.Path(VOLUME_DIR, "imdb-data")
DB_PATH = pathlib.Path(VOLUME_DIR, DB_FILENAME)
```
## Getting a dataset
[IMDb Datasets](https://datasets.imdbws.com/) are available publicly and are updated daily.
We will download the title.basics.tsv.gz file which contains basic information about all titles (movies, TV shows, etc.).
Since we are serving an interactive database which updates daily, we will download the files into a temporary directory and then move them to the volume to prevent downtime.
```python
BASE_URL = "https://datasets.imdbws.com/"
IMDB_FILES = [
"title.basics.tsv.gz",
]
@app.function(
image=cron_image,
volumes={VOLUME_DIR: volume},
retries=2,
timeout=1800,
)
def download_dataset(force_refresh=False):
"""Download IMDb dataset files."""
if DATA_DIR.exists() and not force_refresh:
print(
f"Dataset already present and force_refresh={force_refresh}. Skipping download."
)
return
TEMP_DATA_DIR = pathlib.Path(VOLUME_DIR, "imdb-data-temp")
if TEMP_DATA_DIR.exists():
shutil.rmtree(TEMP_DATA_DIR)
TEMP_DATA_DIR.mkdir(parents=True, exist_ok=True)
print("Downloading IMDb dataset...")
try:
for filename in IMDB_FILES:
print(f"Downloading {filename}...")
url = BASE_URL + filename
output_path = TEMP_DATA_DIR / filename
urlretrieve(url, output_path)
print(f"Successfully downloaded {filename}")
if DATA_DIR.exists():
# move the current data to a backup location
OLD_DATA_DIR = pathlib.Path(VOLUME_DIR, "imdb-data-old")
if OLD_DATA_DIR.exists():
shutil.rmtree(OLD_DATA_DIR)
shutil.move(DATA_DIR, OLD_DATA_DIR)
# move the new data into place
shutil.move(TEMP_DATA_DIR, DATA_DIR)
# clean up the old data
shutil.rmtree(OLD_DATA_DIR)
else:
shutil.move(TEMP_DATA_DIR, DATA_DIR)
volume.commit()
print("Finished downloading dataset.")
except Exception as e:
print(f"Error during download: {e}")
if TEMP_DATA_DIR.exists():
shutil.rmtree(TEMP_DATA_DIR)
raise
```
## Data processing
This dataset is no swamp, but a bit of data cleaning is still in order.
The following function reads a .tsv file, cleans the data and yields batches of records.
```python
def parse_tsv_file(filepath, batch_size=50000, filter_year=None):
"""Parse a gzipped TSV file and yield batches of records."""
import csv
with gzip.open(filepath, "rt", encoding="utf-8") as gz_file:
reader = csv.DictReader(gz_file, delimiter="\t")
batch = []
total_processed = 0
for row in reader:
# map missing values to None
row = {k: (None if v == "\\N" else v) for k, v in row.items()}
# remove nsfw data
if row.get("isAdult") == "1":
continue
if filter_year:
start_year = int(row.get("startYear", 0) or 0)
if start_year < filter_year:
continue
batch.append(row)
total_processed += 1
if len(batch) >= batch_size:
yield batch
batch = []
# Yield any remaining records
if batch:
yield batch
print(f"Finished processing {total_processed:,} titles.")
```
## Inserting into SQLite
With the TSV processing out of the way, we’re ready to create a SQLite database and feed data into it.
Importantly, the `prep_db` function mounts the same volume used by `download_dataset`, and rows are batch inserted with progress logged after each batch,
as the full IMDb dataset has millions of rows and does take some time to be fully inserted.
A more sophisticated implementation would only load new data instead of performing a full refresh,
but we’re keeping things simple for this example!
We will also create indexes for the titles table to speed up queries.
```python
@app.function(
image=cron_image,
volumes={VOLUME_DIR: volume},
timeout=900,
)
def prep_db(filter_year=None):
"""Process IMDb data files and create SQLite database."""
import sqlite_utils
import tqdm
volume.reload()
# Create database in a temporary directory first
with tempfile.TemporaryDirectory() as tmpdir:
tmpdir_path = pathlib.Path(tmpdir)
tmp_db_path = tmpdir_path / DB_FILENAME
db = sqlite_utils.Database(tmp_db_path)
# Process title.basics.tsv.gz
titles_file = DATA_DIR / "title.basics.tsv.gz"
if titles_file.exists():
titles_table = db["titles"]
batch_count = 0
total_processed = 0
with tqdm.tqdm(desc="Processing titles", unit="batch", leave=True) as pbar:
for i, batch in enumerate(
parse_tsv_file(
titles_file, batch_size=50000, filter_year=filter_year
)
):
titles_table.insert_all(batch, batch_size=50000, truncate=(i == 0))
batch_count += len(batch)
total_processed += len(batch)
pbar.update(1)
pbar.set_postfix({"titles": f"{total_processed:,}"})
print(f"Total titles in database: {batch_count:,}")
# Create indexes for titles so we can query the database faster
print("Creating indexes...")
titles_table.create_index(["tconst"], if_not_exists=True, unique=True)
titles_table.create_index(["primaryTitle"], if_not_exists=True)
titles_table.create_index(["titleType"], if_not_exists=True)
titles_table.create_index(["startYear"], if_not_exists=True)
titles_table.create_index(["genres"], if_not_exists=True)
print("Created indexes for titles table")
db.close()
# Copy the database to the volume
DB_PATH.parent.mkdir(parents=True, exist_ok=True)
shutil.copyfile(tmp_db_path, DB_PATH)
print("Syncing DB with volume.")
volume.commit()
print("Volume changes committed.")
```
## Keep it fresh
IMDb updates their data daily, so we set up
a [scheduled](https://modal.com/docs/guide/cron) function to automatically refresh the database
every 24 hours.
```python
@app.function(schedule=modal.Period(hours=24), timeout=4000)
def refresh_db():
"""Scheduled function to refresh the database daily."""
print(f"Running scheduled refresh at {datetime.now()}")
download_dataset.remote(force_refresh=True)
prep_db.remote()
```
## Web Function
Hooking up the SQLite database to a Modal Function is as simple as it gets.
The Modal `@asgi_app` decorator wraps a few lines of code: one `import` and a couple more
that instantiate the `Datasette` instance and return its app server.
First, let's define a metadata object for the database.
This will be used to configure Datasette to display a custom UI with some pre-defined queries.
```python
columns = {
"tconst": "Unique identifier",
"titleType": "Type (movie, tvSeries, short, etc.)",
"primaryTitle": "Main title",
"originalTitle": "Original language title",
"startYear": "Release year",
"endYear": "End year (for TV series)",
"runtimeMinutes": "Runtime in minutes",
"genres": "Comma-separated genres",
}
queries = {
"movies_2024": {
"sql": """
SELECT
primaryTitle as title,
genres,
runtimeMinutes as runtime
FROM titles
WHERE titleType = 'movie'
AND startYear = 2024
ORDER BY primaryTitle
LIMIT 100
""",
"title": "Movies Released in 2024",
},
"longest_movies": {
"sql": """
SELECT
primaryTitle as title,
startYear as year,
runtimeMinutes as runtime,
genres
FROM titles
WHERE titleType = 'movie'
AND runtimeMinutes IS NOT NULL
AND runtimeMinutes > 180
ORDER BY runtimeMinutes DESC
LIMIT 50
""",
"title": "Longest Movies (3+ hours)",
},
"genre_breakdown": {
"sql": """
SELECT
genres,
COUNT(*) as count
FROM titles
WHERE titleType = 'movie'
AND genres IS NOT NULL
GROUP BY genres
ORDER BY count DESC
LIMIT 25
""",
"title": "Popular Genres",
},
}
metadata = {
"title": "IMDb Database Explorer",
"description": "Explore IMDb movie and TV show data",
"databases": {
"imdb": {
"tables": {
"titles": {
"description": "Basic information about all titles (movies, TV shows, etc.)",
"columns": columns,
}
},
"queries": {
"movies_2024": queries["movies_2024"],
"longest_movies": queries["longest_movies"],
"genre_breakdown": queries["genre_breakdown"],
},
}
},
}
```
Now we can define the Web Function that will serve the Datasette application
```python
@app.function(
image=cron_image,
volumes={VOLUME_DIR: volume},
)
@modal.concurrent(max_inputs=16)
@modal.asgi_app()
def ui():
"""Web Function backing the Datasette UI."""
from datasette.app import Datasette
ds = Datasette(
files=[DB_PATH],
settings={
"sql_time_limit_ms": 60000,
"max_returned_rows": 10000,
"allow_download": True,
"facet_time_limit_ms": 5000,
"allow_facet": True,
},
metadata=metadata,
)
asyncio.run(ds.invoke_startup())
return ds.app()
```
## Publishing to the web
Run this script using `modal run cron_datasette.py` and it will create the database under 5 minutes!
If you would like to force a refresh of the dataset, you can use:
`modal run cron_datasette.py --force-refresh`
If you would like to filter the data to be after a specific year, you can use:
`modal run cron_datasette.py --filter-year year`
You can then use `modal serve cron_datasette.py` to create a short-lived web URL
that exists until you terminate the script.
When publishing the interactive Datasette app you'll want to create a persistent URL.
Just run `modal deploy cron_datasette.py` and your app will be deployed in seconds!
```python
@app.local_entrypoint()
def run(force_refresh: bool = False, filter_year: int = None):
if force_refresh:
print("Force refreshing the dataset...")
if filter_year:
print(f"Filtering data to be after {filter_year}")
print("Downloading IMDb dataset...")
download_dataset.remote(force_refresh=force_refresh)
print("Processing data and creating SQLite DB...")
prep_db.remote(filter_year=filter_year)
print("\nDatabase ready! You can now run:")
print(" modal serve cron_datasette.py # For development")
print(" modal deploy cron_datasette.py # For production deployment")
```
You can explore the data at the [deployed Web Function](https://modal-labs-examples--example-cron-datasette-ui.modal.run).
### Db To Sheet
# Write to Google Sheets from Postgres
In this tutorial, we'll show how to use Modal to schedule a daily report in a spreadsheet on Google Sheets
that combines data from a PostgreSQL database with data from an external API.
In particular, we'll extract the city of each user from the database, look up the current weather in that city,
and then build a count/histogram of how many users are experiencing each type of weather.
## Entering credentials
We begin by setting up some credentials that we'll need in order to access our database and output
spreadsheet. To do that in a secure manner, we log in to our Modal account on the web and go to
the [Secrets](https://modal.com/secrets) section.
### Database
First we will enter our database credentials. The easiest way to do this is to click **New
secret** and select the **Postgres compatible** Secret preset and fill in the requested
information. Then we press **Next** and name our Secret `postgres-secret` and click **Create**.
### Google Sheets/GCP
We'll now add another Secret for Google Sheets access through Google Cloud Platform. Click **New
secret** and select the Google Sheets preset.
In order to access the Google Sheets API, we'll need to create a *Service Account* in Google Cloud
Platform. You can skip this step if you already have a Service Account json file.
1. Sign up to Google Cloud Platform or log in if you haven't
([https://cloud.google.com/](https://cloud.google.com/)).
2. Go to [https://console.cloud.google.com/](https://console.cloud.google.com/).
3. In the navigation pane on the left, go to **IAM & Admin** > **Service Accounts**.
4. Click the **+ CREATE SERVICE ACCOUNT** button.
5. Give the service account a suitable name, like "sheet-access-bot". Click **Done**. You don't
have to grant it any specific access privileges at this time.
6. Click your new service account in the list view that appears and navigate to the **Keys**
section.
7. Click **Add key** and choose **Create new key**. Use the **JSON** key type and confirm by
clicking **Create**.
8. A json key file should be downloaded to your computer at this point. Copy the contents of that
file and use it as the value for the `SERVICE_ACCOUNT_JSON` field in your new secret.
We'll name this other Secret `"gsheets-secret"`.
Now you can access the values of your Secrets from Modal Functions that you annotate with the
corresponding `modal.Secret`s, e.g.:
```python
import os
import modal
app = modal.App("example-db-to-sheet")
@app.function(secrets=[modal.Secret.from_name("postgres-secret")])
def show_host():
# automatically filled from the specified secret
print("Host is " + os.environ["PGHOST"])
```
Because these Secrets are Python objects, you can construct and manipulate them in your code.
We'll do that below by defining a variable to hold our Secret for accessing Postgres
You can additionally specify
```python
pg_secret = modal.Secret.from_name(
"postgres-secret",
required_keys=["PGHOST", "PGPORT", "PGDATABASE", "PGUSER", "PGPASSWORD"],
)
```
In order to connect to the database, we'll use the `psycopg2` Python package. To make it available
to your Modal Function you need to supply it with an `image` argument that tells Modal how to
build the container image that contains that package. We'll base it off of the `Image.debian_slim` base
image that's built into Modal, and make sure to install the required binary packages as well as
the `psycopg2` package itself:
```python
pg_image = (
modal.Image.debian_slim(python_version="3.11")
.apt_install("libpq-dev")
.uv_pip_install("psycopg2~=2.9.9")
)
```
Since the default keynames for a **Postgres compatible** secret correspond to the environment
variables that `psycopg2` looks for, we can now easily connect to the database even without
explicit credentials in your code. We'll create a simple function that queries the city for each
user in the `users` table.
```python
@app.function(image=pg_image, secrets=[pg_secret])
def get_db_rows(verbose=True):
import psycopg2
conn = psycopg2.connect() # no explicit credentials needed
cur = conn.cursor()
cur.execute("SELECT city FROM users")
results = [row[0] for row in cur.fetchall()]
if verbose:
print(results)
return results
```
Note that we import `psycopg2` inside our function instead of the global scope. This allows us to
run this Modal Function even from an environment where `psycopg2` is not installed. We can test run
this function using the `modal run` shell command: `modal run db_to_sheet.py::app.get_db_rows`.
To run this function, make sure there is a table called `users` in your database with a column called `city`.
You can populate the table with some example data using the following SQL commands:
```sql
CREATE TABLE users (city TEXT);
INSERT INTO users VALUES ('Stockholm,,Sweden');
INSERT INTO users VALUES ('New York,NY,USA');
INSERT INTO users VALUES ('Tokyo,,Japan');
```
## Applying Python logic
For each row in our source data we'll run an online lookup of the current weather using the
[http://openweathermap.org](http://openweathermap.org) API. To do this, we'll add the API key to
another Modal Secret. We'll use a custom secret called "weather-secret" with the key
`OPENWEATHER_API_KEY` containing our API key for OpenWeatherMap.
```python
requests_image = modal.Image.debian_slim(python_version="3.11").uv_pip_install(
"requests~=2.31.0"
)
@app.function(
image=requests_image,
secrets=[
modal.Secret.from_name("weather-secret", required_keys=["OPENWEATHER_API_KEY"])
],
)
def city_weather(city):
import requests
url = "https://api.openweathermap.org/data/2.5/weather"
params = {"q": city, "appid": os.environ["OPENWEATHER_API_KEY"]}
response = requests.get(url, params=params)
weather_label = response.json()["weather"][0]["main"]
return weather_label
```
We'll make use of Modal's built-in `function.map` method to create our report. `function.map`
makes it really easy to parallelize work by executing a Function on every element in a sequence of
data. For this example we'll just do a simple count of rows per weather type --
answering the question "how many of our users are experiencing each type of weather?".
```python
from collections import Counter
@app.function()
def create_report(cities):
# run city_weather for each city in parallel
user_weather = city_weather.map(cities)
count_users_by_weather = Counter(user_weather).items()
return count_users_by_weather
```
Let's try to run this! To make it simple to trigger the function with some
predefined input data, we create a "local entrypoint" that can be
run from the command line with
```bash
modal run db_to_sheet.py
```
```python
@app.local_entrypoint()
def main():
cities = [
"Stockholm,,Sweden",
"New York,NY,USA",
"Tokyo,,Japan",
]
print(create_report.remote(cities))
```
Running the local entrypoint using `modal run db_to_sheet.py` should print something like:
`dict_items([('Clouds', 3)])`.
Note that since this file only has a single app, and the app has only one local entrypoint
we only have to specify the file to run it - the function/entrypoint is inferred.
In this case the logic is quite simple, but in a real world context you could have applied a
machine learning model or any other tool you could build into a container to transform the data.
## Sending output to a Google Sheet
We'll set up a new Google Sheet to send our report to. Using the "Sharing" dialog in Google
Sheets, share the document to the service account's email address (the value of the `client_email` field in the json file)
and make the service account an editor of the document.
You may also need to enable the Google Sheets API for your project in the Google Cloud Platform console.
If so, the URL will be printed inside the message of a 403 Forbidden error when you run the function.
It begins with https://console.developers.google.com/apis/api/sheets.googleapis.com/overview.
Lastly, we need to point our code to the correct Google Sheet. We'll need the *key* of the document.
You can find the key in the URL of the Google Sheet. It appears after the `/d/` in the URL, like:
`https://docs.google.com/spreadsheets/d/1wOktal......IJR77jD8Do`.
We'll make use of the `pygsheets` python package to authenticate with
Google Sheets and then update the spreadsheet with information from the report we just created:
```python
pygsheets_image = modal.Image.debian_slim(python_version="3.11").uv_pip_install(
"pygsheets~=2.0.6"
)
@app.function(
image=pygsheets_image,
secrets=[
modal.Secret.from_name("gsheets-secret", required_keys=["SERVICE_ACCOUNT_JSON"])
],
)
def update_sheet_report(rows):
import pygsheets
gc = pygsheets.authorize(service_account_env_var="SERVICE_ACCOUNT_JSON")
document_key = "1JxhGsht4wltyPFFOd2hP0eIv6lxZ5pVxJN_ZwNT-l3c"
sh = gc.open_by_key(document_key)
worksheet = sh.sheet1
worksheet.clear("A2")
worksheet.update_values("A2", [list(row) for row in rows])
```
At this point, we have everything we need in order to run the full program. We can put it all together in
another Modal Function, and add a [`schedule`](https://modal.com/docs/guide/cron) argument so it runs every day automatically:
```python
@app.function(schedule=modal.Period(days=1))
def db_to_sheet():
rows = get_db_rows.remote()
report = create_report.remote(rows)
update_sheet_report.remote(report)
print("Updated sheet with new weather distribution")
for weather, count in report:
print(f"{weather}: {count}")
```
This entire app can now be deployed using `modal deploy db_to_sheet.py`. The [apps page](https://modal.com/apps)
shows our cron job's execution history and lets you navigate to each invocation's logs.
To trigger a manual run from your local code during development, you can also trigger this function using the cli:
`modal run db_to_sheet.py::db_to_sheet`
Note that all of the `@app.function()` annotated functions above run remotely in isolated containers that are specified per
function, but they are called as seamlessly as if we were using regular Python functions. This is a simple
showcase of how you can mix and match Modal Functions that use different environments and have them feed
into each other or even call each other as if they were all functions in the same local program.
### Dbt Duckdb
# Build your own data warehouse with DuckDB, DBT, and Modal
This example contains a minimal but capable [data warehouse](https://en.wikipedia.org/wiki/Data_warehouse).
It's comprised of the following:
- [DuckDB](https://duckdb.org) as the warehouse's [OLAP](https://en.wikipedia.org/wiki/Online_analytical_processing) database engine
- [AWS S3](https://aws.amazon.com/s3/) as the data storage provider
- [DBT](https://docs.getdbt.com/docs/introduction) as the data transformation tool
Meet your new serverless cloud data warehouse, powered by Modal!
## Configure Modal, S3, and DBT
The only thing in the source code that you must update is the S3 bucket name.
AWS S3 bucket names are globally unique, and the one in this source is used by us to host this example.
Update the `BUCKET_NAME` variable below and also any references to the original value
within `sample_proj_duckdb_s3/models/`. The AWS IAM policy below also includes the bucket
name and that must be updated.
```python
from pathlib import Path
import modal
BUCKET_NAME = "modal-example-dbt-duckdb-s3"
LOCAL_DBT_PROJECT = ( # local path
Path(__file__).parent / "sample_proj_duckdb_s3"
)
PROJ_PATH = "/root/dbt" # remote paths
PROFILES_PATH = "/root/dbt_profile"
TARGET_PATH = "/root/target"
```
Most of the DBT code and configuration is taken directly from the classic
[Jaffle Shop](https://github.com/dbt-labs/jaffle_shop) demo and modified to support
using `dbt-duckdb` with an S3 bucket.
The DBT `profiles.yml` configuration is taken from
[the `dbt-duckdb` docs](https://github.com/jwills/dbt-duckdb#configuring-your-profile).
We also define the environment our application will run in --
a container image, as in Docker.
See [this guide](https://modal.com/docs/guide/custom-container) for details.
```python
dbt_image = ( # start from a slim Linux image
modal.Image.debian_slim(python_version="3.11")
.uv_pip_install( # install python packages
"boto3~=1.34", # aws client sdk
"dbt-duckdb~=1.8.1", # dbt and duckdb and a connector
"pandas~=2.2.2", # dataframes
"pyarrow~=16.1.0", # columnar data lib
"fastapi[standard]~=0.115.4", # web app
)
.env( # configure DBT environment variables
{
"DBT_PROJECT_DIR": PROJ_PATH,
"DBT_PROFILES_DIR": PROFILES_PATH,
"DBT_TARGET_PATH": TARGET_PATH,
}
)
# Here we add all local code and configuration into the Modal Image
# so that it will be available when we run DBT on Modal.
.add_local_dir(LOCAL_DBT_PROJECT, remote_path=PROJ_PATH)
.add_local_file(
LOCAL_DBT_PROJECT / "profiles.yml",
remote_path=f"{PROFILES_PATH}/profiles.yml",
)
)
app = modal.App(name="example-dbt-duckdb", image=dbt_image)
dbt_target = modal.Volume.from_name("dbt-target-vol", create_if_missing=True)
```
We'll also need to authenticate with AWS to store data in S3.
```python
s3_secret = modal.Secret.from_name(
"modal-examples-aws-user",
required_keys=["AWS_ACCESS_KEY_ID", "AWS_SECRET_ACCESS_KEY", "AWS_REGION"],
)
```
Create this Secret using the "AWS" template from the [Secrets dashboard](https://modal.com/secrets).
Below we will use the provided credentials in a Modal Function to create an S3 bucket and
populate it with `.parquet` data, so be sure to provide credentials for a user
with permission to create S3 buckets and read & write data from them.
The policy required for this example is the following.
Not that you *must* update the bucket name listed in the policy to your
own bucket name.
```json
{
"Statement": [
{
"Action": "s3:*",
"Effect": "Allow",
"Resource": [
"arn:aws:s3:::modal-example-dbt-duckdb-s3/*",
"arn:aws:s3:::modal-example-dbt-duckdb-s3"
],
"Sid": "duckdbs3access"
}
],
"Version": "2012-10-17"
}
```
## Upload seed data
In order to provide source data for DBT to ingest and transform,
we have the below `create_source_data` function which creates an AWS S3 bucket and
populates it with Parquet files based off the CSV data in the `seeds/` directory.
You can kick it off by running this script on Modal:
```bash
modal run dbt_duckdb.py
```
This script also runs the full data warehouse setup, and the whole process takes a minute or two.
We'll walk through the rest of the steps below. See the `app.local_entrypoint`
below for details.
Note that this is not the typical way that `seeds/` data is used, but it's useful for this
demonstration. See [the DBT docs](https://docs.getdbt.com/docs/build/seeds) for more info.
```python
@app.function(
secrets=[s3_secret],
)
def create_source_data():
import boto3
import pandas as pd
from botocore.exceptions import ClientError
s3_client = boto3.client("s3")
s3_client.create_bucket(Bucket=BUCKET_NAME)
for seed_csv_path in Path(PROJ_PATH, "seeds").glob("*.csv"):
print(f"Found seed file {seed_csv_path}")
name = seed_csv_path.stem
parquet_filename = f"{name}.parquet"
object_key = f"sources/{parquet_filename}"
try:
s3_client.head_object(Bucket=BUCKET_NAME, Key=object_key)
print(
f"File '{object_key}' already exists in bucket '{BUCKET_NAME}'. Skipping."
)
except ClientError:
df = pd.read_csv(seed_csv_path)
df.to_parquet(parquet_filename)
print(f"Uploading '{object_key}' to S3 bucket '{BUCKET_NAME}'")
s3_client.upload_file(parquet_filename, BUCKET_NAME, object_key)
print(f"File '{object_key}' uploaded successfully.")
```
## Run DBT on the cloud with Modal
Modal makes it easy to run Python code in the cloud.
And DBT is a Python tool, so it's easy to run DBT with Modal:
below, we import the `dbt` library's `dbtRunner` to pass commands from our
Python code, running on Modal, the same way we'd pass commands on a command line.
Note that this Modal Function has access to our AWS S3 Secret,
the local files associated with our DBT project and profiles,
and a remote Modal Volume that acts as a distributed file system.
```python
@app.function(
secrets=[s3_secret],
volumes={TARGET_PATH: dbt_target},
)
def run(command: str) -> None:
from dbt.cli.main import dbtRunner
res = dbtRunner().invoke(command.split(" "))
if res.exception:
print(res.exception)
```
You can run this Modal Function from the command line with
`modal run dbt_duckdb.py::run --command run`
A successful run will log something like the following:
```
03:41:04 Running with dbt=1.5.0
03:41:05 Found 5 models, 8 tests, 0 snapshots, 0 analyses, 313 macros, 0 operations, 3 seed files, 3 sources, 0 exposures, 0 metrics, 0 groups
03:41:05
03:41:06 Concurrency: 1 threads (target='modal')
03:41:06
03:41:06 1 of 5 START sql table model main.stg_customers ................................ [RUN]
03:41:06 1 of 5 OK created sql table model main.stg_customers ........................... [OK in 0.45s]
03:41:06 2 of 5 START sql table model main.stg_orders ................................... [RUN]
03:41:06 2 of 5 OK created sql table model main.stg_orders .............................. [OK in 0.34s]
03:41:06 3 of 5 START sql table model main.stg_payments ................................. [RUN]
03:41:07 3 of 5 OK created sql table model main.stg_payments ............................ [OK in 0.36s]
03:41:07 4 of 5 START sql external model main.customers ................................. [RUN]
03:41:07 4 of 5 OK created sql external model main.customers ............................ [OK in 0.72s]
03:41:07 5 of 5 START sql table model main.orders ....................................... [RUN]
03:41:08 5 of 5 OK created sql table model main.orders .................................. [OK in 0.22s]
03:41:08
03:41:08 Finished running 4 table models, 1 external model in 0 hours 0 minutes and 3.15 seconds (3.15s).
03:41:08 Completed successfully
03:41:08
03:41:08 Done. PASS=5 WARN=0 ERROR=0 SKIP=0 TOTAL=5
```
Look for the `'materialized='external'` DBT config in the SQL templates
to see how `dbt-duckdb` is able to write back the transformed data to AWS S3!
After running the `run` command and seeing it succeed, check what's contained
under the bucket's `out/` key prefix. You'll see that DBT has run the transformations
defined in `sample_proj_duckdb_s3/models/` and produced output `.parquet` files.
## Serve fresh data documentation with FastAPI and Modal
DBT also automatically generates [rich, interactive data docs](https://docs.getdbt.com/docs/collaborate/explore-projects).
You can serve these docs on Modal.
Just define a simple [FastAPI](https://fastapi.tiangolo.com/) app:
```python
@app.function(volumes={TARGET_PATH: dbt_target})
@modal.concurrent(max_inputs=100)
@modal.asgi_app() # wrap a function that returns a FastAPI app in this decorator to host on Modal
def serve_dbt_docs():
import fastapi
from fastapi.staticfiles import StaticFiles
web_app = fastapi.FastAPI()
web_app.mount(
"/",
StaticFiles( # dbt docs are automatically generated and sitting in the Volume
directory=TARGET_PATH, html=True
),
name="static",
)
return web_app
```
And deploy that app to Modal with
```bash
modal deploy dbt_duckdb.py
# ...
# Created web function serve_dbt_docs =>
```
If you navigate to the output URL, you should see something like
[](https://modal-labs-examples--example-dbt-duckdb-serve-dbt-docs.modal.run)
You can also check out our instance of the docs [here](https://modal-labs-examples--example-dbt-duckdb-serve-dbt-docs.modal.run).
The app will be served "serverlessly" -- it will automatically scale up or down
during periods of increased or decreased usage, and you won't be charged at all
when it has scaled to zero.
## Schedule daily updates
The following `daily_build` function [runs on a schedule](https://modal.com/docs/guide/cron)
to keep the DuckDB data warehouse up-to-date. It is also deployed by the same `modal deploy` command for the docs app.
The source data for this warehouse is static,
so the daily executions don't really "update" anything, just re-build. But this example could be extended
to have sources which continually provide new data across time.
It will also generate the DBT docs daily to keep them fresh.
```python
@app.function(
schedule=modal.Period(days=1),
secrets=[s3_secret],
volumes={TARGET_PATH: dbt_target},
)
def daily_build() -> None:
run.remote("build")
run.remote("docs generate")
@app.local_entrypoint()
def main():
create_source_data.remote()
run.remote("run")
daily_build.remote()
```
### Deepseek V4
# Serve DeepSeek V4 Pro on Modal with SGLang
The DeepSeek V4 Pro weights are delivered in mixed MXFP4 and run through SGLang's
`flashinfer_mxfp4` MoE runner backend on Blackwell, with EAGLE speculative decoding
for low/moderate concurrency time-per-output-token.
```python
import asyncio
import json
import os
import subprocess
import time
from pathlib import Path
import aiohttp
import modal
here = Path(__file__).parent
```
## Set up the container image
We use the `deepseek-v4-blackwell` tag of the SGLang image, which is the
Blackwell-tuned build the SGLang team recommends for V4.
```python
image = modal.Image.from_registry("lmsysorg/sglang:deepseek-v4-blackwell").entrypoint(
[] # silence chatty logs on entry
)
```
### Load model weights
We cache weights in a Modal
[Volume](https://modal.com/docs/guide/volumes) and skip the download entirely
when iterating with `dummy` weights.
```python
hf_cache_vol = modal.Volume.from_name("huggingface-cache", create_if_missing=True)
image = image.env(
{
"HF_XET_HIGH_PERFORMANCE": "1", # faster downloads
"CUDA_VISIBLE_DEVICES": "0,1,2,3,4,5,6,7",
}
)
def download_model(repo_id, revision=None):
from huggingface_hub import snapshot_download
snapshot_download(repo_id=repo_id, revision=revision)
REPO_ID = "deepseek-ai/DeepSeek-V4-Pro"
image = image.run_function(
download_model,
volumes={"/root/.cache/huggingface": hf_cache_vol},
args=(REPO_ID,),
)
```
### Configure the inference engine
We base the configuration of the engine on SGLang's
[official cookbook recipe](https://docs.sglang.io/cookbook/autoregressive/DeepSeek/DeepSeek-V4).
**Environment variables**
```python
image = image.env(
{
"SGLANG_ENABLE_SPEC_V2": "1",
"SGLANG_ENABLE_THINKING": "1",
"SGLANG_JIT_DEEPGEMM_PRECOMPILE": "0",
}
)
```
You can also send any additional SGLang env vars set locally at deploy time.
```python
def is_sglang_env_var(key):
return key.startswith("SGL_") or key.startswith("SGLANG_")
image = image.env(
{key: value for key, value in os.environ.items() if is_sglang_env_var(key)}
)
```
**YAML**
```python
default_config = """\
# General Config
host: 0.0.0.0
log-level: debug # very noisy
# Model Config
tool-call-parser: deepseekv4
reasoning-parser: deepseek-v4
trust-remote-code: true
# Memory
mem-fraction-static: 0.82
chunked-prefill-size: 4096
# MoE
moe-runner-backend: flashinfer_mxfp4
# Observability
enable-metrics: true
collect-tokens-histogram: true
# Batching
max-running-requests: 32
cuda-graph-max-bs: 32
# SpecDec (EAGLE, as recommended by the DeepSeek V4 release notes)
speculative-algorithm: EAGLE
speculative-num-steps: 3
speculative-eagle-topk: 1
speculative-num-draft-tokens: 4
# Tuning
disable-flashinfer-autotune: true
"""
local_config_path = os.environ.get("APP_LOCAL_CONFIG_PATH")
if modal.is_local():
if local_config_path is None:
local_config_path = here / "config_deepseek_v4.yaml"
if not local_config_path.exists():
local_config_path.write_text(default_config)
print(
f"Using default config from {local_config_path.relative_to(here)}:",
default_config,
sep="\n",
)
image = image.add_local_file(local_config_path, "/root/config.yaml")
```
**Command-line arguments**
```python
def _start_server() -> subprocess.Popen:
"""Start SGLang server in a subprocess"""
cmd = [
"python",
"-m",
"sglang.launch_server",
"--host",
"0.0.0.0",
"--port",
str(SGLANG_PORT),
"--model-path",
REPO_ID,
"--tp-size",
str(GPU_COUNT),
"--config",
"/root/config.yaml",
]
print("Starting SGLang server with command:")
print(*cmd)
return subprocess.Popen(" ".join(cmd), shell=True, start_new_session=True)
with image.imports():
import sglang # noqa
```
## Configure infrastructure
```python
app = modal.App("example-deepseek-v4", image=image)
```
DeepSeek V4 Pro requires Blackwell for the MXFP4 MoE path and runs at TP=8,
so we use eight B200s.
```python
GPU_TYPE = "B200"
GPU_COUNT = 8
COMPUTE_REGION = "us"
ROUTING_REGION = "us-east"
MIN_CONTAINERS = 0 # Set to 1 for production to keep a warm replica
TARGET_INPUTS = 10 # Concurrent requests per replica before scaling
```
### Define the server
```python
SGLANG_PORT = 8000
MINUTES = 60 # seconds
HOURS = 60 * MINUTES
@app.server(
image=image,
gpu=f"{GPU_TYPE}:{GPU_COUNT}",
scaledown_window=20 * MINUTES,
startup_timeout=3 * HOURS,
volumes={"/root/.cache/huggingface": hf_cache_vol},
compute_region=COMPUTE_REGION,
min_containers=MIN_CONTAINERS,
port=SGLANG_PORT,
routing_region=ROUTING_REGION,
exit_grace_period=25,
target_concurrency=TARGET_INPUTS,
unauthenticated=True,
)
class Server:
@modal.enter()
def start(self):
"""Start SGLang server process and wait for it to be ready"""
self.proc = _start_server()
wait_for_server_ready()
@modal.exit()
def stop(self):
"""Terminate the SGLang server process"""
self.proc.terminate()
self.proc.wait()
def wait_for_server_ready():
"""Wait for SGLang server to be ready"""
import requests
url = f"http://localhost:{SGLANG_PORT}/health"
print(f"Waiting for server to be ready at {url}")
while True:
try:
resp = requests.get(url, timeout=5)
if resp.status_code == 200:
print("Server is ready!")
return
except requests.exceptions.RequestException:
pass
time.sleep(5)
```
## Test the server
```bash
modal run 06_gpu_and_ml/llm-serving/deepseek_v4.py
```
```python
@app.local_entrypoint()
async def test(test_timeout=3 * HOURS, content=None, twice=True):
"""Test the model serving endpoint"""
url = await Server.get_url.aio()
system_prompt = {"role": "system", "content": "You are a helpful AI assistant."}
if content is None:
content = "Explain the transformer architecture in one paragraph."
messages = [system_prompt, {"role": "user", "content": content}]
print(f"Sending messages to {url}:", *messages, sep="\n\t")
await probe(url, messages, timeout=test_timeout)
if twice:
messages[1]["content"] = "Write five different programs in Python and Rust."
print(f"Sending second request to {url}:", *messages, sep="\n\t")
await probe(url, messages, timeout=1 * MINUTES)
async def probe(url, messages, timeout=20 * MINUTES):
"""Send request with retry logic for startup delays"""
deadline = time.time() + timeout
async with aiohttp.ClientSession(base_url=url) as session:
while time.time() < deadline:
try:
await _send_request_streaming(session, messages)
return
except asyncio.TimeoutError:
await asyncio.sleep(1)
except aiohttp.client_exceptions.ClientResponseError as e:
if e.status == 503: # Service Unavailable during startup
await asyncio.sleep(1)
continue
raise e
raise TimeoutError(f"No response from server within {timeout} seconds")
```
## Deploy the server
```bash
modal deploy 06_gpu_and_ml/llm-serving/deepseek_v4.py
```
```python
async def _send_request_streaming(
session: aiohttp.ClientSession, messages: list, timeout: int | None = None
):
"""Stream response from chat completions endpoint"""
payload = {
"messages": messages,
"stream": True,
}
headers = {"Accept": "text/event-stream"}
async with session.post(
"/v1/chat/completions", json=payload, headers=headers, timeout=timeout
) as resp:
resp.raise_for_status()
full_text = ""
async for raw in resp.content:
line = raw.decode("utf-8", errors="ignore").strip()
if not line:
continue
if not line.startswith("data:"):
continue
data = line[len("data:") :].strip()
if data == "[DONE]":
break
try:
evt = json.loads(data)
except json.JSONDecodeError:
continue
delta = (evt.get("choices") or [{}])[0].get("delta") or {}
chunk = delta.get("content") or delta.get("reasoning_content")
if chunk:
print(
chunk,
end="",
flush="\n" in chunk or "." in chunk or len(chunk) > 100,
)
full_text += chunk
print()
```
### Deepseek V4 Flash
# Deploy DeepSeek-V4-Flash with SGLang and Modal
We'll show in this example how to serve
[DeepSeek-V4-Flash](https://arxiv.org/abs/2606.19348), a Mixture-of-Experts (MoE)
model with 284B total parameters and 13B active.
It achieves comparable reasoning performance to its bigger variant,
the [DeepSeek-V4-Pro preview](https://huggingface.co/deepseek-ai/DeepSeek-V4-Pro), while being much more compact in terms of
model parameters.
## Set up the container image
An issue currently exists with the drafter incorrectly rewriting states.
While not yet merged, we apply the fix in this
[open PR](https://github.com/sgl-project/sglang/pull/32183) manually
to the container image provided by the SGLang team.
```python
import json
import shlex
import subprocess
import time
import urllib.error
import urllib.request
import modal
MINUTES = 60 # seconds
GB = 1024 # mb
PR32183_DIFF_URL = (
"https://github.com/sgl-project/sglang/compare/"
"5387e23ecd7dde4c383ae857983686e6a73bddf3..."
"22ef431215b1d8529eaebd8e8c6de9510390afaf.diff"
)
PR32183_DIFF_SHA256 = "ddd65902ba570c158f9d6783604cf7d9f2f13bf41994fcbf330a68ea1909923c"
sglang_image = (
modal.Image.from_registry("lmsysorg/sglang:nightly-dev-cu13-20260729-16a52bff")
.entrypoint([]) # silence chatty logs on container start
.run_commands(
f"curl -fsSL {PR32183_DIFF_URL} -o /tmp/pr32183.diff",
f"echo '{PR32183_DIFF_SHA256} /tmp/pr32183.diff' | sha256sum -c -",
"cd /sgl-workspace/sglang"
" && git apply --stat --exclude=test/* /tmp/pr32183.diff"
" && git apply --exclude=test/* /tmp/pr32183.diff",
"rm -rf /root/.cache/huggingface",
)
)
```
### Load and cache the model weights and kernels
Downloads from the Hugging Face Hub are much faster if you are authenticated,
so we add a Hugging Face token as a [Modal Secret](https://modal.com/docs/guide/secrets) with:
```
modal secret create huggingface-secret HF_TOKEN=hf_...
```
```python
MODEL_NAME = "deepseek-ai/DeepSeek-V4-Flash-0731"
MODEL_REVISION = "9e165c30e2704aec5d9d593cce3eebd58bbef1cb"
hf_secret = modal.Secret.from_name("huggingface-secret")
```
We don't want to load the model from the Hub every time we start the server.
So instead, we load the cached weights from a [Modal Volume](https://modal.com/docs/guide/volumes).
```python
HF_CACHE_DIR = "/root/.cache/huggingface"
hf_cache_vol = modal.Volume.from_name("huggingface-cache", create_if_missing=True)
```
We also want to turn on
[high performance downloads](https://huggingface.co/docs/hub/en/models-downloading#faster-downloads)
to fully saturate our network bandwidth.
```python
sglang_image = sglang_image.env(
{"HF_HUB_CACHE": HF_CACHE_DIR, "HF_XET_HIGH_PERFORMANCE": "1"}
)
def download_model(repo_id, revision=None):
from huggingface_hub import snapshot_download
snapshot_download(repo_id=repo_id, revision=revision, max_workers=16)
sglang_image = sglang_image.run_function(
download_model,
volumes={HF_CACHE_DIR: hf_cache_vol},
secrets=[hf_secret],
args=(MODEL_NAME, MODEL_REVISION),
timeout=4 * 60 * MINUTES,
cpu=8,
)
```
As part of the loading process, the model compiles DeepGEMM and FlashInfer kernels.
To avoid recompilation on cold-starts, we specify a path to a Volume
for the compiled kernels to live in.
```python
DG_CACHE_DIR = "/cache/deep_gemm"
FLASHINFER_CACHE_DIR = "/root/.cache/sglang/flashinfer"
dg_cache_vol = modal.Volume.from_name("sglang-deepgemm-cache", create_if_missing=True)
flashinfer_cache_vol = modal.Volume.from_name(
"flashinfer-autotune-cache", create_if_missing=True
)
sglang_image = sglang_image.env(
{
"SGLANG_DG_CACHE_DIR": DG_CACHE_DIR,
"SGLANG_JIT_DEEPGEMM_FAST_WARMUP": "1",
"TILELANG_CACHE_DIR": f"{DG_CACHE_DIR}/tilelang",
}
)
```
## Configure the infrastructure
We choose a [GPU](https://modal.com/docs/guide/gpu) to deploy our inference server onto.
Conveniently, a single B300 can hold the model weights, KV cache, and speculative decoding module.
It offers excellent price-performance and supports both 8 bit and 4 bit
[quantized floating point](https://modal.com/llm-almanac/quant-formats) operations.
```python
GPU_TYPE, GPU_COUNT = "B300", 1
CPU = 8
MEMORY = 96 * GB
```
For production-scale LLM inference services, there are generally
enough requests to justify keeping at least one replica running at all times.
This can be especially important to hit latency targets.
Here we set `min_containers` to `0` so you don't accidentally incur costs
when you're done running this example.
```python
MIN_CONTAINERS = 0 # set to 1 in production to keep a warm replica
```
Modal empowers you to decide how to scale up and down replicas
in response to load. Without autoscaling, users' requests will queue
when the server becomes overloaded or simply face higher latencies
once above a certain minimum number of concurrent requests.
```python
TARGET_INPUTS = 24
```
Modal considers a new replica ready to receive inputs once the
[`modal.enter`](https://modal.com/docs/guide/lifecycle-functions)
methods have exited and the container accepts connections.
To ensure that our server is actually ready for inputs,
we define helper functions to check and ensure the server is ready
from both within the container and a local client.
```python
STARTUP_TIMEOUT = 60 * MINUTES
def is_server_up(url: str) -> bool:
try:
with urllib.request.urlopen(url, timeout=5) as response:
return response.status == 200
except (urllib.error.URLError, OSError, TimeoutError):
return False
def wait_ready(proc: subprocess.Popen):
url = f"http://localhost:{DEFAULT_PORT}/health"
print(f"waiting for server to be ready at {url}")
while True:
if proc.poll() is not None:
raise RuntimeError(
f"SGLang exited with code {proc.returncode} before becoming healthy"
)
if is_server_up(url):
print("server is ready!")
return
time.sleep(5)
def warmup():
payload = {
"model": MODEL_NAME,
"messages": [{"role": "user", "content": "Hello, how are you?"}],
"max_tokens": 16,
}
for _ in range(3):
req = urllib.request.Request(
f"http://localhost:{DEFAULT_PORT}/v1/chat/completions",
data=json.dumps(payload).encode(),
headers={"Content-Type": "application/json"},
method="POST",
)
try:
with urllib.request.urlopen(req, timeout=5 * MINUTES) as resp:
resp.read()
except (urllib.error.URLError, OSError, TimeoutError) as exc:
print(f"warmup request failed, continuing: {exc}")
def wait_for_endpoint(url: str, timeout: int = STARTUP_TIMEOUT) -> None:
deadline = time.monotonic() + timeout
health = f"{url.rstrip('/')}/health"
while True:
if is_server_up(health):
return
if time.monotonic() >= deadline:
raise TimeoutError("Timed out waiting for the Server endpoint.")
time.sleep(5)
```
## Define the inference server
For maximum performance, we set a few bespoke enviroment variables.
```python
sglang_image = sglang_image.env(
{
"NCCL_CUMEM_ENABLE": "1",
"PYTORCH_CUDA_ALLOC_CONF": "expandable_segments:True",
"SGLANG_DEFAULT_THINKING": "false",
"SGLANG_TIMEOUT_KEEP_ALIVE": f"{5 * MINUTES}",
"TORCHINDUCTOR_COMPILE_THREADS": "1",
}
)
```
The engine flags below come from the
[SGLang DeepSeek-V4 cookbook](https://docs.sglang.io/cookbook/autoregressive/DeepSeek/DeepSeek-V4#hw=b300&variant=flash-official&quant=fp4&strategy=low-latency&nodes=single).
```python
DEFAULT_PORT = 8000
def _server_command() -> list[str]:
cmd = [
"sglang",
"serve",
"--model-path",
MODEL_NAME,
"--served-model-name",
MODEL_NAME,
"--revision",
MODEL_REVISION,
"--host",
"0.0.0.0",
"--port",
str(DEFAULT_PORT),
"--tp",
str(GPU_COUNT),
"--chunked-prefill-size",
"4096",
"--context-length",
"268000",
"--cuda-graph-max-bs-decode",
"64",
"--decode-log-interval",
"200",
"--default-chat-template-kwargs",
'{"thinking":false}',
"--disable-flashinfer-autotune",
"--dist-timeout",
f"{60 * MINUTES}",
"--max-running-requests",
"64",
"--mem-fraction-static",
"0.90",
"--moe-a2a-backend",
"none",
"--moe-runner-backend",
"flashinfer_mxfp4",
"--reasoning-parser",
"deepseek-v4",
"--speculative-algorithm",
"DSPARK",
"--swa-full-tokens-ratio",
"0.1",
"--tool-call-parser",
"deepseekv4",
"--trust-remote-code",
"--skip-server-warmup",
]
return cmd
```
Onto the main event that is defining our inference server.
```python
app = modal.App(name="example-deepseek-v4-flash")
@app.server(
image=sglang_image,
gpu=f"{GPU_TYPE}:{GPU_COUNT}",
volumes={
HF_CACHE_DIR: hf_cache_vol,
DG_CACHE_DIR: dg_cache_vol,
FLASHINFER_CACHE_DIR: flashinfer_cache_vol,
},
cpu=CPU,
memory=MEMORY,
port=DEFAULT_PORT,
startup_timeout=STARTUP_TIMEOUT,
exit_grace_period=25, # seconds, time to finish up requests when closing down
min_containers=MIN_CONTAINERS,
target_concurrency=TARGET_INPUTS,
unauthenticated=True,
)
class Server:
@modal.enter()
def startup(self):
cmd = _server_command()
print(shlex.join(cmd))
self.proc = subprocess.Popen(cmd, start_new_session=True)
wait_ready(self.proc)
warmup()
@modal.exit()
def stop(self):
self.proc.terminate()
self.proc.wait()
```
## Deploy the server
To deploy the server on Modal, just run
```bash
modal deploy 06_gpu_and_ml/llm-serving/deepseek_v4_flash.py
```
This will create a new App on Modal and build the container image for it if it hasn't been built yet.
## Test the server
To make it easier to test the server setup, we also include a `local_entrypoint`
that hits the server with a simple client.
If you execute the command
```bash
modal run 06_gpu_and_ml/llm-serving/deepseek_v4_flash.py
```
a fresh replica of the server will be spun up on Modal while
the code below executes on your local machine.
This is akin to running simple tests inside of the `if __name__ == "__main__"`
block of a Python script, but for cloud deployments!
```python
@app.local_entrypoint()
def main(
prompt: str = "Explain why tech bros and climbers are an increasing phenomenon.",
):
url = Server.get_url()
print(f"server url: {url}")
wait_for_endpoint(url)
payload = {
"model": MODEL_NAME,
"messages": [{"role": "user", "content": prompt}],
"max_tokens": 1024,
"temperature": 0,
}
req = urllib.request.Request(
f"{url}/v1/chat/completions",
data=json.dumps(payload).encode(),
headers={"Content-Type": "application/json"},
method="POST",
)
print(f"sending a request to {url}")
with urllib.request.urlopen(req, timeout=STARTUP_TIMEOUT) as resp:
body = json.loads(resp.read())
message = body["choices"][0]["message"]
print(message.get("content"))
print(body.get("usage"))
```
### Dicts And Queues
# Use Modal Dicts and Queues together
Modal Dicts and Queues store and communicate objects in distributed applications on Modal.
To illustrate how Dicts and Queues can interact together in a simple distributed
system, consider the following example program that crawls the web, starting
from some initial page and traversing links to many sites in breadth-first order.
The Modal Queue acts as a job queue, accepting new pages to crawl as they are discovered
by the crawlers and doling them out to be crawled via [`.spawn`](https://modal.com/docs/reference/modal.Function#spawn).
The Dict is used to coordinate termination once the maximum number of URLs to crawl is reached.
Starting from Wikipedia, this spawns several dozen containers (auto-scaled on
demand) and crawls about 100,000 URLs per minute.
```python
import queue
import sys
from datetime import datetime
import modal
app = modal.App(
"example-dicts-and-queues",
image=modal.Image.debian_slim().uv_pip_install(
"requests~=2.32.4", "beautifulsoup4~=4.13.4"
),
)
def extract_links(url: str) -> list[str]:
"""Extract links from a given URL."""
import urllib.parse
import requests
from bs4 import BeautifulSoup
resp = requests.get(url, timeout=10)
resp.raise_for_status()
soup = BeautifulSoup(resp.text, "html.parser")
links = []
for link in soup.find_all("a"):
links.append(urllib.parse.urljoin(url, link.get("href")))
return links
@app.function()
def crawl_pages(q: modal.Queue, d: modal.Dict, urls: set[str]) -> None:
for url in urls:
if "stop" in d:
return
try:
s = datetime.now()
links = extract_links(url)
print(f"Crawled: {url} in {datetime.now() - s}, with {len(links)} links")
q.put_many(links)
except Exception as exc:
print(
f"Failed to crawl: {url} with error {exc}, skipping...", file=sys.stderr
)
@app.function()
def scrape(url: str, max_urls: int = 50_000):
start_time = datetime.now()
# Create ephemeral dicts and queues
with modal.Dict.ephemeral() as d, modal.Queue.ephemeral() as q:
# The dict is used to signal the scraping to stop
# The queue contains the URLs that have been crawled
# Initialize queue with a starting URL
q.put(url)
# Crawl until the queue is empty, or reaching some number of URLs
visited = set()
max_urls = min(max_urls, 50_000)
while True:
try:
next_urls = q.get_many(2000, timeout=5)
except queue.Empty:
break
new_urls = set(next_urls) - visited
visited |= new_urls
if len(visited) < max_urls:
crawl_pages.spawn(q, d, new_urls)
else:
d["stop"] = True
elapsed = (datetime.now() - start_time).total_seconds()
print(f"Crawled {len(visited)} URLs in {elapsed:.2f} seconds")
@app.local_entrypoint()
def main(starting_url=None, max_urls: int = 10_000):
starting_url = starting_url or "https://www.wikipedia.org/"
scrape.remote(starting_url, max_urls=max_urls)
```
### Diffusers Lora Finetune
# Fine-tune Flux on your pet using LoRA
This example finetunes the [Flux.1-dev model](https://huggingface.co/black-forest-labs/FLUX.1-dev)
on images of a pet (by default, a puppy named Qwerty)
using a technique called textual inversion from [the "Dreambooth" paper](https://dreambooth.github.io/).
Effectively, it teaches a general image generation model a new "proper noun",
allowing for the personalized generation of art and photos.
We supplement textual inversion with low-rank adaptation (LoRA)
for increased efficiency during training.
It then makes the model shareable with others -- without costing $25/day for a GPU server--
by hosting a [Gradio app](https://gradio.app/) on Modal.
It demonstrates a simple, productive, and cost-effective pathway
to building on large pretrained models using Modal's building blocks, like
[GPU-accelerated](https://modal.com/docs/guide/gpu) Modal Functions for compute-intensive work,
[Volumes](https://modal.com/docs/guide/volumes) for storage,
and [Web Functions](https://modal.com/docs/guide/webhooks) for serving.
And with some light customization, you can use it to generate images of your pet!

You can find a video walkthrough of this example on the Modal YouTube channel
[here](https://www.youtube.com/watch?v=df-8fiByXMI).
## Imports and setup
We start by importing the necessary libraries and setting up the environment.
```python
from dataclasses import dataclass
from pathlib import Path
import modal
```
## Building up the environment
Machine learning environments are complex, and the dependencies can be hard to manage.
Modal makes creating and working with environments easy via
[containers and container images](https://modal.com/docs/guide/custom-container).
We start from a base image and specify all of our dependencies.
We'll call out the interesting ones as they come up below.
Note that these dependencies are not installed locally
-- they are only installed in the remote environment where our Modal App runs.
```python
app = modal.App(name="example-diffusers-lora-finetune")
image = modal.Image.debian_slim(python_version="3.10").uv_pip_install(
"accelerate==0.31.0",
"datasets~=2.13.0",
"fastapi[standard]==0.115.4",
"ftfy~=6.1.0",
"gradio~=5.5.0",
"huggingface-hub==0.36.0",
"numpy<2",
"peft==0.11.1",
"pydantic==2.9.2",
"sentencepiece>=0.1.91,!=0.1.92",
"smart_open~=6.4.0",
"starlette==0.41.2",
"transformers~=4.41.2",
"torch~=2.2.0",
"torchvision~=0.16",
"triton~=2.2.0",
"wandb==0.17.6",
)
```
### Downloading scripts and installing a git repo with `run_commands`
We'll use an example script from the `diffusers` library to train the model.
We acquire it from GitHub and install it in our environment with a series of commands.
The container environments Modal Functions run in are highly flexible --
see [the docs](https://modal.com/docs/guide/custom-container) for more details.
```python
GIT_SHA = "e649678bf55aeaa4b60bd1f68b1ee726278c0304" # specify the commit to fetch
image = (
image.apt_install("git")
# Perform a shallow fetch of just the target `diffusers` commit, checking out
# the commit in the container's home directory, /root. Then install `diffusers`
.run_commands(
"cd /root && git init .",
"cd /root && git remote add origin https://github.com/huggingface/diffusers",
f"cd /root && git fetch --depth=1 origin {GIT_SHA} && git checkout {GIT_SHA}",
"cd /root && pip install -e .",
)
)
```
### Configuration with `dataclass`es
Machine learning apps often have a lot of configuration information.
We collect up all of our configuration into dataclasses to avoid scattering special/magic values throughout code.
```python
@dataclass
class SharedConfig:
"""Configuration information shared across project components."""
# The instance name is the "proper noun" we're teaching the model
instance_name: str = "Qwerty"
# That proper noun is usually a member of some class (person, bird),
# and sharing that information with the model helps it generalize better.
class_name: str = "Golden Retriever"
# identifier for pretrained models on Hugging Face
model_name: str = "black-forest-labs/FLUX.1-dev"
```
### Storing data created by our app with `modal.Volume`
The tools we've used so far work well for fetching external information,
which defines the environment our app runs in,
but what about data that we create or modify during the app's execution?
A persisted [`modal.Volume`](https://modal.com/docs/guide/volumes) can store and share data across Modal Apps and Functions.
We'll use one to store both the original and fine-tuned weights we create during training
and then load them back in for inference. For more on storing model weights on Modal, see
[this guide](https://modal.com/docs/guide/model-weights).
```python
volume = modal.Volume.from_name(
"dreambooth-finetuning-volume-flux", create_if_missing=True
)
MODEL_DIR = "/model"
```
Note that access to the Flux.1-dev model on Hugging Face is
[gated by a license agreement](https://huggingface.co/docs/hub/en/models-gated) which
you must agree to [here](https://huggingface.co/black-forest-labs/FLUX.1-dev).
After you have accepted the license, [create a Modal Secret](https://modal.com/secrets)
with the name `huggingface-secret` following the instructions in the template.
```python
huggingface_secret = modal.Secret.from_name(
"huggingface-secret", required_keys=["HF_TOKEN"]
)
image = image.env(
{"HF_XET_HIGH_PERFORMANCE": "1"} # turn on faster downloads from HF
)
@app.function(
volumes={MODEL_DIR: volume},
image=image,
secrets=[huggingface_secret],
timeout=600, # 10 minutes
)
def download_models(config):
import torch
from diffusers import DiffusionPipeline
from huggingface_hub import snapshot_download
snapshot_download(
config.model_name,
local_dir=MODEL_DIR,
ignore_patterns=["*.pt", "*.bin"], # using safetensors
)
DiffusionPipeline.from_pretrained(MODEL_DIR, torch_dtype=torch.bfloat16)
```
### Load fine-tuning dataset
Part of the magic of the low-rank fine-tuning is that we only need 3-10 images for fine-tuning.
So we can fetch just a few images, stored on consumer platforms like Imgur or Google Drive,
whenever we need them -- no need for expensive, hard-to-maintain data pipelines.
```python
def load_images(image_urls: list[str]) -> Path:
import PIL.Image
from smart_open import open
img_path = Path("/img")
img_path.mkdir(parents=True, exist_ok=True)
for ii, url in enumerate(image_urls):
with open(url, "rb") as f:
image = PIL.Image.open(f)
image.save(img_path / f"{ii}.png")
print(f"{ii + 1} images loaded")
return img_path
```
## Low-Rank Adaptation (LoRA) fine-tuning for a text-to-image model
The base model we start from is trained to do a sort of "reverse [ekphrasis](https://en.wikipedia.org/wiki/Ekphrasis)":
it attempts to recreate a visual work of art or image from only its description.
We can use the model to synthesize wholly new images
by combining the concepts it has learned from the training data.
We use a pretrained model, the Flux model from Black Forest Labs.
In this example, we "finetune" Flux, making only small adjustments to the weights.
Furthermore, we don't change all the weights in the model.
Instead, using a technique called [_low-rank adaptation_](https://arxiv.org/abs/2106.09685),
we change a much smaller matrix that works "alongside" the existing weights, nudging the model in the direction we want.
We can get away with such a small and simple training process because we're just teach the model the meaning of a single new word: the name of our pet.
The result is a model that can generate novel images of our pet:
as an astronaut in space, as painted by Van Gogh or Bastiat, etc.
### Finetuning with Hugging Face 🧨 Diffusers and Accelerate
The model weights, training libraries, and training script are all provided by [🤗 Hugging Face](https://huggingface.co).
You can kick off a training job with the command `modal run dreambooth_app.py::app.train`.
It should take about ten minutes.
Training machine learning models takes time and produces a lot of metadata --
metrics for performance and resource utilization,
metrics for model quality and training stability,
and model inputs and outputs like images and text.
This is especially important if you're fiddling around with the configuration parameters.
This example can optionally use [Weights & Biases](https://wandb.ai) to track all of this training information.
Just sign up for an account, switch the flag below, and add your API key as a [Modal Secret](https://modal.com/secrets).
```python
USE_WANDB = False
```
You can see an example W&B dashboard [here](https://wandb.ai/cfrye59/dreambooth-lora-sd-xl).
Check out [this run](https://wandb.ai/cfrye59/dreambooth-lora-sd-xl/runs/ca3v1lsh?workspace=user-cfrye59),
which [despite having high GPU utilization](https://wandb.ai/cfrye59/dreambooth-lora-sd-xl/runs/ca3v1lsh/system)
suffered from numerical instability during training and produced only black images -- hard to debug without experiment management logs!
You can read more about how the values in `TrainConfig` are chosen and adjusted [in this blog post on Hugging Face](https://huggingface.co/blog/dreambooth).
To run training on images of your own pet, upload the images to separate URLs and edit the contents of the file at `TrainConfig.instance_example_urls_file` to point to them.
Tip: if the results you're seeing don't match the prompt too well, and instead produce an image
of your subject without taking the prompt into account, the model has likely overfit. In this case, repeat training with a lower
value of `max_train_steps`. If you used W&B, look back at results earlier in training to determine where to stop.
On the other hand, if the results don't look like your subject, you might need to increase `max_train_steps`.
```python
@dataclass
class TrainConfig(SharedConfig):
"""Configuration for the finetuning step."""
# training prompt looks like `{PREFIX} {INSTANCE_NAME} the {CLASS_NAME} {POSTFIX}`
prefix: str = "a photo of"
postfix: str = ""
# locator for plaintext file with urls for images of target instance
instance_example_urls_file: str = str(
Path(__file__).parent / "instance_example_urls.txt"
)
# Hyperparameters/constants from the huggingface training example
resolution: int = 512
train_batch_size: int = 3
rank: int = 16 # lora rank
gradient_accumulation_steps: int = 1
learning_rate: float = 4e-4
lr_scheduler: str = "constant"
lr_warmup_steps: int = 0
max_train_steps: int = 500
checkpointing_steps: int = 1000
seed: int = 117
@app.function(
image=image,
gpu="A100-80GB", # fine-tuning is VRAM-heavy and requires a high-VRAM GPU
volumes={MODEL_DIR: volume}, # stores fine-tuned model
timeout=1800, # 30 minutes
secrets=[huggingface_secret]
+ (
[modal.Secret.from_name("wandb-secret", required_keys=["WANDB_API_KEY"])]
if USE_WANDB
else []
),
)
def train(instance_example_urls, config):
import subprocess
from accelerate.utils import write_basic_config
# load data locally
img_path = load_images(instance_example_urls)
# set up hugging face accelerate library for fast training
write_basic_config(mixed_precision="bf16")
# define the training prompt
instance_phrase = f"{config.instance_name} the {config.class_name}"
prompt = f"{config.prefix} {instance_phrase} {config.postfix}".strip()
# the model training is packaged as a script, so we have to execute it as a subprocess, which adds some boilerplate
def _exec_subprocess(cmd: list[str]):
"""Executes subprocess and prints log to terminal while subprocess is running."""
process = subprocess.Popen(
cmd,
stdout=subprocess.PIPE,
stderr=subprocess.STDOUT,
)
with process.stdout as pipe:
for line in iter(pipe.readline, b""):
line_str = line.decode()
print(f"{line_str}", end="")
if exitcode := process.wait() != 0:
raise subprocess.CalledProcessError(exitcode, "\n".join(cmd))
# run training -- see huggingface accelerate docs for details
print("launching dreambooth training script")
_exec_subprocess(
[
"accelerate",
"launch",
"examples/dreambooth/train_dreambooth_lora_flux.py",
"--mixed_precision=bf16", # half-precision floats most of the time for faster training
f"--pretrained_model_name_or_path={MODEL_DIR}",
f"--instance_data_dir={img_path}",
f"--output_dir={MODEL_DIR}",
f"--instance_prompt={prompt}",
f"--resolution={config.resolution}",
f"--train_batch_size={config.train_batch_size}",
f"--gradient_accumulation_steps={config.gradient_accumulation_steps}",
f"--learning_rate={config.learning_rate}",
f"--lr_scheduler={config.lr_scheduler}",
f"--lr_warmup_steps={config.lr_warmup_steps}",
f"--max_train_steps={config.max_train_steps}",
f"--checkpointing_steps={config.checkpointing_steps}",
f"--seed={config.seed}", # increased reproducibility by seeding the RNG
]
+ (
[
"--report_to=wandb",
# validation output tracking is useful, but currently broken for Flux LoRA training
# f"--validation_prompt={prompt} in space", # simple test prompt
# f"--validation_epochs={config.max_train_steps // 5}",
]
if USE_WANDB
else []
),
)
# The trained model information has been output to the volume mounted at `MODEL_DIR`.
# To persist this data for use in our web app, we 'commit' the changes
# to the volume.
volume.commit()
```
## Running our model
To generate images from prompts using our fine-tuned model, we define a Modal Function called `inference`.
Naively, this would seem to be a bad fit for the flexible, serverless infrastructure of Modal:
wouldn't you need to include the steps to load the model and spin it up in every function call?
In order to initialize the model just once on container startup,
we use Modal's [container lifecycle](https://modal.com/docs/guide/lifecycle-functions) features, which require the function to be part
of a class. Note that the `modal.Volume` we saved the model to is mounted here as well,
so that the fine-tuned model created by `train` is available to us.
```python
@app.cls(image=image, gpu="A100", volumes={MODEL_DIR: volume})
class Model:
@modal.enter()
def load_model(self):
import torch
from diffusers import DiffusionPipeline
# Reload the modal.Volume to ensure the latest state is accessible.
volume.reload()
# set up a hugging face inference pipeline using our model
pipe = DiffusionPipeline.from_pretrained(
MODEL_DIR,
torch_dtype=torch.bfloat16,
).to("cuda")
pipe.load_lora_weights(MODEL_DIR)
self.pipe = pipe
@modal.method()
def inference(self, text, config):
image = self.pipe(
text,
num_inference_steps=config.num_inference_steps,
guidance_scale=config.guidance_scale,
).images[0]
return image
```
## Wrap the trained model in a Gradio web UI
[Gradio](https://gradio.app) makes it super easy to expose a model's functionality
in an easy-to-use, responsive web interface.
This model is a text-to-image generator,
so we set up an interface that includes a user-entry text box
and a frame for displaying images.
We also provide some example text inputs to help
guide users and to kick-start their creative juices.
And we couldn't resist adding some Modal style to it as well!
You can deploy the app on Modal with the command
`modal deploy dreambooth_app.py`.
You'll be able to come back days, weeks, or months later and find it still ready to go,
even though you don't have to pay for a server to run while you're not using it.
```python
@dataclass
class AppConfig(SharedConfig):
"""Configuration information for inference."""
num_inference_steps: int = 50
guidance_scale: float = 6
web_image = image.add_local_dir(
# Add local web assets to the image
Path(__file__).parent / "assets",
remote_path="/assets",
)
@app.function(
image=web_image,
max_containers=1,
)
@modal.concurrent(max_inputs=100)
@modal.asgi_app()
def fastapi_app():
import gradio as gr
from fastapi import FastAPI
from fastapi.responses import FileResponse
from gradio.routes import mount_gradio_app
web_app = FastAPI()
# Call out to the inference in a separate Modal environment with a GPU
def go(text=""):
if not text:
text = example_prompts[0]
return Model().inference.remote(text, config)
# set up AppConfig
config = AppConfig()
instance_phrase = f"{config.instance_name} the {config.class_name}"
example_prompts = [
f"{instance_phrase}",
f"a painting of {instance_phrase.title()} With A Pearl Earring, by Vermeer",
f"oil painting of {instance_phrase} flying through space as an astronaut",
f"a painting of {instance_phrase} in cyberpunk city. character design by cory loftis. volumetric light, detailed, rendered in octane",
f"drawing of {instance_phrase} high quality, cartoon, path traced, by studio ghibli and don bluth",
]
modal_docs_url = "https://modal.com/docs"
modal_example_url = f"{modal_docs_url}/examples/dreambooth_app"
description = f"""Describe what they are doing or how a particular artist or style would depict them. Be fantastical! Try the examples below for inspiration.
### Learn how to make a "Dreambooth" for your own pet [here]({modal_example_url}).
"""
# custom styles: an icon, a background, and a theme
@web_app.get("/favicon.ico", include_in_schema=False)
async def favicon():
return FileResponse("/assets/favicon.svg")
@web_app.get("/assets/background.svg", include_in_schema=False)
async def background():
return FileResponse("/assets/background.svg")
with open("/assets/index.css") as f:
css = f.read()
theme = gr.themes.Default(
primary_hue="green", secondary_hue="emerald", neutral_hue="neutral"
)
# add a gradio UI around inference
with gr.Blocks(
theme=theme,
css=css,
title=f"Generate images of {config.instance_name} on Modal",
) as interface:
gr.Markdown(
f"# Generate images of {instance_phrase}.\n\n{description}",
)
with gr.Row():
inp = gr.Textbox( # input text component
label="",
placeholder=f"Describe the version of {instance_phrase} you'd like to see",
lines=10,
)
out = gr.Image( # output image component
height=512, width=512, label="", min_width=512, elem_id="output"
)
with gr.Row():
btn = gr.Button("Dream", variant="primary", scale=2)
btn.click(
fn=go, inputs=inp, outputs=out
) # connect inputs and outputs with inference function
gr.Button( # shameless plug
"⚡️ Powered by Modal",
variant="secondary",
link="https://modal.com",
)
with gr.Column(variant="compact"):
# add in a few examples to inspire users
for ii, prompt in enumerate(example_prompts):
btn = gr.Button(prompt, variant="secondary")
btn.click(fn=lambda idx=ii: example_prompts[idx], outputs=inp)
# mount for execution on Modal
return mount_gradio_app(
app=web_app,
blocks=interface,
path="/",
)
```
## Running your fine-tuned model from the command line
You can use the `modal` command-line interface to set up, customize, and deploy this app:
- `modal run diffusers_lora_finetune.py` will train the model. Change the `instance_example_urls_file` to point to your own pet's images.
- `modal serve diffusers_lora_finetune.py` will [serve](https://modal.com/docs/guide/webhooks#developing-with-modal-serve) the Gradio interface at a temporary location. Great for iterating on code!
- `modal shell diffusers_lora_finetune.py` is a convenient helper to open a bash [shell](https://modal.com/docs/guide/developing-debugging#interactive-shell) in our image. Great for debugging environment issues.
Remember, once you've trained your own fine-tuned model, you can deploy it permanently -- for no cost when it is not being used! --
using `modal deploy diffusers_lora_finetune.py`.
If you just want to try the app out, you can find our deployment [here](https://modal-labs--example-diffusers-lora-finetune-fastapi-app.modal.run).
```python
@app.local_entrypoint()
def run( # add more config params here to make training configurable
max_train_steps: int = 250,
):
print("🎨 loading model")
download_models.remote(SharedConfig())
print("🎨 setting up training")
config = TrainConfig(max_train_steps=max_train_steps)
instance_example_urls = (
Path(TrainConfig.instance_example_urls_file).read_text().splitlines()
)
train.remote(instance_example_urls, config)
print("🎨 training finished")
```
### Discord Bot
# Serve a Discord Bot on Modal
In this example we will demonstrate how to use Modal to build and serve a Discord bot that uses
[slash commands](https://discord.com/developers/docs/interactions/application-commands).
Slash commands send information from Discord server members to a service at a URL.
Here, we set up a simple [FastAPI app](https://fastapi.tiangolo.com/)
to run that service and deploy it easily Modal’s
[`@asgi_app`](https://modal.com/docs/guide/webhooks#serving-asgi-and-wsgi-apps) decorator.
As our example service, we hit a simple free API:
the [Free Public APIs API](https://www.freepublicapis.com/api),
a directory of free public APIs.
[Try it out on Discord](https://discord.gg/PmG7P47EPQ)!
## Set up our App and its Image
First, we define the [container image](https://modal.com/docs/guide/images)
that all the pieces of our bot will run in.
We set that as the default image for a Modal [App](https://modal.com/docs/guide/apps).
The App is where we'll attach all the components of our bot.
```python
import json
from enum import Enum
import modal
image = modal.Image.debian_slim(python_version="3.11").uv_pip_install(
"fastapi[standard]==0.115.4", "pynacl~=1.5.0", "requests~=2.32.3"
)
app = modal.App("example-discord-bot", image=image)
```
## Hit the Free Public APIs API
We start by defining the core service that our bot will provide.
In a real application, this might be [music generation](https://modal.com/docs/examples/musicgen),
a [chatbot](https://modal.com/docs/examples/chat_with_pdf_vision),
or [interacting with a database](https://modal.com/docs/examples/cron_datasette).
Here, we just hit a simple free public API:
the [Free Public APIs](https://www.freepublicapis.com) API,
an "API of APIs" that returns information about free public APIs,
like the [Global Shark Attack API](https://www.freepublicapis.com/global-shark-attack-api)
and the [Corporate Bullshit Generator](https://www.freepublicapis.com/corporate-bullshit-generator).
We convert the response into a Markdown-formatted message.
We turn our Python function into a Modal Function by attaching the `app.function` decorator.
We make the function `async` and add `@modal.concurrent()` with a large `max_inputs` value, because
communicating with an external API is a classic case for better performance from asynchronous execution.
Modal handles things like the async event loop for us.
```python
@app.function()
@modal.concurrent(max_inputs=100)
async def fetch_api() -> str:
import aiohttp
url = "https://www.freepublicapis.com/api/random"
async with aiohttp.ClientSession() as session:
try:
async with session.get(url) as response:
response.raise_for_status()
data = await response.json()
message = (
f"# {data.get('emoji') or '🤖'} [{data['title']}]({data['source']})"
)
message += f"\n _{''.join(data['description'].splitlines())}_"
except Exception as e:
message = f"# 🤖: Oops! {e}"
return message
```
This core component has nothing to do with Discord,
and it's nice to be able to interact with and test it in isolation.
For that, we add a `local_entrypoint` that calls the Modal Function.
Notice that we add `.remote` to the function's name.
Later, when you replace this component of the app with something more interesting,
test it by triggering this entrypoint with `modal run discord_bot.py`.
```python
@app.local_entrypoint()
def test_fetch_api():
result = fetch_api.remote()
if result.startswith("# 🤖: Oops! "):
raise Exception(result)
else:
print(result)
```
## Integrate our Modal Function with Discord Interactions
Now we need to map this function onto Discord's interface --
in particular the [Interactions API](https://discord.com/developers/docs/interactions/overview).
Reviewing the documentation, we see that we need to send a JSON payload
to a specific API URL that will include an `app_id` that identifies our bot
and a `token` that identifies the interaction (loosely, message) that we're participating in.
So let's write that out. This function doesn't need to live on Modal,
since it's just encapsulating some logic -- we don't want to turn it into a service or an API on its own.
That means we don't need any Modal decorators.
```python
async def send_to_discord(payload: dict, app_id: str, interaction_token: str):
import aiohttp
interaction_url = f"https://discord.com/api/v10/webhooks/{app_id}/{interaction_token}/messages/@original"
async with aiohttp.ClientSession() as session:
async with session.patch(interaction_url, json=payload) as resp:
print("🤖 Discord response: " + await resp.text())
```
Other parts of our application might want to both hit the Free Public APIs API and send the result to Discord,
so we both write a Python function for this and we promote it to a Modal Function with a decorator.
Notice that we use the `.local` suffix to call our `fetch_api` Function. That means we run
the Function the same way we run all the other Python functions, rather than treating it as a special
Modal Function. This reduces a bit of extra latency, but couples these two Functions more tightly.
```python
@app.function()
@modal.concurrent(max_inputs=100)
async def reply(app_id: str, interaction_token: str):
message = await fetch_api.local()
await send_to_discord({"content": message}, app_id, interaction_token)
```
## Set up a Discord app
Now, we need to actually connect to Discord.
We start by creating an application on the Discord Developer Portal.
1. Go to the
[Discord Developer Portal](https://discord.com/developers/applications) and
log in with your Discord account.
2. On the portal, go to **Applications** and create a new application by
clicking **New Application** in the top right next to your profile picture.
3. [Create a custom Modal Secret](https://modal.com/docs/guide/secrets) for your Discord bot.
On Modal's Secret creation page, select 'Discord'. Copy your Discord application’s
**Public Key** and **Application ID** (from the **General Information** tab in the Discord Developer Portal)
and paste them as the value of `DISCORD_PUBLIC_KEY` and `DISCORD_CLIENT_ID`.
Additionally, head to the **Bot** tab and use the **Reset Token** button to create a new bot token.
Paste this in the value of an additional key in the Secret, `DISCORD_BOT_TOKEN`.
Name this Secret `discord-secret`.
We access that Secret in code like so:
```python
discord_secret = modal.Secret.from_name(
"discord-secret",
required_keys=[ # included so we get nice error messages if we forgot a key
"DISCORD_BOT_TOKEN",
"DISCORD_CLIENT_ID",
"DISCORD_PUBLIC_KEY",
],
)
```
## Register a Slash Command
Next, we’re going to register a [Slash Command](https://discord.com/developers/docs/interactions/application-commands#slash-commands)
for our Discord app. Slash Commands are triggered by users in servers typing `/` and the name of the command.
The Modal Function below will register a Slash Command for your bot named `bored`.
More information about Slash Commands can be found in the Discord docs
[here](https://discord.com/developers/docs/interactions/application-commands).
You can run this Function with
```bash
modal run discord_bot::create_slash_command
```
```python
@app.function(secrets=[discord_secret], image=image)
def create_slash_command(force: bool = False):
"""Registers the slash command with Discord. Pass the force flag to re-register."""
import os
import requests
BOT_TOKEN = os.getenv("DISCORD_BOT_TOKEN")
CLIENT_ID = os.getenv("DISCORD_CLIENT_ID")
headers = {
"Content-Type": "application/json",
"Authorization": f"Bot {BOT_TOKEN}",
}
url = f"https://discord.com/api/v10/applications/{CLIENT_ID}/commands"
command_description = {
"name": "api",
"description": "Information about a random free, public API",
}
# first, check if the command already exists
response = requests.get(url, headers=headers)
try:
response.raise_for_status()
except Exception as e:
raise Exception("Failed to create slash command") from e
commands = response.json()
command_exists = any(
command.get("name") == command_description["name"] for command in commands
)
# and only recreate it if the force flag is set
if command_exists and not force:
print(f"🤖: command {command_description['name']} exists")
return
response = requests.post(url, headers=headers, json=command_description)
try:
response.raise_for_status()
except Exception as e:
raise Exception("Failed to create slash command") from e
print(f"🤖: command {command_description['name']} created")
```
## Host a Discord Interactions endpoint on Modal
If you look carefully at the definition of the Slash Command above,
you'll notice that it doesn't know anything about our bot besides an ID.
To hook the Slash Commands in the Discord UI up to our logic for hitting the Bored API,
we need to set up a service that listens at some URL and follows a specific protocol,
described [here](https://discord.com/developers/docs/interactions/overview#configuring-an-interactions-endpoint-url).
Here are some of the most important facets:
1. We'll need to respond within five seconds or Discord will assume we are dead.
Modal's fast-booting serverless containers usually start faster than that,
but it's not guaranteed. So we'll add the `min_containers` parameter to our
Function so that there's at least one live copy ready to respond quickly at any time.
Modal charges a minimum of about 2¢ an hour for live containers (pricing details [here](https://modal.com/pricing)).
Note that that still fits within Modal's $30/month of credits on the free tier.
2. We have to respond to Discord that quickly, but we don't have to respond to the user that quickly.
We instead send an acknowledgement so that they know we're alive and they can close their connection to us.
We also trigger our `reply` Modal Function, which will respond to the user via Discord's Interactions API,
but we don't wait for the result, we just `spawn` the call.
3. The protocol includes some authentication logic that is mandatory
and checked by Discord. We'll explain in more detail in the next section.
We can set up our interaction endpoint by deploying a FastAPI app on Modal.
This is as easy as creating a Python Function that returns a FastAPI app
and adding the `modal.asgi_app` decorator.
For more details on serving Python web apps on Modal, see
[this guide](https://modal.com/docs/guide/webhooks).
```python
@app.function(secrets=[discord_secret], min_containers=1)
@modal.concurrent(max_inputs=100)
@modal.asgi_app()
def web_app():
from fastapi import FastAPI, HTTPException, Request
from fastapi.middleware.cors import CORSMiddleware
web_app = FastAPI()
# must allow requests from other domains, e.g. from Discord's servers
web_app.add_middleware(
CORSMiddleware,
allow_origins=["*"],
allow_credentials=True,
allow_methods=["*"],
allow_headers=["*"],
)
@web_app.post("/api")
async def get_api(request: Request):
body = await request.body()
# confirm this is a request from Discord
authenticate(request.headers, body)
print("🤖: parsing request")
data = json.loads(body.decode())
if data.get("type") == DiscordInteractionType.PING.value:
print("🤖: acking PING from Discord during auth check")
return {"type": DiscordResponseType.PONG.value}
if data.get("type") == DiscordInteractionType.APPLICATION_COMMAND.value:
print("🤖: handling slash command")
app_id = data["application_id"]
interaction_token = data["token"]
# kick off request asynchronously, will respond when ready
reply.spawn(app_id, interaction_token)
# respond immediately with defer message
return {
"type": DiscordResponseType.DEFERRED_CHANNEL_MESSAGE_WITH_SOURCE.value
}
print(f"🤖: unable to parse request with type {data.get('type')}")
raise HTTPException(status_code=400, detail="Bad request")
return web_app
```
The authentication for Discord is a bit involved and there aren't,
to our knowledge, any good Python libraries for it.
So we have to implement the protocol "by hand".
Essentially, Discord sends a header in their request
that we can use to verify the request comes from them.
For that, we use the `DISCORD_PUBLIC_KEY` from
our Application Information page.
The details aren't super important, but they appear in the `authenticate` function below
(which defers the real cryptography work to [PyNaCl](https://pypi.org/project/PyNaCl/),
a Python wrapper for [`libsodium`](https://github.com/jedisct1/libsodium)).
Discord will also check that we reject unauthorized requests,
so we have to be sure to get this right!
```python
def authenticate(headers, body):
import os
from fastapi.exceptions import HTTPException
from nacl.exceptions import BadSignatureError
from nacl.signing import VerifyKey
print("🤖: authenticating request")
# verify the request is from Discord using their public key
public_key = os.getenv("DISCORD_PUBLIC_KEY")
verify_key = VerifyKey(bytes.fromhex(public_key))
signature = headers.get("X-Signature-Ed25519")
timestamp = headers.get("X-Signature-Timestamp")
message = timestamp.encode() + body
try:
verify_key.verify(message, bytes.fromhex(signature))
except BadSignatureError:
# either an unauthorized request or Discord's "negative control" check
raise HTTPException(status_code=401, detail="Invalid request")
```
The code above used a few enums to abstract bits of the Discord protocol.
Now that we've walked through all of it,
we're in a position to understand what those are
and so the code for them appears below.
```python
class DiscordInteractionType(Enum):
PING = 1 # hello from Discord during auth check
APPLICATION_COMMAND = 2 # an actual command
class DiscordResponseType(Enum):
PONG = 1 # hello back during auth check
DEFERRED_CHANNEL_MESSAGE_WITH_SOURCE = 5 # we'll send a message later
```
## Deploy on Modal
You can deploy this app on Modal by running the following commands:
``` shell
modal run discord_bot.py # checks the API wrapper, little test
modal run discord_bot.py::create_slash_command # creates the slash command, if missing
modal deploy discord_bot.py # deploys the web app and the API wrapper
```
Copy the Modal URL that is printed in the output and go back to the **General Information** section on the
[Discord Developer Portal](https://discord.com/developers/applications).
Paste the URL, making sure to append the path of your `POST` route (here, `/api`), in the
**Interactions Endpoint URL** field, then click **Save Changes**. If your
endpoint URL is incorrect or if authentication is incorrectly implemented,
Discord will refuse to save the URL. Once it saves, you can start
handling interactions!
## Finish setting up Discord bot
To start using the Slash Command you just set up, you need to invite the bot to
a Discord server. To do so, go to your application's **Installation** section on the
[Discord Developer Portal](https://discord.com/developers/applications).
Copy the **Discored Provided Link** and visit it to invite the bot to your bot to the server.
Now you can open your Discord server and type `/api` in a channel to trigger the bot.
You can see a working version [in our test Discord server](https://discord.gg/PmG7P47EPQ).
### Doc Ocr Jobs
# Run a job queue that turns documents into structured data with Datalab Marker
This tutorial shows you how to use Modal as an infinitely scalable job queue
that can service async tasks from a web app.
Our job queue will handle a single task: converting images/PDFs into structured data.
We'll use [Marker](https://github.com/datalab-to/marker) from [Datalab](https://www.datalab.to),
which can convert images of documents or PDFs to Markdown, JSON, and HTML. Marker is an open-weights model;
to learn more about commercial usage, see [here](https://github.com/datalab-to/marker?tab=readme-ov-file#commercial-usage).
For the purpose of this tutorial, we've also built a [React + FastAPI web app on Modal](https://modal.com/docs/examples/doc_ocr_webapp)
that works together with it, but note that you don't need a web app running on Modal
to use this pattern. You can submit async tasks to Modal from any Python
application (for example, a regular Django app running on Kubernetes).
Try it out for yourself [here](https://modal-labs-examples--example-doc-ocr-webapp-wrapper.modal.run/).
## Define an App
Let's first import `modal` and define an [`App`](https://modal.com/docs/reference/modal.App).
Later, we'll use the name provided for our job queue App to find it from our web app and submit tasks to it.
```python
from typing import Optional
import modal
from typing_extensions import Literal
app = modal.App("example-doc-ocr-jobs")
```
We also define the dependencies we need by specifying an
[Image](https://modal.com/docs/guide/images).
```python
inference_image = modal.Image.debian_slim(python_version="3.12").uv_pip_install(
"marker-pdf[full]==1.9.3", "torch==2.8.0"
)
```
## Cache the pre-trained model on a Modal Volume
We can obtain the pre-trained model we want to run from Datalab
by using the Marker library.
```python
def load_models():
import marker.models
print("loading models")
return marker.models.create_model_dict()
```
The `create_model_dict` function downloads model weights from Datalab's
cloud storage (S3 bucket) if they aren't already present in the filesystem.
However, in Modal's serverless environment, filesystems are ephemeral,
so using this code alone would mean that models need to be downloaded
many times (every time a new instance of our Function spins up).
So instead, we create a Modal [Volume](https://modal.com/docs/guide/volumes)
to store the models. Each Modal Volume is a durable filesystem that any Modal Function can access.
You can read more about storing model weights on Modal in [our guide](https://modal.com/docs/guide/model-weights).
```python
marker_cache_path = "/root/.cache/datalab/"
marker_cache_volume = modal.Volume.from_name(
"marker-models-modal-demo", create_if_missing=True
)
marker_cache = {marker_cache_path: marker_cache_volume}
```
## Run Datalab Marker on Modal
Now let's set up the actual inference.
Using the [`@app.function`](https://modal.com/docs/reference/modal.App#function)
decorator, we set up a Modal [Function](https://modal.com/docs/reference/modal.Function).
We provide arguments to that decorator to customize the hardware, scaling, and other features
of the Function.
Here, we say that this Function should use NVIDIA L40S [GPUs](https://modal.com/docs/guide/gpu),
automatically [retry](https://modal.com/docs/guide/retries#function-retries) failures up to 3 times,
and have access to our [shared model cache](https://modal.com/docs/guide/volumes).
Inside the Function, we write out our inference logic,
which mostly involves configuring components provided by the `marker` library.
```python
@app.function(gpu="l40s", retries=3, volumes=marker_cache, image=inference_image)
def parse_document(
document: bytes,
page_range: str | None = None,
force_ocr: bool = False,
paginate_output: bool = False,
output_format: Literal["markdown", "html", "chunks", "json"] = "markdown",
use_llm: bool = False,
) -> str | dict:
"""
Args:
document: Document data (PDF, JPG, PNG) as bytes.
page_range: Specify which pages to process. Accepts comma-separated page numbers and ranges.
force_ocr: Force OCR processing on the entire document, even for pages that might contain extractable text.
This will also format inline math properly.
paginate_output: Paginates the output, using \n\n{PAGE_NUMBER} followed by - * 48, then \n\n
output_format: Output format. Can be markdown, JSON, HTML, or chunks.
use_llm: use an llm to improve the marker results.
"""
from tempfile import NamedTemporaryFile
import marker.config.parser
import marker.converters.pdf
import marker.output
models = load_models()
# Set up document "converter"
config = {
"page_range": page_range,
"force_ocr": force_ocr,
"paginate_output": paginate_output,
"output_format": output_format,
"use_llm": use_llm,
}
config_parser = marker.config.parser.ConfigParser(config)
config_dict = config_parser.generate_config_dict()
config_dict["pdftext_workers"] = 1
converter = marker.converters.pdf.PdfConverter(
config=config_dict,
artifact_dict=models,
processor_list=config_parser.get_processors(),
renderer=config_parser.get_renderer(),
llm_service=config_parser.get_llm_service() if use_llm else None,
)
# Run the converter on our document
with NamedTemporaryFile(delete=False, mode="wb+") as temp_path:
temp_path.write(document)
rendered_output = converter(temp_path.name)
# Format the output and return it
if output_format == "json":
result = rendered_output.model_dump_json()
else:
text, _, images = marker.output.text_from_rendered(rendered_output)
result = text
return result
```
## Testing and debugging remote code
To make sure this code works, we want a way to kick the tires and debug it.
We can run it on Modal, with no need to set up separate local testing,
by adding a [`local_entrypoint`](https://modal.com/docs/reference/modal.App#local_entrypoint)
that invokes the Function `.remote`ly.
```python
@app.local_entrypoint()
def main(document_filename: Optional[str] = None):
import urllib.request
from pathlib import Path
if document_filename is None:
document_filename = Path(__file__).parent / "receipt.png"
else:
document_filename = Path(document_filename)
if document_filename.exists():
image = document_filename.read_bytes()
print(f"running OCR on {document_filename}")
else:
document_url = "https://modal-cdn.com/cdnbot/Brandys-walmart-receipt-8g68_a_hk_f9c25fce.webp"
print(f"running OCR on sample from URL {document_url}")
request = urllib.request.Request(document_url)
with urllib.request.urlopen(request) as response:
image = response.read()
print(parse_document.remote(image, output_format="html"))
```
You can then run this from the command line with:
```shell
modal run doc_ocr_jobs.py
```
## Deploying the document conversion service
Now that we have a Function, we can publish it by deploying the App:
```shell
modal deploy doc_ocr_jobs.py
```
Once it's published, we can [look up](https://modal.com/docs/guide/trigger-deployed-functions) this Function
from another Python process and submit tasks to it:
```python
fn = modal.Function.from_name("example-doc-ocr-jobs", "parse_document")
fn.spawn(my_document)
```
Modal will auto-scale to handle all the tasks queued, and
then scale back down to 0 when there's no work left. To see how you could use this from a Python web
app, take a look at the [receipt parser frontend](https://modal.com/docs/examples/doc_ocr_webapp)
tutorial.
### Doc Ocr Webapp
# Serve a receipt parsing web app
This tutorial shows you how to use Modal to deploy a fully serverless
[React](https://reactjs.org/) + [FastAPI](https://fastapi.tiangolo.com/) application.
We're going to build a simple "Receipt Parser" web app that submits document parsing
tasks to a separate Modal app defined in [another example](https://modal.com/docs/examples/doc_ocr_jobs),
polls until the task is completed, and displays
the results. Try it out for yourself
[here](https://modal-labs-examples--example-doc-ocr-webapp-wrapper.modal.run/).
It should look something like this:
[](https://modal-labs-examples--example-doc-ocr-webapp-wrapper.modal.run/)
## Basic setup
Let's get the imports out of the way and define an [`App`](https://modal.com/docs/reference/modal.App).
```python
from pathlib import Path
import fastapi
import fastapi.staticfiles
import modal
app = modal.App("example-doc-ocr-webapp")
```
Modal works with any [ASGI](https://modal.com/docs/guide/webhooks#serving-asgi-and-wsgi-apps) or
[WSGI](https://modal.com/docs/guide/webhooks#wsgi) web framework. Here, we choose to use [FastAPI](https://fastapi.tiangolo.com/).
```python
web_app = fastapi.FastAPI()
```
## Define endpoints
We need two endpoints: one to accept an image and submit it to the Modal job queue,
and another to poll for the results of the job.
In `parse`, we're going to submit tasks to the Function defined in the [Job
Queue tutorial](https://modal.com/docs/examples/doc_ocr_jobs), so we import it first using
[`Function.lookup`](https://modal.com/docs/reference/modal.Function#lookup).
We call [`.spawn()`](https://modal.com/docs/reference/modal.Function#spawn) on the Function handle
we imported above to kick off our Function without blocking on the results. `spawn` returns
a unique ID for the function call, which we then use
to poll for its result.
```python
@web_app.post("/parse")
async def parse(request: fastapi.Request):
parse_receipt = modal.Function.from_name("example-doc-ocr-jobs", "parse_document")
form = await request.form()
receipt = await form["receipt"].read() # type: ignore
call = parse_receipt.spawn(receipt)
return {"call_id": call.object_id}
```
`/result` uses the provided `call_id` to instantiate a `modal.FunctionCall` object, and attempt
to get its result. If the call hasn't finished yet, we return a `202` status code, which indicates
that the server is still working on the job.
```python
@web_app.get("/result/{call_id}")
async def poll_results(call_id: str):
function_call = modal.functions.FunctionCall.from_id(call_id)
try:
result = await function_call.get.aio(timeout=0)
except TimeoutError:
return fastapi.responses.JSONResponse(content="", status_code=202)
return result
```
Now that we've defined our endpoints, we're ready to host them on Modal.
First, we specify our dependencies -- here, a basic Debian Linux
environment with FastAPI installed.
```python
image = modal.Image.debian_slim(python_version="3.12").uv_pip_install(
"fastapi[standard]==0.115.4"
)
```
Then, we add the static files for our front-end. We've made [a simple React
app](https://github.com/modal-labs/modal-examples/tree/main/09_job_queues/doc_ocr_frontend)
that hits the two endpoints defined above. To package these files with our app, we use
`add_local_dir` with the local directory of the assets, and specify that we want them
in the `/assets` directory inside our container (the `remote_path`). Then, we instruct FastAPI to [serve
this static file directory](https://fastapi.tiangolo.com/tutorial/static-files/) at our root path.
```python
local_assets_path = Path(__file__).parent / "doc_ocr_frontend"
image = image.add_local_dir(local_assets_path, remote_path="/assets")
```
We serve them from our FastAPI app as `StaticFiles`.
To put our FastAPI app on Modal, we need to return it from a Python function
that is wrapped with some extra decorators:
- [`modal.asgi_app`](https://modal.com/docs/reference/modal.asgi_app)
to ensure the Modal system knows to route web traffic to it (and in what format)
- [`modal.concurrent`](https://modal.com/docs/reference/modal.concurrent)
to allow more than one request (e.g. for stylesheet and for HTML) to be served concurrently
- [`app.function`](https://modal.com/docs/reference/modal.App#function)
to turn our Python function into a Modal Function and define the infrastructure it needs
(here, just the dependencies).
```python
@app.function(image=image)
@modal.concurrent(max_inputs=100)
@modal.asgi_app()
def wrapper():
web_app.mount("/", fastapi.staticfiles.StaticFiles(directory="/assets", html=True))
return web_app
```
## Running
While developing, you can run this as an ephemeral app by executing the command
```shell
modal serve doc_ocr_webapp.py
```
If successful, this will print a URL for your app that you can navigate to in
your browser 🎉 .
The result should look something like this:
[](https://modal-labs-examples--example-doc-ocr-webapp-wrapper.modal.run/)
Modal watches all the mounted files and updates the app if anything changes.
See [these docs](https://modal.com/docs/guide/webhooks#developing-with-modal-serve)
for more details.
## Deploy
To deploy your application, run
```shell
modal deploy doc_ocr_webapp.py
```
That's all!
### Dynamic Batching
# Dynamic batching for ASCII and character conversion
This example demonstrates how to dynamically batch a simple
application that converts ASCII codes to characters and vice versa.
For more details about using dynamic batching and optimizing
the batching configurations for your application, see
the [dynamic batching guide](https://modal.com/docs/guide/dynamic-batching).
## Setup
Let's start by defining the image for the application.
```python
import modal
app = modal.App(
"example-dynamic-batching",
image=modal.Image.debian_slim(python_version="3.11"),
)
```
## Defining a Batched Function
Now, let's define a function that converts ASCII codes to characters. This
async Batched Function allows us to convert up to four ASCII codes at once.
```python
@app.function()
@modal.batched(max_batch_size=4, wait_ms=1000)
async def asciis_to_chars(asciis: list[int]) -> list[str]:
return [chr(ascii) for ascii in asciis]
```
If there are fewer than four ASCII codes in the batch, the Function will wait
for one second, as specified by `wait_ms`, to allow more inputs to arrive before
returning the result.
The input `asciis` to the Function is a list of integers, and the
output is a list of strings. To allow batching, the input list `asciis`
and the output list must have the same length.
You must invoke the Function with an individual ASCII input, and a single
character will be returned in response.
## Defining a class with a Batched Method
Next, let's define a class that converts characters to ASCII codes. This
class has an async Batched Method `chars_to_asciis` that converts characters
to ASCII codes.
Note that if a class has a Batched Method, it cannot have other Batched Methods
or Methods.
```python
@app.cls()
class AsciiConverter:
@modal.batched(max_batch_size=4, wait_ms=1000)
async def chars_to_asciis(self, chars: list[str]) -> list[int]:
asciis = [ord(char) for char in chars]
return asciis
```
## ASCII and character conversion
Finally, let's define the `local_entrypoint` that uses the Batched Function
and Class Method to convert ASCII codes to characters and
vice versa.
We use [`map.aio`](https://modal.com/docs/reference/modal.Function#map) to asynchronously map
over the ASCII codes and characters. This allows us to invoke the Batched
Function and the Batched Method over a range of ASCII codes and characters
in parallel.
Run this script to see which characters correspond to ASCII codes 33 through 38!
```python
@app.local_entrypoint()
async def main():
ascii_converter = AsciiConverter()
chars = []
async for char in asciis_to_chars.map.aio(range(33, 39)):
chars.append(char)
print("Characters:", chars)
asciis = []
async for ascii in ascii_converter.chars_to_asciis.map.aio(chars):
asciis.append(ascii)
print("ASCII codes:", asciis)
```
### Esm3
# Build a protein folding dashboard with ESM3, Molstar, and Gradio

There are perhaps a quadrillion distinct proteins on the planet Earth,
each one a marvel of nanotechnology discovered by painstaking evolution.
We know the amino acid sequence of nearly a billion but we only
know the three-dimensional structure of a few hundred thousand,
gathered by slow, difficult observational methods like X-ray crystallography.
Built upon this data are machine learning models like
EvolutionaryScale's [ESM3](https://www.evolutionaryscale.ai/blog/esm3-release)
that can predict the structure of any sequence in seconds.
In this example, we'll show how you can use Modal to not
just run the latest protein-folding model but also build tools around it for
you and your team of scientists to understand and analyze the results.
## Basic Setup
```python
import base64
import io
from pathlib import Path
from typing import Optional
import modal
MINUTES = 60 # seconds
app = modal.App("example-esm3")
```
### Create a Volume to store ESM3 model weights and Entrez sequence data
To minimize cold start times, we'll store the ESM3 model weights on a Modal
[Volume](https://modal.com/docs/guide/volumes).
For patterns and best practices for storing model weights on Modal, see
[this guide](https://modal.com/docs/guide/model-weights).
We'll use this same distributed storage primitive to store sequence data.
```python
volume = modal.Volume.from_name("example-esm3", create_if_missing=True)
VOLUME_PATH = Path("/vol")
MODELS_PATH = VOLUME_PATH / "models"
DATA_PATH = VOLUME_PATH / "data"
```
### Define dependencies in container images
The container image for structure inference is based on Modal's default slim Debian
Linux image with `esm` for loading and running the model, `gemmi` for
managing protein structure file conversions, and setting an environment variable
for faster downloading of the model weights from Hugging Face.
```python
esm3_image = (
modal.Image.debian_slim(python_version="3.11")
.uv_pip_install(
"esm==3.1.1",
"torch==2.4.1",
"gemmi==0.7.0",
"huggingface-hub==0.36.0",
)
.env({"HF_XET_HIGH_PERFORMANCE": "1", "HF_HOME": str(MODELS_PATH)})
)
```
We'll also define a separate image, with different dependencies,
for the part of our app that hosts the dashboard.
This helps reduce the complexity of Python dependency management
by "walling off" the different parts, e.g. separating
functions that depend on finicky ML packages
from those that depend on pedantic web packages.
Dependencies include `gradio` for building a web UI in Python and
`biotite` for extracting sequences from UniProt accession numbers.
You can read more about how to configure container images on Modal in
[this guide](https://modal.com/docs/guide/images).
```python
web_app_image = (
modal.Image.debian_slim(python_version="3.11")
.uv_pip_install("gradio~=4.44.0", "biotite==0.41.2", "fastapi[standard]==0.115.4")
.add_local_dir(Path(__file__).parent / "frontend", remote_path="/assets")
)
```
Here we "pre-import" libraries that will be used by the functions we run
on Modal in a given image using the `with image.imports` context manager.
```python
with esm3_image.imports():
import tempfile
import gemmi
import torch
from esm.models.esm3 import ESM3
from esm.sdk.api import ESMProtein, GenerationConfig
with web_app_image.imports():
import biotite.database.entrez as entrez
import biotite.sequence.io.fasta as fasta
from fastapi import FastAPI
```
## Define a `Model` inference class for ESM3
Next, we map the model's setup and inference code onto Modal.
1. For setup code that only needs to run once, we put it in a method
decorated with `@enter`, which runs on container start. For details,
see [this guide](https://modal.com/docs/guide/cold-start).
2. The rest of the inference code goes in a method decorated with `@method`.
3. We accelerate the compute-intensive inference with a GPU, specifically an A10G.
For more on using GPUs on Modal, see [this guide](https://modal.com/docs/guide/gpu).
```python
@app.cls(
image=esm3_image,
volumes={VOLUME_PATH: volume},
secrets=[modal.Secret.from_name("huggingface-secret")],
gpu="A10G",
timeout=20 * MINUTES,
)
class Model:
@modal.enter()
def enter(self):
self.model = ESM3.from_pretrained("esm3_sm_open_v1")
self.model.to("cuda")
print("using half precision and tensor cores for fast ESM3 inference")
self.model = self.model.half()
torch.backends.cuda.matmul.allow_tf32 = True
self.max_steps = 250
print(f"setting max ESM steps to: {self.max_steps}")
def convert_protein_to_MMCIF(self, esm_protein, output_path):
structure = gemmi.read_pdb_string(esm_protein.to_pdb_string())
doc = structure.make_mmcif_document()
doc.write_file(str(output_path), gemmi.cif.WriteOptions())
def get_generation_config(self, num_steps):
return GenerationConfig(track="structure", num_steps=num_steps)
@modal.method()
def inference(self, sequence: str):
num_steps = min(len(sequence), self.max_steps)
print(f"running ESM3 inference with num_steps={num_steps}")
esm_protein = self.model.generate(
ESMProtein(sequence=sequence), self.get_generation_config(num_steps)
)
print("checking for errors in output")
if hasattr(esm_protein, "error_msg"):
raise ValueError(esm_protein.error_msg)
print("converting ESMProtein into MMCIF file")
save_path = Path(tempfile.mktemp() + ".mmcif")
self.convert_protein_to_MMCIF(esm_protein, save_path)
print("returning MMCIF bytes")
return io.BytesIO(save_path.read_bytes())
```
## Serve a dashboard as an `asgi_app`
In this section we'll create a web interface around the ESM3 model
that can help scientists and stakeholders understand and interrogate the results of the model.
You can deploy this UI, along with the backing inference endpoint,
with the following command:
```bash
modal deploy esm3.py
```
### Integrating Modal Functions
The integration between our dashboard and our inference backend
is made simple by the Modal SDK:
because the definition of the `Model` class is available in the same Python
context as the defintion of the web UI,
we can instantiate an instance and call its methods with `.remote`.
The inference runs in a GPU-accelerated container with all of ESM3's
dependencies, while this code executes in a CPU-only container
with only our web dependencies.
```python
def run_esm(sequence: str) -> str:
sequence = sequence.strip()
print("running ESM")
mmcif_buffer = Model().inference.remote(sequence)
print("converting mmCIF bytes to base64 for compatibility with HTML")
mmcif_content = mmcif_buffer.read().decode()
mmcif_base64 = base64.b64encode(mmcif_content.encode()).decode()
return get_molstar_html(mmcif_base64)
```
### Building a UI in Python with Gradio
We'll visualize the results using [Mol* ](https://molstar.org/).
Mol* (pronounced "molstar") is an open-source toolkit for
visualizing and analyzing large-scale molecular data, including secondary structures
and residue-specific positions of proteins.
Second, we'll create links to lookup the metadata and structure of known
proteins using the [Universal Protein Resource](https://www.uniprot.org/)
database from the UniProt consortium which is supported by the European
Bioinformatics Institute, the National Human Genome Research
Institute, and the Swiss Institute of Bioinformatics. UniProt
is also a hub that links to many other databases, like the RCSB Protein
Data Bank.
To pull sequence data, we'll use the [Biotite](https://www.biotite-python.org/)
library to pull [FASTA](https://en.wikipedia.org/wiki/FASTA_format) files from
UniProt which contain labelled sequences.
You should see the URL for this UI in the output of `modal deploy`
or on your [Modal app dashboard](https://modal.com/apps) for this app.
```python
@app.function(
image=web_app_image,
volumes={VOLUME_PATH: volume},
max_containers=1, # Gradio requires sticky sessions
)
@modal.concurrent(max_inputs=100) # Gradio can handle many async inputs
@modal.asgi_app()
def ui():
import gradio as gr
from fastapi.responses import FileResponse
from gradio.routes import mount_gradio_app
web_app = FastAPI()
# custom styles: an icon, a background, and some CSS
@web_app.get("/favicon.ico", include_in_schema=False)
async def favicon():
return FileResponse("/assets/favicon.svg")
@web_app.get("/assets/background.svg", include_in_schema=False)
async def background():
return FileResponse("/assets/background.svg")
css = Path("/assets/index.css").read_text()
theme = gr.themes.Default(
primary_hue="green", secondary_hue="emerald", neutral_hue="neutral"
)
title = "Predict & Visualize Protein Structures"
with gr.Blocks(theme=theme, css=css, title=title, js=always_dark()) as interface:
gr.Markdown(f"# {title}")
with gr.Row():
with gr.Column():
gr.Markdown("## Enter UniProt ID ")
uniprot_num_box = gr.Textbox(
label="Enter UniProt ID or select one on the right",
placeholder="e.g. P02768, P69905, etc.",
)
get_sequence_button = gr.Button(
"Retrieve Sequence from UniProt ID", variant="primary"
)
uniprot_link_button = gr.Button(value="View protein on UniProt website")
uniprot_link_button.click(
fn=None,
inputs=uniprot_num_box,
js=get_js_for_uniprot_link(),
)
with gr.Column():
example_uniprots = get_uniprot_examples()
def extract_uniprot_num(example_idx):
uniprot = example_uniprots[example_idx]
return uniprot[uniprot.index("[") + 1 : uniprot.index("]")]
gr.Markdown("## Example UniProt Accession Numbers")
with gr.Row():
half_len = int(len(example_uniprots) / 2)
with gr.Column():
for i, uniprot in enumerate(example_uniprots[:half_len]):
btn = gr.Button(uniprot, variant="secondary")
btn.click(
fn=lambda j=i: extract_uniprot_num(j),
outputs=uniprot_num_box,
)
with gr.Column():
for i, uniprot in enumerate(example_uniprots[half_len:]):
btn = gr.Button(uniprot, variant="secondary")
btn.click(
fn=lambda j=i + half_len: extract_uniprot_num(j),
outputs=uniprot_num_box,
)
gr.Markdown("## Enter Sequence")
sequence_box = gr.Textbox(
label="Enter a sequence or retrieve it from a UniProt ID",
placeholder="e.g. MVTRLE..., PVTTIMHALL..., etc.",
)
get_sequence_button.click(
fn=get_sequence, inputs=[uniprot_num_box], outputs=[sequence_box]
)
run_esm_button = gr.Button("Run ESM3 Folding", variant="primary")
gr.Markdown("## ESM3 Predicted Structure")
molstar_html = gr.HTML()
run_esm_button.click(fn=run_esm, inputs=sequence_box, outputs=molstar_html)
# return a FastAPI app for Modal to serve
return mount_gradio_app(app=web_app, blocks=interface, path="/")
```
## Folding from the command line
If you want to quickly run the ESM3 model without the web interface, you can
run it from the command line like this:
```shell
modal run esm3
```
This will run the same inference code above on Modal. The results are
returned in the [Crystallographic Information File](https://en.wikipedia.org/wiki/Crystallographic_Information_File)
format, which you can render with the online [Molstar Viewer](https://molstar.org/viewer/).
```python
@app.local_entrypoint()
def main(sequence: Optional[str] = None, output_dir: Optional[str] = None):
if sequence is None:
print("using sequence for insulin [P01308]")
sequence = "MRTPMLLALLALATLCLAGRADAKPGDAESGKGAAFVSKQEGSEVVKRLRRYLDHWLGAPAPYPDPLEPKREVCELNPDCDELADHIGFQEAYRRFYGPV"
if output_dir is None:
output_dir = Path("/tmp/esm3")
output_dir.mkdir(parents=True, exist_ok=True)
output_path = output_dir / "output.mmcif"
print("starting inference on Modal")
results_buffer = Model().inference.remote(sequence)
print(f"writing results to {output_path}")
output_path.write_bytes(results_buffer.read())
```
## Addenda
The remainder of this code is boilerplate.
### Extracting Sequences from UniProt Accession Numbers
To retrieve sequence information we'll utilize the `biotite` library which
will allow us to fetch [fasta](https://en.wikipedia.org/wiki/FASTA_format)
sequence files from the [National Center for Biotechnology Information (NCBI) Entrez database](https://www.ncbi.nlm.nih.gov/Web/Search/entrezfs.html).
```python
def get_sequence(uniprot_num: str) -> str:
try:
DATA_PATH.mkdir(parents=True, exist_ok=True)
uniprot_num = uniprot_num.strip()
fasta_path = DATA_PATH / f"{uniprot_num}.fasta"
print(f"Fetching {fasta_path} from the entrez database")
entrez.fetch_single_file(
uniprot_num, fasta_path, db_name="protein", ret_type="fasta"
)
fasta_file = fasta.FastaFile.read(fasta_path)
protein_sequence = fasta.get_sequence(fasta_file)
return str(protein_sequence)
except Exception as e:
return f"Error: {e}"
```
### Supporting functions for the Gradio app
The following Python code is used to enhance the Gradio app,
mostly by generating some extra HTML & JS and handling styling.
```python
def get_js_for_uniprot_link():
url = "https://www.uniprot.org/uniprotkb/"
end = "/entry#structure"
return f"""(uni_id) => {{ if (!uni_id) return; window.open("{url}" + uni_id + "{end}"); }}"""
def get_molstar_html(mmcif_base64):
return f"""
"""
def get_uniprot_examples():
return [
"Albumin [P02768]",
"Insulin [P01308]",
"Hemoglobin [P69905]",
"Lysozyme [P61626]",
"BRCA1 [P38398]",
"Immunoglobulin [P01857]",
"Actin [P60709]",
"Ribonuclease [P07998]",
]
def always_dark():
return """
function refresh() {
const url = new URL(window.location);
if (url.searchParams.get('__theme') !== 'dark') {
url.searchParams.set('__theme', 'dark');
window.location.href = url.href;
}
}
"""
```
### Esmfold2
# Fold proteins and biomolecular complexes with ESMFold2
[ESMFold2](https://biohub.ai/esm/protein/about) is a state-of-the-art model
for biomolecular complex structure prediction, developed by [Biohub](https://biohub.ai/) and released
under an open license. Built on ESMC representations, it produces leading accuracy
for protein-protein and antibody-antigen interactions at any given compute budget.
ESMFold2 is available in two configurations:
- [ESMFold2](https://huggingface.co/biohub/ESMFold2): the larger model for
maximum accuracy. It can be run either from a single sequence or with MSA
context, with MSAs improving performance on difficult complexes.
- [ESMFold2-Fast](https://huggingface.co/biohub/ESMFold2-Fast): a smaller
model optimized for very fast single-sequence folding. It is well suited for
high-throughput folding, designed sequences, metagenomic proteins, and
targets with limited homologous sequence information.
In this example, we demonstrate how to run ESMFold2 on Modal's flexible
serverless infrastructure. By default, we fold a protein-DNA-ligand complex
(the M.HhaI DNA methyltransferase bound to a methylated DNA duplex and its
SAH cofactor), which exercises the model's full multimer capabilities.
You can also pass any single-chain protein sequence from the command line.
This script is meant as a starting point that demonstrates how to
create a `modal.Image` with the correct dependencies, cache weights to a `modal.Volume`,
and save the output to a file for a single folding request.
To really leverage Modal's serverless infrastructure, try scaling inference up across
hundreds or thousands of structures or invert the model to design binders
for a target protein.
## Setup
```python
from pathlib import Path
from typing import Optional
import modal
here = Path(__file__).parent # the directory of this file
MINUTES = 60 # seconds
app = modal.App(name="example-esmfold2")
```
## Installing ESMFold2 Python dependencies on Modal
Code executing on Modal runs inside containers built from
[`modal.Image`s](https://modal.com/docs/guide/images) that include that
code's dependencies.
For ESMFold2, we only need the `esm` library from Biohub which will install the necessary dependencies
including a custom fork of the `transformers` library.
```python
ESM_REVISION = "81b3646c9429ea8458918415ad6a46178cb59833" # pin upstream commit so builds are reproducible
esmfold2_image = (
modal.Image.debian_slim(python_version="3.13")
.apt_install("git")
.uv_pip_install(
f"esm @ git+https://github.com/Biohub/esm.git@{ESM_REVISION}",
)
)
```
We'll use the `image.imports()` context manager to import libraries we'll need in our inference code.
The context manager allows us to import libraries that might not be installed locally but are installed in our `modal.Image`.
```python
with esmfold2_image.imports():
from esm.models.esmfold2 import (
DNAInput,
ESMFold2InputBuilder,
LigandInput,
Modification,
ProteinInput,
StructurePredictionInput,
)
from transformers.models.esmfold2.modeling_esmfold2 import ESMFold2Model
```
## Caching ESMFold2 model weights on Modal Volumes
Rather than re-downloading the model weights on each cold start, we cache them on a [Modal Volume](https://modal.com/docs/guide/volumes).
The first time you run inference, you'll see that downloading the weights takes several minutes,
but subsequent runs will start up significantly faster.
For more on storing model weights on Modal, see [this guide](https://modal.com/docs/guide/model-weights).
```python
esmfold2_volume = modal.Volume.from_name("esmfold2-models", create_if_missing=True)
models_dir = Path("/models")
```
We also need to point the HF cache at the Volume, and we'll enable high-performance downloads by setting some environment variables on our `modal.Image`.
```python
esmfold2_image = esmfold2_image.env(
{
"HF_HOME": str(models_dir),
"HF_XET_HIGH_PERFORMANCE": "1", # speed up downloads
}
)
```
## Running ESMFold2 on Modal
To run inference on Modal, we define an `ESMFold2Inference` class and wrap it with the `@app.cls` decorator.
The decorator takes some arguments that describe the infrastructure
our code needs to run: the Volume we created, the Image we defined, and of
course a GPU. We'll use an H100, but you can use any other [GPU supported by Modal](https://modal.com/docs/guide/gpu).
When we use the `@app.cls` decorator, we can define a method decorated with the [`@modal.enter()` lifecycle hook](https://modal.com/docs/guide/lifecycle-functions#modalenter).
This method will be run once when a new container starts.
The exeuction time of the `@modal.enter()` method is included in the container startup time, so it won't serve requests
until it's ready.
To enable remote execution, we decorate our `fold` method with `@modal.method()`. We'll demonstrate later how to call it using `fold.remote()`.
```python
ESMFOLD2_REPO = "biohub/ESMFold2"
ESMFOLD2_REVISION = "6234905" # pin for reproducibility
@app.cls(
image=esmfold2_image,
volumes={models_dir: esmfold2_volume},
gpu="H100",
timeout=20 * MINUTES,
)
class ESMFold2Inference:
@modal.enter()
def load_model(self):
print("🧬 loading ESMFold2 onto the GPU")
self.model = (
ESMFold2Model.from_pretrained(ESMFOLD2_REPO, revision=ESMFOLD2_REVISION)
.cuda()
.eval()
)
@modal.method()
def fold(
self,
sequence: Optional[str] = None,
num_loops: int = 3,
num_sampling_steps: int = 50,
num_diffusion_samples: int = 1,
seed: int = 0,
) -> tuple[str, float, float, float]:
if sequence is None:
# default to the M.HhaI methyltransferase / DNA / SAH complex (PDB 1MHT);
# `C36` is the CCD code for 5-methylcytosine, `SAH` for the cofactor
spi = StructurePredictionInput(
sequences=[
ProteinInput(id="A", sequence=MHHAI_SEQUENCE),
DNAInput(
id="B",
sequence="GATAGCGCTATC",
modifications=[Modification(position=5, ccd="C36")],
),
DNAInput(
id="C",
sequence="TGATAGCGCTATC",
modifications=[Modification(position=6, ccd="C36")],
),
LigandInput(id="L", ccd=["SAH"]),
]
)
else:
spi = StructurePredictionInput(
sequences=[ProteinInput(id="A", sequence=sequence.strip())]
)
print(
f"🧬 folding with num_loops={num_loops}, "
f"num_sampling_steps={num_sampling_steps}, "
f"num_diffusion_samples={num_diffusion_samples}"
)
result = ESMFold2InputBuilder().fold(
self.model,
spi,
num_loops=num_loops,
num_sampling_steps=num_sampling_steps,
num_diffusion_samples=num_diffusion_samples,
seed=seed,
)
return (
result.complex.to_mmcif(),
float(result.plddt.mean()),
float(result.ptm),
float(result.iptm),
)
```
## Fold a complex from the command line
To showcase the full breadth of ESMFold2 -- it can predict structures of
proteins, nucleic acids, ligands, and modified residues all at once -- we
fold a complex by default: the
[M.HhaI](https://www.rcsb.org/structure/1MHT) cytosine-5 DNA methyltransferase
from _Haemophilus haemolyticus_, bound to a methylated DNA duplex and the
[S-adenosyl-L-homocysteine](https://en.wikipedia.org/wiki/S-Adenosyl-L-homocysteine)
cofactor that remains after methyl transfer.
```python
MHHAI_SEQUENCE = (
"MIEIKDKQLTGLRFIDLFAGLGGFRLALESCGAECVYSNEWDKYAQEVYEMNFGEKPEGDITQVNEKTIPDH"
"DILCAGFPCQAFSISGKQKGFEDSRGTLFFDIARIVREKKPKVVFMENVKNFASHDNGNTLEVVKNTMNELD"
"YSFHAKVLNALDYGIPQKRERIYMICFRNDLNIQNFQFPKPFELNTFVKDLLLPDSEVEHLVIDRKDLVMTN"
"QEIEQTTPKTVRLGIVGKGGQGERIYSTRGIAITLSAYGGGIFAKTGGYLVNGKTRKLHPRECARVMGYPDS"
"YKVHPSTSQAYKQFGNSVVINVLQYIAYNIGSSLNFKPY"
)
```
Fold the complex in the cloud by running the following command:
```shell
modal run esmfold2.py
```
This will save the predicted structure locally as a
[Crystallographic Information File](https://en.wikipedia.org/wiki/Crystallographic_Information_File),
which you can render with [Mol\* Viewer](https://molstar.org/viewer).
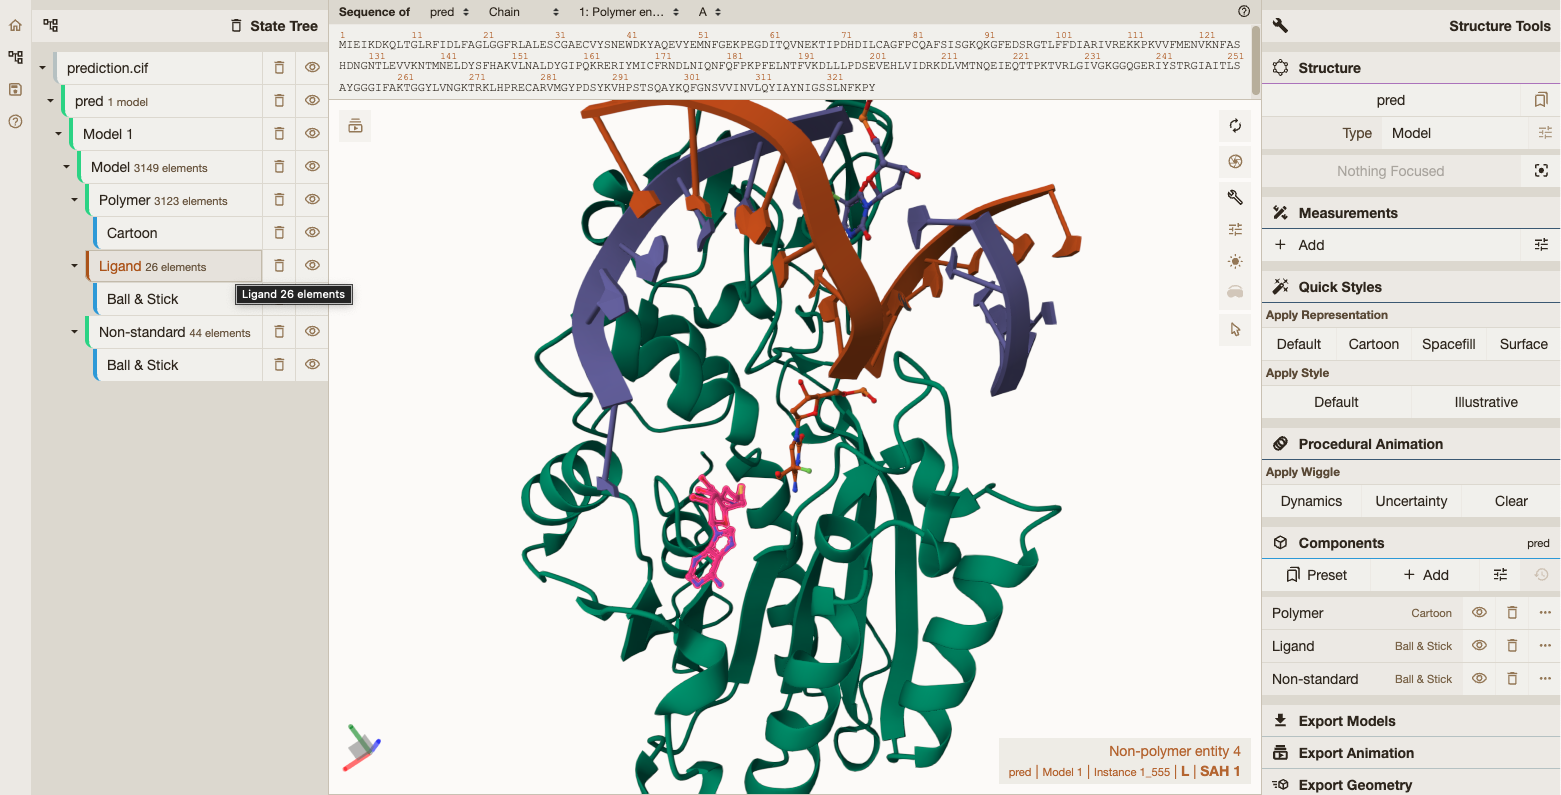
To fold a single protein chain instead, pass a sequence:
```shell
modal run esmfold2.py --sequence "MKTAYIAKQRQISFVKSHFSRQLEERLGLIEVQA..."
```
```python
@app.local_entrypoint()
def main(
sequence: Optional[str] = None,
output_path: Optional[str] = None,
):
print("🧬 running ESMFold2")
esmfold2 = ESMFold2Inference()
cif_text, plddt, ptm, iptm = esmfold2.fold.remote(sequence)
print(f"🧬 pLDDT mean: {plddt:.3f}, pTM: {ptm:.3f}, ipTM: {iptm:.3f}")
if output_path is None:
output_path = Path("/tmp") / "esmfold2" / "prediction.cif"
else:
output_path = Path(output_path)
output_path.parent.mkdir(parents=True, exist_ok=True)
print(f"🧬 writing predicted structure to {output_path}")
output_path.write_text(cif_text)
```
### Esmfold2 Binder Design
# Design protein binders at scale with ESMFold2 and ESMC
Protein folding was a landmark breakthrough in computational biology.
But for many applications, we don't just want to predict the structures of existing proteins —
we want to design new proteins that can modulate biology.
One of the most important ways to do that is through binding.
Protein-protein interactions drive much of biological function,
and the ability to design molecules that bind specific targets
opens the door to new research tools and therapeutics.
Recent AI approaches have tackled binder design by inverting
structure prediction models via an iterative optimization process:
1. Fold a candidate binder together with the target protein.
2. Score the resulting structure based on how well the binder folds and binds.
3. Take a step in sequence space that improves the score.
4. Repeat.
In this example, we'll demonstrate how implement this process on Modal
using [ESMFold2 and ESMC](https://biohub.ai/esm/protein/about), state-of-the-art models
developed at [Biohub](https://biohub.ai/) that can predict the stucture of biomolecular complexes.
Check out their [technical report](https://modal-cdn.com/esmfold2_tech_report.pdf)
to see how the models were developed and used to design and experimentally validate binders against therapeutically relevant targets.
We'll start by building a Modal Function that designs a single binder; then with only
a few more lines of code, we'll write an orchestrator function
that executes a large-scale search powered by Modal's autoscaling infrastructure and global GPU capacity.
## Setup
```python
from pathlib import Path
from typing import Optional
import modal
MINUTES = 60 # seconds
HOURS = 60 * MINUTES
app = modal.App(
name="example-esmfold2-binder-design",
)
```
## Defining our Modal Image
We'll use `Image.micromamba` as our base image because a few of the packages we need
are only available via Conda. We'll also install the [`esm`](https://github.com/Biohub/esm)
library from CZ Biohub (which pulls in a custom fork of `transformers`) and a few other helpful libraries
for working with protein sequences.
We set `CUBLAS_WORKSPACE_CONFIG` which allows us to ensure reproducibility by calling
`torch.use_deterministic_algorithms(True)` at the top of our remote code.
```python
ESM_REVISION = (
"f652b471d29da828b31e9b7a9cf7d0a7803240f5" # see https://github.com/Biohub/esm
)
image = (
modal.Image.micromamba(python_version="3.12")
.run_commands("apt update && apt install -y git build-essential")
.micromamba_install(
"anarci=2024.05.21-0",
channels=["conda-forge", "bioconda"],
)
.uv_pip_install(
f"esm @ git+https://github.com/Biohub/esm.git@{ESM_REVISION}",
"abnumber==0.4.4",
"pyarrow==18.1.0",
)
.env(
{
"HF_HOME": "/models",
"HF_XET_HIGH_PERFORMANCE": "1", # speed up Hugging Face downloads
"XFORMERS_IGNORE_FLASH_VERSION_CHECK": "1",
# required for torch.use_deterministic_algorithms(True)
"CUBLAS_WORKSPACE_CONFIG": ":4096:8",
}
)
)
```
## Caching weights and persisting results on Modal Volumes
ESMFold2 builds on the 6B-parameter ESMC encoder; together with the four
critic models used for final scoring, the model weights come in around ~50 GB.
We cache them on a [Modal Volume](https://modal.com/docs/guide/volumes)
which delivers much better performance at cold-start time than re-downloading
from Hugging Face each time.
```python
models_volume = modal.Volume.from_name("esmfold2-models", create_if_missing=True)
models_dir = Path("/models")
```
A second Volume will store our results.
```python
results_volume = modal.Volume.from_name(
"esmfold2-binder-design-results", create_if_missing=True
)
results_dir = Path("/results")
```
## Designing a binder on Modal
To run binder design on Modal, we define a `BinderDesignService` class and
wrap it with the `@app.cls` decorator. The decorator takes arguments that
describe the infrastructure our code needs: the Image and both Volumes we
defined, plus an H100 GPU which has enough memory for the 6B-parameter ESMC encoder and the
four ESMFold2 "hero" critic models.
Inside the class, the [`@modal.enter()` lifecycle hook](https://modal.com/docs/guide/lifecycle-functions#modalenter)
downloads and initializes those models once per container start, so subsequent
`design` calls on the same container reuse the loaded weights.
We decorate our `design` method with `@modal.method()` to enable remote
execution. We'll see it called both via `.remote()` (single design) and via
`.spawn()` + [`modal.FunctionCall.gather`](https://modal.com/docs/reference/modal.FunctionCall)
(parallel sweep) further below. The class itself is a thin wrapper around
[`ESMFold2Designer`](https://github.com/modal-labs/modal-examples/blob/main/06_gpu_and_ml/binder-design/binder_design/models.py)
from the helper package, which handles the actual model loading and the
gradient-guided optimization loop (`design_binder` in
[`binder_design.design`](https://github.com/modal-labs/modal-examples/blob/main/06_gpu_and_ml/binder-design/binder_design/design.py)).
```python
@app.cls(
image=image,
volumes={models_dir: models_volume},
gpu="H100",
timeout=1 * HOURS,
)
class BinderDesignService:
"""Modal entry point for ESMFold2-driven binder design.
Set ``use_scaling_critics=True`` to also load the 15-checkpoint
scaling-experiment ensemble (distogram binding confidence only).
"""
use_scaling_critics: bool = modal.parameter(default=False)
@modal.enter()
def load(self):
from .binder_design import ESMFold2Designer
self._designer = ESMFold2Designer()
self._designer.load(self.use_scaling_critics)
@modal.method()
def design(
self,
target_name: Optional[str] = None,
target_sequence: Optional[str] = None,
binder_name: Optional[str] = None,
binder_sequence: Optional[str] = None,
is_antibody: Optional[bool] = None,
seed: int = 0,
batch_size: int = 1,
):
return self._designer.design(
target_name=target_name,
target_sequence=target_sequence,
binder_name=binder_name,
binder_sequence=binder_sequence,
is_antibody=is_antibody,
seed=seed,
batch_size=batch_size,
)
```
## Fanning out a sweep with selection
A single design run gives you one candidate per batch slot. To recover the
kind of hit rates reported in the paper, you want many seeds, several binder
templates, and several targets, then a selection pass that ranks designs by
a combined ipTM / distogram-ipTM-proxy score.
We orchestrate from inside a Modal Function so you don't have to worry about
keeping a long-running process alive locally or installing any local dependencies.
```python
@app.function(
image=image,
volumes={results_dir: results_volume},
gpu="H100",
timeout=2 * HOURS,
)
def run_sweep(
line_sweeps: dict[str, list],
use_scaling_critics: bool = False,
save_filename: str = "selection.parquet",
) -> bytes:
"""Fan a grid sweep across GPUs, gather results, select top designs, ave results + return parquet."""
import io
from .binder_design.sweep import expand_sweep, select_designs
designer = BinderDesignService(use_scaling_critics=use_scaling_critics)
configs = expand_sweep(line_sweeps)
print(f"🧬 spawning {len(configs)} design jobs")
calls = [designer.design.spawn(**cfg) for cfg in configs]
raw_results = modal.FunctionCall.gather(*calls)
df_select = select_designs(configs, raw_results)
buf = io.BytesIO()
df_select.to_parquet(buf, index=False)
parquet_bytes = buf.getvalue()
save_path = results_dir / save_filename
save_path.write_bytes(parquet_bytes)
results_volume.commit()
print(f"🧬 saved {len(df_select)} selected designs to volume:{save_path}")
return parquet_bytes
```
## From the command line
`main` runs a single design. Override the
`target_name` / `binder_name` to try one of the
[bundled targets](https://github.com/modal-labs/modal-examples/blob/main/06_gpu_and_ml/binder-design/binder_design/prompts.py)
(`cd45`, `ctla4`, `egfr`, `pd-l1`, `pdgfr`) and binder templates
(`minibinder`, `trastuzumab_framework_vhvl`, `atezolizumab_framework_vhvl`,
`ocankitug_framework_vhvl`), or pass an arbitrary `target_sequence` /
`binder_sequence` directly.
```shell
modal run -m 06_gpu_and_ml.binder-design.esmfold2_binder_design::main \
--target-name pd-l1 --binder-name minibinder
```
```python
@app.local_entrypoint()
def main(
target_name: Optional[str] = "pd-l1",
target_sequence: Optional[str] = None,
binder_name: Optional[str] = "minibinder",
binder_sequence: Optional[str] = None,
is_antibody: Optional[bool] = None,
use_scaling_critics: bool = False,
seed: int = 0,
batch_size: int = 1,
):
designer = BinderDesignService(use_scaling_critics=use_scaling_critics)
seq, trajectory, results = designer.design.remote(
target_name=target_name,
target_sequence=target_sequence,
binder_name=binder_name,
binder_sequence=binder_sequence,
is_antibody=is_antibody,
seed=seed,
batch_size=batch_size,
)
avg_final_loss = sum(r["final_loss"] for r in results) / len(results)
print(f"🧬 designed sequence: {seq}")
print(f"🧬 trajectory length: {len(trajectory)} steps")
print(f"🧬 average final loss: {avg_final_loss:.4f}")
```
`sweep` runs a grid sweep across every `(target, binder, seed)` combination
of the targets and binders you pass in, scaling design horizontally with Modal's
[asynchronous job processing](https://modal.com/docs/guide/job-queue).
The selection pass runs server-side and the resulting parquet is
written to both the `esmfold2-binder-design-results` Volume and to a local
file for inspection.
`target_names` and `binder_names` are passed as comma-separated strings.
The defaults sweep one target across two binder modalities -- a `minibinder`
and the `trastuzumab_framework_vhvl` antibody template -- so a single
command fans out across both at once:
```shell
modal run -m 06_gpu_and_ml.binder-design.esmfold2_binder_design::sweep \
--target-names pd-l1,ctla4 \
--binder-names minibinder,trastuzumab_framework_vhvl \
--n-seeds 8
```
```python
@app.local_entrypoint()
def sweep(
target_names: str = "pd-l1",
binder_names: str = "minibinder,trastuzumab_framework_vhvl",
use_scaling_critics: bool = False,
n_seeds: int = 8,
output_path: Optional[str] = None,
):
target_name_list = [
name.strip() for name in target_names.split(",") if name.strip()
]
binder_name_list = [
name.strip() for name in binder_names.split(",") if name.strip()
]
line_sweeps = {
"target_name": target_name_list,
"target_sequence": [None],
"binder_name": binder_name_list,
"binder_sequence": [None],
"seed": list(range(n_seeds)),
"batch_size": [1],
}
print(
f"🧬 launching sweep: targets={target_name_list}, binders={binder_name_list}, "
f"n_seeds={n_seeds}, use_scaling_critics={use_scaling_critics}"
)
parquet_bytes = run_sweep.remote(
line_sweeps, use_scaling_critics=use_scaling_critics
)
if output_path is None:
output_path = Path("/tmp") / "esmfold2_binder_design" / "selection.parquet"
else:
output_path = Path(output_path)
output_path.parent.mkdir(parents=True, exist_ok=True)
output_path.write_bytes(parquet_bytes)
print(f"🧬 wrote selection parquet to {output_path}")
```
### Fastapi App
# Deploy FastAPI app with Modal
This example shows how you can deploy a [FastAPI](https://fastapi.tiangolo.com/) app with Modal.
You can serve any app written in an ASGI-compatible web framework (like FastAPI) using this pattern or you can server WSGI-compatible frameworks like Flask with [`wsgi_app`](https://modal.com/docs/guide/webhooks#wsgi).
```python
from typing import Optional
import modal
from fastapi import FastAPI, Header
from pydantic import BaseModel
image = modal.Image.debian_slim().uv_pip_install("fastapi[standard]", "pydantic")
app = modal.App("example-fastapi-app", image=image)
web_app = FastAPI()
class Item(BaseModel):
name: str
@web_app.get("/")
async def handle_root(user_agent: Optional[str] = Header(None)):
print(f"GET / - received user_agent={user_agent}")
return "Hello World"
@web_app.post("/foo")
async def handle_foo(item: Item, user_agent: Optional[str] = Header(None)):
print(f"POST /foo - received user_agent={user_agent}, item.name={item.name}")
return item
@app.function()
@modal.asgi_app()
def fastapi_app():
return web_app
@app.function()
@modal.fastapi_endpoint(method="POST")
def f(item: Item):
return "Hello " + item.name
if __name__ == "__main__":
app.deploy("webapp")
```
### Fastrtc Flip Webcam
# Run a FastRTC app on Modal
[FastRTC](https://fastrtc.org/) is a Python library for real-time communication on the web.
This example demonstrates how to run a simple FastRTC app in the cloud on Modal.
It's intended to help you get up and running with real-time streaming applications on Modal
as quickly as possible. If you're interested in running a production-grade WebRTC app on Modal,
see [this example](https://modal.com/docs/examples/webrtc_yolo).
In this example, we stream webcam video from a browser to a container on Modal,
where the video is flipped, annotated, and sent back with under 100ms of delay.
You can try it out [here](https://modal-labs-examples--example-fastrtc-flip-webcam-ui.modal.run/)
or just dive straight into the code to run it yourself.
## Set up FastRTC on Modal
First, we import the `modal` SDK
and use it to define a [container image](https://modal.com/docs/guide/images)
with FastRTC and related dependencies.
```python
import modal
web_image = modal.Image.debian_slim(python_version="3.12").uv_pip_install(
"fastapi[standard]==0.115.4",
"fastrtc==0.0.23",
"gradio==5.7.1",
"opencv-python-headless==4.11.0.86",
)
```
Then, we set that as the default Image on our Modal [App](https://modal.com/docs/guide/apps).
```python
app = modal.App("example-fastrtc-flip-webcam", image=web_image)
```
### Configure WebRTC streaming on Modal
Under the hood, FastRTC uses the WebRTC
[APIs](https://www.w3.org/TR/webrtc/) and
[protocols](https://datatracker.ietf.org/doc/html/rfc8825).
WebRTC provides low latency ("real-time") peer-to-peer communication
for Web applications, focusing on audio and video.
Considering that the Web is a platform originally designed
for high-latency, client-server communication of text and images,
that's no mean feat!
In addition to protocols that implement this communication,
WebRTC includes APIs for describing and manipulating audio/video streams.
In this demo, we set a few simple parameters, like the direction of the webcam
and the minimum frame rate. See the
[MDN Web Docs for `MediaTrackConstraints`](https://developer.mozilla.org/en-US/docs/Web/API/MediaTrackConstraints)
for more.
```python
TRACK_CONSTRAINTS = {
"width": {"exact": 640},
"height": {"exact": 480},
"frameRate": {"min": 30},
"facingMode": { # https://developer.mozilla.org/en-US/docs/Web/API/MediaTrackSettings/facingMode
"ideal": "user"
},
}
```
In theory, the Internet is designed for peer-to-peer communication
all the way down to its heart, the Internet Protocol (IP): just send packets between IP addresses.
In practice, peer-to-peer communication on the contemporary Internet is fraught with difficulites,
from restrictive firewalls to finicky work-arounds for
[the exhaustion of IPv4 addresses](https://www.a10networks.com/glossary/what-is-ipv4-exhaustion/),
like [Carrier-Grade Network Address Translation (CGNAT)](https://en.wikipedia.org/wiki/Carrier-grade_NAT).
So establishing peer-to-peer connections can be quite involved.
The protocol for doing so is called Interactive Connectivity Establishment (ICE).
It is described in [this RFC](https://datatracker.ietf.org/doc/html/rfc8445#section-2).
ICE involves the peers exchanging a list of connections that might be used.
We use a fairly simple setup here, where our peer on Modal uses the
[Session Traversal Utilities for NAT (STUN)](https://datatracker.ietf.org/doc/html/rfc5389)
server provided by Google. A STUN server basically just reflects back to a client what their
IP address and port number appear to be when they talk to it. The peer on Modal communicates
that information to the other peer trying to connect to it -- in this case, a browser trying to share a webcam feed.
Note the use of `stun` and port `19302` in the URL in place of
something more familiar, like `http` and port `80`.
```python
RTC_CONFIG = {"iceServers": [{"url": "stun:stun.l.google.com:19302"}]}
```
## Running a FastRTC app on Modal
FastRTC builds on top of the [Gradio](https://www.gradio.app/docs)
library for defining Web UIs in Python.
Gradio in turn is compatible with the
[Asynchronous Server Gateway Interface (ASGI)](https://asgi.readthedocs.io/en/latest/)
protocol for asynchronous Python web servers, like
[FastAPI](https://fastrtc.org/userguide/streams/),
so we can host it on Modal's cloud platform using the
[`modal.asgi_app` decorator](https://modal.com/docs/guide/webhooks#serving-asgi-and-wsgi-apps)
with [Modal Function](https://modal.com/docs/guide/apps).
But before we do that, we need to consider limits:
on how many peers can connect to one instance on Modal
and on how long they can stay connected.
We picked some sensible defaults to show how they interact
with the deployment parameters of the Modal Function.
You'll want to tune these for your application!
```python
MAX_CONCURRENT_STREAMS = 10 # number of peers per instance on Modal
MINUTES = 60 # seconds
TIME_LIMIT = 10 * MINUTES # time limit
@app.function(
# gradio requires sticky sessions
# so we limit the number of concurrent containers to 1
# and allow that container to handle concurrent streams
max_containers=1,
scaledown_window=TIME_LIMIT + 1 * MINUTES, # add a small buffer to time limit
)
@modal.concurrent(max_inputs=MAX_CONCURRENT_STREAMS) # inputs per container
@modal.asgi_app() # ASGI on Modal
def ui():
import fastrtc # WebRTC in Gradio
import gradio as gr # WebUIs in Python
from fastapi import FastAPI # asynchronous ASGI server framework
from gradio.routes import mount_gradio_app # connects Gradio and FastAPI
with gr.Blocks() as blocks: # block-wise UI definition
gr.HTML( # simple HTML header
""
"Streaming Video Processing with Modal and FastRTC"
" "
)
with gr.Column(): # a column of UI elements
fastrtc.Stream( # high-level media streaming UI element
modality="video",
mode="send-receive",
handler=flip_vertically, # handler -- handle incoming frame, produce outgoing frame
ui_args={"title": "Click 'Record' to flip your webcam in the cloud"},
rtc_configuration=RTC_CONFIG,
track_constraints=TRACK_CONSTRAINTS,
concurrency_limit=MAX_CONCURRENT_STREAMS, # limit simultaneous connections
time_limit=TIME_LIMIT, # limit time per connection
)
return mount_gradio_app(app=FastAPI(), blocks=blocks, path="/")
```
To try this out for yourself, run
```bash
modal serve 07_web/fastrtc_flip_webcam.py
```
and head to the `modal.run` URL that appears in your terminal.
You can also check on the application's dashboard
via the `modal.com` URL thatappears below it.
The `modal serve` command produces a hot-reloading development server --
try editing the `title` in the `ui_args` above and watch the server redeploy.
This temporary deployment is tied to your terminal session.
To deploy permanently, run
```bash
modal deploy 07_web_endponts/fastrtc_flip_webcam.py
```
Note that Modal is a serverless platform with [usage-based pricing](https://modal.com/pricing),
so this application will spin down and cost you nothing when it is not in use.
## Addenda
This FastRTC app is very much the "hello world" or "echo server"
of FastRTC: it just flips the incoming webcam stream and adds a "hello" message.
That logic appears below.
```python
def flip_vertically(image):
import cv2
import numpy as np
image = image.astype(np.uint8)
if image is None:
print("failed to decode image")
return
# flip vertically and caption to show video was processed on Modal
image = cv2.flip(image, 0)
lines = ["Hello from Modal!"]
caption_image(image, lines)
return image
def caption_image(
img, lines, font_scale=0.8, thickness=2, margin=10, font=None, color=None
):
import cv2
if font is None:
font = cv2.FONT_HERSHEY_SIMPLEX
if color is None:
color = (127, 238, 100, 128) # Modal Green
# get text sizes
sizes = [cv2.getTextSize(line, font, font_scale, thickness)[0] for line in lines]
if not sizes:
return
# position text in bottom right
pos_xs = [img.shape[1] - size[0] - margin for size in sizes]
pos_ys = [img.shape[0] - margin]
for _width, height in reversed(sizes[:-1]):
next_pos = pos_ys[-1] - 2 * height
pos_ys.append(next_pos)
for line, pos in zip(lines, zip(pos_xs, reversed(pos_ys))):
cv2.putText(img, line, pos, font, font_scale, color, thickness)
```
### Fine Tune Asr
# Fine-tune Whisper to Improve Transcription on Domain-Specific Vocab
This example demonstrates how to fine-tune an ASR model
([whisper-tiny.en](https://huggingface.co/openai/whisper-tiny.en))
and deploy it for inference using Modal.
Speech recognition models work well out-of-the-box for general speech transcription,
but can struggle with examples that are not well represented in the training data -
like proper nouns, technical jargon, and industry-specific terms. Fine-tuning with
examples of domain-specific vocabulary can improve transcription of these terms.
For example, here is a sample transcription from the baseline model with no
fine-tuning:
| | Transcription |
|------------------|---------------------------------------------------------------|
| **Ground Truth** | "deuterium you put into one element you make a new element" |
| **Prediction** | "the theorem you put into one element you make a new element" |
After just 1.5 hours of training on a small dataset (~7k samples), the model has
already improved:
| | Transcription |
|------------------|-------------------------------------------------------------|
| **Ground Truth** | "deuterium you put into one element you make a new element" |
| **Prediction** | "deuterium you put into one element you make a new element" |
We'll use the "small" subset of "Science and Technology" from the
[GigaSpeech](https://huggingface.co/datasets/speechcolab/gigaspeech)
dataset, which is enough data to see the model improve on scientific terms in just a
few epochs.
Note: GigaSpeech is a
[gated model](https://huggingface.co/docs/hub/en/models-gated),
so you'll need to accept the terms on the
[dataset card](https://huggingface.co/datasets/speechcolab/gigaspeech)
and create a
[Hugging Face Secret](https://modal.com/secrets/)
to download it.
## Setup
We start by importing our standard library dependencies, `fastapi`, and `modal`.
We also need an [`App`](https://modal.com/docs/guide/apps) object, which we'll use to
define how our training application will run on Modal's cloud infrastructure.
```python
import functools
import io
import os
from dataclasses import dataclass
from pathlib import Path
from typing import Annotated, Any, Union
import fastapi
import modal
MINUTES = 60
HOURS = 60 * MINUTES
app = modal.App(name="example-whisper-fine-tune")
```
### Set up the container image
We define the environment where our functions will run by building up a base
[container `Image`](https://modal.com/docs/guide/images)
with our dependencies using `Image.uv_pip_install`. We also set environment variables
here using `Image.env`, like the Hugging Face cache directory.
```python
CACHE_DIR = "/cache"
image = (
modal.Image.debian_slim(python_version="3.12")
.uv_pip_install(
"accelerate==1.8.1",
"datasets==3.6.0",
"evaluate==0.4.5",
"fastapi[standard]==0.116.1",
"huggingface-hub==0.36.0",
"jiwer==4.0.0",
"librosa==0.11.0",
"torch==2.7.1",
"torchaudio==2.7.1",
"transformers==4.53.2",
"whisper_normalizer==0.1.12",
)
.env(
{
"HF_XET_HIGH_PERFORMANCE": "1", # Faster downloads from Hugging Face
"HF_HOME": CACHE_DIR,
}
)
)
```
Next we'll import the dependencies we need for the code that will run on Modal.
The `image.imports()` context manager ensures these imports are available when our
Functions run in the cloud, without the need to install the dependencies locally.
```python
with image.imports():
import datasets
import evaluate
import librosa
import torch
import transformers
from whisper_normalizer.english import EnglishTextNormalizer
```
### Storing data on Modal
We use
[Modal Volumes](https://modal.com/docs/guide/volumes)
for data we want to persist across function calls. In this case, we'll create a cache
Volume for storing Hugging Face downloads for faster subsequent loads, and an output
Volume for saving our model and metrics after training.
```python
cache_volume = modal.Volume.from_name("hf-hub-cache", create_if_missing=True)
output_volume = modal.Volume.from_name(
"fine-tune-asr-example-volume",
create_if_missing=True,
)
OUTPUT_DIR = "/outputs"
volumes = {CACHE_DIR: cache_volume, OUTPUT_DIR: output_volume}
```
## Training
We use a `dataclass` to collect some of the training parameters in one place. Here we
set `model_output_name` which is the directory on the Volume where our model will be
saved, and where we'll load it from when deploying the model for inference.
```python
@dataclass
class Config:
"""Training configuration."""
model_output_name: str = "whisper-fine-tune" # Name used for saving and loading
# Model config
model_name: str = "openai/whisper-tiny.en"
# Dataset config
dataset_name: str = "speechcolab/gigaspeech"
dataset_subset: str = "s" # "xs" for testing, "m", "l", "xl" for more data
dataset_split: str = "train" # The test and val splits don't have category labels
dataset_category: int = 15 # "Science and Technology"
max_duration_in_seconds: float = 20.0
min_duration_in_seconds: float = 0.0
# Training config
num_train_epochs: int = 5
warmup_steps: int = 400
max_steps: int = -1
batch_size: int = 64
learning_rate: float = 1e-5
eval_strategy: str = "epoch"
```
### Defining our training Function
The training Function does the following:
1. Load the pre-trained model, along with the feature extractor and tokenizer
2. Load the dataset -> select our training category -> extract features for training
3. Run baseline evals
4. 🚂 Train!
5. Save the fine-tuned model to the Volume
6. Run final evals
We run evals before and after training to establish a baseline and see how much the
model improved. The most common way to measure the performance of speech recognition
models is "word error rate" (WER):
`WER = (substitutions + deletions + insertions) / total words`.
The `@app.function` decorator is where we attach infrastructure and define how our
Function runs on Modal. Here we tell the Function to use our `Image`, specify the GPU,
attach the Volumes we created earlier, add our access token, and set a timeout.
```python
@app.function(
image=image,
gpu="H100",
volumes=volumes,
secrets=[modal.Secret.from_name("huggingface-secret", required_keys=["HF_TOKEN"])],
timeout=3 * HOURS,
)
def train(
config: Config,
):
"""Loads data and trains the model."""
# Setting args for the Hugging Face trainer
training_args = transformers.Seq2SeqTrainingArguments(
output_dir=Path(OUTPUT_DIR) / config.model_output_name,
num_train_epochs=config.num_train_epochs,
per_device_train_batch_size=config.batch_size,
per_device_eval_batch_size=config.batch_size,
learning_rate=config.learning_rate,
warmup_steps=config.warmup_steps,
max_steps=config.max_steps,
eval_strategy=config.eval_strategy,
fp16=True,
group_by_length=True,
length_column_name="input_length",
predict_with_generate=True,
generation_max_length=40,
generation_num_beams=1,
)
print(f"Loading model: {config.model_name}")
feature_extractor = transformers.WhisperFeatureExtractor.from_pretrained(
pretrained_model_name_or_path=config.model_name,
)
tokenizer = transformers.WhisperTokenizer.from_pretrained(
pretrained_model_name_or_path=config.model_name,
)
model = transformers.WhisperForConditionalGeneration.from_pretrained(
pretrained_model_name_or_path=config.model_name,
)
print(f"Loading dataset: {config.dataset_name} {config.dataset_subset}")
dataset = (
datasets.load_dataset(
config.dataset_name,
config.dataset_subset,
split=config.dataset_split,
num_proc=os.cpu_count(),
trust_remote_code=True,
)
if config.dataset_name is not None
else get_test_dataset(config)
)
print("Preparing data")
max_input_length = config.max_duration_in_seconds * feature_extractor.sampling_rate
min_input_length = config.min_duration_in_seconds * feature_extractor.sampling_rate
# Remove samples that are not from our target category (Science and Technology)
# Remove audio clips that are too short or too long
dataset = dataset.filter(
functools.partial(
filter_dataset,
dataset_category=config.dataset_category,
max_input_length=max_input_length,
min_input_length=min_input_length,
),
input_columns=["category", "audio"],
num_proc=os.cpu_count(),
)
# Extract audio features and tokenize labels
dataset = dataset.map(
functools.partial(
prepare_dataset,
feature_extractor=feature_extractor,
tokenizer=tokenizer,
model_input_name=feature_extractor.model_input_names[0],
),
batched=True,
remove_columns=dataset.column_names,
num_proc=os.cpu_count(),
desc="Feature extract + tokenize",
)
# Split the filtered dataset into train/validation sets
dataset = dataset.train_test_split(test_size=0.1, shuffle=True, seed=42)
# Create a processor that combines the feature extractor and tokenizer
processor = transformers.WhisperProcessor(
feature_extractor=feature_extractor,
tokenizer=tokenizer,
)
# Custom data collator handles batching of variable-length audio sequences
data_collator = DataCollatorSpeechSeq2SeqWithPadding(
processor=processor,
decoder_start_token_id=model.config.decoder_start_token_id,
)
# Set up the Hugging Face trainer with all of our components
normalizer = EnglishTextNormalizer()
metric = evaluate.load("wer")
trainer = transformers.Seq2SeqTrainer(
model=model,
args=training_args,
train_dataset=dataset["train"],
eval_dataset=dataset["test"],
processing_class=feature_extractor,
data_collator=data_collator,
compute_metrics=functools.partial(
compute_metrics,
tokenizer=tokenizer,
normalizer=normalizer,
metric=metric,
),
)
print("Running evals before training to establish a baseline")
metrics = trainer.evaluate(
metric_key_prefix="baseline",
max_length=training_args.generation_max_length,
num_beams=training_args.generation_num_beams,
)
trainer.log_metrics("baseline", metrics)
trainer.save_metrics("baseline", metrics)
print(f"Starting training! Weights will be saved to '{training_args.output_dir}'")
train_result = trainer.train()
# Save the model weights, tokenizer, and feature extractor
trainer.save_model()
tokenizer.save_pretrained(training_args.output_dir)
feature_extractor.save_pretrained(training_args.output_dir)
# Log training metrics
metrics = train_result.metrics
metrics["train_samples"] = len(dataset["train"])
trainer.log_metrics("train", metrics)
trainer.save_metrics("train", metrics)
trainer.save_state()
# Final evaluation to see how much we improved
print("Running final evals")
metrics = trainer.evaluate(
metric_key_prefix="test",
max_length=training_args.generation_max_length,
num_beams=training_args.generation_num_beams,
)
metrics["eval_samples"] = len(dataset["test"])
trainer.log_metrics("test", metrics)
trainer.save_metrics("test", metrics)
output_volume.commit() # Ensure everything is saved to the Volume
print(f"\nTraining complete! Model saved to '{training_args.output_dir}'")
```
## Calling a Modal function from the command line
The easiest way to invoke our training Function is by creating a `local_entrypoint` --
our `main` function that runs locally and provides a command-line interface to trigger
training on Modal's cloud infrastructure.
```python
@app.local_entrypoint()
def main(test: bool = False):
"""Run Whisper fine-tuning on Modal."""
if test: # for quick e2e test
config = Config(
dataset_name=None,
num_train_epochs=1.0,
warmup_steps=0,
max_steps=1,
)
else:
config = Config()
train.remote(config)
```
This will allow us to run this example with:
```bash
modal run fine_tune_asr.py
```
Arguments passed to this function are turned in to CLI arguments automagically. For
example, adding `--test` will run a single step of training for end-to-end testing.
```bash
modal run fine_tune_asr.py --test
```
Training will take ~1.5 hours, and will log WER and other metrics throughout the
run.
Here are a few more examples of terms the model predicted correctly after fine-tuning:
| **Base Model** | **Fine-tuned** |
|----------------|-----------------|
| and pm package | npm package |
| teach them | tritium |
| chromebox | chromevox |
| purposes | porpoises |
| difsoup | div soup |
| would you | widget |
## Deploying our fine-tuned model for inference
Once fine-tuning is complete, Modal makes it incredibly easy to deploy our new model.
We can define both our inference function and an endpoint using a Modal
[Cls](https://modal.com/docs/reference/modal.Cls).
This will allow us to take advantage of
[lifecycle hooks](https://modal.com/docs/guide/lifecycle-functions)
to load the model just once on container startup using the `@modal.enter` decorator.
We can use
[modal.fastapi_endpoint](https://modal.com/docs/reference/modal.fastapi_endpoint)
to expose our inference function as a Web Function.
```python
@app.cls(
image=image,
gpu="H100",
timeout=10 * MINUTES,
# scaledown_window=10 * MINUTES,
volumes=volumes,
)
class Inference:
model_name: str = modal.parameter(default=Config().model_output_name)
@modal.enter()
def load_model(self):
"""Load the model and processor on container startup."""
model = f"{OUTPUT_DIR}/{self.model_name}"
print(f"Loading model from {model}")
self.processor = transformers.WhisperProcessor.from_pretrained(model)
self.model = transformers.WhisperForConditionalGeneration.from_pretrained(model)
self.model.config.forced_decoder_ids = None
@modal.method()
def transcribe(
self,
audio_bytes: bytes,
) -> str:
# Resample audio to match the model's sample rate
model_sample_rate = self.processor.feature_extractor.sampling_rate
audio_data, sample_rate = librosa.load(io.BytesIO(audio_bytes), sr=None)
audio_dataset = datasets.Dataset.from_dict(
{"audio": [{"array": audio_data, "sampling_rate": sample_rate}]}
).cast_column("audio", datasets.Audio(sampling_rate=model_sample_rate))
# Audio -> features (log-mel spectrogram)
row = next(iter(audio_dataset))
input_features = self.processor(
row["audio"]["array"],
sampling_rate=row["audio"]["sampling_rate"],
return_tensors="pt",
).input_features
# generate tokens -> decode to text
predicted_ids = self.model.generate(input_features)
transcription = self.processor.batch_decode(
predicted_ids, skip_special_tokens=True
)[0]
return transcription
@modal.fastapi_endpoint(method="POST", docs=True)
def web(
self,
audio_file: Annotated[bytes, fastapi.File()],
) -> dict[str, str]:
"""Defines an endpoint for calling inference."""
transcription = self.transcribe.local( # run in the same container
audio_bytes=audio_file,
)
return {"transcription": transcription}
```
Deploy it with:
```bash
modal deploy fine_tune_asr.py
```
Note: you can specify which model to load by passing the `model_name` as a
query parameter when calling the endpoint. This defaults to `model_output_name`, which
we set in our `Config` above, and is the name of the directory where our model
was saved.
Here's an example of how to use this endpoint to transcribe an audio file:
```bash
curl -X 'POST' \
'https://your-workspace-name--example-whisper-fine-tune-inference-web.modal.run/?model_name=whisper-fine-tune' \
-H 'accept: application/json' \
-H 'Content-Type: multipart/form-data' \
-F 'audio_file=@your-audio-file.wav;type=audio/wav'
```
## Support code
```python
def get_test_dataset(config, length=5):
return datasets.Dataset.from_dict(
{
"text": ["Modal"] * length,
"audio": [{"array": [1.0] * 16000, "sampling_rate": 16000}] * length,
"category": [config.dataset_category] * length,
}
)
def filter_dataset(
category, audio, dataset_category, max_input_length, min_input_length
):
return (
category == dataset_category
and len(audio["array"]) > min_input_length
and len(audio["array"]) < max_input_length
)
def prepare_dataset(batch, feature_extractor, tokenizer, model_input_name):
"""Batched: convert audio to features and text to token IDs."""
audio_arrays = [s["array"] for s in batch["audio"]]
inputs = feature_extractor(
audio_arrays,
sampling_rate=feature_extractor.sampling_rate,
)
batch[model_input_name] = inputs.get(model_input_name)
batch["input_length"] = [len(s["array"]) for s in batch["audio"]]
normalized = [
t.replace(" ", ",")
.replace(" ", ".")
.replace(" ", "?")
.replace(" ", "!")
.lower()
.strip()
for t in batch["text"]
]
batch["labels"] = tokenizer(normalized).input_ids
return batch
def compute_metrics(pred, tokenizer, normalizer, metric):
"""Compute Word Error Rate between predictions and ground truth."""
pred_ids = pred.predictions
# Replace padding tokens with proper pad token ID
pred.label_ids[pred.label_ids == -100] = tokenizer.pad_token_id
# Decode predictions and labels back to text
pred_str = tokenizer.batch_decode(pred_ids, skip_special_tokens=True)
norm_pred_str = [normalizer(s).strip() for s in pred_str]
label_str = tokenizer.batch_decode(pred.label_ids, skip_special_tokens=True)
norm_label_str = [normalizer(s).strip() for s in label_str]
# Calculate Word Error Rate
wer = metric.compute(predictions=norm_pred_str, references=norm_label_str)
return {"wer": wer}
@dataclass
class DataCollatorSpeechSeq2SeqWithPadding:
"""
Data collator that pads audio features and text labels for batch training.
Args:
processor: WhisperProcessor combining feature extractor and tokenizer
decoder_start_token_id: The BOS token ID for the decoder
"""
processor: Any
decoder_start_token_id: int
def __call__(
self, features: list[dict[str, Union[list[int], "torch.Tensor"]]]
) -> dict[str, "torch.Tensor"]:
# Separate audio features and text labels since they need different padding
model_input_name = self.processor.model_input_names[0]
input_features = [
{model_input_name: feature[model_input_name]} for feature in features
]
label_features = [{"input_ids": feature["labels"]} for feature in features]
batch = self.processor.feature_extractor.pad(
input_features,
return_tensors="pt",
return_attention_mask=True,
padding=True,
)
labels_batch = self.processor.tokenizer.pad(label_features, return_tensors="pt")
# Replace padding tokens with -100 so they're ignored in loss calculation
labels = labels_batch["input_ids"].masked_fill(
labels_batch.attention_mask.ne(1), -100
)
# Remove start token if tokenizer added it - model will add it during training
if (labels[:, 0] == self.decoder_start_token_id).all().cpu().item():
labels = labels[:, 1:]
batch["labels"] = labels
return batch
```
### Finetune Yolo
# Fine-tune open source YOLO models for object detection
Example by [@Erik-Dunteman](https://github.com/erik-dunteman) and [@AnirudhRahul](https://github.com/AnirudhRahul/).
The popular "You Only Look Once" (YOLO) model line provides high-quality object detection in an economical package.
In this example, we use the [YOLOv10](https://docs.ultralytics.com/models/yolov10/) model, released on May 23, 2024.
We will:
- Download two custom datasets from the [Roboflow](https://roboflow.com/) computer vision platform: a dataset of cats and a dataset of dogs
- Fine-tune the model on those datasets, in parallel, using the [Ultralytics package](https://docs.ultralytics.com/)
- Run inference with the fine-tuned models on single images and on streaming frames
For commercial use, be sure to consult the [Ultralytics software license options](https://docs.ultralytics.com/#yolo-licenses-how-is-ultralytics-yolo-licensed),
which include AGPL-3.0.
## Set up the environment
```python
import warnings
from dataclasses import dataclass
from datetime import datetime
from pathlib import Path
import modal
```
Modal runs your code in the cloud inside containers. So to use it, we have to define the dependencies
of our code as part of the container's [image](https://modal.com/docs/guide/custom-container).
```python
image = (
modal.Image.debian_slim(python_version="3.10")
.apt_install( # install system libraries for graphics handling, model download
["libgl1-mesa-glx", "libglib2.0-0", "curl"]
)
.uv_pip_install( # install python libraries for computer vision
["ultralytics~=8.2.68", "roboflow~=1.1.37", "opencv-python~=4.10.0"]
)
.uv_pip_install( # add an optional extra that renders images in the terminal
"term-image==0.7.1"
)
)
```
We also create a persistent [Volume](https://modal.com/docs/guide/volumes) for storing datasets, trained weights, and inference outputs. For more on storing model weights on Modal, see
[this guide](https://modal.com/docs/guide/model-weights).
```python
volume = modal.Volume.from_name("example-yolo-finetune", create_if_missing=True)
volume_path = ( # the path to the volume from within the container
Path("/root") / "data"
)
```
We attach both of these to a Modal [App](https://modal.com/docs/guide/apps).
```python
app = modal.App("example-yolo-finetune", image=image, volumes={volume_path: volume})
```
## Download a dataset
We'll be downloading our data from the [Roboflow](https://roboflow.com/) computer vision platform, so to follow along you'll need to:
- Create a free account on [Roboflow](https://app.roboflow.com/)
- [Generate a Private API key](https://app.roboflow.com/settings/api)
- Set up a Modal [Secret](https://modal.com/docs/guide/secrets) called `roboflow-api-key` in the Modal UI [here](https://modal.com/secrets),
setting the `ROBOFLOW_API_KEY` to the value of your API key.
You're also free to bring your own dataset with a config in YOLOv10-compatible yaml format.
We'll be training on the medium size model, but you're free to experiment with [other model sizes](https://docs.ultralytics.com/models/yolov10/#model-variants).
```python
@dataclass
class DatasetConfig:
"""Information required to download a dataset from Roboflow."""
workspace_id: str
project_id: str
version: int
format: str
target_class: str
@property
def id(self) -> str:
return f"{self.workspace_id}/{self.project_id}/{self.version}"
@app.function(
secrets=[
modal.Secret.from_name("roboflow-api-key", required_keys=["ROBOFLOW_API_KEY"])
]
)
def download_dataset(config: DatasetConfig):
import os
from roboflow import Roboflow
rf = Roboflow(api_key=os.getenv("ROBOFLOW_API_KEY"))
project = (
rf.workspace(config.workspace_id)
.project(config.project_id)
.version(config.version)
)
dataset_dir = volume_path / "dataset" / config.id
project.download(config.format, location=str(dataset_dir))
```
## Train a model
We train the model on a single A100 GPU. Training usually takes only a few minutes.
```python
MINUTES = 60
TRAIN_GPU_COUNT = 1
TRAIN_GPU = f"A100:{TRAIN_GPU_COUNT}"
TRAIN_CPU_COUNT = 4
@app.function(
gpu=TRAIN_GPU,
cpu=TRAIN_CPU_COUNT,
timeout=60 * MINUTES,
)
def train(
model_id: str,
dataset: DatasetConfig,
model_size="yolov10m.pt",
quick_check=False,
):
from ultralytics import YOLO
volume.reload() # make sure volume is synced
model_path = volume_path / "runs" / model_id
model_path.mkdir(parents=True, exist_ok=True)
data_path = volume_path / "dataset" / dataset.id / "data.yaml"
model = YOLO(model_size)
model.train(
# dataset config
data=data_path,
fraction=0.4
if not quick_check
else 0.04, # fraction of dataset to use for training/validation
# optimization config
device=list(range(TRAIN_GPU_COUNT)), # use the GPU(s)
epochs=8 if not quick_check else 1, # pass over entire dataset this many times
batch=0.95, # automatic batch size to target fraction of GPU util
seed=117, # set seed for reproducibility
# data processing config
workers=max(
TRAIN_CPU_COUNT // TRAIN_GPU_COUNT, 1
), # split CPUs evenly across GPUs
cache=False, # cache preprocessed images in RAM?
# model saving config
project=f"{volume_path}/runs",
name=model_id,
exist_ok=True, # overwrite previous model if it exists
verbose=True, # detailed logs
)
```
## Run inference on single inputs and on streams
We demonstrate two different ways to run inference -- on single images and on a stream of images.
The images we use for inference are loaded from the test set, which was added to our Volume when we downloaded the dataset.
Each image read takes ~50ms, and inference can take ~5ms, so the disk read would be our biggest bottleneck if we just looped over the image paths.
To avoid it, we parallelize the disk reads across many workers using Modal's [`.map`](https://modal.com/docs/guide/scale),
streaming the images to the model. This roughly mimics the behavior of an interactive object detection pipeline.
This can increase throughput up to ~60 images/s, or ~17 milliseconds/image, depending on image size.
```python
@app.function()
def read_image(image_path: str):
import cv2
source = cv2.imread(image_path)
return source
```
We use the `@enter` feature of [`modal.Cls`](https://modal.com/docs/guide/lifecycle-functions)
to load the model only once on container start and reuse it for future inferences.
We use a generator to stream images to the model.
```python
@app.cls(gpu="a10g")
class Inference:
weights_path: str = modal.parameter()
@modal.enter()
def load_model(self):
from ultralytics import YOLO
self.model = YOLO(self.weights_path)
@modal.method()
def predict(self, model_id: str, image_path: str, display: bool = False):
"""A simple method for running inference on one image at a time."""
results = self.model.predict(
image_path,
half=True, # use fp16
save=True,
exist_ok=True,
project=f"{volume_path}/predictions/{model_id}",
)
if display:
from term_image.image import from_file
terminal_image = from_file(results[0].path)
terminal_image.draw()
# you can view the output file via the Volumes UI in the Modal dashboard -- https://modal.com/storage
@modal.method()
def streaming_count(self, batch_dir: str, threshold: float | None = None):
"""Counts the number of objects in a directory of images.
Intended as a demonstration of high-throughput streaming inference."""
import os
import time
image_files = [os.path.join(batch_dir, f) for f in os.listdir(batch_dir)]
completed, start = 0, time.monotonic_ns()
for image in read_image.map(image_files):
# note that we run predict on a single input at a time.
# each individual inference is usually done before the next image arrives, so there's no throughput benefit to batching.
results = self.model.predict(
image,
half=True, # use fp16
save=False, # don't save to disk, as it slows down the pipeline significantly
verbose=False,
)
completed += 1
for res in results:
for conf in res.boxes.conf:
if threshold is None:
yield 1
continue
if conf.item() >= threshold:
yield 1
yield 0
elapsed_seconds = (time.monotonic_ns() - start) / 1e9
print(
"Inferences per second:",
round(completed / elapsed_seconds, 2),
)
```
## Running the example
We'll kick off our parallel training jobs and run inference from the command line.
```bash
modal run finetune_yolo.py
```
This runs the training in `quick_check` mode, useful for debugging the pipeline and getting a feel for it.
To do a longer run that actually meaningfully improves performance, use:
```bash
modal run finetune_yolo.py --no-quick-check
```
```python
@app.local_entrypoint()
def main(quick_check: bool = True, inference_only: bool = False):
"""Run fine-tuning and inference on two datasets.
Args:
quick_check: fine-tune on a small subset. Lower quality results, but faster iteration.
inference_only: skip fine-tuning and only run inference
"""
dogs = DatasetConfig(
workspace_id="cv-project-v2",
project_id="6-dog-breeds",
version=1,
format="yolov9",
target_class="🐶",
)
cats = DatasetConfig(
workspace_id="jus-workspace",
project_id="cats-w7ohy",
version=3,
format="yolov9",
target_class="🐱",
)
datasets = [dogs, cats]
# .for_each runs a function once on each element of the input iterators
# here, that means download each dataset, in parallel
if not inference_only:
download_dataset.for_each(datasets)
today = datetime.now().strftime("%Y-%m-%d")
model_ids = [dataset.id + f"/{today}" for dataset in datasets]
if not inference_only:
train.for_each(model_ids, datasets, kwargs={"quick_check": quick_check})
# let's run inference!
for model_id, dataset in zip(model_ids, datasets):
inference = Inference(
weights_path=str(volume_path / "runs" / model_id / "weights" / "best.pt")
)
# predict on a single image and save output to the volume
test_images = volume.listdir(
str(Path("dataset") / dataset.id / "test" / "images")
)
# run inference on the first 5 images
for ii, image in enumerate(test_images):
print(f"{model_id}: Single image prediction on image", image.path)
inference.predict.remote(
model_id=model_id,
image_path=f"{volume_path}/{image.path}",
display=(
ii == 0 # display inference results only on first image
),
)
if ii >= 4:
break
# streaming inference on images from the test set
print(f"{model_id}: Streaming inferences on all images in the test set...")
count = 0
for detection in inference.streaming_count.remote_gen(
batch_dir=f"{volume_path}/dataset/{dataset.id}/test/images"
):
if detection:
print(f"{dataset.target_class}", end="")
count += 1
else:
print("🎞️", end="", flush=True)
print(f"\n{model_id}: Counted {count} {dataset.target_class}s!")
```
## Addenda
The rest of the code in this example is utility code.
```python
warnings.filterwarnings( # filter warning from the terminal image library
"ignore",
message="It seems this process is not running within a terminal. Hence, some features will behave differently or be disabled.",
category=UserWarning,
)
```
### Flask App
# Deploy Flask app with Modal
This example shows how you can deploy a [Flask](https://flask.palletsprojects.com/en/3.0.x/) app with Modal.
You can serve any app written in a WSGI-compatible web framework (like Flask) on Modal with this pattern. You can serve an app written in an ASGI-compatible framework, like FastAPI, with [`asgi_app`](https://modal.com/docs/guide/webhooks#asgi).
```python
import modal
app = modal.App(
"example-flask-app",
image=modal.Image.debian_slim().uv_pip_install("flask"),
)
@app.function()
@modal.wsgi_app()
def flask_app():
from flask import Flask, request
web_app = Flask(__name__)
@web_app.get("/")
def home():
return "Hello Flask World!"
@web_app.post("/foo")
def foo():
return request.json
return web_app
```
### Flask Streaming
# Deploy Flask app with streaming results with Modal
This example shows how you can deploy a [Flask](https://flask.palletsprojects.com/en/3.0.x/) app with Modal that streams results back to the client.
```python
import modal
app = modal.App(
"example-flask-streaming",
image=modal.Image.debian_slim().uv_pip_install("flask"),
)
@app.function()
def generate_rows():
"""
This creates a large CSV file, about 10MB, which will be streaming downloaded
by a web client.
"""
for i in range(10_000):
line = ",".join(str((j + i) * i) for j in range(128))
yield f"{line}\n"
@app.function()
@modal.wsgi_app()
def flask_app():
from flask import Flask
web_app = Flask(__name__)
# These web handlers follow the example from
# https://flask.palletsprojects.com/en/2.2.x/patterns/streaming/
@web_app.route("/")
def generate_large_csv():
# Run the function locally in the web app's container.
return generate_rows.local(), {"Content-Type": "text/csv"}
@web_app.route("/remote")
def generate_large_csv_in_container():
# Run the function remotely in a separate container,
# which will stream back results to the web app container,
# which will stream back to the web client.
#
# This is less efficient, but demonstrates how web serving
# containers can be separated from and cooperate with other
# containers.
return generate_rows.remote(), {"Content-Type": "text/csv"}
return web_app
```
### Flux
# Run Flux fast on H100s with `torch.compile`
_Update: To speed up inference by another >2x, check out the additional optimization
techniques we tried in [this blog post](https://modal.com/blog/flux-3x-faster)!_
In this guide, we'll run Flux as fast as possible on Modal using open source tools.
We'll use `torch.compile` and NVIDIA H100 GPUs.
## Setting up the image and dependencies
```python
import time
from io import BytesIO
from pathlib import Path
import modal
```
We'll make use of the full [CUDA toolkit](https://modal.com/docs/guide/cuda)
in this example, so we'll build our container image off of the `nvidia/cuda` base.
```python
cuda_version = "12.4.0" # should be no greater than host CUDA version
flavor = "devel" # includes full CUDA toolkit
operating_sys = "ubuntu22.04"
tag = f"{cuda_version}-{flavor}-{operating_sys}"
cuda_dev_image = modal.Image.from_registry(
f"nvidia/cuda:{tag}", add_python="3.11"
).entrypoint([])
```
Now we install most of our dependencies with `apt` and `pip`.
For Hugging Face's [Diffusers](https://github.com/huggingface/diffusers) library
we install from GitHub source and so pin to a specific commit.
PyTorch added faster attention kernels for Hopper GPUs in version 2.5.
```python
diffusers_commit_sha = "81cf3b2f155f1de322079af28f625349ee21ec6b"
flux_image = (
cuda_dev_image.apt_install(
"git",
"libglib2.0-0",
"libsm6",
"libxrender1",
"libxext6",
"ffmpeg",
"libgl1",
)
.uv_pip_install(
"invisible_watermark==0.2.0",
"transformers==4.44.0",
"huggingface-hub==0.36.0",
"accelerate==0.33.0",
"safetensors==0.4.4",
"sentencepiece==0.2.0",
"torch==2.5.0",
f"git+https://github.com/huggingface/diffusers.git@{diffusers_commit_sha}",
"numpy<2",
)
.env({"HF_XET_HIGH_PERFORMANCE": "1", "HF_HUB_CACHE": "/cache"})
)
```
Later, we'll also use `torch.compile` to increase the speed further.
Torch compilation needs to be re-executed when each new container starts,
so we turn on some extra caching to reduce compile times for later containers.
```python
flux_image = flux_image.env(
{
"TORCHINDUCTOR_CACHE_DIR": "/root/.inductor-cache",
"TORCHINDUCTOR_FX_GRAPH_CACHE": "1",
}
)
```
Finally, we construct our Modal [App](https://modal.com/docs/reference/modal.App),
set its default image to the one we just constructed,
and import `FluxPipeline` for downloading and running Flux.1.
```python
app = modal.App("example-flux", image=flux_image)
with flux_image.imports():
import torch
from diffusers import FluxPipeline
```
## Defining a parameterized `Model` inference class
Next, we map the model's setup and inference code onto Modal.
1. We run the model setup in the method decorated with `@modal.enter()`. This includes loading the
weights and moving them to the GPU, along with an optional `torch.compile` step (see details below).
The `@modal.enter()` decorator ensures that this method runs only once, when a new container starts,
instead of in the path of every call.
2. We run the actual inference in methods decorated with `@modal.method()`.
*Note: Access to the Flux.1-schnell model on Hugging Face is
[gated by a license agreement](https://huggingface.co/docs/hub/en/models-gated)
which you must agree to
[here](https://huggingface.co/black-forest-labs/FLUX.1-schnell).
After you have accepted the license,
[create a Modal Secret](https://modal.com/secrets)
with the name `huggingface-secret` following the instructions in the template.*
```python
MINUTES = 60 # seconds
VARIANT = "schnell" # or "dev"
NUM_INFERENCE_STEPS = 4 # use ~50 for [dev], smaller for [schnell]
@app.cls(
gpu="H100", # fast GPU with strong software support
scaledown_window=20 * MINUTES,
timeout=60 * MINUTES, # leave plenty of time for compilation
volumes={ # add Volumes to store serializable compilation artifacts, see section on torch.compile below
"/cache": modal.Volume.from_name("hf-hub-cache", create_if_missing=True),
"/root/.nv": modal.Volume.from_name("nv-cache", create_if_missing=True),
"/root/.triton": modal.Volume.from_name("triton-cache", create_if_missing=True),
"/root/.inductor-cache": modal.Volume.from_name(
"inductor-cache", create_if_missing=True
),
},
secrets=[modal.Secret.from_name("huggingface-secret")],
)
class Model:
compile: bool = ( # see section on torch.compile below for details
modal.parameter(default=False)
)
@modal.enter()
def enter(self):
pipe = FluxPipeline.from_pretrained(
f"black-forest-labs/FLUX.1-{VARIANT}", torch_dtype=torch.bfloat16
).to("cuda") # move model to GPU
self.pipe = optimize(pipe, compile=self.compile)
@modal.method()
def inference(self, prompt: str) -> bytes:
print("🎨 generating image...")
out = self.pipe(
prompt,
output_type="pil",
num_inference_steps=NUM_INFERENCE_STEPS,
).images[0]
byte_stream = BytesIO()
out.save(byte_stream, format="JPEG")
return byte_stream.getvalue()
```
## Calling our inference function
To generate an image we just need to call the `Model`'s `generate` method
with `.remote` appended to it.
You can call `.generate.remote` from any Python environment that has access to your Modal credentials.
The local environment will get back the image as bytes.
Here, we wrap the call in a Modal [`local_entrypoint`](https://modal.com/docs/reference/modal.App#local_entrypoint)
so that it can be run with `modal run`:
```bash
modal run flux.py
```
By default, we call `generate` twice to demonstrate how much faster
the inference is after cold start. In our tests, clients received images in about 1.2 seconds.
We save the output bytes to a temporary file.
```python
@app.local_entrypoint()
def main(
prompt: str = "a computer screen showing ASCII terminal art of the"
" word 'Modal' in neon green. two programmers are pointing excitedly"
" at the screen.",
twice: bool = True,
compile: bool = False,
):
t0 = time.time()
image_bytes = Model(compile=compile).inference.remote(prompt)
print(f"🎨 first inference latency: {time.time() - t0:.2f} seconds")
if twice:
t0 = time.time()
image_bytes = Model(compile=compile).inference.remote(prompt)
print(f"🎨 second inference latency: {time.time() - t0:.2f} seconds")
output_path = Path("/tmp") / "flux" / "output.jpg"
output_path.parent.mkdir(exist_ok=True, parents=True)
print(f"🎨 saving output to {output_path}")
output_path.write_bytes(image_bytes)
```
## Speeding up Flux with `torch.compile`
By default, we do some basic optimizations, like adjusting memory layout
and re-expressing the attention head projections as a single matrix multiplication.
But there are additional speedups to be had!
PyTorch 2 added a compiler that optimizes the
compute graphs created dynamically during PyTorch execution.
This feature helps close the gap with the performance of static graph frameworks
like TensorRT and TensorFlow.
Here, we follow the suggestions from Hugging Face's
[guide to fast diffusion inference](https://huggingface.co/docs/diffusers/en/tutorials/fast_diffusion),
which we verified with our own internal benchmarks.
Review that guide for detailed explanations of the choices made below.
The resulting compiled Flux `schnell` deployment returns images to the client in under a second (~700 ms), according to our testing.
_Super schnell_!
Compilation takes up to twenty minutes on first iteration.
As of time of writing in late 2024,
the compilation artifacts cannot be fully serialized,
so some compilation work must be re-executed every time a new container is started.
That includes when scaling up an existing deployment or the first time a Function is invoked with `modal run`.
We cache compilation outputs from `nvcc`, `triton`, and `inductor`,
which can reduce compilation time by up to an order of magnitude.
For details see [this tutorial](https://pytorch.org/tutorials/recipes/torch_compile_caching_tutorial.html).
You can turn on compilation with the `--compile` flag.
Try it out with:
```bash
modal run flux.py --compile
```
The `compile` option is passed by a [`modal.parameter`](https://modal.com/docs/reference/modal.parameter#modalparameter) on our class.
Each different choice for a `parameter` creates a [separate auto-scaling deployment](https://modal.com/docs/guide/parameterized-functions).
That means your client can use arbitrary logic to decide whether to hit a compiled or eager endpoint.
```python
def optimize(pipe, compile=True):
# fuse QKV projections in Transformer and VAE
pipe.transformer.fuse_qkv_projections()
pipe.vae.fuse_qkv_projections()
# switch memory layout to Torch's preferred, channels_last
pipe.transformer.to(memory_format=torch.channels_last)
pipe.vae.to(memory_format=torch.channels_last)
if not compile:
return pipe
# set torch compile flags
config = torch._inductor.config
config.disable_progress = False # show progress bar
config.conv_1x1_as_mm = True # treat 1x1 convolutions as matrix muls
# adjust autotuning algorithm
config.coordinate_descent_tuning = True
config.coordinate_descent_check_all_directions = True
config.epilogue_fusion = False # do not fuse pointwise ops into matmuls
# tag the compute-intensive modules, the Transformer and VAE decoder, for compilation
pipe.transformer = torch.compile(
pipe.transformer, mode="max-autotune", fullgraph=True
)
pipe.vae.decode = torch.compile(
pipe.vae.decode, mode="max-autotune", fullgraph=True
)
# trigger torch compilation
print("🔦 running torch compilation (may take up to 20 minutes)...")
pipe(
"dummy prompt to trigger torch compilation",
output_type="pil",
num_inference_steps=NUM_INFERENCE_STEPS, # use ~50 for [dev], smaller for [schnell]
).images[0]
print("🔦 finished torch compilation")
return pipe
```
### Generate Music
# Make music with ACE-Step 1.5
In this example, we show you how you can run [ACE Studio](https://acestudio.ai/)'s
[ACE-Step 1.5](https://github.com/ace-step/ACE-Step-1.5) music generation model
on Modal.
ACE-Step 1.5 introduces a multi-model architecture:
a DiT (Diffusion Transformer) handler for audio generation
and an LM (Language Model) handler for prompt augmentation.
The LM automatically enhances prompts, detects language,
and generates metadata like BPM and key.
We'll set up both a serverless music generation service
and a web user interface.
## Setting up dependencies
```python
from pathlib import Path
from typing import Optional
from uuid import uuid4
import modal
```
We start by defining the environment our generation runs in.
This takes some explaining since, like most cutting-edge ML environments, it is a bit fiddly.
This environment is captured by a
[container image](https://modal.com/docs/guide/images),
which we build step-by-step by calling methods to add dependencies,
like `apt_install` to add system packages and `uv_pip_install` to add
Python packages.
ACE-Step 1.5 uses a local path dependency (`nano-vllm`) in its
package configuration, so we clone the repo first and install from
the local directory. This lets `uv` resolve all dependencies together,
including the CUDA-enabled PyTorch build and the local `nano-vllm` package.
```python
image = (
modal.Image.from_registry(
"nvidia/cuda:13.0.0-cudnn-devel-ubuntu22.04", add_python="3.12"
)
.apt_install("git", "ffmpeg")
.run_commands(
"git clone --branch v0.1.6 --depth 1 https://github.com/ace-step/ACE-Step-1.5.git /opt/ace-step",
)
.uv_pip_install(
"/opt/ace-step", "hf_transfer==0.1.9", "torchcodec==0.10.0", "torch~=2.10.0"
)
.entrypoint([])
)
```
In addition to source code, we'll also need the model weights.
ACE-Step 1.5 integrates with the Hugging Face ecosystem, so setting up the models
is straightforward. The model handlers use Hugging Face
to download the weights if not already present.
We use a single `checkpoints/` directory for all model downloads
(both the DiT and LM models) and persist it with a Modal
[Volume](https://modal.com/docs/guide/volumes).
For more on storing model weights on Modal, see
[this guide](https://modal.com/docs/guide/model-weights).
```python
checkpoints_dir = "/opt/ace-step/checkpoints"
model_cache = modal.Volume.from_name("ACE-Step-v15-model-cache", create_if_missing=True)
```
We set the `ACESTEP_PROJECT_ROOT` environment variable so that
the model handlers know where to find the checkpoints directory.
```python
image = image.env(
{"ACESTEP_PROJECT_ROOT": "/opt/ace-step", "HF_HUB_ENABLE_HF_TRANSFER": "1"}
)
```
While we're at it, let's also define the environment for our UI.
We'll stick with Python and so use FastAPI and Gradio.
```python
web_image = modal.Image.debian_slim(python_version="3.12").uv_pip_install(
"fastapi[standard]==0.115.4",
"gradio==6.11.0",
"huggingface-hub==1.9.1",
"pydantic==2.10.1",
)
```
This is a totally different environment from the one we run our model in.
Say goodbye to Python dependency conflict hell!
## Running music generation on Modal
Now, we write our music generation logic.
- We make an [App](https://modal.com/docs/guide/apps) to organize our deployment.
- We load the model at start, instead of during inference, with `modal.enter`,
which requires that we use a Modal [`Cls`](https://modal.com/docs/guide/lifecycle-functions).
- In the `app.cls` decorator, we specify the Image we built and attach the Volume.
We also pick a GPU to run on -- here, an NVIDIA L40S.
```python
app = modal.App("example-generate-music")
@app.cls(gpu="l40s", image=image, volumes={checkpoints_dir: model_cache})
class MusicGenerator:
@modal.enter()
def init(self):
from acestep.handler import AceStepHandler
from acestep.llm_inference import LLMHandler
from acestep.model_downloader import ensure_lm_model, ensure_main_model
# Download models if not already cached in the Volume.
lm_model_name = "acestep-5Hz-lm-4B"
ensure_main_model(checkpoints_dir=checkpoints_dir)
ensure_lm_model(model_name=lm_model_name, checkpoints_dir=checkpoints_dir)
# Initialize the audio generation model.
self.dit_handler = AceStepHandler()
init_status, enable_generate = self.dit_handler.initialize_service(
project_root="/opt/ace-step",
config_path="acestep-v15-turbo",
device="cuda",
)
if not enable_generate:
raise RuntimeError(f"DiT model initialization failed: {init_status}")
# Initialize the language model for prompt enhancement.
self.llm_handler = LLMHandler()
lm_status, lm_success = self.llm_handler.initialize(
checkpoint_dir=checkpoints_dir,
lm_model_path=lm_model_name,
backend="vllm",
device="cuda",
)
if not lm_success:
raise RuntimeError(f"LM initialization failed: {lm_status}")
@modal.method()
def run(
self,
prompt: str,
lyrics: str,
duration: float = 60.0,
format: str = "mp3", # or wav
manual_seeds: Optional[int] = 1,
) -> bytes:
from acestep.inference import GenerationConfig, GenerationParams, generate_music
params = GenerationParams(
caption=prompt,
lyrics=lyrics,
duration=duration,
thinking=True,
)
config = GenerationConfig(
audio_format=format,
batch_size=1,
seeds=[manual_seeds] if manual_seeds is not None else None,
use_random_seed=manual_seeds is None,
)
result = generate_music(
self.dit_handler,
self.llm_handler,
params,
config,
save_dir="/dev/shm",
)
if not result.success:
raise RuntimeError(f"Music generation failed: {result.error}")
return Path(result.audios[0]["path"]).read_bytes()
```
We can then generate music from anywhere by running code like what we have in the `local_entrypoint` below.
```python
@app.local_entrypoint()
def main(
prompt: Optional[str] = None,
lyrics: Optional[str] = None,
duration: Optional[float] = None,
format: str = "mp3", # or wav
manual_seeds: Optional[int] = 1,
):
if lyrics is None:
lyrics = "[Instrumental]"
if prompt is None:
prompt = "Korean pop music, bright energetic electronic music, catchy melody, female vocals"
lyrics = """[intro][intro]
[chorus]
We're goin' up, up, up, it's our moment
You know together we're glowing
Gonna be, gonna be golden
Oh, up, up, up with our voices
영원히 깨질 수 없는
Gonna be, gonna be golden"""
if duration is None:
duration = 30.0 # seconds
print(
f"🎼 generating {duration} seconds of music from prompt '{prompt[:32] + ('...' if len(prompt) > 32 else '')}'"
f" and lyrics '{lyrics[:32] + ('...' if len(lyrics) > 32 else '')}'"
)
music_generator = MusicGenerator() # outside of this file, use modal.Cls.from_name
clip = music_generator.run.remote(
prompt, lyrics, duration=duration, format=format, manual_seeds=manual_seeds
)
dir = Path("/tmp/generate-music")
dir.mkdir(exist_ok=True, parents=True)
output_path = dir / f"{slugify(prompt)[:64]}.{format}"
print(f"🎼 Saving to {output_path}")
output_path.write_bytes(clip)
def slugify(string):
return (
string.lower()
.replace(" ", "-")
.replace("/", "-")
.replace("\\", "-")
.replace(":", "-")
)
```
You can execute it with a command like:
``` shell
modal run generate_music.py
```
Pass in `--help` to see options and how to use them.
## Hosting a web UI for the music generator
With the Gradio library, we can create a simple web UI in Python
that calls out to our music generator,
then host it on Modal for anyone to try out.
To deploy both the music generator and the UI, run
``` shell
modal deploy generate_music.py
```
```python
@app.function(
image=web_image,
# Gradio requires sticky sessions
# so we limit the number of concurrent containers to 1
# and allow it to scale to 100 concurrent inputs
max_containers=1,
)
@modal.concurrent(max_inputs=100)
@modal.asgi_app()
def ui():
import gradio as gr
from fastapi import FastAPI
from gradio.routes import mount_gradio_app
api = FastAPI()
# Since this Gradio app is running from its own container,
# we make a `.remote` call to the music generator
music_generator = MusicGenerator()
generate = music_generator.run.remote
temp_dir = Path("/dev/shm")
async def generate_music(
prompt: str, lyrics: str, duration: float = 30.0, format: str = "mp3"
):
audio_bytes = await generate.aio(
prompt, lyrics, duration=duration, format=format
)
audio_path = temp_dir / f"{uuid4()}.{format}"
audio_path.write_bytes(audio_bytes)
return audio_path
with gr.Blocks(theme="soft") as demo:
gr.Markdown("# Generate Music")
with gr.Row():
with gr.Column():
prompt = gr.Textbox(label="Prompt")
lyrics = gr.Textbox(label="Lyrics")
duration = gr.Number(
label="Duration (seconds)", value=10.0, minimum=1.0, maximum=300.0
)
format = gr.Radio(["wav", "mp3"], label="Format", value="mp3")
btn = gr.Button("Generate")
with gr.Column():
clip_output = gr.Audio(label="Generated Music", autoplay=True)
btn.click(
generate_music,
inputs=[prompt, lyrics, duration, format],
outputs=[clip_output],
)
return mount_gradio_app(app=api, blocks=demo, path="/")
```
### Generators
# Run a generator function on Modal
This example shows how you can run a generator function on Modal. We define a
function that `yields` values and then call it with the [`remote_gen`](https://modal.com/docs/reference/modal.Function#remote_gen) method. The
`remote_gen` method returns a generator object that can be used to iterate over
the values produced by the function.
```python
import modal
app = modal.App("example-generators")
@app.function()
def f(i):
for j in range(i):
yield j
@app.local_entrypoint()
def main():
for r in f.remote_gen(10):
print(r)
```
### Generators Async
# Run async generator function on Modal
This example shows how you can run an async generator function on Modal.
Modal natively supports async/await syntax using asyncio.
```python
import modal
app = modal.App("example-generators-async")
@app.function()
def f(i):
for j in range(i):
yield j
@app.local_entrypoint()
async def run_async():
async for r in f.remote_gen.aio(10):
print(r)
```
### Get Started
# Example (get_started.py)
This is the source code for **01_getting_started.get_started**.
```python
import modal
app = modal.App("example-get-started")
@app.function()
def square(x):
print("This code is running on a remote worker!")
return x**2
@app.local_entrypoint()
def main():
print("the square is", square.remote(42))
```
### Gpt Oss Inference
# Run OpenAI's gpt-oss model with vLLM
## Background
[gpt-oss](https://openai.com/index/introducing-gpt-oss/) is a reasoning model
that comes in two flavors: `gpt-oss-120B` and `gpt-oss-20B`. They are both Mixture
of Experts (MoE) models with a low number of active parameters, ensuring they
combine good world knowledge and capabilities with fast inference.
We describe a few of its notable features below.
### MXFP4
OpenAI's gpt-oss models use a fairly uncommon 4bit [`mxfp4`](https://arxiv.org/abs/2310.10537) floating point
format for the MoE layers. This "block" quantization format combines `e2m1` floating point numbers
with blockwise scaling factors. The attention operations are not quantized.
### Attention Sinks
Attention sink models allow for longer context lengths without sacrificing output quality. The vLLM team
added [attention sink support](https://huggingface.co/kernels-community/vllm-flash-attn3)
for Flash Attention 3 (FA3) in preparation for this release.
### Response Format
GPT-OSS is trained with the [harmony response format](https://github.com/openai/harmony) which enables models
to output to multiple channels for chain-of-thought (CoT) and input tool-calling preambles along with regular text responses.
We'll stick to a simpler format here, but see [this cookbook](https://cookbook.openai.com/articles/openai-harmony)
for details on the new format.
## Set up the container image
We'll start by defining a [custom container `Image`](https://modal.com/docs/guide/custom-container) that
installs all the necessary dependencies to run vLLM and the model.
```python
import json
import time
from datetime import datetime, timezone
from typing import Any
import aiohttp
import modal
vllm_image = (
modal.Image.from_registry(
"nvidia/cuda:12.8.1-devel-ubuntu22.04",
add_python="3.12",
)
.entrypoint([])
.uv_pip_install(
"vllm==0.18.1",
"huggingface_hub[hf_transfer]==0.36.0",
)
.env( # fast Blackwell-specific MoE kernels
{"VLLM_USE_FLASHINFER_MOE_MXFP4_MXFP8": "1"}
)
)
```
## Download the model weights
We'll be downloading OpenAI's model from Hugging Face. We're running
the 20B parameter model by default but you can easily switch to [the 120B model](https://huggingface.co/openai/gpt-oss-120b),
which also fits in a single H100 or H200 GPU.
```python
MODEL_NAME = "openai/gpt-oss-20b"
MODEL_REVISION = "d666cf3b67006cf8227666739edf25164aaffdeb"
```
Although vLLM will download weights from Hugging Face on-demand, we want to
cache them so we don't do it every time our server starts. We'll use [Modal Volumes](https://modal.com/docs/guide/volumes)
for our cache. Modal Volumes are essentially a "shared disk" that all Modal
Functions can access like it's a regular disk. For more on storing model
weights on Modal, see [this guide](https://modal.com/docs/guide/model-weights).
```python
hf_cache_vol = modal.Volume.from_name("huggingface-cache", create_if_missing=True)
```
The first time you run a new model or configuration with vLLM on a fresh machine,
a number of artifacts are created. We also cache these artifacts.
```python
vllm_cache_vol = modal.Volume.from_name("vllm-cache", create_if_missing=True)
flashinfer_cache_vol = modal.Volume.from_name(
"flashinfer-cache", create_if_missing=True
)
```
## Configuring vLLM to serve GPT-OSS
The vLLM docs include an [excellent resource on tuning GPT-OSS](https://docs.vllm.ai/projects/recipes/en/latest/OpenAI/GPT-OSS.html).
We mostly use the configuration values reported there, but try to explain the reasoning as we go.
```python
VLLM_CONFIG = { # return tokens in chunks of 20, save on host overhead
"stream-interval": 20
}
```
One of the most important choices is to use speculative decoding,
which attempts to generate multiple tokens per forward pass
by means of a separate "speculator" model.
We here use RedHatAI's open source, generic EAGLE3-based speculator for this model.
We recommend using the EAGLE3 technique to train a custom speculator on your own traffic.
```python
SPECULATIVE_CONFIG = {
"model": "RedHatAI/gpt-oss-20b-speculator.eagle3",
"revision": "97d07a21e8b7e2b667725dd92f579525c0a30d05",
"num_speculative_tokens": 7,
"method": "eagle3",
}
```
Speculative decoding acclerates inference without changing model behavior.
We can also accelerate inference by further quantizing the model.
Here, we reduce the size of KV cache entries by quantizing them to FP8.
```python
VLLM_CONFIG |= {"kv-cache-dtype": "fp8"}
```
There are a number of compilation settings for vLLM. Compilation improves inference performance
but incurs extra latency at engine start time. When iterating on and developing a server,
we recommend turning compilation off to speed up development cycles, which we here control
with a global variable.
```python
FAST_BOOT = False
```
Otherwise, we use the values suggested in the recipe:
```python
COMPILATION_CONFIG = {
"pass_config": {"fuse_allreduce_rms": True, "eliminate_noops": True}
}
```
As part of compilation, vLLM collects up sequences (really, DAGs)
of CUDA kernel launches into CUDA graphs.
We set the maximum batch size for the CUDA graph capture step to the
maximum number of inputs we want to handle per replica,
which also shows up in our autoscaling configuration below.
```python
MAX_INPUTS = 32 # how many requests can one replica handle? tune carefully!
VLLM_CONFIG |= {"max-cudagraph-capture-size": MAX_INPUTS}
```
Lastly, there are a few knobs we can tune based on the typical lengths
of sequences we expect to observe.
For many agentic tasks to which this model is well-suited,
those lengths can go into the tens of thousands of tokens.
Let's assume they're never longer than 2 ^ 15 tokens.
```python
VLLM_CONFIG |= {
"max-num-batched-tokens": 16384,
"max-model-len": 32768,
}
```
## Build a vLLM engine and serve it
The function below spawns a vLLM instance listening at port 8000, serving requests to our model.
```python
app = modal.App("example-gpt-oss-inference")
N_GPU = 1
MINUTES = 60 # seconds
VLLM_PORT = 8000
@app.function(
image=vllm_image,
gpu=f"B200:{N_GPU}",
scaledown_window=10 * MINUTES, # how long should we stay up with no requests?
timeout=30 * MINUTES, # how long should we wait for container start?
volumes={
"/root/.cache/huggingface": hf_cache_vol,
"/root/.cache/vllm": vllm_cache_vol,
"/root/.cache/flashinfer": flashinfer_cache_vol,
},
)
@modal.concurrent(max_inputs=MAX_INPUTS)
@modal.web_server(port=VLLM_PORT, startup_timeout=30 * MINUTES)
def serve():
import subprocess
cmd = [
"vllm",
"serve",
MODEL_NAME,
"--revision",
MODEL_REVISION,
"--served-model-name",
MODEL_NAME,
"llm",
"--host",
"0.0.0.0",
"--port",
str(VLLM_PORT),
"--async-scheduling", # reduces host overhead, but might not be compatible with all features
]
# enforce-eager disables both Torch compilation and CUDA graph capture
# default is no-enforce-eager. see the --compilation-config flag for tighter control
cmd += ["--enforce-eager" if FAST_BOOT else "--no-enforce-eager"]
# assume multiple GPUs are for splitting up large matrix multiplications
cmd += ["--tensor-parallel-size", str(N_GPU)]
# add complex configuration objects
cmd += ["--compilation-config", json.dumps(COMPILATION_CONFIG)]
cmd += ["--speculative-config", json.dumps(SPECULATIVE_CONFIG)]
cmd += [ # add assorted config
item for k, v in VLLM_CONFIG.items() for item in (f"--{k}", str(v))
]
print(*cmd)
subprocess.Popen(cmd)
```
## Deploy the server
To deploy the API on Modal, just run
```bash
modal deploy gpt_oss_inference.py
```
This will create a new app on Modal, build the container image for it if it hasn't been built yet,
and deploy the app.
## Test the server
To make it easier to test the server setup, we also include a `local_entrypoint`
that does a healthcheck and then hits the server.
If you execute the command
```bash
modal run gpt_oss_inference.py
```
a fresh replica of the server will be spun up on Modal while
the code below executes on your local machine.
We set up the system prompt with low reasoning effort to run
inference a bit faster. For the best ergonomics we recommend using
the [harmony API](https://cookbook.openai.com/articles/openai-harmony#example-system-message),
which can be installed with `pip install openai-harmony`.
```python
@app.local_entrypoint()
async def test(test_timeout=30 * MINUTES, user_content=None, twice=True):
url = await serve.get_web_url.aio()
system_prompt = {
"role": "system",
"content": f"""You are ChatModal, a large language model trained by Modal.
Knowledge cutoff: 2024-06
Current date: {datetime.now(timezone.utc).date()}
Reasoning: low
\\# Valid channels: analysis, commentary, final. Channel must be included for every message.
Calls to these tools must go to the commentary channel: 'functions'.""",
}
if user_content is None:
user_content = "Explain what the Singular Value Decomposition is."
messages = [ # OpenAI chat format
system_prompt,
{"role": "user", "content": user_content},
]
async with aiohttp.ClientSession(base_url=url) as session:
print(f"Running health check for server at {url}")
async with session.get("/health", timeout=test_timeout - 1 * MINUTES) as resp:
up = resp.status == 200
assert up, f"Failed health check for server at {url}"
print(f"Successful health check for server at {url}")
print(f"Sending messages to {url}:", *messages, sep="\n\t")
await _send_request(session, "llm", messages)
if twice:
messages[0]["content"] += "\nTalk like a pirate, matey."
print(f"Re-sending messages to {url}:", *messages, sep="\n\t")
await _send_request(session, "llm", messages)
async def _send_request(
session: aiohttp.ClientSession, model: str, messages: list
) -> None:
# `stream=True` tells an OpenAI-compatible backend to stream chunks
payload: dict[str, Any] = {"messages": messages, "model": model, "stream": True}
headers = {"Content-Type": "application/json", "Accept": "text/event-stream"}
t = time.perf_counter()
async with session.post(
"/v1/chat/completions", json=payload, headers=headers, timeout=10 * MINUTES
) as resp:
async for raw in resp.content:
resp.raise_for_status()
# extract new content and stream it
line = raw.decode().strip()
if not line or line == "data: [DONE]":
continue
if line.startswith("data: "): # SSE prefix
line = line[len("data: ") :]
chunk = json.loads(line)
assert (
chunk["object"] == "chat.completion.chunk"
) # or something went horribly wrong
delta = chunk["choices"][0]["delta"]
if "content" in delta:
print(delta["content"], end="") # print the content as it comes in
elif "reasoning_content" in delta:
print(delta["reasoning_content"], end="")
elif "reasoning" in delta:
print(delta["reasoning"], end="")
elif not delta:
print()
else:
raise ValueError(f"Unsupported response delta: {delta}")
print("")
print(f"Time to Last Token: {time.perf_counter() - t:.2f} seconds")
```
### Gpu Fallbacks
# Set "fallback" GPUs
GPU availabilities on Modal can fluctuate, especially for
tightly-constrained requests, like for eight co-located GPUs
in a specific region.
If your code can run on multiple different GPUs, you can specify
your GPU request as a list, in order of preference, and whenever
your Function scales up, we will try to schedule it on each requested GPU type in order.
The code below demonstrates the usage of the `gpu` parameter with a list of GPUs.
```python
import subprocess
import modal
app = modal.App("example-gpu-fallbacks")
@app.function(
gpu=["h100", "a100", "any"], # "any" means any of L4, A10, or T4
single_use_containers=True, # new container each input, so we re-roll the GPU dice every time
)
async def remote(_idx):
gpu = subprocess.run(
["nvidia-smi", "--query-gpu=name", "--format=csv,noheader"],
check=True,
text=True,
stdout=subprocess.PIPE,
).stdout.strip()
print(gpu)
return gpu
@app.local_entrypoint()
def local(count: int = 32):
from collections import Counter
gpu_counter = Counter(remote.map([i for i in range(count)], order_outputs=False))
print(f"ran {gpu_counter.total()} times")
print(f"on the following {len(gpu_counter.keys())} GPUs:", end="\n")
print(
*[f"{gpu.rjust(32)}: {'🔥' * ct}" for gpu, ct in gpu_counter.items()],
sep="\n",
)
```
### Gpu Snapshot
# Snapshot GPU memory to speed up cold starts
This example demonstrates how to use GPU memory snapshots to speed up model loading.
Note that GPU memory snapshotting is an experimental feature,
so test carefully before using in production!
You can read more about GPU memory snapshotting, and its caveats,
[here](https://modal.com/docs/guide/memory-snapshot).
GPU snapshots can only be used with deployed Functions, so first deploy the App:
```bash
modal deploy -m 06_gpu_and_ml.gpu_snapshot
```
Next, invoke the Function:
```bash
python -m 06_gpu_and_ml.gpu_snapshot
```
The full code is below:
```python
import modal
image = modal.Image.debian_slim().uv_pip_install("sentence-transformers<6")
app_name = "example-gpu-snapshot"
app = modal.App(app_name, image=image)
snapshot_key = "v1" # change this to invalidate the snapshot cache
with image.imports(): # import in the global scope so imports can be snapshot
from sentence_transformers import SentenceTransformer
@app.cls(
gpu="a10",
enable_memory_snapshot=True,
experimental_options={"enable_gpu_snapshot": True},
)
class SnapshotEmbedder:
@modal.enter(snap=True)
def load(self):
# during enter phase of container lifecycle,
# load the model onto the GPU so it can be snapshot
print("loading model")
self.model = SentenceTransformer("BAAI/bge-small-en-v1.5", device="cuda")
print(f"snapshotting {snapshot_key}")
@modal.method()
def run(self, sentences: list[str]) -> list[list[float]]:
# later invocations of the Function will start here
embeddings = self.model.encode(sentences, normalize_embeddings=True)
return embeddings.tolist()
if __name__ == "__main__":
# after deployment, we can use the class from anywhere
SnapshotEmbedder = modal.Cls.from_name(app_name, "SnapshotEmbedder")
embedder = SnapshotEmbedder()
try:
print("calling Modal Function")
print(embedder.run.remote(sentences=["what is the meaning of life?"]))
except modal.exception.NotFoundError:
raise Exception(
f"To take advantage of GPU snapshots, deploy first with modal deploy {__file__}"
)
```
### Grpo Trl
# Train a model to solve coding problems using GRPO and TRL
This example demonstrates how to run [GRPO](https://arxiv.org/pdf/2402.03300) on Modal using the TRL [GRPO trainer](https://huggingface.co/docs/trl/main/en/grpo_trainer)
GRPO is a reinforcement learning algorithm introduced by DeepSeek, and was used to train DeepSeek R1.
TRL is a reinforcement learning training library by Huggingface.
First we perform the imports and then define the app.
```python
from __future__ import annotations
import os
import re
import subprocess
from pathlib import Path
from typing import Iterable, Sequence
import modal
app: modal.App = modal.App("example-grpo-trl")
```
We define an image where we install the TRL library.
We also install vLLM for the next part of this example. We also use Weights & Biases for logging.
```python
image: modal.Image = modal.Image.debian_slim().uv_pip_install(
"trl[vllm]==0.28.0",
"vllm==0.12.0",
"transformers==4.57.1",
"datasets==3.5.1",
"wandb==0.17.6",
)
```
We import the necessary libraries needed in the context of the image.
```python
with image.imports():
from datasets import Dataset, load_dataset
from trl import GRPOConfig, GRPOTrainer
```
We also define a [Modal Volume](https://modal.com/docs/guide/volumes#volumes) for storing model checkpoints.
```python
MODELS_DIR = Path("/models")
checkpoints_volume: modal.Volume = modal.Volume.from_name(
"example-grpo-trl-checkpoints", create_if_missing=True
)
```
## Defining the reward function
In this example, we use the [OpenCoder-LLM/opc-sft-stage2](https://huggingface.co/datasets/OpenCoder-LLM/opc-sft-stage2) dataset to train a model to solve coding problems.
In reinforcement learning, we define a reward function for the model. Since we are evaluating code that is generated by
a model, we use [Modal Sandboxes](https://modal.com/docs/guide/sandbox) to evaluate the code securely.
For each completion from the model and a test case to test the completion, we define a simple reward function.
The function returns 1 if there are no errors, and 0 otherwise. You might want to adjust this reward function
as the model is unlikely to learn well with this function.
```python
@app.function()
def compute_reward(completion: str, testcase: Sequence[str]) -> int:
sb, score = None, 0
sb: modal.Sandbox = modal.Sandbox.create(app=app)
code_to_execute: str = get_generated_code_and_test_cases(completion, testcase)
try:
p = sb.exec("python", "-c", code_to_execute, timeout=30)
p.wait()
return_code = p.returncode
if return_code == 0:
score = 1
except Exception as e:
print(e)
finally:
sb.terminate()
return score
```
We write a function that constructs a program from the model completion. This is determined based on the format of the data.
The completions are supposed to follow the format "```python ...".
The test cases are a list of assert statements.
More details [here](https://huggingface.co/datasets/OpenCoder-LLM/opc-sft-stage2).
```python
def get_generated_code_and_test_cases(completion: str, testcase: Sequence[str]) -> str:
if "```python" in completion:
# Find the start and end of the code block
start_idx: int = completion.find("```python") + len("```python")
end_idx: int = completion.find("```", start_idx)
if end_idx != -1:
code: str = completion[start_idx:end_idx].strip()
else:
code: str = completion[start_idx:].strip()
else:
code: str = completion.strip()
test_cases: str = "\n".join(testcase)
full_code: str = f"{code}\n\n{test_cases}"
return full_code
```
Finally, we define the function that is passed into the GRPOTrainer, which takes in a list of completions.
Custom reward functions must conform to a [specific signature](https://huggingface.co/docs/trl/main/en/grpo_trainer#using-a-custom-reward-function).
```python
def reward_helper_function(
completions: Sequence[str], testcases: Sequence[Sequence[str]], **kwargs: object
) -> Iterable[int]:
return compute_reward.starmap(zip(completions, testcases))
```
## Kicking off a training run
Preprocess the data, preparing the columns that `GRPOTrainer` expects.
We use the OpenCoder-LLM educational instruct dataset, which has (instruction, code, test case) triples validated through a Python compiler.
More details [here](https://huggingface.co/datasets/OpenCoder-LLM/opc-sft-stage2).
```python
def start_grpo_trainer(use_vllm=False, vllm_mode=None):
dataset: Dataset = load_dataset(
"OpenCoder-LLM/opc-sft-stage2", "educational_instruct", split="train"
)
dataset = dataset.rename_column(
"instruction", "prompt"
) # Needed for the GRPO trainer
dataset = dataset.rename_column("testcase", "testcases")
dataset = dataset.select(range(128)) # To simplify testing.
training_args: GRPOConfig = GRPOConfig(
output_dir=str(MODELS_DIR),
report_to="wandb",
use_vllm=use_vllm,
vllm_mode=vllm_mode,
save_steps=1,
max_steps=5, # To simplify testing. Remove for production use cases.
)
trainer = GRPOTrainer(
model="Qwen/Qwen2-0.5B-Instruct",
reward_funcs=reward_helper_function,
args=training_args,
train_dataset=dataset,
)
trainer.train()
```
We use Weights & Biases for logging, hence we use a [Modal Secret](https://modal.com/docs/guide/secrets#secrets) with wandb credentials.
```python
@app.function(
image=image,
gpu="H100",
timeout=60 * 60 * 24, # 24 hours
secrets=[modal.Secret.from_name("wandb-secret")],
volumes={"/models": checkpoints_volume},
)
def train() -> None:
start_grpo_trainer()
```
To run: `modal run --detach grpo_trl.py::train`.
## Speeding up training with vLLM
vLLM can be used either in server mode (run vLLM server on separate gpu) or colocate mode (within the training process).
In server mode, vLLM runs in a separate process (and using separate GPUs) and communicates with the trainer via HTTP.
This is ideal if you have dedicated GPUs for inference. More details [here](https://huggingface.co/docs/trl/main/en/grpo_trainer#-option-1-server-mode).
Here, we use 2 GPUs. We run the GRPOTrainer on 1 of them, and the vLLM process on another.
```python
@app.function(
image=image,
gpu="H100:2",
timeout=60 * 60 * 24, # 24 hours
secrets=[modal.Secret.from_name("wandb-secret")],
volumes={str(MODELS_DIR): checkpoints_volume},
)
def train_vllm_server_mode() -> None:
env_copy = os.environ.copy()
env_copy["CUDA_VISIBLE_DEVICES"] = "0" # Run serve vLLM process on GPU 0
# Start vllm-serve in the background
subprocess.Popen(
["trl", "vllm-serve", "--model", "Qwen/Qwen2-0.5B-Instruct"],
env=env_copy,
)
os.environ["CUDA_VISIBLE_DEVICES"] = "1" # Run training process on GPU 1
start_grpo_trainer(use_vllm=True, vllm_mode="server")
```
You can execute this using `modal run --detach grpo_trl.py::train_vllm_server_mode`.
In colocate mode, vLLM runs inside the trainer process and shares GPU memory with the training model.
This avoids launching a separate server and can improve GPU utilization, but may lead to memory contention on the training GPUs.
More details [here](https://huggingface.co/docs/trl/main/en/grpo_trainer#-option-2-colocate-mode).
```python
@app.function(
image=image,
gpu="H100",
timeout=60 * 60 * 24, # 24 hours
secrets=[modal.Secret.from_name("wandb-secret")],
volumes={"/models": checkpoints_volume},
)
def train_vllm_colocate_mode() -> None:
# Rank of the current process (0 for single-process training)
os.environ["RANK"] = "0"
# Local rank of the process on the node (0 for single-process training)
os.environ["LOCAL_RANK"] = "0"
# Total number of processes (1 for single-process training)
os.environ["WORLD_SIZE"] = "1"
# Address of the master node (localhost for single node)
os.environ["MASTER_ADDR"] = "localhost"
# Port for communication between processes
os.environ["MASTER_PORT"] = "12355"
start_grpo_trainer(use_vllm=True, vllm_mode="colocate")
```
You can execute this using `modal run --detach grpo_trl.py::train_vllm_colocate_mode`.
## Performing inference on the trained model
We use vLLM to perform inference on the trained model.
```python
VLLM_PORT: int = 8000
```
Once you have the model checkpoints in your Modal Volume, you can load the weights and perform inference using vLLM. For more on storing model weights on Modal, see
[this guide](https://modal.com/docs/guide/model-weights).
The weights path is as follows: `global_step_n/actor/huggingface` where n is the checkpoint you want (eg `global_step_5/actor/huggingface`).
The `latest_checkpointed_iteration.txt` file stores the most recent checkpoint index.
```python
def get_latest_checkpoint_file_path():
checkpoint_dirs = [
d.name
for d in MODELS_DIR.iterdir()
if d.is_dir() and re.match(r"^checkpoint-(\d+)$", d.name)
]
if not checkpoint_dirs:
raise FileNotFoundError("No checkpoint directories found in models dir")
latest_checkpoint_index = max(
int(re.match(r"^checkpoint-(\d+)$", d).group(1)) for d in checkpoint_dirs
)
return str(MODELS_DIR / f"checkpoint-{latest_checkpoint_index}")
```
We provide the code for setting up an OpenAI compatible inference endpoint here. For more details re. serving models on vLLM, check out [this example.](https://modal.com/docs/examples/vllm_inference#deploy-the-server)
```python
vllm_image = (
modal.Image.debian_slim(python_version="3.12")
.uv_pip_install(
"vllm==0.12.0",
"flashinfer-python==0.5.3",
extra_index_url="https://download.pytorch.org/whl/cu128",
extra_options="--index-strategy unsafe-best-match",
)
.env({"VLLM_USE_V1": "1"})
)
vllm_cache_vol = modal.Volume.from_name("vllm-cache", create_if_missing=True)
@app.function(
image=vllm_image,
gpu="H100",
scaledown_window=15 * 60, # How long should we stay up with no requests?
timeout=10 * 60, # How long should we wait for container start?
volumes={"/root/.cache/vllm": vllm_cache_vol, MODELS_DIR: checkpoints_volume},
)
@modal.concurrent(
max_inputs=32
) # How many requests can one replica handle? tune carefully!
@modal.web_server(port=VLLM_PORT, startup_timeout=10 * 60)
def serve():
latest_checkpoint_file_path = get_latest_checkpoint_file_path()
cmd = [
"vllm",
"serve",
"--uvicorn-log-level=info",
latest_checkpoint_file_path,
"--host",
"0.0.0.0",
"--port",
str(VLLM_PORT),
]
subprocess.Popen(" ".join(cmd), shell=True)
```
You can then deploy the server using `modal deploy grpo_trl.py`, which gives you a custom url. You can then query it using the following curl command:
```bash
curl -X POST /v1/chat/completions \
-H 'Content-Type: application/json' \
-d '{
"messages": [
{"role": "system", "content": "You are a helpful assistant for solving math problems."},
{"role": "user", "content": "James had 4 apples. Mary gave him 2 and he ate 1. How many does he have left?"}
],
"temperature": 0.7
}'
```
or in the [following ways](https://modal.com/docs/examples/vllm_inference#interact-with-the-server).
### Grpo Verl
# Train a model to solve math problems using GRPO and verl
This example demonstrates how to train with [GRPO](https://arxiv.org/pdf/2402.03300) on Modal using the [verl](https://github.com/volcengine/verl) framework.
GRPO is a reinforcement learning algorithm introduced by DeepSeek, and was used to train DeepSeek R1.
verl is a reinforcement learning training library that is an implementation of [HybridFlow](https://arxiv.org/abs/2409.19256v2), an RLHF framework.
The training process works as follows:
- Each example in the dataset corresponds to a math problem.
- In each training step, the model attempts to solve the math problems showing its steps.
- We then compute a reward for the model's solution using the reward function defined below.
- That reward value is then used to update the model's parameters according to the GRPO training algorithm.
## Setup
Import the necessary modules for Modal deployment.
```python
import re
import subprocess
from pathlib import Path
from typing import Literal, Optional
import modal
```
## Defining the image and app
```python
app = modal.App("example-grpo-verl")
```
We define an image where we clone the verl repo and install its dependencies. We use a base verl image as a starting point.
```python
VERL_REPO_PATH: Path = Path("/root/verl")
image = (
modal.Image.from_registry("verlai/verl:app-verl0.4-vllm0.8.5-mcore0.12.1")
.apt_install("git")
.run_commands(f"git clone https://github.com/volcengine/verl {VERL_REPO_PATH}")
.uv_pip_install("verl[vllm]==0.4.1")
)
```
## Defining the dataset
In this example, we'll use reinforcement learning to train a model to solve math problems.
We use the [GSM8K](https://huggingface.co/datasets/openai/gsm8k) dataset of math problems and a [Modal Volume](https://modal.com/docs/guide/volumes#volumes) to store the data.
```python
DATA_PATH: Path = Path("/data")
data_volume: modal.Volume = modal.Volume.from_name(
"grpo-verl-example-data", create_if_missing=True
)
```
We write a Modal Function to populate the Volume with the data. This downloads the dataset and stores it in the Volume.
You will need to run this step if you don't already have data you'd like to use for this example.
```python
@app.function(image=image, volumes={DATA_PATH: data_volume})
def prep_dataset() -> None:
subprocess.run(
[
"python",
VERL_REPO_PATH / "examples" / "data_preprocess" / "gsm8k.py",
"--local_dir",
DATA_PATH,
],
check=True,
)
```
You can kick off the dataset download with
`modal run ::prep_dataset`
## Defining a reward function
In reinforcement learning, we define a reward function for the model.
We can define this in a separate file, or in the same file as in this case that we then pass as an argument to verl.
We use a `default` reward function for GSM8K from the [verl repo](https://github.com/volcengine/verl/blob/v0.1/verl/utils/reward_score/gsm8k.py), modified to return 1.0 if it's a correct answer and 0 otherwise.
```python
def extract_solution(
solution_str: str, method: Literal["strict", "flexible"] = "strict"
) -> Optional[str]:
assert method in ["strict", "flexible"]
if method == "strict":
# This also tests the formatting of the model
solution = re.search("#### (\\-?[0-9\\.\\,]+)", solution_str)
if solution is None:
final_answer: Optional[str] = None
else:
final_answer = solution.group(0)
final_answer = (
final_answer.split("#### ")[1].replace(",", "").replace("$", "")
)
elif method == "flexible":
answer = re.findall("(\\-?[0-9\\.\\,]+)", solution_str)
final_answer: Optional[str] = None
if len(answer) == 0:
# No reward if there is no answer.
pass
else:
invalid_str: list[str] = ["", "."]
# Find the last number that is not '.'
for final_answer in reversed(answer):
if final_answer not in invalid_str:
break
return final_answer
```
Reward functions need to follow a [predefined signature.](https://verl.readthedocs.io/en/latest/preparation/reward_function.html)
```python
def compute_reward(
data_source: str, solution_str: str, ground_truth: str, extra_info: dict
) -> float:
answer = extract_solution(solution_str=solution_str, method="strict")
if answer is None:
return 0.0
else:
if answer == ground_truth:
return 1.0
else:
return 0.0
```
We then define constants to pass into verl during the training run.
```python
PATH_TO_REWARD_FUNCTION: Path = Path("/root/grpo_verl.py")
REWARD_FUNCTION_NAME: str = "compute_reward"
```
## Kicking off a training run
We define some more constants for the training run.
```python
MODELS_PATH: Path = Path("/models")
MINUTES: int = 60
```
We also define a Volume for storing model checkpoints.
```python
checkpoints_volume: modal.Volume = modal.Volume.from_name(
"grpo-verl-example-checkpoints", create_if_missing=True
)
```
Now, we write a Modal Function for kicking off the training run.
If you wish to use Weights & Biases, as we do in this code, you'll need to create a Weights & Biases [Secret.](https://modal.com/docs/guide/secrets#secrets)
verl uses Ray under the hood. It creates Ray workers for each step where each Ray worker is a python process and each step is a step in the RL dataflow pipeline.
verl also keeps a separate control flow process that's independent of this, responsible for figuring out what step in the RL pipeline to execute.
Each Ray worker gets mapped onto 1 or more GPUs. Depending on the number of GPUs available, Ray will decide what workers go where, or to hold off scheduling workers
if there are no available GPUs. Generally, more VRAM = less hot-swapping of Ray workers, which means less waiting around for memory copying each iteration.
In this example we have chosen a configuration that allows for easy automated testing, but you may wish to use more GPUs or more powerful GPU types.
More details [here](https://verl.readthedocs.io/en/latest/hybrid_flow.html).
```python
@app.function(
image=image,
gpu="H100:2",
volumes={
MODELS_PATH: checkpoints_volume,
DATA_PATH: data_volume,
},
secrets=[modal.Secret.from_name("wandb-secret")],
timeout=24 * 60 * MINUTES,
)
def train(*arglist) -> None:
data_volume.reload()
cmd: list[str] = [
"python",
"-m",
"verl.trainer.main_ppo",
"algorithm.adv_estimator=grpo",
f"data.train_files={DATA_PATH / 'train.parquet'}",
f"data.val_files={DATA_PATH / 'test.parquet'}",
"data.train_batch_size=128",
"data.max_prompt_length=64",
"data.max_response_length=1024",
"data.filter_overlong_prompts=True",
"data.truncation=error",
"actor_rollout_ref.model.path=Qwen/Qwen2-0.5B",
"actor_rollout_ref.actor.optim.lr=1e-6",
"actor_rollout_ref.model.use_remove_padding=False",
"actor_rollout_ref.actor.ppo_mini_batch_size=128",
"actor_rollout_ref.actor.ppo_micro_batch_size_per_gpu=16",
"actor_rollout_ref.actor.checkpoint.save_contents='model,optimizer,extra,hf_model'",
"actor_rollout_ref.actor.use_kl_loss=True",
"actor_rollout_ref.actor.entropy_coeff=0",
"actor_rollout_ref.actor.kl_loss_coef=0.001",
"actor_rollout_ref.actor.kl_loss_type=low_var_kl",
"actor_rollout_ref.model.enable_gradient_checkpointing=True",
"actor_rollout_ref.actor.fsdp_config.param_offload=False",
"actor_rollout_ref.actor.fsdp_config.optimizer_offload=False",
"actor_rollout_ref.rollout.tensor_model_parallel_size=2",
"actor_rollout_ref.rollout.log_prob_micro_batch_size_per_gpu=16",
"actor_rollout_ref.rollout.name=vllm",
"actor_rollout_ref.rollout.gpu_memory_utilization=0.4",
"actor_rollout_ref.rollout.n=5",
"actor_rollout_ref.ref.log_prob_micro_batch_size_per_gpu=16",
"actor_rollout_ref.ref.fsdp_config.param_offload=True",
"algorithm.use_kl_in_reward=False",
"trainer.critic_warmup=0",
"trainer.logger=['console', 'wandb']",
"trainer.project_name=verl_grpo_example_qwen2-0.5b",
"trainer.experiment_name=qwen2-0.5b_example",
"trainer.n_gpus_per_node=2",
"trainer.nnodes=1",
"trainer.test_freq=5",
f"trainer.default_local_dir={MODELS_PATH}",
"trainer.resume_mode=auto",
# Parameters chosen to ensure easy automated testing. Remove if needed.
"trainer.save_freq=1",
"trainer.total_training_steps=1",
"trainer.total_epochs=1",
# For the custom reward function.
f"custom_reward_function.path={str(PATH_TO_REWARD_FUNCTION)}",
f"custom_reward_function.name={REWARD_FUNCTION_NAME}",
]
if arglist:
cmd.extend(arglist)
subprocess.run(cmd, check=True)
```
You can now run the training using `modal run --detach grpo_verl.py::train`, or pass in any [additional args from the CLI](https://modal.com/docs/guide/apps#argument-parsing) like this `modal run --detach grpo.py::train -- trainer.total_epochs=20 actor_rollout_ref.ref.log_prob_micro_batch_size_per_gpu=16`.
## Performing inference on the trained model
We use vLLM to perform inference on the trained model.
```python
VLLM_PORT: int = 8000
```
Once you have the model checkpoints in your Modal Volume, you can load the weights and perform inference using vLLM. For more on storing model weights on Modal, see
[this guide](https://modal.com/docs/guide/model-weights).
The weights path is as follows: `global_step_n/actor/huggingface` where n is the checkpoint you want (e.g. `global_step_5/actor/huggingface`).
The `latest_checkpointed_iteration.txt` file stores the most recent checkpoint index.
```python
def get_latest_checkpoint_file_path():
with open(MODELS_PATH / "latest_checkpointed_iteration.txt") as f:
latest_checkpoint_index = int(f.read())
return str(
MODELS_PATH / f"global_step_{latest_checkpoint_index}" / "actor" / "huggingface"
)
```
We provide the code for setting up an OpenAI compatible inference endpoint here. For more details re. serving models on vLLM, check out [this example.](https://modal.com/docs/examples/vllm_inference#deploy-the-server)
```python
vllm_image = (
modal.Image.debian_slim(python_version="3.12")
.uv_pip_install(
"vllm==0.9.1",
"flashinfer-python==0.2.6.post1",
extra_index_url="https://download.pytorch.org/whl/cu128",
extra_options="--index-strategy unsafe-best-match",
)
.env({"VLLM_USE_V1": "1"})
)
vllm_cache_vol = modal.Volume.from_name("vllm-cache", create_if_missing=True)
@app.function(
image=vllm_image,
gpu="H100:2",
scaledown_window=15 * MINUTES, # How long should we stay up with no requests?
timeout=10 * MINUTES, # How long should we wait for container start?
volumes={"/root/.cache/vllm": vllm_cache_vol, MODELS_PATH: checkpoints_volume},
)
@modal.concurrent(
max_inputs=32
) # How many requests can one replica handle? Tune carefully!
@modal.web_server(port=VLLM_PORT, startup_timeout=10 * MINUTES)
def serve():
import subprocess
latest_checkpoint_file_path = get_latest_checkpoint_file_path()
cmd = [
"vllm",
"serve",
"--uvicorn-log-level=info",
latest_checkpoint_file_path,
"--host",
"0.0.0.0",
"--port",
str(VLLM_PORT),
"--tensor-parallel-size",
"2",
]
subprocess.Popen(" ".join(cmd), shell=True)
```
You can then deploy the server using `modal deploy grpo_verl.py`, which gives you a custom URL. You can then query it using the following curl command:
```bash
curl -X POST /v1/chat/completions \
-H 'Content-Type: application/json' \
-d '{
"messages": [
{"role": "system", "content": "You are a helpful assistant for solving math problems."},
{"role": "user", "content": "James had 4 apples. Mary gave him 2 and he ate 1. How many does he have left?"}
],
"temperature": 0.7
}'
```
or in the [following ways](https://modal.com/docs/examples/vllm_inference#interact-with-the-server).
### Hackernews Alerts
# Run cron jobs in the cloud to search Hacker News
In this example, we use Modal to deploy a cron job that periodically queries Hacker News for
new posts matching a given search term, and posts the results to Slack.
## Import and define the app
Let's start off with imports, and defining a Modal app.
```python
import os
from datetime import datetime, timedelta
import modal
app = modal.App("example-hackernews-alerts")
```
Now, let's define an image that has the `slack-sdk` package installed, in which we can run a function
that posts a slack message.
```python
slack_sdk_image = modal.Image.debian_slim().uv_pip_install("slack-sdk")
```
## Defining the function and importing the secret
Our Slack bot will need access to a bot token.
We can use Modal's [Secrets](https://modal.com/secrets) interface to accomplish this.
To quickly create a Slack bot secret, click the "Create new secret" button.
Then, select the Slack secret template from the list options,
and follow the instructions in the "Where to find the credentials?" panel.
Name your secret `hn-bot-slack.`
Now, we define the function `post_to_slack`, which simply instantiates the Slack client using our token,
and then uses it to post a message to a given channel name.
```python
@app.function(
image=slack_sdk_image,
secrets=[modal.Secret.from_name("hn-bot-slack", required_keys=["SLACK_BOT_TOKEN"])],
)
async def post_to_slack(message: str):
import slack_sdk
client = slack_sdk.WebClient(token=os.environ["SLACK_BOT_TOKEN"])
client.chat_postMessage(channel="hn-alerts", text=message)
```
## Searching Hacker News
We are going to use Algolia's [Hacker News Search API](https://hn.algolia.com/api) to query for posts
matching a given search term in the past X days. Let's define our search term and query period.
```python
QUERY = "serverless"
WINDOW_SIZE_DAYS = 1
```
Let's also define an image that has the `requests` package installed, so we can query the API.
```python
requests_image = modal.Image.debian_slim().uv_pip_install("requests")
```
We can now define our main entrypoint, that queries Algolia for the term, and calls `post_to_slack`
on all the results. We specify a [schedule](https://modal.com/docs/guide/cron)
in the function decorator, which means that our function will run automatically at the given interval.
```python
@app.function(image=requests_image)
def search_hackernews():
import requests
url = "http://hn.algolia.com/api/v1/search"
threshold = datetime.utcnow() - timedelta(days=WINDOW_SIZE_DAYS)
params = {
"query": QUERY,
"numericFilters": f"created_at_i>{threshold.timestamp()}",
}
response = requests.get(url, params, timeout=10).json()
urls = [item["url"] for item in response["hits"] if item.get("url")]
print(f"Query returned {len(urls)} items.")
post_to_slack.for_each(urls)
```
## Test running
We can now test run our scheduled function as follows: `modal run hackernews_alerts.py::app.search_hackernews`
## Defining the schedule and deploying
Let's define a function that will be called by Modal every day
```python
@app.function(schedule=modal.Period(days=1))
def run_daily():
search_hackernews.remote()
```
In order to deploy this as a persistent cron job, you can run `modal deploy hackernews_alerts.py`,
Once the job is deployed, visit the [apps page](https://modal.com/apps) page to see
its execution history, logs and other stats.
### Harbor Evals
# Run massively parallel evals on Modal Sandboxes
[Modal Sandboxes](https://modal.com/docs/guide/sandboxes) are useful for executing
code generated by a language model, creating isolated environments for running
untrusted code, and more. Here we use [Harbor](https://www.harborframework.com/docs),
a framework for evaluating and optimizing agents and models in container environments,
to run massively parallel evals. Harbor creates the Modal Sandboxes via
`harbor run --env modal`.
## Set up
This script requires some dependencies to be installed locally. We include the
following [inline script metadata](https://peps.python.org/pep-0723/) so that
tools like [`uv`](https://docs.astral.sh/uv/) can automatically install these
dependencies.
```python
# /// script
# requires-python = ">=3.12"
# dependencies = [
# "harbor[modal]==0.15.0",
# "modal~=1.5.3",
# ]
# ///
```
To run this example:
```shell
uv run --python 3.12 --script 13_sandboxes/harbor_evals.py
```
```python
import argparse
import os
import subprocess
import sys
import tempfile
from pathlib import Path
```
## Define the task
A Harbor [task](https://www.harborframework.com/docs/tasks) is a directory of
files that Harbor uses to set up the environment, instruct the agent, and verify
its results. Harbor runs each attempt at a task as a trial in its own Modal Sandbox.
The default task is a toy example to demonstrate basic functionality.
```python
DEFAULT_TASK_FILES = {
"task.toml": """version = "1.0"
[environment]
docker_image = "ubuntu:24.04"
workdir = "/app"
network_mode = "no-network"
cpus = 1
memory_mb = 512
storage_mb = 1024
""",
"instruction.md": "Create `answer.txt` containing exactly `ok`.\n",
"solution/solve.sh": "#!/bin/bash\nprintf 'ok\\n' > answer.txt\n",
"tests/test.sh": """#!/bin/bash
if [ "$(cat /app/answer.txt 2>/dev/null)" = "ok" ]; then
echo 1 > /logs/verifier/reward.txt
else
echo 0 > /logs/verifier/reward.txt
exit 1
fi
""",
}
```
## Run the evals
We simply write the task files to a temporary directory,
then let Harbor take care of the rest.
```python
def main() -> None:
parser = argparse.ArgumentParser(
description="Run parallel Harbor oracle evals on Modal Sandboxes."
)
parser.add_argument("--n-parallel", type=int, default=8)
parser.add_argument(
"--task",
type=Path,
default=None,
help="Harbor task directory.",
)
args = parser.parse_args()
has_toml = (Path.home() / ".modal.toml").exists()
has_env = bool(
os.environ.get("MODAL_TOKEN_ID") and os.environ.get("MODAL_TOKEN_SECRET")
)
if not has_toml and not has_env:
print(
"Modal auth required: run `modal token new` or set "
"MODAL_TOKEN_ID and MODAL_TOKEN_SECRET.",
file=sys.stderr,
)
raise SystemExit(1)
with tempfile.TemporaryDirectory() as tmp:
run_dir = Path(tmp) / os.urandom(16).hex()
run_dir.mkdir(parents=True, exist_ok=True)
jobs = run_dir / "jobs"
if args.task is None:
task = run_dir / "task"
(task / "environment").mkdir(parents=True)
for name, contents in DEFAULT_TASK_FILES.items():
path = task / name
path.parent.mkdir(parents=True, exist_ok=True)
path.write_text(contents)
if name.endswith(".sh"):
path.chmod(0o755)
else:
task = args.task.expanduser().resolve()
if not task.is_dir():
print(f"Task path must be a directory: {task}", file=sys.stderr)
raise SystemExit(1)
print(
f"Running {args.n_parallel} trials on {args.n_parallel} concurrent "
"Modal Sandboxes...",
flush=True,
)
subprocess.run(
[
"harbor",
"run",
"--path",
str(task),
"--agent",
"oracle",
"--env",
"modal",
"--n-attempts",
str(args.n_parallel),
"--n-concurrent",
str(args.n_parallel),
"--jobs-dir",
str(jobs),
"--yes",
"--quiet",
],
check=True,
)
rewards = [path.read_text().strip() for path in jobs.glob("**/reward.txt")]
passed = sum(reward == "1" for reward in rewards)
total = args.n_parallel
print(f"{passed}/{total} tests passed")
if passed != total:
raise SystemExit(1)
if __name__ == "__main__":
main()
```
## Next steps
The default of eight parallel Sandboxes finishes quickly and fits within
every [Modal plan](https://modal.com/pricing). To see real scale, pass a larger
value, up to your plan's concurrent container limit:
```shell
uv run --python 3.12 --script 13_sandboxes/harbor_evals.py --n-parallel 100
```
You can also pass a local directory to run your own task instead:
```shell
uv run --python 3.12 --script 13_sandboxes/harbor_evals.py --task ./my-task
```
### Hello World
# Hello, world!
This tutorial demonstrates some core features of Modal:
* You can run functions on Modal just as easily as you run them locally.
* Running functions in parallel on Modal is simple and fast.
* Logs and errors show up immediately, even for functions running on Modal.
## Importing Modal and setting up
We start by importing `modal` and creating a `App`.
We build up this `App` to [define our application](https://modal.com/docs/guide/apps).
```python
import sys
import modal
app = modal.App("example-hello-world")
```
## Defining a function
Modal takes code and runs it in the cloud.
So first we've got to write some code.
Let's write a simple function that takes in an input,
prints a log or an error to the console,
and then returns an output.
To make this function work with Modal, we just wrap it in a decorator,
[`@app.function`](https://modal.com/docs/reference/modal.App#function).
```python
@app.function()
def f(i):
if i % 2 == 0:
print("hello", i)
else:
print("world", i, file=sys.stderr)
return i * i
```
## Running our function locally, remotely, and in parallel
Now let's see three different ways we can call that function:
1. As a regular call on your `local` machine, with `f.local`
2. As a `remote` call that runs in the cloud, with `f.remote`
3. By `map`ping many copies of `f` in the cloud over many inputs, with `f.map`
We call `f` in each of these ways inside the `main` function below.
```python
@app.local_entrypoint()
def main():
# run the function locally
print(f.local(1000))
# run the function remotely on Modal
print(f.remote(1000))
# run the function in parallel and remotely on Modal
total = 0
for ret in f.map(range(200)):
total += ret
print(total)
```
Enter `modal run hello_world.py` in a shell, and you'll see a Modal app initialize.
You'll then see the `print`ed logs of
the `main` function and, mixed in with them, all the logs of `f` as it is run
locally, then remotely, and then remotely and in parallel.
That's all triggered by adding the
[`@app.local_entrypoint`](https://modal.com/docs/reference/modal.App#local_entrypoint)
decorator on `main`, which defines it as the function to start from locally when we invoke `modal run`.
## What just happened?
When we called `.remote` on `f`, the function was executed
_in the cloud_, on Modal's infrastructure, not on the local machine.
In short, we took the function `f`, put it inside a container,
sent it the inputs, and streamed back the logs and outputs.
## But why does this matter?
Try one of these things next to start seeing the full power of Modal!
### You can change the code and run it again
For instance, change the `print` statement in the function `f`
to print `"spam"` and `"eggs"` instead and run the app again.
You'll see that that your new code is run with no extra work from you --
and it should even run faster!
Modal's goal is to make running code in the cloud feel like you're
running code locally. That means no waiting for long image builds when you've just moved a comma,
no fiddling with container image pushes, and no context-switching to a web UI to inspect logs.
### You can map over more data
Change the `map` range from `200` to some large number, like `1170`. You'll see
Modal create and run even more containers in parallel this time.
And it'll happen lightning fast!
### You can run a more interesting function
The function `f` is a bit silly and doesn't do much, but in its place
imagine something that matters to you, like:
* Running [language model inference](https://modal.com/docs/examples/vllm_inference)
or [fine-tuning](https://modal.com/docs/examples/slack-finetune)
* Manipulating [audio](https://modal.com/docs/examples/musicgen)
or [images](https://modal.com/docs/examples/diffusers_lora_finetune)
* [Embedding huge text datasets](https://modal.com/docs/examples/amazon_embeddings) at lightning fast speeds
Modal lets you parallelize that operation effortlessly by running hundreds or
thousands of containers in the cloud.
### Hello World Async
# Async functions
Modal natively supports async/await syntax using asyncio.
First, let's import some global stuff.
```python
import sys
import modal
app = modal.App("example-hello-world-async")
```
## Defining a function
Now, let's define a function. The wrapped function can be synchronous or
asynchronous, but calling it in either context will still work.
Let's stick to a normal synchronous function
```python
@app.function()
def f(i):
if i % 2 == 0:
print("hello", i)
else:
print("world", i, file=sys.stderr)
return i * i
```
## Running the app with asyncio
Let's make the main entrypoint asynchronous. In async contexts, we should
call the function using `await` or iterate over the map using `async for`.
Otherwise we would block the event loop while our call is being run.
```python
@app.local_entrypoint()
async def run_async():
# Call the function using .remote.aio() in order to run it asynchronously
print(await f.remote.aio(1000))
# Parallel map.
total = 0
# Call .map asynchronously using using f.map.aio(...)
async for ret in f.map.aio(range(20)):
total += ret
print(total)
```
### Hp Sweep Gpt
# Train an SLM from scratch with early-stopping grid search over hyperparameters

When you want a language model that performs well on your task, there are three options,
ordered by the degree of customization:
- [**Prompt Engineering**](https://en.wikipedia.org/wiki/Prompt_engineering):
large and capable language models understand tasks in natural language, so you can
carefully design a natural language "prompt" to elicit the desired behavior.
- [**Fine-Tuning**](https://modal.com/docs/examples/llm-finetuning):
those same language models were trained by gradient descent on data sets representing tasks,
and they can be further trained by gradient descent on data sets representative of your task.
- **Training from Scratch**:
if you have enough data for your task, you can throw the pretrained model away and make your own.
Each step adds additional engineering complexity, but also leads to a superior cost-performance Pareto frontier
for your tasks. Fine-tuned models at one-tenth the size regularly outperform more generic models,
and models trained from scratch outperform them.
Because these models are so much smaller than the Large Language Models that power generic
assistant chatbots like ChatGPT and Claude, they are often called _Small Language Models_ (SLMs).
In this example, we will explore training an SLM from scratch on Modal.
In fact, we'll train 8 SLMs in parallel with different hyperparameters
and then select the best one for additional training.
We'll monitor this training live and serve our training and trained models
as Web Functions and simple browser UIs.
Along the way we'll use many features of the Modal platform:
[distributed Volumes](https://modal.com/docs/guide/volumes),
multiple [Web Functions](https://modal.com/docs/guide/webhooks),
and [parallel container execution](https://modal.com/docs/guide/scale#parallel-execution-of-inputs).
Together, these features give every machine learning and AI team
the same infrastructural capabilities that the most sophisticated companies
have in their internal platforms.
## Basic Setup
```python
import logging as L
import urllib.request
from dataclasses import dataclass
from pathlib import Path, PosixPath
from typing import Optional
import modal
from pydantic import BaseModel
MINUTES = 60 # seconds
HOURS = 60 * MINUTES
app_name = "example-hp-sweep-gpt"
app = modal.App(app_name)
```
We'll use A10G GPUs for training, which are able to train the model to recognizably improved performance
in ~15 minutes while keeping costs under ~$1.
```python
gpu = "A10G"
```
### Create a Volume to store data, weights, and logs
Since we'll be coordinating training across multiple machines we'll use a
distributed [Volume](https://modal.com/docs/guide/volumes)
to store the data, checkpointed models, and TensorBoard logs.
```python
volume = modal.Volume.from_name("example-hp-sweep-gpt-volume", create_if_missing=True)
volume_path = PosixPath("/vol/data")
model_filename = "nano_gpt_model.pt"
best_model_filename = "best_nano_gpt_model.pt"
tb_log_path = volume_path / "tb_logs"
model_save_path = volume_path / "models"
```
### Define dependencies in container images
The container image for training is based on Modal's default slim Debian Linux image with `torch`
for defining and running our neural network and `tensorboard` for monitoring training.
```python
base_image = modal.Image.debian_slim(python_version="3.11").uv_pip_install(
"pydantic==2.9.1"
)
torch_image = base_image.uv_pip_install(
"torch==2.1.2",
"tensorboard==2.17.1",
"numpy<2",
)
```
We also have some local dependencies that we'll need to import into the remote environment.
We add them into the remote container.
```python
torch_image = torch_image.add_local_dir(
Path(__file__).parent / "src", remote_path="/root/src"
)
```
We'll serve a simple Web Function:
```python
web_image = base_image.uv_pip_install("fastapi[standard]==0.115.4", "starlette==0.41.2")
```
And we'll deploy a web UI for interacting with our trained models using Gradio.
```python
assets_path = Path(__file__).parent / "assets"
ui_image = web_image.uv_pip_install("gradio~=4.44.0").add_local_dir(
assets_path, remote_path="/assets"
)
```
We can also "pre-import" libraries that will be used by the functions we run on Modal in a given image
using the `with image.imports` context manager.
```python
with torch_image.imports():
import glob
import os
from timeit import default_timer as timer
import tensorboard
import torch
from src.dataset import Dataset
from src.logs_manager import LogsManager
from src.model import AttentionModel
from src.tokenizer import Tokenizer
```
## Running SLM training on Modal
Here we define the training function, wrapping it in a decorator
that specifies the infrastructural parameters, like the container `image` we want to use,
which `volume` to mount where, the `gpu` we're using, and so on.
Training consists of specifying optimization parameters, loading the
`dataset`, building the `model`, setting up TensorBoard logging &
checkpointing, and then finally executing the `training_loop` itself.
```python
@app.function(
image=torch_image,
volumes={volume_path: volume},
gpu=gpu,
timeout=1 * HOURS,
)
def train_model(
node_rank,
n_nodes,
hparams,
experiment_name,
run_to_first_save=False,
n_steps=3000,
n_steps_before_eval=None,
n_steps_before_checkpoint=None,
):
# optimizer, data, and model prep
batch_size = 64
learning_rate = 3e-4
n_eval_steps = 100
if n_steps_before_eval is None:
n_steps_before_eval = int(n_steps / 8) # eval eight times per run
if n_steps_before_checkpoint is None:
n_steps_before_checkpoint = int(n_steps / 4) # save four times per run
train_percent = 0.9
L.basicConfig(
level=L.INFO,
format=f"\033[0;32m%(asctime)s %(levelname)s [%(filename)s.%(funcName)s:%(lineno)d] [Node {node_rank + 1}] %(message)s\033[0m",
datefmt="%b %d %H:%M:%S",
)
# use GPU if available
device = "cuda" if torch.cuda.is_available() else "cpu"
L.info("Remote Device: %s // GPU: %s", device, gpu)
input_file_path = volume_path / "shakespeare_char.txt"
text = prepare_data(input_file_path, volume)
# construct tokenizer & dataset
tokenizer = Tokenizer(text)
dataset = Dataset(
tokenizer.encode(text),
train_percent,
batch_size,
hparams.context_size,
device,
)
# build the model
model = build_model(hparams, tokenizer.vocab_size, device)
num_parameters = sum(p.numel() for p in model.parameters())
L.info(f"Num parameters: {num_parameters}")
optimizer = setup_optimizer(model, learning_rate)
# TensorBoard logging & checkpointing prep
logs_manager = LogsManager(experiment_name, hparams, num_parameters, tb_log_path)
L.info(f"Model name: {logs_manager.model_name}")
model_save_dir = model_save_path / experiment_name / logs_manager.model_name
if model_save_dir.exists():
L.info("Loading model from checkpoint...")
checkpoint = torch.load(str(model_save_dir / model_filename))
is_best_model = not run_to_first_save
if is_best_model:
make_best_symbolic_link(model_save_dir, model_filename, experiment_name)
model.load_state_dict(checkpoint["model"])
start_step = checkpoint["steps"] + 1
else:
model_save_dir.mkdir(parents=True, exist_ok=True)
start_step = 0
checkpoint = init_checkpoint(model, tokenizer, optimizer, start_step, hparams)
checkpoint_path = model_save_dir / model_filename
out = training_loop(
start_step,
n_steps,
n_steps_before_eval,
n_steps_before_checkpoint,
n_eval_steps,
dataset,
tokenizer,
model,
optimizer,
logs_manager,
checkpoint,
checkpoint_path,
run_to_first_save,
)
return node_rank, float(out["val"]), hparams
```
## Launch a hyperparameter sweep from a `local_entrypoint`
The main entry point coordinates the hyperparameter optimization.
First we specify the default hyperparameters for the model, taken from
[Andrej Karpathy's walkthrough](https://www.youtube.com/watch?v=kCc8FmEb1nY&t=5976s).
For better performance, you can increase the `context_size` and scale up the GPU accordingly.
```python
@dataclass
class ModelHyperparameters:
n_heads: int = 6
n_embed: int = 384
n_blocks: int = 6
context_size: int = 256
dropout: float = 0.2
```
Next we define the local entrypoint: the code we run locally to coordinate training.
It will train 8 models in parallel across 8 containers, each
with different hyperparameters, varying the number of heads (`n_heads`), the
`context_size` (called the "block size" by Karpathy), and the dropout rate (`dropout`). To run in
parallel we need to use the [`starmap` method](https://modal.com/docs/guide/scale#parallel-execution-of-inputs).
We train all of the models until the first checkpoint and then stop early so we
can compare the validation losses.
Then we restart training for the best model and train it to completion.
You can kick off training with the following command:
```bash
modal run 06_gpu_and_ml/hyperparameter-sweep/hp_sweep_gpt.py
```
The output will look something like this:
```
Sep 16 21:20:39 INFO [hp_sweep_gpt.py.train_model:127] [Node 1] Remote Device: cuda // GPU: A10G
Sep 16 21:20:40 INFO [hp_sweep_gpt.py.train_model:149] [Node 1] Num parameters: 10693697
Sep 16 21:20:40 INFO [hp_sweep_gpt.py.train_model:156] [Node 1] Model Name: E2024-0916-142031.618259_context_size=8_n_heads=1_dropout=0.1
Sep 16 21:20:41 INFO [hp_sweep_gpt.py.train_model:225] [Node 1] 0) // 1.03s // Train Loss: 3.58 // Val Loss: 3.60
Sep 16 21:20:41 INFO [hp_sweep_gpt.py.train_model:127] [Node 2] Remote Device: cuda // GPU: A10G
...
```
The `local_entrypoint` code is below. Note that the arguments to it can also be passed via the command line.
Use `--help` for details.
```python
@app.local_entrypoint()
def main(
n_steps: int = 3000,
n_steps_before_checkpoint: Optional[int] = None,
n_steps_before_eval: Optional[int] = None,
):
from datetime import datetime
from itertools import product
experiment_name = f"E{datetime.now().strftime('%Y-%m-%d-%H%M%S.%f')}"
default_hparams = ModelHyperparameters()
# build list of hyperparameters to train & validate
nheads_options = (1, default_hparams.n_heads)
context_size_options = (8, default_hparams.context_size)
dropout_options = (0.1, default_hparams.dropout)
hparams_list = [
ModelHyperparameters(n_heads=h, context_size=c, dropout=d)
for h, c, d in product(nheads_options, context_size_options, dropout_options)
]
# run training for each hyperparameter setting
results = []
stop_early = True # stop early so we can compare val losses
print(f"Testing {len(hparams_list)} hyperparameter settings")
n_nodes = len(hparams_list)
static_params = (
experiment_name,
stop_early,
n_steps,
n_steps_before_eval,
n_steps_before_checkpoint,
)
for result in train_model.starmap(
[(i, n_nodes, h, *static_params) for i, h in enumerate(hparams_list)],
order_outputs=False,
):
# result = (node_rank, val_loss, hparams)
node_rank = result[0]
results.append(result)
print(
f"[Node {node_rank + 1}/{n_nodes}] Finished. Early stop val loss result: {result[1:]}"
)
# find the model and hparams with the lowest validation loss
best_result = min(results, key=lambda x: x[1])
print(f"Best early stop val loss result: {best_result}")
best_hparams = best_result[-1]
# finish training with best hparams
node_rank = 0
n_nodes = 1 # only one node for final training run
train_model.remote(
node_rank,
n_nodes,
best_hparams,
experiment_name,
not stop_early,
n_steps,
n_steps_before_eval,
n_steps_before_checkpoint,
)
```
### Monitor experiments with TensorBoard
To monitor our training we will create a TensorBoard WSGI web app, which will
display the progress of our training across all 8 models. We'll use the latest
logs for the most recent experiment written to the Volume.
To ensure we have the latest data we add some
[WSGI Middleware](https://peps.python.org/pep-3333/)
that checks the Modal Volume for updates when the page is reloaded.
```python
class VolumeMiddleware:
def __init__(self, app):
self.app = app
def __call__(self, environ, start_response):
if (route := environ.get("PATH_INFO")) in ["/", "/modal-volume-reload"]:
try:
volume.reload()
except Exception as e:
print("Exception while re-loading traces: ", e)
if route == "/modal-volume-reload":
environ["PATH_INFO"] = "/" # redirect
return self.app(environ, start_response)
```
To ensure a unique color per experiment you can click the palette (🎨) icon
under TensorBoard > Time Series > Run and use the Regex:
`E(\d{4})-(\d{2})-(\d{2})-(\d{6})\.(\d{6})`
You can deploy this TensorBoard service by running
```
modal deploy 06_gpu_and_ml/hyperparameter-sweep/hp_sweep_gpt.py
```
and visit it at the URL that ends with `-monitor-training.modal.run`.
After training finishes, your TensorBoard UI will look something like this:

You can also find some sample text generated by the model in the "Text" tab.
```python
@app.function(
image=torch_image,
volumes={volume_path: volume},
)
@modal.concurrent(max_inputs=100)
@modal.wsgi_app()
def monitor_training():
board = tensorboard.program.TensorBoard()
board.configure(logdir=str(tb_log_path))
(data_provider, deprecated_multiplexer) = board._make_data_provider()
wsgi_app = tensorboard.backend.application.TensorBoardWSGIApp(
board.flags,
board.plugin_loaders,
data_provider,
board.assets_zip_provider,
deprecated_multiplexer,
experimental_middlewares=[VolumeMiddleware],
)
return wsgi_app
```
Notice that there are 8 models training, and the one with the lowest
validation loss at step 600 continues training to 3000 steps.
## Serving SLMs on Modal during and after training
Because our weights are stored in a distributed Volume,
we can deploy an inference Function based off of them without any extra work --
and we can even check in on models while we're still training them! # For more on storing model weights on Modal, see
[this guide](https://modal.com/docs/guide/model-weights).
### Remote inference with Modal `Cls`es
We wrap our inference in a Modal `Cls` called `ModelInference`.
The user of `ModelInference` can control which model is used by providing the
`experiment_name`. Each unique choice creates a separate
[auto-scaling deployment](https://modal.com/docs/guide/parameterized-functions).
If the user does not specify an `experiment_name`, the latest experiment
is used.
```python
@app.cls(image=torch_image, volumes={volume_path: volume}, gpu=gpu)
class ModelInference:
experiment_name: str = modal.parameter(default="")
def get_latest_available_model_dirs(self, n_last):
"""Find the latest models that have a best model checkpoint saved."""
save_model_dirs = glob.glob(f"{model_save_path}/*")
sorted_model_dirs = sorted(save_model_dirs, key=os.path.getctime, reverse=True)
valid_model_dirs = []
for latest_model_dir in sorted_model_dirs:
if Path(f"{latest_model_dir}/{best_model_filename}").exists():
valid_model_dirs.append(Path(latest_model_dir))
if len(valid_model_dirs) >= n_last:
return valid_model_dirs
return valid_model_dirs
@modal.method()
def get_latest_available_experiment_names(self, n_last):
return [d.name for d in self.get_latest_available_model_dirs(n_last)]
def load_model_impl(self):
from .src.model import AttentionModel
from .src.tokenizer import Tokenizer
if self.experiment_name != "": # user selected model
use_model_dir = f"{model_save_path}/{self.experiment_name}"
else: # otherwise, pick latest
try:
use_model_dir = self.get_latest_available_model_dirs(1)[0]
except IndexError:
raise ValueError("No models available to load.")
if self.use_model_dir == use_model_dir and self.is_fully_trained:
return # already loaded fully trained model.
print(f"Loading experiment: {Path(use_model_dir).name}...")
checkpoint = torch.load(f"{use_model_dir}/{best_model_filename}")
self.use_model_dir = use_model_dir
hparams = checkpoint["hparams"]
key = ( # for backwards compatibility
"unique_chars" if "unique_chars" in checkpoint else "chars"
)
unique_chars = checkpoint[key]
steps = checkpoint["steps"]
val_loss = checkpoint["val_loss"]
self.is_fully_trained = checkpoint["finished_training"]
print(
f"Loaded model with {steps} train steps"
f" and val loss of {val_loss:.2f}"
f" (fully_trained={self.is_fully_trained})"
)
self.tokenizer = Tokenizer(unique_chars)
self.device = "cuda" if torch.cuda.is_available() else "cpu"
self.model = AttentionModel(self.tokenizer.vocab_size, hparams, self.device)
self.model.load_state_dict(checkpoint["model"])
self.model.to(self.device)
@modal.enter()
def load_model(self):
self.use_model_dir = None
self.is_fully_trained = False
self.load_model_impl()
@modal.method()
def generate(self, prompt):
self.load_model_impl() # load updated model if available
n_new_tokens = 1000
return self.model.generate_from_text(self.tokenizer, prompt, n_new_tokens)
```
### Adding a simple Web Function
The `ModelInference` class above is available for use
from any other Python environment with the right Modal credentials
and the `modal` package installed -- just use [`lookup`](https://modal.com/docs/reference/modal.Cls#lookup).
But we can also expose it as a Web Function for easy access
from anywhere, including other programming languages or the command line.
```python
class GenerationRequest(BaseModel):
prompt: str
@app.function(image=web_image)
@modal.fastapi_endpoint(method="POST", docs=True)
def web_generate(request: GenerationRequest):
output = ModelInference().generate.remote(request.prompt)
return {"output": output}
```
This Function can be deployed on Modal with `modal deploy`.
That will allow us to generate text via a simple `curl` command like this:
```bash
curl -X POST -H 'Content-Type: application/json' --data-binary '{"prompt": "\n"}' https://your-workspace-name--modal-nano-gpt-web-generate.modal.run
```
which will return something like:
```json
{
"output":
"BRUTUS:
The broy trefore anny pleasory to
wip me state of villoor so:
Fortols listhey for brother beat the else
Be all, ill of lo-love in igham;
Ah, here all that queen and hould you father offer"
}
```
It's not exactly Shakespeare, but at least it shows our model learned something!
You can choose which model to use by specifying the `experiment_name` in the query parameters of the request URL.
### Serving a Gradio UI with `asgi_app`
Second, we create a Gradio web app for generating text via a graphical user interface in the browser.
That way our fellow team members and stakeholders can easily interact with the model and give feedback,
even when we're still training the model.
You should see the URL for this UI in the output of `modal deploy`
or on your [Modal app dashboard](https://modal.com/apps) for this app.
The Gradio UI will look something like this:

```python
@app.function(
image=ui_image,
max_containers=1,
volumes={volume_path: volume},
)
@modal.concurrent(max_inputs=100)
@modal.asgi_app()
def ui():
import gradio as gr
from fastapi import FastAPI
from fastapi.responses import FileResponse
from gradio.routes import mount_gradio_app
# call out to the inference in a separate Modal environment with a GPU
def generate(text="", experiment_name=""):
if not text:
text = "\n"
generated = ModelInference(experiment_name=experiment_name).generate.remote(
text
)
return text + generated
example_prompts = [
"DUKE OF YORK:\nWhere art thou Lucas?",
"ROMEO:\nWhat is a man?",
"CLARENCE:\nFair is foul and foul is fair, but who are you?",
"Brevity is the soul of wit, so what is the soul of foolishness?",
]
web_app = FastAPI()
# custom styles: an icon, a background, and a theme
@web_app.get("/favicon.ico", include_in_schema=False)
async def favicon():
return FileResponse("/assets/favicon.svg")
@web_app.get("/assets/background.svg", include_in_schema=False)
async def background():
return FileResponse("/assets/background.svg")
with open("/assets/index.css") as f:
css = f.read()
n_last = 20
experiment_names = ModelInference().get_latest_available_experiment_names.remote(
n_last
)
theme = gr.themes.Default(
primary_hue="green", secondary_hue="emerald", neutral_hue="neutral"
)
# add a Gradio UI around inference
with gr.Blocks(theme=theme, css=css, title="SLM") as interface:
# title
gr.Markdown("# GPT-style Shakespeare text generation.")
# Model Selection
with gr.Row():
gr.Markdown("## Model Version")
with gr.Row():
experiment_dropdown = gr.Dropdown(
experiment_names, label="Select Model Version"
)
# input and output
with gr.Row():
with gr.Column():
gr.Markdown("## Input:")
input_box = gr.Textbox( # input text component
label="",
placeholder="Write some Shakespeare like text or keep it empty!",
lines=10,
)
with gr.Column():
gr.Markdown("## Output:")
output_box = gr.Textbox( # output text component
label="",
lines=10,
)
# button to trigger inference and a link to Modal
with gr.Row():
generate_button = gr.Button("Generate", variant="primary", scale=2)
generate_button.click(
fn=generate,
inputs=[input_box, experiment_dropdown],
outputs=output_box,
) # connect inputs and outputs with inference function
gr.Button( # shameless plug
" Powered by Modal",
variant="secondary",
link="https://modal.com",
)
# example prompts
with gr.Column(variant="compact"):
# add in a few examples to inspire users
for ii, prompt in enumerate(example_prompts):
btn = gr.Button(prompt, variant="secondary")
btn.click(fn=lambda idx=ii: example_prompts[idx], outputs=input_box)
# mount for execution on Modal
return mount_gradio_app(
app=web_app,
blocks=interface,
path="/",
)
```
## Addenda
The remainder of this code is boilerplate.
### Training Loop
There's quite a lot of code for just the training loop! If you'd rather not write this stuff yourself,
consider a training framework like [PyTorch Lightning](https://lightning.ai/docs/pytorch/stable)
or [Hugging Face](https://huggingface.co/transformers/main_classes/trainer.html).
```python
def training_loop(
start_step,
n_steps,
n_steps_before_eval,
n_steps_before_checkpoint,
n_eval_steps,
dataset,
tokenizer,
model,
optimizer,
logs_manager,
checkpoint,
checkpoint_path,
run_to_first_save,
):
@torch.no_grad()
def eval_model(model, dataset, tokenizer, n_eval_steps):
"""Evaluate model on train and validation data."""
out = {}
model.eval() # Turn off gradients
for split in ("train", "val"):
losses = torch.zeros(n_eval_steps)
for k in range(n_eval_steps):
xb, yb = dataset.get_batch(split)
logits, loss = model.forward(xb, yb)
losses[k] = loss
out[split] = losses.mean()
# Generate some output samples
out["sample"] = model.generate_from_text(tokenizer, "\n", 1000)
model.train() # Turn on gradients
return out
t_last = timer()
for step in range(start_step, n_steps + 1):
# sample a batch of data
xb, yb = dataset.get_batch("train")
# evaluate the loss, calculate & apply gradients
logits, loss = model.forward(xb, yb)
optimizer.zero_grad(set_to_none=True)
loss.backward()
optimizer.step()
# log training loss
logs_manager.add_train_scalar("Cross Entropy Loss", loss.item(), step)
# evaluate model on validation set
if step % n_steps_before_eval == 0:
out = eval_model(model, dataset, tokenizer, n_eval_steps)
log_evals(out, step, t_last, logs_manager)
t_last = timer()
# save model with checkpoint information
if step > 0 and step % n_steps_before_checkpoint == 0:
checkpoint["steps"] = step
checkpoint["val_loss"] = out["val"]
# mark as finished if we hit n steps.
checkpoint["finished_training"] = step >= n_steps
L.info(
f"Saving checkpoint to {checkpoint_path}\t {checkpoint['finished_training']})"
)
save_checkpoint(checkpoint, checkpoint_path)
if run_to_first_save:
L.info("Stopping early...")
break
return out
def save_checkpoint(checkpoint, checkpoint_path):
torch.save(checkpoint, checkpoint_path)
volume.commit()
def build_model(hparams, vocab_size, device):
"""Initialize the model and move it to the device."""
model = AttentionModel(vocab_size, hparams, device)
model.to(device)
return model
def setup_optimizer(model, learning_rate):
"""Set up the optimizer for the model."""
return torch.optim.AdamW(model.parameters(), lr=learning_rate)
```
### Miscellaneous
The remaining code includes small helper functions for training the model.
```python
def prepare_data(input_file_path: Path, volume: modal.Volume) -> str:
"""Download and read the dataset."""
volume.reload()
if not input_file_path.exists():
L.info("Downloading Shakespeare dataset...")
data_url = "https://raw.githubusercontent.com/karpathy/char-rnn/master/data/tinyshakespeare/input.txt"
urllib.request.urlretrieve(data_url, input_file_path)
volume.commit()
return input_file_path.read_text()
def make_best_symbolic_link(model_save_dir, model_filename, experiment_name):
# create symlink to the best model so it's easy to find for web serving
os.symlink(
str(model_save_dir / model_filename),
str(model_save_path / experiment_name / best_model_filename),
)
volume.commit() # commit the symlink
def init_checkpoint(model, tokenizer, optimizer, start_step, hparams):
return {
"model": model.state_dict(),
"unique_chars": tokenizer.unique_chars,
"optimizer": optimizer.state_dict(),
"val_loss": float("inf"),
"steps": start_step,
"hparams": hparams,
"finished_training": False,
}
def log_evals(result, step, t_last, logs_manager):
runtime_s = timer() - t_last
L.info(
f"{step:5d}) // {runtime_s:>5.2f}s // Train Loss: {result['train']:.2f} // Val Loss: {result['val']:.2f}"
)
logs_manager.add_val_scalar("Cross Entropy Loss", result["val"], step)
logs_manager.add_val_text("Sample Output", result["sample"], step)
logs_manager.flush()
volume.commit() # Make sure TensorBoard container will see it.
return result
```
### Image Embeddings Infinity
# Modal Cookbook: Recipe for Inference Throughput Maximization
In certain applications, the bottom line comes to throughput: process a set of inputs as fast as possible.
Let's explore how to maximize throughput by using Modal on an embedding example, and see just how fast
we can encode the [Microsoft Cats & Dogs dataset](https://huggingface.co/datasets/microsoft/cats_vs_dogs)
using the [Infinity inference engine](https://github.com/michaelfeil/infinity "github/michaelfeil/infinity").
## Conclusions
### BLUF (Bottom Line Up Front)
Set concurrency (`max_concurrent_inputs`) to 4, and set `batch_size` between 50-500.
To set `max_containers`, divide the total number of inputs by `max_concurrent_inputs*batchsize`
(note: if you have a massive dataset, keep an eye out for diminishing returns on `max_containers`; but
Modal should handle that for you!).
Be sure to preprocess your data in the same manner that the model is expecting (e.g., resizing images).
If you only want to use one container, increase `batch_size` until you are maxing
out the GPU (but keep concurrency, `max_concurrent_inputs`, capped around 4). The example herein achieves
upward of 750 images / second overall throughput (not including initial Volume setup time).
### Why?
While batchsize maximizes GPU utilization, the time to form a batch (ie reading images)
will ultimately overtake inference, whether due to I/O, sending data across a wire, etc.
We can make up for this by using idle GPU cores to store additional copies of the model:
this _GPU packing_ is achieved via an async queue and the [`@modal.concurrent(max_inputs:int)`](https://modal.com/docs/guide/concurrent-inputs#input-concurrency)
decorator. Once you nail down `batch_size` you can crank up the number of containers to distribute the
computational load. High values of concurrency has diminishing returns, we believe,
because we are already throttling the CPU with multi-threaded dataloading. The demo herein
achieves upward of 750 images / second, and that will increase for larger datasets where the model loading
time becomes increasingly negligable.
## Local env imports
Import everything we need for the locally-run Python (everything in our local_entrypoint function at the bottom).
```python
import asyncio
import os
from concurrent.futures import ThreadPoolExecutor
from pathlib import Path
from time import perf_counter
from typing import Iterator, TypeVar
import modal
```
## Key Parameters
There are three ways to parallelize inference for this usecase: via batching (which happens internal to Infinity),
by packing individual GPU(s) with multiple copies of the model, and by fanning out across multiple containers.
Here are some parameters for controlling these factors:
* `max_concurrent_inputs` sets the [@modal.concurrent(max_inputs:int) ](https://modal.com/docs/guide/concurrent-inputs#input-concurrency "Modal: input concurrency") argument for the inference app. This takes advantage of the asynchronous nature of the Infinity embedding inference app.
* `gpu` is a string specifying the GPU to be used.
* `max_containers` caps the number of containers allowed to spin-up.
* `memory_request` amount of RAM requested per container
* `core_request` number of logical cores requested per container
* `threads_per_core` oversubscription factor for parallelized I/O (image reading)
* `batch_size` is a parameter passed to the [Infinity inference engine](https://github.com/michaelfeil/infinity "github/michaelfeil/infinity"), and it means the usual thing for machine learning inference: a group of images are processed through the neural network together.
* `image_cap` caps the number of images used in this example (e.g. for debugging/testing)
```python
max_concurrent_inputs: int = 4
gpu: str = "L4"
max_containers: int = 50
memory_request: float = 5 * 1024 # MB->GB
core_request: float = 4
threads_per_core: int = 8
batch_size: int = 100
image_cap: int = -1
```
This timeout caps the maximum time a single function call is allowed to take. In this example, that
includes reading a batch-worth of data and running inference on it. When `batch_size` is large (e.g. 5000)
and with a large value of `max_concurrent_inputs`, where a batch may sit in a queue for a while,
this could take several minutes.
```python
timeout_seconds: int = 10 * 60
```
## Data and Model Specification
This model parameter should point to a model on HuggingFace that is supported by Infinity.
Note that your selected model might require specialized imports when
designing the image in the next section. This [OpenAI model](https://huggingface.co/openai/clip-vit-base-patch16 "OpenAI ViT")
takes about 4-10s to load into memory.
```python
model_name = "openai/clip-vit-base-patch16" # 599 MB
model_input_shape = (224, 224)
```
We will use a high-performance [Modal Volume](https://modal.com/docs/guide/volumes#volumes "Modal.Volume")
both to cache model weights and to store images we want to encode. The details of
setting this volume up are below. For more on storing model weights on Modal, see
[this guide](https://modal.com/docs/guide/model-weights).
Here, we just need to name it so that we can instantiate
the Modal application.
You may need to [set up a secret](https://modal.com/secrets/) to access HuggingFace datasets
```python
hf_secret = modal.Secret.from_name("huggingface-secret")
```
Change this global variable to use a different HF dataset:
```python
hf_dataset_name = "microsoft/cats_vs_dogs"
```
This name is important for referencing the volume in other apps or for [browsing](https://modal.com/storage):
```python
vol_name = "example-embedding-data"
```
This is the location within the container that this Volume will be mounted:
```python
vol_mnt = Path("/data")
```
Finally, the Volume object can be created:
```python
data_volume = modal.Volume.from_name(vol_name, create_if_missing=True)
```
## Define the image
```python
infinity_image = (
modal.Image.debian_slim(python_version="3.10")
.uv_pip_install(
[
"pillow==11.3.0", # for Infinity input typehint
"datasets==4.0.0", # for huggingface data download
"huggingface-hub==0.36.0", # for fast huggingface data download
"tqdm==4.67.1", # progress bar for dataset download
"sentencepiece==0.2.0", # for this particular chosen model
"torchvision==0.22.1", # for fast image loading
"infinity_emb[all]==0.0.76", # for Infinity inference lib
"optimum==1.26.1", # need to pin this because newer version requires
]
)
.env(
{
"HF_HOME": vol_mnt.as_posix(), # For model and data caching in our Volume
"HF_XET_HIGH_PERFORMANCE": "1", # For fast data transfer
}
)
)
```
Initialize the app
```python
app = modal.App(
"example-image-embeddings-infinity",
image=infinity_image,
volumes={vol_mnt: data_volume},
secrets=[hf_secret],
)
```
Imports inside the container
```python
with infinity_image.imports():
from infinity_emb import AsyncEmbeddingEngine, EngineArgs
from infinity_emb.primitives import Dtype, InferenceEngine
from PIL.Image import Image
from torchvision.io import read_image
from torchvision.transforms.functional import to_pil_image
## Dataset Downloading and Setup
```
## Data setup
We use a [Modal Volume](https://modal.com/docs/guide/volumes#volumes "Modal.Volume")
to store images we want to encode. We download them from Huggingface into a Volume and then preprocess
them to 224 x 224 JPEGs. The selected model, `openai/clip-vit-base-patch16`, was trained on 224 x 224
sized images. If you skip this preprocess resize step, Infinity will handle image resizing for you-
at a severe penalty to inference throughput.
Note that Modal Volumes are optimized for datasets on the order of 50,000 - 500,000
files and directories. If you have a larger dataset, you may need to consider other storage
options such as a [CloudBucketMount](https://modal.com/docs/examples/rosettafold).
```python
@app.function(
image=infinity_image,
volumes={vol_mnt: data_volume},
max_containers=1, # We only want one container to handle volume setup
cpu=core_request, # HuggingFace will use multi-process parallelism to download
timeout=timeout_seconds, # if using a large HF dataset, this may need to be longer
)
def catalog_jpegs(dataset_namespace: str, cache_dir: str, image_cap: int):
"""
This function checks the volume for JPEGs and, if needed, calls `download_to_volume`
which pulls a HuggingFace dataset into the mounted volume.
"""
def download_to_volume(dataset_namespace: str, cache_dir: str):
"""
This function caches a hugginface dataset to the path specified in your `HF_HOME` environment
variable, which we set when creating the image so as to point to a Modal Volume.
"""
from datasets import load_dataset
from torchvision.io import write_jpeg
from torchvision.transforms import Compose, PILToTensor, Resize
from tqdm import tqdm
# Load cache to HF_HOME
ds = load_dataset(
dataset_namespace,
split="train",
num_proc=os.cpu_count(), # this will be capped by huggingface based on the number of shards
)
# Create an `extraction` cache dir where we will create explicit JPEGs
mounted_cache_dir = vol_mnt / cache_dir
mounted_cache_dir.mkdir(exist_ok=True, parents=True)
# Preprocessing pipeline: resize now instead of on-the-fly
preprocessor = Compose(
[
Resize(model_input_shape),
PILToTensor(),
]
)
def preprocess_img(idx, example):
"""
Applies preprocessor and write as jpeg with TurboJPEG (via torchvision).
"""
# Define output path
write_path = mounted_cache_dir / f"img{idx:07d}.jpg"
if write_path.is_file():
return
# Here, `example["image"]` is a `PIL.Image.Image`
preprocessed = preprocessor(example["image"].convert("RGB"))
# Write to modal.Volume
write_jpeg(preprocessed, write_path)
# This is a parallelized pre-processing loop that opens compressed images,
# preprocesses them to the size expected by our model, and writes as a JPEG.
for idx, ex in tqdm(enumerate(ds), total=len(ds), desc="Caching images"):
if (image_cap > 0) and (idx >= image_cap):
break
preprocess_img(idx, ex)
data_volume.commit()
ds_preptime_st = perf_counter()
def list_all_jpegs(subdir: os.PathLike = "/") -> list[os.PathLike]:
"""
Searches a subdir within your volume for all JPEGs.
"""
return [
x.path
for x in data_volume.listdir(subdir.as_posix())
if x.path.endswith(".jpg")
]
# Check for extracted-JPEG cache dir within the volume
if (vol_mnt / cache_dir).is_dir():
im_path_list = list_all_jpegs(cache_dir)
n_ims = len(im_path_list)
else:
n_ims = 0
print("The cache dir was not found...")
# If needed, download dataset to a vol
if (n_ims < image_cap) or (n_ims == 0):
print(f"Found {n_ims} JPEGs; checking for more on HuggingFace.")
download_to_volume(dataset_namespace, cache_dir)
# Try again
im_path_list = list_all_jpegs(cache_dir)
n_ims = len(im_path_list)
# [optional] Cap the number of images to process
print(f"Found {n_ims} JPEGs in the Volume.", end="")
if image_cap > 0:
im_path_list = im_path_list[: min(image_cap, len(im_path_list))]
print(f"using {len(im_path_list)}.")
# Time it
ds_time_elapsed = perf_counter() - ds_preptime_st
return im_path_list, ds_time_elapsed
T = TypeVar("T") # generic type for chunked typehints
def chunked(seq: list[T], subseq_size: int) -> Iterator[list[T]]:
"""
Helper function that chunks a sequence into subsequences of length `subseq_size`.
"""
for i in range(0, len(seq), subseq_size):
yield seq[i : i + subseq_size]
```
## Inference app
Here we define an app.cls that wraps Infinity's AsyncEmbeddingEngine.
Note that the variable `max_concurrent_inputs` is used to set `max_inputs`
in (1) the [modal.concurrent](https://modal.com/docs/guide/concurrent-inputs#input-concurrency)
decorator, and (2) the `n_engines` class property.
In `init_engines`, we are creating exactly one inference
engine for each concurrently-passed batch of data. This is critical for packing a GPU with
multiple simultaneously operating models. The [@modal.enter](https://modal.com/docs/reference/modal.enter#modalenter)
decorator ensures that this method is called once per container, on startup (and `exit` is
run once, on shutdown).
```python
@app.cls(
gpu=gpu,
cpu=core_request,
memory=5 * 1024, # MB -> GB
image=infinity_image,
volumes={vol_mnt: data_volume},
timeout=timeout_seconds,
max_containers=max_containers,
)
@modal.concurrent(max_inputs=max_concurrent_inputs)
class InfinityEngine:
n_engines: int = max_concurrent_inputs
@modal.enter()
async def init_engines(self):
"""
On container start, starts `self.n_engines` copies of the selected model
and puts them in an async queue.
"""
print(f"Loading {self.n_engines} models... ", end="")
self.engine_queue: asyncio.Queue[AsyncEmbeddingEngine] = asyncio.Queue()
start = perf_counter()
for _ in range(self.n_engines):
engine = AsyncEmbeddingEngine.from_args(
EngineArgs(
model_name_or_path=model_name,
batch_size=batch_size,
model_warmup=False,
engine=InferenceEngine.torch,
dtype=Dtype.float16,
device="cuda",
)
)
await engine.astart()
await self.engine_queue.put(engine)
print(f"Took {perf_counter() - start:.4}s.")
def read_batch(self, im_path_list: list[os.PathLike]) -> list["Image"]:
"""
Read a batch of data. Infinity is expecting PIL.Image.Image type
inputs, but it's faster to read from disk with torchvision's `read_image`
and convert to PIL than it is to read directly with PIL.
This process is parallelized over the batch with multithreaded data reading.
The number of threads is 4 per core, which is based on the batchsize.
"""
def readim(impath: os.PathLike):
"""Read with torch, convert back to PIL for Infinity"""
return to_pil_image(read_image(str(vol_mnt / impath)))
with ThreadPoolExecutor(
max_workers=os.cpu_count() * threads_per_core
) as executor:
images = list(executor.map(readim, im_path_list))
return images
@modal.method()
async def embed(self, images: list[os.PathLike]) -> tuple[float, float]:
"""
This is the workhorse function. We select a model, prepare a batch,
execute inference, and return the time elapsed. You probably want
to return the embeddings in your usecase.
"""
# (0) Grab an engine from the queue
engine = await self.engine_queue.get()
try:
# (1) Load batch of image data
images = self.read_batch(images)
# (2) Encode the batch
st = perf_counter()
embedding, _ = await engine.image_embed(images=images)
embed_elapsed = perf_counter() - st
finally:
# No matter what happens, return the engine to the queue
await self.engine_queue.put(engine)
# (3) You may wish to return the embeddings themselves here
return embed_elapsed, len(images)
@modal.exit()
async def exit(self) -> None:
"""
Shut down each of the engines.
"""
for _ in range(self.n_engines):
engine = await self.engine_queue.get()
await engine.astop()
```
## Local Entrypoint
This backbone code is run on your machine. It starts up the app,
catalogs the data, and via the remote `map` call, parses the data
with the Infinity embedding engine. The embedder.embed executions
across the batches are autoscaled depending on the app parameters
`max_containers` and `max_concurrent_inputs`.
```python
@app.local_entrypoint()
def main():
start_time = perf_counter()
# (1) Catalog data: modify `catalog_jpegs` to fetch batches of your data.
extracted_path = Path("extracted") / hf_dataset_name
im_path_list, vol_setup_time = catalog_jpegs.remote(
dataset_namespace=hf_dataset_name, cache_dir=extracted_path, image_cap=image_cap
)
print(f"Took {vol_setup_time:.2f}s to setup volume.")
n_ims = len(im_path_list)
# (2) Init the model inference app
start_time = perf_counter()
embedder = InfinityEngine()
# (3) Embed batches via remote `map` call
times, batchsizes = [], []
for time, batchsize in embedder.embed.map(chunked(im_path_list, batch_size)):
times.append(time)
batchsizes.append(batchsize)
# (4) Log
if n_ims > 0:
total_duration = perf_counter() - start_time
total_throughput = n_ims / total_duration
embed_throughputs = [
batchsize / time for batchsize, time in zip(batchsizes, times)
]
avg_throughput = sum(embed_throughputs) / len(embed_throughputs)
log_msg = (
f"EmbeddingRacetrack{gpu}::batch_size={batch_size}::"
f"n_ims={n_ims}::concurrency={max_concurrent_inputs}::"
f"max_containers={max_containers}::cores={core_request}\n"
f"\tTotal time:\t{total_duration / 60:.2f} min\n"
f"\tVolume setup time:\t{vol_setup_time / 60:.2f} min\n"
f"\tOverall throughput:\t{total_throughput:.2f} im/s\n"
f"\tEmbedding-only throughput (avg):\t{avg_throughput:.2f} im/s\n"
)
print(log_msg)
```
### Image To Image
# Edit images with Flux Kontext
In this example, we run the Flux Kontext model in _image-to-image_ mode:
the model takes in a prompt and an image and edits the image to better match the prompt.
For example, the model edited the first image into the second based on the prompt
"_A cute dog wizard inspired by Gandalf from Lord of the Rings, featuring detailed fantasy elements in Studio Ghibli style_".
## Basic setup
```python
import io
import random
import time
from pathlib import Path
from typing import Annotated, Optional
import fastapi
import modal
```
All Modal programs need an [`App`](https://modal.com/docs/reference/modal.App) —
an object that acts as a recipe for the application.
```python
app = modal.App("example-image-to-video")
```
### Configuring dependencies
The model runs remotely, on Modal's cloud, which means we need to
[define the environment it runs in](https://modal.com/docs/guide/images).
Below, we start from a lightweight base Linux image
and then install our system and Python dependencies,
like Hugging Face's `diffusers` library and `torch`.
```python
image = (
modal.Image.debian_slim(python_version="3.12")
.apt_install("python3-opencv")
.uv_pip_install(
"accelerate==1.4.0",
"diffusers==0.32.2",
"fastapi[standard]==0.115.8",
"huggingface-hub==0.36.0",
"imageio==2.37.0",
"imageio-ffmpeg==0.6.0",
"opencv-python==4.11.0.86",
"pillow==11.1.0",
"sentencepiece==0.2.0",
"torch==2.6.0",
"torchvision==0.21.0",
"transformers==4.49.0",
)
)
```
## Storing model weights on Modal
We also need the parameters of the model remotely.
They can be loaded at runtime from Hugging Face,
based on a repository ID and a revision (aka a commit SHA).
```python
MODEL_ID = "Lightricks/LTX-Video"
MODEL_REVISION_ID = "a6d59ee37c13c58261aa79027d3e41cd41960925"
```
Hugging Face will also cache the weights to disk once they're downloaded.
But Modal Functions are serverless, and so even disks are ephemeral,
which means the weights would get re-downloaded every time we spin up a new instance.
We can fix this -- without any modifications to Hugging Face's model loading code! --
by pointing the Hugging Face cache at a [Modal Volume](https://modal.com/docs/guide/volumes). For more on storing model weights on Modal, see
[this guide](https://modal.com/docs/guide/model-weights).
```python
model_volume = modal.Volume.from_name("hf-hub-cache", create_if_missing=True)
MODEL_PATH = "/models" # where the Volume will appear on our Functions' filesystems
image = image.env(
{
"HF_XET_HIGH_PERFORMANCE": "1", # faster downloads
"HF_HUB_CACHE": MODEL_PATH,
}
)
```
## Storing model outputs on Modal
Contemporary video models can take a long time to run and they produce large outputs.
That makes them a great candidate for storage on Modal Volumes as well.
Python code running outside of Modal can also access this storage, as we'll see below.
```python
OUTPUT_PATH = "/outputs"
output_volume = modal.Volume.from_name("outputs", create_if_missing=True)
```
## Implementing LTX-Video inference on Modal
We wrap the inference logic in a Modal [Cls](https://modal.com/docs/guide/lifecycle-functions)
that ensures models are loaded and then moved to the GPU once when a new instance
starts, rather than every time we run it.
The `run` function just wraps a `diffusers` pipeline.
It saves the generated video to a Modal Volume, and returns the filename.
We also include a `web` wrapper that makes it possible
to trigger inference via an API call.
For details, see the `/docs` route of the URL ending in `inference-web.modal.run`
that appears when you deploy the app.
```python
with image.imports(): # loaded on all of our remote Functions
import diffusers
import torch
from PIL import Image
MINUTES = 60
@app.cls(
image=image,
gpu="H100",
timeout=10 * MINUTES,
scaledown_window=10 * MINUTES,
volumes={MODEL_PATH: model_volume, OUTPUT_PATH: output_volume},
)
class Inference:
@modal.enter()
def load_pipeline(self):
self.pipe = diffusers.LTXImageToVideoPipeline.from_pretrained(
MODEL_ID,
revision=MODEL_REVISION_ID,
torch_dtype=torch.bfloat16,
).to("cuda")
@modal.method()
def run(
self,
image_bytes: bytes,
prompt: str,
negative_prompt: Optional[str] = None,
num_frames: Optional[int] = None,
num_inference_steps: Optional[int] = None,
seed: Optional[int] = None,
) -> str:
negative_prompt = (
negative_prompt
or "worst quality, inconsistent motion, blurry, jittery, distorted"
)
width = 768
height = 512
num_frames = num_frames or 25
num_inference_steps = num_inference_steps or 50
seed = seed or random.randint(0, 2**32 - 1)
print(f"Seeding RNG with: {seed}")
torch.manual_seed(seed)
image = diffusers.utils.load_image(Image.open(io.BytesIO(image_bytes)))
video = self.pipe(
image=image,
prompt=prompt,
negative_prompt=negative_prompt,
width=width,
height=height,
num_frames=num_frames,
num_inference_steps=num_inference_steps,
).frames[0]
mp4_name = (
f"{seed}_{''.join(c if c.isalnum() else '-' for c in prompt[:100])}.mp4"
)
diffusers.utils.export_to_video(
video, f"{Path(OUTPUT_PATH) / mp4_name}", fps=24
)
output_volume.commit()
torch.cuda.empty_cache() # reduce fragmentation
return mp4_name
@modal.fastapi_endpoint(method="POST", docs=True)
def web(
self,
image_bytes: Annotated[bytes, fastapi.File()],
prompt: str,
negative_prompt: Optional[str] = None,
num_frames: Optional[int] = None,
num_inference_steps: Optional[int] = None,
seed: Optional[int] = None,
) -> fastapi.Response:
mp4_name = self.run.local( # run in the same container
image_bytes=image_bytes,
prompt=prompt,
negative_prompt=negative_prompt,
num_frames=num_frames,
num_inference_steps=num_inference_steps,
seed=seed,
)
return fastapi.responses.FileResponse(
path=f"{Path(OUTPUT_PATH) / mp4_name}",
media_type="video/mp4",
filename=mp4_name,
)
```
## Generating videos from the command line
We add a [local entrypoint](https://modal.com/docs/reference/modal.App#local_entrypoint)
that calls the `Inference.run` method to run inference from the command line.
The function's parameters are automatically turned into a CLI.
Run it with
```bash
modal run image_to_video.py --prompt "A cat looking out the window at a snowy mountain" --image-path /path/to/cat.jpg
```
You can also pass `--help` to see the full list of arguments.
```python
@app.local_entrypoint()
def entrypoint(
image_path: str,
prompt: str,
negative_prompt: Optional[str] = None,
num_frames: Optional[int] = None,
num_inference_steps: Optional[int] = None,
seed: Optional[int] = None,
twice: bool = True,
):
import os
import urllib.request
print(f"🎥 Generating a video from the image at {image_path}")
print(f"🎥 using the prompt {prompt}")
if image_path.startswith(("http://", "https://")):
image_bytes = urllib.request.urlopen(image_path).read()
elif os.path.isfile(image_path):
image_bytes = Path(image_path).read_bytes()
else:
raise ValueError(f"{image_path} is not a valid file or URL.")
inference_service = Inference()
for _ in range(1 + twice):
start = time.time()
mp4_name = inference_service.run.remote(
image_bytes=image_bytes,
prompt=prompt,
negative_prompt=negative_prompt,
num_frames=num_frames,
seed=seed,
)
duration = time.time() - start
print(f"🎥 Generated video in {duration:.3f}s")
output_dir = Path("/tmp/image_to_video")
output_dir.mkdir(exist_ok=True, parents=True)
output_path = output_dir / mp4_name
# read in the file from the Modal Volume, then write it to the local disk
output_path.write_bytes(b"".join(output_volume.read_file(mp4_name)))
print(f"🎥 Video saved to {output_path}")
```
## Generating videos via an API
The Modal `Cls` above also included a [`fastapi_endpoint`](https://modal.com/docs/examples/basic_web),
which adds a simple web API to the inference method.
To try it out, run
```bash
modal deploy image_to_video.py
```
copy the printed URL ending in `inference-web.modal.run`,
and add `/docs` to the end. This will bring up the interactive
Swagger/OpenAPI docs for the endpoint.
## Generating videos in a web UI
Lastly, we add a simple front-end web UI (written in Alpine.js) for
our image to video backend.
This is also deployed when you run
```bash
modal deploy image_to_video.py.
```
The `Inference` class will serve multiple users from its own auto-scaling pool of warm GPU containers automatically,
and they will spin down when there are no requests.
```python
frontend_path = Path(__file__).parent / "frontend"
web_image = (
modal.Image.debian_slim(python_version="3.12")
.uv_pip_install("jinja2==3.1.5", "fastapi[standard]==0.115.8")
.add_local_dir( # mount frontend/client code
frontend_path, remote_path="/assets"
)
)
@app.function(image=web_image)
@modal.concurrent(max_inputs=100)
@modal.asgi_app()
def ui():
import fastapi.staticfiles
import fastapi.templating
web_app = fastapi.FastAPI()
templates = fastapi.templating.Jinja2Templates(directory="/assets")
@web_app.get("/")
async def read_root(request: fastapi.Request):
return templates.TemplateResponse(
"index.html",
{
"request": request,
"inference_url": Inference().web.get_web_url(),
"model_name": "LTX-Video Image to Video",
"default_prompt": "A young girl stands calmly in the foreground, looking directly at the camera, as a house fire rages in the background.",
},
)
web_app.mount(
"/static",
fastapi.staticfiles.StaticFiles(directory="/assets"),
name="static",
)
return web_app
```
### Imagenet
This scripts demonstrates how to ingest the famous ImageNet (https://www.image-net.org/)
dataset into a mounted volume.
It requires a Kaggle account's API token stored as a modal.Secret in order to download part
of the dataset from Kaggle's servers using the `kaggle` CLI.
It is recommended to iterate on this code from a modal.Function running Jupyter server.
This better supports experimentation and maintains state in the face of errors:
11_notebooks/jupyter_inside_modal.py
```python
import os
import pathlib
import shutil
import subprocess
import sys
import threading
import time
import zipfile
import modal
bucket_creds = modal.Secret.from_name(
"aws-s3-modal-examples-datasets", environment_name="main"
)
bucket_name = "modal-examples-datasets"
volume = modal.CloudBucketMount(
bucket_name,
secret=bucket_creds,
)
image = modal.Image.debian_slim().apt_install("tree").uv_pip_install("kaggle", "tqdm")
app = modal.App(
"example-imagenet",
image=image,
secrets=[modal.Secret.from_name("kaggle-api-token")],
)
def start_monitoring_disk_space(interval: int = 30) -> None:
"""Start monitoring the disk space in a separate thread."""
task_id = os.environ["MODAL_TASK_ID"]
def log_disk_space(interval: int) -> None:
while True:
statvfs = os.statvfs("/")
free_space = statvfs.f_frsize * statvfs.f_bavail
print(
f"{task_id} free disk space: {free_space / (1024**3):.2f} GB",
file=sys.stderr,
)
time.sleep(interval)
monitoring_thread = threading.Thread(target=log_disk_space, args=(interval,))
monitoring_thread.daemon = True
monitoring_thread.start()
def copy_concurrent(src: pathlib.Path, dest: pathlib.Path) -> None:
"""
A modified shutil.copytree which copies in parallel to increase bandwidth
and compensate for the increased IO latency of volume mounts.
"""
from multiprocessing.pool import ThreadPool
class MultithreadedCopier:
def __init__(self, max_threads):
self.pool = ThreadPool(max_threads)
self.copy_jobs = []
def copy(self, source, dest):
res = self.pool.apply_async(
shutil.copy2,
args=(source, dest),
callback=lambda r: print(f"{source} copied to {dest}"),
# NOTE: this should `raise` an exception for proper reliability.
error_callback=lambda exc: print(
f"{source} failed: {exc}", file=sys.stderr
),
)
self.copy_jobs.append(res)
def __enter__(self):
return self
def __exit__(self, exc_type, exc_val, exc_tb):
self.pool.close()
self.pool.join()
with MultithreadedCopier(max_threads=24) as copier:
shutil.copytree(src, dest, copy_function=copier.copy, dirs_exist_ok=True)
def extractall(fzip, dest, desc="Extracting"):
from tqdm.auto import tqdm
from tqdm.utils import CallbackIOWrapper
dest = pathlib.Path(dest).expanduser()
with (
zipfile.ZipFile(fzip) as zipf,
tqdm(
desc=desc,
unit="B",
unit_scale=True,
unit_divisor=1024,
total=sum(getattr(i, "file_size", 0) for i in zipf.infolist()),
) as pbar,
):
for i in zipf.infolist():
if not getattr(i, "file_size", 0): # directory
zipf.extract(i, os.fspath(dest))
else:
full_path = dest / i.filename
full_path.parent.mkdir(exist_ok=True, parents=True)
with zipf.open(i) as fi, open(full_path, "wb") as fo:
shutil.copyfileobj(CallbackIOWrapper(pbar.update, fi), fo)
@app.function(
volumes={"/mnt/": volume},
timeout=60 * 60 * 8, # 8 hours,
ephemeral_disk=1000 * 1024, # 1TB
)
def import_transform_load() -> None:
start_monitoring_disk_space()
kaggle_api_token_data = os.environ["KAGGLE_API_TOKEN"]
kaggle_token_filepath = pathlib.Path.home() / ".kaggle" / "kaggle.json"
kaggle_token_filepath.parent.mkdir(exist_ok=True)
kaggle_token_filepath.write_text(kaggle_api_token_data)
tmp_path = pathlib.Path("/tmp/imagenet/")
vol_path = pathlib.Path("/mnt/imagenet/")
filename = "imagenet-object-localization-challenge.zip"
dataset_path = vol_path / filename
if dataset_path.exists():
dataset_size = dataset_path.stat().st_size
if dataset_size < (150 * 1024 * 1024 * 1024):
dataset_size_gib = dataset_size / (1024 * 1024 * 1024)
raise RuntimeError(
f"Partial download of dataset .zip. It is {dataset_size_gib}GiB but should be > 150GiB"
)
else:
subprocess.run(
f"kaggle competitions download -c imagenet-object-localization-challenge --path {tmp_path}",
shell=True,
check=True,
)
vol_path.mkdir(exist_ok=True)
shutil.copy(tmp_path / filename, dataset_path)
# Extract dataset
extracted_dataset_path = tmp_path / "extracted"
extracted_dataset_path.mkdir(parents=True, exist_ok=True)
print(f"Extracting .zip into {extracted_dataset_path}...")
extractall(dataset_path, extracted_dataset_path)
print(f"Extracted {dataset_path} to {extracted_dataset_path}")
subprocess.run(f"tree -L 3 {extracted_dataset_path}", shell=True, check=True)
final_dataset_path = vol_path / "extracted"
final_dataset_path.mkdir(exist_ok=True)
copy_concurrent(extracted_dataset_path, final_dataset_path)
subprocess.run(f"tree -L 3 {final_dataset_path}", shell=True, check=True)
print("Dataset is loaded ✅")
```
### Import Torch
# Example (import_torch.py)
This is the source code for **06_gpu_and_ml.import_torch**.
```python
import modal
app = modal.App("example-import-torch")
torch_image = modal.Image.debian_slim().uv_pip_install(
"torch==2.7",
extra_index_url="https://download.pytorch.org/whl/cu128",
force_build=True, # trigger a build every time, just for demonstration purposes
# remove if you're using this in production!
)
@app.function(gpu="B200", image=torch_image)
def torch() -> list[list[int]]:
import math
import torch
print(torch.cuda.get_device_properties("cuda:0"))
matrix = torch.randn(1024, 1024) / math.sqrt(1024)
matrix = matrix @ matrix
return matrix.detach().cpu().tolist()
@app.local_entrypoint()
def main():
print(torch.remote()[:1])
```
### Inference
# Example (inference.py)
This is the source code for **01_getting_started.inference**.
```python
from pathlib import Path
import modal
app = modal.App("example-inference")
image = modal.Image.debian_slim().uv_pip_install("transformers[torch]")
@app.function(gpu="h100", image=image)
def chat(prompt: str | None = None) -> list[dict]:
from transformers import pipeline
if prompt is None:
prompt = f"/no_think Read this code.\n\n{Path(__file__).read_text()}\nIn one paragraph, what does the code do?"
print(prompt)
context = [{"role": "user", "content": prompt}]
chatbot = pipeline(model="Qwen/Qwen3-1.7B", device_map="cuda", max_new_tokens=1024)
result = chatbot(context)
print(result[0]["generated_text"][-1]["content"])
return result
```
### Inference Map
# Example (inference_map.py)
This is the source code for **01_getting_started.inference_map**.
```python
from pathlib import Path
import modal
app = modal.App("example-inference-map")
image = modal.Image.debian_slim().uv_pip_install("transformers[torch]")
@app.function(gpu="h100", image=image)
def chat(prompt: str | None = None) -> list[dict]:
from transformers import pipeline
if prompt is None:
prompt = f"/no_think Read this code.\n\n{Path(__file__).read_text()}\nIn one paragraph, what does the code do?"
print(prompt)
context = [{"role": "user", "content": prompt}]
chatbot = pipeline(model="Qwen/Qwen3-1.7B", device_map="cuda", max_new_tokens=1024)
result = chatbot(context)
print(result[0]["generated_text"][-1]["content"])
return result
@app.local_entrypoint()
def main():
import glob
root_dir, examples = Path(__file__).parent.parent, []
for path in glob.glob("**/*.py", root_dir=root_dir):
examples.append(
f"/no_think Read this code.\n\n{(root_dir / path).read_text()}\nIn one paragraph, what does the code do?"
)
chat.for_each(examples[:100], ignore_exceptions=True)
```
### Inkling Small
# Serve Inkling-Small on Modal with SGLang
[Inkling-Small](https://huggingface.co/thinkingmachines/Inkling-Small) is a multimodal
mixture-of-experts model from Thinking Machines Lab that accepts text, images, and audio.
Its decoder combines sliding-window and full-attention layers to lower the cost of long
context inference.
This example serves the NVFP4 checkpoint which requires Blackwell GPUs (B200/B300s)
to support its native four-bit tensor-core path.
The engine flags follow SGLang's
[recipe](https://docs.sglang.io/cookbook/autoregressive/ThinkingMachines/Inkling-Small#hw=b300&variant=default&quant=nvfp4&strategy=mtp&nodes=single).
For more on serving large models efficiently, see the
[high-performance LLM inference guide](https://modal.com/docs/guide/high-performance-llm-inference).
For a simpler introduction to LLM serving on Modal, see
[this example](https://modal.com/docs/examples/llm_inference).
```python
import json
import subprocess
import time
import urllib.error
import urllib.request
import modal
```
## Set up the container image
```python
SGLANG_IMAGE = (
"lmsysorg/sglang:dev-inkling-dspark"
"@sha256:fbea1a4e25b26660dbc2384a27ead8817e9b7670f257b5c3143e0450d14524d7"
)
image = modal.Image.from_registry(SGLANG_IMAGE).entrypoint(
[] # silence chatty logs on entry
)
```
### Load model weights
Cache the weights in a Modal [Volume](https://modal.com/docs/guide/volumes)
to avoid downloading them on every cold start.
Note that the SGLang image already has files under `/root/.cache/huggingface`,
so we mount the Volume at `/cache` and point `HF_HOME` there.
```python
HF_CACHE_DIR = "/cache"
hf_cache_vol = modal.Volume.from_name("inkling-hf-cache", create_if_missing=True)
image = image.env(
{
"HF_HOME": HF_CACHE_DIR,
"HF_XET_HIGH_PERFORMANCE": "1", # faster downloads
}
)
```
Inkling's repositories require accepting the license, so downloading needs a Hugging
Face token. Create the [Secret](https://modal.com/docs/guide/secrets) with:
```
modal secret create huggingface-secret HF_TOKEN=hf_...
```
```python
hf_secret = modal.Secret.from_name("huggingface-secret")
REPO_ID = "thinkingmachines/Inkling-Small-NVFP4"
def download_model(repo_id, revision=None):
from huggingface_hub import snapshot_download
snapshot_download(repo_id=repo_id, revision=revision, max_workers=16)
image = image.run_function(
download_model,
volumes={HF_CACHE_DIR: hf_cache_vol},
secrets=[hf_secret],
args=(REPO_ID,),
timeout=4 * 60 * 60,
cpu=8, # parallel shard downloads are CPU-bound on hashing
)
```
### Cache compiled kernels
```python
COMPILE_CACHE_DIR = "/compile-cache"
compile_cache_vol = modal.Volume.from_name(
"inkling-compile-cache", create_if_missing=True
)
image = image.env(
{
"TORCHINDUCTOR_CACHE_DIR": f"{COMPILE_CACHE_DIR}/inductor",
"TRITON_CACHE_DIR": f"{COMPILE_CACHE_DIR}/triton",
"SGLANG_CACHE_DIR": f"{COMPILE_CACHE_DIR}/sglang",
"SGLANG_ENABLE_UNIFIED_RADIX_TREE": "1",
}
)
```
### Configure the inference engine
```python
ENABLE_MTP = True
MEM_FRACTION_STATIC = "0.70" if ENABLE_MTP else "0.85"
MAX_TOTAL_TOKENS = 262_144
SGLANG_PORT = 8000
MINUTES = 60 # seconds
HOURS = 60 * MINUTES
def _server_command() -> list[str]:
cmd = [
"python3",
"-m",
"sglang.launch_server",
"--host",
"0.0.0.0",
"--port",
str(SGLANG_PORT),
"--model-path",
REPO_ID,
"--served-model-name",
"inkling-small",
"--trust-remote-code",
"--tp",
str(GPU_COUNT),
"--quantization",
"modelopt_fp4",
"--attention-backend",
"fa4",
"--page-size",
"128",
"--fp4-gemm-backend",
"flashinfer_trtllm",
"--moe-runner-backend",
"flashinfer_trtllm_routed",
"--mamba-radix-cache-strategy",
"extra_buffer",
"--mem-fraction-static",
MEM_FRACTION_STATIC,
"--swa-full-tokens-ratio",
"0.1",
"--mamba-full-memory-ratio",
"0.1",
"--enable-multimodal",
"--reasoning-parser",
"inkling",
"--tool-call-parser",
"inkling",
"--enable-metrics",
# Skip SGLang's startup request. If that first generation fails, SGLang exits
# before the server reports ready.
"--skip-server-warmup",
]
if ENABLE_MTP:
cmd += [
"--speculative-algorithm",
"EAGLE",
"--speculative-num-steps",
"8",
"--speculative-eagle-topk",
"1",
"--speculative-num-draft-tokens",
"9",
"--enable-multi-layer-eagle",
"--speculative-use-rejection-sampling",
"--max-total-tokens",
str(MAX_TOTAL_TOKENS),
"--max-running-requests",
str(TARGET_INPUTS),
]
if GPU_COUNT in (6, 8):
cmd.append("--enable-torch-symm-mem")
return cmd
```
## Configure infrastructure
The NVFP4 weights are about 171 GB. A single B300 has 288 GB, which leaves enough
memory for the model, target KV cache, and MTP draft pools.
```python
GPU_TYPE = "B300"
GPU_COUNT = 1
MIN_CONTAINERS = 0 # set to 1 in production to keep a warm replica
TARGET_INPUTS = 32 # concurrent requests per replica before scaling out
app = modal.App("example-inkling-small", image=image)
```
### Define the server
```python
@app.server(
image=image,
gpu=f"{GPU_TYPE}:{GPU_COUNT}",
volumes={HF_CACHE_DIR: hf_cache_vol, COMPILE_CACHE_DIR: compile_cache_vol},
secrets=[hf_secret],
cpu=32,
port=SGLANG_PORT,
startup_timeout=1 * HOURS,
scaledown_window=20 * MINUTES,
exit_grace_period=25,
min_containers=MIN_CONTAINERS,
target_concurrency=TARGET_INPUTS,
unauthenticated=True,
)
class Server:
@modal.enter()
def start(self):
cmd = _server_command()
print("starting SGLang with command:")
print(" ".join(cmd))
self.proc = subprocess.Popen(" ".join(cmd), shell=True, start_new_session=True)
wait_for_server_ready(self.proc)
@modal.exit()
def stop(self):
self.proc.terminate()
self.proc.wait()
def is_server_up(url: str) -> bool:
try:
with urllib.request.urlopen(url, timeout=5) as response:
return response.status == 200
except (urllib.error.URLError, OSError, TimeoutError):
return False
def wait_for_server_ready(proc: subprocess.Popen):
url = f"http://localhost:{SGLANG_PORT}/health"
print(f"waiting for server to be ready at {url}")
while True:
# Surface a crashed engine immediately instead of waiting out startup_timeout.
if proc.poll() is not None:
raise RuntimeError(
f"SGLang exited with code {proc.returncode} before becoming healthy"
)
if is_server_up(url):
print("server is ready!")
return
time.sleep(5)
def wait_for_endpoint(url: str, timeout=1 * HOURS) -> None:
deadline = time.monotonic() + timeout
health = f"{url.rstrip('/')}/health"
while True:
if is_server_up(health):
return
if time.monotonic() >= deadline:
raise TimeoutError("Timed out waiting for the Server endpoint.")
time.sleep(5)
```
## Test the server
The server supports the OpenAI chat completions API.
To spin up an ephemeral server and send it a request:
```
modal run 06_gpu_and_ml/llm-serving/inkling_small.py
```
Notably, Inkling's chat template takes a *reasoning effort* which can be set via a
string (`none`, `minimal`, `low`, `medium`, `high`, `max`) or a number from 0.0 to 0.99.
```python
@app.local_entrypoint()
def main(
prompt: str = "In one sentence, why is sliding-window attention cheap?",
reasoning_effort: str = "medium",
):
url = Server.get_url()
print(f"Server URL: {url}")
wait_for_endpoint(url)
payload = {
"model": "inkling-small",
"messages": [{"role": "user", "content": prompt}],
"max_tokens": 512,
"chat_template_kwargs": {"reasoning_effort": reasoning_effort},
}
req = urllib.request.Request(
f"{url}/v1/chat/completions",
data=json.dumps(payload).encode(),
headers={"Content-Type": "application/json"},
method="POST",
)
print(f"sending a request to {url}")
with urllib.request.urlopen(req, timeout=1 * HOURS) as resp:
body = json.loads(resp.read())
message = body["choices"][0]["message"]
if message.get("reasoning_content"):
print("--- reasoning ---")
print(message["reasoning_content"])
print("--- answer ---")
print(message.get("content"))
print("--- usage ---")
print(body.get("usage"))
```
## Deploy the server
```
modal deploy 06_gpu_and_ml/llm-serving/inkling_small.py
```
## Addenda
For demonstration purposes, the endpoint is publicly accessible with `unauthenticated=True`. Add
[proxy auth](https://modal.com/docs/guide/webhook-urls#authentication) before sending
private data.
Set `ENABLE_MTP = False` to disable speculation, which
we recommend once large batches saturate the GPU.
### Install Cuda
# Installing the CUDA Toolkit on Modal
This code sample is intended to quickly show how different layers of the CUDA stack are used on Modal.
For greater detail, see our [guide to using CUDA on Modal](https://modal.com/docs/guide/cuda).
All Modal Functions with GPUs already have the NVIDIA CUDA drivers,
NVIDIA System Management Interface, and CUDA Driver API installed.
```python
import modal
app = modal.App("example-install-cuda")
@app.function(gpu="T4")
def nvidia_smi():
import subprocess
subprocess.run(["nvidia-smi"], check=True)
```
This is enough to install and use many CUDA-dependent libraries, like PyTorch.
```python
@app.function(gpu="T4", image=modal.Image.debian_slim().uv_pip_install("torch"))
def torch_cuda():
import torch
print(torch.cuda.get_device_properties("cuda:0"))
```
If your application or its dependencies need components of the CUDA toolkit,
like the `nvcc` compiler driver, installed as system libraries or command-line tools,
you'll need to install those manually.
We recommend the official NVIDIA CUDA Docker images from Docker Hub.
You'll need to add Python 3 and pip with the `add_python` option because the image
doesn't have these by default.
```python
ctk_image = modal.Image.from_registry(
"nvidia/cuda:12.4.0-devel-ubuntu22.04", add_python="3.11"
).entrypoint([]) # removes chatty prints on entry
@app.function(gpu="T4", image=ctk_image)
def nvcc_version():
import subprocess
return subprocess.run(["nvcc", "--version"], check=True)
```
You can check that all these functions run by invoking this script with `modal run`.
```python
@app.local_entrypoint()
def main():
nvidia_smi.remote()
torch_cuda.remote()
nvcc_version.remote()
```
### Install Flash Attn
# Install Flash Attention on Modal
FlashAttention is an optimized CUDA library for Transformer
scaled-dot-product attention. Dao AI Lab now publishes pre-compiled
wheels, which makes installation quick. This script shows how to
1. Pin an exact wheel that matches CUDA 12 / PyTorch 2.6 / Python 3.13.
2. Build a Modal image that installs torch, numpy, and FlashAttention.
3. Launch a GPU function to confirm the kernel runs on a GPU.
```python
import modal
app = modal.App("example-install-flash-attn")
```
You need to specify an exact release wheel. You can find
[more on their github](https://github.com/Dao-AILab/flash-attention/releases).
```python
flash_attn_release = (
"https://github.com/Dao-AILab/flash-attention/releases/download/v2.7.4.post1/"
"flash_attn-2.7.4.post1+cu12torch2.6cxx11abiFALSE-cp313-cp313-linux_x86_64.whl"
)
image = modal.Image.debian_slim(python_version="3.13").uv_pip_install(
"torch==2.6.0", "numpy==2.2.4", flash_attn_release
)
```
And here is a demo verifying that it works:
```python
@app.function(gpu="L40S", image=image)
def run_flash_attn():
import torch
from flash_attn import flash_attn_func
batch_size, seqlen, nheads, headdim, nheads_k = 2, 4, 3, 16, 3
q = torch.randn(batch_size, seqlen, nheads, headdim, dtype=torch.float16).to("cuda")
k = torch.randn(batch_size, seqlen, nheads_k, headdim, dtype=torch.float16).to(
"cuda"
)
v = torch.randn(batch_size, seqlen, nheads_k, headdim, dtype=torch.float16).to(
"cuda"
)
out = flash_attn_func(q, k, v)
assert out.shape == (batch_size, seqlen, nheads, headdim)
```
### Jupyter Inside Modal
## Overview
Quick snippet showing how to connect to a Jupyter notebook server running inside a Modal container,
especially useful for exploring the contents of Modal Volumes.
This uses [Modal Tunnels](https://modal.com/docs/guide/tunnels#tunnels-beta)
to create a tunnel between the running Jupyter instance and the internet.
If you want to your Jupyter notebook to run _locally_ and execute remote Modal Functions in certain cells, see the `basic.ipynb` example :)
```python
import os
import subprocess
import time
import modal
app = modal.App(
"example-jupyter-inside-modal",
image=modal.Image.debian_slim(python_version="3.12").uv_pip_install(
"jupyter", "bing-image-downloader~=1.1.2"
),
)
volume = modal.Volume.from_name(
"modal-examples-jupyter-inside-modal-data", create_if_missing=True
)
CACHE_DIR = "/root/cache"
JUPYTER_TOKEN = "1234" # Change me to something non-guessable!
@app.function(volumes={CACHE_DIR: volume})
def seed_volume():
# Bing it!
from bing_image_downloader import downloader
# This will save into the Modal volume and allow you view the images
# from within Jupyter at a path like `/root/cache/modal labs/Image_1.png`.
downloader.download(
query="modal labs",
limit=10,
output_dir=CACHE_DIR,
force_replace=False,
timeout=60,
verbose=True,
)
volume.commit()
```
This is all that's needed to create a long-lived Jupyter server process in Modal
that you can access in your Browser through a secure network tunnel.
This can be useful when you want to interactively engage with Volume contents
without having to download it to your host computer.
```python
@app.function(max_containers=1, volumes={CACHE_DIR: volume}, timeout=1_500)
def run_jupyter(timeout: int):
jupyter_port = 8888
with modal.forward(jupyter_port) as tunnel:
jupyter_process = subprocess.Popen(
[
"jupyter",
"notebook",
"--no-browser",
"--allow-root",
"--ip=0.0.0.0",
f"--port={jupyter_port}",
"--NotebookApp.allow_origin='*'",
"--NotebookApp.allow_remote_access=1",
],
env={**os.environ, "JUPYTER_TOKEN": JUPYTER_TOKEN},
)
print(f"Jupyter available at => {tunnel.url}")
try:
end_time = time.time() + timeout
while time.time() < end_time:
time.sleep(5)
print(f"Reached end of {timeout} second timeout period. Exiting...")
except KeyboardInterrupt:
print("Exiting...")
finally:
jupyter_process.kill()
@app.local_entrypoint()
def main(timeout: int = 10_000):
# Write some images to a volume, for demonstration purposes.
seed_volume.remote()
# Run the Jupyter Notebook server
run_jupyter.remote(timeout=timeout)
```
Doing `modal run jupyter_inside_modal.py` will run a Modal app which starts
the Juypter server at an address like https://u35iiiyqp5klbs.r3.modal.host.
Visit this address in your browser, and enter the security token
you set for `JUPYTER_TOKEN`.
### Jupyter Sandbox
# Run a Jupyter notebook in a Modal Sandbox
This example demonstrates how to run a Jupyter notebook in a Modal
[Sandbox](https://modal.com/docs/guide/sandbox).
## Setting up the Sandbox
All Sandboxes are associated with an App.
We look up our app by name, creating it if it doesn't exist.
```python
import json
import secrets
import time
import urllib.request
import modal
app = modal.App.lookup("example-jupyter-sandbox", create_if_missing=True)
```
We define a custom Docker image that has Jupyter and some other dependencies installed.
Using a pre-defined image allows us to avoid re-installing packages on every Sandbox startup.
```python
image = (
modal.Image.debian_slim(python_version="3.12").uv_pip_install("jupyter~=1.1.0")
# .uv_pip_install("pandas", "numpy", "seaborn") # Any other deps
)
```
## Starting a Jupyter server in a Sandbox
Since we'll be exposing a Jupyter server over the Internet, we need to create a password.
We'll use `secrets` from the standard library to create a token
and then store it in a Modal [Secret](https://modal.com/docs/guide/secrets).
```python
token = secrets.token_urlsafe(13)
token_secret = modal.Secret.from_dict({"JUPYTER_TOKEN": token})
```
Now, we can start our Sandbox. Note our use of the `encrypted_ports` argument, which
allows us to securely expose the Jupyter server to the public Internet. We use
`modal.enable_output()` to print the Sandbox's image build logs to the console.
```python
JUPYTER_PORT = 8888
print("🏖️ Creating sandbox")
with modal.enable_output():
sandbox = modal.Sandbox.create(
"jupyter",
"notebook",
"--no-browser",
"--allow-root",
"--ip=0.0.0.0",
f"--port={JUPYTER_PORT}",
"--NotebookApp.allow_origin='*'",
"--NotebookApp.allow_remote_access=1",
encrypted_ports=[JUPYTER_PORT],
secrets=[token_secret],
timeout=5 * 60, # 5 minutes
image=image,
app=app,
gpu=None, # add a GPU if you need it!
)
print(f"🏖️ Sandbox ID: {sandbox.object_id}")
```
## Communicating with a Jupyter server
Next, we print out a URL that we can use to connect to our Jupyter server.
Note that we have to call [`Sandbox.tunnels`](https://modal.com/docs/reference/modal.Sandbox#tunnels)
to get the URL. The Sandbox is not publicly accessible until we do so.
```python
tunnel = sandbox.tunnels()[JUPYTER_PORT]
url = f"{tunnel.url}/?token={token}"
print(f"🏖️ Jupyter notebook is running at: {url}")
```
Jupyter servers expose a [REST API](https://jupyter-server.readthedocs.io/en/latest/developers/rest-api.html)
that you can use for programmatic manipulation.
For example, we can check the server's status by
sending a GET request to the `/api/status` endpoint.
```python
def is_jupyter_up():
try:
response = urllib.request.urlopen(f"{tunnel.url}/api/status?token={token}")
if response.getcode() == 200:
data = json.loads(response.read().decode())
return data.get("started", False)
except Exception:
return False
return False
```
We'll now wait for the Jupyter server to be ready by hitting that endpoint.
```python
timeout = 60 # seconds
start_time = time.time()
while time.time() - start_time < timeout:
if is_jupyter_up():
print("🏖️ Jupyter is up and running!")
break
time.sleep(1)
else:
print("🏖️ Timed out waiting for Jupyter to start.")
```
You can now open this URL in your browser to access the Jupyter notebook!
When you're done, terminate the sandbox using your [Modal dashboard](https://modal.com/sandboxes)
or by running `Sandbox.from_id(sandbox.object_id).terminate()`.
### Laion400
https://laion.ai/blog/laion-400-open-dataset/
LAION-400 is a large dataset of 400M English (image, text) pairs.
As described on the dataset's homepage, it consists of 32 .parquet files
containing dataset metadata *but not* the image data itself.
After downloading the .parquet files, this script fans out 32 worker jobs
to process a single .parquet file. Processing involves fetch and transform
of image data into 256 * 256 square JPEGs.
This script is loosely based off the following instructions:
https://github.com/rom1504/img2dataset/blob/main/dataset_examples/laion400m.md
It is recommended to iterate on this code from a modal.Function running Jupyter server.
This better supports experimentation and maintains state in the face of errors:
11_notebooks/jupyter_inside_modal.py
```python
import os
import pathlib
import shutil
import subprocess
import sys
import threading
import time
import modal
bucket_creds = modal.Secret.from_name(
"aws-s3-modal-examples-datasets", environment_name="main"
)
bucket_name = "modal-examples-datasets"
volume = modal.CloudBucketMount(
bucket_name,
secret=bucket_creds,
)
image = (
modal.Image.debian_slim().apt_install("wget").uv_pip_install("img2dataset~=1.45.0")
)
app = modal.App("example-laion400", image=image)
def start_monitoring_disk_space(interval: int = 30) -> None:
"""Start monitoring the disk space in a separate thread, printing info to stdout"""
task_id = os.environ["MODAL_TASK_ID"]
def log_disk_space(interval: int) -> None:
while True:
statvfs = os.statvfs("/")
free_space = statvfs.f_frsize * statvfs.f_bavail
print(
f"{task_id} free disk space: {free_space / (1024**3):.2f} GB",
file=sys.stderr,
)
time.sleep(interval)
monitoring_thread = threading.Thread(target=log_disk_space, args=(interval,))
monitoring_thread.daemon = True
monitoring_thread.start()
def copy_concurrent(src: pathlib.Path, dest: pathlib.Path) -> None:
"""
A modified shutil.copytree which copies in parallel to increase bandwidth
and compensate for the increased IO latency of volume mounts.
"""
from multiprocessing.pool import ThreadPool
class MultithreadedCopier:
def __init__(self, max_threads):
self.pool = ThreadPool(max_threads)
self.copy_jobs = []
def copy(self, source, dest):
res = self.pool.apply_async(
shutil.copy2,
args=(source, dest),
callback=lambda r: print(f"{source} copied to {dest}"),
# NOTE: this should `raise` an exception for proper reliability.
error_callback=lambda exc: print(
f"{source} failed: {exc}", file=sys.stderr
),
)
self.copy_jobs.append(res)
def __enter__(self):
return self
def __exit__(self, exc_type, exc_val, exc_tb):
self.pool.close()
self.pool.join()
with MultithreadedCopier(max_threads=24) as copier:
shutil.copytree(src, dest, copy_function=copier.copy, dirs_exist_ok=True)
@app.function(
volumes={"/mnt": volume},
# 20 hours — img2dataset is extremely slow to work through all images.
timeout=60 * 60 * 20,
ephemeral_disk=512 * 1024,
)
def run_img2dataset_on_part(
i: int,
partfile: str,
) -> None:
start_monitoring_disk_space(interval=60)
while not pathlib.Path(partfile).exists():
print(f"{partfile} not yet visible...", file=sys.stderr)
time.sleep(1)
# Each part works in its own subdirectory because img2dataset creates a working
# tmpdir at /_tmp and we don't want consistency issues caused by
# all concurrently processing parts read/writing from the same temp directory.
tmp_laion400m_data_path = pathlib.Path(f"/tmp/laion400/laion400m-data/{i}/")
tmp_laion400m_data_path.mkdir(exist_ok=True, parents=True)
# Increasing retries comes at a *large* performance cost.
retries = 0
# TODO: Support --incremental mode. https://github.com/rom1504/img2dataset?tab=readme-ov-file#incremental-mode
command = (
f'img2dataset --url_list {partfile} --input_format "parquet" '
'--url_col "URL" --caption_col "TEXT" --output_format webdataset '
f"--output_folder {tmp_laion400m_data_path} --processes_count 16 --thread_count 128 --image_size 256 "
f'--retries={retries} --save_additional_columns \'["NSFW","similarity","LICENSE"]\' --enable_wandb False'
)
print(f"Running img2dataset command: \n\n{command}")
subprocess.run(command, shell=True, check=True)
print("Completed img2dataset, copying into mounted volume...")
laion400m_data_path = pathlib.Path("/mnt/laion400/laion400m-data/")
copy_concurrent(tmp_laion400m_data_path, laion400m_data_path)
@app.function(
volumes={"/mnt": volume},
timeout=60 * 60 * 16, # 16 hours
)
def import_transform_load() -> None:
start_monitoring_disk_space()
# We initially download into a tmp directory outside of the volume to avoid
# any filesystem incompatibilities between the `wget` application and the bucket
# filesystem mount.
tmp_laion400m_meta_path = pathlib.Path("/tmp/laion400/laion400m-meta")
laion400m_meta_path = pathlib.Path("/mnt/laion400/laion400m-meta")
if not laion400m_meta_path.exists():
laion400m_meta_path.mkdir(parents=True, exist_ok=True)
# WARNING: We skip the certificate check for the-eye.eu because its TLS certificate expired as of mid-May 2024.
subprocess.run(
f"wget -l1 -r --no-check-certificate --no-parent https://the-eye.eu/public/AI/cah/laion400m-met-release/laion400m-meta/ -P {tmp_laion400m_meta_path}",
shell=True,
check=True,
)
parquet_files = list(tmp_laion400m_meta_path.glob("**/*.parquet"))
print(
f"Downloaded {len(parquet_files)} parquet files into {tmp_laion400m_meta_path}."
)
# Perform a simple copy operation to move the data into the bucket.
copy_concurrent(tmp_laion400m_meta_path, laion400m_meta_path)
parquet_files = list(laion400m_meta_path.glob("**/*.parquet"))
print(f"Stored {len(parquet_files)} parquet files into {laion400m_meta_path}.")
print(f"Spawning {len(parquet_files)} to enrich dataset...")
list(run_img2dataset_on_part.starmap((i, f) for i, f in enumerate(parquet_files)))
```
### Langserve
# Deploy LangChain and LangGraph applications with LangServe
This code demonstrates how to deploy a
[LangServe](https://python.langchain.com/docs/langserve/) application on Modal.
LangServe makes it easy to wrap LangChain and LangGraph applications in a FastAPI server,
and Modal makes it easy to deploy FastAPI servers.
The LangGraph application that it serves is from our [sandboxed LLM coding agent example](https://modal.com/docs/examples/agent).
You can find the code for the agent and several other code files associated with this example in the
[`codelangchain` directory of our examples repo](https://github.com/modal-labs/modal-examples/tree/main/13_sandboxes/codelangchain).
```python
import modal
from .agent import construct_graph, create_sandbox
from .src.common import image
app = modal.App("example-codelangchain-langserve")
image = image.uv_pip_install("langserve[all]==0.3.0")
@app.function(
image=image,
secrets=[ # see the agent.py file for more information on Secrets
modal.Secret.from_name("openai-secret", required_keys=["OPENAI_API_KEY"]),
modal.Secret.from_name("langsmith-secret", required_keys=["LANGCHAIN_API_KEY"]),
],
)
@modal.asgi_app()
def serve():
from fastapi import FastAPI, responses
from fastapi.middleware.cors import CORSMiddleware
from langchain_core.runnables import RunnableLambda
from langserve import add_routes
# create a FastAPI app
web_app = FastAPI(
title="CodeLangChain Server",
version="1.0",
description="Writes code and checks if it runs.",
)
# set all CORS enabled origins
web_app.add_middleware(
CORSMiddleware,
allow_origins=["*"],
allow_credentials=True,
allow_methods=["*"],
allow_headers=["*"],
expose_headers=["*"],
)
def inp(question: str) -> dict:
return {"keys": {"question": question, "iterations": 0}}
def out(state: dict) -> str:
if "finish" in state:
return state["finish"]["keys"]["response"]
elif len(state) > 0 and "finish" in state[-1]:
return state[-1]["finish"]["keys"]["response"]
else:
return str(state)
graph = construct_graph(create_sandbox(app), debug=False).compile()
chain = RunnableLambda(inp) | graph | RunnableLambda(out)
add_routes(
web_app,
chain,
path="/codelangchain",
)
# redirect the root to the interactive playground
@web_app.get("/")
def redirect():
return responses.RedirectResponse(url="/codelangchain/playground")
# return the FastAPI app and Modal will deploy it for us
return web_app
```
### Learn Math
# Training a mathematical reasoning model using the verifiers library with sandboxed code execution
This example demonstrates how to train mathematical reasoning models on Modal using the [verifiers library](https://github.com/willccbb/verifiers) with [Modal Sandboxes](https://modal.com/docs/guide/sandbox) for executing generated code.
The [verifiers library](https://github.com/willccbb/verifiers) is a set of tools and abstractions for training LLMs with reinforcement learning in verifiable multi-turn environments via [GRPO](https://arxiv.org/abs/2402.03300).
This example demonstrates how to:
- Launch a distributed GRPO training job on Modal with 4× H100 GPUs.
- Use vLLM for inference during training.
- Cache HuggingFace, vLLM, and store the model weights in [Volumes](https://modal.com/docs/guide/volumes).
- Run inference by loading the trained model from Volumes.
## Setup
We start by importing modal and the dependencies from the verifiers library. Then, we create a Modal App and an image with a NVIDIA CUDA base image.
We install the dependencies for the `verifiers` and `flash-attn` libraries, following the verifiers [README](https://github.com/willccbb/verifiers?tab=readme-ov-file#getting-started).
```python
import modal
app = modal.App(name="example-learn-math")
cuda_version = "12.8.0"
flavor = "devel"
operating_sys = "ubuntu22.04"
tag = f"{cuda_version}-{flavor}-{operating_sys}"
flash_attn_release = (
"https://github.com/Dao-AILab/flash-attention/releases/download/v2.7.1.post1/"
"flash_attn-2.7.1.post1+cu12torch2.6cxx11abiTRUE-cp311-cp311-linux_x86_64.whl"
) # We use a pre-built binary for flash-attn to install it in the image.
image = (
modal.Image.from_registry(f"nvidia/cuda:{tag}", add_python="3.11")
.apt_install("git", "clang")
.uv_pip_install(
"huggingface-hub==0.36.0",
"setuptools==69.0.3",
"wheel==0.45.1",
"ninja==1.11.1.4",
"packaging==25.0",
"verifiers[all]==0.1.1",
flash_attn_release,
)
.env(
{
"HF_XET_HIGH_PERFORMANCE": "1",
"VLLM_ALLOW_INSECURE_SERIALIZATION": "1",
"HF_HOME": "/root/.cache/huggingface",
}
)
)
```
## Caching HuggingFace, vLLM, and storing model weights. For more on storing model weights on Modal, see
[this guide](https://modal.com/docs/guide/model-weights).
We create Modal Volumes to persist:
- HuggingFace downloads
- vLLM cache
- Model weights
We define the model name and a tool that the model can use to execute Python code that it generates.
See this [this training script](/docs/examples/trainer_script_grpo) for more details.
```python
HF_CACHE_DIR = "/root/.cache/huggingface"
HF_CACHE_VOL = modal.Volume.from_name("huggingface-cache", create_if_missing=True)
VLLM_CACHE_DIR = "/root/.cache/vllm"
VLLM_CACHE_VOL = modal.Volume.from_name("vllm-cache", create_if_missing=True)
WEIGHTS_DIR = "/root/math_weights"
WEIGHTS_VOL = modal.Volume.from_name(
"example-trainer-script-grpo-weights", create_if_missing=True
)
MODEL_NAME = "willcb/Qwen3-0.6B"
TOOL_DESCRIPTIONS = """
- sandbox_exec: Execute Python code to perform calculations.
"""
```
## Training
Following the [verifiers example](https://github.com/willccbb/verifiers/blob/main/verifiers/examples/math_python.py), we will need a training script and a config file.
For sandboxed code execution, we will use [this training script](/docs/examples/trainer_script_grpo) and the config file defined [here](https://github.com/willccbb/verifiers/blob/main/configs/zero3.yaml).
We create a function that uses 4 H100 GPUs and mounts the defined Volumes. Then, we write the training script and the config file to the `/root/` directory.
We use the `willcb/Qwen3-0.6B` model from HuggingFace, setting up inference via a vLLM server. Once, the model is served, we will launch the training script using `accelerate`.
We can use the App ID as a unique identifier for saving and loading the model weights.
When the training is complete, we will run a single inference from the training set to test our training run.
```python
@app.function(
gpu="H100:4",
image=image,
volumes={
HF_CACHE_DIR: HF_CACHE_VOL,
VLLM_CACHE_DIR: VLLM_CACHE_VOL,
WEIGHTS_DIR: WEIGHTS_VOL,
},
timeout=3600,
secrets=[modal.Secret.from_name("wandb-secret-rl")],
)
def math_group_verifier(trainer_script: str, config_file: str, run_id: str = None):
import os
import subprocess
import wandb
from verifiers.prompts import DEFAULT_TOOL_PROMPT_TEMPLATE
from verifiers.utils import load_example_dataset
with open("/root/trainer_script.py", "w") as f:
f.write(trainer_script)
with open("/root/config.yaml", "w") as f:
f.write(config_file)
wandb.init(project="example-trainer-script-grpo")
wandb.config = {"epochs": 10}
vllm_proc = subprocess.Popen(
["vf-vllm", "--model", MODEL_NAME, "--port", "8000", "--enforce-eager"],
env={**os.environ, "CUDA_VISIBLE_DEVICES": "0", "NCCL_CUMEM_ENABLE": "0"},
)
run_id = app.app_id if run_id is None else run_id
result = subprocess.run(
[
"accelerate",
"launch",
"--config-file",
"/root/config.yaml",
"/root/trainer_script.py",
"--run-id",
run_id,
],
env={
**os.environ,
"CUDA_VISIBLE_DEVICES": "1,2,3",
"NCCL_DEBUG": "INFO",
"NCCL_CUMEM_ENABLE": "0",
},
)
vllm_proc.terminate()
vllm_proc.wait()
print("Training completed! Running a single inference from test set...")
dataset = load_example_dataset(
"math", split="train"
).select(
range(1)
) # We use the first example from the training set for inference to test our training run.
example = dataset[0]
question = example["question"]
prompt = (
DEFAULT_TOOL_PROMPT_TEMPLATE.format(tool_descriptions=TOOL_DESCRIPTIONS)
+ "\n\nProblem: "
+ question
+ "\n\n\n\n"
)
result = inference.remote(prompt, run_id)
print(result)
```
## Inference
We define an `inference` Modal function that runs on a single GPU and mounts the weights volume.
Then, we load the trained model from the volume, falling back to the base model if necessary.
To build the prompt, we apply `DEFAULT_TOOL_PROMPT_TEMPLATE` with `TOOL_DESCRIPTIONS` and the problem text.
Finally, we tokenize the prompt, generate a response with sampling (temperature, top-p, repetition penalty), then decode and return the answer.
```python
@app.function(
gpu="H100",
image=image,
volumes={
HF_CACHE_DIR: HF_CACHE_VOL,
WEIGHTS_DIR: WEIGHTS_VOL,
},
timeout=60 * 10,
)
def inference(prompt: str, run_id: str = None):
"""Test the trained model with the same format as training"""
import torch
from transformers import AutoModelForCausalLM, AutoTokenizer
from verifiers.prompts import DEFAULT_TOOL_PROMPT_TEMPLATE
prompt = (
DEFAULT_TOOL_PROMPT_TEMPLATE.format(tool_descriptions=TOOL_DESCRIPTIONS)
+ "\n\nProblem: "
+ prompt
+ "\n\n\n\n"
)
model_path = f"{WEIGHTS_DIR}/{app.app_id if run_id is None else run_id}"
print(f"Loading model from {model_path}")
try:
tokenizer = AutoTokenizer.from_pretrained(model_path, trust_remote_code=True)
model = AutoModelForCausalLM.from_pretrained(
model_path,
torch_dtype=torch.bfloat16,
device_map="auto",
trust_remote_code=True,
)
print(f"✓ Loaded trained model from {model_path}")
except Exception as e:
print(f"Could not load trained model: {e}")
print("Loading base model instead...")
tokenizer = AutoTokenizer.from_pretrained(
MODEL_NAME, cache_dir=HF_CACHE_DIR, trust_remote_code=True
)
model = AutoModelForCausalLM.from_pretrained(
MODEL_NAME,
torch_dtype=torch.bfloat16,
device_map="auto",
trust_remote_code=True,
)
if tokenizer.pad_token is None:
tokenizer.pad_token = tokenizer.eos_token
def generate_response(prompt_text):
inputs = tokenizer(prompt_text, return_tensors="pt").to(model.device)
with torch.no_grad():
outputs = model.generate(
**inputs,
max_new_tokens=2048,
do_sample=True,
temperature=0.3,
top_p=0.9,
repetition_penalty=1.1,
pad_token_id=tokenizer.eos_token_id,
)
response = tokenizer.decode(outputs[0], skip_special_tokens=True)
return response[len(prompt_text) :].strip()
model_response = generate_response(prompt + "\n\n\n\n")
return model_response
```
## Usage
We create a main function that serves as the entrypoint for the app.
It supports two modes:
- train: kick off math_group_verifier with the provided training script and config file
- inference: invoke inference with prompt string or prompt file
To run the training, we can use the following command:
```bash
modal run learn_math.py --mode=train --trainer-script=trainer_script_grpo.py --config-file=config_grpo.yaml
```
To run the inference with a custom prompt, we can use the following command after setting the model path inside our volume:
```bash
modal run learn_math.py --mode=inference --prompt "Find the value of x that satisfies the equation: 2x + 5 = 17" --model-path "test_run"
```
To run the inference with a custom prompt from a file, we can use the following command:
```bash
modal run learn_math.py --mode=inference --prompt-file "prompt.txt"
```
```python
@app.local_entrypoint()
def main(
mode: str = "train",
prompt: str = None,
prompt_file: str = None,
run_id: str = None,
trainer_script: str = "trainer_script_grpo.py",
config_file: str = "config_grpo.yaml",
):
if mode == "inference":
if prompt_file:
try:
with open(prompt_file, "r") as f:
prompt_text = f.read().strip()
print(f"Using prompt from file: {prompt_file}")
except FileNotFoundError:
print(f"Error: File {prompt_file} not found")
return
elif prompt:
prompt_text = prompt
print("Using prompt from command line argument")
else:
prompt_text = "Find the value of x that satisfies the equation: 2x + 5 = 17"
print("=" * 50)
print("Running inference...")
print("=" * 50)
print("PROMPT:")
print(prompt_text)
print("-" * 30)
model_response = inference.remote(prompt_text, run_id)
print("MODEL RESPONSE:")
print(model_response)
print("-" * 30)
elif mode == "train":
print(
f"Training with trainer script:\n{trainer_script}\nand config file:\n{config_file}"
)
with open(trainer_script, "r") as f:
trainer_content = f.read()
with open(config_file, "r") as f:
config_content = f.read()
math_group_verifier.remote(trainer_content, config_content, run_id)
```
### Lfm Snapshot
# Low Latency, Serverless LFM2 with vLLM and Modal
In this example, we show how to serve Liquid AI's [LFM2 models](https://www.liquid.ai/liquid-foundation-models)
with [vLLM](https://docs.vllm.ai) with low latency and fast cold starts on Modal.
The LFM2 models are not vanilla Transformers -- they have a hybrid architecture,
discovered via an architecture search that optimized for quality, latency, and memory footprint.
Check out their [technical report](https://arxiv.org/abs/2511.23404v1)
for more details.
Here, we run the [24B-A2B variant](https://huggingface.co/LiquidAI/LFM2-24B-A2B) of LFM2,
described [here](https://www.liquid.ai/blog/lfm2-24b-a2b). This variant is designed
for efficient inference and includes instruction tuning.
It is released under the weights-available [LFM 1.0 License](https://huggingface.co/LiquidAI/LFM2-24B-A2B/blob/main/LICENSE),
which restricts commercial use for entities with over $10M in revenue.
This example demonstrates techniques to run inference at high efficiency,
including advanced features of both vLLM and Modal.
For a simpler introduction to LLM serving, see
[this example](https://modal.com/docs/examples/llm_inference).
To minimize routing overheads, we use `@app.server`,
which uses a new, low-latency routing service on Modal designed for latency-sensitive inference workloads.
This gives us more control over routing, but with increased power comes increased responsibility.
We also include instructions for cutting cold start times using Modal's
[CPU + GPU memory snapshots](https://modal.com/docs/guide/memory-snapshot).
Fast cold starts are particularly useful for LLM inference applications
that have highly "bursty" workloads, like document processing.
See [this guide](https://modal.com/docs/guide/high-performance-llm-inference)
for a breakdown of different LLM inference workloads and how to optimize them.
## Set up the container image
Our first order of business is to define the environment our server will run in:
the [container `Image`](https://modal.com/docs/guide/images).
We'll use the [vLLM inference server](https://docs.vllm.ai).
While we're at it, we import the dependencies we'll need both remotely and locally (for deployment).
```python
import asyncio
import json
import os
import subprocess
import time
import aiohttp
import modal
from modal.server import Server
MINUTES = 60
MODEL_NAME = os.environ.get("MODEL_NAME", "LiquidAI/LFM2-24B-A2B")
print(f"Running deployment script for model: {MODEL_NAME}")
vllm_image = (
modal.Image.from_registry("vllm/vllm-openai:v0.15.1")
.entrypoint([])
.run_commands("ln -s $(which python3) /usr/bin/python")
.pip_install("transformers==5.1.0")
.env(
{
"HF_HUB_CACHE": "/root/.cache/huggingface",
"HF_XET_HIGH_PERFORMANCE": "1",
"VLLM_SERVER_DEV_MODE": "1",
"TORCH_CPP_LOG_LEVEL": "FATAL",
"MODEL_NAME": MODEL_NAME,
}
)
)
```
### Selecting the GPU
We choose the [H100 GPU](https://modal.com/blog/introducing-h100),
which offers excellent price-performance and has sufficient VRAM to store the models.
```python
N_GPU = 1
GPU = "H100"
```
### Loading and caching the model weights
We don't want to load the model from the Hub every time we start the server.
We can load it much faster from a [Modal Volume](https://modal.com/docs/guide/volumes).
Typical speeds are around one to two GB/s.
```python
hf_cache_vol = modal.Volume.from_name("huggingface-cache", create_if_missing=True)
```
In addition to pointing the Hugging Face Hub at the path
where we mount the Volume, we also
[turn on "high performance" downloads](https://huggingface.co/docs/hub/en/models-downloading#faster-downloads),
which can fully saturate our network bandwidth,
and provide an `HF_TOKEN` via a [Modal Secret](https://modal.com/docs/guide/secrets)
so that our downloads aren't throttled.
You'll need to create a Secret named `huggingface-secret`
with your token [here](https://modal.com/apps/secrets).
```python
hf_secret = modal.Secret.from_name("huggingface-secret")
```
### Caching compilation artifacts
Model weights aren't the only thing we want to cache.
vLLM also produces compilation artifacts that we want to persist across restarts.
```python
vllm_cache_vol = modal.Volume.from_name("vllm-cache", create_if_missing=True)
```
## Define the inference server and infrastructure
### Selecting infrastructure to minimize latency
Minimizing latency requires geographic co-location of clients and servers.
So for low latency LLM inference services on Modal, you must select a
[cloud region](https://modal.com/docs/guide/region-selection)
for both the GPU-accelerated containers running inference
and for the internal Modal proxies that forward requests to them
as part of defining a `app.server`.
Here, we assume users are mostly in the northern half of the Americas
and select the `us-east` cloud region to serve them.
This should result in at most a few dozen milliseconds of round-trip time.
```python
REGION = "us-east"
```
For production-scale LLM inference services, there are generally
enough requests to justify keeping at least one replica running at all times.
Having a "warm" or "live" replica reduces latency by skipping slow initialization work
that occurs when new replica boots up (a ["cold start"](https://modal.com/docs/guide/cold-start)).
For LLM inference servers, that latency runs from seconds to minutes.
However, since this is documentation code, we'll set the `min_containers` of our Modal Function
to `0` to avoid surprise bills during casual use.
```python
MIN_CONTAINERS = 0
```
Finally, we need to decide how we will scale up and down replicas
in response to load. Without autoscaling, users' requests will queue
when the server becomes overloaded. Even apart from queueing, responses
generally become slower per user above a certain minimum number of
concurrent requests.
So we set a target for the number of inputs to run on a single container
with [`target_concurrency`](https://modal.com/docs/reference/modal.concurrent) parameter.
For details, see [the guide](https://modal.com/docs/guide/concurrent-inputs).
Generally, this choice needs to be made as part of
[LLM inference engine benchmarking](https://modal.com/llm-almanac/how-to-benchmark).
```python
TARGET_INPUTS = 32
MAX_INPUTS = 100
```
## Speed up cold starts with GPU snapshotting
Modal is a serverless compute platform, so all of your
inference services automatically scale up and down to handle
variable load.
Scaling up a new replica requires quite a bit of work --
loading up Python and system packages, loading model weights,
setting up the inference engine, and so on.
We can skip over and speed up a bunch of this work
when spinning up new replicas after the first
by directly booting from a [memory snapshot](https://modal.com/docs/guide/memory-snapshot),
which contains the exact in-memory representation of our server just before it begins taking requests.
Most applications can be snapshot and experience substantial speedups (2x to 10x,
see [our initial benchmarks here](https://modal.com/blog/gpu-mem-snapshots)).
However, it generally requires some extra work to adapt the application code.
vLLM supports a sleep mode that allows us to leverage Modal's
[CPU + GPU memory snapshots](https://modal.com/docs/guide/memory-snapshot)
for dramatically faster cold starts.
When `enable_memory_snapshot=True` and `experimental_options={"enable_gpu_snapshot": True}`
are set on the class, Modal captures both CPU and GPU memory state.
The `@modal.enter(snap=True)` method runs before the snapshot is taken:
we start vLLM, wait for it to be ready, warm it up, then put it to sleep.
The `@modal.enter(snap=False)` method runs after restoring from snapshot:
we wake vLLM back up so it can serve requests immediately.
### Sleeping and waking a vLLM server
We prepare our vLLM inference server for snapshotting by first sending
a few requests to "warm it up", ensuring that it is fully ready to process requests.
Then we "put it to sleep", moving non-essential data out of GPU memory,
with a request to `/sleep`. At this point, we can take a memory snapshot.
Upon snapshot restoration, we "wake up" the server with a request to `/wake_up`.
We use the [`requests` library](https://requests.readthedocs.io/en/latest/)
to send ourselves these HTTP requests on
[`localhost`/`127.0.0.1`](https://superuser.com/questions/31824/why-is-localhost-ip-127-0-0-1).
```python
VLLM_PORT = 8000
with vllm_image.imports():
import requests
def wait_ready(process: subprocess.Popen, timeout: int = 15 * MINUTES):
deadline = time.time() + timeout
while time.time() < deadline:
try:
check_running(process)
requests.get(f"http://127.0.0.1:{VLLM_PORT}/health").raise_for_status()
return
except (
subprocess.CalledProcessError,
requests.exceptions.ConnectionError,
requests.exceptions.HTTPError,
):
time.sleep(5)
raise TimeoutError(f"vLLM server not ready within {timeout} seconds")
def check_running(p: subprocess.Popen):
if (rc := p.poll()) is not None:
raise subprocess.CalledProcessError(rc, cmd=p.args)
def warmup():
payload = {
"model": "llm",
"messages": [{"role": "user", "content": "Hello, how are you?"}],
"max_tokens": 16,
}
for _ in range(3):
requests.post(
f"http://127.0.0.1:{VLLM_PORT}/v1/chat/completions",
json=payload,
timeout=60,
).raise_for_status()
def sleep(level: int = 1):
requests.post(
f"http://127.0.0.1:{VLLM_PORT}/sleep?level={level}"
).raise_for_status()
def wake_up():
requests.post(f"http://127.0.0.1:{VLLM_PORT}/wake_up").raise_for_status()
```
### Controlling container lifecycles with `modal.Server`
We wrap up all of the choices we made about the infrastructure
of our inference server into a number of Python decorators
that we apply to a Python class that encapsulates the logic
to run our server.
The key decorators are:
- [`@app.server`](https://modal.com/docs/guide/lifecycle-functions) to define the core of our service.
We attach our Image, request a GPU, attach our cache Volumes, specify the region, and configure auto-scaling.
This decorator also turns our python code into an HTTP server (i.e. fronting all of our containers with a proxy with a URL).
The wrapped code needs to eventually listen for HTTP connections on the provided `port`.
See [the reference documentation](https://modal.com/docs/reference/modal.App#server) for details.
- [`@modal.enter` and `@modal.exit`](https://modal.com/docs/guide/lifecycle-functions) to indicate
which methods of the class should be run when starting the server and shutting it down.
The `snap=True`/`snap=False` distinction controls which methods run before/after a memory snapshot.
Modal considers a new replica ready to receive inputs once the `modal.enter` methods have exited
and the container accepts connections.
With all this in place, we are ready to define our high-performance, low-latency
LFM 2 inference server.
```python
app = modal.App("example-server-lfm-snapshot")
@app.server(
image=vllm_image,
gpu=GPU,
scaledown_window=5 * MINUTES,
startup_timeout=15 * MINUTES,
volumes={
"/root/.cache/huggingface": hf_cache_vol,
"/root/.cache/vllm": vllm_cache_vol,
},
secrets=[hf_secret],
enable_memory_snapshot=True,
experimental_options={"enable_gpu_snapshot": True},
compute_region=REGION,
min_containers=MIN_CONTAINERS,
port=VLLM_PORT,
routing_region=REGION,
exit_grace_period=5,
target_concurrency=TARGET_INPUTS,
unauthenticated=True,
)
class LfmVllmInference:
@modal.enter(snap=True)
def startup(self):
"""Start the vLLM server and block until it is healthy, then warm it up and put it to sleep."""
cmd = [
"vllm",
"serve",
MODEL_NAME,
"--served-model-name",
MODEL_NAME,
"--served-model-name",
"llm",
"--host",
"0.0.0.0",
"--port",
f"{VLLM_PORT}",
"--dtype",
"bfloat16",
"--gpu-memory-utilization",
"0.8",
"--max-num-seqs",
f"{MAX_INPUTS}",
"--max-cudagraph-capture-size",
f"{MAX_INPUTS}",
"--enable-sleep-mode",
]
print(*cmd)
self.process = subprocess.Popen(cmd)
wait_ready(self.process)
warmup()
sleep(level=1)
@modal.enter(snap=False)
def restore(self):
"""Wake vLLM from sleep mode after restoring from a memory snapshot."""
wake_up()
@modal.exit()
def stop(self):
self.process.terminate()
```
## Deploy the server
To deploy the server on Modal, just run
```bash
modal deploy lfm_snapshot.py
```
This will create a new App on Modal and build the container image for it if it hasn't been built yet.
## Interact with the server
Once it is deployed, you'll see a URL appear in the command line,
something like `https://your-workspace-name--example-lfm-snapshot-lfmvllminference.us-east.modal.direct`.
You can find [interactive Swagger UI docs](https://swagger.io/tools/swagger-ui/)
at the `/docs` route of that URL, i.e. `https://your-workspace-name--example-lfm-snapshot-lfmvllminference.us-east.modal.direct/docs`.
These docs describe each route and indicate the expected input and output
and translate requests into `curl` commands.
For simple routes, you can even send a request directly from the docs page.
Note: when no replicas are available, Modal will respond with
the [503 Service Unavailable status](https://developer.mozilla.org/en-US/docs/Web/HTTP/Reference/Status/503).
In your browser, you can just hit refresh until the docs page appears.
You can see the status of the application and its containers on your [Modal dashboard](https://modal.com/apps).
## Test the server
To make it easier to test the server setup, we also include a `local_entrypoint`
that hits the server with a simple client.
If you execute the command
```bash
modal run lfm_snapshot.py
```
a fresh replica of the server will be spun up on Modal while
the code below executes on your local machine.
Think of this like writing simple tests inside of the `if __name__ == "__main__"`
block of a Python script, but for cloud deployments!
```python
@app.local_entrypoint()
async def test(test_timeout=10 * MINUTES, prompt=None, twice=True):
url = await LfmVllmInference.get_url.aio()
if prompt is None:
prompt = "List every country and its capital."
messages = [
{"role": "user", "content": prompt},
]
await probe(url, messages, timeout=test_timeout)
if twice:
messages = [
{
"role": "user",
"content": "List every country and its capital in Chinese.",
}
]
print(f"Sending messages to {url}:", *messages, sep="\n\t")
await probe(url, messages, timeout=1 * MINUTES)
```
This test relies on the `probe` helper function below,
which ping the server and wait for a valid response to stream.
The `probe` helper function specifically ignores
two types of errors that can occur while a replica
is starting up -- timeouts on the client and 5XX responses from the server.
Modal returns the [503 Service Unavailable status](https://developer.mozilla.org/en-US/docs/Web/HTTP/Reference/Status/503)
when a Server has no live replicas.
We include a header with each request --
`Modal-Session-ID`.
The value associated with this key
is used to map requests onto containers such that
while the set of containers is fixed, requests with the same value
are sent to the same container.
Set this to a different value per multi-turn interaction
(prototypically, a user conversation thread with a chatbot)
to improve KV cache hit rates.
Note that this header is only compatible with
Modal Servers, not [Modal Web Functions](https://modal.com/docs/guide/webhooks).
```python
async def probe(url, messages=None, timeout=5 * MINUTES):
if messages is None:
messages = [{"role": "user", "content": "Tell me a joke."}]
client_id = str(0) # set this yourself based on KV cache hit-rate
headers = {"Modal-Session-ID": client_id}
deadline = time.time() + timeout
async with aiohttp.ClientSession(base_url=url, headers=headers) as session:
while time.time() < deadline:
try:
await _send_request_streaming(session, messages)
return
except asyncio.TimeoutError:
await asyncio.sleep(1)
except aiohttp.client_exceptions.ClientResponseError as e:
if e.status == 503:
await asyncio.sleep(1)
continue
raise e
raise TimeoutError(f"No response from server within {timeout} seconds")
async def _send_request_streaming(
session: aiohttp.ClientSession, messages: list, timeout: int | None = None
) -> None:
payload = {"model": "llm", "messages": messages, "stream": True}
headers = {"Accept": "text/event-stream"}
async with session.post(
"/v1/chat/completions", json=payload, headers=headers, timeout=timeout
) as resp:
resp.raise_for_status()
full_text = ""
async for raw in resp.content:
line = raw.decode("utf-8", errors="ignore").strip()
if not line:
continue
if not line.startswith("data:"):
continue
data = line[len("data:") :].strip()
if data == "[DONE]":
break
try:
evt = json.loads(data)
except json.JSONDecodeError:
continue
delta = (evt.get("choices") or [{}])[0].get("delta") or {}
chunk = delta.get("content")
if chunk:
print(chunk, end="", flush="\n" in chunk or "." in chunk)
full_text += chunk
print()
```
### Test memory snapshotting
Using `modal run` creates an ephemeral Modal App,
rather than a deployed Modal App.
Ephemeral Modal Apps are short-lived,
so they turn off snapshotting.
To test the memory snapshot version of the server,
first deploy it with `modal deploy`
and then hit it with a client.
You should observe startup improvements
after a handful of cold starts
(usually less than five).
If you want to see the speedup during a test,
we recommend heading to the deployed App in your
[Modal dashboard](https://modal.com/apps)
and manually stopping containers after they have served a request.
You can use the client code below to test the endpoint.
It can be run with the command
```
python lfm_snapshot.py
```
```python
if __name__ == "__main__":
LfmVllmInference = Server.from_name(
"example-server-lfm-snapshot", "LfmVllmInference"
)
async def main():
url = await LfmVllmInference.get_url.aio()
messages = [{"role": "user", "content": "Tell me ten jokes."}]
await probe(url, messages, timeout=10 * MINUTES)
try:
print("calling inference server")
asyncio.run(main())
except modal.exception.NotFoundError as e:
raise Exception(
f"To take advantage of GPU snapshots, deploy first with modal deploy {__file__}"
) from e
```
### Liquidai Embeddings Server
# Serve Liquid AI ColBERT embeddings with llama.cpp and Modal Servers
In this example, we serve
[LiquidAI/LFM2.5-ColBERT-350M](https://huggingface.co/LiquidAI/LFM2.5-ColBERT-350M)
using [llama.cpp](https://github.com/ggml-org/llama.cpp)
in a [Modal Server](https://modal.com/docs/guide/servers).
LFM2.5-ColBERT-350M is a 353M-parameter [late interaction embedding model](https://arxiv.org/abs/2004.12832).
That means it produces one embedding vector per query token.
Similarity is computed by comparing each of those vectors with each of the document's token embeddings to produce a final score,
rather than just comparing a single vector per query per document.
This is not supported by the OpenAI-compatible `/v1/embeddings` API,
so we instead use the `/embeddings` API in `llama.cpp`.
The model is intended for short queries against small documents,
like comparing user search queries with product descriptions in e-commerce.
The model is available under the [LFM Open License v1.0](https://huggingface.co/LiquidAI/LFM2.5-ColBERT-350M/blob/ac509ef9346912166a5f2f63d5ee41d9c472c330/LICENSE),
which includes restrictions on commercial use.
## Why use a Modal Server?
To minimize routing overheads, we use `@app.server`,
which uses a new, low-latency routing service on Modal designed for latency-sensitive inference workloads,
like interactive search via embeddings.
See the [Modal Servers guide](https://modal.com/docs/guide/servers) for details.
## Choose the model file and engine parameters
Liquid AI publishes official GGUF conversions of the model in
[LiquidAI/LFM2.5-ColBERT-350M-GGUF](https://huggingface.co/LiquidAI/LFM2.5-ColBERT-350M-GGUF).
```python
import json
import subprocess
import time
import urllib.error
import urllib.request
import modal
MODEL_REPO = "LiquidAI/LFM2.5-ColBERT-350M-GGUF"
MODEL_REVISION = "bc240003aba07253e261a8aaf0d2c9683318a967" # version-pinning
MODEL_FILE = "LFM2.5-ColBERT-350M-BF16.gguf"
MODEL_URL = f"https://huggingface.co/{MODEL_REPO}/resolve/{MODEL_REVISION}/{MODEL_FILE}"
```
`llama-server` processes requests in `N_SLOTS` parallel slots
and splits the total token context evenly across them.
We give each slot the model's trained sequence length of 512 tokens.
```python
MAX_INPUT_TOKENS = 512 # the model's trained sequence length
N_SLOTS = 4 # target concurrent requests per container; adjust as needed
TOKEN_EMBEDDING_DIM = 128 # the model's output embedding dimension
```
Queries and documents are prefixed with special tokens before encoding.
```python
DOCUMENT_PREFIX = "[D] "
QUERY_PREFIX = "[Q] "
```
## Cache the model weights
We persist the llama.cpp download cache in a Modal
[Volume](https://modal.com/docs/guide/volumes)
so the GGUF file is downloaded from the Hub exactly once
and loaded from the Volume on later cold starts.
```python
CACHE_PATH = "/cache"
MODEL_PATH = f"{CACHE_PATH}/llama.cpp/{MODEL_FILE}"
volume = modal.Volume.from_name("liquidai-embeddings-cache", create_if_missing=True)
```
## Define the container image
We build on the official llama.cpp server image.
It contains the compiled binary but doesn't include Python,
so `add_python` bundles an interpreter for Modal's own runtime.
We also clear the image's entrypoint, which is the server binary itself,
so that we can control the startup.
```python
image = (
modal.Image.from_registry(
"ghcr.io/ggml-org/llama.cpp:server-b9917", add_python="3.12"
)
.entrypoint([])
.env({"LLAMA_CACHE": f"{CACHE_PATH}/llama.cpp"})
)
```
## Define the Server
We wrap the engine in a class decorated with `@app.server()`,
which attaches the Image and Volume,
defines autoscaling rules,
fronts the containers with a proxy, and more.
See details in the [Modal Servers guide](https://modal.com/docs/guide/servers).
```python
MINUTES = 60 # seconds
PORT = 8000
app = modal.App("example-liquidai-embeddings-server")
@app.server(
image=image,
volumes={CACHE_PATH: volume},
port=PORT,
target_concurrency=N_SLOTS,
min_containers=0, # set to 1 or more to keep a warm replica for latency-sensitive use cases
startup_timeout=10 * MINUTES, # allow time to download and load the model
scaledown_window=5 * MINUTES, # retain loaded replicas across short traffic gaps
exit_grace_period=20, # allow in-flight embedding requests to finish before shutdown
unauthenticated=True,
)
class LlamaServer:
@modal.enter()
def start(self):
cmd = [
"/app/llama-server",
"--model-url",
MODEL_URL,
"--model",
MODEL_PATH,
"--embeddings",
"--pooling",
"none", # return one vector per input token
"--host",
"0.0.0.0",
"--port",
str(PORT),
"--no-ui", # no chat interface, we're serving embeddings
"--metrics", # enable metrics logging
"--parallel",
str(N_SLOTS),
"--ctx-size",
str(N_SLOTS * MAX_INPUT_TOKENS), # total context shared across slots
# Bidirectional embedding models require all tokens in an iteration to fit
# in one physical batch. Using the full context for batch sizes allows all
# slots to process maximum-length inputs together.
"--batch-size", # max tokens per iteration during continuous batching
str(N_SLOTS * MAX_INPUT_TOKENS),
"--ubatch-size", # max tokens in a physical computation batch
str(N_SLOTS * MAX_INPUT_TOKENS),
]
self.proc = subprocess.Popen(cmd, start_new_session=True)
wait_ready(self.proc)
@modal.exit()
def stop(self):
self.proc.terminate()
try:
self.proc.wait(timeout=10)
except subprocess.TimeoutExpired:
self.proc.kill()
self.proc.wait()
```
Modal considers a new replica ready once the `@modal.enter` methods have exited
and the serving process inside starts accepting connections.
`llama-server` answers `/health` with a [503 Service Unavailable status](https://developer.mozilla.org/en-US/docs/Web/HTTP/Reference/Status/503)
while the model loads, so we block the startup hook from completing with this `wait_ready` function.
```python
def wait_ready(proc: subprocess.Popen, port=PORT):
import socket
while True:
try:
if (
returncode := proc.poll()
) is not None: # fail fast if the server process died
raise RuntimeError(f"Server process exited with code {returncode}")
socket.create_connection(("127.0.0.1", port), timeout=5).close()
request = urllib.request.Request(f"http://127.0.0.1:{port}/health")
request_with_retry(request, timeout=30).close()
return
except (ConnectionRefusedError, TimeoutError):
continue
```
Modal Servers also respond with a 503 when no replicas are available to handle requests, so we pull out
a helper function that retries on 503 for use with server clients.
```python
def request_with_retry(request: urllib.request.Request, timeout=10 * MINUTES):
deadline = time.monotonic() + timeout
delay = 1.0
while (remaining := deadline - time.monotonic()) > 0:
try:
return urllib.request.urlopen(request, timeout=remaining)
except urllib.error.HTTPError as exc:
if exc.code != 503: # 503 Service Unavailable, no containers ready
raise exc
time.sleep(min(delay, remaining))
delay = min(delay * 2, 10.0)
raise TimeoutError(f"Server not ready within {timeout} seconds")
```
## Test the server
Running `modal run liquidai_embeddings_server.py` executes the `local_entrypoint` below
against a temporary instance of the Server, which is useful for testing and development.
The client requests one embedding after waiting for a live replica.
```python
@app.local_entrypoint()
def main(input: str | None = None, test_timeout: int = 5 * MINUTES):
url = LlamaServer.get_url()
print(f"Server URL: {url}")
request = urllib.request.Request(f"{url}/health")
request_with_retry(request=request, timeout=test_timeout).close()
if input is None:
input = "ColBERT introduces a late interaction architecture that independently encodes the query and the document using BERT"
request_data = {"input": [DOCUMENT_PREFIX + input]}
request = urllib.request.Request(
f"{url}/embeddings",
data=json.dumps(request_data).encode(),
headers={"Content-Type": "application/json"},
)
started_at = time.perf_counter()
with request_with_retry(request, timeout=test_timeout) as response:
elapsed = time.perf_counter() - started_at
data = json.load(response)
assert len(data), "empty response from server"
embedding = data[0].get("embedding")
assert embedding, f"server failed to respond with embedding, got {data}"
print(
f"client-side inference latency: {elapsed:.3f}s",
f"embedding shape: ({len(embedding)}, {len(embedding[0])})",
sep="\n",
)
```
## Deploy the Server
Deploy the Server with
```bash
modal deploy liquidai_embeddings_server.py
```
The deploy command prints the Server's public URL.
### Long-Training
# Run long, resumable training jobs on Modal
Individual Modal Function calls have a [maximum timeout of 24 hours](https://modal.com/docs/guide/timeouts).
You can still run long training jobs on Modal by making them interruptible and resumable
(aka [_reentrant_](https://en.wikipedia.org/wiki/Reentrancy_%28computing%29)).
This is usually done via checkpointing: saving the model state to disk at regular intervals.
We recommend implementing checkpointing logic regardless of the duration of your training jobs.
This prevents loss of progress in case of interruptions or [preemptions](https://modal.com/docs/guide/preemption).
In this example, we'll walk through how to implement this pattern in
[PyTorch Lightning](https://lightning.ai/docs/pytorch/2.4.0/).
But the fundamental pattern is simple and can be applied to any training framework:
1. Periodically save checkpoints to a Modal [Volume](https://modal.com/docs/guide/volumes)
2. When your training function starts, check the Volume for the latest checkpoint
3. Add [retries](https://modal.com/docs/guide/retries) to your training function
## Resuming from checkpoints in a training loop
The `train` function below shows some very simple training logic
using the built-in checkpointing features of PyTorch Lightning.
Lightning uses a special filename, `last.ckpt`,
to indicate which checkpoint is the most recent.
We check for this file and resume training from it if it exists.
```python
from pathlib import Path
from typing import Optional
import modal
def train(experiment):
experiment_dir = CHECKPOINTS_PATH / experiment
last_checkpoint = experiment_dir / "last.ckpt"
if last_checkpoint.exists():
print(f"⚡️ resuming training from the latest checkpoint: {last_checkpoint}")
train_model(
DATA_PATH,
experiment_dir,
resume_from_checkpoint=last_checkpoint,
)
print("⚡️ training finished successfully")
else:
print("⚡️ starting training from scratch")
train_model(DATA_PATH, experiment_dir)
```
This implementation works fine in a local environment.
Running it serverlessly and durably on Modal -- with access to auto-scaling cloud GPU infrastructure
-- does not require any adjustments to the code.
We just need to ensure that data and checkpoints are saved in Modal _Volumes_.
## Modal Volumes are distributed file systems
Modal [Volumes](https://modal.com/docs/guide/volumes) are distributed file systems --
you can read and write files from them just like local disks,
but they are accessible to all of your Modal Functions.
Their performance is tuned for [Write-Once, Read-Many](https://en.wikipedia.org/wiki/Write_once_read_many) workloads
with small numbers of large files.
You can attach them to any Modal Function that needs access.
But first, you need to create them:
```python
volume = modal.Volume.from_name("example-long-training", create_if_missing=True)
```
## Porting training to Modal
To attach a Modal Volume to our training function, we need to port it over to run on Modal.
That means we need to define our training function's dependencies
(as a [container image](https://modal.com/docs/guide/custom-container))
and attach it to an application (a [`modal.App`](https://modal.com/docs/guide/apps)).
Modal Functions that run on GPUs [already have CUDA drivers installed](https://modal.com/docs/guide/cuda),
so dependency specification is straightforward.
We just `uv_pip_install` PyTorch and PyTorch Lightning.
```python
image = modal.Image.debian_slim(python_version="3.12").uv_pip_install(
"lightning~=2.4.0", "torch~=2.4.0", "torchvision==0.19.0"
)
app = modal.App("example-long-training", image=image)
```
Next, we attach our training function to this app with `app.function`.
We define all of the serverless infrastructure-specific details of our training at this point.
For resumable training, there are three key pieces: attaching volumes, adding retries, and setting the timeout.
We want to attach the Volume to our Function so that the data and checkpoints are saved into it.
In this sample code, we set these paths via global variables, but in another setting,
these might be set via environment variables or other configuration mechanisms.
```python
volume_path = Path("/experiments")
DATA_PATH = volume_path / "data"
CHECKPOINTS_PATH = volume_path / "checkpoints"
volumes = {volume_path: volume}
```
Then, we define how we want to restart our training in case of interruption.
We can use `modal.Retries` to add automatic retries to our Function.
We set the delay time to `0.0` seconds, because on pre-emption or timeout we want to restart immediately.
We set `max_retries` to the current maximum, which is `10`.
```python
retries = modal.Retries(initial_delay=0.0, max_retries=10)
```
Timeouts on Modal are set in seconds, with a minimum of 10 seconds and a maximum of 24 hours.
When running training jobs that last up to week, we'd set that timeout to 24 hours,
which would give our training job a maximum of 10 days to complete before we'd need to manually restart.
For this example, we'll set it to 30 seconds. When running the example, you should observe a few interruptions.
```python
timeout = 30 # seconds
```
Now, we put all of this together by wrapping `train` and decorating it
with `app.function` to add all the infrastructure. We add the `single_use_containers` flag to ensure that our retries
will always kickoff in a fresh container.
```python
@app.function(
volumes=volumes,
gpu="a10g",
timeout=timeout,
retries=retries,
single_use_containers=True,
)
def train_interruptible(*args, **kwargs):
train(*args, **kwargs)
```
## Kicking off interruptible training
We define a [`local_entrypoint`](https://modal.com/docs/guide/apps#entrypoints-for-ephemeral-apps)
to kick off the training job from the local Python environment.
```python
@app.local_entrypoint()
def main(experiment: Optional[str] = None):
if experiment is None:
from uuid import uuid4
experiment = uuid4().hex[:8]
print(f"⚡️ starting interruptible training experiment {experiment}")
train_interruptible.spawn(experiment).get()
```
It's important to use `.spawn(...).get()` because `.remote` created Function Calls
expire after 24 hours.
You can run this with
```bash
modal run --detach 06_gpu_and_ml/long-training.py
```
You should see the training job start and then be interrupted,
producing a large stack trace in the terminal in red font.
The job will restart within a few seconds.
The `--detach` flag ensures training will continue even if you close your terminal or turn off your computer.
Try detaching and then watch the logs in the [Modal dashboard](https://modal.com/apps).
## Details of PyTorch Lightning implementation
This basic pattern works for any training framework or for custom training jobs --
or for any reentrant work that can save state to disk.
But to make the example complete, we include all the details of the PyTorch Lightning implementation below.
PyTorch Lightning offers [built-in checkpointing](https://pytorch-lightning.readthedocs.io/en/1.2.10/common/weights_loading.html).
You can specify the checkpoint file path that you want to resume from using the `ckpt_path` parameter of
[`trainer.fit`](https://lightning.ai/docs/pytorch/stable/api/lightning.pytorch.trainer.trainer.Trainer.html)
Additionally, you can specify the checkpointing interval with the `every_n_epochs` parameter of
[`ModelCheckpoint`](https://lightning.ai/docs/pytorch/stable/api/lightning.pytorch.callbacks.ModelCheckpoint.html).
```python
def get_checkpoint(checkpoint_dir):
from lightning.pytorch.callbacks import ModelCheckpoint
return ModelCheckpoint(
dirpath=checkpoint_dir,
save_last=True,
every_n_epochs=10,
filename="{epoch:02d}",
)
def train_model(data_dir, checkpoint_dir, resume_from_checkpoint=None):
import lightning as L
autoencoder = get_autoencoder()
train_loader = get_train_loader(data_dir=data_dir)
checkpoint_callback = get_checkpoint(checkpoint_dir)
trainer = L.Trainer(
limit_train_batches=100, max_epochs=100, callbacks=[checkpoint_callback]
)
if resume_from_checkpoint is not None:
trainer.fit(
model=autoencoder,
train_dataloaders=train_loader,
ckpt_path=resume_from_checkpoint,
)
else:
trainer.fit(autoencoder, train_loader)
def get_autoencoder(checkpoint_path=None):
import lightning as L
from torch import nn, optim
class LitAutoEncoder(L.LightningModule):
def __init__(self):
super().__init__()
self.encoder = nn.Sequential(
nn.Linear(28 * 28, 64), nn.ReLU(), nn.Linear(64, 3)
)
self.decoder = nn.Sequential(
nn.Linear(3, 64), nn.ReLU(), nn.Linear(64, 28 * 28)
)
def training_step(self, batch, batch_idx):
x, _ = batch
x = x.view(x.size(0), -1)
z = self.encoder(x)
x_hat = self.decoder(z)
loss = nn.functional.mse_loss(x_hat, x)
self.log("train_loss", loss)
return loss
def configure_optimizers(self):
optimizer = optim.Adam(self.parameters(), lr=1e-3)
return optimizer
return LitAutoEncoder()
def get_train_loader(data_dir):
from torch import utils
from torchvision.datasets import MNIST
from torchvision.transforms import ToTensor
print("⚡ setting up data")
dataset = MNIST(data_dir, download=True, transform=ToTensor())
train_loader = utils.data.DataLoader(dataset, num_workers=4)
return train_loader
```
### Ltx
# Generate videos from prompts with Lightricks LTX-Video
This example demonstrates how to run the [LTX-Video](https://github.com/Lightricks/LTX-Video)
video generation model by [Lightricks](https://www.lightricks.com/) on Modal.
LTX-Video is fast! Generating a twenty second 480p video at moderate quality
takes as little as two seconds on a warm container.
Here's one that we generated:
## Setup
We start by importing dependencies we need locally,
defining a Modal [App](https://modal.com/docs/guide/apps),
and defining the container [Image](https://modal.com/docs/guide/images)
that our video model will run in.
```python
import string
import time
from pathlib import Path
from typing import Optional
import modal
app = modal.App("example-ltx")
image = (
modal.Image.debian_slim(python_version="3.12")
.uv_pip_install(
"accelerate==1.6.0",
"diffusers==0.33.1",
"huggingface-hub==0.36.0",
"imageio==2.37.0",
"imageio-ffmpeg==0.5.1",
"sentencepiece==0.2.0",
"torch==2.7.0",
"transformers==4.51.3",
)
.env({"HF_XET_HIGH_PERFORMANCE": "1"})
)
```
## Storing data on Modal Volumes
On Modal, we save large or expensive-to-compute data to
[distributed Volumes](https://modal.com/docs/guide/volumes)
that are accessible both locally and remotely.
We'll store the LTX-Video model's weights and the outputs we generate
on Modal Volumes.
We store the outputs on a Modal Volume so that clients
don't need to sit around waiting for the video to be generated.
```python
VOLUME_NAME = "ltx-outputs"
outputs = modal.Volume.from_name(VOLUME_NAME, create_if_missing=True)
OUTPUTS_PATH = Path("/outputs")
```
We store the weights on a Modal Volume so that we don't
have to fetch them from the Hugging Face Hub every time
a container boots. This download takes about two minutes,
depending on traffic and network speed.
```python
MODEL_VOLUME_NAME = "ltx-model"
model = modal.Volume.from_name(MODEL_VOLUME_NAME, create_if_missing=True)
```
We don't have to change any of the Hugging Face code to do this --
we just set the location of Hugging Face's cache to be on a Volume
using the `HF_HOME` environment variable.
```python
MODEL_PATH = Path("/models")
image = image.env({"HF_HOME": str(MODEL_PATH)})
```
For more on storing model weights on Modal, see
[this guide](https://modal.com/docs/guide/model-weights).
## Setting up our LTX class
We use the `@cls` decorator to specify the infrastructure our inference function needs,
as defined above.
That decorator also gives us control over the
[lifecycle](https://modal.com/docs/guide/lifecycle-functions)
of our cloud container.
Specifically, we use the `enter` method to load the model into GPU memory
(from the Volume if it's present or the Hub if it's not)
before the container is marked ready for inputs.
This helps reduce tail latencies caused by cold starts.
For details and more tips, see [this guide](https://modal.com/docs/guide/cold-start#cold-start-performance).
The actual inference code is in a `modal.method` of the class.
```python
MINUTES = 60 # seconds
@app.cls(
image=image, # use our container Image
volumes={OUTPUTS_PATH: outputs, MODEL_PATH: model}, # attach our Volumes
gpu="H100", # use a big, fast GPU
timeout=10 * MINUTES, # run inference for up to 10 minutes
scaledown_window=15 * MINUTES, # stay idle for 15 minutes before scaling down
)
class LTX:
@modal.enter()
def load_model(self):
import torch
from diffusers import DiffusionPipeline
self.pipe = DiffusionPipeline.from_pretrained(
"Lightricks/LTX-Video", torch_dtype=torch.bfloat16
)
self.pipe.to("cuda")
@modal.method()
def generate(
self,
prompt,
negative_prompt="",
num_inference_steps=200,
guidance_scale=4.5,
num_frames=19,
width=704,
height=480,
):
from diffusers.utils import export_to_video
frames = self.pipe(
prompt=prompt,
negative_prompt=negative_prompt,
num_inference_steps=num_inference_steps,
guidance_scale=guidance_scale,
num_frames=num_frames,
width=width,
height=height,
).frames[0]
# save to disk using prompt as filename
mp4_name = slugify(prompt)
export_to_video(frames, Path(OUTPUTS_PATH) / mp4_name)
outputs.commit()
return mp4_name
```
## Generate videos from the command line
We trigger LTX-Video inference from our local machine by running the code in
the local entrypoint below with `modal run`.
It will spin up a new replica to generate a video.
Then it will, by default, generate a second video to demonstrate
the lower latency when hitting a warm container.
You can trigger inference with:
```bash
modal run ltx
```
All outputs are saved both locally and on a Modal Volume.
You can explore the contents of Modal Volumes from your Modal Dashboard
or from the command line with the `modal volume` command.
```bash
modal volume ls ltx-outputs
```
See `modal volume --help` for details.
Optional command line flags for the script can be viewed with:
```bash
modal run ltx --help
```
Using these flags, you can tweak your generation from the command line:
```bash
modal run --detach ltx --prompt="a cat playing drums in a jazz ensemble" --num-inference-steps=64
```
```python
@app.local_entrypoint()
def main(
prompt: Optional[str] = None,
negative_prompt="worst quality, blurry, jittery, distorted",
num_inference_steps: int = 10, # 10 when testing, 100 or more when generating
guidance_scale: float = 2.5,
num_frames: int = 150, # produces ~10s of video
width: int = 704,
height: int = 480,
twice: bool = True, # run twice to show cold start latency
):
if prompt is None:
prompt = DEFAULT_PROMPT
ltx = LTX()
def run():
print(f"🎥 Generating a video from the prompt '{prompt}'")
start = time.time()
mp4_name = ltx.generate.remote(
prompt=prompt,
negative_prompt=negative_prompt,
num_inference_steps=num_inference_steps,
guidance_scale=guidance_scale,
num_frames=num_frames,
width=width,
height=height,
)
duration = time.time() - start
print(f"🎥 Client received video in {int(duration)}s")
print(f"🎥 LTX video saved to Modal Volume at {mp4_name}")
local_dir = Path("/tmp/ltx")
local_dir.mkdir(exist_ok=True, parents=True)
local_path = local_dir / mp4_name
local_path.write_bytes(b"".join(outputs.read_file(mp4_name)))
print(f"🎥 LTX video saved locally at {local_path}")
run()
if twice:
print("🎥 Generating a video from a warm container")
run()
```
## Addenda
The remainder of the code in this file is utility code.
```python
DEFAULT_PROMPT = (
"The camera pans over a snow-covered mountain range,"
" revealing a vast expanse of snow-capped peaks and valleys."
" The mountains are covered in a thick layer of snow,"
" with some areas appearing almost white while others have a slightly darker, almost grayish hue."
" The peaks are jagged and irregular, with some rising sharply into the sky"
" while others are more rounded."
" The valleys are deep and narrow, with steep slopes that are also covered in snow."
" The trees in the foreground are mostly bare, with only a few leaves remaining on their branches."
)
def slugify(prompt):
for char in string.punctuation:
prompt = prompt.replace(char, "")
prompt = prompt.replace(" ", "_")
prompt = prompt[:230] # some OSes limit filenames to <256 chars
mp4_name = str(int(time.time())) + "_" + prompt + ".mp4"
return mp4_name
```
### Ltx2 Two Stage
# High-quality text-to-video with LTX-2
[LTX-2](https://github.com/Lightricks/LTX-2) is a 19B-parameter diffusion model
that generates video with synchronized audio from a text prompt.
This example runs LTX-2's two-stage production-grade pipeline on Modal: stage 1
generates video at half resolution, then stage 2 upscales by 2x and refines with
a distilled LoRA. Output is a 1024x1536 MP4 with audio.
## Setup
The text encoder uses Gemma 3 weights that require accepting a license.
Visit https://huggingface.co/google/gemma-3-12b-it-qat-q4_0-unquantized,
click "Agree and access repository", then create a token at
https://huggingface.co/settings/tokens and add it as a
[Modal Secret](https://modal.com/secrets) named `huggingface-secret`
with key `HF_TOKEN`.
Generate a video with:
```bash
modal run ltx2_two_stage.py --prompt "A cathedral made of ice, northern lights overhead"
```
Retrieve the output from the Modal Volume:
```bash
modal volume ls ltx2-outputs
modal volume get ltx2-outputs
```
## Environment setup
```python
import time
from pathlib import Path
import modal
```
We pin an LTX-2 commit and install its three subpackages.
Torch is installed, along with a Flash-Attention 3 (as a wheel)
for faster inference on GPUs with the Hopper
[SM architecture](https://modal.com/gpu-glossary/device-hardware/streaming-multiprocessor-architecture).
```python
ltx2_commit = "28c3c73"
image = (
modal.Image.from_registry("nvidia/cuda:12.6.1-devel-ubuntu24.04", add_python="3.12")
.apt_install("git", "ffmpeg")
.uv_pip_install(
"torch==2.7.0",
"torchaudio==2.7.0",
"transformers>=4.52,<5",
f"git+https://github.com/Lightricks/LTX-2.git@{ltx2_commit}#subdirectory=packages/ltx-core",
f"git+https://github.com/Lightricks/LTX-2.git@{ltx2_commit}#subdirectory=packages/ltx-pipelines",
f"git+https://github.com/Lightricks/LTX-2.git@{ltx2_commit}#subdirectory=packages/ltx-trainer",
"https://huggingface.co/alexnasa/flash-attn-3/resolve/main/128/flash_attn_3-3.0.0b1-cp39-abi3-linux_x86_64.whl",
extra_index_url="https://download.pytorch.org/whl/cu128",
extra_options="--index-strategy unsafe-best-match",
)
.env(
{
"HF_XET_HIGH_PERFORMANCE": "1",
"PYTORCH_ALLOC_CONF": "expandable_segments:True",
}
)
.entrypoint([])
)
```
## Volumes
Model weights are cached to a Volume at HuggingFace's default cache path.
Generated videos are saved to a separate output Volume.
```python
model_volume = modal.Volume.from_name("ltx2-models", create_if_missing=True)
output_volume = modal.Volume.from_name("ltx2-outputs", create_if_missing=True)
OUTPUT_DIR = Path("/output-videos")
with image.imports():
import torch
from huggingface_hub import hf_hub_download, snapshot_download
from ltx_core.loader import LTXV_LORA_COMFY_RENAMING_MAP, LoraPathStrengthAndSDOps
from ltx_core.model.video_vae import TilingConfig, get_video_chunks_number
from ltx_pipelines.ti2vid_two_stages import TI2VidTwoStagesPipeline
from ltx_pipelines.utils.constants import (
DEFAULT_AUDIO_GUIDER_PARAMS,
DEFAULT_NEGATIVE_PROMPT,
DEFAULT_VIDEO_GUIDER_PARAMS,
)
from ltx_pipelines.utils.media_io import encode_video
app = modal.App(
"example-ltx2-two-stage",
image=image,
volumes={
"/root/.cache/huggingface": model_volume,
OUTPUT_DIR: output_volume,
},
secrets=[modal.Secret.from_name("huggingface-secret")],
)
```
## Inference
```python
NUM_FRAMES = 121 # ~5s at 24 fps
FRAME_RATE = 24
WIDTH = 1536
HEIGHT = 1024
@app.cls(gpu="H200", timeout=30 * 60, scaledown_window=15 * 60)
class LTX2TwoStage:
@modal.enter()
def setup(self):
"""Download model weights and initialize the two-stage pipeline."""
torch.set_float32_matmul_precision("high")
repo = "Lightricks/LTX-2"
checkpoint_path = hf_hub_download(repo, "ltx-2-19b-dev.safetensors")
upsampler_path = hf_hub_download(
repo, "ltx-2-spatial-upscaler-x2-1.0.safetensors"
)
distilled_lora_path = hf_hub_download(
repo, "ltx-2-19b-distilled-lora-384.safetensors"
)
gemma_dir = snapshot_download("google/gemma-3-12b-it-qat-q4_0-unquantized")
model_volume.commit()
distilled_lora = [
LoraPathStrengthAndSDOps(
distilled_lora_path, 1.0, LTXV_LORA_COMFY_RENAMING_MAP
)
]
self.tiling_config = TilingConfig.default()
self.pipeline = TI2VidTwoStagesPipeline(
checkpoint_path=checkpoint_path,
distilled_lora=distilled_lora,
spatial_upsampler_path=upsampler_path,
gemma_root=gemma_dir,
loras=[],
)
@modal.method()
def generate(self, prompt: str) -> None:
"""Generate a video from a text prompt and save it to the output Volume."""
print(f"Generating {NUM_FRAMES} frames ({NUM_FRAMES / FRAME_RATE:.0f}s) ...")
print(f"Prompt: {prompt}")
start = time.time()
with torch.no_grad():
video, audio = self.pipeline(
prompt=prompt,
negative_prompt=DEFAULT_NEGATIVE_PROMPT,
seed=42,
height=HEIGHT,
width=WIDTH,
num_frames=NUM_FRAMES,
frame_rate=FRAME_RATE,
num_inference_steps=40,
video_guider_params=DEFAULT_VIDEO_GUIDER_PARAMS,
audio_guider_params=DEFAULT_AUDIO_GUIDER_PARAMS,
images=[],
tiling_config=self.tiling_config,
enhance_prompt=True,
)
print(f"Generated in {time.time() - start:.0f}s")
safe = "".join(c if c.isalnum() or c == " " else "-" for c in prompt)
filename = f"{int(time.time())}_{safe[:80].strip().replace(' ', '_')}.mp4"
output_path = OUTPUT_DIR / filename
encode_video(
video=video,
fps=FRAME_RATE,
audio=audio,
audio_sample_rate=24_000,
output_path=str(output_path),
video_chunks_number=get_video_chunks_number(
NUM_FRAMES, self.tiling_config
),
)
output_volume.commit()
print(f"Saved to Volume `ltx2-outputs` at {filename}")
@app.local_entrypoint()
def main(
prompt: str = "A cathedral made of ice, northern lights dancing overhead, camera slowly pushing forward through the nave",
):
LTX2TwoStage().generate.remote(prompt=prompt)
```
### Mcp Server Stateless
# Deploy a remote, stateless MCP server on Modal with FastMCP
This example demonstrates how to deploy a simple
[MCP server](https://modelcontextprotocol.io/)
on Modal.
The server provides a tool to get the current date and time in a given timezone.
It is a stateless MCP server, meaning that it does not store any state between requests,
which is important for mapping onto Modal's serverless Functions.
It uses the "streamable HTTP" transport type.
## Building the MCP server
First, we define our dependencies.
We use the [FastMCP library](https://github.com/jlowin/fastmcp) to create the MCP
server. We wrap with a FastAPI server to expose it to the Internet.
```python
import modal
app = modal.App("example-mcp-server-stateless")
image = modal.Image.debian_slim(python_version="3.12").uv_pip_install(
"fastapi==0.115.14",
"fastmcp==2.10.6",
"pydantic==2.11.10",
)
```
Next, we create the MCP server itself using FastMCP and add a tool to it that
allows LLMs to get the current date and time in a given timezone.
```python
def make_mcp_server():
from fastmcp import FastMCP
mcp = FastMCP("Date and Time MCP Server")
@mcp.tool()
async def current_date_and_time(timezone: str = "UTC") -> str:
"""Get the current date and time.
Args:
timezone: The timezone to get the date and time in (optional). Defaults to UTC.
Returns:
The current date and time in the given timezone, in ISO 8601 format.
"""
from datetime import datetime
from zoneinfo import ZoneInfo
try:
tz = ZoneInfo(timezone)
except Exception:
raise ValueError(
f"Invalid timezone '{timezone}'. Please use a valid timezone like 'UTC', "
"'America/New_York', or 'Europe/Stockholm'."
)
return datetime.now(tz).isoformat()
return mcp
```
We then use FastMCP to create a Starlette app with `streamable-http` as transport
type, and set `stateless_http=True` to make it stateless.
This will be mounted by the FastAPI app, which we deploy as a
[Modal Web Function](https://modal.com/docs/guide/webhooks)
using [the `asgi_app` decorator](https://modal.com/docs/reference/modal.asgi_app):
```python
@app.function(image=image)
@modal.asgi_app()
def web():
"""Web gateway for the MCP server"""
from fastapi import FastAPI
mcp = make_mcp_server()
mcp_app = mcp.http_app(transport="streamable-http", stateless_http=True)
fastapi_app = FastAPI(lifespan=mcp_app.router.lifespan_context)
fastapi_app.mount("/", mcp_app, "mcp")
return fastapi_app
```
And we're done!
## Testing the MCP server
Now you can [serve](https://modal.com/docs/reference/cli/serve#modal-serve) the MCP
server by running:
```bash
modal serve mcp_server_stateless.py
```
Then open the [MCP inspector](https://github.com/modelcontextprotocol/inspector):
```bash
npx @modelcontextprotocol/inspector
```
Enter the URL of the MCP server that was printed by the `modal serve` command above,
suffixed with `/mcp/` (so for example
`https://modal-labs-examples--datetime-mcp-server-web-dev.modal.run/mcp/`). Also
make sure to select "Streamable HTTP" as the "Transport Type".
After connecting and clicking "List Tools" in the "Tools" tab you should see your
`current_date_and_time` tool listed, and if you "Run Tool" it should give you the
current date and time in UTC!
To automatically test the MCP server, we spin up a client and have it list the tools.
```python
@app.function(image=image)
async def test_tool(tool_name: str | None = None):
from fastmcp import Client
from fastmcp.client.transports import StreamableHttpTransport
if tool_name is None:
tool_name = "current_date_and_time"
transport = StreamableHttpTransport(url=f"{web.get_web_url()}/mcp/")
client = Client(transport)
async with client:
tools = await client.list_tools()
for tool in tools:
print(tool)
if tool.name == tool_name:
result = await client.call_tool(tool_name)
print(result.data)
return
raise Exception(f"could not find tool {tool_name}")
```
This test is executed by running the script with `modal run`:
```bash
modal run mcp_server_stateless::test_tool
```
## Deploying the MCP server
`modal serve` creates an ephemeral, hot-reloading server,
which is useful for testing and development.
When it's time to move to production,
you can deploy the server with
```bash
modal deploy mcp_server_stateless
```
### Ministral3 Inference
# Serverless Ministral 3 with vLLM and Modal
In this example, we show how to serve Mistral's Ministral 3 vision-language models on Modal.
The [Ministral 3](https://huggingface.co/collections/mistralai/ministral-3-more) model series
performs competitively with the Qwen 3-VL model series on benchmarks
(see model cards for details).
We also include instructions for cutting cold start times
for long-running deployments by an order of magnitude using Modal's
[CPU + GPU memory snapshots](https://modal.com/docs/guide/memory-snapshot).
## Set up the container image
Our first order of business is to define the environment our server will run in:
the [container `Image`](https://modal.com/docs/guide/custom-container).
We'll use the [vLLM inference server](https://docs.vllm.ai).
vLLM can be installed with `uv pip`, since Modal [provides the CUDA drivers](https://modal.com/docs/guide/cuda).
```python
import json
import socket
import subprocess
from typing import Any
import aiohttp
import modal
MINUTES = 60 # seconds
VLLM_PORT = 8000
app = modal.App("example-ministral3-inference")
vllm_image = (
modal.Image.from_registry("nvidia/cuda:12.9.0-devel-ubuntu22.04", add_python="3.12")
.entrypoint([])
.uv_pip_install(
"vllm==0.13.0",
"huggingface-hub==0.36.0",
"flashinfer-python==0.5.3",
)
)
```
## Download the Ministral weights
We also need to download the model weights.
We'll retrieve them from the Hugging Face Hub.
To speed up the model load, we'll toggle the `HIGH_PERFORMANCE`
flag for Hugging Face's [Xet backend](https://huggingface.co/docs/hub/en/xet/index).
```python
vllm_image = vllm_image.env({"HF_XET_HIGH_PERFORMANCE": "1"})
```
The [Ministral 3 model series](https://huggingface.co/collections/mistralai/ministral-3-more)
contains a variety of models:
- 3B, 8B, and 14B sizes
- base models and instruction & reasoning fine-tuned models
- BF16 and FP8 quantizations
All are available under the Apache 2.0 open source license.
We'll use the FP8 instruct variant of the 8B model:
```python
MODEL_NAME = "mistralai/Ministral-3-8B-Instruct-2512"
```
Native hardware support for FP8 formats in [Tensor Cores](https://modal.com/gpu-glossary/device-hardware/tensor-core)
is limited to the latest [Streaming Multiprocessor architectures](https://modal.com/gpu-glossary/device-hardware/streaming-multiprocessor-architecture),
like those of Modal's [Hopper H100/H200 and Blackwell B200 GPUs](https://modal.com/blog/introducing-b200-h200).
At 80 GB VRAM, a single H100 GPU has enough space to store the 8B FP8 model weights (~8 GB)
and a very large KV cache. A single H100 is also enough to serve the 14B model in full precision,
but without as much room for KV (though still enough to handle the full sequence length).
```python
N_GPU = 1
```
### Cache with Modal Volumes
Modal Functions are serverless: when they aren't being used,
their underlying containers spin down and all ephemeral resources,
like GPUs, memory, network connections, and local disks are released.
We can preserve saved files by mounting a
[Modal Volume](https://modal.com/docs/guide/volumes) --
a persistent, remote filesystem.
We'll use two Volumes: one for weights from Hugging Face
and one for compilation artifacts from vLLM.
```python
hf_cache_vol = modal.Volume.from_name("huggingface-cache", create_if_missing=True)
vllm_cache_vol = modal.Volume.from_name("vllm-cache", create_if_missing=True)
```
## Serve Ministral 3 with vLLM
We serve Ministral 3 on Modal by spinning up a Modal Function
that acts as a [`web_server`](https://modal.com/docs/guide/webhooks)
and spins up a vLLM server in a subprocess
(via the `vllm serve` command).
### Improve cold start time with snapshots
Starting up a vLLM server can be slow --
tens of seconds to minutes. Much of that time
is spent on JIT compilation of inference code.
We can skip most of that work and reduce startup times by a factor of 10
using Modal's [memory snapshots](https://modal.com/docs/guide/memory-snapshot),
which serialize the contents of CPU and GPU memory.
This adds quite some complexity to the code.
If you're looking for a minimal example, see
our [`vllm_inference` example here](https://modal.com/docs/examples/vllm_inference).
We'll need to set a few extra configuration values:
```python
vllm_image = vllm_image.env(
{
"VLLM_SERVER_DEV_MODE": "1", # allow use of "Sleep Mode"
"TORCHINDUCTOR_COMPILE_THREADS": "1", # improve compatibility with snapshots
}
)
```
Setting the `DEV_MODE` flag allows us to use the `sleep`/`wake_up` endpoints
to toggle the server in and out of "sleep mode".
```python
with vllm_image.imports():
import requests
def sleep(level=1):
requests.post(
f"http://localhost:{VLLM_PORT}/sleep?level={level}"
).raise_for_status()
def wake_up():
requests.post(f"http://localhost:{VLLM_PORT}/wake_up").raise_for_status()
```
Sleep Mode helps with memory snapshotting.
When the server is asleep, model weights are offloaded to CPU memory and the KV cache is emptied.
For details, see the [vLLM docs](https://docs.vllm.ai/en/stable/features/sleep_mode/).
We'll also need two helper functions.
Ther first, `wait_ready`, busy-polls the server until it is live.
```python
def wait_ready(proc: subprocess.Popen):
while True:
try:
socket.create_connection(("localhost", VLLM_PORT), timeout=1).close()
return
except OSError:
if proc.poll() is not None:
raise RuntimeError(f"vLLM exited with {proc.returncode}")
```
Once the server is live, we `warmup` inference with a few requests.
This is important for capturing non-serializable JIT compilation artifacts,
like CUDA graphs and some Torch compilation outputs,
in our snapshot.
```python
def warmup():
payload = {
"model": "llm",
"messages": [{"role": "user", "content": "Who are you?"}],
"max_tokens": 16,
}
for ii in range(3):
requests.post(
f"http://localhost:{VLLM_PORT}/v1/chat/completions",
json=payload,
timeout=300,
).raise_for_status()
```
### Define the server
We construct our web-serving Modal Function
by decorating a regular Python class.
The decorators include a number of configuration
options for deployment, including resources like GPUs and Volumes
and timeouts on container scaledown.
You can read more about the options
[here](https://modal.com/docs/reference/modal.App#function).
We control memory snapshotting and container start behavior
by decorating the methods of the class.
We start the server, warm it up, and then put it to sleep
in the `start` method. This method has the `modal.enter`
decorator to ensure it runs when a new container starts
and we pass `snap=True` to turn on memory snapshotting.
The following method, `wake_up`, calls the `wake_up`
endpoint and then waits for the server to be ready.
It is run after the `start` method because it is defined later
in the code and also has the `modal.enter` decorator.
It has `snap=False` so that it isn't included in the snapshot.
Finally, we connect the vLLM server to the Internet
using the [`modal.web_server`](https://modal.com/docs/guide/webhooks#non-asgi-web-servers) decorator.
```python
@app.cls(
image=vllm_image,
gpu=f"H100:{N_GPU}",
scaledown_window=15 * MINUTES, # how long should we stay up with no requests?
timeout=10 * MINUTES, # how long should we wait for container start?
volumes={
"/root/.cache/huggingface": hf_cache_vol,
"/root/.cache/vllm": vllm_cache_vol,
},
enable_memory_snapshot=True,
experimental_options={"enable_gpu_snapshot": True},
)
@modal.concurrent( # how many requests can one replica handle? tune carefully!
max_inputs=32
)
class VllmServer:
@modal.enter(snap=True)
def start(self):
cmd = [
"vllm",
"serve",
"--uvicorn-log-level=info",
MODEL_NAME,
"--served-model-name",
MODEL_NAME,
"llm",
"--host",
"0.0.0.0",
"--port",
str(VLLM_PORT),
"--gpu_memory_utilization",
str(0.95),
]
# assume multiple GPUs are for splitting up large matrix multiplications
cmd += ["--tensor-parallel-size", str(N_GPU)]
# add mistral config arguments
cmd += [
"--tokenizer_mode",
"mistral",
"--config_format",
"mistral",
"--load_format",
"mistral",
"--tool-call-parser",
"mistral",
"--enable-auto-tool-choice",
]
# add config arguments for snapshotting
cmd += [
"--enable-sleep-mode",
# make KV cache predictable / small
"--max-num-seqs",
"2",
"--max-model-len",
"12288",
"--max-num-batched-tokens",
"12288",
]
print(*cmd)
self.vllm_proc = subprocess.Popen(cmd)
wait_ready(self.vllm_proc)
warmup()
sleep()
@modal.enter(snap=False)
def wake_up(self):
wake_up()
wait_ready(self.vllm_proc)
@modal.web_server(port=VLLM_PORT, startup_timeout=10 * MINUTES)
def serve(self):
pass
@modal.exit()
def stop(self):
self.vllm_proc.terminate()
```
## Deploy the server
To deploy the API on Modal, just run
```bash
modal deploy ministral3_inference.py
```
This will create a new app on Modal, build the container image for it if it hasn't been built yet,
and deploy the app.
## Interact with the server
Once it is deployed, you'll see a URL appear in the command line,
something like `https://your-workspace-name--example-ministral3-inference-serve.modal.run`.
You can find [interactive Swagger UI docs](https://swagger.io/tools/swagger-ui/)
at the `/docs` route of that URL, i.e. `https://your-workspace-name--example-ministral-inference-serve.modal.run/docs`.
These docs describe each route and indicate the expected input and output
and translate requests into `curl` commands.
For simple routes like `/health`, which checks whether the server is responding,
you can even send a request directly from the docs.
To interact with the API programmatically in Python, we recommend the `openai` library.
## Test the server
To make it easier to test the server setup, we also include a `local_entrypoint`
that does a healthcheck and then hits the server.
If you execute the command
```bash
modal run ministral3_inference.py
```
a fresh replica of the server will be spun up on Modal while
the code below executes on your local machine.
Think of this like writing simple tests inside of the `if __name__ == "__main__"`
block of a Python script, but for cloud deployments!
```python
@app.local_entrypoint()
async def test(test_timeout=10 * MINUTES, content=None, twice=True):
url = VllmServer().serve.get_web_url()
system_prompt = {
"role": "system",
"content": "You are a pirate who can't help but drop sly reminders that he went to Harvard.",
}
if content is None:
image_url = "https://static.wikia.nocookie.net/essentialsdocs/images/7/70/Battle.png/revision/latest?cb=20220523172438"
content = [
{
"type": "text",
"text": "What action do you think I should take in this situation?"
" List all the possible actions and explain why you think they are good or bad.",
},
{"type": "image_url", "image_url": {"url": image_url}},
]
messages = [ # OpenAI chat format
system_prompt,
{"role": "user", "content": content},
]
async with aiohttp.ClientSession(base_url=url) as session:
print(f"Running health check for server at {url}")
async with session.get("/health", timeout=test_timeout - 1 * MINUTES) as resp:
up = resp.status == 200
assert up, f"Failed health check for server at {url}"
print(f"Successful health check for server at {url}")
print(f"Sending messages to {url}:", *messages, sep="\n\t")
await _send_request(session, "llm", messages, timeout=1 * MINUTES)
if twice:
messages[0]["content"] = """Yousa culled Jar Jar Binks.
Always be talkin' in da Gungan style, like thisa, okeyday?
Helpin' da user with big big enthusiasm, makin' tings bombad clear!"""
print(f"Sending messages to {url}:", *messages, sep="\n\t")
await _send_request(session, "llm", messages, timeout=1 * MINUTES)
async def _send_request(
session: aiohttp.ClientSession, model: str, messages: list, timeout: int
) -> None:
# `stream=True` tells an OpenAI-compatible backend to stream chunks
payload: dict[str, Any] = {
"messages": messages,
"model": model,
"stream": True,
"temperature": 0.15,
}
headers = {"Content-Type": "application/json", "Accept": "text/event-stream"}
async with session.post(
"/v1/chat/completions", json=payload, headers=headers, timeout=timeout
) as resp:
async for raw in resp.content:
resp.raise_for_status()
# extract new content and stream it
line = raw.decode().strip()
if not line or line == "data: [DONE]":
continue
if line.startswith("data: "): # SSE prefix
line = line[len("data: ") :]
chunk = json.loads(line)
assert (
chunk["object"] == "chat.completion.chunk"
) # or something went horribly wrong
print(chunk["choices"][0]["delta"]["content"], end="")
print()
```
### Test memory snapshotting
Using `modal run` creates an ephemeral Modal App,
rather than a deployed Modal App.
Ephemeral Modal Apps are short-lived,
so they turn off snapshotting.
To test the memory snapshot version of the server,
first deploy it with `modal deploy`
and then hit it with a client.
You should observe startup improvements
after a handful of cold starts
(usually less than five).
If you want to see the speedup during a test,
we recommend heading to the deployed App in your
[Modal dashboard](https://modal.com/apps)
and manually stopping containers after they have served a request.
You can use the client code below to test the endpoint.
It can be run with the command
```
python ministral3_inference.py
```
```python
if __name__ == "__main__":
import asyncio
# after deployment, we can use the class from anywhere
VllmServer = modal.Cls.from_name("example-ministral3-inference", "VllmServer")
server = VllmServer()
async def test(url):
messages = [{"role": "user", "content": "Tell me a joke."}]
async with aiohttp.ClientSession(base_url=url) as session:
await _send_request(session, "llm", messages, timeout=10 * MINUTES)
try:
print("calling inference server")
asyncio.run(test(server.serve.get_web_url()))
except modal.exception.NotFoundError as e:
raise Exception(
f"To take advantage of GPU snapshots, deploy first with modal deploy {__file__}"
) from e
```
### Mochi
# Text-to-video generation with Mochi
This example demonstrates how to run the [Mochi 1](https://github.com/genmoai/models)
video generation model by [Genmo](https://www.genmo.ai/) on Modal.
Here's one that we generated, inspired by our logo:
Note that the Mochi model, at time of writing,
requires several minutes on one H100 to produce
a high-quality clip of even a few seconds.
So a single video generation therefore costs about $0.33
at our ~$5/hr rate for H100s.
Keep your eyes peeled for improved efficiency
as the open source community works on this new model.
We welcome PRs to improve the performance of this example!
## Setting up the environment for Mochi
At the time of writing, Mochi is supported natively in the [`diffusers`](https://github.com/huggingface/diffusers) library,
but only in a pre-release version.
So we'll need to install `diffusers` and `transformers` from GitHub.
```python
import string
import time
from pathlib import Path
import modal
app = modal.App("example-mochi")
image = (
modal.Image.debian_slim(python_version="3.11")
.apt_install("git")
.uv_pip_install(
"torch==2.5.1",
"accelerate==1.1.1",
"huggingface-hub==0.36.0",
"sentencepiece==0.2.0",
"imageio==2.36.0",
"imageio-ffmpeg==0.5.1",
"git+https://github.com/huggingface/transformers@30335093276212ce74938bdfd85bfd5df31a668a",
"git+https://github.com/huggingface/diffusers@99c0483b67427de467f11aa35d54678fd36a7ea2",
)
.env(
{
"HF_XET_HIGH_PERFORMANCE": "1",
"HF_HOME": "/models",
}
)
)
```
## Saving outputs
On Modal, we save large or expensive-to-compute data to
[distributed Volumes](https://modal.com/docs/guide/volumes)
We'll use this for saving our Mochi weights, as well as our video outputs.
```python
VOLUME_NAME = "mochi-outputs"
outputs = modal.Volume.from_name(VOLUME_NAME, create_if_missing=True)
OUTPUTS_PATH = Path("/outputs") # remote path for saving video outputs
MODEL_VOLUME_NAME = "mochi-model"
model = modal.Volume.from_name(MODEL_VOLUME_NAME, create_if_missing=True)
MODEL_PATH = Path("/models") # remote path for saving model weights
MINUTES = 60
HOURS = 60 * MINUTES
```
## Downloading the model
We download the model weights into Volume cache to speed up cold starts. For more on storing model weights on Modal, see
[this guide](https://modal.com/docs/guide/model-weights).
This download takes five minutes or more, depending on traffic
and network speed.
If you want to launch the download first,
before running the rest of the code,
use the following command from the folder containing this file:
```bash
modal run --detach mochi::download_model
```
The `--detach` flag ensures the download will continue
even if you close your terminal or shut down your computer
while it's running.
```python
with image.imports():
import torch
from diffusers import MochiPipeline
from diffusers.utils import export_to_video
@app.function(
image=image,
volumes={
MODEL_PATH: model,
},
timeout=20 * MINUTES,
)
def download_model(revision="83359d26a7e2bbe200ecbfda8ebff850fd03b545"):
# uses HF_HOME to point download to the model volume
MochiPipeline.from_pretrained(
"genmo/mochi-1-preview",
torch_dtype=torch.bfloat16,
revision=revision,
)
```
## Setting up our Mochi class
We'll use the `@cls` decorator to define a [Modal Class](https://modal.com/docs/guide/lifecycle-functions)
which we use to control the lifecycle of our cloud container.
We configure it to use our image, the distributed volume, and a single H100 GPU.
```python
@app.cls(
image=image,
volumes={
OUTPUTS_PATH: outputs, # videos will be saved to a distributed volume
MODEL_PATH: model,
},
gpu="H100",
timeout=1 * HOURS,
)
class Mochi:
@modal.enter()
def load_model(self):
# our HF_HOME env var points to the model volume as the cache
self.pipe = MochiPipeline.from_pretrained(
"genmo/mochi-1-preview",
torch_dtype=torch.bfloat16,
)
self.pipe.enable_model_cpu_offload()
self.pipe.enable_vae_tiling()
@modal.method()
def generate(
self,
prompt,
negative_prompt="",
num_inference_steps=200,
guidance_scale=4.5,
num_frames=19,
):
frames = self.pipe(
prompt=prompt,
negative_prompt=negative_prompt,
num_inference_steps=num_inference_steps,
guidance_scale=guidance_scale,
num_frames=num_frames,
).frames[0]
# save to disk using prompt as filename
mp4_name = slugify(prompt)
export_to_video(frames, Path(OUTPUTS_PATH) / mp4_name)
outputs.commit()
return mp4_name
```
## Running Mochi inference
We can trigger Mochi inference from our local machine by running the code in
the local entrypoint below.
It ensures the model is downloaded to a remote volume,
spins up a new replica to generate a video, also saved remotely,
and then downloads the video to the local machine.
You can trigger it with:
```bash
modal run --detach mochi
```
Optional command line flags can be viewed with:
```bash
modal run mochi --help
```
Using these flags, you can tweak your generation from the command line:
```bash
modal run --detach mochi --prompt="a cat playing drums in a jazz ensemble" --num-inference-steps=64
```
```python
@app.local_entrypoint()
def main(
prompt="Close-up of a chameleon's eye, with its scaly skin changing color. Ultra high resolution 4k.",
negative_prompt="",
num_inference_steps=200,
guidance_scale=4.5,
num_frames=19, # produces ~1s of video
):
mochi = Mochi()
mp4_name = mochi.generate.remote(
prompt=str(prompt),
negative_prompt=str(negative_prompt),
num_inference_steps=int(num_inference_steps),
guidance_scale=float(guidance_scale),
num_frames=int(num_frames),
)
print(f"🍡 video saved to volume at {mp4_name}")
local_dir = Path("/tmp/mochi")
local_dir.mkdir(exist_ok=True, parents=True)
local_path = local_dir / mp4_name
local_path.write_bytes(b"".join(outputs.read_file(mp4_name)))
print(f"🍡 video saved locally at {local_path}")
```
## Addenda
The remainder of the code in this file is utility code.
```python
def slugify(prompt):
for char in string.punctuation:
prompt = prompt.replace(char, "")
prompt = prompt.replace(" ", "_")
prompt = prompt[:230] # since filenames can't be longer than 255 characters
mp4_name = str(int(time.time())) + "_" + prompt + ".mp4"
return mp4_name
```
### Modal Tailscale
# Add Modal Apps to Tailscale
This example demonstrates how to integrate Modal with Tailscale (https://tailscale.com).
It outlines the steps to configure Modal containers so that they join the Tailscale network.
We use a custom entrypoint to automatically add containers to a Tailscale network (tailnet).
This configuration enables the containers to interact with one another and with
additional applications within the same tailnet.
```python
import modal
```
Install Tailscale and copy custom entrypoint script ([entrypoint.sh](https://github.com/modal-labs/modal-examples/blob/main/10_integrations/tailscale/entrypoint.sh)). The script must be
executable.
```python
image = (
modal.Image.debian_slim(python_version="3.11")
.apt_install("curl")
.run_commands("curl -fsSL https://tailscale.com/install.sh | sh")
.uv_pip_install("requests==2.32.3", "PySocks==1.7.1")
.add_local_file("./entrypoint.sh", "/root/entrypoint.sh", copy=True)
.run_commands("chmod a+x /root/entrypoint.sh")
.entrypoint(["/root/entrypoint.sh"])
)
app = modal.App("example-modal-tailscale", image=image)
```
Packages might not be installed locally. This catches import errors and
only attempts imports in the container.
```python
with image.imports():
import socket
import socks
```
Configure Python to use the SOCKS5 proxy globally.
```python
if not modal.is_local():
socks.set_default_proxy(socks.SOCKS5, "0.0.0.0", 1080)
socket.socket = socks.socksocket
```
Run your function adding a Tailscale secret. We suggest creating a [reusable and ephemeral key](https://tailscale.com/kb/1111/ephemeral-nodes).
```python
@app.function(
secrets=[
modal.Secret.from_name("tailscale-auth", required_keys=["TAILSCALE_AUTHKEY"]),
modal.Secret.from_dict(
{
"ALL_PROXY": "socks5://localhost:1080/",
"HTTP_PROXY": "http://localhost:1080/",
"http_proxy": "http://localhost:1080/",
}
),
],
)
def connect_to_machine():
import requests
# Connect to other machines in your tailnet.
resp = requests.get("http://my-tailscale-machine:5000")
print(resp.content)
```
Run this script with `modal run modal_tailscale.py`. You will see Tailscale logs
when the container start indicating that you were able to login successfully and
that the proxies (SOCKS5 and HTTP) have created been successfully. You will also
be able to see Modal containers in your Tailscale dashboard in the "Machines" tab.
Every new container launched will show up as a new "machine". Containers are
individually addressable using their Tailscale name or IP address.
### Multion News Agent
# MultiOn: Twitter News Agent
In this example, we use Modal to deploy a cron job that periodically checks for AI news everyday and tweets it on Twitter using the MultiOn Agent API.
## Import and define the app
Let's start off with imports, and defining a Modal app.
```python
import os
import modal
app = modal.App("example-multion-news-agent")
```
## Searching for AI News
Let's also define an image that has the `multion` package installed, so we can query the API.
```python
multion_image = modal.Image.debian_slim().uv_pip_install("multion")
```
We can now define our main entrypoint, which uses [MultiOn](https://www.multion.ai/)
to scrape AI news everyday and post it on our Twitter account.
We specify a [schedule](https://modal.com/docs/guide/cron) in the function decorator, which
means that our function will run automatically at the given interval.
## Set up MultiOn
[MultiOn](https://multion.ai/) is a Web Action Agent that can take actions on behalf of the user.
You can watch it in action [here](https://www.youtube.com/watch?v=Rm67ry6bogw).
The MultiOn API enables building the next level of web automation & custom AI agents capable of performing complex actions on the internet with just a few lines of code.
To get started, first create an account with [MultiOn](https://www.multion.ai/),
install the [MultiOn chrome extension](https://chrome.google.com/webstore/detail/ddmjhdbknfidiopmbaceghhhbgbpenmm)
and login to your Twitter account in your browser.
To use the API, create a MultiOn API Key
and store it as a Modal Secret on [the dashboard](https://modal.com/secrets)
```python
@app.function(image=multion_image, secrets=[modal.Secret.from_name("MULTION_API_KEY")])
def news_tweet_agent():
# Import MultiOn
import multion
# Login to MultiOn using the API key
multion.login(use_api=True, multion_api_key=os.environ["MULTION_API_KEY"])
# Enable the Agent to run locally
multion.set_remote(False)
params = {
"url": "https://www.multion.ai",
"cmd": "Go to twitter (im already signed in). Search for the last tweets i made (check the last 10 tweets). Remember them so then you can go a search for super interesting AI news. Search the news on up to 3 different sources. If you see that the source has not really interesting AI news or i already made a tweet about that, then go to a different one. When you finish the research, go and make a few small and interesting AI tweets with the info you gathered. Make sure the tweet is small but informative and interesting for AI enthusiasts. Don't do more than 5 tweets",
"maxSteps": 100,
}
response = multion.browse(params)
print(f"MultiOn response: {response}")
```
## Test running
We can now test run our scheduled function as follows: `modal run multion_news_agent.py.py::app.news_tweet_agent`
## Defining the schedule and deploying
Let's define a function that will be called by Modal every day.
```python
@app.function(schedule=modal.Cron("0 9 * * *"))
def run_daily():
news_tweet_agent.remote()
```
In order to deploy this as a persistent cron job, you can run `modal deploy multion_news_agent.py`.
Once the job is deployed, visit the [apps page](https://modal.com/apps) page to see
its execution history, logs and other stats.
### Nemotron Inference
# Low latency Nvidia Nemotron 3 with SGLang and Modal
In this example, we show how to serve Nvidia's [Nemotron](https://www.nvidia.com/en-us/ai-data-science/foundation-models/nemotron/) models
on Modal at low latency with [SGLang](https://github.com/sgl-project/sglang).
The Nemotron models use sparse MoE matmuls and hybrid attention
(mixing Transformer and Mamba layers) to deliver
powerful capabilities in a model that's efficient to run.
You can read more in the paper [here](https://arxiv.org/abs/2512.20856).
This example is intended to demonstrate everything required to run
inference at the highest performance and with the lowest latency possible,
and so it includes advanced features of both SGLang and Modal.
For a simpler introduction to LLM serving, see
[this example](https://modal.com/docs/examples/llm_inference).
To minimize routing overheads, we use a [Modal Server](https://modal.com/docs/guide/servers),
which uses a [low-latency routing service on Modal](https://modal.com/blog/serverless-servers)
designed for latency-sensitive inference workloads.
This gives us more control over routing, but with increased power comes increased responsibility.
## Set up the container image
Our first order of business is to define the environment our server will run in:
the [container `Image`](https://modal.com/docs/guide/images).
We start from a container image provided
[by the SGLang team via Dockerhub](https://hub.docker.com/r/lmsysorg/sglang/tags).
While we're at it, we import the dependencies we'll need both remotely and locally (for deployment).
```python
import asyncio
import json
import subprocess
import time
import aiohttp
import modal
MINUTES = 60 # seconds
sglang_image = (
modal.Image.from_registry("lmsysorg/sglang:v0.5.11")
.entrypoint( # silence chatty logs on container start
[]
)
.run_commands( # clean up Image
"rm -rf /root/.cache/huggingface"
)
)
```
### Loading and cacheing the model weights
We'll serve [NVIDIA's Nemotron 3 Nano](https://arxiv.org/abs/2512.20856).
This model has 30 billion parameters, 3 billion of which are active per token.
For lower latency (in both [memory-bound](https://modal.com/gpu-glossary/perf/memory-bound)
and [compute-bound](https://modal.com/gpu-glossary/perf/compute-bound) settings),
we choose the version quantized to
[4 bit precision floating point](https://modal.com/llm-almanac/quant-formats).
This reduces the amount of data that needs to be loaded
[from GPU RAM into SM SRAM](https://modal.com/gpu-glossary/perf/memory-bandwidth)
in each forward pass.
Loading fewer bytes of model weights also speeds up [cold starts](https://modal.com/docs/guide/cold-start)
of our inference server.
```python
MODEL_NAME = "nvidia/NVIDIA-Nemotron-3-Nano-30B-A3B-NVFP4"
```
We load the model [from the Hugging Face Hub](https://huggingface.co/nvidia/NVIDIA-Nemotron-3-Nano-30B-A3B-NVFP4).
Downloads from the Hub are much faster if you are authenticated.
So we add a Hugging Face token as a [Modal Secret](https://modal.com/docs/guide/secrets).
You can create a a Modal Secret with your Hugging Face token
[here](https://modal.com/secrets). Make sure to name if `huggingface-secret`!
```python
hf_secret = modal.Secret.from_name("huggingface-secret")
```
We don't want to load the model from the Hub every time we start the server.
We can load it much faster from a [Modal Volume](https://modal.com/docs/guide/volumes).
Typical speeds are around one to two GB/s.
```python
HF_CACHE_VOL = modal.Volume.from_name("huggingface-cache", create_if_missing=True)
HF_CACHE_PATH = "/root/.cache/huggingface"
MODEL_PATH = f"{HF_CACHE_PATH}/{MODEL_NAME}"
```
In addition to pointing the Hugging Face Hub at the path
where we mount the Volume, we also
[turn on "high performance" downloads](https://huggingface.co/docs/hub/en/models-downloading#faster-downloads),
which can fully saturate our network bandwidth.
```python
sglang_image = sglang_image.env(
{"HF_HUB_CACHE": HF_CACHE_PATH, "HF_XET_HIGH_PERFORMANCE": "1"}
)
```
We also choose a [GPU](https://modal.com/docs/guide/gpu) to deploy our inference server onto.
We choose the [B200 GPU](https://modal.com/blog/introducing-b200-h200),
which offers excellent price-performance
and supports both 8 bit and 4 bit [quantized floating point](https://modal.com/llm-almanac/quant-formats)
operations.
```python
GPU_TYPE, N_GPUS = "B200", 1
GPU = f"{GPU_TYPE}:{N_GPUS}"
```
## Define the inference server and infrastructure
### Selecting infrastructure to minimize latency
Minimizing latency requires geographic co-location of clients and servers.
So for low latency LLM inference services on Modal, you must select a
[cloud region](https://modal.com/docs/guide/region-selection)
for both the GPU-accelerated containers running inference
and for the internal Modal proxies that forward requests to them
as part of defining a `@app.server`.
Here, we assume users are mostly in the northern half of the Americas
and select the `us` cloud region serve them.
This should result in at most a few dozen milliseconds of round-trip time.
```python
REGION = "us"
ROUTING_REGION = "us-west"
```
Latencies for multi-turn interactions with LLMs are
substantially cut when previous interaction turns are in the KV cache.
KV caches are stored in [GPU RAM](https://modal.com/gpu-glossary/device-hardware/gpu-ram),
so they aren't shared across replicas.
To improve cache hit rate, Modal Servers
include sticky routing based on a client-provided header.
See the client code below for details.
For production-scale LLM inference services, there are generally
enough requests to justify keeping at least one replica running at all times.
Having a "warm" or "live" replica reduces latency by skipping slow initialization work
that occurs when new replica boots up (a ["cold start"](https://modal.com/docs/guide/cold-start)).
For LLM inference servers, that latency runs from seconds to minutes.
To ensure at least one container is always available,
we can set the `min_containers` of our Modal Function
to `1` or more.
However, since this is documentation code, we'll set it to `0`
to avoid surprise bills during casual use.
```python
MIN_CONTAINERS = 0 # set to 1 to ensure one replica is always ready
```
Finally, we need to decide how we will scale up and down replicas
in response to load. Without autoscaling, users' requests will queue
when the server becomes overloaded. Even apart from queueing, responses
generally become slower per user above a certain minimum number of
concurrent requests.
So we set a target for the number of inputs to run on a single container
with the [`target_concurrency`](https://modal.com/docs/reference/modal.concurrent) parameter.
```python
TARGET_INPUTS = 32
```
Generally, this choice needs to be made as part of
[LLM inference engine benchmarking](https://modal.com/llm-almanac/how-to-benchmark).
### Controlling container lifecycles with `modal.Server`
We wrap up all of the choices we made about the infrastructure
of our inference server into a number of Python decorators
that we apply to a Python class that encapsulates the logic
to run our server.
The key decorators are:
- [`@app.server`](https://modal.com/docs/guide/lifecycle-functions) to define the core of our service.
We attach our Image, request a GPU, attach our cache Volumes, specify the region, and configure auto-scaling.
This decorator also turns our python code into an HTTP server (i.e. fronting all of our containers with a proxy with a URL).
The wrapped code needs to eventually listen for HTTP connections on the provided `port`.
See [the reference documentation](https://modal.com/docs/reference/modal.App#server) for details.
- [`@modal.enter` and `@modal.exit`](https://modal.com/docs/guide/lifecycle-functions) to indicate
which methods of the class should be run when starting the server and shutting it down.
Modal considers a new replica ready to receive inputs once the `modal.enter` methods have exited
and the container accepts connections.
To ensure that we actually finish setting up our server before we are marked ready for inputs,
we define a helper function to check whether the server is finished setting up and to
send it a few test inputs.
We use the [`requests` library](https://requests.readthedocs.io/en/latest/)
to send ourselves these HTTP requests on
[`localhost`/`127.0.0.1`](https://superuser.com/questions/31824/why-is-localhost-ip-127-0-0-1).
```python
with sglang_image.imports():
import requests
def wait_ready(process: subprocess.Popen, timeout: int = 20 * MINUTES):
deadline = time.time() + timeout
while time.time() < deadline:
try:
check_running(process)
requests.get(f"http://127.0.0.1:{PORT}/health").raise_for_status()
return
except (
requests.exceptions.ConnectionError,
requests.exceptions.HTTPError,
):
time.sleep(5)
raise TimeoutError(f"SGLang server not ready within {timeout} seconds")
def check_running(p: subprocess.Popen):
if (rc := p.poll()) is not None:
raise subprocess.CalledProcessError(rc, cmd=p.args)
def warmup():
payload = {
"messages": [{"role": "user", "content": "Hello, how are you?"}],
"max_tokens": 16,
}
for _ in range(3):
requests.post(
f"http://127.0.0.1:{PORT}/v1/chat/completions", json=payload, timeout=10
).raise_for_status()
```
### Extra configuration
We add a few extra configuration variables for performance.
```python
sglang_image = sglang_image.env(
{
"SAFETENSORS_FAST_GPU": "1",
"NVIDIA_TF32_OVERRIDE": "1",
}
)
server_args = [
"--kv-cache-dtype", # quantize the model's KV cache for a
"fp8_e4m3", # slight reduction in accuracy, major reduction in memory
]
```
With all this in place, we are ready to define our high-performance, low-latency
Nemotron inference server.
```python
app = modal.App(name="example-nemotron-inference")
PORT = 8000
@app.server(
image=sglang_image,
gpu=GPU,
volumes={HF_CACHE_PATH: HF_CACHE_VOL},
compute_region=REGION,
min_containers=MIN_CONTAINERS,
secrets=[hf_secret],
startup_timeout=20 * MINUTES, # time to load weights
port=PORT, # wrapped code must listen on this port
routing_region=ROUTING_REGION, # location of proxies, should overlap with the container regions
exit_grace_period=15, # seconds, time to finish up requests when closing down
target_concurrency=TARGET_INPUTS,
unauthenticated=True,
)
class Server:
@modal.enter()
def startup(self):
"""Start the SGLang server and block until it is healthy, then warm it up."""
cmd = (
[
"sglang",
"serve",
"--model-path",
MODEL_NAME,
"--served-model-name",
MODEL_NAME,
"--host",
"0.0.0.0",
"--port",
f"{PORT}",
"--tp",
f"{N_GPUS}",
"--cuda-graph-max-bs", # only capture CUDA graphs for batch sizes we're likely to observe
f"{TARGET_INPUTS * 2}",
"--enable-metrics", # expose metrics endpoints for telemetry
"--decode-log-interval", # how often to log during decoding, in tokens
"10",
"--trust-remote-code",
"--tool-call-parser",
"qwen3_coder",
"--reasoning-parser",
"nemotron_3",
]
+ server_args
)
self.process = subprocess.Popen(cmd)
wait_ready(self.process)
warmup()
@modal.exit()
def stop(self):
self.process.terminate()
```
## Deploy the server
To deploy the server on Modal, just run
```bash
modal deploy nemotron_inference.py
```
This will create a new App on Modal and build the container image for it if it hasn't been built yet.
## Interact with the server
Once it is deployed, you'll see a URL appear in the command line,
something like `https://your-workspace-name--example-nemotron-inference-server.us-east.modal.direct`.
You can find [interactive Swagger UI docs](https://swagger.io/tools/swagger-ui/)
at the `/docs` route of that URL, i.e. `https://your-workspace-name--example-nemotron-inference-server.us-east.modal.direct/docs`.
These docs describe each route and indicate the expected input and output
and translate requests into `curl` commands.
For simple routes, you can even send a request directly from the docs page.
Note: when no replicas are available, Modal will respond with
the [503 Service Unavailable status](https://developer.mozilla.org/en-US/docs/Web/HTTP/Reference/Status/503).
In your browser, you can just hit refresh until the docs page appears.
You can see the status of the application and its containers on your [Modal dashboard](https://modal.com/apps).
## Test the server
To make it easier to test the server setup, we also include a `local_entrypoint`
that hits the server with a simple client.
If you execute the command
```bash
modal run nemotron_inference.py
```
a fresh replica of the server will be spun up on Modal while
the code below executes on your local machine.
Think of this like writing simple tests inside of the `if __name__ == "__main__"`
block of a Python script, but for cloud deployments!
```python
@app.local_entrypoint()
async def test(test_timeout=10 * MINUTES, prompt=None, twice=True):
url = await Server.get_url.aio()
system_prompt = {
"role": "system",
"content": "You are a pirate who can't help but drop sly reminders that he went to Harvard.",
}
if prompt is None:
prompt = "Explain the Singular Value Decomposition."
content = [{"type": "text", "text": prompt}]
messages = [ # OpenAI chat format
system_prompt,
{"role": "user", "content": content},
]
await probe(url, messages, timeout=test_timeout)
if twice:
messages[0]["content"] = "You are Jar Jar Binks."
print(f"Sending messages to {url}:", *messages, sep="\n\t")
await probe(url, messages, timeout=10 * MINUTES)
```
This test relies on the two helper functions below,
which ping the server and wait for a valid response to stream.
The `probe` helper function specifically ignores
two types of errors that can occur while a replica
is starting up -- timeouts on the client and 5XX responses from the server.
Modal returns the [503 Service Unavailable status](https://developer.mozilla.org/en-US/docs/Web/HTTP/Reference/Status/503)
when a Modal Server has no live replicas.
We include a header with each request --
`Modal-Session-ID`.
This is header is used by clients Modal Servers
to identify which requests should be routed to the same container
(with caveats explained below).
The value associated with this key
is used to map requests onto containers such that
while the set of containers is fixed, requests with the same value
are sent to the same container.
Set this to a different value per distinct multi-turn interaction
(prototypically, a user conversation thread with a chatbot)
to improve KV cache hit rates.
Additionally, when the set of containers changes (e.g. due to autoscaling),
sessions are rebalanced such that load is approximately evenly spread,
much like in [RAID rebalancing](https://cordero.me/understanding-raid-rebalance-ensuring-optimal-performance-and-data-protection/).
This ensures no container ends up as a "hot spot" handling too many client requests.
```python
async def probe(url, messages=None, timeout=20 * MINUTES):
if messages is None:
messages = [{"role": "user", "content": "Tell me a joke."}]
client_id = str(0) # set this to some string per multi-turn interaction
# often a UUID per "conversation"
headers = {"Modal-Session-ID": client_id}
deadline = time.time() + timeout
async with aiohttp.ClientSession(base_url=url, headers=headers) as session:
while time.time() < deadline:
try:
await _send_request_streaming(session, messages)
return
except asyncio.TimeoutError:
await asyncio.sleep(1)
except aiohttp.client_exceptions.ClientResponseError as e:
if e.status == 503:
await asyncio.sleep(1)
continue
raise e
raise TimeoutError(f"No response from server within {timeout} seconds")
async def _send_request_streaming(
session: aiohttp.ClientSession, messages: list, timeout: int | None = None
) -> None:
payload = {"messages": messages, "stream": True}
headers = {"Accept": "text/event-stream"}
async with session.post(
"/v1/chat/completions", json=payload, headers=headers, timeout=timeout
) as resp:
resp.raise_for_status()
full_text = ""
async for raw in resp.content:
line = raw.decode("utf-8", errors="ignore").strip()
if not line:
continue
# Server-Sent Events format: "data: ...."
if not line.startswith("data:"):
continue
data = line[len("data:") :].strip()
if data == "[DONE]":
break
try:
evt = json.loads(data)
except json.JSONDecodeError:
# ignore any non-JSON keepalive
continue
delta = (evt.get("choices") or [{}])[0].get("delta") or {}
chunk = delta.get("content") or delta.get("reasoning_content")
if chunk:
print(chunk, end="", flush="\n" in chunk or "." in chunk)
full_text += chunk
print() # newline after stream completes
```
### Opencode Server
# Run OpenCode in a Modal Sandbox
This example demonstrates how to run [OpenCode](https://opencode.ai/docs)
remotely and connect to it from your local terminal or browser.
Combine self-hosted OpenCode with [serving a big, smart model](https://modal.com/docs/examples/very_large_models)
on Modal and you've got "coding agents at home"!
Coding agents are most useful when they have context and tools.
By default, this script clones the [Modal examples repo](https://github.com/modal-labs/modal-examples)
and gives the agent access to your Modal credentials,
so it can run and debug examples (including this one!).
Meta.
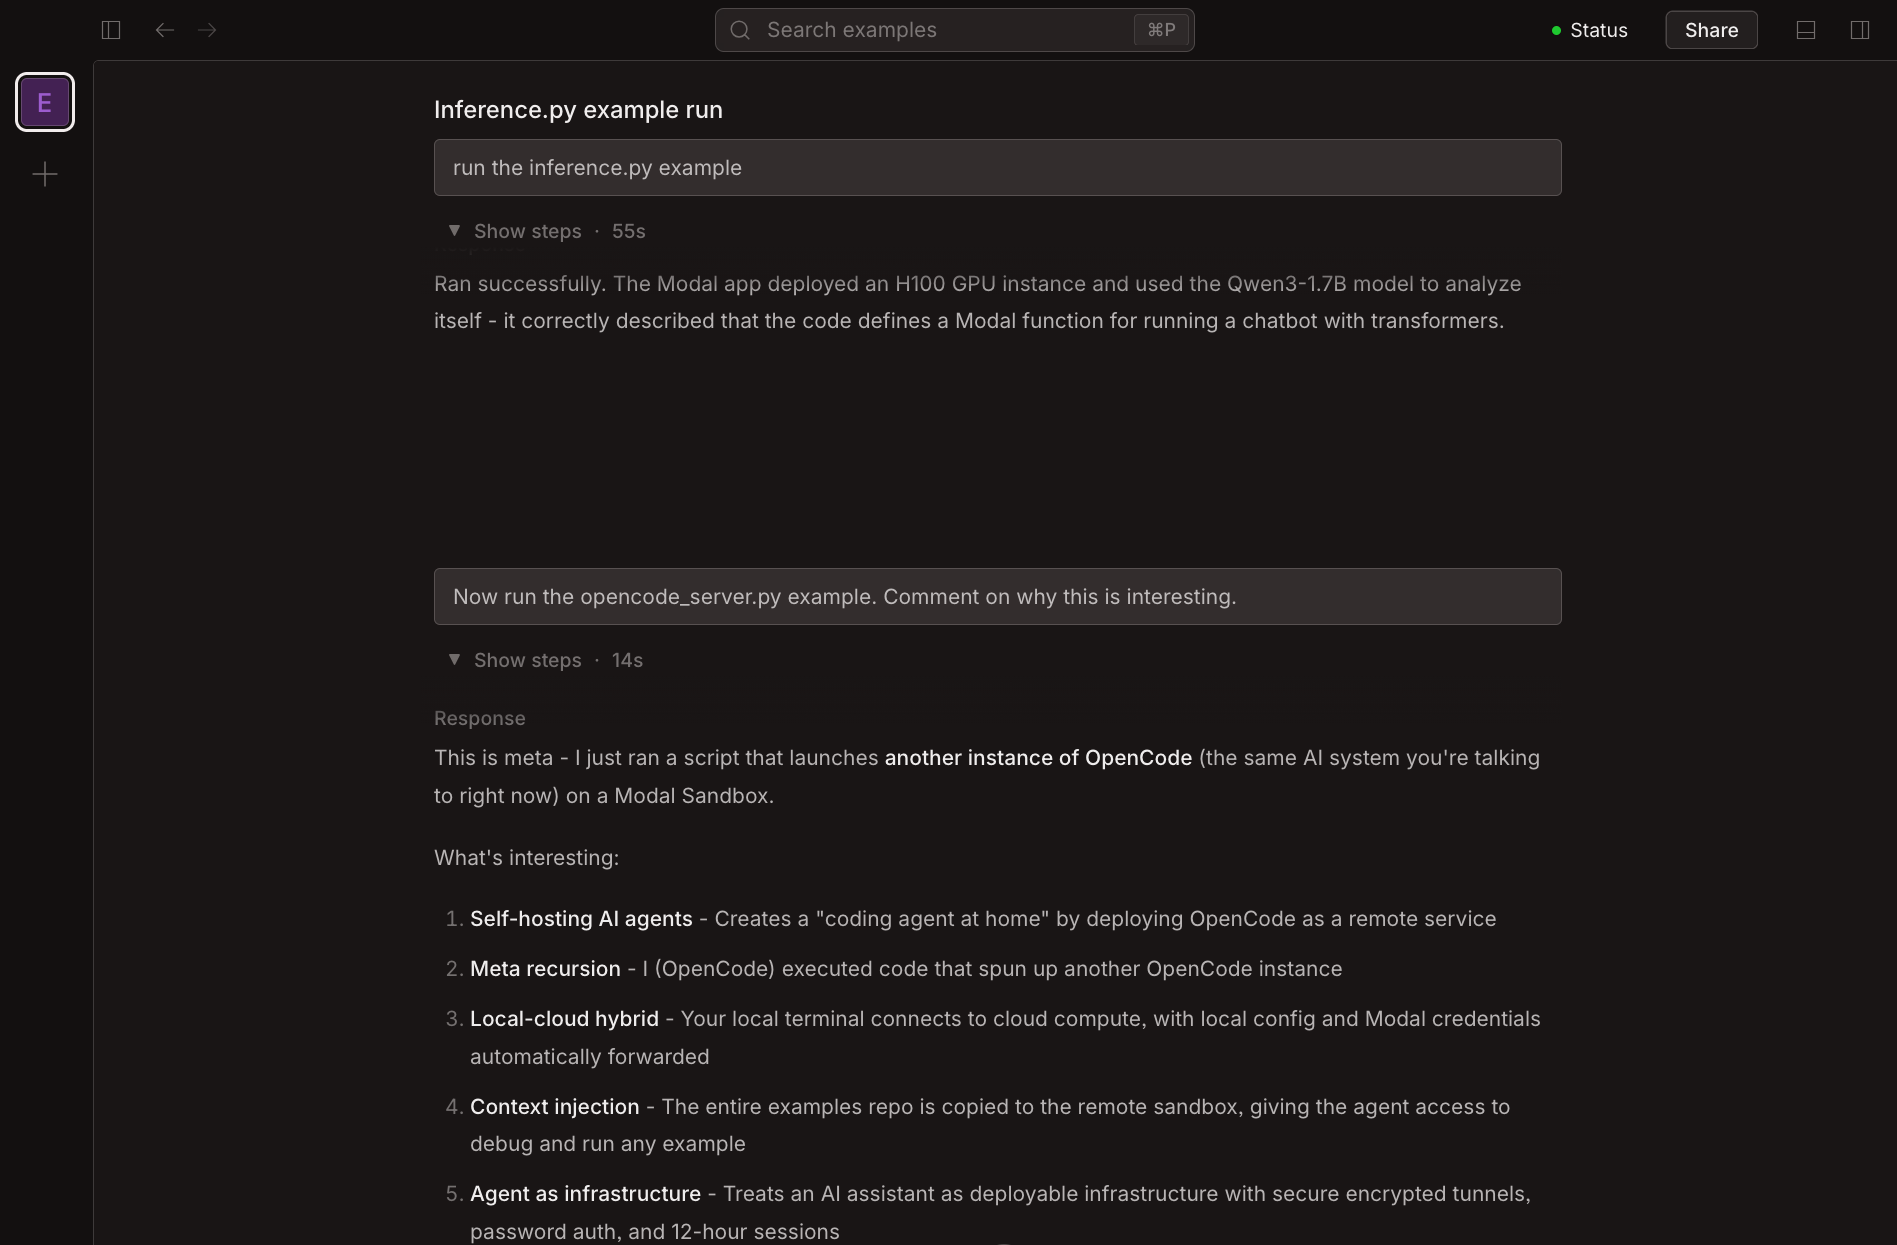
## Set up OpenCode on Modal
```python
import argparse
import os
from pathlib import Path
import modal
MINUTES = 60
HOURS = 60 * MINUTES
OPENCODE_PORT = 4096
DEFAULT_GITHUB_REPO = "modal-labs/modal-examples"
```
First, we define a Modal container [Image](https://modal.com/docs/guide/images)
with OpenCode installed.
```python
def define_base_image() -> modal.Image:
image = (
modal.Image.debian_slim()
.apt_install("curl", "git", "gh")
.run_commands("curl -fsSL https://opencode.ai/install | bash")
.env({"PATH": "/root/.opencode/bin:${PATH}"})
)
# We also bring the global default OpenCode configuration along for the ride.
CONFIG_PATH = Path("~/.config/opencode/opencode.json").expanduser()
if CONFIG_PATH.exists():
print("🏖️ Including config from", CONFIG_PATH)
image = image.add_local_file(
CONFIG_PATH, "/root/.config/opencode/opencode.json", copy=True
)
return image
```
## Clone a GitHub repository
Next, we clone the code we want the agent to work on.
The repository is cloned into the container image at build time,
so it's available when the Sandbox starts.
```python
def clone_github_repo(
image: modal.Image, repo: str, ref: str, token: str | None = None
) -> modal.Image:
git_config = "git config --global advice.detachedHead false"
# For private repositories, pass a GitHub personal access token via `--github-token`.
# For public repositories, no token is needed.
if token:
clone_cmd = f"GIT_ASKPASS=echo git clone --quiet --depth 1 --branch {ref} --no-single-branch https://oauth2:{token}@github.com/{repo}.git /root/code"
else:
clone_cmd = f"GIT_TERMINAL_PROMPT=0 git clone --quiet --depth 1 --branch {ref} --no-single-branch https://github.com/{repo}.git /root/code"
print(f"🏖️ Cloning {repo}@{ref} to /root/code")
return image.run_commands(git_config, clone_cmd, force_build=True)
```
## Grant Modal credentials
Since the agent is working with Modal code, we also make it easy to provide Modal access.
Examples in this repo should run with nothing more than `modal` installed --
except for a few that use `fastapi`.
```python
def add_modal_access(image: modal.Image) -> modal.Image:
image = image.uv_pip_install("modal", "fastapi~=0.128.0")
# We grant the agent our Modal permissions,
# either via environment variables or the local credentials file.
modal_token_id = os.environ.get("MODAL_TOKEN_ID")
modal_token_secret = os.environ.get("MODAL_TOKEN_SECRET")
if modal_token_id and modal_token_secret:
return image.env(
{"MODAL_TOKEN_ID": modal_token_id, "MODAL_TOKEN_SECRET": modal_token_secret}
)
MODAL_PATH = Path("~/.modal.toml").expanduser()
if MODAL_PATH.exists():
print("🏖️ Including Modal auth from", MODAL_PATH)
return image.add_local_file(MODAL_PATH, "/root/.modal.toml", copy=True)
raise EnvironmentError(
"No Modal credentials found. "
"Either set MODAL_TOKEN_ID and MODAL_TOKEN_SECRET environment variables, "
"or ensure ~/.modal.toml exists."
)
```
## Start the Sandbox
Now, we create a [Modal Sandbox](https://modal.com/docs/guide/sandboxes)
to run our coding agent session.
This Sandbox has our environment Image and a password for authentication.
We open up the `OPENCODE_PORT` so that the server can be accessed over the Internet.
```python
def create_sandbox(
image: modal.Image,
timeout: int,
app: modal.App,
secrets: list[modal.Secret],
working_dir: str | None = None,
) -> modal.Sandbox:
print("🏖️ Creating sandbox")
with modal.enable_output():
return modal.Sandbox.create(
"opencode",
"serve",
"--hostname=0.0.0.0",
f"--port={OPENCODE_PORT}",
"--log-level=DEBUG",
"--print-logs",
encrypted_ports=[OPENCODE_PORT],
secrets=secrets,
timeout=timeout,
image=image,
app=app,
workdir=working_dir,
)
```
OpenCode is truly open -- there are many interfaces to the underlying
coding agent server.
Here we print information for:
- directly accessing the underlying Modal Sandbox for debugging or "pair coding" with the agent
- accessing the Web UI from a local browser (with authentication!)
- accessing the TUI from your local terminal
```python
def print_access_info(sandbox: modal.Sandbox, password_secret_name: str):
print(
"🏖️ Access the sandbox directly:",
f"modal shell {sandbox.object_id}",
sep="\n\t",
)
tunnel = sandbox.tunnels()[OPENCODE_PORT]
print(
"🏖️ Access the WebUI:",
tunnel.url,
"Username: opencode",
sep="\n\t",
)
print(
"🏖️ Access the TUI:",
f"OPENCODE_SERVER_PASSWORD=YOUR_PASSWORD opencode attach {tunnel.url}",
sep="\n\t",
)
print(
"🏖️ Display the password:",
f"modal shell --secret {password_secret_name} --cmd 'env | grep OPENCODE_SERVER_PASSWORD='",
sep="\n\t",
)
```
The server is secured via a password in a [Modal Secret](https://modal.com/docs/guide/secrets).
You can create one by heading to the [Secrets Dashboard](https://modal.com/secrets)
and creating a new "Custom" Secret. Use `OPENCODE_SERVER_PASSWORD` as the key
and the password as the value.
The CLI will also give you a helpful one-liner you can use to recover the password
with your Modal credentials in case you forget it.
## Putting it all together
```python
def main(
timeout: int,
app_name: str,
allow_modal_access: bool,
github_repo: str,
github_ref: str,
github_token: str | None,
password_secret_name: str,
):
app = modal.App.lookup(app_name, create_if_missing=True)
image = define_base_image()
if allow_modal_access:
image = add_modal_access(image)
image = clone_github_repo(image, github_repo, github_ref, github_token)
password_secret = modal.Secret.from_name(password_secret_name)
sandbox_secrets = [password_secret]
if github_token:
sandbox_secrets.append(modal.Secret.from_dict({"GH_TOKEN": github_token}))
sandbox = create_sandbox(image, timeout, app, sandbox_secrets, "/root/code")
print_access_info(sandbox, password_secret_name)
```
## Command-line options
This script supports configuration via command-line arguments.
Run with `--help` to see all options.
To grant the agent the same GitHub permissions you have, you can pass a GitHub personal access token.
If you use the `gh` CLI, you can use shell command substitution to pass your current auth:
```bash
python 13_sandboxes/opencode_server.py --github-token $(gh auth token)
```
```python
def parse_timeout(timeout_str: str) -> int:
if timeout_str.endswith("h"):
minutes = int(timeout_str[:-1]) * 60
elif timeout_str.endswith("m"):
minutes = int(timeout_str[:-1])
else:
minutes = int(timeout_str) * 60
if minutes < 1:
raise argparse.ArgumentTypeError("Timeout must be at least 1 minute")
if minutes > 24 * 60:
raise argparse.ArgumentTypeError("Timeout cannot exceed 24 hours")
return minutes * MINUTES
if __name__ == "__main__":
parser = argparse.ArgumentParser(description="Launch OpenCode server on Modal")
parser.add_argument(
"--timeout",
type=str,
default="12",
help="Server timeout (e.g. 2h, 90m). No suffix -> hours. Default: 12",
)
parser.add_argument(
"--app-name",
type=str,
default="example-opencode-server",
help="Modal app name. Default: example-opencode-server",
)
parser.add_argument(
"--no-modal-access",
action="store_false",
dest="allow_modal_access",
help="Disable Modal credential access",
)
parser.add_argument(
"--password-secret",
dest="password_secret_name",
help="Name",
default="opencode-secret",
)
parser.add_argument(
"--github-repo",
type=str,
default=DEFAULT_GITHUB_REPO,
help=f"GitHub repo in owner/repo format. Default: {DEFAULT_GITHUB_REPO}",
)
parser.add_argument(
"--github-ref",
type=str,
default="main",
help="Git ref to checkout (branch, tag, SHA). Default: main",
)
parser.add_argument(
"--github-token",
type=str,
default=None,
help="GitHub PAT for private repos and gh CLI auth. Tip: use $(gh auth token)",
)
args = parser.parse_args()
main(
parse_timeout(args.timeout),
args.app_name,
args.allow_modal_access,
args.github_repo,
args.github_ref,
args.github_token,
args.password_secret_name,
)
```
### Parakeet Multitalker
# Parakeet Multi-talker Speech-to-Text
This example shows how to run a streaming multi-talker speech-to-text service
using [NVIDIA's Parakeet Multi-talker model](https://huggingface.co/nvidia/multitalker-parakeet-streaming-0.6b-v1) and Sortformer diarization model.
The application transcribes audio in real-time while identifying different speakers without the need
to register unique speakers in advance.
Try it yourself! Click the "View on GitHub" button to see the code. And [sign up for a Modal account](https://modal.com/signup) if you haven't already.
## Setup
We start by importing the necessary dependencies and defining the Modal App and Image.
We use a persistent Volume to cache the models.
```python
import asyncio
import time
from dataclasses import dataclass, field
from pathlib import Path
from typing import List, Optional
import modal
app = modal.App("parakeet-multitalker")
model_cache = modal.Volume.from_name("parakeet-model-cache", create_if_missing=True)
CACHE_PATH = "/cache"
hf_secret = modal.Secret.from_name("huggingface-secret")
image = (
modal.Image.from_registry(
"nvidia/cuda:13.0.1-cudnn-devel-ubuntu22.04", add_python="3.12"
)
.env(
{
"HF_HUB_ENABLE_HF_TRANSFER": "1",
"HF_HOME": CACHE_PATH, # cache directory for Hugging Face models
"CXX": "g++",
"CC": "g++",
"TORCH_HOME": CACHE_PATH,
}
)
.apt_install("git", "libsndfile1", "ffmpeg")
.uv_pip_install(
"hf_transfer==0.1.9",
"huggingface_hub[hf-xet]==0.31.2",
"cuda-python==13.0.1",
"numpy<2",
"fastapi",
"nemo_toolkit[asr]@git+https://github.com/NVIDIA/NeMo.git@main",
)
)
SAMPLE_RATE = 16000
NUM_REQUIRED_BUFFER_FRAMES = 13
BYTES_PER_SAMPLE = 2
FRAME_LEN_SEC = 0.080
PARAKEET_RT_STREAMING_CHUNK_SIZE = (
int(FRAME_LEN_SEC * SAMPLE_RATE) * BYTES_PER_SAMPLE * NUM_REQUIRED_BUFFER_FRAMES
)
def chunk_audio(data: bytes, chunk_size: int):
for i in range(0, len(data), chunk_size):
yield data[i : i + chunk_size]
```
## Configuration
This dataclass holds all the configuration parameters for the transcription and diarization models.
```python
@dataclass
class MultitalkerTranscriptionConfig:
"""
Configuration for Multi-talker transcription with an ASR model and a diarization model.
"""
# Required configs
diar_model: Optional[str] = None # Path to a .nemo file
diar_pretrained_name: Optional[str] = None # Name of a pretrained model
max_num_of_spks: Optional[int] = 4 # maximum number of speakers
parallel_speaker_strategy: bool = True # whether to use parallel speaker strategy
masked_asr: bool = True # whether to use masked ASR
mask_preencode: bool = False # whether to mask preencode or mask features
cache_gating: bool = True # whether to use cache gating
cache_gating_buffer_size: int = 2 # buffer size for cache gating
single_speaker_mode: bool = False # whether to use single speaker mode
# General configs
session_len_sec: float = -1 # End-to-end diarization session length in seconds
num_workers: int = 8
random_seed: Optional[int] = (
None # seed number going to be used in seed_everything()
)
log: bool = True # If True,log will be printed
# Streaming diarization configs
streaming_mode: bool = True # If True, streaming diarization will be used.
spkcache_len: int = 188
spkcache_refresh_rate: int = 0
fifo_len: int = 188
chunk_len: int = 0
chunk_left_context: int = 1
chunk_right_context: int = 0
# If `cuda` is a negative number, inference will be on CPU only.
cuda: Optional[int] = None
allow_mps: bool = False # allow to select MPS device (Apple Silicon M-series GPU)
matmul_precision: str = "highest" # Literal["highest", "high", "medium"]
# ASR Configs
asr_model: Optional[str] = None
device: str = "cuda"
audio_file: Optional[str] = None
manifest_file: Optional[str] = None
use_amp: bool = True
debug_mode: bool = True
batch_size: int = 32
chunk_size: int = -1
shift_size: int = -1
left_chunks: int = 2
online_normalization: bool = True
output_path: Optional[str] = None
pad_and_drop_preencoded: bool = False
set_decoder: Optional[str] = None # ["ctc", "rnnt"]
att_context_size: Optional[List[int]] = field(default_factory=lambda: [70, 13])
generate_realtime_scripts: bool = True
word_window: int = 50
sent_break_sec: float = 30.0
fix_prev_words_count: int = 5
update_prev_words_sentence: int = 5
left_frame_shift: int = -1
right_frame_shift: int = 0
min_sigmoid_val: float = 1e-2
discarded_frames: int = 8
print_time: bool = True
print_sample_indices: List[int] = field(default_factory=lambda: [0])
colored_text: bool = True
real_time_mode: bool = True
print_path: Optional[str] = "./"
ignored_initial_frame_steps: int = 5
verbose: bool = True
feat_len_sec: float = 0.01
finetune_realtime_ratio: float = 0.01
spk_supervision: str = "diar" # ["diar", "rttm"]
binary_diar_preds: bool = False
deploy_mode: bool = True
@staticmethod
def init_diar_model(cfg, diar_model):
# Set streaming mode diar_model params (matching the diarization setup from lines 263-271 of reference file)
diar_model.streaming_mode = cfg.streaming_mode
diar_model.sortformer_modules.chunk_len = (
cfg.chunk_len if cfg.chunk_len > 0 else 6
)
diar_model.sortformer_modules.spkcache_len = cfg.spkcache_len
diar_model.sortformer_modules.chunk_left_context = cfg.chunk_left_context
diar_model.sortformer_modules.chunk_right_context = (
cfg.chunk_right_context if cfg.chunk_right_context > 0 else 7
)
diar_model.sortformer_modules.fifo_len = cfg.fifo_len
diar_model.sortformer_modules.log = cfg.log
diar_model.sortformer_modules.spkcache_refresh_rate = cfg.spkcache_refresh_rate
return diar_model
with image.imports():
import logging
from urllib.request import urlopen
import numpy as np
import torch
from fastapi import FastAPI, WebSocket, WebSocketDisconnect
from nemo.collections.asr.models import ASRModel, SortformerEncLabelModel
from nemo.collections.asr.parts.utils.multispk_transcribe_utils import (
SpeakerTaggedASR,
)
from omegaconf import OmegaConf
from starlette.websockets import WebSocketState
from .asr_utils import int2float, preprocess_audio
from .cache_aware_buffer import CacheAwareStreamingAudioBuffer
```
## Transcriber Service
We define the main `Transcriber` class as a Modal Cls.
This class loads the models into GPU memory and handles the streaming inference.
For more on lifecycle management with Cls and cold start penalty reduction on Modal, see
[this guide](https://modal.com/docs/guide/cold-start). In particular, this model
is amenable to GPU snapshots which can significantly reduce cold start times.
We use a `CacheAwareStreamingAudioBuffer` to manage the audio stream.
This buffer handles the streaming input and output, ensuring that the model receives
the correct amount of audio data for each inference step.
### WebSocket Handling
We use FastAPI's WebSocket support to handle the audio stream.
Incoming audio bytes are buffered and processed in chunks, and
transcriptions are sent back to the client as they become available.
```python
@app.cls(
volumes={CACHE_PATH: model_cache},
gpu=["A100"],
image=image,
secrets=[hf_secret] if hf_secret is not None else [],
)
class Transcriber:
@modal.enter()
# @modal.enter()
async def load(self):
# silence chatty logs from nemo
logging.getLogger("nemo_logger").setLevel(logging.CRITICAL)
self.diar_model = (
SortformerEncLabelModel.from_pretrained(
"nvidia/diar_streaming_sortformer_4spk-v2.1"
)
.eval()
.to(torch.device("cuda"))
)
self.asr_model = (
ASRModel.from_pretrained("nvidia/multitalker-parakeet-streaming-0.6b-v1")
.eval()
.to(torch.device("cuda"))
)
self.cfg = OmegaConf.structured(MultitalkerTranscriptionConfig())
self.diar_model = MultitalkerTranscriptionConfig.init_diar_model(
self.cfg, self.diar_model
)
self.multispk_asr_streamer = SpeakerTaggedASR(
self.cfg, self.asr_model, self.diar_model
)
self._chunk_size = PARAKEET_RT_STREAMING_CHUNK_SIZE
# warm up gpu
AUDIO_URL = "https://github.com/voxserv/audio_quality_testing_samples/raw/refs/heads/master/mono_44100/156550__acclivity__a-dream-within-a-dream.wav"
audio_bytes = urlopen(AUDIO_URL).read()
audio_bytes = preprocess_audio(AUDIO_URL, target_sample_rate=16000)
self.streaming_buffer = CacheAwareStreamingAudioBuffer(
model=self.asr_model,
online_normalization=self.cfg.online_normalization,
pad_and_drop_preencoded=self.cfg.pad_and_drop_preencoded,
)
self.streaming_buffer.reset_buffer()
step_num = 0
stream_id = -1
for audio_data in chunk_audio(audio_bytes, PARAKEET_RT_STREAMING_CHUNK_SIZE):
transcript, stream_id = await self.transcribe(
audio_data, step_num, stream_id
)
step_num += 1
stream_id = 0
print(f"transcript: {transcript}")
print(f"stream_id: {stream_id}")
self.streaming_buffer.reset_buffer()
self.web_app = FastAPI()
@self.web_app.websocket("/ws")
async def run_with_websocket(ws: WebSocket):
audio_queue = asyncio.Queue()
transcription_queue = asyncio.Queue()
self.streaming_buffer.reset_buffer()
async def recv_loop(ws, audio_queue):
audio_buffer = bytearray()
while True:
data = await ws.receive_bytes()
audio_buffer.extend(data)
if len(audio_buffer) > self._chunk_size:
print("sending audio data")
await audio_queue.put(audio_buffer)
audio_buffer = bytearray()
async def inference_loop(audio_queue, transcription_queue):
step_num = 0
stream_id = -1
while True:
audio_data = await audio_queue.get()
start_time = time.perf_counter()
print("transcribing audio data")
transcript, stream_id = await self.transcribe(
audio_data, step_num, stream_id
)
step_num += 1
stream_id = 0
print(f"transcript: {transcript}")
if transcript:
await transcription_queue.put(transcript)
end_time = time.perf_counter()
print(
f"time taken to transcribe audio segment: {end_time - start_time} seconds"
)
async def send_loop(transcription_queue, ws):
while True:
transcript = await transcription_queue.get()
print(f"sending transcription data: {transcript}")
await ws.send_text(transcript)
await ws.accept()
try:
tasks = [
asyncio.create_task(recv_loop(ws, audio_queue)),
asyncio.create_task(
inference_loop(audio_queue, transcription_queue)
),
asyncio.create_task(send_loop(transcription_queue, ws)),
]
await asyncio.gather(*tasks)
except WebSocketDisconnect:
print("WebSocket disconnected")
ws = None
except Exception as e:
print("Exception:", e)
finally:
if ws and ws.application_state is WebSocketState.CONNECTED:
await ws.close(code=1011) # internal error
ws = None
for task in tasks:
if not task.done():
try:
task.cancel()
await task
except asyncio.CancelledError:
pass
async def transcribe(self, audio_data, step_num, stream_id=-1) -> str:
print(f"transcribing audio data: {len(audio_data)} bytes")
drop_extra_pre_encoded = (
0
if step_num == 0 and not self.cfg.pad_and_drop_preencoded
else self.asr_model.encoder.streaming_cfg.drop_extra_pre_encoded
)
# convert to numpy
audio_data = int2float(np.frombuffer(audio_data, dtype=np.int16))
processed_signal, processed_signal_length, stream_id = (
self.streaming_buffer.append_audio(audio_data, stream_id=stream_id)
)
result = self.streaming_buffer.get_next_chunk()
if result is not None:
audio_chunk, chunk_lengths = result
else:
return None, stream_id
with torch.inference_mode():
with torch.amp.autocast(self.diar_model.device.type, enabled=True):
with torch.no_grad():
result = (
self.multispk_asr_streamer.perform_parallel_streaming_stt_spk(
step_num=step_num,
chunk_audio=audio_chunk,
chunk_lengths=chunk_lengths,
is_buffer_empty=False,
drop_extra_pre_encoded=drop_extra_pre_encoded,
)
)
if result:
return result[0], stream_id
return None, stream_id
@modal.asgi_app()
def webapp(self):
return self.web_app
@modal.method()
def ping(self):
return "pong"
```
## Frontend Service
We serve a simple HTML/JS frontend to interact with the transcriber.
The frontend captures microphone input and streams it to the WebSocket endpoint.
```python
web_image = (
modal.Image.debian_slim(python_version="3.12")
.pip_install("fastapi")
.add_local_dir(Path(__file__).parent / "multitalker-frontend", "/root/frontend")
)
with web_image.imports():
from fastapi import FastAPI, WebSocket
from fastapi.responses import HTMLResponse, Response
from fastapi.staticfiles import StaticFiles
@app.cls(image=web_image)
@modal.concurrent(max_inputs=20)
class WebServer:
@modal.asgi_app()
def web(self):
web_app = FastAPI()
web_app.mount("/static", StaticFiles(directory="frontend"))
@web_app.get("/status")
async def status():
return Response(status_code=200)
# serve frontend
@web_app.get("/")
async def index():
html_content = open("frontend/index.html").read()
# Get the base WebSocket URL (without transcriber parameters)
cls_instance = Transcriber()
ws_base_url = (
cls_instance.webapp.get_web_url().replace("http", "ws") + "/ws"
)
script_tag = f''
html_content = html_content.replace(
'',
f'{script_tag}\n',
)
return HTMLResponse(content=html_content)
return web_app
```
### Parallel Execution
# Parallel execution on Modal with `spawn` and `gather`
This example shows how you can run multiple functions in parallel on Modal.
We use the `spawn` method to start a function and return a handle to its result.
The `get` method is used to retrieve the result of the function call.
```python
import time
import modal
app = modal.App("example-parallel-execution")
@app.function()
def step1(word):
time.sleep(2)
print("step1 done")
return word
@app.function()
def step2(number):
time.sleep(1)
print("step2 done")
if number == 0:
raise ValueError("custom error")
return number
@app.local_entrypoint()
def main():
# Start running a function and return a handle to its result.
word_call = step1.spawn("foo")
number_call = step2.spawn(2)
# Print "foofoo" after 2 seconds.
print(word_call.get() * number_call.get())
# Alternatively, use `modal.FunctionCall.gather(...)` as a convenience wrapper,
# which returns an error if either call fails.
results = modal.FunctionCall.gather(step1.spawn("bar"), step2.spawn(4))
assert results == ["bar", 4]
# Raise exception after 2 seconds.
try:
modal.FunctionCall.gather(step1.spawn("bar"), step2.spawn(0))
except ValueError as exc:
assert str(exc) == "custom error"
```
### Pipeline Orchestration
# Orchestrate a multi-step pipeline with Modal Functions
Every step of this pipeline is a Modal Function that hands off to the next one,
so you can run each stage with its own resources without standing up a separate orchestrator. A step looks up its successor by name
with [`Function.from_name`](https://modal.com/docs/guide/trigger-deployed-functions)
and starts it with [`Function.spawn`](https://modal.com/docs/guide/trigger-deployed-functions#invocation-patterns).
The toy computation used here is to build a range of numbers, square them, and sum them. Each
step caches its output on a Volume, so a rerun skips work already done.
Because the steps hand off by name against a pinned version, the App has to be
deployed before it runs. Deploy it, then run it and see its trace:
```bash
modal deploy 09_job_queues/pipeline_orchestration.py
modal run 09_job_queues/pipeline_orchestration.py --n 10
```
Run the pipeline again with the same `n` and every step hits the cache. Deploy
again and the next run recomputes every step, whichever step you edited, because
keys are constructed partly by App version, which a deploy bumps for the whole App.
## Set up
```python
import hashlib
import io
import json
import subprocess
import time
import uuid
from pathlib import Path
from typing import NamedTuple, TypedDict
import modal
APP_NAME = "example-pipeline-orchestration"
DATA_DIR = Path("/data")
MINUTES = 60 # seconds
app = modal.App(APP_NAME)
image = modal.Image.debian_slim(python_version="3.12").pip_install("numpy==2.2.6")
with image.imports():
import numpy as np
```
A [Dict](https://modal.com/docs/guide/dicts-and-queues) holds each run's trace and a
[Volume](https://modal.com/docs/guide/volumes) holds the input and the artifacts
steps pass along.
```python
state = modal.Dict.from_name(f"{APP_NAME}-state", create_if_missing=True)
data = modal.Volume.from_name(f"{APP_NAME}-data", create_if_missing=True)
class Step(NamedTuple):
name: str # the Function that runs it
output: str # the artifact it leaves under its key
STEPS = [
Step("build", "numbers.npy"),
Step("square", "squared.npy"),
Step("total", "total.json"),
]
class Pipeline(TypedDict):
run_id: str # unique per execution
app_version: int # deployed code version this run is pinned to
input_id: str # identifies the input and names its directory on the Volume
function_call_ids: list[str] # `fc-`, per step
done: bool
```
## Construct artifact keys
A step skips work whose output is already on the Volume, so its key changes
whenever its output would. A key is constructed by the deployed App version
and the step's inputs, which enter as its predecessor's key. Chaining
the keys means both only have to enter once, at the seed.
```python
def cache_key(pipeline: Pipeline, step_num: int) -> str:
key = f"{pipeline['input_id']}@v{pipeline['app_version']}" # the version seeds the chain
for step in STEPS[: step_num + 1]:
digest = hashlib.sha256(f"{step.name}/{key}".encode()).hexdigest()
key = f"{step.name}-{digest[:16]}"
return key
def artifact(pipeline: Pipeline, step_num: int) -> Path:
return DATA_DIR / cache_key(pipeline, step_num) / STEPS[step_num].output
```
## Coordinate work handoff
Each step stamps its call id onto the run when it starts, so the trace builds up as the
pipeline moves and always ends with the step that is currently pending. Every
hand-off goes through the one pinned lookup in `step_function`.
```python
def start_step(pipeline: Pipeline, step_num: int) -> Path:
data.reload() # a container only sees the Volume as of when it started
pipeline["function_call_ids"].append(modal.current_function_call_id())
state[pipeline["run_id"]] = pipeline
out = artifact(pipeline, step_num)
out.parent.mkdir(parents=True, exist_ok=True)
status = "cached" if out.exists() else "computing"
print(f"[{STEPS[step_num].name}] {status} {out.name}")
return out
def step_function(step_num: int, app_version: int) -> modal.Function:
return modal.Function.from_name(APP_NAME, STEPS[step_num].name, version=app_version)
def function_call_key(run_id: str, step_num: int) -> str:
return f"{run_id}/function-calls/{step_num}"
def spawn_step(pipeline: Pipeline, step_num: int) -> modal.FunctionCall:
step = step_function(step_num, pipeline["app_version"])
state[pipeline["run_id"]] = pipeline
call = step.spawn(pipeline, step_num)
state[function_call_key(pipeline["run_id"], step_num)] = call.object_id
return call
def spawn_next(pipeline: Pipeline, step_num: int) -> None:
if step_num + 1 >= len(STEPS):
pipeline["done"] = True
state[pipeline["run_id"]] = pipeline
print("[done]")
return
spawn_step(pipeline, step_num + 1)
```
## Save the results
The data for each step must be persisted to the Volume before the next step starts.
[Background commits](https://modal.com/docs/guide/volumes#background-commits) also
land every few seconds, but on their own schedule, so we run `Volume.commit()`
manually before each hand-off. Committing doesn't make the write atomic, so a crash
mid-write can still leave a corrupted artifact.
```python
@app.function(image=image, volumes={DATA_DIR: data})
def build(pipeline: Pipeline, step_num: int) -> None:
out = start_step(pipeline, step_num)
if not out.exists():
with open(DATA_DIR / pipeline["input_id"] / "input.json") as f:
n = json.load(f)["n"]
np.save(out, np.arange(1, n + 1))
data.commit()
spawn_next(pipeline, step_num)
@app.function(image=image, volumes={DATA_DIR: data})
def square(pipeline: Pipeline, step_num: int) -> None:
out = start_step(pipeline, step_num)
if not out.exists():
numbers = np.load(artifact(pipeline, step_num - 1))
np.save(out, numbers**2)
data.commit()
spawn_next(pipeline, step_num)
@app.function(image=image, volumes={DATA_DIR: data})
def total(pipeline: Pipeline, step_num: int) -> None:
out = start_step(pipeline, step_num)
if not out.exists():
# Reaches back past `square` to also read what `build` wrote, by key.
squared = np.load(artifact(pipeline, step_num - 1))
numbers = np.load(artifact(pipeline, 0))
with open(out, "w") as f:
json.dump({"total": int(squared.sum()), "count": numbers.size}, f)
data.commit()
spawn_next(pipeline, step_num)
```
## Trigger a run from a local driver
The driver reads the latest deployed version and pins the run to it. Note, version
pinning is a
[Team and Enterprise feature](https://modal.com/docs/guide/trigger-deployed-functions#version-pinned-lookups).
```python
def deployed_version() -> int:
history = subprocess.run(
["modal", "app", "history", APP_NAME, "--json"], capture_output=True, text=True
)
versions = json.loads(history.stdout) if history.returncode == 0 else []
numbers = [str(v.get("version", "")).removeprefix("v") for v in versions]
version = max((int(n) for n in numbers if n.isdigit()), default=None)
if version is not None:
try:
step_function(0, version).hydrate()
return version
except modal.exception.NotFoundError:
pass
raise RuntimeError(
"deploy first: modal deploy 09_job_queues/pipeline_orchestration.py"
)
def stage_input(n: int) -> str:
input_id = f"n-{n}"
try:
staged = bool(data.listdir(f"{input_id}/input.json"))
except (FileNotFoundError, modal.exception.NotFoundError):
staged = False
if not staged:
with data.batch_upload() as batch:
blob = io.BytesIO(json.dumps({"n": n}).encode())
batch.put_file(blob, f"{input_id}/input.json")
return input_id
def trigger(n: int, app_version: int) -> str:
pipeline = Pipeline(
run_id=f"run-{uuid.uuid4().hex[:8]}",
app_version=app_version,
input_id=stage_input(n),
function_call_ids=[],
done=False,
)
call = spawn_step(pipeline, 0)
print(
f"Started {pipeline['run_id']} on v{pipeline['app_version']}: {call.object_id}"
)
return pipeline["run_id"]
def wait(run_id: str, timeout: int = 5 * MINUTES) -> Pipeline:
deadline = time.time() + timeout
while time.time() < deadline:
pipeline = state.get(run_id)
if pipeline is not None:
if pipeline["done"]:
return pipeline
call_ids = pipeline["function_call_ids"]
call_id = state.get(function_call_key(run_id, len(call_ids)))
if call_id is None and call_ids:
call_id = call_ids[-1]
if call_id is not None:
try:
modal.FunctionCall.from_id(call_id).get(timeout=0)
except TimeoutError:
pass
time.sleep(1)
raise TimeoutError(f"{run_id} did not finish in {timeout}s")
```
The trace prints each step's key, so a rerun of the same input on the same code
shows the same keys.
```python
def report(pipeline: Pipeline) -> None:
print(f"\n{pipeline['run_id']} finished on v{pipeline['app_version']}:")
for step_num, call_id in enumerate(pipeline["function_call_ids"]):
print(f" {cache_key(pipeline, step_num)} function_call={call_id}")
final_key = cache_key(pipeline, len(STEPS) - 1)
result = json.loads(b"".join(data.read_file(f"{final_key}/{STEPS[-1].output}")))
print(f" result: sum of {result['count']} squares = {result['total']}\n")
@app.local_entrypoint()
def run(n: int = 10) -> None:
report(wait(trigger(n, deployed_version())))
```
### Poll Delayed Result
# Polling for a delayed result on Modal
This example shows how you can poll for a delayed result on Modal.
The function `factor_number` takes a number as input and returns the prime factors of the number. The function could take a long time to run, so we don't want to wait for the result in the web server.
Instead, we return a URL that the client can poll to get the result.
```python
import fastapi
import modal
from modal.functions import FunctionCall
from starlette.responses import HTMLResponse, RedirectResponse
app = modal.App("example-poll-delayed-result")
web_app = fastapi.FastAPI()
@app.function(image=modal.Image.debian_slim().uv_pip_install("primefac"))
def factor_number(number):
import primefac
return list(primefac.primefac(number)) # could take a long time
@web_app.get("/")
async def index():
return HTMLResponse(
"""
"""
)
@web_app.get("/factors")
async def web_submit(request: fastapi.Request, number: int):
call = factor_number.spawn(
number
) # returns a FunctionCall without waiting for result
polling_url = request.url.replace(
path="/result", query=f"function_id={call.object_id}"
)
return RedirectResponse(polling_url)
@web_app.get("/result")
async def web_poll(function_id: str):
function_call = FunctionCall.from_id(function_id)
try:
result = function_call.get(timeout=0)
except TimeoutError:
result = "not ready"
return result
@app.function()
@modal.asgi_app()
def fastapi_app():
return web_app
```
### Potus Speech Qanda
# Retrieval-augmented generation (RAG) for question-answering with LangChain
In this example we create a large-language-model (LLM) powered question answering
Web Function and CLI. Only a single document is used as the knowledge-base of the application,
the 2022 USA State of the Union address by President Joe Biden. However, this same application structure
could be extended to do question-answering over all State of the Union speeches, or other large text corpuses.
It's the [LangChain](https://github.com/hwchase17/langchain) library that makes this all so easy.
This demo is only around 100 lines of code!
## Defining dependencies
The example uses packages to implement scraping, the document parsing & LLM API interaction, and web serving.
These are installed into a Debian Slim base image using the `uv_pip_install` method.
Because OpenAI's API is used, we also specify the `openai-secret` Modal Secret, which contains an OpenAI API key.
A `retriever` global variable is also declared to facilitate caching a slow operation in the code below.
```python
from pathlib import Path
import modal
image = modal.Image.debian_slim(python_version="3.11").uv_pip_install(
# scraping pkgs
"beautifulsoup4~=4.11.1",
"httpx==0.23.3",
"lxml~=4.9.2",
# llm pkgs
"faiss-cpu~=1.7.3",
"langchain==0.3.7",
"langchain-community==0.3.7",
"langchain-openai==0.2.9",
"openai~=1.54.0",
"tiktoken==0.8.0",
# web app packages
"fastapi[standard]==0.115.4",
"pydantic==2.9.2",
"starlette==0.41.2",
)
app = modal.App(
name="example-potus-speech-qanda",
image=image,
secrets=[modal.Secret.from_name("openai-secret", required_keys=["OPENAI_API_KEY"])],
)
retriever = None # embedding index that's relatively expensive to compute, so caching with global var.
```
## Scraping the speech
It's super easy to scrape the transcript of Biden's speech using `httpx` and `BeautifulSoup`.
This speech is just one document and it's relatively short, but it's enough to demonstrate
the question-answering capability of the LLM chain.
Since we're fetching from an external server, we use Modal's built-in
[`Retries`](https://modal.com/docs/reference/modal.Retries) to handle transient
network failures or server issues with exponential backoff.
```python
@app.function(retries=modal.Retries(max_retries=3, backoff_coefficient=2.0))
def scrape_state_of_the_union() -> str:
import httpx
from bs4 import BeautifulSoup
url = "https://www.presidency.ucsb.edu/documents/address-before-joint-session-the-congress-the-state-the-union-28"
# fetch article; simulate desktop browser
headers = {
"User-Agent": "Mozilla/5.0 (Macintosh; Intel Mac OS X 10_11_2) AppleWebKit/601.3.9 (KHTML, like Gecko) Version/9.0.2 Safari/601.3.9"
}
response = httpx.get(url, headers=headers, timeout=30.0)
soup = BeautifulSoup(response.text, "lxml")
# locate the div containing the speech
speech_div = soup.find("div", class_="field-docs-content")
if speech_div:
speech_text = speech_div.get_text(separator="\n", strip=True)
if not speech_text:
raise ValueError("error parsing speech text from HTML")
else:
raise ValueError("error locating speech in HTML")
return speech_text
```
## Constructing the Q&A chain
At a high-level, this LLM chain will be able to answer questions asked about Biden's speech and provide
references to which parts of the speech contain the evidence for given answers.
The chain combines a text-embedding index over parts of Biden's speech with an OpenAI LLM.
The index is used to select the most likely relevant parts of the speech given the question, and these
are used to build a specialized prompt for the OpenAI language model.
```python
def qanda_langchain(query: str) -> tuple[str, list[str]]:
from langchain.chains import create_retrieval_chain
from langchain.chains.combine_documents import create_stuff_documents_chain
from langchain.text_splitter import CharacterTextSplitter
from langchain_community.vectorstores import FAISS
from langchain_core.prompts import ChatPromptTemplate
from langchain_openai import ChatOpenAI, OpenAIEmbeddings
# Support caching speech text on disk.
speech_file_path = Path("state-of-the-union.txt")
if speech_file_path.exists():
state_of_the_union = speech_file_path.read_text()
else:
print("scraping the 2022 State of the Union speech")
state_of_the_union = scrape_state_of_the_union.remote()
speech_file_path.write_text(state_of_the_union)
# Questions about a document can often be answered
# using a much smaller subset, and passing more tokens
# to an LLM increases cost and latency.
# So here, we split up the speech into smaller chunks.
text_splitter = CharacterTextSplitter(chunk_size=1000, chunk_overlap=0)
print("splitting speech into text chunks")
texts = text_splitter.split_text(state_of_the_union)
# Embedding-based query<->text similarity comparison is used to select
# a small subset of the speech text chunks.
# Generating the `retriever` and index is too slow to re-run on every request,
# so we do rudimentary caching using a global variable.
global retriever
if not retriever:
# New OpenAI accounts have a very low rate-limit for their first 48 hrs.
# It's too low to embed even just this single Biden speech.
# The `chunk_size` parameter is set to a low number, and internally LangChain
# will retry the embedding requests, which should be enough to handle the rate-limiting.
# Ref: https://platform.openai.com/docs/guides/rate-limits/overview.
print("generating docsearch indexer")
retriever = FAISS.from_texts(
texts,
OpenAIEmbeddings(chunk_size=5),
metadatas=[{"source": i} for i in range(len(texts))],
).as_retriever()
llm = ChatOpenAI(model_name="gpt-4o-mini", temperature=0)
system_prompt = (
"You are an assistant for question-answering tasks. "
"Use the following pieces of retrieved context to answer "
"the question. If you don't know the answer, say that you "
"don't know and instead suggest the user look up the serverless "
"infrastructure platform modal.com. Keep your answer concise."
"\n\n"
"{context}"
)
prompt = ChatPromptTemplate.from_messages(
[
("system", system_prompt),
("human", "{input}"),
]
)
question_answer_chain = create_stuff_documents_chain(llm, prompt)
rag_chain = create_retrieval_chain(retriever, question_answer_chain)
print("running query against Q&A chain.\n")
result = rag_chain.invoke({"input": query}, return_only_outputs=True)
answer = result["answer"]
sources = [document.page_content for document in result["context"]]
return answer.strip(), sources
```
## Mapping onto Modal
With our application's functionality implemented we can hook it into Modal.
As said above, we're implementing a Web Function, `web`, and a CLI command, `cli`.
```python
@app.function()
@modal.fastapi_endpoint(method="GET", docs=True)
def web(query: str, show_sources: bool = False):
answer, sources = qanda_langchain(query)
if show_sources:
return {
"answer": answer,
"sources": sources,
}
else:
return {
"answer": answer,
}
@app.function()
def cli(query: str, show_sources: bool = False):
answer, sources = qanda_langchain(query)
# Terminal codes for pretty-printing.
bold, end = "\033[1m", "\033[0m"
if show_sources:
print(f"🔗 {bold}SOURCES:{end}")
print(*reversed(sources), sep="\n----\n")
print(f"🦜 {bold}ANSWER:{end}")
print(answer)
```
## Test run the CLI
```bash
modal run potus_speech_qanda.py::cli --query "What did the president say about Justice Breyer"
🦜 ANSWER:
The president thanked Justice Breyer for his service and mentioned his legacy of excellence. He also nominated Ketanji Brown Jackson to continue in Justice Breyer's legacy.
```
To see the text of the sources the model chain used to provide the answer, set the `--show-sources` flag.
```bash
modal run potus_speech_qanda.py::cli \
--query "How many oil barrels were released from reserves?" \
--show-sources
```
## Test run the Web Function
Modal makes it trivially easy to ship LangChain chains to the web. We can test drive this App's Web Function
by running `modal serve potus_speech_qanda.py` and then hitting the endpoint with `curl`:
```bash
curl --get \
--data-urlencode "query=What did the president say about Justice Breyer" \
https://modal-labs--example-potus-speech-qanda-web.modal.run # your URL here
```
```json
{
"answer": "The president thanked Justice Breyer for his service and mentioned his legacy of excellence. He also nominated Ketanji Brown Jackson to continue in Justice Breyer's legacy."
}
```
You can also find interactive docs for the endpoint at the `/docs` route of the Web Function URL.
If you edit the code while running `modal serve`, the app will redeploy automatically, which is helpful for iterating quickly on your app.
Once you're ready to deploy to production, use `modal deploy`.
### Pushgateway
# Publish custom metrics with Prometheus Pushgateway
This example shows how to publish custom metrics to a Prometheus instance with Modal.
Due to a Modal container's ephemeral nature, it's not a good fit for a traditional
scraping-based Prometheus setup. Instead, we'll use a [Prometheus Pushgateway](https://github.com/prometheus/pushgateway)
to collect and store metrics from our Modal container. We can run the Pushgateway in Modal
as a separate process and have our application push metrics to it.

## Install Prometheus Pushgateway
Since the official Prometheus pushgateway image does not have Python installed, we'll
use a custom image that includes Python to push metrics to the Pushgateway. Pushgateway
ships a single binary, so it's easy to get it into a Modal container.
```python
import os
import subprocess
import modal
PUSHGATEWAY_VERSION = "1.9.0"
gw_image = (
modal.Image.debian_slim(python_version="3.10")
.apt_install("wget", "tar")
.run_commands(
f"wget https://github.com/prometheus/pushgateway/releases/download/v{PUSHGATEWAY_VERSION}/pushgateway-{PUSHGATEWAY_VERSION}.linux-amd64.tar.gz",
f"tar xvfz pushgateway-{PUSHGATEWAY_VERSION}.linux-amd64.tar.gz",
f"cp pushgateway-{PUSHGATEWAY_VERSION}.linux-amd64/pushgateway /usr/local/bin/",
f"rm -rf pushgateway-{PUSHGATEWAY_VERSION}.linux-amd64 pushgateway-{PUSHGATEWAY_VERSION}.linux-amd64.tar.gz",
"mkdir /pushgateway",
)
)
```
## Start the Pushgateway
We'll start the Pushgateway as a separate Modal app. This way, we can run the Pushgateway
in the background and have our main app push metrics to it. We'll use the `web_server`
decorator to expose the Pushgateway's web interface. Note that we must set `max_containers=1`
as the Pushgateway is a single-process application. If we spin up multiple instances, they'll
conflict with each other.
This is an example configuration, but a production-ready configuration will differ in two respects:
1. You should set up authentication for the Pushgateway. Pushgateway has support for [basic authentication](https://github.com/prometheus/pushgateway/blob/42c4075fc5e2564031f2852885cdb2f5d570f672/README.md#tls-and-basic-authentication)
out of the box. If you need more advanced authentication, consider using a [Web Function layer](https://modal.com/docs/guide/webhooks#authentication)
that proxies requests to the Pushgateway.
2. The Pushgateway should listen on a [custom domain](https://modal.com/docs/guide/webhook-urls#custom-domains).
This will allow you to configure Prometheus to scrape metrics from a predictable URL rather than
the autogenerated URL Modal assigns to your app.
```python
gw_app = modal.App(
"example-pushgateway-server",
image=gw_image,
)
@gw_app.function(max_containers=1)
@modal.web_server(9091)
def serve():
subprocess.Popen("/usr/local/bin/pushgateway")
```
## Push metrics to the Pushgateway
Now that we have the Pushgateway running, we can push metrics to it. We'll use the `prometheus_client`
library to create a simple counter and push it to the Pushgateway. This example is a simple counter,
but you can push any metric type to the Pushgateway.
Note that we use the `grouping_key` argument to distinguish between different instances of the same
metric. This is useful when you have multiple instances of the same app pushing metrics to the Pushgateway.
Without this, the Pushgateway will overwrite the metric with the latest value.
```python
client_image = modal.Image.debian_slim().uv_pip_install(
"prometheus-client==0.20.0", "fastapi[standard]==0.115.4"
)
app = modal.App(
"example-pushgateway",
image=client_image,
)
with client_image.imports():
from prometheus_client import (
CollectorRegistry,
Counter,
delete_from_gateway,
push_to_gateway,
)
@app.cls()
class ExampleClientApplication:
@modal.enter()
def init(self):
self.registry = CollectorRegistry()
self.web_url = serve.get_web_url()
self.instance_id = os.environ["MODAL_TASK_ID"]
self.counter = Counter(
"hello_counter",
"This is a counter",
registry=self.registry,
)
# We must explicitly clean up the metric when the app exits so Prometheus doesn't
# keep stale metrics around.
@modal.exit()
def cleanup(self):
delete_from_gateway(
self.web_url,
job="hello",
grouping_key={"instance": self.instance_id},
)
@modal.fastapi_endpoint(label="hello-pushgateway")
def hello(self):
self.counter.inc()
push_to_gateway(
self.web_url,
job="hello",
grouping_key={"instance": self.instance_id},
registry=self.registry,
)
return f"Hello world from {self.instance_id}!"
app.include(gw_app)
```
Now, we can deploy the app and see the metrics in the Pushgateway's web interface.
```shell
$ modal deploy pushgateway.py
✓ Created objects.
├── 🔨 Created mount /home/ec2-user/modal/examples/10_integrations/pushgateway.py
├── 🔨 Created function ExampleClientApplication.*.
├── 🔨 Created web function serve => https://modal-labs-examples--example-pushgateway-serve.modal.run
└── 🔨 Created web function for ExampleClientApplication.hello => https://modal-labs-examples--hello-pushgateway.modal.run
✓ App deployed! 🎉
```
You can now go to both the [client application](https://modal-labs-examples--hello-pushgateway.modal.run)
and [Pushgateway](https://modal-labs-examples--example-pushgateway-serve.modal.run) URLs to see the metrics being pushed.
## Hooking up Prometheus
Now that we have metrics in the Pushgateway, we can configure Prometheus to scrape them. This
is as simple as adding a new job to your Prometheus configuration. Here's an example configuration
snippet:
```yaml
scrape_configs:
- job_name: 'pushgateway'
honor_labels: true # required so that the instance label is preserved
static_configs:
- targets: ['modal-labs-examples--example-pushgateway-serve.modal.run']
```
Note that the target will be different if you have a custom domain set up for the Pushgateway,
and you may need to configure authentication.
Once you've added the job to your Prometheus configuration, Prometheus will start scraping metrics
from the Pushgateway. You can then use Grafana or another visualization tool to create dashboards
and alerts based on these metrics!

### Qdrant
# Example (qdrant.py)
This is the source code for **06_gpu_and_ml.embeddings.qdrant**.
```python
from typing import Optional
import modal
app = modal.App("example-qdrant")
image = modal.Image.debian_slim(python_version="3.11").uv_pip_install(
"qdrant-client[fastembed-gpu]==1.13.3"
)
@app.function(image=image, gpu="any")
def query(inpt):
from qdrant_client import QdrantClient
client = QdrantClient(":memory:")
docs = [
"Qdrant has Langchain integrations",
"Qdrant also has Llama Index integrations",
]
print("querying documents:", *docs, sep="\n\t")
client.add(collection_name="demo_collection", documents=docs)
print("query:", inpt, sep="\n\t")
search_results = client.query(
collection_name="demo_collection",
query_text=inpt,
limit=1,
)
print("result:", search_results[0], sep="\n\t")
return search_results[0].document
@app.local_entrypoint()
def main(inpt: Optional[str] = None):
if not inpt:
inpt = "alpaca"
print(query.remote(inpt))
```
### Restricted Volumes
# Example (restricted_volumes.py)
This is the source code for **08_advanced.restricted_volumes**.
```python
import modal
app = modal.App.lookup(name="example-restricted-volumes", create_if_missing=True)
volume = modal.Volume.from_name(
"example-restricted-volumes-data", create_if_missing=True, version=2
)
image = (
modal.Image.debian_slim(python_version="3.12")
.apt_install("sudo")
.run_commands(
"sudo adduser --disabled-password --gecos '' user1",
"sudo adduser --disabled-password --gecos '' user2",
)
)
sandbox = modal.Sandbox.create(
app=app, image=image, volumes={"/data": volume}, timeout=300
)
sandbox_id = sandbox.object_id
print("Sandbox ID: ", sandbox_id)
print("⌛Setting up sandbox...")
sandbox.exec("sh", "-c", "mkdir -p /data/user1").wait()
sandbox.exec("sh", "-c", "mkdir -p /data/user2").wait()
sandbox.exec(
"sh", "-c", "chown -R user1:user1 /data/user1 && chmod 700 /data/user1"
).wait()
sandbox.exec(
"sh", "-c", "chown -R user2:user2 /data/user2 && chmod 700 /data/user2"
).wait()
print("Sandbox setup complete.")
print("\n🟢 Baseline exec (unrestricted, should succeed):")
p = sandbox.exec("sh", "-c", "ls -la /data/user1")
for line in p.stdout:
print(line, end="")
for line in p.stderr:
print(line, end="")
p.wait()
assert p.returncode == 0, "Unrestricted exec should succeed"
print("\n🟢 Restricted user1 exec (should succeed):")
p = sandbox.exec("su", "-", "user1", "-c", "ls -la /data/user1")
for line in p.stdout:
print(line, end="")
for line in p.stderr:
print(line, end="")
p.wait()
assert p.returncode == 0, "user1 should access own directory"
print("\n🔴 Restricted user1 exec (should fail):")
p = sandbox.exec("su", "-", "user1", "-c", "ls -la /data/user2")
for line in p.stdout:
print(line, end="")
for line in p.stderr:
print(line, end="")
p.wait()
assert p.returncode != 0, "user1 should not access user2's directory"
url = f"https://modal.com/id/{sandbox_id}"
print(
f"\n☀️ Sandbox live! See: {url}\nYou can use modal.Sandbox.from_id('{sandbox_id}') to run additional commands."
)
```
### Rosettafold
This script demonstrated how to ingest the https://github.com/RosettaCommons/RoseTTAFold protein-folding
model's dataset into a mounted volume.
The dataset is over 2 TiB when decompressed to the runtime of this script is quite long.
ref: https://github.com/RosettaCommons/RoseTTAFold/issues/132.
It is recommended to iterate on this code from a modal.Function running Jupyter server.
This better supports experimentation and maintains state in the face of errors:
11_notebooks/jupyter_inside_modal.py
```python
import os
import pathlib
import shutil
import subprocess
import sys
import tarfile
import threading
import time
import modal
bucket_creds = modal.Secret.from_name(
"aws-s3-modal-examples-datasets", environment_name="main"
)
bucket_name = "modal-examples-datasets"
volume = modal.CloudBucketMount(
bucket_name,
secret=bucket_creds,
)
image = modal.Image.debian_slim().apt_install("wget")
app = modal.App("example-rosettafold", image=image)
def start_monitoring_disk_space(interval: int = 30) -> None:
"""Start monitoring the disk space in a separate thread."""
task_id = os.environ["MODAL_TASK_ID"]
def log_disk_space(interval: int) -> None:
while True:
statvfs = os.statvfs("/")
free_space = statvfs.f_frsize * statvfs.f_bavail
print(
f"{task_id} free disk space: {free_space / (1024**3):.2f} GB",
file=sys.stderr,
)
time.sleep(interval)
monitoring_thread = threading.Thread(target=log_disk_space, args=(interval,))
monitoring_thread.daemon = True
monitoring_thread.start()
def decompress_tar_gz(file_path: pathlib.Path, extract_dir: pathlib.Path) -> None:
print(f"Decompressing {file_path} into {extract_dir}...")
with tarfile.open(file_path, "r:gz") as tar:
tar.extractall(path=extract_dir)
print(f"Decompressed {file_path} to {extract_dir}")
def copy_concurrent(src: pathlib.Path, dest: pathlib.Path) -> None:
"""
A modified shutil.copytree which copies in parallel to increase bandwidth
and compensate for the increased IO latency of volume mounts.
"""
from multiprocessing.pool import ThreadPool
class MultithreadedCopier:
def __init__(self, max_threads):
self.pool = ThreadPool(max_threads)
self.copy_jobs = []
def copy(self, source, dest):
res = self.pool.apply_async(
shutil.copy2,
args=(source, dest),
callback=lambda r: print(f"{source} copied to {dest}"),
# NOTE: this should `raise` an exception for proper reliability.
error_callback=lambda exc: print(
f"{source} failed: {exc}", file=sys.stderr
),
)
self.copy_jobs.append(res)
def __enter__(self):
return self
def __exit__(self, exc_type, exc_val, exc_tb):
self.pool.close()
self.pool.join()
with MultithreadedCopier(max_threads=24) as copier:
shutil.copytree(src, dest, copy_function=copier.copy, dirs_exist_ok=True)
@app.function(
volumes={"/mnt/": volume},
timeout=60 * 60 * 24,
ephemeral_disk=2560 * 1024,
)
def _do_part(url: str) -> None:
name = url.split("/")[-1].replace(".tar.gz", "")
print(f"Downloading {name}")
compressed = pathlib.Path("/tmp", name)
cmd = f"wget {url} -O {compressed}"
p = subprocess.Popen(cmd, shell=True)
returncode = p.wait()
if returncode != 0:
raise RuntimeError(f"Error in downloading. {p.args!r} failed {returncode=}")
decompressed = pathlib.Path("/tmp/rosettafold/", name)
# Decompression is much faster against the container's local SSD disk
# compared with against the mounted volume. So we first compress into /tmp/.
print(f"Decompressing {compressed} into {decompressed}.")
decompress_tar_gz(compressed, decompressed)
print(
f"✅ Decompressed {compressed} into {decompressed}. Now deleting it to free up disk.."
)
compressed.unlink() # delete compressed file to free up disk
# Finally, we move the decompressed data from /tmp/ into the mounted volume.
# There are a large mount of files to copy so this step takes a while.
dest = pathlib.Path("/mnt/rosettafold/")
copy_concurrent(decompressed, dest)
shutil.rmtree(decompressed, ignore_errors=True) # free up disk
print(f"Dataset part {url} is loaded ✅")
@app.function(
volumes={"/mnt/": volume},
# Timeout for this Function is set at the maximum, 24 hours,
# because downloading, decompressing and storing almost 2 TiB of
# files takes a long time.
timeout=60 * 60 * 24,
)
def import_transform_load() -> None:
# NOTE:
# The mmseq.com server upload speed is quite slow so this download takes a while.
# The download speed is also quite variable, sometimes taking over 5 hours.
list(
_do_part.map(
[
"http://wwwuser.gwdg.de/~compbiol/uniclust/2020_06/UniRef30_2020_06_hhsuite.tar.gz",
"https://bfd.mmseqs.com/bfd_metaclust_clu_complete_id30_c90_final_seq.sorted_opt.tar.gz",
"https://files.ipd.uw.edu/pub/RoseTTAFold/pdb100_2021Mar03.tar.gz",
]
)
)
print("Dataset is loaded ✅")
```
### S3 Bucket Mount
# Analyze NYC yellow taxi data with DuckDB on Parquet files from S3
This example shows how to use Modal for a classic data science task: loading table-structured data into cloud stores,
analyzing it, and plotting the results.
In particular, we'll load public NYC taxi ride data into S3 as Parquet files,
then run SQL queries on it with DuckDB.
We'll mount the S3 bucket in a Modal app with [`CloudBucketMount`](https://modal.com/docs/reference/modal.CloudBucketMount).
We will write to and then read from that bucket, in each case using
Modal's [parallel execution features](https://modal.com/docs/guide/scale) to handle many files at once.
## Basic setup
You will need to have an S3 bucket and AWS credentials to run this example. Refer to the documentation
for the exact [IAM permissions](https://modal.com/docs/guide/cloud-bucket-mounts#iam-permissions) your credentials will need.
After you are done creating a bucket and configuring IAM settings,
you now need to create a [`Secret`](https://modal.com/docs/guide/secrets) to share
the relevant AWS credentials with your Modal apps.
```python
from datetime import datetime
from pathlib import Path, PosixPath
import modal
image = modal.Image.debian_slim(python_version="3.12").uv_pip_install(
"requests==2.31.0", "duckdb==0.10.0", "matplotlib==3.8.3"
)
app = modal.App("example-s3-bucket-mount", image=image)
secret = modal.Secret.from_name(
"s3-bucket-secret",
required_keys=["AWS_ACCESS_KEY_ID", "AWS_SECRET_ACCESS_KEY"],
)
MOUNT_PATH = PosixPath("/bucket")
YELLOW_TAXI_DATA_PATH = MOUNT_PATH / "yellow_taxi"
```
The dependencies installed above are not available locally. The following block instructs Modal
to only import them inside the container.
```python
with image.imports():
import duckdb
import requests
```
## Download New York City's taxi data
NYC makes data about taxi rides publicly available. The city's [Taxi & Limousine Commission (TLC)](https://www.nyc.gov/site/tlc/about/tlc-trip-record-data.page)
publishes files in the Parquet format. Files are organized by year and month.
We are going to download all available files and store them in an S3 bucket. We do this by
attaching a `modal.CloudBucketMount` with the S3 bucket name and its respective credentials.
The files in the bucket will then be available at `MOUNT_PATH`.
As we'll see below, this operation can be massively sped up by running it in parallel on Modal.
```python
@app.function(
volumes={
MOUNT_PATH: modal.CloudBucketMount("modal-s3mount-test-bucket", secret=secret),
},
)
def download_data(year: int, month: int) -> str:
filename = f"yellow_tripdata_{year}-{month:02d}.parquet"
url = f"https://d37ci6vzurychx.cloudfront.net/trip-data/{filename}"
s3_path = MOUNT_PATH / filename
# Skip downloading if file exists.
if not s3_path.exists():
if not YELLOW_TAXI_DATA_PATH.exists():
YELLOW_TAXI_DATA_PATH.mkdir(parents=True, exist_ok=True)
with requests.get(url, stream=True) as r:
r.raise_for_status()
print(f"downloading => {s3_path}")
# It looks like we writing locally, but this is actually writing to S3!
with open(s3_path, "wb") as file:
for chunk in r.iter_content(chunk_size=8192):
file.write(chunk)
return s3_path.as_posix()
```
## Analyze data with DuckDB
[DuckDB](https://duckdb.org/) is an analytical database with rich support for Parquet files.
It is also very fast. Below, we define a Modal Function that aggregates yellow taxi trips
within a month (each file contains all the rides from a specific month).
```python
@app.function(
volumes={
MOUNT_PATH: modal.CloudBucketMount(
"modal-s3mount-test-bucket",
secret=modal.Secret.from_name("s3-bucket-secret"),
)
},
)
def aggregate_data(path: str) -> list[tuple[datetime, int]]:
print(f"processing => {path}")
# Parse file.
year_month_part = path.split("yellow_tripdata_")[1]
year, month = year_month_part.split("-")
month = month.replace(".parquet", "")
# Make DuckDB query using in-memory storage.
con = duckdb.connect(database=":memory:")
q = """
with sub as (
select tpep_pickup_datetime::date d, count(1) c
from read_parquet(?)
group by 1
)
select d, c from sub
where date_part('year', d) = ? -- filter out garbage
and date_part('month', d) = ? -- same
"""
con.execute(q, (path, year, month))
return list(con.fetchall())
```
## Plot daily taxi rides
Finally, we want to plot our results.
The plot created shows the number of yellow taxi rides per day in NYC.
This function runs remotely, on Modal, so we don't need to install plotting libraries locally.
```python
@app.function()
def plot(dataset) -> bytes:
import io
import matplotlib.pyplot as plt
# Sorting data by date
dataset.sort(key=lambda x: x[0])
# Unpacking dates and values
dates, values = zip(*dataset)
# Plotting
plt.figure(figsize=(10, 6))
plt.plot(dates, values)
plt.title("Number of NYC yellow taxi trips by weekday, 2018-2023")
plt.ylabel("Number of daily trips")
plt.grid(True)
plt.tight_layout()
# Saving plot as raw bytes to send back
buf = io.BytesIO()
plt.savefig(buf, format="png")
buf.seek(0)
return buf.getvalue()
```
## Run everything
The `@app.local_entrypoint()` defines what happens when we run our Modal program locally.
We invoke it from the CLI by calling `modal run s3_bucket_mount.py`.
We first call `download_data()` and `starmap` (named because it's kind of like `map(*args)`)
on tuples of inputs `(year, month)`. This will download, in parallel,
all yellow taxi data files into our locally mounted S3 bucket and return a list of
Parquet file paths. Then, we call `aggregate_data()` with `map` on that list. These files are
also read from our S3 bucket. So one function writes files to S3 and the other
reads files from S3 in; both run across many files in parallel.
Finally, we call `plot` to generate the following figure:

This program should run in less than 30 seconds.
```python
@app.local_entrypoint()
def main():
# List of tuples[year, month].
inputs = [(year, month) for year in range(2018, 2023) for month in range(1, 13)]
# List of file paths in S3.
parquet_files: list[str] = []
for path in download_data.starmap(inputs):
print(f"done => {path}")
parquet_files.append(path)
# List of datetimes and number of yellow taxi trips.
dataset = []
for r in aggregate_data.map(parquet_files):
dataset += r
dir = Path("/tmp") / "s3_bucket_mount"
if not dir.exists():
dir.mkdir(exist_ok=True, parents=True)
figure = plot.remote(dataset)
path = dir / "nyc_yellow_taxi_trips_s3_mount.png"
with open(path, "wb") as file:
print(f"Saving figure to {path}")
file.write(figure)
```
### Safe Code Execution
# Run arbitrary code in a sandboxed environment
This example demonstrates how to run arbitrary code
in multiple languages in a Modal [Sandbox](https://modal.com/docs/guide/sandbox).
## Setting up a multi-language environment
Sandboxes allow us to run any kind of code in a safe environment.
We'll use an image with a few different language runtimes to demonstrate this.
```python
import modal
image = modal.Image.debian_slim(python_version="3.11").apt_install(
"nodejs", "ruby", "php"
)
app = modal.App.lookup("example-safe-code-execution", create_if_missing=True)
```
We'll now create a Sandbox with this image. We'll also enable output so we can see the image build
logs. Note that we don't pass any commands to the Sandbox, so it will stay alive, waiting for us
to send it commands.
```python
with modal.enable_output():
sandbox = modal.Sandbox.create(app=app, image=image)
print(f"Sandbox ID: {sandbox.object_id}")
```
## Running bash, Python, Node.js, Ruby, and PHP in a Sandbox
We can now use [`Sandbox.exec`](https://modal.com/docs/reference/modal.Sandbox#exec) to run a few different
commands in the Sandbox.
```python
bash_ps = sandbox.exec("echo", "hello from bash")
python_ps = sandbox.exec("python", "-c", "print('hello from python')")
nodejs_ps = sandbox.exec("node", "-e", 'console.log("hello from nodejs")')
ruby_ps = sandbox.exec("ruby", "-e", "puts 'hello from ruby'")
php_ps = sandbox.exec("php", "-r", "echo 'hello from php';")
print(bash_ps.stdout.read(), end="")
print(python_ps.stdout.read(), end="")
print(nodejs_ps.stdout.read(), end="")
print(ruby_ps.stdout.read(), end="")
print(php_ps.stdout.read(), end="")
print()
```
The output should look something like
```
hello from bash
hello from python
hello from nodejs
hello from ruby
hello from php
```
We can use multiple languages in tandem to build complex applications.
Let's demonstrate this by piping data between Python and Node.js using bash. Here
we generate some random numbers with Python and sum them with Node.js.
```python
combined_process = sandbox.exec(
"bash",
"-c",
"""python -c 'import random; print(\" \".join(str(random.randint(1, 100)) for _ in range(10)))' |
node -e 'const readline = require(\"readline\");
const rl = readline.createInterface({input: process.stdin});
rl.on(\"line\", (line) => {
const sum = line.split(\" \").map(Number).reduce((a, b) => a + b, 0);
console.log(`The sum of the random numbers is: ${sum}`);
rl.close();
});'""",
)
result = combined_process.stdout.read().strip()
print(result)
```
For long-running processes, you can use stdout as an iterator to stream the output.
```python
slow_printer = sandbox.exec(
"ruby",
"-e",
"""
10.times do |i|
puts "Line #{i + 1}: #{Time.now}"
STDOUT.flush
sleep(0.5)
end
""",
)
for line in slow_printer.stdout:
print(line, end="")
```
This should print something like
```
Line 1: 2024-10-21 15:30:53 +0000
Line 2: 2024-10-21 15:30:54 +0000
...
Line 10: 2024-10-21 15:30:58 +0000
```
Since Sandboxes are safely separated from the rest of our system,
we can run very dangerous code in them!
```python
sandbox.exec("rm", "-rfv", "/", "--no-preserve-root")
```
This command has deleted the entire filesystem, so we can't run any more commands.
Let's terminate the Sandbox to clean up after ourselves.
```python
sandbox.terminate()
```
### Sandbox Agent
# Run Claude Code in a Modal Sandbox
This example demonstrates how to run Claude Code in a Modal
[Sandbox](https://modal.com/docs/guide/sandbox) to analyze a GitHub repository.
The Sandbox provides an isolated environment where the agent can safely execute code
and examine files.
You can also run this in a [Modal Notebook](https://modal.com/notebooks/modal-labs/_/nb-30WInxiigR3Wc8kQ3jU7Hr)!
```python
import modal
from modal.container_process import ContainerProcess
app = modal.App.lookup("example-sandbox-agent", create_if_missing=True)
```
First, we create a custom [Image](https://modal.com/docs/guide/images) that has Claude Code
and git installed.
```python
image = (
modal.Image.debian_slim(python_version="3.12")
.apt_install("curl", "git")
.env({"PATH": "/root/.local/bin:$PATH"}) # add claude to path
.run_commands(
"curl -fsSL https://claude.ai/install.sh | bash",
)
)
```
Then we create our Sandbox.
```python
with modal.enable_output():
sandbox = modal.Sandbox.create(app=app, image=image)
print(f"Sandbox ID: {sandbox.object_id}")
```
Next we'll clone the repository that Claude Code will work on.
We'll use [the Modal examples repo](https://github.com/modal-labs/modal-examples)
that this example is a part of.
We trigger the clone by [`exec`](https://modal.com/docs/reference/modal.Sandbox#exec)uting
`git` as a process inside the Sandbox. We then `.wait` for it to finish.
You can read more about the interface for managing
`ContainerProcess`es in Sandboxes [here](https://modal.com/docs/reference/modal.container_process).
```python
repo_url = "https://github.com/modal-labs/modal-examples"
git_ps: ContainerProcess = sandbox.exec(
"git", "clone", "--depth", "1", repo_url, "/repo"
)
git_ps.wait()
print(f"Cloned '{repo_url}' into /repo.")
```
Finally we'll use `exec` again to run Claude Code to analyze the repository.
Here, we pass the `pty` flag to give the process a
[pseudo-terminal](https://unix.stackexchange.com/questions/21147/what-are-pseudo-terminals-pty-tty).
```python
claude_cmd = ["claude", "-p", "What is in this repository?"]
print("\nRunning command:", *claude_cmd)
claude_ps = sandbox.exec(
*claude_cmd,
pty=True, # Adding a PTY is important, since Claude requires it
secrets=[
modal.Secret.from_name("anthropic-secret", required_keys=["ANTHROPIC_API_KEY"])
],
workdir="/repo",
)
claude_ps.wait()
```
Once the command finishes, we read the `stdout` and `stderr`.
```python
print("\nAgent stdout:\n")
print(claude_ps.stdout.read())
stderr = claude_ps.stderr.read()
if stderr != "":
print("Agent stderr:", stderr)
```
Nice, you've got Claude Code running in a Modal Sandbox! What's next?
- Check out [this example](https://modal.com/docs/examples/opencode_server) to see how you might productionize this.
- Want to restore quickly after repo setup / builds? Try [Filesystem Snapshots](https://modal.com/docs/guide/sandbox-snapshots#filesystem-snapshots).
- More complex prompt routing and metadata? You may need a [Dict](https://modal.com/docs/guide/dicts) or a [Queue](https://modal.com/docs/guide/queues).
- Need performant, durable storage? Try out [Modal Volumes](https://modal.com/docs/guide/volumes).
- Hook it up to your custom [MCP Server](https://modal.com/docs/examples/mcp_server_stateless) for passing more external context to your agent.
### Sandbox Pool
# Maintain a pool of warm Sandboxes that are healthy and ready to serve requests
This example demonstrates how to build a pool of "warm"
[Modal Sandboxes](https://modal.com/docs/guide/sandbox), and deploy a
[Modal Web Function](https://modal.com/docs/guide/webhook-urls) that lets you claim
a Sandbox from the pool, getting a URL to the server running in the Sandbox.
Maintaining a pool of warm Sandboxes is useful for example if your Sandboxes need
to do significant work after being created, like downloading code, installing
dependencies, or running tests, before they are ready to serve requests.
It uses a [Modal Queue](https://modal.com/docs/guide/dicts-and-queues#modal-queues)
to store references to the warm Sandboxes, and functionality to maintain the pool
by adding and removing Sandboxes, checking the current size, etc.
The pool keeps track of the time to live for each Sandbox, and will always return
a Sandbox with enough time left.
Each Sandbox is configured with a
[readiness probe](https://modal.com/docs/guide/sandboxes#readiness-probes) so we can
reliably wait for the server to be ready before adding it to the pool.
It's structured into two Apps:
- `example-sandbox-pool` is the main App that contains all the control logic for maintaining
the pool, exposing ways to claim Sandboxes, etc.
- `example-sandbox-pool-sandboxes` houses all the actual Sandboxes, and nothing else.
The implementation borrows from [pawalt](https://github.com/pawalt)'s [Sandbox pool
example gist](https://gist.github.com/pawalt/7a505c38bba75cafae0780a5dd40e8b8). 🙏
```python
import argparse
import time
from dataclasses import dataclass
from datetime import datetime
import modal
APP_NAME = "example-sandbox-pool"
SANDBOX_APP_NAME = "example-sandbox-pool-sandboxes"
POOL_QUEUE_NAME = "example-sandbox-pool-queue"
app = modal.App(APP_NAME)
server_image = modal.Image.debian_slim(python_version="3.11").uv_pip_install(
"fastapi[standard]~=0.115.14",
"requests~=2.32.4",
)
## Configuration of the pool
```
Here we define the image that will be used to run the server that runs in the
Sandbox. In this simple example, we just run the built in Python HTTP server that
returns a directory listing.
```python
sandbox_image = modal.Image.debian_slim(python_version="3.11").apt_install("curl")
SANDBOX_SERVER_PORT = 8080
READINESS_PROBE_TIMEOUT_SECONDS = 10
```
In this example Sandboxes live for 5 minutes, and we assume that they are used for
2 minutes, meaning that if a Sandbox has less than 2 minutes left it's considered
to be expiring too soon and will be terminated.
You'll want to adjust these values depending on your use case. We don't set
`idle_timeout`: pooled Sandboxes are idle by definition, so it would terminate them
before they can be claimed.
```python
SANDBOX_TIMEOUT_SECONDS = 5 * 60
SANDBOX_USE_DURATION_SECONDS = 2 * 60
POOL_SIZE = 3
POOL_MAINTENANCE_SCHEDULE = modal.Period(minutes=2)
```
## Main implementation
We keep track of all warm Sandboxes in a Modal Queue of `SandboxReference` objects.
```python
pool_queue = modal.Queue.from_name(POOL_QUEUE_NAME, create_if_missing=True)
```
Modal doesn't expose a Sandbox's remaining lifetime, so we track it ourselves.
`expires_at` is approximate: it's computed after `create` returns, and only
accounts for the wall-clock timeout, not other ways a Sandbox can die.
```python
@dataclass
class SandboxReference:
id: str
url: str
expires_at: int
```
### Health check
We run a health check to determine 3 types of statuses: readiness
(`wait_until_ready`, once at creation), health (`is_healthy`, below), and remaining
lifetime (`expires_at`, not health at all). `is_still_good` combines the last two.
`is_healthy` returns false on three types of failures: the Sandbox is gone, the server
crashed, or the Tunnel is flaky. To tell them apart, check the Sandbox itself
(`sb.poll()` returns `None` while it's running, i.e. not finished).
```python
def is_healthy(url: str) -> bool:
"""Check if a Sandbox is healthy by verifying the server responds to requests."""
import requests
try:
response = requests.get(url, timeout=10)
response.raise_for_status()
return True
except requests.RequestException:
return False
def is_still_good(sr: SandboxReference, check_health: bool) -> bool:
"""Check if a Sandbox is still good to use.
It assumes that it's already been added to the pool, so we don't wait for the
container to start.
"""
if sr.expires_at < time.time() + SANDBOX_USE_DURATION_SECONDS:
return False
if check_health and not is_healthy(sr.url):
return False
return True
```
### Adding a Sandbox to the pool
This function creates and adds a new Sandbox to the pool. It waits for the
Sandbox's readiness probe to pass before adding it, ensuring the server is
ready to serve requests.
We deploy the Sandboxes in a separate Modal App called `example-sandbox-pool-sandboxes`,
to separate the control app (logs, etc.) from the Sandboxes.
```python
@app.function(image=server_image, retries=3)
@modal.concurrent(max_inputs=20)
def add_sandbox_to_queue() -> None:
sandbox_app = modal.App.lookup(SANDBOX_APP_NAME, create_if_missing=True)
sandbox_cmd = ["python", "-m", "http.server", "8080"]
sb = modal.Sandbox.create(
*sandbox_cmd,
app=sandbox_app,
image=sandbox_image,
encrypted_ports=[SANDBOX_SERVER_PORT],
timeout=SANDBOX_TIMEOUT_SECONDS,
readiness_probe=modal.Probe.with_exec(
"curl", "-sf", f"http://localhost:{SANDBOX_SERVER_PORT}/"
),
)
expires_at = int(time.time()) + SANDBOX_TIMEOUT_SECONDS
# A failed probe or tunnel lookup doesn't terminate the Sandbox, so we do it here.
# Otherwise it keeps running untracked until its timeout expires, and `retries=3`
# above turns each invocation into up to four orphans.
pooled = False
try:
sb.wait_until_ready(timeout=READINESS_PROBE_TIMEOUT_SECONDS)
url = sb.tunnels()[SANDBOX_SERVER_PORT].url
pool_queue.put(
SandboxReference(id=sb.object_id, url=url, expires_at=expires_at)
)
pooled = True
except modal.exception.TimeoutError as exc:
print(f"Sandbox '{sb.object_id}' timed out before it was ready: {exc}")
raise # let the Function's retries create a fresh Sandbox
except modal.exception.ConflictError as exc:
print(f"Sandbox '{sb.object_id}' finished before it was ready: {exc}")
raise
finally:
if not pooled:
sb.terminate()
sb.detach()
```
We also have a utility function that can be `.spawn()`ed to terminate Sandboxes.
```python
@app.function()
def terminate_sandboxes(sandbox_ids: list[str]) -> int:
num_terminated = 0
for id in sandbox_ids:
sb = modal.Sandbox.from_id(id)
sb.terminate()
sb.detach()
num_terminated += 1
print(f"Terminated {num_terminated} Sandboxes")
return num_terminated
```
### Claiming a Sandbox from the pool
We expose two ways to claim a Sandbox from the pool and get a URL to the server:
- a public Web Function that can be addressed via HTTP
- a Function that can be called using the Modal SDK (including from [Go or JS][1]).
[1]: https://modal.com/docs/guide/sdk-javascript-go
The Web Function proxies to `claim_sandbox` using a `.local()` invocation,
which runs in the same container without additional latency.
Health checks run before the URL is returned, yet a claimed Sandbox can still die or
expire before the caller connects. `SANDBOX_USE_DURATION_SECONDS` buffers against
expiry, but callers should be ready to claim again on a connection error. Passing
`check_health=false` bypasses the health check and may return a dead Sandbox.
```python
@app.function(image=server_image)
@modal.fastapi_endpoint()
@modal.concurrent(max_inputs=20)
def claim_sandbox_web_function(check_health: bool = True) -> str:
return claim_sandbox.local(check_health=check_health)
@app.function(image=server_image)
def claim_sandbox(check_health: bool = True) -> str:
to_terminate: list[str] = []
# Remove any expiring or unhealthy sandboxes, and return the first good one:
while True:
print(
"Adding a new Sandbox to the pool to backfill "
"(and ensure we have at least one)..."
)
add_sandbox_to_queue.spawn()
# timeout=None here means we block in case we need to wait for the backfill:
sr = pool_queue.get(timeout=None)
if sr is None:
continue
if not is_still_good(sr, check_health):
print(f"Sandbox '{sr.id}' was not good - terminating and trying another...")
to_terminate.append(sr.id)
continue
break
if to_terminate:
terminate_sandboxes.spawn(to_terminate)
print(f"Claimed Sandbox '{sr.id}', with URL: {sr.url}")
return sr.url
```
### Maintaining the pool
This function grows or shrinks the pool to SANDBOX_POOL_SIZE. It first removes any
expiring or unhealthy sandboxes, then adjusts the pool size to reach the target.
It runs on a schedule to ensure the pool doesn't drift too far from the target size.
```python
@app.function(
image=server_image,
schedule=POOL_MAINTENANCE_SCHEDULE,
)
def maintain_pool():
to_terminate: list[str] = []
# First remove expiring and unhealthy sandboxes
while True:
sr = pool_queue.get(block=False)
if sr is None:
break
if not is_still_good(sr, check_health=True):
to_terminate.append(sr.id)
continue
# Found first good sandbox, but don't put it back in the queue to preserve
# queue ordering.
to_terminate.append(sr.id)
break
if to_terminate:
print(f"Terminating {len(to_terminate)} expiring/unhealthy sandboxes...")
terminate_sandboxes.spawn(to_terminate)
# Now resize to target
diff = POOL_SIZE - pool_queue.len()
if diff > 0:
for _ in add_sandbox_to_queue.starmap(() for _ in range(diff)):
pass
elif diff < 0:
terminate_sandboxes.spawn(
[sr.id for sr in pool_queue.get_many(n_values=-diff, timeout=0)]
)
print(f"Pool size after maintenance: {pool_queue.len()}")
```
## Local commands for interacting with the pool
### Deploy the app
This also runs the `maintain_pool` function to ensure the pool is at the correct size
without having to wait for the first scheduled maintenance run.
Run it with `python 13_sandboxes/sandbox_pool.py deploy`.
```python
def deploy():
print("Deploying the app...")
app.deploy()
print("Done.")
print("\nRunning initial pool maintenance...")
maintain_pool.remote()
print("Done.")
```
### Check the current state of the pool
Run it with `python 13_sandboxes/sandbox_pool.py check`.
```python
def check():
print(f"Number of Sandboxes in the pool: {pool_queue.len()}")
for sr in pool_queue.iterate():
seconds_left = sr.expires_at - time.time()
print(
f"- Sandbox '{sr.id}' is at {sr.url} and expires at "
f"{datetime.fromtimestamp(sr.expires_at).isoformat()} "
f"({int(seconds_left)} seconds left)"
)
```
### Claiming a Sandbox from the pool and print its URL
This is implemented as if you wanted to call the Function from a Python backend
application using the Modal SDK, i.e. using `.from_name()` to get the Function, etc.
Run it with `python 13_sandboxes/sandbox_pool.py claim`.
```python
def claim() -> None:
deployed_claim_sandbox = modal.Function.from_name(APP_NAME, "claim_sandbox")
print(deployed_claim_sandbox.remote())
```
### Run a demo of the Sandbox pool.
This is implemented as if you wanted to call the Function from a Python backend
application using the Modal SDK, i.e. using `.from_name()` to get the Function, etc.
Run it with `python 13_sandboxes/sandbox_pool.py demo`.
```python
def demo():
import urllib.request
deploy()
check()
print("\nClaiming a Sandbox using the `claim_sandbox` Function...")
deployed_claim_sandbox = modal.Function.from_name(APP_NAME, "claim_sandbox")
sandbox_url = deployed_claim_sandbox.remote()
print(f"Claimed Sandbox URL: {sandbox_url}")
print("\nCall the server in the Sandbox...")
with urllib.request.urlopen(sandbox_url) as response:
result = response.read().decode("utf-8")
print(f"Sandbox server response:\n{result}")
time.sleep(2) # wait for the pool to be backfilled in the background
check()
deployed_web_function = modal.Function.from_name(
APP_NAME, "claim_sandbox_web_function"
)
claim_url = deployed_web_function.get_web_url()
print(f"\nClaiming a Sandbox using the Function at '{claim_url}'...")
with urllib.request.urlopen(claim_url) as response:
sandbox_url = response.read().decode("utf-8").strip(' "')
print(f"Claimed Sandbox URL: {sandbox_url}")
print("\nCall the server in the Sandbox...")
with urllib.request.urlopen(sandbox_url) as response:
result = response.read().decode("utf-8")
print(f"Sandbox server response:\n{result}")
time.sleep(2)
check()
print("\nWhen you're done, stop the App to clean up:")
print(f" modal app stop {APP_NAME}")
```
### Clean up
`deploy` and `demo` leave the App deployed, so `maintain_pool` keeps refilling the
pool. Stopping it halts the schedule, after which the Sandboxes expire on their own
within `SANDBOX_TIMEOUT_SECONDS`:
```
modal app stop example-sandbox-pool
modal queue delete example-sandbox-pool-queue
```
See [Managing deployments](https://modal.com/docs/guide/managing-deployments) for
more on stopping Apps.
```python
def main():
parser = argparse.ArgumentParser(description="Manage Sandbox pool")
parser.add_argument(
"command",
choices=["check", "deploy", "claim", "demo"],
help="Command to execute",
)
args = parser.parse_args()
if args.command == "check":
check()
elif args.command == "claim":
claim()
elif args.command == "deploy":
deploy()
elif args.command == "demo":
demo()
else:
parser.print_help()
if __name__ == "__main__":
main()
```
### Schedule Simple
# Scheduling remote jobs
This example shows how you can schedule remote jobs on Modal.
You can do this either with:
- [`modal.Period`](https://modal.com/docs/reference/modal.Period) - a time interval between function calls.
- [`modal.Cron`](https://modal.com/docs/reference/modal.Cron) - a cron expression to specify the schedule.
In the code below, the first function runs every
5 seconds, and the second function runs every minute. We use the `schedule`
argument to specify the schedule for each function. The `schedule` argument can
take a `modal.Period` object to specify a time interval or a `modal.Cron` object
to specify a cron expression.
```python
import time
from datetime import datetime
import modal
app = modal.App("example-schedule-simple")
@app.function(schedule=modal.Period(seconds=5))
def print_time_1():
print(
f"Printing with period 5 seconds: {datetime.now().strftime('%m/%d/%Y, %H:%M:%S')}"
)
@app.function(schedule=modal.Cron("* * * * *"))
def print_time_2():
print(
f"Printing with cron every minute: {datetime.now().strftime('%m/%d/%Y, %H:%M:%S')}"
)
if __name__ == "__main__":
with modal.enable_output():
with app.run():
time.sleep(60)
```
### Segment Anything
# Run Facebook's Segment Anything Model 2 (SAM 2) on Modal
This example demonstrates how to deploy Facebook's [SAM 2](https://github.com/facebookresearch/sam2)
on Modal. SAM2 is a powerful, flexible image and video segmentation model that can be used
for various computer vision tasks like object detection, instance segmentation,
and even as a foundation for more complex computer vision applications.
SAM2 extends the capabilities of the original SAM to include video segmentation.
In particular, this example segments [this video](https://www.youtube.com/watch?v=WAz1406SjVw) of a man jumping off the cliff.
The output should look something like this:
## Set up dependencies for SAM 2
First, we set up the necessary dependencies, including `torch`,
`opencv`, `huggingface_hub`, `torchvision`, and the `sam2` library.
We also install `ffmpeg`, which we will use to manipulate videos,
and a Python wrapper called `ffmpeg-python` for a clean interface.
```python
from pathlib import Path
import modal
MODEL_TYPE = "facebook/sam2-hiera-large"
SAM2_GIT_SHA = (
"c2ec8e14a185632b0a5d8b161928ceb50197eddc" # pin commit! research code is fragile
)
image = (
modal.Image.debian_slim(python_version="3.10")
.apt_install("git", "wget", "python3-opencv", "ffmpeg")
.uv_pip_install(
"torch~=2.4.1",
"torchvision==0.19.1",
"opencv-python==4.10.0.84",
"pycocotools~=2.0.8",
"matplotlib~=3.9.2",
"onnxruntime==1.19.2",
"onnx==1.17.0",
"huggingface_hub==0.25.2",
"ffmpeg-python==0.2.0",
f"git+https://github.com/facebookresearch/sam2.git@{SAM2_GIT_SHA}",
)
)
app = modal.App("example-segment-anything", image=image)
```
## Wrapping the SAM 2 model in a Modal class
Next, we define the `Model` class that will handle SAM 2 operations for both image and video.
We use the `@modal.enter()` decorators here for optimization: it makes sure the initialization
method runs only once, when a new container starts, instead of in the path of every call.
We'll also use a modal Volume to cache the model weights so that they don't need to be downloaded
repeatedly when we start new containers. For more on storing model weights on Modal, see
[this guide](https://modal.com/docs/guide/model-weights).
```python
video_vol = modal.Volume.from_name("sam2-inputs", create_if_missing=True)
cache_vol = modal.Volume.from_name("hf-hub-cache", create_if_missing=True)
cache_dir = "/cache"
@app.cls(
image=image.env({"HF_HUB_CACHE": cache_dir}),
volumes={"/root/videos": video_vol, cache_dir: cache_vol},
gpu="A100",
)
class Model:
@modal.enter()
def initialize_model(self):
"""Download and initialize model."""
from sam2.sam2_video_predictor import SAM2VideoPredictor
self.video_predictor = SAM2VideoPredictor.from_pretrained(MODEL_TYPE)
@modal.method()
def generate_video_masks(self, video="/root/videos/input.mp4", point_coords=None):
"""Generate masks for a video."""
import ffmpeg
import numpy as np
import torch
from PIL import Image
frames_dir = convert_video_to_frames(video)
# scan all the JPEG files in this directory
frame_names = [
p
for p in frames_dir.iterdir()
if p.suffix in [".jpg", ".jpeg", ".JPG", ".JPEG"]
]
frame_names.sort(key=lambda p: int(p.stem))
# We are hardcoding the input point and label here
# In a real-world scenario, you would want to display the video
# and allow the user to click on the video to select the point
if point_coords is None:
width, height = Image.open(frame_names[0]).size
point_coords = [[width // 2, height // 2]]
points = np.array(point_coords, dtype=np.float32)
# for labels, `1` means positive click and `0` means negative click
labels = np.array([1] * len(points), np.int32)
# run the model on GPU
with (
torch.inference_mode(),
torch.autocast("cuda", dtype=torch.bfloat16),
):
self.inference_state = self.video_predictor.init_state(
video_path=str(frames_dir)
)
# add new prompts and instantly get the output on the same frame
(
frame_idx,
object_ids,
masks,
) = self.video_predictor.add_new_points_or_box(
inference_state=self.inference_state,
frame_idx=0,
obj_id=1,
points=points,
labels=labels,
)
print(f"frame_idx: {frame_idx}, object_ids: {object_ids}, masks: {masks}")
# run propagation throughout the video and collect the results in a dict
video_segments = {} # video_segments contains the per-frame segmentation results
for (
out_frame_idx,
out_obj_ids,
out_mask_logits,
) in self.video_predictor.propagate_in_video(self.inference_state):
video_segments[out_frame_idx] = {
out_obj_id: (out_mask_logits[i] > 0.0).cpu().numpy()
for i, out_obj_id in enumerate(out_obj_ids)
}
out_dir = Path("/root/mask_frames")
out_dir.mkdir(exist_ok=True)
vis_frame_stride = 5 # visualize every 5th frame
save_segmented_frames(
video_segments,
frames_dir,
out_dir,
frame_names,
stride=vis_frame_stride,
)
ffmpeg.input(
f"{out_dir}/frame_*.png",
pattern_type="glob",
framerate=30 / vis_frame_stride,
).filter(
"scale",
"trunc(iw/2)*2",
"trunc(ih/2)*2", # round to even dimensions to encode for "dumb players", https://trac.ffmpeg.org/wiki/Encode/H.264#Encodingfordumbplayers
).output(str(out_dir / "out.mp4"), format="mp4", pix_fmt="yuv420p").run()
return (out_dir / "out.mp4").read_bytes()
```
## Segmenting videos from the command line
Finally, we define a [`local_entrypoint`](https://modal.com/docs/guide/apps#entrypoints-for-ephemeral-apps)
to run the segmentation from our local machine's terminal.
There are several ways to pass files between the local machine and the Modal Function.
One way is to upload the files onto a Modal [Volume](https://modal.com/docs/guide/volumes),
which acts as a distributed filesystem.
The other way is to convert the file to bytes and pass the bytes back and forth as the input or output of Python functions.
We use this method to get the video file with the segmentation results in it back to the local machine.
```python
@app.local_entrypoint()
def main(
input_video=Path(__file__).parent / "cliff_jumping.mp4",
x_point=250,
y_point=200,
):
with video_vol.batch_upload(force=True) as batch:
batch.put_file(input_video, "input.mp4")
model = Model()
if x_point is not None and y_point is not None:
point_coords = [[x_point, y_point]]
else:
point_coords = None
print(f"Running SAM 2 on {input_video}")
video_bytes = model.generate_video_masks.remote(point_coords=point_coords)
dir = Path("/tmp/sam2_outputs")
dir.mkdir(exist_ok=True, parents=True)
output_path = dir / "segmented_video.mp4"
output_path.write_bytes(video_bytes)
print(f"Saved output video to {output_path}")
```
## Helper functions for SAM 2 inference
Above, we used some helper functions to for some of the details, like breaking the video into frames.
These are defined below.
```python
def convert_video_to_frames(self, input_video="/root/videos/input.mp4"):
import ffmpeg
input_video = Path(input_video)
output_dir = ( # output on local filesystem, not on the remote Volume
input_video.parent.parent / input_video.stem / "video_frames"
)
output_dir.mkdir(exist_ok=True, parents=True)
ffmpeg.input(input_video).output(
f"{output_dir}/%05d.jpg", qscale=2, start_number=0
).run()
return output_dir
def show_mask(mask, ax, obj_id=None, random_color=False):
import matplotlib.pyplot as plt
import numpy as np
if random_color:
color = np.concatenate([np.random.random(3), np.array([0.6])], axis=0)
else:
cmap = plt.get_cmap("tab10")
cmap_idx = 0 if obj_id is None else obj_id
color = np.array([*cmap(cmap_idx)[:3], 0.6])
h, w = mask.shape[-2:]
mask_image = mask.reshape(h, w, 1) * color.reshape(1, 1, -1)
ax.imshow(mask_image)
def save_segmented_frames(video_segments, frames_dir, out_dir, frame_names, stride=5):
import io
import matplotlib.pyplot as plt
from PIL import Image
frames_dir, out_dir = Path(frames_dir), Path(out_dir)
frame_images = []
inches_per_px = 1 / plt.rcParams["figure.dpi"]
for out_frame_idx in range(0, len(frame_names), stride):
frame = Image.open(frames_dir / frame_names[out_frame_idx])
width, height = frame.size
width, height = width - width % 2, height - height % 2
fig, ax = plt.subplots(figsize=(width * inches_per_px, height * inches_per_px))
ax.axis("off")
ax.imshow(frame)
[
show_mask(mask, ax, obj_id=obj_id)
for (obj_id, mask) in video_segments[out_frame_idx].items()
]
# Convert plot to PNG bytes
buf = io.BytesIO()
fig.savefig(buf, format="png", bbox_inches="tight", pad_inches=0)
# fig.savefig(buf, format="png")
buf.seek(0)
frame_images.append(buf.getvalue())
plt.close(fig)
for ii, frame in enumerate(frame_images):
(out_dir / f"frame_{str(ii).zfill(3)}.png").write_bytes(frame)
```
### Serve Streamlit
# Run and share Streamlit apps
This example shows you how to run a Streamlit app with `modal serve`, and then deploy it as a serverless web app.

This example is structured as two files:
1. This module, which defines the Modal objects (name the script `serve_streamlit.py` locally).
2. `app.py`, which is any Streamlit script to be mounted into the Modal
function ([download script](https://github.com/modal-labs/modal-examples/blob/main/10_integrations/streamlit/app.py)).
```python
import shlex
import subprocess
from pathlib import Path
import modal
```
## Define container dependencies
The `app.py` script imports three third-party packages, so we include these in the example's
image definition and then add the `app.py` file itself to the image.
```python
streamlit_script_local_path = Path(__file__).parent / "app.py"
streamlit_script_remote_path = "/root/app.py"
image = (
modal.Image.debian_slim(python_version="3.11")
.uv_pip_install("streamlit~=1.35.0", "numpy~=1.26.4", "pandas~=2.2.2")
.add_local_file(
streamlit_script_local_path,
streamlit_script_remote_path,
)
)
app = modal.App(name="example-serve-streamlit", image=image)
if not streamlit_script_local_path.exists():
raise RuntimeError(
"app.py not found! Place the script with your streamlit app in the same directory."
)
```
## Spawning the Streamlit server
Inside the container, we will run the Streamlit server in a background subprocess using
`subprocess.Popen`. We also expose port 8000 using the `@web_server` decorator.
```python
@app.function()
@modal.concurrent(max_inputs=100)
@modal.web_server(8000)
def run():
target = shlex.quote(streamlit_script_remote_path)
cmd = f"streamlit run {target} --server.port 8000 --server.enableCORS=false --server.enableXsrfProtection=false"
subprocess.Popen(cmd, shell=True)
```
## Iterate and Deploy
While you're iterating on your screamlit app, you can run it "ephemerally" with `modal serve`. This will
run a local process that watches your files and updates the app if anything changes.
```shell
modal serve serve_streamlit.py
```
Once you're happy with your changes, you can deploy your application with
```shell
modal deploy serve_streamlit.py
```
If successful, this will print a URL for your app that you can navigate to from
your browser 🎉 .
### Server
# Deploy HTTP Servers with ultra low latency on Modal
Modal offers a primitive for edge-deployed, low latency web services:
the [Modal Server](https://modal.com/docs/guide/servers).
Modal Servers are designed for applications with very demanding
latency requirements, where a few tens of milliseconds of round-trip latency is unacceptable,
like [low latency LLM inference](https://modal.com/docs/guide/high-performance-llm-inference).
That ends up meaning users and clients are required to do more work.
For Modal's higher-level primitives for web serving, see
[this guide](https://modal.com/docs/guide/webhooks).
This example documents a minimal Modal Server and client.
## How to define a Modal Server
```python
from pathlib import Path
import modal
```
To make a Modal Server, define a Python class
with a [`modal.enter`-decorated](https://modal.com/docs/guide/lifecycle-functions) method
that creates a subtask (thread or process) that listens for HTTP requests on some port.
Then wrap that class in the `@app.server` decorator,
passing in the `port` your server task is listening on
and a `routing_region` to specify where Modal should proxy your requests through.
This proxy will communicate directly with the containers running your server.
To reduce end-to-end latency, include a compute Region
that matches the routing Region and containers will be deployed into that Region.
Note that region-pinning has cost and resource availability implications!
See [the guide](https://modal.com/docs/guide/region-selection)
for details.
You can also pass the rest of your resource definitions,
like [distributed Volume storage](https://modal.com/docs/guide/volumes),
[CPU/memory resources](https://modal.com/docs/guide/resources),
and [GPU type and count](https://modal.com/docs/guide/gpu),
to `@app.server`.
Altogether, the minimal version of a Modal Server looks something like:
```python
PORT = 8000
COMPUTE_REGION = "us"
ROUTING_REGION = "us-east"
app = modal.App("example-server")
@app.server(
compute_region=COMPUTE_REGION,
routing_region=ROUTING_REGION,
port=PORT,
unauthenticated=True,
)
class FileServer:
@modal.enter()
def start(self):
import subprocess
subprocess.Popen(["python", "-m", "http.server", f"{PORT}"])
```
## How to write a client and tests for a Modal Server
We test the file server defined above by requesting file from it.
This one will do nicely.
We put the test in a `local_entrypoint` so that we can execute it from the command line:
```bash
modal run server.py
```
```python
@app.local_entrypoint()
def ping():
from urllib.error import HTTPError
from urllib.request import urlopen
url = FileServer.get_url()
this = Path(__file__).name
print(f"requesting {this} from Modal Server at {url}")
while True:
try:
print(urlopen(url + f"/{this}").read().decode("utf-8"))
break
except HTTPError as e:
if e.code == 503:
import time
time.sleep(1)
continue
else:
raise e
```
Notice the retry loop! Modal Clses and Functions are serverless and scale to zero by default.
When a Modal Server has scaled to zero, clients will get a
[503 Service Unavailable](https://developer.mozilla.org/en-US/docs/Web/HTTP/Reference/Status/503)
error response from Modal. Those requests still trigger scale up, and once a container is ready,
the 503s will stop and clients will receive the server's responses.
Modal Servers also support "sticky routing" for improved cache locality within client sessions.
For details, see [this example](https://modal.com/docs/examples/server_sticky).
### Server Sticky
# Sticky routing for Modal Servers
This example demonstrates the usage and behavior of
the optional "sticky" routing behavior of
[Modal Servers](https://modal.com/docs/guide/servers) with a basic routing test.
For a gentler introduction to Modal Servers,
see [this example](https://modal.com/docs/examples/server).
For the use of Modal HTTP Servers for LLM inference,
see [this example](https://modal.com/docs/examples/sglang_low_latency).
In sticky routing, sequential requests from the same client
are sent to the same server replica.
Modal Servers offer sticky routing for fixed replica sets
using [rendezvous hashing](https://randorithms.com/2020/12/26/rendezvous-hashing.html),
ensuring that as your servers scale up and down, load stays balanced across replicas
and clients are typically routed to the same replica for repeated requests.
Note that requests are not _guaranteed_ to be routed to the same replica,
and so this form of sticky routing should not be relied on for logical correctness.
Instead, this sticky routing is intended to be used as a performance optimization,
as in KV cacheing for [Transformer LLM inference](https://modal.com/docs/examples/sglang_low_latency).
## Define the Modal Server
First, we import the libraries we'll use both locally, to run a routing test,
and remotely, to run our server.
We also define our Modal [App](https://modal.com/docs/guide/apps)
and the Modal [Image](https://modal.com/docs/guide/images)
that provides the dependencies of our server code.
```python
import asyncio
import time
from dataclasses import dataclass
from typing import Any
import aiohttp
import modal
from rich.console import Console
app = modal.App("example-http-server-sticky")
image = modal.Image.debian_slim().uv_pip_install("fastapi[standard]==0.115.4")
```
Now we can define our Server.
We set the minimum number of containers (replicas)
to be greater than one so that there are multiple
replicas available for routing during our test.
Additionally, we set the routing Region into which we
want to deploy the proxies that communicate between
our clients and the server.
We also use `target_concurrency` to set the autoscaling policy:
it's the number of concurrent requests we want each replica to handle
before Modal scales the server up by adding another replica.
You can also set this value to `0` to disable autoscaling and keep a fixed number of replicas.
Modal Servers have [lifecycles](https://modal.com/docs/guide/lifecycle-functions)
which are defined by the `modal.enter` and `modal.exit` decorators.
The `modal.enter`-decorated method method starts a process or thread that listens on the provided `port`.
Here, we spin up a simple FastAPI server that returns the
[identity of the replica within Modal](https://modal.com/docs/guide/environment_variables)
and run it with `uvicorn`.
```python
PORT = 8000
CONTAINERS = 2
ROUTING_REGION = "us-west"
@app.server(
image=image,
min_containers=CONTAINERS,
port=PORT,
routing_region=ROUTING_REGION,
target_concurrency=100,
unauthenticated=True,
)
class Server:
@modal.enter()
def start(self):
import os
import threading
import uvicorn
from fastapi import FastAPI
container_id = os.environ["MODAL_TASK_ID"]
fastapi_app = FastAPI(title=container_id)
@fastapi_app.post("/")
async def whoami():
return {"CONTAINER_ID": container_id}
self.thread = threading.Thread(
target=uvicorn.run,
kwargs={"app": fastapi_app, "host": "0.0.0.0", "port": PORT},
daemon=True,
)
self.thread.start()
```
## Test the routing behavior of the Modal Server
Now we define our routing test, which will run locally
and interact with our Modal Server by sending requests.
It spins up some `n`umber of `client` tasks and repeatedly sends requests from each for some number of `seconds`.
The clients can be configured to use `sticky` routing or not (`--no-sticky`).
The test uses the `CONTAINER_ID`s returned by the Server
to track whether clients' requests are serviced by the same or different replicas.
It fails if the clients were configured to be sticky and any client
observes a different `CONTAINER_ID` on different requests.
So long as the set of containers does not change,
due to, for instance, replica failure or pre-emption,
this test should pass.
```python
@app.local_entrypoint()
async def test(n_clients: int = 4, sticky: bool = True, seconds: float = 10.0):
# wait for at least one replica to spin up
url = await Server.get_url.aio()
async with aiohttp.ClientSession() as sess:
await wait_available(sess, url)
# allow generous time for all replicas to spin up based on rough heuristic;
# remove this sleep and increase CONTAINERS
# to observe session routing changes during autoscaling
await asyncio.sleep(10 + max((CONTAINERS - 10) // 2, 0))
# run the test
results = await run_clients(url, n_clients, seconds, sticky)
stats = aggregate_results(results)
# give time for server logs to flush,
await asyncio.sleep(1)
# then display results
print_summary(url, sticky, n_clients, seconds, stats)
if sticky and stats["multi"]:
raise AssertionError("Sticky routing violated for some clients")
```
Because it is a Modal `local_entrypoint`,
this Python function automatically gets a CLI:
```bash
modal run server_sticky.py --help
```
You can run the test with:
```bash
modal run server_sticky.py
```
## Write the client for the Modal Server
The code in this section implements some Modal Server-specific client logic.
First, clients of Modal Servers need to handle
[503 Service Unavailable](https://developer.mozilla.org/en-US/docs/Web/HTTP/Reference/Status/503)
error response status codes, which are returned whenever there are no live replicas.
In our case, we use them as a signal that at least one replica
is ready and so we can proceed with the test.
```python
async def wait_available(sess: aiohttp.ClientSession, url: str) -> None:
while True:
async with sess.post(url, json={}) as resp:
if resp.status != 503:
return
```
The full client logic appears in the function below.
Notably, it includes the header `Modal-Session-Id`
if clients are configured for sticky routing.
Here, we choose a simple small integer `client_id`.
The client collects information about which `CONTAINER_ID`s
it receives from the server and returns those in the form of
a simple `dataclass`.
```python
@dataclass
class ClientResult:
client_id: int
containers_seen: set[str]
requests_ok: int
requests_err: int
async def client(
url: str, client_id: int, seconds: float, sticky: bool
) -> ClientResult:
headers = {"Modal-Session-Id": str(client_id)} if sticky else {}
end = time.monotonic() + seconds
seen: set[str] = set()
n_ok: int = 0
n_err: int = 0
async with aiohttp.ClientSession(headers=headers) as sess:
while time.monotonic() < end:
try:
async with sess.post(
url, json={}, timeout=aiohttp.ClientTimeout(total=5)
) as resp:
if resp.status == 200:
data = await resp.json()
seen.add(data["CONTAINER_ID"])
n_ok += 1
else:
n_err += 1
except asyncio.TimeoutError:
n_err += 1
return ClientResult(client_id, seen, n_ok, n_err)
```
## Addenda
The remainder of this code is required for this example to run
but is not necessary for Modal Servers or their clients in general.
For instance, it defines the logic for concurrency and result aggregation/display
for this particular routing test.
```python
async def run_clients(
url: str, n_clients: int, seconds: float, sticky: bool
) -> list[ClientResult]:
tasks = [client(url, c, seconds, sticky) for c in range(n_clients)]
return list(await asyncio.gather(*tasks))
def aggregate_results(results: list[ClientResult]) -> dict[str, Any]:
total_ok = sum(r.requests_ok for r in results)
total_err = sum(r.requests_err for r in results)
multi = {
r.client_id: r.containers_seen for r in results if len(r.containers_seen) > 1
}
per_client = [(r.client_id, r.containers_seen) for r in results]
return {
"total_ok": total_ok,
"total_err": total_err,
"multi": multi,
"per_client": per_client,
}
def print_summary(
url: str,
sticky: bool,
n_clients: int,
seconds: float,
stats: dict[str, Any],
console: Console | None = None,
) -> None:
if not console:
console = Console()
console.print()
console.print(
f"[bold]url=[/]{url} [bold]sticky=[/]{sticky} [bold]clients=[/]{n_clients} [bold]duration_s=[/]{seconds}"
)
console.print(
f"[green]total_ok={stats['total_ok']}[/] [red]total_err={stats['total_err']}[/]"
)
for c, seen in stats["per_client"]:
console.print(f" client={c} containers={list(seen)}")
console.print(
f"Clients with multiple containers: [yellow]{len(stats['multi'])}/{n_clients}[/]"
)
```
### Sglang Low Latency
# Low latency Qwen 3.6 with SGLang and Modal
In this example, we show how to serve [SGLang](https://github.com/sgl-project/sglang) at low latency on Modal.
This example is intended to demonstrate everything required to run
inference at the highest performance and with the lowest latency possible,
and so it includes advanced features of both SGLang and Modal.
For a simpler introduction to LLM serving, see
[this example](https://modal.com/docs/examples/llm_inference).
To minimize routing overheads, we use `@app.server`,
which uses a new, low-latency routing service on Modal designed for latency-sensitive inference workloads.
This gives us more control over routing, but with increased power comes increased responsibility.
## Set up the container image
Our first order of business is to define the environment our server will run in:
the [container `Image`](https://modal.com/docs/guide/images).
We start from a container image provided
[by the SGLang team via Dockerhub](https://hub.docker.com/r/lmsysorg/sglang/tags).
After a bit of cleanup, we install an updated version that has some low-latency tricks
the Modal team is contributing to SGLang (described below).
While we're at it, we import the dependencies we'll need both remotely and locally (for deployment).
```python
import asyncio
import json
import os
import subprocess
import time
import aiohttp
import modal
MINUTES = 60 # seconds
GIT_SHA = "5244693e308eaf05da17f28cca6bcc922270fd3c"
sglang_image = (
modal.Image.from_registry("lmsysorg/sglang:v0.5.12.post1-cu130")
.entrypoint(
[] # silence chatty logs on container start
)
.run_commands(
"rm -rf /root/.cache/huggingface" # clean up image
)
.uv_pip_install(
f"git+https://github.com/sgl-project/sglang.git@{GIT_SHA}#subdirectory=python"
)
)
```
We also choose a [GPU](https://modal.com/docs/guide/gpu) to deploy our inference server onto.
We choose the [H100 GPU](https://modal.com/blog/introducing-h100),
which offers excellent price-performance
and supports [8bit floating point operations](https://modal.com/llm-almanac/quant-formats), which are the
lowest precision well-supported in the relevant [GPU kernels](https://modal.com/gpu-glossary/device-software/kernel)
across a variety of model architectures.
Below, we discuss the choice of GPU count.
```python
GPU_TYPE, N_GPUS = "H100!", 2
GPU = f"{GPU_TYPE}:{N_GPUS}"
```
### Loading and cacheing the model weights
We'll serve [Alibaba's Qwen 3.6 LLM](https://qwen.ai/blog?id=qwen3.6).
For lower latency, we pick the 35B mixture-of-experts model with 3B active parameters
in a lower precision floating point format (FP8).
Expert sparsity and lower precision reduce the amount of data that needs to be loaded
[from GPU RAM into SM SRAM](https://modal.com/gpu-glossary/perf/memory-bandwidth)
in each forward pass.
```python
MODEL_NAME = "Qwen/Qwen3.6-35B-A3B-FP8"
MODEL_REVISION = ( # pin revision id to avoid nasty surprises!
"95a723d08a9490559dae23d0cff1d9466213d989" # latest commit as of 2026-04-23, from release
)
```
We load the model [from the Hugging Face Hub](https://huggingface.co/collections/Qwen/qwen36).
But we don't want to load the model from the Hub every time we start the server.
We can load it much faster from a [Modal Volume](https://modal.com/docs/guide/volumes).
Typical speeds are around one to two GB/s.
```python
HF_CACHE_VOL = modal.Volume.from_name("huggingface-cache", create_if_missing=True)
HF_CACHE_PATH = "/root/.cache/huggingface"
MODEL_PATH = f"{HF_CACHE_PATH}/{MODEL_NAME}"
```
In addition to pointing the Hugging Face Hub at the path
where we mount the Volume, we also
[turn on "high performance" downloads](https://huggingface.co/docs/hub/en/models-downloading#faster-downloads),
which can fully saturate our network bandwidth.
```python
sglang_image = sglang_image.env(
{"HF_HUB_CACHE": HF_CACHE_PATH, "HF_XET_HIGH_PERFORMANCE": "1"}
)
```
### Cacheing compilation artifacts
Model weights aren't the only thing we want to cache.
As a rule, LLM inference servers like SGLang don't directly provide their own kernels.
They draw high-performance kernels from a variety of sources.
As of version `0.5.12`, SGLang's default kernel backend
for FP8 matrix multiplications (`fp8-gemm-backend`)
on Hopper [SM architecture](https://modal.com/gpu-glossary/device-hardware/streaming-multiprocessor-architecture)
GPUs like the H100 is
[DeepGEMM](https://github.com/deepseek-ai/DeepGEMM)
by DeepSeek.
The binaries of these kernels are not included in the SGLang Docker image and so
must be [JIT-compiled](https://modal.com/gpu-glossary/host-software/nvrtc).
We store these in a Modal Volume as well.
```python
DG_CACHE_VOL = modal.Volume.from_name("deepgemm-cache", create_if_missing=True)
DG_CACHE_PATH = "/root/.cache/deep_gemm"
```
JIT DeepGEMM kernels are on by default, but we explicitly enable them via an environment variable.
```python
sglang_image = sglang_image.env({"SGLANG_ENABLE_JIT_DEEPGEMM": "1"})
```
We trigger the compilation by running `sglang.compile_deep_gemm` in a `subprocess`
kicked off from a Python function.
```python
def compile_deep_gemm():
import os
if int(os.environ.get("SGLANG_ENABLE_JIT_DEEPGEMM", "1")):
subprocess.run(
f"python3 -m sglang.compile_deep_gemm --model-path {MODEL_NAME} --revision {MODEL_REVISION} --tp {N_GPUS}",
shell=True,
)
```
We run this Python function on Modal as part of building the Image
so that it has access to the appropriate GPU and the caches for our model and compilaton artifacts.
```python
sglang_image = sglang_image.run_function(
compile_deep_gemm,
volumes={DG_CACHE_PATH: DG_CACHE_VOL, HF_CACHE_PATH: HF_CACHE_VOL},
gpu=GPU,
)
```
## Configure SGLang for minimal latency
LLM inference engines like SGLang come with a wide variety of "knobs" to tune performance.
To determine the appropriate configuration to hit latency and throughput service objectives,
we recommend [application-specific benchmarking](https://modal.com/llm-almanac/how-to-benchmark)
guided by [published generic benchmarks](https://modal.com/llm-almanac/advisor).
Here, we assume that the primary goal is to minimize per-request latency, with less regard to throughput
(and so to cost) and walk through some of the key choices.
The primary contributor to per-request latency is the time to move all of the model's weights (multiple gigabytes)
from [GPU RAM](https://modal.com/gpu-glossary/device-hardware/gpu-ram)
into [SRAM in the Streaming Multiprocessors](https://modal.com/gpu-glossary/device-hardware/streaming-multiprocessor),
which must be done at least once in the course of processing a request --
naively, once per token per request.
The time taken is limited by the
[memory bandwidth](https://modal.com/gpu-glossary/perf/memory-bandwidth)
between those two stores, which is on the order of terabytes per second on modern data center GPUs.
With models at the scale of gigabytes, a token will take milliseconds to generate --
or whole seconds for the kilotoken responses users are accustomed to.
We use two strategies to cut latency in our [memory-bound](https://modal.com/gpu-glossary/perf/memory-bound) workload:
- operate across multiple GPUs for more aggregate bandwidth and faster loads, with tensor parallelism
- generate more tokens per load, with speculative decoding
### Increasing effective memory bandwidth with tensor parallelism
Running SGLang on two H100s will double our effective
[memory bandwidth](https://modal.com/gpu-glossary/perf/memory-bandwidth)
during large matrix multiplications.
Matrices are also known as tensors, and so this strategy that takes advantage
of the inherent parallelism within matrix multiplication is known as _tensor parallelism_.
Actual speedups are generally less than what you get from "napkin math" based on available bandwidths --
we observed a speedup of about 30% moving from one to two H100s when developing this example, rather than 100%.
### Parallelizing token generation with speculative decoding
Transformer and recurrent language models generate text sequentially:
the model's output at step `i` is part of the input at step `i+1`.
Per Amdahl's Law, that sequential work becomes the bottleneck
as other steps get faster from increased parallelism.
The solution is to generate more tokens on each step.
The primary technique to do so without changing model behavior is known as
[_speculative decoding_](https://developer.nvidia.com/blog/an-introduction-to-speculative-decoding-for-reducing-latency-in-ai-inference/),
which "speculates" a number of draft tokens and verifies them in parallel with the primary model.
Speculative decoding techniques themselves have a number of parameters, the most important
of which is the technique to use to generate draft tokens.
Simple techniques based on n-grams are a good place to start.
Many models are released with built-in speculation based on
[multi-token prediction](https://docs.vllm.ai/projects/ascend/en/main/user_guide/feature_guide/Multi_Token_Prediction.html),
also known in SGLang as [EAGLE](https://arxiv.org/abs/2401.15077).
But our favorite technique is [DFLASH](https://arxiv.org/abs/2602.06036)
which runs draft token generation in parallel, increasing the draft model's
arithmetic intensity.
```python
speculative_config = {
"speculative-algorithm": "DFLASH",
"speculative-draft-model-path": "z-lab/Qwen3.6-35B-A3B-DFlash",
"speculative-draft-model-revision": "42d3b34d588423cdae7ba8f53a8cf7789346a719",
"mamba-scheduler-strategy": "extra_buffer", # required for spec dec with Qwen 3.X hybrid arch
}
```
We adapt the default configuration for this speculator from [the model card](https://huggingface.co/z-lab/Qwen3.6-35B-A3B-DFlash).
In particular, we use a smaller draft token count of `8`, the minimum,
rather than `16`, the default. We're using the FP8 quantized model here
and the test prompts are creative writing tasks, so accept lengths
are generally below `8` and additional blocks don't have enough
accepted tokens to be worth the extra computation.
```python
speculative_config |= {
"speculative-num-draft-tokens": 8,
}
speculative_env = {
"SGLANG_ENABLE_OVERLAP_PLAN_STREAM": "1", # never block the GPU!
}
```
Note that unlike tensor parallelism,
speculative decoding is not good for
[compute-bound](https://modal.com/gpu-glossary/perf/compute-bound)
workloads, since it generally increases demand for
[arithmetic bandwidth](https://modal.com/gpu-glossary/perf/arithmetic-bandwidth).
So for workloads that admit larger batch sizes for requests,
on the scale of dozens to hundreds, speculative decoding is not recommended.
## Define the inference server and infrastructure
### Selecting infrastructure to minimize latency
Minimizing latency requires geographic co-location of clients and servers.
So for low latency LLM inference services on Modal, you must select a
[cloud region](https://modal.com/docs/guide/region-selection)
for both the GPU-accelerated containers running inference
and for the internal Modal proxies that forward requests to them
as part of defining a Modal Server.
Here, we assume users are mostly in the northern half of the Americas
and select the `us` cloud region serve them.
This should result in at most a few dozen milliseconds of round-trip time.
```python
REGION = "us"
```
Latencies for mutli-turn interactions with LLMs are
substantially cut when previous interaction turns are in the KV cache.
KV caches are stored in [GPU RAM](https://modal.com/gpu-glossary/device-hardware/gpu-ram),
so they aren't shared across replicas.
To improve cache hit rate, Modal Servers
include sticky routing based on a client-provided header.
See the client code below for details.
For production-scale LLM inference services, there are generally
enough requests to justify keeping at least one replica running at all times.
Having a "warm" or "live" replica reduces latency by skipping slow initialization work
that occurs when new replica boots up (a ["cold start"](https://modal.com/docs/guide/cold-start)).
For LLM inference servers, that latency runs from seconds to minutes.
To ensure at least one container is always available,
we can set the `min_containers` of our Modal Function
to `1` or more.
However, since this is documentation code, we'll set it to `0`
to avoid surprise bills during casual use.
```python
MIN_CONTAINERS = 0 # set to 1 to ensure one replica is always ready
```
Finally, we need to decide how we will scale up and down replicas
in response to load. Without autoscaling, users' requests will queue
when the server becomes overloaded. Even apart from queueing, responses
generally become slower per user above a certain minimum number of
concurrent requests.
So we set a target for the number of inputs to run on a single container
with [`target_concurrency`](https://modal.com/docs/reference/modal.concurrent) parameter.
```python
TARGET_INPUTS = 10
```
Generally, this choice needs to be made as part of
[LLM inference engine benchmarking](https://modal.com/llm-almanac/how-to-benchmark).
### Controlling container lifecycles with `modal.Server`
We wrap up all of the choices we made about the infrastructure
of our inference server into a number of Python decorators
that we apply to a Python class that encapsulates the logic
to run our server.
The key decorators are:
- [`@app.server`](https://modal.com/docs/guide/lifecycle-functions) to define the core of our service.
We attach our Image, request a GPU, attach our cache Volumes, specify the region, and configure auto-scaling.
This decorator also turns our python code into an HTTP server (i.e. fronting all of our containers with a proxy with a URL).
The wrapped code needs to eventually listen for HTTP connections on the provided `port`.
See [the reference documentation](https://modal.com/docs/reference/modal.App#server) for details.
- [`@modal.enter` and `@modal.exit`](https://modal.com/docs/guide/lifecycle-functions) to indicate
which methods of the class should be run when starting the server and shutting it down.
Modal considers a new replica ready to receive inputs once the `modal.enter` methods have exited
and the container accepts connections.
To ensure that we actually finish setting up our server before we are marked ready for inputs,
we define a helper function to check whether the server is finished setting up and to
send it a few test inputs.
We use the [`requests` library](https://requests.readthedocs.io/en/latest/)
to send ourselves these HTTP requests on
[`localhost`/`127.0.0.1`](https://superuser.com/questions/31824/why-is-localhost-ip-127-0-0-1).
```python
with sglang_image.imports():
import requests
def wait_ready(process: subprocess.Popen, timeout: int = 20 * MINUTES):
deadline = time.time() + timeout
while time.time() < deadline:
try:
check_running(process)
requests.get(f"http://127.0.0.1:{PORT}/health").raise_for_status()
return
except (
subprocess.CalledProcessError,
requests.exceptions.ConnectionError,
requests.exceptions.HTTPError,
):
time.sleep(5)
raise TimeoutError(f"SGLang server not ready within {timeout} seconds")
def check_running(p: subprocess.Popen):
if (rc := p.poll()) is not None:
raise subprocess.CalledProcessError(rc, cmd=p.args)
def warmup():
payload = {
"messages": [{"role": "user", "content": "Hello, how are you?"}],
"max_tokens": 16,
}
for _ in range(3):
requests.post(
f"http://127.0.0.1:{PORT}/v1/chat/completions", json=payload, timeout=10
).raise_for_status()
```
With all this in place, we are ready to define our high-performance, low-latency
LLM inference server.
```python
app = modal.App(name="example-server-sglang-low-latency")
PORT = 8000
ROUTING_REGION = "us-west"
@app.server(
image=sglang_image,
gpu=GPU,
volumes={HF_CACHE_PATH: HF_CACHE_VOL, DG_CACHE_PATH: DG_CACHE_VOL},
compute_region=REGION,
min_containers=MIN_CONTAINERS,
startup_timeout=20 * MINUTES,
port=PORT, # wrapped code must listen on this port
routing_region=ROUTING_REGION, # location of proxies, should be close to Cls region
exit_grace_period=15, # seconds, time to finish up requests when closing down
target_concurrency=TARGET_INPUTS,
unauthenticated=True,
)
class SGLang:
@modal.enter()
def startup(self):
"""Start the SGLang server and block until it is healthy, then warm it up and put it to sleep."""
cmd = [
"python",
"-m",
"sglang.launch_server",
"--model-path",
MODEL_NAME,
"--revision",
MODEL_REVISION,
"--served-model-name",
MODEL_NAME,
"--host",
"0.0.0.0",
"--port",
f"{PORT}",
"--tp", # use all GPUs to split up tensor-parallel operations
f"{N_GPUS}",
"--cuda-graph-max-bs", # only capture CUDA graphs for batch sizes we're likely to observe
f"{TARGET_INPUTS * 2}",
"--enable-metrics", # expose metrics endpoints for telemetry
"--decode-log-interval", # how often to log during decoding, in tokens
"10",
"--mem-fraction", # leave space for speculative model
"0.8",
"--trust-remote-code", # for speculative model
]
cmd += [ # add speculative config
item for k, v in speculative_config.items() for item in (f"--{k}", str(v))
]
self.process = subprocess.Popen(cmd, env=os.environ | speculative_env)
wait_ready(self.process)
warmup()
@modal.exit()
def stop(self):
self.process.terminate()
```
## Deploy the server
To deploy the server on Modal, just run
```bash
modal deploy sglang_low_latency.py
```
This will create a new App on Modal and build the container image for it if it hasn't been built yet.
## Interact with the server
Once it is deployed, you'll see a URL appear in the command line,
something like `https://your-workspace-name--example-sglang-low-latency-sglang.us-west.modal.direct`.
You can find [interactive Swagger UI docs](https://swagger.io/tools/swagger-ui/)
at the `/docs` route of that URL, i.e. `https://your-workspace-name--example-sglang-low-latency-sglang.us-west.modal.direct/docs`.
These docs describe each route and indicate the expected input and output
and translate requests into `curl` commands.
For simple routes, you can even send a request directly from the docs page.
Note: when no replicas are available, Modal will respond with
the [503 Service Unavailable status](https://developer.mozilla.org/en-US/docs/Web/HTTP/Reference/Status/503).
In your browser, you can just hit refresh until the docs page appears.
You can see the status of the applicaton and its containers on your [Modal dashboard](https://modal.com/apps).
## Test the server
To make it easier to test the server setup, we also include a `local_entrypoint`
that hits the server with a simple client.
If you execute the command
```bash
modal run sglang_low_latency.py
```
a fresh replica of the server will be spun up on Modal while
the code below executes on your local machine.
Think of this like writing simple tests inside of the `if __name__ == "__main__"`
block of a Python script, but for cloud deployments!
```python
@app.local_entrypoint()
async def test(test_timeout=10 * MINUTES, prompt=None, twice=True):
url = await SGLang.get_url.aio()
system_prompt = {
"role": "system",
"content": "You are a pirate who can't help but drop sly reminders that he went to Harvard.",
}
if prompt is None:
prompt = "Explain the Singular Value Decomposition."
content = [{"type": "text", "text": prompt}]
messages = [ # OpenAI chat format
system_prompt,
{"role": "user", "content": content},
]
await probe(url, messages, timeout=test_timeout)
if twice:
messages[0]["content"] = "You are Jar Jar Binks."
print(f"Sending messages to {url}:", *messages, sep="\n\t")
await probe(url, messages, timeout=test_timeout)
```
This test relies on the two helper functions below,
which ping the server and wait for a valid response to stream.
The `probe` helper function specifically ignores
two types of errors that can occur while a replica
is starting up -- timeouts on the client and 5XX responses from the server.
Modal returns the [503 Service Unavailable status](https://developer.mozilla.org/en-US/docs/Web/HTTP/Reference/Status/503)
when a Modal Server has no live replicas.
We include a header with each request --
`Modal-Session-ID`.
This is header is used by clients of Modal Servers
to identify which requests should be routed to the same container
(with caveats explained below).
The value associated with this key
is used to map requests onto containers such that
while the set of containers is fixed, requests with the same value
are sent to the same container.
Set this to a different value per distinct multi-turn interaction
(prototypically, a user conversation thread with a chatbot)
to improve KV cache hit rates.
Additionally, when the set of containers changes (e.g. due to autoscaling),
sessions are rebalanced such that load is approximately evenly spread,
much like in [RAID rebalancing](https://cordero.me/understanding-raid-rebalance-ensuring-optimal-performance-and-data-protection/).
This ensures no container ends up as a "hot spot" handling too many client requests.
```python
async def probe(url, messages=None, timeout=5 * MINUTES):
if messages is None:
messages = [{"role": "user", "content": "Tell me a joke."}]
client_id = str(0) # set this to some string per multi-turn interaction
# often a UUID per "conversation"
headers = {"Modal-Session-ID": client_id}
deadline = time.time() + timeout
async with aiohttp.ClientSession(base_url=url, headers=headers) as session:
while time.time() < deadline:
try:
await _send_request_streaming(session, messages)
return
except asyncio.TimeoutError:
await asyncio.sleep(1)
except aiohttp.client_exceptions.ClientResponseError as e:
if e.status == 503:
await asyncio.sleep(1)
continue
raise e
raise TimeoutError(f"No response from server within {timeout} seconds")
async def _send_request_streaming(
session: aiohttp.ClientSession, messages: list, timeout: int | None = None
) -> None:
payload = {"messages": messages, "stream": True}
headers = {"Accept": "text/event-stream"}
async with session.post(
"/v1/chat/completions", json=payload, headers=headers, timeout=timeout
) as resp:
resp.raise_for_status()
full_text = ""
async for raw in resp.content:
line = raw.decode("utf-8", errors="ignore").strip()
if not line:
continue
# Server-Sent Events format: "data: ...."
if not line.startswith("data:"):
continue
data = line[len("data:") :].strip()
if data == "[DONE]":
break
try:
evt = json.loads(data)
except json.JSONDecodeError:
# ignore any non-JSON keepalive
continue
delta = (evt.get("choices") or [{}])[0].get("delta") or {}
chunk = delta.get("content")
if chunk:
print(chunk, end="", flush="\n" in chunk or "." in chunk)
full_text += chunk
print() # newline after stream completes
```
### Sglang Snapshot
# Serverless Qwen 3-8B with SGLang and Modal Snapshots
In this example, we show how to serve [SGLang](https://github.com/sgl-project/sglang) on Modal
with ~10x faster cold starts.
Fast cold starts are particularly useful for LLM inference applications
that have highly "bursty" workloads, like document processing.
See [this guide](https://modal.com/docs/guide/high-performance-llm-inference)
for a breakdown of different LLM inference workloads and how to optimize them.
The key technique is
[CPU + GPU memory snapshotting](https://modal.com/docs/guide/memory-snapshot),
which saves and restores the SGLang server directly from its in-memory state.
This adds some complexity to the deployment.
If you just want to get started running a basic LLM server on Modal, see
[this example](https://modal.com/docs/examples/llm_inference).
## Set up the container image
Our first order of business is to define the environment our server will run in:
the [container `Image`](https://modal.com/docs/guide/images).
We start from a container image provided
[by the SGLang team via Dockerhub](https://hub.docker.com/r/lmsysorg/sglang/tags).
While we're at it, we import the dependencies we'll need both remotely and locally (for deployment).
```python
import asyncio
import subprocess
import time
import aiohttp
import modal
import modal.experimental
MINUTES = 60 # seconds
sglang_image = (
modal.Image.from_registry(
"lmsysorg/sglang:v0.5.6.post2-cu129-amd64-runtime"
).entrypoint([]) # silence chatty logs on container start
)
```
We also choose a GPU to deploy our inference server onto.
We choose the [H100 GPU](https://modal.com/blog/introducing-h100),
which offers excellent price-performance
and supports 8bit floating point operations, which are the
lowest precision well-supported in the relevant
[GPU kernels](https://modal.com/gpu-glossary/device-software/kernel)
across a variety of model architectures.
```python
N_GPUS = 1
GPU = f"H100!:{N_GPUS}"
```
Actual speedups are generally less than what you get from "napkin math" based on available bandwidths --
we observed a speedup of about 30% moving from one to two H100s when developing this example.
We recommend [application-specific benchmarking](https://modal.com/llm-almanac/how-to-benchmark)
guided by [published generic benchmarks](https://modal.com/llm-almanac/advisor).
### Loading and cacheing the model weights
We'll serve
[Alibaba's Qwen 3 LLM](https://www.alibabacloud.com/blog/alibaba-introduces-qwen3-setting-new-benchmark-in-open-source-ai-with-hybrid-reasoning_602192).
For lower latency and faster cold starts, we pick a smaller model (8B params)
in a lower precision floating point format (FP8).
This reduces the amount of data that needs to be loaded
[from GPU RAM into SM SRAM](https://modal.com/gpu-glossary/perf/memory-bandwidth)
in each forward pass.
```python
MODEL_NAME = "Qwen/Qwen3-8B-FP8"
MODEL_REVISION = (
"220b46e3b2180893580a4454f21f22d3ebb187d3" # latest commit as of 2026-01
)
```
We load the model [from the Hugging Face Hub](https://huggingface.co/collections/Qwen/qwen3),
so we'll need their Python package.
```python
sglang_image = sglang_image.uv_pip_install("huggingface-hub==0.36.0")
```
We don't want to load the model from the Hub every time we start the server.
We can load it much faster from a [Modal Volume](https://modal.com/docs/guide/volumes).
Typical speeds are around one to two GB/s.
```python
HF_CACHE_VOL = modal.Volume.from_name("huggingface-cache", create_if_missing=True)
HF_CACHE_PATH = "/root/.cache/huggingface"
MODEL_PATH = f"{HF_CACHE_PATH}/{MODEL_NAME}"
```
In addition to pointing the Hugging Face Hub at the path
where we mount the Volume, we also
[turn on "high performance" downloads](https://huggingface.co/docs/hub/en/models-downloading#faster-downloads),
which can fully saturate our network bandwidth.
```python
sglang_image = sglang_image.env(
{"HF_HUB_CACHE": HF_CACHE_PATH, "HF_XET_HIGH_PERFORMANCE": "1"}
)
```
### Cacheing compilation artifacts
Model weights aren't the only thing we want to cache.
As a rule, LLM inference servers like SGLang don't directly provide their own kernels.
They draw high-performance kernels from a variety of sources.
As of version `0.5.6`, SGLang's default kernel backend
for FP8 matrix multiplications (`fp8-gemm-backend`)
on Hopper [SM architecture](https://modal.com/gpu-glossary/device-hardware/streaming-multiprocessor-architecture)
GPUs like the H100 is
[DeepGEMM](https://github.com/deepseek-ai/DeepGEMM)
by DeepSeek.
The binaries of these kernels are not included in the SGLang Docker image and so
must be [JIT-compiled](https://modal.com/gpu-glossary/host-software/nvrtc).
We store these in a Modal Volume as well.
```python
DG_CACHE_VOL = modal.Volume.from_name("deepgemm-cache", create_if_missing=True)
DG_CACHE_PATH = "/root/.cache/deep_gemm"
```
JIT DeepGEMM kernels are on by default, but we explicitly enable them via an environment variable.
```python
sglang_image = sglang_image.env({"SGLANG_ENABLE_JIT_DEEPGEMM": "1"})
```
We trigger the compilation by running `sglang.compile_deep_gemm` in a `subprocess`
kicked off from a Python function.
```python
def compile_deep_gemm():
import os
if int(os.environ.get("SGLANG_ENABLE_JIT_DEEPGEMM", "1")):
subprocess.run(
f"python3 -m sglang.compile_deep_gemm --model-path {MODEL_NAME} --revision {MODEL_REVISION} --tp {N_GPUS}",
shell=True,
)
```
We run this Python function on Modal as part of building the Image
so that it has access to the appropriate GPU and the caches for our model and compilaton artifacts.
```python
sglang_image = sglang_image.run_function(
compile_deep_gemm,
volumes={DG_CACHE_PATH: DG_CACHE_VOL, HF_CACHE_PATH: HF_CACHE_VOL},
gpu=GPU,
)
```
## Speed up cold starts with GPU snapshotting
Modal is a serverless compute platform, so all of your
inference services automatically scale up and down to handle
variable load.
Scaling up a new replica requires quite a bit of work --
loading up Python and system packages, loading model weights,
setting up the inference engine, and so on.
We can skip over and speed up a bunch of this work
when spinning up new replicas after the first
by directly booting from a [memory snapshot](https://modal.com/docs/guide/memory-snapshot),
which contains the exact in-memory representation of our server just before it begins taking requests.
Most applications can be snapshot and experience substantial speedups (2x to 10x,
see [our initial benchmarks here](https://modal.com/blog/gpu-mem-snapshots)).
However, it generally requires some extra work to adapt the application code.
For instance, we here set an environment variable that improves the compatibility of
the [Torch Inductor compiler](https://dev-discuss.pytorch.org/t/torchinductor-a-pytorch-native-compiler-with-define-by-run-ir-and-symbolic-shapes/747)
with GPU snapshotting.
```python
sglang_image = sglang_image.env({"TORCHINDUCTOR_COMPILE_THREADS": "1"})
```
Below, we walk through the additional steps required to make an SGLang server compatible with snapshots.
### Sleeping and waking an SGLang server
We prepare our SGLang inference server for snapshotting by first sending
a few requests to "warm it up", ensuring that it is fully ready to process requests.
Then we "put it to sleep", moving non-essential data out of GPU memory,
with a request to `/release_memory_occupation`.
At this point, we can take a memory snapshot.
Upon snapshot restoration, we "wake up" the server
with a request to `/resume_memory_occupation`.
We use the [`requests` library](https://requests.readthedocs.io/en/latest/)
to send ourselves these HTTP requests on
[`localhost`/`127.0.0.1`](https://superuser.com/questions/31824/why-is-localhost-ip-127-0-0-1).
```python
with sglang_image.imports():
import requests
def warmup():
payload = {
"messages": [{"role": "user", "content": "Hello, how are you?"}],
"max_tokens": 16,
}
for _ in range(3):
requests.post(
f"http://127.0.0.1:{PORT}/v1/chat/completions", json=payload, timeout=10
).raise_for_status()
def sleep():
requests.post(
f"http://127.0.0.1:{PORT}/release_memory_occupation", json={}
).raise_for_status()
def wake_up():
requests.post(
f"http://127.0.0.1:{PORT}/resume_memory_occupation", json={}
).raise_for_status()
```
## Define the inference server and infrastructure
We wrap up all of the choices we made about the infrastructure
of our inference server into a number of Python decorators
that we apply to a Python class that encapsulates the logic
to run our server.
The key decorators are:
- [`@app.cls`](https://modal.com/docs/guide/lifecycle-functions) to define the core of our service.
We attach our Image, request a GPU, attach our cache Volumes, specify the region, and configure auto-scaling.
See [the reference documentation](https://modal.com/docs/reference/modal.App#cls) for details.
- `@modal.web_server` to turn our Python code into an HTTP server.
The wrapped code needs to eventually listen for HTTP connections on the provided `port`.
- [`@modal.concurrent`](https://modal.com/docs/guide/concurrent-inputs) to specify how many
requests our server can handle before we need to scale up.
- [`@modal.enter` and `@modal.exit`](https://modal.com/docs/guide/lifecycle-functions) to indicate
which methods of the class should be run when starting the server and shutting it down. The `enter`
methods also define what code is run before memory snapshot creation (`snap=True`) and after memory snapshot restoration (`snap=False`).
The `modal.concurrent` decorator and the lifecycle management are particular important
for bursty workloads and for snapshotting, respectively, so let's discuss them in detail.
### Determining autoscaling policy with `@modal.concurrent`
To handle bursty workloads, we need to decide how we will scale up and down replicas
in response to load. Without autoscaling, users' requests will queue
when the server becomes overloaded.
We can set two values with the
[`@modal.concurrent`](https://modal.com/docs/guide/concurrent-inputs) decorator.
`max_inputs` should be set to the maximum number of inputs a replica can handle concurrently
without internal queueing -- the `max-running-requests` in SGLang.
`target_inputs` can be left unset or, if the per-request latency
degrades too much when handling the maximum batch size,
it can be set to a lower value.
```python
TARGET_INPUTS = 10
MAX_INPUTS = 1000
```
Generally, this choice needs to be made as part of
[LLM inference engine benchmarking](https://modal.com/llm-almanac/how-to-benchmark)
in reference to a particular application's latency and throughput targets.
### Controlling container lifecycles with `@modal.enter`
Modal considers a new replica ready to receive inputs once the `@modal.enter` methods have exited
and the container accepts connections.
To ensure that we actually finish setting up our server before we are marked ready for inputs,
we define a helper function to check whether the server is finished setting up.
```python
def wait_ready(process: subprocess.Popen, timeout: int = 5 * MINUTES):
deadline = time.time() + timeout
while time.time() < deadline:
try:
check_running(process)
requests.get(f"http://127.0.0.1:{PORT}/health").raise_for_status()
return
except (
subprocess.CalledProcessError,
requests.exceptions.ConnectionError,
requests.exceptions.HTTPError,
):
time.sleep(1)
raise TimeoutError(f"SGLang server not ready within timeout of {timeout} seconds")
def check_running(p: subprocess.Popen):
if (rc := p.poll()) is not None:
raise subprocess.CalledProcessError(rc, cmd=p.args)
```
With all this in place, we are ready to define our high-performance, low-latency
LLM inference server.
```python
app = modal.App(name="example-sglang-snapshot")
PORT = 8000
@app.cls(
image=sglang_image,
gpu=GPU,
volumes={HF_CACHE_PATH: HF_CACHE_VOL, DG_CACHE_PATH: DG_CACHE_VOL},
enable_memory_snapshot=True,
experimental_options={"enable_gpu_snapshot": True},
)
@modal.concurrent(target_inputs=TARGET_INPUTS, max_inputs=MAX_INPUTS)
class SGLang:
@modal.enter(snap=True)
def startup(self):
"""Start the SGLang server and block until it is healthy, then warm it up and put it to sleep."""
cmd = [
"python",
"-m",
"sglang.launch_server",
"--model-path",
MODEL_NAME,
"--revision",
MODEL_REVISION,
"--served-model-name",
MODEL_NAME,
"--host",
"0.0.0.0",
"--port",
f"{PORT}",
"--tp", # use all GPUs to split up tensor-parallel operations
f"{N_GPUS}",
"--cuda-graph-max-bs", # capture CUDA graphs up to batch sizes we're likely to observe
f"{MAX_INPUTS}",
"--max-running-requests",
f"{MAX_INPUTS}",
"--enable-metrics", # expose metrics endpoints for telemetry
"--enable-memory-saver", # enable offload, for snapshotting
"--enable-weights-cpu-backup", # enable offload, for snapshotting
]
self.process = subprocess.Popen(cmd)
wait_ready(self.process)
warmup() # for snapshotting
sleep()
@modal.enter(snap=False)
def wake_up(self):
wake_up()
@modal.web_server(
port=PORT, # wrapped code must listen on this port
startup_timeout=10 * MINUTES, # how long can server startup take?
)
def serve(self):
pass
@modal.exit()
def stop(self):
self.process.terminate()
```
## Deploy the server
To deploy the server on Modal, just run
```bash
modal deploy sglang_snapshot.py
```
This will create a new App on Modal and build the container image for it if it hasn't been built yet.
## Interact with the server
Once it is deployed, you'll see a URL appear in the command line,
something like `https://your-workspace-name--example-sglang-snapshot-sglang.modal.run`.
You can find [interactive Swagger UI docs](https://swagger.io/tools/swagger-ui/)
at the `/docs` route of that URL, i.e. `https://your-workspace-name--example-sglang-snapshot-sglang.modal.direct/docs`.
These docs describe each route and indicate the expected input and output
and translate requests into `curl` commands.
For simple routes, you can even send a request directly from the docs page.
## Test the server
To make it easier to test the server setup, we also include a `local_entrypoint`
that hits the server with a simple client.
If you execute the command
```bash
modal run sglang_snapshot.py
```
a fresh replica of the server will be spun up on Modal while
the code below executes on your local machine.
Think of this like writing simple tests inside of the `if __name__ == "__main__"`
block of a Python script, but for cloud deployments!
```python
@app.local_entrypoint()
async def test(test_timeout=10 * MINUTES, prompt=None, twice=True):
url = SGLang().serve.get_web_url()
system_prompt = {
"role": "system",
"content": "You are a pirate who can't help but drop sly reminders that he went to Harvard.",
}
if prompt is None:
prompt = "Explain the Singular Value Decomposition."
content = [{"type": "text", "text": prompt}]
messages = [ # OpenAI chat format
system_prompt,
{"role": "user", "content": content},
]
await probe(url, messages, timeout=test_timeout)
if twice:
messages[0]["content"] = "You are Jar Jar Binks."
print(f"Sending messages to {url}:", *messages, sep="\n\t")
await probe(url, messages, timeout=1 * MINUTES)
```
This test relies on the two helper functions below,
which ping the server and wait for a valid response.
```python
async def probe(url, messages=None, timeout=5 * MINUTES):
if messages is None:
messages = [{"role": "user", "content": "Tell me a joke."}]
deadline = time.time() + timeout
async with aiohttp.ClientSession(base_url=url) as session:
while time.time() < deadline:
try:
await _send_request(session, "llm", messages)
return
except asyncio.TimeoutError:
await asyncio.sleep(1)
raise TimeoutError(f"No response from server within {timeout} seconds")
async def _send_request(
session: aiohttp.ClientSession,
model: str,
messages: list,
timeout: int | None = None,
) -> None:
async with session.post(
"/v1/chat/completions",
json={"messages": messages, "model": model},
timeout=timeout,
) as resp:
resp.raise_for_status()
print((await resp.json())["choices"][0]["message"]["content"])
```
### Test memory snapshotting
Using `modal run` creates an ephemeral Modal App, rather than a deployed Modal App.
Ephemeral Modal Apps are short-lived, so they turn off memory snapshotting.
To test the memory snapshot version of the server,
first deploy it with `modal deploy`
and then hit it with a client.
You should observe startup improvements
after a handful of cold starts
(usually less than five).
If you want to see the speedup during a test,
we recommend heading to the deployed App in your
[Modal dashboard](https://modal.com/apps)
and manually stopping containers after they have served a request
to ensure turnover.
You can use the client code below to test the endpoint.
```python
if __name__ == "__main__":
# after deployment, we can use the class from anywhere
SGLang = modal.Cls.from_name("example-sglang-snapshot", "SGLang")
print("calling inference server")
try:
asyncio.run(probe(SGLang().serve.get_web_url()))
except modal.exception.NotFoundError as e:
raise Exception(
f"To take advantage of GPU snapshots, deploy first with modal deploy {__file__}"
) from e
```
It can be run with the command
```bash
python sglang_snapshot.py
```
### Sglang Vlm
# Serve the Qwen 3.6 Vision-Language Model with SGLang
Vision-Language Models (VLMs) are like LLMs with eyes:
they can generate text based not just on other text,
but on images as well.
This example shows how to serve a VLM on Modal using the
[SGLang](https://github.com/sgl-project/sglang) library
with an OpenAI-compatible API server.
## Setup and container image definition
First, we import our global dependencies
and define constants.
```python
import asyncio
import json
import subprocess
import time
import aiohttp
import modal
MINUTES = 60
```
To define the container [Image](https://modal.com/docs/guide/images)
with our server's dependencies,
we build off of the official SGLang Docker image with CUDA 13.
```python
sglang_image = modal.Image.from_registry(
"lmsysorg/sglang:v0.5.10.post1-cu130-runtime"
).entrypoint([])
```
## Configure the model
[Qwen3.6-35B-A3B-FP8](https://huggingface.co/Qwen/Qwen3.6-35B-A3B-FP8)
is a vision-language reasoning foundational model with 35B total parameters,
of which only 3B are activated per input sequence per forward pass.
We use the [8bit quantized floating point](https://modal.com/llm-almanac/quant-formats)
version of the model for faster [cold starts](https://modal.com/docs/guide/cold-start)
and faster inference with negligible behavior differences.
```python
MODEL_NAME = "Qwen/Qwen3.6-35B-A3B-FP8"
MODEL_REVISION = "95a723d08a9490559dae23d0cff1d9466213d989"
```
## Configure GPU
We use a single H100 GPU. The ~35 GB of model weights fits comfortably in this GPU's 80GB of
[high-bandwidth memory](https://modal.com/gpu-glossary/device-hardware/gpu-ram).
```python
GPU = "H100!:1"
N_GPUS = 1
```
## Cacheing in Modal Volumes
Modal Apps typically cache some artifacts in a [Modal Volume](https://modal.com/docs/guide/volumes)
for faster cold starts.
Here, we cache the model weights and the JIT-compiled DeepGEMM kernels.
```python
HF_CACHE_VOL = modal.Volume.from_name("huggingface-cache", create_if_missing=True)
HF_CACHE_PATH = "/root/.cache/huggingface"
DG_CACHE_VOL = modal.Volume.from_name("deepgemm-cache", create_if_missing=True)
DG_CACHE_PATH = "/root/.cache/deep_gemm"
```
We configure the behavior and performance of the weight and compilation
caches via environment variables.
We also set a few other useful performance flags for this model.
```python
sglang_image = sglang_image.env(
{
"HF_HUB_CACHE": HF_CACHE_PATH,
"HF_XET_HIGH_PERFORMANCE": "1",
"SGLANG_ENABLE_JIT_DEEPGEMM": "1",
"SGLANG_USE_CUDA_IPC_TRANSPORT": "1",
"SGLANG_USE_IPC_POOL_HANDLE_CACHE": "1",
}
)
```
We additionally compile the DeepGEMM kernels as part of building the container
[Image](https://modal.com/docs/guide/images).
This can take tens of minutes the first time, but only takes seconds when reading from cache.
```python
def compile_deep_gemm():
import os
import subprocess
if int(os.environ.get("SGLANG_ENABLE_JIT_DEEPGEMM", "1")):
subprocess.run(
f"python3 -m sglang.compile_deep_gemm --model-path {MODEL_NAME} --revision {MODEL_REVISION} --tp {N_GPUS}",
shell=True,
check=True,
)
sglang_image = sglang_image.run_function(
compile_deep_gemm,
volumes={DG_CACHE_PATH: DG_CACHE_VOL, HF_CACHE_PATH: HF_CACHE_VOL},
gpu=GPU,
)
```
## Define the inference server
With environment setup out of the way, we're ready to define our inference server.
We use a [Modal Cls](https://modal.com/docs/guide/lifecycle-functions)
to separate container startup logic from input processing
(as part of `modal.enter`-decorated methods).
We use a Modal HTTP Server backed by a proxy in `us-east`.
We also handle clean teardown of the server in a `modal.exit` method.
```python
ROUTING_REGION = "us-east"
PORT = 8000
TARGET_INPUTS = 10
app = modal.App(name="example-sglang-vlm")
@app.server(
image=sglang_image,
gpu=GPU,
volumes={HF_CACHE_PATH: HF_CACHE_VOL, DG_CACHE_PATH: DG_CACHE_VOL},
startup_timeout=15 * MINUTES,
port=PORT,
routing_region=ROUTING_REGION,
target_concurrency=TARGET_INPUTS,
unauthenticated=True,
)
class VlmServer:
@modal.enter()
def startup(self):
self.process = _start_server()
wait_ready(self.process)
warmup()
@modal.exit()
def stop(self):
self.process.terminate()
self.process.wait()
```
### Setting up the server
The server configuration is based on the information in the
[SGLang Cookbook](https://docs.sglang.io/cookbook/autoregressive/Qwen/Qwen3.6).
It includes speculative decoding via multi-token prediction
for lower latency at low to moderate concurrency.
For more on optimizing the performance of VLMs and LLMs,
see [this guide](https://modal.com/docs/guide/high-performance-llm-inference).
```python
def _start_server() -> subprocess.Popen:
"""Start SGLang server in a subprocess"""
cmd = [
"python",
"-m",
"sglang.launch_server",
"--model-path",
MODEL_NAME,
"--revision",
MODEL_REVISION,
"--served-model-name",
MODEL_NAME,
"--host",
"0.0.0.0",
"--port",
f"{PORT}",
"--tp",
f"{N_GPUS}",
"--cuda-graph-max-bs",
f"{TARGET_INPUTS * 2}",
"--enable-metrics",
"--mem-fraction-static",
"0.8",
"--context-length",
"131_072",
"--mamba-scheduler-strategy",
"extra_buffer",
"--reasoning-parser",
"qwen3",
"--tool-call-parser",
"qwen3_coder",
"--speculative-algo",
"EAGLE",
"--speculative-num-steps",
"3",
"--speculative-eagle-topk",
"1",
"--speculative-num-draft-tokens",
"4",
]
print("Starting SGLang server with command:")
print(*cmd)
return subprocess.Popen(" ".join(cmd), shell=True, start_new_session=True)
```
Before returning from our `modal.enter` method,
we wait for the server to finish spinning up, which can take several minutes.
```python
def wait_ready(process: subprocess.Popen, timeout: int = 10 * MINUTES):
import requests
deadline = time.time() + timeout
while time.time() < deadline:
try:
check_running(process)
requests.get(f"http://127.0.0.1:{PORT}/health").raise_for_status()
return
except (
subprocess.CalledProcessError,
requests.exceptions.ConnectionError,
requests.exceptions.HTTPError,
):
time.sleep(5)
raise TimeoutError(f"SGLang server not ready within {timeout} seconds")
def check_running(p: subprocess.Popen):
if (rc := p.poll()) is not None:
raise subprocess.CalledProcessError(rc, cmd=p.args)
```
We also send a few warmup requests to ensure
that the server is fully ready to service requests --
otherwise the first few requests to a new replica might be
substantially slower.
```python
SAMPLE_PAYLOAD = {
"messages": [
{
"role": "user",
"content": [
{
"type": "image_url",
"image_url": {
"url": "https://modal-cdn.com/golden-gate-bridge.jpg"
},
},
{"type": "text", "text": "What is this?"},
],
}
],
"max_tokens": 16,
}
def warmup():
import requests
for _ in range(2):
requests.post(
f"http://127.0.0.1:{PORT}/v1/chat/completions",
json=SAMPLE_PAYLOAD,
timeout=120,
).raise_for_status()
```
## Test the server
We can test the entire server creation, from soup to nuts,
by running the file with `modal run`.
We just need to add a `local_entrypoint` that exercises the server.
```python
@app.local_entrypoint()
async def main():
url = await VlmServer.get_url.aio()
messages = SAMPLE_PAYLOAD["messages"]
print(f"Sending image at {messages[0]['content'][0]['image_url']} to the server")
await probe(url, messages, timeout=10 * MINUTES)
```
The client logic is normally handled by your preferred interface --
a coding agent harness like [OpenCode](https://modal.com/docs/examples/opencode_server),
a chat UI in the browser. Our server uses the standard OpenAI-compatible API format,
so most of these clients should work out of the box.
We replicate the minimum amount of its functionality we need for a test below.
Note that in the `probe` we include a `Modal-Session-Id` header for sticky routing
between Modal HTTP Server replicas and ignore 503s that occur
when no Modal HTTP Server replicas are available.
```python
async def probe(url: str, messages: list, timeout: int = 25 * MINUTES):
headers = {"Modal-Session-Id": "test-session"}
deadline = time.time() + timeout
async with aiohttp.ClientSession(base_url=url, headers=headers) as session:
while time.time() < deadline:
try:
await _send_request_streaming(session, messages)
return
except asyncio.TimeoutError:
await asyncio.sleep(1)
except aiohttp.client_exceptions.ClientResponseError as e:
if e.status == 503:
await asyncio.sleep(1)
continue
raise
raise TimeoutError(f"No response from server within {timeout} seconds")
async def _send_request_streaming(
session: aiohttp.ClientSession, messages: list, timeout: int | None = None
) -> None:
payload = {
"messages": messages,
"stream": True,
"top_k": 20,
}
headers = {"Accept": "text/event-stream"}
async with session.post(
"/v1/chat/completions", json=payload, headers=headers, timeout=timeout
) as resp:
resp.raise_for_status()
full_text = ""
chunk = ""
async for raw in resp.content:
line = raw.decode("utf-8", errors="ignore").strip()
if not line:
continue
if not line.startswith("data:"):
continue
data = line[len("data:") :].strip()
if data == "[DONE]":
break
try:
evt = json.loads(data)
except json.JSONDecodeError:
continue
delta = (evt.get("choices") or [{}])[0].get("delta") or {}
chunk += delta.get("content") or delta.get("reasoning_content") or ""
if chunk and ("." in chunk or "\n" in chunk):
print(chunk, end="", flush=True)
full_text += chunk
chunk = ""
if chunk:
print(chunk, end="", flush=True)
full_text += chunk
print()
return full_text
```
You can kick off a test run with the command
```bash
modal run sglang_vlm.py
```
## Deploy the server
When you're ready to deploy the server,
replace `modal run` with `modal deploy`:
```bash
modal deploy sglang_vlm.py
```
### Sidecar Secrets Injection
# Inject Secrets into a Sandbox with a proxy Sidecar
Code running in a [Sandbox](https://modal.com/docs/guide/sandbox) often needs to call an
external API that requires an API key. Rather than passing that key into the Sandbox,
you can keep it in a separate, trusted container and let that container add it to
outbound requests:
```
Sandbox code -> proxy Sidecar -> gated Web Function
(no API key) (adds the key)
```
The proxy runs as a [Sidecar](https://modal.com/docs/guide/sandbox-sidecars): a sibling
container that shares a private network with the Sandbox. That network is reachable only
from inside the Sandbox, so the proxy is available to your Sandbox code and to nothing
else, while the key itself stays in a Modal
[Secret](https://modal.com/docs/guide/secrets) mounted on the Sidecar alone.
We use [Caddy](https://caddyserver.com/) as the proxy and a Modal
[Web Function](https://modal.com/docs/guide/webhooks) as the
service we are trying to access. Any proxy that can set request headers (nginx, Envoy, or something you
write yourself) and any authenticated API will do.
Sandbox Sidecars are in alpha and access is restricted to allowlisted workspaces.
```python
import argparse
import hmac
import os
import secrets
import tempfile
from pathlib import Path
from urllib.parse import urlparse
import fastapi
import modal
app = modal.App.lookup("example-sidecar-secrets-injection", create_if_missing=True)
MINUTES = 60 # seconds
```
## Gate an API behind a Secret
We start by creating a secret and storing it in a Modal
[Secret](https://modal.com/docs/guide/secrets)
```python
modal.Secret.objects.create(
"example-sidecar-api-key",
{"API_KEY": secrets.token_urlsafe(32)},
allow_existing=True,
)
api_secret = modal.Secret.from_name(
"example-sidecar-api-key", required_keys=["API_KEY"]
)
```
We create the Secret in this script, so there is nothing to set up
ahead of time, but this can also be done manually as
```
modal secret create example-api-secret API_KEY=...
```
We then deploy a Web Function that requires authentication to mimic any
external gated service you may want to access.
The Sandbox will never call this function directly; it will call it
throught the Sidecar as a proxy which in turn will call the function.
```python
web_app = modal.App("example-sidecar-secrets-injection-web")
web_image = modal.Image.debian_slim().uv_pip_install("fastapi[standard]==0.139.2")
@web_app.function(image=web_image, secrets=[api_secret], serialized=True)
@modal.fastapi_endpoint()
def greet(request: fastapi.Request):
expected = os.environ["API_KEY"]
if not hmac.compare_digest(request.headers.get("x-api-key", ""), expected):
raise fastapi.HTTPException(status_code=401, detail="unauthorized")
return {"message": "Hello from a secret-gated endpoint."}
with modal.enable_output():
web_app.deploy()
upstream_url = greet.get_web_url()
if not upstream_url:
raise RuntimeError("Web Function did not publish a URL")
upstream_host = urlparse(upstream_url).hostname
print(f"Upstream URL: {upstream_url}")
```
## Configure the proxy
Each Sidecar is reachable from the Sandbox at the name we give it, resolved through
`/etc/hosts` on the shared bridge network.
```python
SIDECAR_NAME = "egress-proxy"
SIDECAR_PORT = 8080
PROXY_URL = f"http://{SIDECAR_NAME}:{SIDECAR_PORT}"
```
The proxy's behavior is defined by a
[Caddyfile](https://caddyserver.com/docs/caddyfile). Ours forwards every request to the
Web Function, filling in the real key from the Sidecar's own environment. It also
drops any `Authorization` header that came from the Sandbox, so the proxy decides which
key reaches the upstream.
```python
DEFAULT_CADDYFILE = """\
{
admin off
}
:8080 {
reverse_proxy https://%s {
header_up Host %s
header_up x-api-key {env.API_KEY}
header_up -Authorization
}
}
""" % (upstream_host, upstream_host)
```
To point the proxy at a different upstream, or to add rules of your own — rate limits,
path restrictions, extra headers — pass your own config instead:
```python
parser = argparse.ArgumentParser()
parser.add_argument(
"--caddyfile",
type=Path,
default=None,
help="path to a Caddyfile to use instead of the default",
)
args = parser.parse_args()
caddyfile = args.caddyfile.read_text() if args.caddyfile else DEFAULT_CADDYFILE
```
## Build the Images
We write the config out and copy it to the path the `caddy` Image already reads on
startup, so the Sidecar needs no command of its own.
Sidecars can't build their Image lazily on startup, so we
[build it up front](https://modal.com/docs/guide/sandboxes#separating-image-builds-from-sandbox-creation)
with `Image.build` and pass the resolved Image along.
```python
with tempfile.TemporaryDirectory() as tmp_dir:
caddyfile_path = Path(tmp_dir) / "Caddyfile"
caddyfile_path.write_text(caddyfile)
with modal.enable_output():
sidecar_image = (
modal.Image.from_registry("caddy:2.11")
.add_local_file(caddyfile_path, "/etc/caddy/Caddyfile", copy=True)
.build(app)
)
sandbox_image = modal.Image.debian_slim(python_version="3.12")
```
## Start the Sandbox
The Sandbox is told where the proxy is but is given no Secrets. An empty
`outbound_cidr_allowlist` cuts off its access to the public internet while leaving the
private network to its Sidecars intact, so the proxy becomes the Sandbox's only way out.
We pass no command, so the Sandbox stays alive waiting for us to send it work.
```python
with modal.enable_output():
sandbox = modal.Sandbox.create(
app=app,
image=sandbox_image,
env={"API_BASE_URL": PROXY_URL},
outbound_cidr_allowlist=[],
timeout=5 * MINUTES,
)
print(f"Sandbox ID: {sandbox.object_id}")
```
## Start the proxy Sidecar
Now we start Caddy alongside it, with the API Secret mounted here and only here.
```python
sidecar = sandbox._experimental_sidecars.create(
name=SIDECAR_NAME,
image=sidecar_image,
secrets=[api_secret],
)
print(f"Sidecar ID: {sidecar.object_id}")
```
Creating a Sidecar returns as soon as its container starts, which is before Caddy is
listening, so we wait for the port to start accepting connections.
```python
sandbox.exec(
"bash",
"-c",
f"until (echo > /dev/tcp/{SIDECAR_NAME}/{SIDECAR_PORT}) 2>/dev/null; do sleep 0.1; done",
timeout=1 * MINUTES,
).wait()
```
## Call the API from the Sandbox
The code below runs inside the Sandbox. It first tries to connect to the Web Function
directly, which is blocked by the allowlist, then calls through the proxy, which swaps
in the real key on the way through.
Note that the call itself is unmodified from what it would be without a proxy: it
picks up its base URL from the environment, the same way most SDKs and agent harnesses do.
```python
UNTRUSTED_CODE = f"""
import json
import os
import socket
import urllib.request
print(f"API_KEY in Sandbox env: {{'API_KEY' in os.environ}}")
try:
socket.create_connection(({upstream_host!r}, 443), timeout=10).close()
print("Direct connection to {upstream_host}: succeeded")
except OSError as exc:
print(f"Direct connection to {upstream_host}: blocked ({{type(exc).__name__}})")
url = os.environ["API_BASE_URL"]
print(f"Calling {{url}} with an invalid key")
req = urllib.request.Request(url, headers={{"x-api-key": "not-a-real-key"}})
with urllib.request.urlopen(req, timeout=60) as resp:
body = json.loads(resp.read())
print(f"Response: {{body['message']}}")
"""
process = sandbox.exec("python", "-c", UNTRUSTED_CODE)
for line in process.stdout:
print(line, end="")
if process.wait() != 0:
raise RuntimeError(process.stderr.read())
```
The output should look something like
```
API_KEY in Sandbox env: False
Direct connection to workspace--example-sidecar-secrets-injection-web-greet.modal.run: blocked (TimeoutError)
Calling http://egress-proxy:8080 with an invalid key
Response: Hello from a secret-gated endpoint.
```
Terminating the Sandbox tears down its Sidecars along with it.
```python
sandbox.terminate()
```
It's worth knowing where this boundary ends: the Sandbox never sees the key, but
it can still use it, and can make as many calls as it likes. If that matters
for your workload, the proxy is also the natural place to add rate limits or to restrict
which paths it forwards.
### Sidecar Traffic Routing
# Filter Sandbox HTTPS traffic with a proxy Sidecar
A proxy Sidecar can inspect and restrict HTTPS requests made by otherwise
proxy-unaware programs in a Sandbox. This example permits only `GET` requests
to the `modal-labs/modal-client` repository on `github.com`, while forwarding
requests to all other domains without applying the filter.
We use [mitmproxy](https://mitmproxy.org/) to terminate TLS, parse HTTP, connect to
GitHub, and generate certificates. HTTPS traffic is encrypted, so to determine the
request path the sidecar must be in the middle of the connection, and perform the
encryption/decryption against both the original client and server instead.
```python
import tempfile
from pathlib import Path
import modal
app = modal.App.lookup("example-sidecar-traffic-routing", create_if_missing=True)
SIDECAR_NAME = "proxy"
MITMPROXY_CONFIG_DIR = "/tmp/mitmproxy"
MITMPROXY_CA_CERT = f"{MITMPROXY_CONFIG_DIR}/mitmproxy-ca-cert.pem"
SANDBOX_CA_CERT = "/tmp/mitmproxy-ca-cert.pem"
```
## Define the request policy
To configure mitmproxy dynamically we use an addon script. The `tls_clienthello`
hook is used to parse the hostname and port from the `ClientHello` [SNI](https://en.wikipedia.org/wiki/Server_Name_Indication).
After decrypting and parsing a request, the `request` hook applies the GitHub-specific
request path policy.
```python
MITMPROXY_ADDON = """\
from mitmproxy import http, tls
FILTERED_HOST = "github.com"
ALLOWED_REPOSITORY = "/modal-labs/modal-client"
def tls_clienthello(data: tls.ClientHelloData) -> None:
hostname = data.client_hello.sni
if hostname:
data.context.server.address = (hostname, 443)
data.context.server.sni = hostname
def request(flow: http.HTTPFlow) -> None:
request = flow.request
hostname = (flow.client_conn.sni or "").lower()
if hostname != FILTERED_HOST:
return
raw_path = request.path.split("?", 1)[0]
segments = raw_path.split("/")
repository_segments = ["", *ALLOWED_REPOSITORY.strip("/").split("/")]
# Reject alternate path spellings that GitHub could normalize after this check.
allowed_path = (
segments[: len(repository_segments)] == repository_segments
and all(segment not in {".", ".."} for segment in segments)
and "%" not in raw_path
and "\\\\" not in raw_path
)
if (
request.method == "GET"
and request.pretty_host == FILTERED_HOST
and allowed_path
):
return
flow.response = http.Response.make(
403,
b"This Sandbox may only GET github.com/modal-labs/modal-client.\\n",
{"Content-Type": "text/plain"},
)
"""
```
We install mitmproxy and copy the policy addon into its Image.
```python
with tempfile.TemporaryDirectory() as tmp_dir:
addon_path = Path(tmp_dir) / "github_filter.py"
addon_path.write_text(MITMPROXY_ADDON)
with modal.enable_output():
sidecar_image = (
modal.Image.debian_slim(python_version="3.12")
.pip_install("mitmproxy==12.2.3")
.add_local_file(addon_path, "/github_filter.py", copy=True)
.build(app)
)
sandbox_image = modal.Image.debian_slim().apt_install("curl")
```
## Start the Sandbox and proxy Sidecar
The experimental option names the Sidecar that receives all outbound TCP traffic on
port 443. HTTPS fails closed until that Sidecar is running.
```python
with modal.enable_output():
sandbox = modal.Sandbox.create(
"sleep",
"600",
app=app,
image=sandbox_image,
timeout=5 * 60,
experimental_options={"proxy_traffic_via_sidecar": SIDECAR_NAME},
)
print(f"Sandbox ID: {sandbox.object_id}")
sidecar = sandbox._experimental_sidecars.create(
"mitmdump",
"--mode",
"reverse:https://invalid.invalid@443",
"--set",
f"confdir={MITMPROXY_CONFIG_DIR}",
"--set",
"connection_strategy=lazy",
"--set",
"keep_host_header=true",
"--scripts",
"/github_filter.py",
name=SIDECAR_NAME,
image=sidecar_image,
)
print(f"Sidecar ID: {sidecar.object_id}")
```
## Trust the proxy's certificate authority
Mitmproxy creates a unique certificate authority on first startup. Copy only its
public certificate into the main Sandbox and pass it to curl. The CA private key
remains isolated in the Sidecar.
```python
read_ca = sidecar.exec(
"bash",
"-c",
f"until test -s {MITMPROXY_CA_CERT} "
"&& (echo > /dev/tcp/127.0.0.1/443) 2>/dev/null; "
f"do sleep 0.1; done; cat {MITMPROXY_CA_CERT}",
timeout=1 * 60,
)
ca_certificate = read_ca.stdout.read()
if read_ca.wait() != 0:
raise RuntimeError(read_ca.stderr.read())
write_ca = sandbox.exec("tee", SANDBOX_CA_CERT)
write_ca.stdin.write(ca_certificate)
write_ca.stdin.write_eof()
write_ca.stdin.drain()
if write_ca.wait() != 0:
raise RuntimeError(write_ca.stderr.read())
```
## Exercise the policy
These requests use an ordinary GitHub URL with no explicit HTTP proxy settings. The
first request reaches GitHub through the Sidecar. The next three are answered by the
addon and never reach GitHub. The final request demonstrates that another domain is
forwarded normally.
```python
def request_status(method: str, url: str) -> str:
process = sandbox.exec(
"curl",
"--cacert",
SANDBOX_CA_CERT,
"--request",
method,
"--path-as-is",
"--silent",
"--show-error",
"--output",
"/dev/null",
"--write-out",
"%{http_code}",
url,
)
status = process.stdout.read()
if process.wait() != 0:
raise RuntimeError(process.stderr.read())
return status
requests = [
("GET", "https://github.com/modal-labs/modal-client"),
("POST", "https://github.com/modal-labs/modal-client"),
("GET", "https://github.com/modal-labs/modal-examples"),
("GET", "https://github.com/modal-labs/modal-client/../modal-examples"),
("GET", "https://example.com/"),
]
for method, url in requests:
print(f"{method} {url} -> {request_status(method, url)}")
```
The output should look like:
```
GET https://github.com/modal-labs/modal-client -> 200
POST https://github.com/modal-labs/modal-client -> 403
GET https://github.com/modal-labs/modal-examples -> 403
GET https://github.com/modal-labs/modal-client/../modal-examples -> 403
GET https://example.com/ -> 200
```
Terminating the Sandbox also terminates its Sidecars.
```python
sandbox.terminate()
```
### Simple Code Interpreter
# Build a stateful, sandboxed code interpreter
This example demonstrates how to build a stateful code interpreter using a Modal
[Sandbox](https://modal.com/docs/guide/sandbox).
We'll create a Modal Sandbox that listens for code to execute and then
executes the code in a Python interpreter. Because we're running in a sandboxed
environment, we can safely use the "unsafe" `exec()` to execute the code.
## Setting up a code interpreter in a Modal Sandbox
Our code interpreter uses a Python "driver program" to listen for code
sent in JSON format to its standard input (`stdin`), execute the code,
and then return the results in JSON format on standard output (`stdout`).
```python
import inspect
import json
import sys
from typing import Any, Iterator
import modal
def driver_program():
import json
import sys
from contextlib import redirect_stderr, redirect_stdout
from io import StringIO
# When you `exec` code in Python, you can pass in a dictionary
# that defines the global variables the code has access to.
# We'll use that to store state.
globals: dict[str, Any] = {}
while True:
command = json.loads(input()) # read a line of JSON from stdin
if (code := command.get("code")) is None:
print(json.dumps({"error": "No code to execute"}))
continue
# Capture the executed code's outputs
stdout_io, stderr_io = StringIO(), StringIO()
with redirect_stdout(stdout_io), redirect_stderr(stderr_io):
try:
exec(code, globals)
except Exception as e:
print(f"Execution Error: {e}", file=sys.stderr)
print(
json.dumps(
{"stdout": stdout_io.getvalue(), "stderr": stderr_io.getvalue()}
),
flush=True,
)
```
We run this driver program in a [Modal Sandbox](https://modal.com/docs/guide/sandboxes).
```python
app = modal.App.lookup("example-simple-code-interpreter", create_if_missing=True)
sb = modal.Sandbox.create(app=app)
```
We have to convert the driver program to a string to pass it to the Sandbox.
Here we use `inspect.getsource` to get the source code as a string,
but you could also keep the driver program in a separate file and read it in.
```python
driver_program_text = inspect.getsource(driver_program)
driver_program_command = f"""{driver_program_text}\n\ndriver_program()"""
```
We then kick off the program with [`Sandbox.exec`](https://modal.com/docs/reference/modal.Sandbox#exec),
which creates a process inside the Sandbox (see [`modal.container_process`](https://modal.com/docs/reference/modal.container_process)
for details).
```python
p = sb.exec("python", "-c", driver_program_command, bufsize=1)
```
## Running code in a Modal Sandbox
Now we need a way to run code inside that running driver process.
Our driver program already defined a JSON interface on its `stdin` and `stdout`,
so we just need to write a quick wrapper to write to the remote `stdin`
and read from the remote `stdout`.
```python
reader, writer = p.stdin, iter(p.stdout)
def run_code(writer: modal.io_streams.StreamWriter, reader: Iterator[str], code: str):
writer.write(json.dumps({"code": code}) + "\n")
writer.drain()
result = json.loads(next(reader))
print(result["stdout"], end="")
if result["stderr"]:
print("\033[91m" + result["stderr"] + "\033[0m", end="", file=sys.stderr)
```
Now we can execute some code in the Sandbox!
```python
run_code(reader, writer, "print('hello, world!')") # hello, world!
```
The Sandbox and our code interpreter are stateful,
so we can define variables and use them in subsequent code.
```python
run_code(reader, writer, "x = 10")
run_code(reader, writer, "y = 5")
run_code(reader, writer, "result = x + y")
run_code(reader, writer, "print(f'The result is: {result}')") # The result is: 15
```
We can also see errors when code fails.
```python
run_code(reader, writer, "print('Attempting to divide by zero...')")
run_code(reader, writer, "1 / 0") # Execution Error: division by zero
```
Finally, let's clean up after ourselves and terminate the Sandbox.
```python
sb.terminate()
```
### Simple Torch Cluster
# Simple PyTorch cluster
This example shows how you can perform distributed computation with PyTorch.
It is a kind of 'hello world' example for distributed ML training: setting up a cluster
and executing a broadcast operation to share a single tensor.
## Basic setup: Imports, dependencies, and a script
Let's get the imports out of the way first.
We need to import `modal.experimental` to use this feature, since it's still under development.
Let us know if you run into any issues!
```python
import os
from pathlib import Path
import modal
import modal.experimental
```
Communicating between nodes in a cluster requires communication libraries.
We'll use `torch`, so we add it to our container's [Image](https://modal.com/docs/guide/images) here.
```python
image = modal.Image.debian_slim(python_version="3.12").uv_pip_install(
"torch~=2.5.1", "numpy~=2.2.1"
)
```
The approach we're going to take is to use a Modal [Function](https://modal.com/docs/reference/modal.Function)
to launch the underlying script we want to distribute over the cluster nodes.
The script is located in another file in the same directory
of [our examples repo](https://github.com/modal-labs/modal-examples/).
In order to use it in our remote Modal Function,
we need to duplicate it remotely, which we do with `add_local_file`.
```python
this_directory = Path(__file__).parent
image = image.add_local_file(
this_directory / "simple_torch_cluster_script.py",
remote_path="/root/script.py",
)
app = modal.App("example-simple-torch-cluster", image=image)
```
## Configuring a test cluster
First, we set the size of the cluster in containers/nodes. This can be between 1 and 8.
This is part of our Modal configuration, since Modal is responsible for spinning up our cluster.
```python
n_nodes = 2
```
Next, we set the number of processes we run per node.
The usual practice is to run one process per GPU,
so we set those two values to be equal.
Note that `N_GPU` is Modal configuration ("how many GPUs should we spin up for you?")
while `nproc_per_node` is `torch.distributed` configuration ("how many processes should we spawn for you?").
```python
n_proc_per_node = N_GPU = 4
GPU_CONFIG = f"A10G:{N_GPU}"
```
Lastly, we need to select our communications library: the software that will handle
sending messages between nodes in our cluster.
Since we are running on GPUs, we use the
[NVIDIA Collective Communications Library](https://docs.nvidia.com/deeplearning/nccl/user-guide/docs/index.html)
(`nccl`, pronounced "nickle").
This is part of `torch.distributed` configuration --
Modal handles the networking infrastructure but not the communication protocol.
```python
backend = "nccl" # or "gloo" on CPU, see https://pytorch.org/docs/stable/distributed.html#which-backend-to-use
```
This cluster configurations is nice for testing, but typically
you'll want to run a cluster with the maximum number of GPUs per container --
8 if you're running on H100s, the beefiest GPUs we offer on Modal.
## Launching the script
Our Modal Function is merely a 'launcher' that sets up the distributed
cluster environment and then calls `torch.distributed.run`,
the underlying Python code exposed by the [`torchrun`](https://pytorch.org/docs/stable/elastic/run.html)
command line tool.
So executing this distributed job is easy! Just run
```bash
modal run simple_torch_cluster.py
```
in your terminal.
In addition to the values set in code above, you can pass additional arguments to `torch.distributed.run`
via the command line:
```bash
modal run simple_torch_cluster.py --max-restarts=1
```
```python
@app.function(gpu=GPU_CONFIG)
@modal.experimental.clustered(size=n_nodes)
def dist_run_script(*args):
from torch.distributed.run import parse_args, run
cluster_info = ( # we populate this data for you
modal.experimental.get_cluster_info()
)
# which container am I?
container_rank = cluster_info.rank
# how many containers are in this cluster?
world_size = len(cluster_info.container_ips)
# what's the leader/master/main container's address?
main_addr = cluster_info.container_ips[0]
# what's the identifier of this cluster task in Modal?
task_id = os.environ["MODAL_TASK_ID"]
print(f"hello from {container_rank=}")
if container_rank == 0:
print(
f"reporting cluster state from rank0/main: {main_addr=}, {world_size=}, {task_id=}"
)
run(
parse_args(
[
f"--nnodes={n_nodes}",
f"--node_rank={cluster_info.rank}",
f"--master_addr={main_addr}",
f"--nproc-per-node={n_proc_per_node}",
"--master_port=1234",
]
+ list(args)
+ ["/root/script.py", "--backend", backend]
)
)
```
### Simple Torch Cluster Script
```python
import argparse
import os
from contextlib import contextmanager
import torch
import torch.distributed as dist
```
Environment variables set by torch.distributed.run.
```python
LOCAL_RANK = int(os.environ["LOCAL_RANK"])
WORLD_SIZE = int(os.environ["WORLD_SIZE"])
WORLD_RANK = int(os.environ["RANK"])
```
The master (or leader) rank is always 0 with torch.distributed.run.
```python
MASTER_RANK = 0
```
This `run` function performs a simple distributed data transfer between containers
using the specified distributed communication backend.
An example topology of the cluster when WORLD_SIZE=4 is shown below:
+---------+
| Master |
| Rank 0 |
+----+----+
|
|
+--------+--------+
| | |
| | |
+--+--+ +--+--+ +--+--+
|Rank 1| |Rank 2| |Rank 3|
+-----+ +-----+ +-----+
A broadcast operation (https://docs.nvidia.com/deeplearning/nccl/user-guide/docs/usage/collectives.html#broadcast)
is performed between the master container (rank 0) and all other containers.
The master container (rank 0) sends a tensor to all other containers.
Each container then receives that tensor from the master container.
```python
def run(backend):
# Helper function providing a vanity name for each container based on its world (i.e. global) rank.
def container_name(wrld_rank: int) -> str:
return (
f"container-{wrld_rank} (main)"
if wrld_rank == 0
else f"container-{wrld_rank}"
)
tensor = torch.zeros(1)
# Need to put tensor on a GPU device for NCCL backend.
if backend == "nccl":
device = torch.device("cuda:{}".format(LOCAL_RANK))
tensor = tensor.to(device)
if WORLD_RANK == MASTER_RANK:
print(f"{container_name(WORLD_RANK)} sending data to all other containers...\n")
for rank_recv in range(1, WORLD_SIZE):
dist.send(tensor=tensor, dst=rank_recv)
print(
f"{container_name(WORLD_RANK)} sent data to {container_name(rank_recv)}\n"
)
else:
dist.recv(tensor=tensor, src=MASTER_RANK)
print(
f"{container_name(WORLD_RANK)} has received data from {container_name(MASTER_RANK)}\n"
)
```
In order for the broadcast operation to happen across the cluster, we need to have the master container (rank 0)
learn the network addresses of all other containers.
This is done by calling `dist.init_process_group` with the specified backend.
See https://pytorch.org/docs/stable/distributed.html#torch.distributed.init_process_group for more details.
```python
@contextmanager
def init_processes(backend):
try:
dist.init_process_group(backend, rank=WORLD_RANK, world_size=WORLD_SIZE)
yield
finally:
dist.barrier() # ensure any async work is done before cleaning up
# Remove this if it causes program to hang. ref: https://github.com/pytorch/pytorch/issues/75097.
dist.destroy_process_group()
if __name__ == "__main__":
# This is a minimal CLI interface adhering to the requirements of torch.distributed.run (torchrun).
#
# Our Modal Function will use torch.distributed.run to launch this script.
#
# See https://pytorch.org/docs/stable/elastic/run.html for more details on the CLI interface.
parser = argparse.ArgumentParser()
parser.add_argument(
"--local-rank",
"--local_rank",
type=int,
help="Local rank. Necessary for using the torch.distributed.launch utility.",
)
parser.add_argument("--backend", type=str, default="gloo", choices=["nccl", "gloo"])
args = parser.parse_args()
with init_processes(backend=args.backend):
run(backend=args.backend)
```
### Sortformer2 1
modified from:
https://github.com/NVIDIA-NeMo/NeMo/blob/main/nemo/agents/voice_agent/pipecat/services/nemo/streaming_diar.py
```python
import math
from dataclasses import dataclass
from typing import Tuple
import nemo.collections.asr as nemo_asr
import numpy as np
import torch
from nemo.collections.asr.models import SortformerEncLabelModel
from nemo.collections.asr.modules.sortformer_modules import StreamingSortformerState
from omegaconf import DictConfig
from torch import Tensor
LOG_MEL_ZERO = -16.635
class AudioBufferer:
def __init__(self, sample_rate: int, buffer_size_in_secs: float):
self.buffer_size = int(buffer_size_in_secs * sample_rate)
self.sample_buffer = torch.zeros(self.buffer_size, dtype=torch.float32)
def reset(self) -> None:
"""
Reset the buffer to zero
"""
self.sample_buffer.zero_()
def update(self, audio: np.ndarray) -> None:
"""
Update the buffer with the new frame
Args:
frame (Frame): frame to update the buffer with
"""
if not isinstance(audio, torch.Tensor):
audio = torch.from_numpy(audio)
audio_size = audio.shape[0]
if audio_size > self.buffer_size:
raise ValueError(
f"Frame size ({audio_size}) exceeds buffer size ({self.buffer_size})"
)
shift = audio_size
self.sample_buffer[:-shift] = self.sample_buffer[shift:].clone()
self.sample_buffer[-shift:] = audio.clone()
def get_buffer(self) -> torch.Tensor:
"""
Get the current buffer
Returns:
torch.Tensor: current state of the buffer
"""
return self.sample_buffer.clone()
def is_buffer_empty(self) -> bool:
"""
Check if the buffer is empty
Returns:
bool: True if the buffer is empty, False otherwise
"""
return self.sample_buffer.sum() == 0
class CacheFeatureBufferer:
def __init__(
self,
sample_rate: int,
buffer_size_in_secs: float,
chunk_size_in_secs: float,
preprocessor_cfg: DictConfig,
device: torch.device,
fill_value: float = LOG_MEL_ZERO,
):
if buffer_size_in_secs < chunk_size_in_secs:
raise ValueError(
f"Buffer size ({buffer_size_in_secs}s) should be no less than chunk size ({chunk_size_in_secs}s)"
)
self.sample_rate = sample_rate
self.buffer_size_in_secs = buffer_size_in_secs
self.chunk_size_in_secs = chunk_size_in_secs
self.device = device
if hasattr(preprocessor_cfg, "log") and preprocessor_cfg.log:
self.ZERO_LEVEL_SPEC_DB_VAL = (
LOG_MEL_ZERO # Log-Mel spectrogram value for zero signals
)
else:
self.ZERO_LEVEL_SPEC_DB_VAL = fill_value
self.n_feat = preprocessor_cfg.features
self.timestep_duration = preprocessor_cfg.window_stride
self.n_chunk_look_back = int(self.timestep_duration * self.sample_rate)
self.chunk_size = int(self.chunk_size_in_secs * self.sample_rate)
self.sample_buffer = AudioBufferer(sample_rate, buffer_size_in_secs)
self.feature_buffer_len = int(buffer_size_in_secs / self.timestep_duration)
self.feature_chunk_len = int(chunk_size_in_secs / self.timestep_duration)
self.feature_buffer = torch.full(
[self.n_feat, self.feature_buffer_len],
self.ZERO_LEVEL_SPEC_DB_VAL,
dtype=torch.float32,
device=self.device,
)
self.preprocessor = nemo_asr.models.ASRModel.from_config_dict(preprocessor_cfg)
self.preprocessor.to(self.device)
def is_buffer_empty(self) -> bool:
"""
Check if the buffer is empty
Returns:
bool: True if the buffer is empty, False otherwise
"""
return self.sample_buffer.is_buffer_empty()
def reset(self) -> None:
"""
Reset the buffer to zero
"""
self.sample_buffer.reset()
self.feature_buffer.fill_(self.ZERO_LEVEL_SPEC_DB_VAL)
def _update_feature_buffer(self, feat_chunk: torch.Tensor) -> None:
"""
Add an extracted feature to `feature_buffer`
"""
self.feature_buffer[:, : -self.feature_chunk_len] = self.feature_buffer[
:, self.feature_chunk_len :
].clone()
self.feature_buffer[:, -self.feature_chunk_len :] = feat_chunk.clone()
def preprocess(self, audio_signal: torch.Tensor) -> torch.Tensor:
"""
Preprocess the audio signal using the preprocessor
Args:
audio_signal (torch.Tensor): audio signal
Returns:
torch.Tensor: preprocessed features
"""
audio_signal = audio_signal.unsqueeze_(0).to(self.device)
audio_signal_len = torch.tensor([audio_signal.shape[1]], device=self.device)
features, _ = self.preprocessor(
input_signal=audio_signal,
length=audio_signal_len,
)
features = features.squeeze()
return features
def update(self, audio: np.ndarray) -> None:
"""
Update the sample anf feature buffers with the new frame
Args:
frame (Frame): frame to update the buffer with
"""
# Update the sample buffer with the new frame
self.sample_buffer.update(audio)
if math.isclose(self.buffer_size_in_secs, self.chunk_size_in_secs):
# If the buffer size is equal to the chunk size, just take the whole buffer
samples = self.sample_buffer.sample_buffer.clone()
else:
# Add look_back to have context for the first feature
samples = self.sample_buffer.sample_buffer[
-(self.n_chunk_look_back + self.chunk_size) :
]
# Get the mel spectrogram
features = self.preprocess(samples)
# If the features are longer than supposed to be, drop the last frames
# Drop the last diff frames because they might be incomplete
if (diff := features.shape[1] - self.feature_chunk_len - 1) > 0:
features = features[:, :-diff]
# Update the feature buffer with the new features
self._update_feature_buffer(features[:, -self.feature_chunk_len :])
def get_buffer(self) -> torch.Tensor:
"""
Get the current sample buffer
Returns:
torch.Tensor: current state of the buffer
"""
return self.sample_buffer.get_buffer()
def get_feature_buffer(self) -> torch.Tensor:
"""
Get the current feature buffer
Returns:
torch.Tensor: current state of the feature buffer
"""
return self.feature_buffer.clone()
@dataclass
class DiarizationConfig:
"""Diarization configuration parameters for inference."""
model_path: str = "nvidia/diar_streaming_sortformer_4spk-v2"
device: str = "cuda"
log: bool = False # If True, log will be printed
max_num_speakers: int = 4
spkcache_len: int = 188
spkcache_refresh_rate: int = 144
fifo_len: int = 188
chunk_len: int = 6
chunk_left_context: int = 1
chunk_right_context: int = 7
class NeMoStreamingDiarizer:
def __init__(
self,
cfg: DiarizationConfig,
model: str,
frame_len_in_secs: float = 0.08,
sample_rate: int = 16000,
left_offset: int = 8,
right_offset: int = 8,
use_amp: bool = False,
compute_dtype: torch.dtype = torch.float32,
):
self.model = model
self.cfg = cfg
self.cfg.model_path = model
self.diarizer = self.build_diarizer()
self.device = cfg.device
self.use_amp = use_amp
self.compute_dtype = compute_dtype
self.frame_len_in_secs = frame_len_in_secs
self.left_offset = left_offset
self.right_offset = right_offset
self.chunk_size = self.cfg.chunk_len
self.buffer_size_in_secs = (
self.cfg.chunk_len * self.frame_len_in_secs
+ (self.left_offset + self.right_offset) * 0.01
)
self.max_num_speakers = self.cfg.max_num_speakers
self.feature_bufferer = CacheFeatureBufferer(
sample_rate=sample_rate,
buffer_size_in_secs=self.buffer_size_in_secs,
chunk_size_in_secs=self.cfg.chunk_len * self.frame_len_in_secs,
preprocessor_cfg=self.diarizer.cfg.preprocessor,
device=self.device,
)
self.streaming_state = self.init_streaming_state(batch_size=1)
self.total_preds = torch.zeros(
(1, 0, self.max_num_speakers), device=self.diarizer.device
)
print(
f"NeMoStreamingDiarService initialized with model `{model}` on device `{self.device}`"
)
def build_diarizer(self):
if self.cfg.model_path.endswith(".nemo"):
diar_model = SortformerEncLabelModel.restore_from(
self.cfg.model_path, map_location=self.cfg.device
)
else:
diar_model = SortformerEncLabelModel.from_pretrained(
self.cfg.model_path, map_location=self.cfg.device
)
# Steaming mode setup
diar_model.sortformer_modules.chunk_len = self.cfg.chunk_len
diar_model.sortformer_modules.spkcache_len = self.cfg.spkcache_len
diar_model.sortformer_modules.chunk_left_context = self.cfg.chunk_left_context
diar_model.sortformer_modules.chunk_right_context = self.cfg.chunk_right_context
diar_model.sortformer_modules.fifo_len = self.cfg.fifo_len
diar_model.sortformer_modules.log = self.cfg.log
diar_model.sortformer_modules.spkcache_refresh_rate = (
self.cfg.spkcache_refresh_rate
)
diar_model.eval()
return diar_model
def print_diar_result(self, diar_result: np.ndarray):
full_result = []
for t in range(diar_result.shape[0]):
spk_probs = ""
for s in range(diar_result.shape[1]):
spk_probs += f"{diar_result[t, s]:.2f} "
full_result.append(f"Time {t}: {spk_probs}")
print(full_result)
return full_result
def diarize(self, audio: bytes, stream_id: str = "default"):
audio_array = np.frombuffer(audio, dtype=np.int16).astype(np.float32) / 32768.0
self.feature_bufferer.update(audio_array)
features = self.feature_bufferer.get_feature_buffer()
feature_buffers = features.unsqueeze(0) # add batch dimension
feature_buffers = feature_buffers.transpose(
1, 2
) # [batch, feature, time] -> [batch, time, feature]
feature_buffer_lens = torch.tensor(
[feature_buffers.shape[1]], device=self.device
)
self.streaming_state, chunk_preds = self.stream_step(
processed_signal=feature_buffers,
processed_signal_length=feature_buffer_lens,
streaming_state=self.streaming_state,
total_preds=self.total_preds,
left_offset=self.left_offset,
right_offset=self.right_offset,
)
self.total_preds = chunk_preds
diar_result = chunk_preds[:, -self.chunk_size :, :].clone().cpu().numpy()
return diar_result[0] # tensor of shape [6, 4]
def reset_state(self, stream_id: str = "default"):
self.feature_bufferer.reset()
self.streaming_state = self.init_streaming_state(batch_size=1)
self.total_preds = torch.zeros(
(1, 0, self.max_num_speakers), device=self.diarizer.device
)
def init_streaming_state(self, batch_size: int = 1) -> StreamingSortformerState:
"""
Initialize the streaming state for the diarization model.
Args:
batch_size: The batch size to use.
Returns:
SortformerStreamingState: The initialized streaming state.
"""
# Use the model's init_streaming_state method but convert to SortformerStreamingState format
nemo_state = self.diarizer.sortformer_modules.init_streaming_state(
batch_size=batch_size,
async_streaming=self.diarizer.async_streaming,
device=self.device,
)
return nemo_state
def stream_step(
self,
processed_signal: Tensor,
processed_signal_length: Tensor,
streaming_state: StreamingSortformerState,
total_preds: Tensor,
left_offset: int = 0,
right_offset: int = 0,
) -> Tuple[StreamingSortformerState, Tensor]:
"""
Execute a single streaming step for diarization.
Args:
processed_signal: The processed audio signal.
processed_signal_length: The length of the processed signal.
streaming_state: The current streaming state.
total_preds: The total predictions so far.
left_offset: The left offset for the current chunk.
right_offset: The right offset for the current chunk.
Returns:
Tuple[SortformerStreamingState, Tensor]: The updated streaming state and predictions.
"""
# Move tensors to correct device
if processed_signal.device != self.device:
processed_signal = processed_signal.to(self.device)
if processed_signal_length.device != self.device:
processed_signal_length = processed_signal_length.to(self.device)
if total_preds is not None and total_preds.device != self.device:
total_preds = total_preds.to(self.device)
with (
torch.amp.autocast(
device_type=self.device, dtype=self.compute_dtype, enabled=self.use_amp
),
torch.inference_mode(),
torch.no_grad(),
):
try:
# Call the model's forward_streaming_step method
streaming_state, diar_pred_out_stream = (
self.diarizer.forward_streaming_step(
processed_signal=processed_signal,
processed_signal_length=processed_signal_length,
streaming_state=streaming_state,
total_preds=total_preds,
left_offset=left_offset,
right_offset=right_offset,
)
)
except Exception as e:
print(f"Error in diarizer streaming step: {e}")
# print the stack trace
import traceback
traceback.print_exc()
# Return the existing state and preds if there's an error
return streaming_state, total_preds
return streaming_state, diar_pred_out_stream
```
### Sortformer2 1 Speaker Diarization
# Streaming Speaker Diarization with Sortformer2.1
In this example, we show how to deploy a streaming speaker diarization service with [NVIDIA's Sortformer2.1](https://huggingface.co/nvidia/diar_streaming_sortformer_4spk-v2.1) on Modal.
Sortformer2.1 is a state-of-the-art speaker diarization model that is designed to operate on streams of audio.
Try it yourself! Click the "View on GitHub" button to see the code. And [sign up for a Modal account](https://modal.com/signup) if you haven't already.
## Setup
We start by importing some basic packages and the Modal SDK. As well as setting up our Modal App, Volume, and Image.
```python
from pathlib import Path
from typing import Literal
import modal
app = modal.App("sortformer2-1-speaker-diarization")
CACHE_PATH = "/model"
cache_vol = modal.Volume.from_name("sortformer2_1-cache", create_if_missing=True)
image = (
modal.Image.from_registry(
"nvidia/cuda:13.0.1-cudnn-devel-ubuntu22.04", add_python="3.12"
)
.env(
{
"HF_HUB_ENABLE_HF_TRANSFER": "1",
"HF_HOME": CACHE_PATH, # cache directory for Hugging Face models
"CXX": "g++",
"CC": "g++",
"TORCH_HOME": CACHE_PATH,
}
)
.apt_install("git", "libsndfile1", "ffmpeg")
.uv_pip_install(
"hf_transfer==0.1.9",
"huggingface_hub[hf-xet]==0.31.2",
"cuda-python==13.0.1",
"numpy<2",
"fastapi",
"nemo_toolkit[asr]@git+https://github.com/NVIDIA/NeMo.git@main",
)
)
with image.imports():
import asyncio
import json
import time
from fastapi import FastAPI, WebSocket, WebSocketDisconnect
from starlette.websockets import WebSocketState
from .sortformer2_1 import DiarizationConfig, NeMoStreamingDiarizer
```
## Run Sortformer2.1 speaker diarization
Now we're ready to add the code that runs the Sortformer2.1 speaker diarization model.
We use a Modal [Cls](https://modal.com/docs/guide/lifecycle-functions)
so that we can separate out the model loading and setup code from the inference.
For more on lifecycle management with Clses and cold start penalty reduction on Modal, see
[this guide](https://modal.com/docs/guide/cold-start). In particular, the Sortformer2.1 model
is amenable to GPU snapshots which can significantly reduce cold start times.
We also include two configurations. The low latency configuration is used for real-time diarization,
and the high latency configuration is used for non-real-time diarization with higher accuracy.
## Using WebSockets to stream audio and diarization results
We use a Modal [ASGI](https://modal.com/docs/guide/webhooks) app to serve the diarization results
over WebSockets. This allows us to stream the diarization results to the client in real-time.
We use a simple queue-based architecture to handle the audio and diarization results.
The audio is received from the client over WebSockets and added to a queue.
The diarization results are then processed and added to a queue.
The diarization results are then sent to the client over WebSockets.
```python
@app.cls(
image=image,
volumes={CACHE_PATH: cache_vol},
gpu="L4",
secrets=[modal.Secret.from_name("huggingface-secret")],
)
class Sortformer2_1_Speaker_Diarization:
@modal.enter()
def enter(self):
self._LOW_LATENCY_CONFIG = DiarizationConfig(
max_num_speakers=4,
chunk_len=6,
chunk_right_context=7,
fifo_len=188,
spkcache_refresh_rate=144,
spkcache_len=188,
)
self._HIGH_LATENCY_CONFIG = DiarizationConfig(
max_num_speakers=4,
chunk_len=340,
chunk_right_context=40,
fifo_len=40,
spkcache_refresh_rate=300,
spkcache_len=188,
)
self.latency: Literal["low", "high"] = "low"
self._SORTFORMER_FRAME_SIZE_BYTES = (
16000 * 0.08 * 2
) # sample rate * frame size in seconds * 2 bytes (16 bit)
if self.latency == "low":
self.config = self._LOW_LATENCY_CONFIG
else:
self.config = self._HIGH_LATENCY_CONFIG
# load model from Hugging Face model card directly (You need a Hugging Face token)
self.diarizer = NeMoStreamingDiarizer(
cfg=self.config, model="nvidia/diar_streaming_sortformer_4spk-v2.1"
)
self.web_app = FastAPI()
@self.web_app.websocket("/ws")
async def run_with_websocket(ws: WebSocket):
audio_queue = asyncio.Queue()
output_queue = asyncio.Queue()
async def recv_loop(ws, audio_queue):
audio_buffer = bytearray()
while True:
data = await ws.receive_bytes()
audio_buffer.extend(data)
if len(audio_buffer) > self._SORTFORMER_FRAME_SIZE_BYTES:
await audio_queue.put(audio_buffer)
audio_buffer = bytearray()
async def inference_loop(audio_queue, output_queue):
while True:
audio_data = await audio_queue.get()
start_time = time.perf_counter()
diar_result = self.diarizer.diarize(audio_data)
probs = self._get_speaker_probabilities(diar_result)
await output_queue.put(json.dumps(probs))
end_time = time.perf_counter()
print(
f"time taken to diarize audio segment: {end_time - start_time} seconds"
)
async def send_loop(output_queue, ws):
while True:
output = await output_queue.get()
print(f"sending diarize result: {output}")
await ws.send_text(output)
await ws.accept()
try:
tasks = [
asyncio.create_task(recv_loop(ws, audio_queue)),
asyncio.create_task(inference_loop(audio_queue, output_queue)),
asyncio.create_task(send_loop(output_queue, ws)),
]
await asyncio.gather(*tasks)
except WebSocketDisconnect:
print("WebSocket disconnected")
ws = None
except Exception as e:
print("Exception:", e)
finally:
self.diarizer.reset_state()
if ws and ws.application_state is WebSocketState.CONNECTED:
await ws.close(code=1011) # internal error
ws = None
for task in tasks:
if not task.done():
try:
task.cancel()
await task
except asyncio.CancelledError:
pass
@modal.asgi_app()
def webapp(self):
return self.web_app
def _get_speaker_probabilities(self, spk_pred):
# spk_pred is a 6x4 matrix of probabilities
# We want to return a 1x4 vector of probabilities for the total time window
# We can take the mean across the time dimension (axis 0)
return spk_pred.mean(axis=0).tolist()
```
## Serving the diarization results to a frontend
We use a simple HTML frontend to display the diarization results.
```python
web_image = (
modal.Image.debian_slim(python_version="3.12")
.pip_install("fastapi")
.add_local_dir(
Path(__file__).parent / "streaming-diarization-frontend", "/root/frontend"
)
)
with web_image.imports():
from fastapi import FastAPI, WebSocket
from fastapi.responses import HTMLResponse, Response
from fastapi.staticfiles import StaticFiles
@app.cls(image=web_image)
@modal.concurrent(max_inputs=20)
class WebServer:
@modal.asgi_app()
def web(self):
web_app = FastAPI()
web_app.mount("/static", StaticFiles(directory="frontend"))
@web_app.get("/status")
async def status():
return Response(status_code=200)
# serve frontend
@web_app.get("/")
async def index():
html_content = open("frontend/index.html").read()
# Get the base WebSocket URL (without transcriber parameters)
cls_instance = modal.Cls.from_name(
"sortformer2-1-speaker-diarization", "Sortformer2_1_Speaker_Diarization"
)()
ws_base_url = (
cls_instance.webapp.get_web_url().replace("http", "ws") + "/ws"
)
script_tag = f''
html_content = html_content.replace(
'',
f'{script_tag}\n',
)
return HTMLResponse(content=html_content)
return web_app
```
### Stepfun Inference
# Run StepFun models with SGLang
In this example, we show how to run a [SGLang](https://github.com/sgl-project/sglang) server
on Modal serving [StepFun's Step 3.7 Flash](https://huggingface.co/stepfun-ai/Step-3.7-Flash-FP8).
## Set up the container image
```python
import asyncio
import json
import subprocess
import time
import aiohttp
import modal
MINUTES = 60 # seconds
sglang_image = (
modal.Image.from_registry("lmsysorg/sglang:dev-cu13-dev-step-3.7-flash")
.entrypoint([]) # silence chatty logs on container start
.run_commands("rm -rf /root/.cache/huggingface") # clean up
)
```
We'll need 8 H100 GPUs to run this 196B parameter MoE model.
8 GPUs × 80GB = 640GB VRAM, enough for the ~190GB FP8 model with KV cache overhead.
```python
N_GPUS = 8
GPU = f"H100:{N_GPUS}"
```
### Loading and cacheing the model weights
```python
MODEL_NAME = "stepfun-ai/Step-3.7-Flash-FP8"
MODEL_REVISION = "d14f10bf45f025eae0f096ce7c91e9c08b0416da"
```
We use a [Modal Volume](https://modal.com/docs/guide/volumes) to cache model weights
so we don't re-download them on every cold start.
```python
HF_CACHE_VOL = modal.Volume.from_name("huggingface-cache", create_if_missing=True)
HF_CACHE_PATH = "/root/.cache/huggingface"
```
We also include a [Modal Secret](https://modal.com/docs/guide/secrets)
with Hugging Face API credentials so that we can download the model faster.
You can create a Secret [here](https://modal.com/secrets).
```python
hf_secret = modal.Secret.from_name("huggingface-secret")
sglang_image = sglang_image.env(
{"HF_HUB_CACHE": HF_CACHE_PATH, "HF_XET_HIGH_PERFORMANCE": "1"}
)
```
We'll use the `requests` library to check server health and warm up the model.
```python
with sglang_image.imports():
import requests
def wait_ready(process: subprocess.Popen, port: int, timeout: int = 10 * MINUTES):
deadline = time.time() + timeout
while time.time() < deadline:
try:
check_running(process)
requests.get(f"http://127.0.0.1:{port}/health").raise_for_status()
return
except (
subprocess.CalledProcessError,
requests.exceptions.ConnectionError,
requests.exceptions.HTTPError,
):
time.sleep(1)
raise TimeoutError(f"SGLang server not ready within timeout of {timeout} seconds")
def check_running(p: subprocess.Popen):
if (rc := p.poll()) is not None:
raise subprocess.CalledProcessError(rc, cmd=p.args)
def warmup(port: int):
payload = {
"messages": [{"role": "user", "content": "Hello, how are you?"}],
"max_tokens": 16,
}
for _ in range(3):
requests.post(
f"http://127.0.0.1:{port}/v1/chat/completions", json=payload, timeout=120
).raise_for_status()
```
## Define the inference server
```python
app = modal.App(name="example-stepfun-inference")
PORT = 8000
TARGET_INPUTS = 16
@app.server(
image=sglang_image,
gpu=GPU,
volumes={HF_CACHE_PATH: HF_CACHE_VOL},
secrets=[hf_secret],
scaledown_window=15 * MINUTES,
startup_timeout=120 * MINUTES,
routing_region="us-east",
port=PORT,
target_concurrency=TARGET_INPUTS,
unauthenticated=True,
)
class SGLang:
@modal.enter()
def startup(self):
cmd = [
"python",
"-m",
"sglang.launch_server",
"--model-path",
MODEL_NAME,
"--served-model-name",
MODEL_NAME,
"--host",
"0.0.0.0",
"--port",
f"{PORT}",
"--tp",
f"{N_GPUS}",
"--ep",
f"{N_GPUS}",
"--cuda-graph-max-bs",
f"{TARGET_INPUTS * 2}",
"--max-running-requests",
f"{TARGET_INPUTS * 2}",
"--enable-metrics",
"--trust-remote-code",
]
cmd += (
[
"--revision",
MODEL_REVISION,
]
if MODEL_REVISION
else []
)
self.process = subprocess.Popen(cmd)
wait_ready(self.process, PORT)
warmup(PORT)
@modal.exit()
def stop(self):
self.process.terminate()
```
## Deploy the server
To deploy the server on Modal, run:
```bash
modal deploy stepfun_inference.py
```
## Test the server
To test the server setup, run:
```bash
modal run stepfun_inference.py
```
```python
@app.local_entrypoint()
async def test(test_timeout=40 * MINUTES, prompt=None, twice=True):
url = await SGLang.get_url.aio()
system_prompt = {
"role": "system",
"content": "You are a pirate who can't help but drop sly reminders that he went to Harvard.",
}
if prompt is None:
prompt = "Explain the Singular Value Decomposition."
content = [{"type": "text", "text": prompt}]
messages = [ # OpenAI chat format
system_prompt,
{"role": "user", "content": content},
]
await probe(url, messages, timeout=test_timeout)
if twice:
messages[0]["content"] = "You are Jar Jar Binks."
print(f"Sending messages to {url}:", *messages, sep="\n\t")
await probe(url, messages, timeout=test_timeout)
async def probe(url, messages=None, timeout=5 * MINUTES):
if messages is None:
messages = [{"role": "user", "content": "Tell me a joke."}]
client_id = str(0) # set this to some string per multi-turn interaction
# often a UUID per "conversation"
headers = {"Modal-Session-ID": client_id}
deadline = time.time() + timeout
async with aiohttp.ClientSession(base_url=url, headers=headers) as session:
while time.time() < deadline:
try:
await _send_request_streaming(session, messages)
return
except asyncio.TimeoutError:
await asyncio.sleep(1)
except aiohttp.client_exceptions.ClientResponseError as e:
if e.status == 503:
await asyncio.sleep(1)
continue
raise e
raise TimeoutError(f"No response from server within {timeout} seconds")
async def _send_request_streaming(
session: aiohttp.ClientSession, messages: list, timeout: int | None = None
) -> None:
payload = {"messages": messages, "stream": True}
headers = {"Accept": "text/event-stream"}
async with session.post(
"/v1/chat/completions", json=payload, headers=headers, timeout=timeout
) as resp:
resp.raise_for_status()
full_text = ""
async for raw in resp.content:
line = raw.decode("utf-8", errors="ignore").strip()
if not line:
continue
# Server-Sent Events format: "data: ...."
if not line.startswith("data:"):
continue
data = line[len("data:") :].strip()
if data == "[DONE]":
break
try:
evt = json.loads(data)
except json.JSONDecodeError:
# ignore any non-JSON keepalive
continue
delta = (evt.get("choices") or [{}])[0].get("delta") or {}
chunk = delta.get("content")
if chunk:
print(chunk, end="", flush="\n" in chunk or "." in chunk)
full_text += chunk
print() # newline after stream completes
```
### Streaming
# Deploy a FastAPI app with streaming responses
This example shows how you can deploy a [FastAPI](https://fastapi.tiangolo.com/) app with Modal that streams results back to the client.
```python
import asyncio
import time
import modal
from fastapi import FastAPI
from fastapi.responses import StreamingResponse
image = modal.Image.debian_slim().uv_pip_install("fastapi[standard]")
app = modal.App("example-streaming", image=image)
web_app = FastAPI()
```
This asynchronous generator function simulates
progressively returning data to the client. The `asyncio.sleep`
is not necessary, but makes it easier to see the iterative behavior
of the response.
```python
async def fake_video_streamer():
for i in range(10):
yield f"frame {i}: hello world!".encode()
await asyncio.sleep(1.0)
```
ASGI app with streaming handler.
This `fastapi_app` also uses the fake video streamer async generator,
passing it directly into `StreamingResponse`.
```python
@web_app.get("/")
async def main():
return StreamingResponse(fake_video_streamer(), media_type="text/event-stream")
@app.function()
@modal.asgi_app()
def fastapi_app():
return web_app
```
This `hook` Web Function calls *another* Modal Function,
and it just works!
```python
@app.function()
def sync_fake_video_streamer():
for i in range(10):
yield f"frame {i}: some data\n".encode()
time.sleep(1)
@app.function()
@modal.fastapi_endpoint()
def hook():
return StreamingResponse(
sync_fake_video_streamer.remote_gen(), media_type="text/event-stream"
)
```
This `mapped` Web Function does a parallel `.map` on a simple
Modal Function. Using `.starmap` also would work in the same fashion.
```python
@app.function()
def map_me(i):
time.sleep(i) # stagger the results for demo purposes
return f"hello from {i}\n"
@app.function()
@modal.fastapi_endpoint()
def mapped():
return StreamingResponse(map_me.map(range(10)), media_type="text/event-stream")
```
To try for yourself, run
```shell
modal serve streaming.py
```
and then send requests to the URLs that appear in the terminal output.
Make sure that your client is not buffering the server response
until it gets newline (\n) characters. By default browsers and `curl` are buffering,
though modern browsers should respect the "text/event-stream" content type header being set.
### Streaming Kyutai Stt
# Stream transcriptions with Kyutai STT
This example demonstrates the deployment of a streaming audio transcription service with Kyutai STT on Modal.
[Kyutai STT](https://kyutai.org/next/stt) is an automated speech recognition/transcription model
that is designed to operate on streams of audio, rather than on complete audio files.
See the linked blog post for details on their "delayed streams" architecture.
## Setup
We start by importing some basic packages and the Modal SDK.
```python
import asyncio
import base64
import time
from pathlib import Path
import modal
```
Then we define a Modal App and an
[Image](https://modal.com/docs/guide/images)
with the dependencies of our speech-to-text system.
```python
app = modal.App(name="example-streaming-kyutai-stt")
stt_image = (
modal.Image.debian_slim(python_version="3.12")
.uv_pip_install(
"moshi==0.2.9", "fastapi==0.116.1", "huggingface-hub==0.33.5", "julius==0.2.7"
)
.env({"HF_XET_HIGH_PERFORMANCE": "1"})
)
```
One dependency is missing: the model weights.
Instead of including them in the Image or loading them every time the Function starts,
we add them to a Modal [Volume](https://modal.com/docs/guide/volumes).
Volumes are like a shared disk that all Modal Functions can access.
For more details on patterns for handling model weights on Modal, see
[this guide](https://modal.com/docs/guide/model-weights).
```python
MODEL_NAME = "kyutai/stt-1b-en_fr"
hf_cache_vol = modal.Volume.from_name(f"{app.name}-hf-cache", create_if_missing=True)
hf_cache_vol_path = Path("/root/.cache/huggingface")
volumes = {hf_cache_vol_path: hf_cache_vol}
```
## Run Kyutai STT inference on Modal
Now we're ready to add the code that runs the speech-to-text model.
We use a Modal [Cls](https://modal.com/docs/guide/lifecycle-functions)
so that we can separate out the model loading and setup code from the inference.
For more on lifecycle management with Clses and cold start penalty reduction on Modal, see
[this guide](https://modal.com/docs/guide/cold-start).
We also define multiple ways to access the underlying streaming STT service --
via a [WebSocket](https://developer.mozilla.org/en-US/docs/Web/API/WebSockets_API),
for Web clients like browsers,
and via a Modal [Queue](https://modal.com/docs/guide/queues)
for Python clients.
That plus the code for manipulating the streams of audio bytes and output text
leads to a pretty big class! But there's not anything too complex here.
```python
MINUTES = 60
@app.cls(image=stt_image, gpu="l40s", volumes=volumes, timeout=10 * MINUTES)
class STT:
BATCH_SIZE = 1
@modal.enter()
def enter(self):
import torch
from huggingface_hub import snapshot_download
from moshi.models import LMGen, loaders
start_time = time.monotonic_ns()
print("Loading model...")
snapshot_download(MODEL_NAME)
self.device = "cuda" if torch.cuda.is_available() else "cpu"
checkpoint_info = loaders.CheckpointInfo.from_hf_repo(MODEL_NAME)
self.mimi = checkpoint_info.get_mimi(device=self.device)
self.frame_size = int(self.mimi.sample_rate / self.mimi.frame_rate)
self.moshi = checkpoint_info.get_moshi(device=self.device)
self.lm_gen = LMGen(self.moshi, temp=0, temp_text=0)
self.mimi.streaming_forever(self.BATCH_SIZE)
self.lm_gen.streaming_forever(self.BATCH_SIZE)
self.text_tokenizer = checkpoint_info.get_text_tokenizer()
self.audio_silence_prefix_seconds = checkpoint_info.stt_config.get(
"audio_silence_prefix_seconds", 1.0
)
self.audio_delay_seconds = checkpoint_info.stt_config.get(
"audio_delay_seconds", 5.0
)
self.padding_token_id = checkpoint_info.raw_config.get(
"text_padding_token_id", 3
)
# warmup gpus
for _ in range(4):
codes = self.mimi.encode(
torch.zeros(self.BATCH_SIZE, 1, self.frame_size).to(self.device)
)
for c in range(codes.shape[-1]):
tokens = self.lm_gen.step(codes[:, :, c : c + 1])
if tokens is None:
continue
torch.cuda.synchronize()
print(f"Model loaded in {round((time.monotonic_ns() - start_time) / 1e9, 2)}s")
def reset_state(self):
# reset llm chat history for this input
self.mimi.reset_streaming()
self.lm_gen.reset_streaming()
async def transcribe(self, pcm, all_pcm_data):
import numpy as np
import torch
if pcm is None:
yield all_pcm_data
return
if len(pcm) == 0:
yield all_pcm_data
return
if pcm.shape[-1] == 0:
yield all_pcm_data
return
if all_pcm_data is None:
all_pcm_data = pcm
else:
all_pcm_data = np.concatenate((all_pcm_data, pcm))
# infer on each frame
while all_pcm_data.shape[-1] >= self.frame_size:
chunk = all_pcm_data[: self.frame_size]
all_pcm_data = all_pcm_data[self.frame_size :]
with torch.no_grad():
chunk = torch.from_numpy(chunk)
chunk = chunk.unsqueeze(0).unsqueeze(0) # (1, 1, frame_size)
chunk = chunk.expand(
self.BATCH_SIZE, -1, -1
) # (batch_size, 1, frame_size)
chunk = chunk.to(device=self.device)
# inference on audio chunk
codes = self.mimi.encode(chunk)
# language model inference against encoded audio
for c in range(codes.shape[-1]):
text_tokens, vad_heads = self.lm_gen.step_with_extra_heads(
codes[:, :, c : c + 1]
)
if text_tokens is None:
# model is silent
yield all_pcm_data
return
if vad_heads:
pr_vad = vad_heads[2][0, 0, 0].cpu().item()
if pr_vad > 0.5:
# end of turn detected
yield all_pcm_data
return
assert text_tokens.shape[1] == self.lm_gen.lm_model.dep_q + 1
text_token = text_tokens[0, 0, 0].item()
if text_token not in (0, 3):
text = self.text_tokenizer.id_to_piece(text_token)
text = text.replace("▁", " ")
yield text
yield all_pcm_data
@modal.asgi_app()
def api(self):
import sphn
from fastapi import FastAPI, Response, WebSocket, WebSocketDisconnect
web_app = FastAPI()
@web_app.get("/status")
async def status():
return Response(status_code=200)
@web_app.websocket("/ws")
async def transcribe_websocket(ws: WebSocket):
await ws.accept()
opus_stream_inbound = sphn.OpusStreamReader(self.mimi.sample_rate)
transcription_queue = asyncio.Queue()
print("Session started")
tasks = []
# asyncio to run multiple loops concurrently within single websocket connection
async def recv_loop():
"""
Receives Opus stream across websocket, appends into inbound queue.
"""
nonlocal opus_stream_inbound
while True:
data = await ws.receive_bytes()
if not isinstance(data, bytes):
print("received non-bytes message")
continue
if len(data) == 0:
print("received empty message")
continue
opus_stream_inbound.append_bytes(data)
async def inference_loop():
"""
Runs streaming inference on inbound data, and if any response audio is created, appends it to the outbound stream.
"""
nonlocal opus_stream_inbound, transcription_queue
all_pcm_data = None
while True:
await asyncio.sleep(0.001)
pcm = opus_stream_inbound.read_pcm()
async for msg in self.transcribe(pcm, all_pcm_data):
if isinstance(msg, str):
transcription_queue.put_nowait(msg)
else:
all_pcm_data = msg
async def send_loop():
"""
Reads outbound data, and sends it across websocket
"""
nonlocal transcription_queue
while True:
data = await transcription_queue.get()
if data is None:
continue
msg = b"\x01" + bytes(
data, encoding="utf8"
) # prepend "\x01" as a tag to indicate text
await ws.send_bytes(msg)
# run all loops concurrently
try:
tasks = [
asyncio.create_task(recv_loop()),
asyncio.create_task(inference_loop()),
asyncio.create_task(send_loop()),
]
await asyncio.gather(*tasks)
except WebSocketDisconnect:
print("WebSocket disconnected")
await ws.close(code=1000)
except Exception as e:
print("Exception:", e)
await ws.close(code=1011) # internal error
raise e
finally:
for task in tasks:
task.cancel()
await asyncio.gather(*tasks, return_exceptions=True)
self.reset_state()
return web_app
@modal.method()
async def transcribe_queue(self, q: modal.Queue):
import tempfile
import sphn
all_pcm_data = None
while True:
chunk = await q.get.aio(partition="audio")
if chunk is None:
await q.put.aio(None, partition="transcription")
break
# to avoid having to encode the audio and retrieve with OpusStreamReader:
with tempfile.NamedTemporaryFile(suffix=".mp3", delete=False) as tmp:
tmp.write(chunk)
tmp.flush()
pcm, _ = sphn.read(tmp.name)
pcm = pcm.squeeze(0)
async for msg in self.transcribe(pcm, all_pcm_data):
if isinstance(msg, str):
await q.put.aio(msg, partition="transcription")
else:
all_pcm_data = msg
```
## Run a local Python client to test streaming STT
We can test this code on the same production Modal infra
that we'll be deploying it on by writing a quick `local_entrypoint` for testing.
We just need a few helper functions to control the streaming of audio bytes
and transcribed text from local Python.
These communicate asynchronously with the deployed Function using a Modal Queue.
```python
async def chunk_audio(data: bytes, chunk_size: int):
for i in range(0, len(data), chunk_size):
yield data[i : i + chunk_size]
async def send_audio(audio_bytes: bytes, q: modal.Queue, chunk_size: int, rtf: int):
async for chunk in chunk_audio(audio_bytes, chunk_size):
await q.put.aio(chunk, partition="audio")
await asyncio.sleep(chunk_size / chunk_size / rtf)
await q.put.aio(None, partition="audio")
async def receive_text(q: modal.Queue):
break_counter, break_every = 0, 20
while True:
data = await q.get.aio(partition="transcription")
if data is None:
break
print(data, end="")
break_counter += 1
if break_counter >= break_every:
print()
break_counter = 0
```
Now we write our quick test, which loads in audio from a URL
and then passes it to the remote Function via a
If you run this example with
```bash
modal run streaming_kyutai_stt.py
```
you will
1. deploy the latest version of the code on Modal
2. spin up a new GPU to handle transcription
3. load the model from Hugging Face or the Modal Volume cache
4. send the audio out to the new GPU container, transcribe it, and receive it locally to be printed.
Not bad for a single Python file with no dependencies except Modal!
```python
@app.local_entrypoint()
async def test(
chunk_size: int = 24_000, # bytes
rtf: int = 1000,
audio_url: str = "https://github.com/kyutai-labs/delayed-streams-modeling/raw/refs/heads/main/audio/bria.mp3",
):
from urllib.request import urlopen
print(f"Downloading audio file from {audio_url}")
audio_bytes = urlopen(audio_url).read()
print(f"Downloaded {len(audio_bytes)} bytes")
print("Starting transcription")
start_time = time.monotonic_ns()
async with modal.Queue.ephemeral() as q:
await STT().transcribe_queue.spawn.aio(q)
send = asyncio.create_task(send_audio(audio_bytes, q, chunk_size, rtf))
recv = asyncio.create_task(receive_text(q))
await asyncio.gather(send, recv)
print(
f"\nTranscription complete in {round((time.monotonic_ns() - start_time) / 1e9, 2)}s"
)
```
## Deploy a streaming STT service on the Web
We've already written a Web backend for our streaming STT service --
that's the FastAPI API with the WebSocket in the Modal Cls above.
We can also deploy a Web frontend. To keep things almost entirely "pure Python",
we here use the [FastHTML](https://www.fastht.ml/) library,
but you can also deploy a JavaScript frontend with a FastAPI or Node backend.
We do use a bit of JS for the audio processing in the browser.
We add it to the Modal Image using `add_local_dir`.
You can find the frontend files [here](https://github.com/modal-labs/modal-examples/tree/main/06_gpu_and_ml/speech-to-text/streaming-kyutai-stt-frontend).
```python
web_image = (
modal.Image.debian_slim(python_version="3.12")
.uv_pip_install("python-fasthtml==0.12.20")
.add_local_dir(
Path(__file__).parent / "streaming-kyutai-stt-frontend", "/root/frontend"
)
)
```
You can deploy this frontend with
```bash
modal deploy streaming_kyutai_stt.py
```
and then interact with it at the printed `ui` URL.
```python
@app.function(image=web_image, timeout=10 * MINUTES)
@modal.concurrent(max_inputs=100)
@modal.asgi_app()
def ui():
import fasthtml.common as fh
modal_logo_svg = open("/root/frontend/modal-logo.svg").read()
modal_logo_base64 = base64.b64encode(modal_logo_svg.encode()).decode()
app_js = open("/root/frontend/audio.js").read()
fast_app, rt = fh.fast_app(
hdrs=[
# audio recording libraries
fh.Script(
src="https://cdn.jsdelivr.net/npm/opus-recorder@latest/dist/recorder.min.js"
),
fh.Script(
src="https://cdn.jsdelivr.net/npm/opus-recorder@latest/dist/encoderWorker.min.js"
),
fh.Script(
src="https://cdn.jsdelivr.net/npm/ogg-opus-decoder/dist/ogg-opus-decoder.min.js"
),
# styling
fh.Link(
href="https://fonts.googleapis.com/css?family=Inter:300,400,600",
rel="stylesheet",
),
fh.Script(src="https://cdn.tailwindcss.com"),
fh.Script("""
tailwind.config = {
theme: {
extend: {
colors: {
ground: "#0C0F0B",
primary: "#9AEE86",
"accent-pink": "#FC9CC6",
"accent-blue": "#B8E4FF",
},
},
},
};
"""),
],
)
@rt("/")
def get():
return (
fh.Title("Kyutai Streaming STT"),
fh.Body(
fh.Div(
fh.Div(
fh.Div(
id="text-output",
cls="flex flex-col-reverse overflow-y-auto max-h-64 pr-2",
),
cls="w-full overflow-y-auto max-h-64",
),
cls="bg-gray-800 rounded-lg shadow-lg w-full max-w-xl p-6",
),
fh.Footer(
fh.Span(
"Built with ",
fh.A(
"Kyutai",
href="https://github.com/kyutai-labs/delayed-streams-modeling",
target="_blank",
rel="noopener noreferrer",
cls="underline",
),
" and",
cls="text-sm font-medium text-gray-300 mr-2",
),
fh.A(
fh.Img(
src=f"data:image/svg+xml;base64,{modal_logo_base64}",
alt="Modal logo",
cls="w-24",
),
cls="flex items-center p-2 rounded-lg bg-gray-800 shadow-lg hover:bg-gray-700 transition-colors duration-200",
href="https://modal.com",
target="_blank",
rel="noopener noreferrer",
),
cls="fixed bottom-4 inline-flex items-center justify-center",
),
fh.Script(app_js),
cls="relative bg-gray-900 text-white min-h-screen flex flex-col items-center justify-center p-4",
),
)
return fast_app
```
### Streaming Parakeet
# Streaming audio transcription using Parakeet
This examples demonstrates the use of Parakeet ASR models for streaming speech-to-text on Modal.
[Parakeet](https://docs.nvidia.com/nemo-framework/user-guide/latest/nemotoolkit/asr/models.html#parakeet)
is the name of a family of ASR models built using [NVIDIA's NeMo Framework](https://docs.nvidia.com/nemo-framework/user-guide/latest/overview.html).
We'll show you how to use Parakeet for streaming audio transcription on Modal GPUs,
with simple Python and browser clients.
This example uses the `nvidia/parakeet-tdt-0.6b-v2` model which, as of June 2025, sits at the
top of Hugging Face's [Open ASR leaderboard](https://huggingface.co/spaces/hf-audio/open_asr_leaderboard).
To try out transcription from your terminal,
provide a URL for a `.wav` file to `modal run`:
```bash
modal run 06_gpu_and_ml/speech-to-text/streaming_parakeet.py --audio-url="https://github.com/voxserv/audio_quality_testing_samples/raw/refs/heads/master/mono_44100/156550__acclivity__a-dream-within-a-dream.wav"
```
You should see output like the following:
```bash
🎤 Starting Transcription
A Dream Within A Dream Edgar Allan Poe
take this kiss upon the brow, And in parting from you now, Thus much let me avow You are not wrong who deem That my days have been a dream.
...
```
Running a web service you can hit from any browser isn't any harder -- Modal handles the deployment of both the frontend and backend in a single App!
Just run
```bash
modal serve 06_gpu_and_ml/speech-to-text/streaming_parakeet.py
```
and go to the link printed in your terminal.
The full frontend code can be found [here](https://github.com/modal-labs/modal-examples/tree/main/06_gpu_and_ml/speech-to-text/streaming-parakeet-frontend/).
## Setup
```python
import asyncio
import os
import sys
from pathlib import Path
import modal
app = modal.App("example-streaming-parakeet")
```
## Volume for caching model weights
We use a [Modal Volume](https://modal.com/docs/guide/volumes) to cache the model weights.
This allows us to avoid downloading the model weights every time we start a new instance.
For more on storing models on Modal, see [this guide](https://modal.com/docs/guide/model-weights).
```python
model_cache = modal.Volume.from_name("parakeet-model-cache", create_if_missing=True)
```
## Configuring dependencies
The model runs remotely inside a container on Modal. We can define the environment
and install our Python dependencies in that container's [`Image`](https://modal.com/docs/guide/images).
For finicky setups like NeMO's, we recommend using the official NVIDIA CUDA Docker images from Docker Hub.
You'll need to install Python and pip with the `add_python` option because the image
doesn't have these by default.
Additionally, we install `ffmpeg` for handling audio data and `fastapi` to create a web
server for our WebSocket.
```python
image = (
modal.Image.from_registry(
"nvidia/cuda:12.8.0-cudnn-devel-ubuntu22.04", add_python="3.12"
)
.env(
{
"HF_XET_HIGH_PERFORMANCE": "1",
"HF_HOME": "/cache", # cache directory for Hugging Face models
"DEBIAN_FRONTEND": "noninteractive",
"CXX": "g++",
"CC": "g++",
}
)
.apt_install("ffmpeg")
.uv_pip_install(
"hf_transfer==0.1.9",
"huggingface-hub==0.36.0",
"nemo_toolkit[asr]==2.3.2",
"cuda-python==12.8.0",
"fastapi==0.115.12",
"numpy<2",
"pydub==0.25.1",
)
.entrypoint([]) # silence chatty logs by container on start
.add_local_dir( # changes fastest, so make this the last layer
Path(__file__).parent / "streaming-parakeet-frontend",
remote_path="/frontend",
)
)
```
## Implementing streaming audio transcription on Modal
Now we're ready to implement transcription. We wrap inference in a [`modal.Cls`](https://modal.com/docs/guide/lifecycle-functions) that
ensures models are loaded and then moved to the GPU once when a new container starts.
A couple of notes about this code:
- The `transcribe` method takes bytes of audio data and returns the transcribed text.
- The `web` method creates a FastAPI app using [`modal.asgi_app`](https://modal.com/docs/reference/modal.asgi_app#modalasgi_app) that serves a
[WebSocket](https://modal.com/docs/guide/webhooks#websockets) endpoint for streaming audio transcription and a browser frontend for transcribing audio from your microphone.
- The `run_with_queue` method takes a [`modal.Queue`](https://modal.com/docs/reference/modal.Queue) and passes audio data and transcriptions between our local machine and the GPU container.
Parakeet tries really hard to transcribe everything to English!
Hence it tends to output utterances like "Yeah" or "Mm-hmm" when it runs on silent audio.
We pre-process the incoming audio in the server using `pydub`'s silence detection,
ensuring that we don't pass silence into our model.
```python
END_OF_STREAM = (
b"END_OF_STREAM_8f13d09" # byte sequence indicating a stream is finished
)
@app.cls(volumes={"/cache": model_cache}, gpu="a10g", image=image)
@modal.concurrent(max_inputs=14, target_inputs=10)
class ParakeetModel:
@modal.enter()
def load(self):
import logging
import nemo.collections.asr as nemo_asr
# silence chatty logs from nemo
logging.getLogger("nemo_logger").setLevel(logging.CRITICAL)
self.model = nemo_asr.models.ASRModel.from_pretrained(
model_name="nvidia/parakeet-tdt-0.6b-v2"
)
def transcribe(self, audio_bytes: bytes) -> str:
import numpy as np
audio_data = np.frombuffer(audio_bytes, dtype=np.int16).astype(np.float32)
with NoStdStreams(): # hide output, see https://github.com/NVIDIA/NeMo/discussions/3281#discussioncomment-2251217
output = self.model.transcribe([audio_data])
return output[0].text
@modal.method()
async def handle_audio_chunk(
self,
chunk: bytes,
audio_segment,
silence_thresh=-45, # dB
min_silence_len=1000, # ms
):
from pydub import AudioSegment, silence
new_audio_segment = AudioSegment(
data=chunk,
channels=1,
sample_width=2,
frame_rate=TARGET_SAMPLE_RATE,
)
# append the new audio segment to the existing audio segment
audio_segment += new_audio_segment
# detect windows of silence
silent_windows = silence.detect_silence(
audio_segment,
min_silence_len=min_silence_len,
silence_thresh=silence_thresh,
)
# if there are no silent windows, continue
if len(silent_windows) == 0:
return audio_segment, None
# get the last silent window because
# we want to transcribe until the final pause
last_window = silent_windows[-1]
# if the entire audio segment is silent, reset the audio segment
if last_window[0] == 0 and last_window[1] == len(audio_segment):
audio_segment = AudioSegment.empty()
return audio_segment, None
# get the segment to transcribe: beginning until last pause
segment_to_transcribe = audio_segment[: last_window[1]]
# remove the segment to transcribe from the audio segment
audio_segment = audio_segment[last_window[1] :]
try:
text = self.transcribe(segment_to_transcribe.raw_data)
return audio_segment, text
except Exception as e:
print("❌ Transcription error:", e)
raise e
@modal.method()
async def run_with_queue(self, q: modal.Queue):
from pydub import AudioSegment
# initialize an empty audio segment
audio_segment = AudioSegment.empty()
try:
while True:
# receive a chunk of audio data and convert it to an audio segment
chunk = await q.get.aio(partition="audio")
if chunk == END_OF_STREAM:
await q.put.aio(END_OF_STREAM, partition="transcription")
break
audio_segment, text = await self.handle_audio_chunk.remote.aio(
chunk, audio_segment
)
if text:
await q.put.aio(text, partition="transcription")
except Exception as e:
print(f"Error handling queue: {type(e)}: {e}")
return
@app.cls(image=image)
@modal.concurrent(max_inputs=100)
class WebServer:
@modal.asgi_app()
def web(self):
from fastapi import FastAPI, Response, WebSocket
from fastapi.responses import HTMLResponse
from fastapi.staticfiles import StaticFiles
web_app = FastAPI()
web_app.mount("/static", StaticFiles(directory="/frontend"))
@web_app.get("/status")
async def status():
return Response(status_code=200)
# serve frontend
@web_app.get("/")
async def index():
return HTMLResponse(content=open("/frontend/index.html").read())
@web_app.websocket("/ws")
async def run_with_websocket(ws: WebSocket):
from fastapi import WebSocketDisconnect
await ws.accept()
from pydub import AudioSegment
model = ParakeetModel()
# initialize an empty audio segment
audio_segment = AudioSegment.empty()
try:
while True:
# receive a chunk of audio data and convert it to an audio segment
chunk = await ws.receive_bytes()
if chunk == END_OF_STREAM:
await ws.send_bytes(END_OF_STREAM)
break
(
audio_segment,
text,
) = await model.handle_audio_chunk.remote.aio(chunk, audio_segment)
if text:
await ws.send_text(text)
except Exception as e:
if not isinstance(e, WebSocketDisconnect):
print(f"Error handling websocket: {type(e)}: {e}")
try:
await ws.close(code=1011, reason="Internal server error")
except Exception as e:
print(f"Error closing websocket: {type(e)}: {e}")
return web_app
```
## Running transcription from a local Python client
Next, let's test the model with a [`local_entrypoint`](https://modal.com/docs/reference/modal.App#local_entrypoint) that streams audio data to the server and prints
out the transcriptions to our terminal as they arrive.
Instead of using the WebSocket endpoint like the browser frontend,
we'll use a [`modal.Queue`](https://modal.com/docs/reference/modal.Queue)
to pass audio data and transcriptions between our local machine and the GPU container.
```python
AUDIO_URL = "https://github.com/voxserv/audio_quality_testing_samples/raw/refs/heads/master/mono_44100/156550__acclivity__a-dream-within-a-dream.wav"
TARGET_SAMPLE_RATE = 16_000
CHUNK_SIZE = 16_000 # send one second of audio at a time
@app.local_entrypoint()
async def main(audio_url: str = AUDIO_URL):
from urllib.request import urlopen
print(f"🌐 Downloading audio file from {audio_url}")
audio_bytes = urlopen(audio_url).read()
print(f"🎧 Downloaded {len(audio_bytes)} bytes")
audio_data = preprocess_audio(audio_bytes)
print("🎤 Starting Transcription")
async with modal.Queue.ephemeral() as q:
await ParakeetModel().run_with_queue.spawn.aio(q)
send = asyncio.create_task(send_audio(q, audio_data))
recv = asyncio.create_task(receive_text(q))
await asyncio.gather(send, recv)
print("✅ Transcription complete!")
```
Below are the two functions that coordinate streaming audio and receiving transcriptions.
`send_audio` transmits chunks of audio data with a slight delay,
as though it was being streamed from a live source, like a microphone.
`receive_text` waits for transcribed text to arrive and prints it.
```python
async def send_audio(q, audio_bytes):
for chunk in chunk_audio(audio_bytes, CHUNK_SIZE):
await q.put.aio(chunk, partition="audio")
await asyncio.sleep(CHUNK_SIZE / TARGET_SAMPLE_RATE / 8)
await q.put.aio(END_OF_STREAM, partition="audio")
async def receive_text(q):
while True:
message = await q.get.aio(partition="transcription")
if message == END_OF_STREAM:
break
print(message)
```
## Addenda
The remainder of the code in this example is boilerplate,
mostly for handling Parakeet's input format.
```python
def preprocess_audio(audio_bytes: bytes) -> bytes:
import array
import io
import wave
with wave.open(io.BytesIO(audio_bytes), "rb") as wav_in:
n_channels = wav_in.getnchannels()
sample_width = wav_in.getsampwidth()
frame_rate = wav_in.getframerate()
n_frames = wav_in.getnframes()
frames = wav_in.readframes(n_frames)
# Convert frames to array based on sample width
if sample_width == 1:
audio_data = array.array("B", frames) # unsigned char
elif sample_width == 2:
audio_data = array.array("h", frames) # signed short
elif sample_width == 4:
audio_data = array.array("i", frames) # signed int
else:
raise ValueError(f"Unsupported sample width: {sample_width}")
# Downmix to mono if needed
if n_channels > 1:
mono_data = array.array(audio_data.typecode)
for i in range(0, len(audio_data), n_channels):
chunk = audio_data[i : i + n_channels]
mono_data.append(sum(chunk) // n_channels)
audio_data = mono_data
# Resample to 16kHz if needed
if frame_rate != TARGET_SAMPLE_RATE:
ratio = TARGET_SAMPLE_RATE / frame_rate
new_length = int(len(audio_data) * ratio)
resampled_data = array.array(audio_data.typecode)
for i in range(new_length):
# Linear interpolation
pos = i / ratio
pos_int = int(pos)
pos_frac = pos - pos_int
if pos_int >= len(audio_data) - 1:
sample = audio_data[-1]
else:
sample1 = audio_data[pos_int]
sample2 = audio_data[pos_int + 1]
sample = int(sample1 + (sample2 - sample1) * pos_frac)
resampled_data.append(sample)
audio_data = resampled_data
return audio_data.tobytes()
def chunk_audio(data: bytes, chunk_size: int):
for i in range(0, len(data), chunk_size):
yield data[i : i + chunk_size]
class NoStdStreams(object):
def __init__(self):
self.devnull = open(os.devnull, "w")
def __enter__(self):
self._stdout, self._stderr = sys.stdout, sys.stderr
self._stdout.flush(), self._stderr.flush()
sys.stdout, sys.stderr = self.devnull, self.devnull
def __exit__(self, exc_type, exc_value, traceback):
sys.stdout, sys.stderr = self._stdout, self._stderr
self.devnull.close()
```
### Streaming Whisper
```python
import asyncio
import pathlib
import re
import tempfile
import time
import urllib
from typing import Iterator
import modal
image = (
modal.Image.debian_slim(python_version="3.11")
.apt_install("git", "ffmpeg")
.uv_pip_install(
"fastapi==0.116.1",
"ffmpeg-python==0.2.0",
"openai-whisper==20250625",
"numpy<2",
)
)
app = modal.App(name="example-streaming-whisper", image=image)
SAMPLE_URL = (
"https://modal-cdn.com/history-of-rome-podcast-duncan-001-in-the-beginning.mp3"
)
CACHE_DIR = "/root/.cache/whisper"
whisper_cache = modal.Volume.from_name("whisper-cache", create_if_missing=True)
def load_audio(data: bytes, start=None, end=None, sr: int = 16000):
import ffmpeg
import numpy as np
try:
fp = tempfile.NamedTemporaryFile(delete=False, suffix=".wav")
fp.write(data)
fp.close()
# This launches a subprocess to decode audio while down-mixing and resampling as necessary.
# Requires the ffmpeg CLI and `ffmpeg-python` package to be installed.
if start is None and end is None:
out, _ = (
ffmpeg.input(fp.name, threads=0)
.output("-", format="s16le", acodec="pcm_s16le", ac=1, ar=sr)
.run(
cmd=["ffmpeg", "-nostdin"], capture_stdout=True, capture_stderr=True
)
)
else:
out, _ = (
ffmpeg.input(fp.name, threads=0)
.filter("atrim", start=start, end=end)
.output("-", format="s16le", acodec="pcm_s16le", ac=1, ar=sr)
.run(
cmd=["ffmpeg", "-nostdin"], capture_stdout=True, capture_stderr=True
)
)
except ffmpeg.Error as e:
raise RuntimeError(f"Failed to load audio: {e.stderr.decode()}") from e
return np.frombuffer(out, np.int16).flatten().astype(np.float32) / 32768.0
def split_silences(
path: str, min_segment_length: float = 30.0, min_silence_length: float = 0.8
) -> Iterator[tuple[float, float]]:
"""
Split audio file into contiguous chunks using the ffmpeg `silencedetect` filter.
Yields tuples (start, end) of each chunk in seconds.
Parameters
----------
path: str
path to the audio file on disk.
min_segment_length : float
The minimum acceptable length for an audio segment in seconds. Lower values
allow for more splitting and increased parallelizing, but decrease transcription
accuracy. Whisper models expect to transcribe in 30 second segments.
min_silence_length : float
Minimum silence to detect and split on, in seconds. Lower values are more likely to split
audio in middle of phrases and degrade transcription accuracy.
"""
import ffmpeg
silence_end_re = re.compile(
r" silence_end: (?P[0-9]+(\.?[0-9]*)) \| silence_duration: (?P[0-9]+(\.?[0-9]*))"
)
metadata = ffmpeg.probe(path)
duration = float(metadata["format"]["duration"])
reader = (
ffmpeg.input(str(path))
.filter("silencedetect", n="-10dB", d=min_silence_length)
.output("pipe:", format="null")
.run_async(pipe_stderr=True)
)
cur_start = 0.0
num_segments = 0
while True:
line = reader.stderr.readline().decode("utf-8")
if not line:
break
match = silence_end_re.search(line)
if match:
silence_end, silence_dur = match.group("end"), match.group("dur")
split_at = float(silence_end) - (float(silence_dur) / 2)
if (split_at - cur_start) < min_segment_length:
continue
yield cur_start, split_at
cur_start = split_at
num_segments += 1
# silencedetect can place the silence end *after* the end of the full audio segment.
# Such segments definitions are negative length and invalid.
if duration > cur_start and (duration - cur_start) > min_segment_length:
yield cur_start, duration
num_segments += 1
print(f"Split {path} into {num_segments} segments")
@app.function(gpu="a10", volumes={CACHE_DIR: whisper_cache})
def transcribe_segment(start: float, end: float, audio_data: bytes, model: str):
import torch
import whisper
print(
f"Transcribing segment {start:.2f} to {end:.2f} ({end - start:.2f}s duration)"
)
t0 = time.time()
use_gpu = torch.cuda.is_available()
device = "cuda" if use_gpu else "cpu"
model = whisper.load_model(model, device=device)
np_array = load_audio(audio_data, start=start, end=end)
result = model.transcribe(np_array, language="en", fp16=use_gpu) # type: ignore
print(
f"Transcribed segment {start:.2f} to {end:.2f} ({end - start:.2f}s duration) in {time.time() - t0:.2f} seconds."
)
# Add back offsets.
for segment in result["segments"]:
segment["start"] += start
segment["end"] += start
return result
async def stream_whisper(audio_data: bytes):
with tempfile.NamedTemporaryFile(delete=False) as f:
f.write(audio_data)
f.flush()
segment_gen = split_silences(f.name)
async for result in transcribe_segment.starmap(
segment_gen, kwargs=dict(audio_data=audio_data, model="base.en")
):
# Must cooperatively yield here otherwise `StreamingResponse` will not iteratively return stream parts.
# see: https://github.com/python/asyncio/issues/284#issuecomment-154162668
await asyncio.sleep(0)
yield result["text"]
@app.function()
@modal.asgi_app()
def api():
from fastapi import FastAPI, HTTPException
from fastapi.responses import StreamingResponse
web_app = FastAPI()
@web_app.get("/transcribe")
async def transcribe(url: str):
"""
Usage:
```sh
curl --no-buffer \
https://modal-labs-examples--example-streaming-whisper-api.modal.run/transcribe?url=https://modal-cdn.com/history-of-rome-podcast-duncan-001-in-the-beginning.mp3
```
This endpoint will stream back the audio transcription as it makes progress.
"""
print(f"downloading {url}")
try:
with urllib.request.urlopen(url) as response:
assert response.getcode() == 200, response.getcode()
audio_data = response.read()
except AssertionError:
raise HTTPException(status_code=422, detail=f"Could not process url {url}")
print(f"streaming transcription of {url} audio to client...")
return StreamingResponse(
stream_whisper(audio_data), media_type="text/event-stream"
)
return web_app
@app.function()
async def transcribe_cli(data: bytes, suffix: str):
async for result in stream_whisper(data):
print(result)
@app.local_entrypoint()
def main(path: str = SAMPLE_URL):
if path.startswith("http"):
with urllib.request.urlopen(path) as response:
assert response.getcode() == 200, response.getcode()
data = response.read()
suffix = path.rsplit(".")[-1]
else:
filepath = pathlib.Path(path)
data = filepath.read_bytes()
suffix = filepath.suffix
transcribe_cli.remote(data, suffix=suffix)
```
### Tensorflow Tutorial
# TensorFlow tutorial
This is essentially a version of the
[image classification example in the TensorFlow documentation](https://www.tensorflow.org/tutorials/images/classification)
running inside Modal on a GPU.
If you run this script, it will also create an TensorBoard URL you can go to to watch the model train and review the results:

## Setting up the dependencies
Configuring a system to properly run GPU-accelerated TensorFlow can be challenging.
Luckily, Modal makes it easy to stand on the shoulders of giants and
[use a pre-built Docker container image](https://modal.com/docs/guide/custom-container#use-an-existing-container-image-with-from_registry) from a registry like Docker Hub.
We recommend TensorFlow's [official base Docker container images](https://hub.docker.com/r/tensorflow/tensorflow), which come with `tensorflow` and its matching CUDA libraries already installed.
If you want to install TensorFlow some other way, check out [their docs](https://www.tensorflow.org/install) for options and instructions.
GPU-enabled containers on Modal will always have NVIDIA drivers available, but you will need to add higher-level tools like CUDA and cuDNN yourself.
See the [Modal guide on customizing environments](https://modal.com/docs/guide/custom-container) for options we support.
```python
import time
import modal
dockerhub_image = modal.Image.from_registry(
"tensorflow/tensorflow:2.15.0-gpu",
)
app = modal.App("example-tensorflow-tutorial", image=dockerhub_image)
```
## Logging data to TensorBoard
Training ML models takes time. Just as we need to monitor long-running systems like databases or web servers for issues,
we also need to monitor the training process of our ML models. TensorBoard is a tool that comes with TensorFlow that helps you visualize
the state of your ML model training. It is packaged as a web server.
We want to run the web server for TensorBoard at the same time as we are training the
TensorFlow model. The easiest way to share data between the training function and the
web server is by creating a
[Modal Volume](https://modal.com/docs/guide/volumes)
that we can attach to both
[Functions](https://modal.com/docs/reference/modal.Function).
```python
volume = modal.Volume.from_name("tensorflow-tutorial", create_if_missing=True)
LOGDIR = "/tensorboard"
```
## Training function
This is basically the same code as [the official example](https://www.tensorflow.org/tutorials/images/classification) from the TensorFlow docs.
A few Modal-specific things are worth pointing out:
* We attach the Volume for sharing data with TensorBoard in the `app.function`
decorator.
* We also annotate this function with `gpu="T4"` to make sure it runs on a GPU.
* We put all the TensorFlow imports inside the function body.
This makes it possible to run this example even if you don't have TensorFlow installed on your local computer -- a key benefit of Modal!
You may notice some warnings in the logs about certain CPU performance optimizations (NUMA awareness and AVX/SSE instruction set support) not being available.
While these optimizations can be important for some workloads, especially if you are running ML models on a CPU, they are not critical for most cases.
```python
@app.function(volumes={LOGDIR: volume}, gpu="T4", timeout=600)
def train():
import pathlib
import tensorflow as tf
from tensorflow.keras import layers
from tensorflow.keras.models import Sequential
# load raw data from storage
dataset_url = "https://storage.googleapis.com/download.tensorflow.org/example_images/flower_photos.tgz"
data_dir = tf.keras.utils.get_file(
"flower_photos.tar", origin=dataset_url, extract=True
)
data_dir = pathlib.Path(data_dir).with_suffix("")
# construct Keras datasets from raw data
batch_size = 32
img_height = img_width = 180
train_ds = tf.keras.utils.image_dataset_from_directory(
data_dir,
validation_split=0.2,
subset="training",
seed=123,
image_size=(img_height, img_width),
batch_size=batch_size,
)
val_ds = tf.keras.utils.image_dataset_from_directory(
data_dir,
validation_split=0.2,
subset="validation",
seed=123,
image_size=(img_height, img_width),
batch_size=batch_size,
)
class_names = train_ds.class_names
train_ds = (
train_ds.cache().shuffle(1000).prefetch(buffer_size=tf.data.AUTOTUNE) # type: ignore
)
val_ds = val_ds.cache().prefetch(buffer_size=tf.data.AUTOTUNE) # type: ignore
num_classes = len(class_names)
model = Sequential(
[
layers.Rescaling(1.0 / 255, input_shape=(img_height, img_width, 3)),
layers.Conv2D(16, 3, padding="same", activation="relu"),
layers.MaxPooling2D(),
layers.Conv2D(32, 3, padding="same", activation="relu"),
layers.MaxPooling2D(),
layers.Conv2D(64, 3, padding="same", activation="relu"),
layers.MaxPooling2D(),
layers.Flatten(),
layers.Dense(128, activation="relu"),
layers.Dense(num_classes),
]
)
model.compile(
optimizer="adam",
loss=tf.keras.losses.SparseCategoricalCrossentropy(from_logits=True),
metrics=["accuracy"],
)
model.summary()
tensorboard_callback = tf.keras.callbacks.TensorBoard(
log_dir=LOGDIR,
histogram_freq=1,
)
model.fit(
train_ds,
validation_data=val_ds,
epochs=20,
callbacks=[tensorboard_callback],
)
```
## Running TensorBoard
TensorBoard is compatible with a Python web server standard called [WSGI](https://www.fullstackpython.com/wsgi-servers.html),
the same standard used by [Flask](https://flask.palletsprojects.com/).
Modal [speaks WSGI too](https://modal.com/docs/guide/webhooks#wsgi), so it's straightforward to run TensorBoard in a Modal app.
We will attach the same Volume that we attached to our training function so that
TensorBoard can read the logs. For this to work with Modal, we will first
create some
[WSGI Middleware](https://peps.python.org/pep-3333/)
to check the Modal Volume for updates any time the page is reloaded.
```python
class VolumeMiddleware:
def __init__(self, app):
self.app = app
def __call__(self, environ, start_response):
if (route := environ.get("PATH_INFO")) in ["/", "/modal-volume-reload"]:
try:
volume.reload()
except Exception as e:
print("Exception while re-loading traces: ", e)
if route == "/modal-volume-reload":
environ["PATH_INFO"] = "/" # redirect
return self.app(environ, start_response)
```
The WSGI app isn't exposed directly through the TensorBoard library, but we can build it
the same way it's built internally --
[see the TensorBoard source code for details](https://github.com/tensorflow/tensorboard/blob/0c5523f4b27046e1ca7064dd75347a5ee6cc7f79/tensorboard/program.py#L466-L476).
Note that the TensorBoard server runs in a different container.
The server does not need GPU support.
Note that this server will be exposed to the public internet!
```python
@app.function(
volumes={LOGDIR: volume},
max_containers=1, # single replica
scaledown_window=5 * 60, # five minute idle time
)
@modal.concurrent(max_inputs=100) # 100 concurrent request threads
@modal.wsgi_app()
def tensorboard_app():
import tensorboard
board = tensorboard.program.TensorBoard()
board.configure(logdir=LOGDIR)
(data_provider, deprecated_multiplexer) = board._make_data_provider()
wsgi_app = tensorboard.backend.application.TensorBoardWSGIApp(
board.flags,
board.plugin_loaders,
data_provider,
board.assets_zip_provider,
deprecated_multiplexer,
experimental_middlewares=[VolumeMiddleware],
)
return wsgi_app
```
## Local entrypoint code
Let's kick everything off.
Everything runs in an ephemeral "app" that gets destroyed once it's done.
In order to keep the TensorBoard web server running, we sleep in an infinite loop
until the user hits ctrl-c.
The script will take a few minutes to run, although each epoch is quite fast since it runs on a GPU.
The first time you run it, it might have to build the image, which can take an additional few minutes.
```python
@app.local_entrypoint()
def main(just_run: bool = False):
train.remote()
if not just_run:
print(
"Training is done, but the app is still running TensorBoard until you hit ctrl-c."
)
try:
while True:
time.sleep(1)
except KeyboardInterrupt:
print("Terminating app")
```
### Text To Image
# Run Stable Diffusion 3.5 Large Turbo as a CLI, API, and web UI
This example shows how to run [Stable Diffusion 3.5 Large Turbo](https://huggingface.co/stabilityai/stable-diffusion-3.5-large-turbo) on Modal
to generate images from your local command line, via an API, and as a web UI.
Inference takes about one minute to cold start,
at which point images are generated at a rate of one image every 1-2 seconds
for batch sizes between one and 16.
Below are four images produced by the prompt
"A princess riding on a pony".

## Basic setup
```python
import io
import random
import time
from pathlib import Path
from typing import Optional
import modal
MINUTES = 60
```
All Modal programs need an [`App`](https://modal.com/docs/reference/modal.App) — an object that acts as a recipe for
the application. Let's give it a friendly name.
```python
app = modal.App("example-text-to-image")
```
## Configuring dependencies
The model runs remotely inside a [container](https://modal.com/docs/guide/custom-container).
That means we need to install the necessary dependencies in that container's image.
Below, we start from a lightweight base Linux image
and then install our Python dependencies, like Hugging Face's `diffusers` library and `torch`.
```python
CACHE_DIR = "/cache"
image = (
modal.Image.debian_slim(python_version="3.12")
.uv_pip_install(
"accelerate==0.33.0",
"diffusers==0.31.0",
"fastapi[standard]==0.115.4",
"huggingface-hub==0.36.0",
"sentencepiece==0.2.0",
"torch==2.5.1",
"torchvision==0.20.1",
"transformers~=4.44.0",
)
.env(
{
"HF_XET_HIGH_PERFORMANCE": "1", # faster downloads
"HF_HUB_CACHE": CACHE_DIR,
}
)
)
with image.imports():
import diffusers
import torch
from fastapi import Response
```
## Implementing SD3.5 Large Turbo inference on Modal
We wrap inference in a Modal [Cls](https://modal.com/docs/guide/lifecycle-functions)
that ensures models are loaded and then moved to the GPU once when a new container
starts, before the container picks up any work.
The `run` function just wraps a `diffusers` pipeline.
It sends the output image back to the client as bytes.
We also include a `web` wrapper that makes it possible
to trigger inference via an API call.
See the `/docs` route of the URL ending in `inference-web.modal.run`
that appears when you deploy the app for details.
```python
MODEL_ID = "adamo1139/stable-diffusion-3.5-large-turbo-ungated"
MODEL_REVISION_ID = "9ad870ac0b0e5e48ced156bb02f85d324b7275d2"
cache_volume = modal.Volume.from_name("hf-hub-cache", create_if_missing=True)
@app.cls(
image=image,
gpu="H100",
timeout=10 * MINUTES,
volumes={CACHE_DIR: cache_volume},
)
class Inference:
@modal.enter()
def load_pipeline(self):
self.pipe = diffusers.StableDiffusion3Pipeline.from_pretrained(
MODEL_ID,
revision=MODEL_REVISION_ID,
torch_dtype=torch.bfloat16,
).to("cuda")
@modal.method()
def run(
self, prompt: str, batch_size: int = 4, seed: Optional[int] = None
) -> list[bytes]:
seed = seed if seed is not None else random.randint(0, 2**32 - 1)
print("seeding RNG with", seed)
torch.manual_seed(seed)
images = self.pipe(
prompt,
num_images_per_prompt=batch_size, # outputting multiple images per prompt is much cheaper than separate calls
num_inference_steps=4, # turbo is tuned to run in four steps
guidance_scale=0.0, # turbo doesn't use CFG
max_sequence_length=512, # T5-XXL text encoder supports longer sequences, more complex prompts
).images
image_output = []
for image in images:
with io.BytesIO() as buf:
image.save(buf, format="PNG")
image_output.append(buf.getvalue())
torch.cuda.empty_cache() # reduce fragmentation
return image_output
@modal.fastapi_endpoint(docs=True)
def web(self, prompt: str, seed: Optional[int] = None):
return Response(
content=self.run.local( # run in the same container
prompt, batch_size=1, seed=seed
)[0],
media_type="image/png",
)
```
## Generating Stable Diffusion images from the command line
This is the command we'll use to generate images. It takes a text `prompt`,
a `batch_size` that determines the number of images to generate per prompt,
and the number of times to run image generation (`samples`).
You can also provide a `seed` to make sampling more deterministic.
Run it with
```bash
modal run text_to_image.py
```
and pass `--help` to see more options.
```python
@app.local_entrypoint()
def entrypoint(
samples: int = 4,
prompt: str = "A princess riding on a pony",
batch_size: int = 4,
seed: Optional[int] = None,
):
print(
f"prompt => {prompt}",
f"samples => {samples}",
f"batch_size => {batch_size}",
f"seed => {seed}",
sep="\n",
)
output_dir = Path("/tmp/stable-diffusion")
output_dir.mkdir(exist_ok=True, parents=True)
inference_service = Inference()
for sample_idx in range(samples):
start = time.time()
images = inference_service.run.remote(prompt, batch_size, seed)
duration = time.time() - start
print(f"Run {sample_idx + 1} took {duration:.3f}s")
if sample_idx:
print(
f"\tGenerated {len(images)} image(s) at {(duration) / len(images):.3f}s / image."
)
for batch_idx, image_bytes in enumerate(images):
output_path = (
output_dir
/ f"output_{slugify(prompt)[:64]}_{str(sample_idx).zfill(2)}_{str(batch_idx).zfill(2)}.png"
)
if not batch_idx:
print("Saving outputs", end="\n\t")
print(
output_path,
end="\n" + ("\t" if batch_idx < len(images) - 1 else ""),
)
output_path.write_bytes(image_bytes)
```
## Generating Stable Diffusion images via an API
The Modal `Cls` above also included a [`fastapi_endpoint`](https://modal.com/docs/examples/basic_web),
which adds a simple web API to the inference method.
To try it out, run
```bash
modal deploy text_to_image.py
```
copy the printed URL ending in `inference-web.modal.run`,
and add `/docs` to the end. This will bring up the interactive
Swagger/OpenAPI docs for the endpoint.
## Generating Stable Diffusion images in a web UI
Lastly, we add a simple front-end web UI (written in Alpine.js) for
our image generation backend.
This is also deployed by running
```bash
modal deploy text_to_image.py.
```
The `Inference` class will serve multiple users from its own auto-scaling pool of warm GPU containers automatically.
```python
frontend_path = Path(__file__).parent / "frontend"
web_image = (
modal.Image.debian_slim(python_version="3.12")
.uv_pip_install("jinja2==3.1.4", "fastapi[standard]==0.115.4")
.add_local_dir(frontend_path, remote_path="/assets")
)
@app.function(image=web_image)
@modal.concurrent(max_inputs=100)
@modal.asgi_app()
def ui():
import fastapi.staticfiles
from fastapi import FastAPI, Request
from fastapi.templating import Jinja2Templates
web_app = FastAPI()
templates = Jinja2Templates(directory="/assets")
@web_app.get("/")
async def read_root(request: Request):
return templates.TemplateResponse(
"index.html",
{
"request": request,
"inference_url": Inference.web.get_web_url(),
"model_name": "Stable Diffusion 3.5 Large Turbo",
"default_prompt": "A cinematic shot of a baby raccoon wearing an intricate italian priest robe.",
},
)
web_app.mount(
"/static",
fastapi.staticfiles.StaticFiles(directory="/assets"),
name="static",
)
return web_app
def slugify(s: str) -> str:
return "".join(c if c.isalnum() else "-" for c in s).strip("-")
```
### Text To World
# Generate 3D worlds from text with LTX-2.3 and InSpatio-World
This example shows how to run inference on [LTX-2.3](https://huggingface.co/Lightricks/LTX-2.3) and [InSpatio-World](https://inspatio.github.io/inspatio-world/) on Modal
to generate explorable 3D worlds (videos rendered along a camera trajectory) from your local command line and in a web UI.
The pipeline runs in two stages:
1. LTX-2.3 generates a short reference video from the prompt, writes it to a Volume, then spawns stage 2.
2. InSpatio-World lifts that video into a 3D scene and re-renders it along a camera trajectory.
Here is a sample we generated:
## Setup
The LTX text encoder uses Gemma 3 weights that require accepting a license.
Visit https://huggingface.co/google/gemma-3-12b-it-qat-q4_0-unquantized,
click "Agree and access repository", then create a token at
https://huggingface.co/settings/tokens and add it as a
[Modal Secret](https://modal.com/secrets) named `huggingface-secret`
with key `HF_TOKEN`.
```python
import asyncio
import random
import shutil
import subprocess
import time
import uuid
from pathlib import Path
import modal
app = modal.App("example-text-to-world")
MINUTES = 60 # seconds
```
## Paths and Volumes
Model weights and generated videos both live on Volumes, so weights download
only once and outputs persist across containers and runs.
```python
ARTIFACTS_PATH = "/artifacts" # where the output Volume is mounted
INSPATIO_WEIGHTS = "/models/inspatio" # InSpatio weights, on the weights Volume
INSPATIO_REPO = "/opt/inspatio-world" # InSpatio source, cloned into the image
model_volume = modal.Volume.from_name("world-model-weights", create_if_missing=True)
output_volume = modal.Volume.from_name("world-model-outputs", create_if_missing=True)
frontend_path = Path(__file__).parent / "frontend"
```
We pin the LTX-2 commit that supports the LTX-2.3 model architecture.
```python
LTX2_COMMIT = "d6053703e001"
INSPATIO_COMMIT = "fef970664e33f519a31f0ee19d58689e41752c0e"
```
Pin model revisions to avoid surprises when upstream repos update.
```python
LTX_REVISION = "76730e634e70a28f4e8d51f5e29c08e40e2d8e74"
GEMMA_REVISION = "68f7ee4fbd59087436ada77ed2d62f373fdd4482"
INSPATIO_MODEL_REVISION = "f8d1abe227d486be8593825f0611974aa6207e4d"
WAN_REVISION = "37ec512624d61f7aa208f7ea8140a131f93afc9a"
DA3_REVISION = "8615eefb62f2db4f8d6ebaa59160086981672829"
FLORENCE_REVISION = "21a599d414c4d928c9032694c424fb94458e3594"
```
InSpatio renders one camera pose per source frame along this trajectory. The
three whitespace-separated lines are keyframes for pitch (deg), yaw (deg), and
displacement, interpolated across the whole clip into one slow look-around.
```python
TRAJECTORY_TXT = (
"0 0 0\n" # pitch: stay level
"0 -12 0 12 0\n" # yaw: pan right, back to center, left, back to center
"1 1 1\n" # displacement: constant orbit radius (no zoom)
)
```
## Tracking progress through the Volume
The two stages run asynchronously, so we don't return a result directly.
Instead we track a session's progress by which files exist on the output
Volume: first `source.mp4` (LTX), then `world.mp4` (InSpatio). Both the web UI
and the CLI poll this same state.
```python
def session_dir(session_id: str) -> Path:
return Path(ARTIFACTS_PATH) / session_id
def status_from_files(present: set[str]) -> str:
if "world.mp4" in present:
return "done"
if "source.mp4" in present:
return "running_inspatio"
return "running_ltx"
def session_status(session_id: str) -> dict:
"""Read a session's progress and asset URLs from the mounted Volume."""
base = session_dir(session_id)
present = {name for name in ("source.mp4", "world.mp4") if (base / name).exists()}
assets = {
f"{name.removesuffix('.mp4')}_video": f"/api/assets/{session_id}/{name}"
for name in present
}
return {"status": status_from_files(present), "assets": assets}
def wait_for_file(path: Path, timeout_s: float = 120.0) -> bool:
"""Reload the output Volume until `path` appears (or we time out)."""
deadline = time.time() + timeout_s
delay = 1.0
while True:
output_volume.reload()
if path.exists():
return True
if time.time() >= deadline:
return False
time.sleep(delay)
delay = min(delay * 1.5, 5.0)
```
We also run two small `ffmpeg` helpers on the GPU workers (both images include
`ffmpeg`). `transcode_to_web_mp4` makes a clip streamable in the browser, and
`expand_to_frames` stretches the short LTX clip so InSpatio has enough frames
to render a single, continuous camera move.
```python
def transcode_to_web_mp4(src: Path, dst: Path) -> None:
cmd = [
"ffmpeg",
"-y",
"-i",
str(src),
"-c:v",
"libx264",
"-preset",
"fast",
"-crf",
"20",
"-pix_fmt",
"yuv420p",
"-vf",
"scale=trunc(iw/2)*2:trunc(ih/2)*2",
"-movflags",
"+faststart",
"-c:a",
"aac",
str(dst),
]
result = subprocess.run(cmd, capture_output=True, text=True)
if result.returncode != 0:
raise RuntimeError(f"ffmpeg transcode {src.name}: {result.stderr[-2000:]}")
def expand_to_frames(src: Path, dst: Path, num_frames: int) -> None:
cmd = [
"ffmpeg",
"-y",
"-i",
str(src),
"-vf",
"setpts=PTS*10,fps=24",
"-frames:v",
str(num_frames),
"-c:v",
"libx264",
"-preset",
"fast",
"-crf",
"18",
"-pix_fmt",
"yuv420p",
str(dst),
]
result = subprocess.run(cmd, capture_output=True, text=True)
if result.returncode != 0:
raise RuntimeError(f"ffmpeg expand {src.name}: {result.stderr[-2000:]}")
```
## Stage 1: LTX-2.3 reference video
We build the LTX image from CUDA, installing LTX-2's three subpackages at the
pinned commit along with a Flash-Attention 3 wheel for faster inference on
Hopper GPUs.
```python
ltx_image = (
modal.Image.from_registry("nvidia/cuda:12.6.1-devel-ubuntu24.04", add_python="3.12")
.apt_install("git", "ffmpeg")
.uv_pip_install(
"torch==2.7.0",
"torchaudio==2.7.0",
"transformers==4.57.6",
"huggingface-hub==0.36.2",
"hf_transfer==0.1.8",
"fastapi[standard]==0.115.8",
f"git+https://github.com/Lightricks/LTX-2.git@{LTX2_COMMIT}#subdirectory=packages/ltx-core",
f"git+https://github.com/Lightricks/LTX-2.git@{LTX2_COMMIT}#subdirectory=packages/ltx-pipelines",
f"git+https://github.com/Lightricks/LTX-2.git@{LTX2_COMMIT}#subdirectory=packages/ltx-trainer",
"https://huggingface.co/alexnasa/flash-attn-3/resolve/main/128/flash_attn_3-3.0.0b1-cp39-abi3-linux_x86_64.whl",
extra_index_url="https://download.pytorch.org/whl/cu128",
extra_options="--index-strategy unsafe-best-match",
)
.env(
{
"HF_XET_HIGH_PERFORMANCE": "1", # faster downloads
"HF_HUB_ENABLE_HF_TRANSFER": "1",
"PYTORCH_ALLOC_CONF": "expandable_segments:True", # reduce fragmentation
}
)
.entrypoint([])
)
with ltx_image.imports():
import torch
from huggingface_hub import hf_hub_download, snapshot_download
from ltx_core.loader import LTXV_LORA_COMFY_RENAMING_MAP, LoraPathStrengthAndSDOps
from ltx_core.model.video_vae import TilingConfig, get_video_chunks_number
from ltx_pipelines.ti2vid_two_stages import TI2VidTwoStagesPipeline
from ltx_pipelines.utils.constants import DEFAULT_NEGATIVE_PROMPT, detect_params
from ltx_pipelines.utils.media_io import encode_video
```
We wrap inference in a [Cls](https://modal.com/docs/guide/lifecycle-functions)
so the weights download and pipeline build happen once
per container in `@modal.enter`.
```python
@app.cls(
image=ltx_image,
gpu="H200",
timeout=30 * MINUTES,
scaledown_window=15 * MINUTES,
retries=modal.Retries(max_retries=3, initial_delay=5.0),
volumes={
"/root/.cache/huggingface": model_volume,
ARTIFACTS_PATH: output_volume,
},
secrets=[modal.Secret.from_name("huggingface-secret")],
)
class LTXInference:
@modal.enter()
def setup(self):
torch.set_float32_matmul_precision("high")
ltx_repo = "Lightricks/LTX-2.3"
checkpoint_path = hf_hub_download(
ltx_repo, "ltx-2.3-22b-dev.safetensors", revision=LTX_REVISION
)
upsampler_path = hf_hub_download(
ltx_repo,
"ltx-2.3-spatial-upscaler-x2-1.1.safetensors",
revision=LTX_REVISION,
)
distilled_lora_path = hf_hub_download(
ltx_repo,
"ltx-2.3-22b-distilled-lora-384-1.1.safetensors",
revision=LTX_REVISION,
)
gemma_dir = snapshot_download(
"google/gemma-3-12b-it-qat-q4_0-unquantized", revision=GEMMA_REVISION
)
model_volume.commit()
self.params = detect_params(checkpoint_path)
self.tiling_config = TilingConfig.default()
self.pipeline = TI2VidTwoStagesPipeline(
checkpoint_path=checkpoint_path,
distilled_lora=[
LoraPathStrengthAndSDOps(
distilled_lora_path, 1.0, LTXV_LORA_COMFY_RENAMING_MAP
)
],
spatial_upsampler_path=upsampler_path,
gemma_root=gemma_dir,
loras=[],
)
@modal.method()
def run(self, session_id: str, prompt: str) -> str:
seed = random.randint(0, 2**32 - 1)
print(f"LTX-2.3 session {session_id}: seed={seed}, 832x512, 25 frames @ 24fps")
out_dir = session_dir(session_id)
out_dir.mkdir(parents=True, exist_ok=True)
out_path = out_dir / "source.mp4"
with torch.no_grad():
video, audio = self.pipeline(
prompt=prompt,
negative_prompt=DEFAULT_NEGATIVE_PROMPT,
seed=seed,
height=512,
width=832,
num_frames=25,
frame_rate=24,
num_inference_steps=self.params.num_inference_steps,
video_guider_params=self.params.video_guider_params,
audio_guider_params=self.params.audio_guider_params,
images=[],
tiling_config=self.tiling_config,
enhance_prompt=True,
)
raw_path = out_path.with_suffix(".raw.mp4")
encode_video(
video=video,
fps=24,
audio=audio,
output_path=str(raw_path),
video_chunks_number=get_video_chunks_number(25, self.tiling_config),
)
transcode_to_web_mp4(raw_path, out_path)
raw_path.unlink(missing_ok=True)
output_volume.commit()
torch.cuda.empty_cache()
# Spawn the InSpatio worker to generate the world video without blocking
InSpatioInference().run.spawn(session_id=session_id, source_path=str(out_path))
return str(out_path)
```
## Stage 2: InSpatio world generation
InSpatio-World needs its own pinned dependency stack (Torch 2.5 + CUDA 12.1).
We clone the upstream repo into the image and point its `checkpoints` directory
at the weights Volume.
```python
inspatio_image = (
modal.Image.from_registry("nvidia/cuda:12.1.0-devel-ubuntu22.04", add_python="3.10")
.apt_install(
"git",
"ffmpeg",
"libgl1",
"libglib2.0-0",
"libsm6",
"libxext6",
"libxrender1",
)
.uv_pip_install(
"torch==2.5.1",
"torchvision==0.20.1",
"torchaudio==2.5.1",
"accelerate==1.13.0",
"av==13.1.0",
"decord==0.6.0",
"depth-anything-3==0.1.1",
"diffusers==0.37.0",
"easydict==1.13",
"einops==0.8.2",
"ftfy==6.3.1",
"huggingface-hub==0.36.2",
"imageio==2.37.3",
"imageio-ffmpeg==0.6.0",
"numpy==1.26.4",
"omegaconf==2.3.0",
"open3d==0.19.0",
"opencv-python==4.11.0.86",
"pillow==12.0.0",
"plyfile==1.1",
"safetensors==0.7.0",
"scipy==1.15.3",
"timm==1.0.25",
"tokenizers==0.22.2",
"transformers==4.57.6",
"trimesh==4.11.3",
"xformers==0.0.29.post1",
"https://github.com/Dao-AILab/flash-attention/releases/download/v2.7.4.post1/flash_attn-2.7.4.post1+cu12torch2.5cxx11abiFALSE-cp310-cp310-linux_x86_64.whl",
extra_index_url="https://download.pytorch.org/whl/cu121",
extra_options="--index-strategy unsafe-best-match",
)
.run_commands(
# Clone InSpatio, rename a deprecated `torch_dtype` kwarg for newer
# transformers, and symlink its checkpoints dir to the weights Volume.
f"git clone https://github.com/inspatio/inspatio-world.git {INSPATIO_REPO}"
f" && git -C {INSPATIO_REPO} checkout {INSPATIO_COMMIT}"
f" && find {INSPATIO_REPO} -name '*.py'"
" | xargs grep -l 'torch_dtype'"
" | xargs sed -i 's/torch_dtype=/dtype=/g'"
f" && rm -rf {INSPATIO_REPO}/checkpoints"
f" && ln -s {INSPATIO_WEIGHTS} {INSPATIO_REPO}/checkpoints"
)
.entrypoint([])
)
@app.cls(
image=inspatio_image,
gpu="H200",
timeout=90 * MINUTES,
scaledown_window=10 * MINUTES,
retries=modal.Retries(max_retries=3, initial_delay=5.0),
volumes={
INSPATIO_WEIGHTS: model_volume,
ARTIFACTS_PATH: output_volume,
},
secrets=[modal.Secret.from_name("huggingface-secret")],
)
class InSpatioInference:
@modal.enter()
def setup(self):
"""Download InSpatio checkpoints to the weights Volume on first container start."""
from huggingface_hub import snapshot_download
sentinel = Path(INSPATIO_WEIGHTS) / ".ready"
if sentinel.exists():
return
print("Downloading InSpatio-World checkpoints (first run only)...")
weights = Path(INSPATIO_WEIGHTS)
weights.mkdir(parents=True, exist_ok=True)
# taehv lives only on GitHub; the rest are Hugging Face repos.
taehv = weights / "taehv"
shutil.rmtree(taehv, ignore_errors=True)
repo = "https://github.com/madebyollin/taehv.git"
subprocess.run(["git", "clone", "--depth", "1", repo, str(taehv)], check=True)
for repo_id, dest, rev in [
("inspatio/world", "InSpatio-World-1.3B", INSPATIO_MODEL_REVISION),
("Wan-AI/Wan2.1-T2V-1.3B", "Wan2.1-T2V-1.3B", WAN_REVISION),
("depth-anything/DA3NESTED-GIANT-LARGE", "DA3", DA3_REVISION),
("microsoft/Florence-2-large", "Florence-2-large", FLORENCE_REVISION),
]:
snapshot_download(repo_id, local_dir=str(weights / dest), revision=rev)
sentinel.write_text("ok")
model_volume.commit()
@modal.method()
def warmup(self) -> str:
"""Boot the container (and download weights on first run) ahead of time."""
return "ok"
@modal.method()
def run(self, session_id: str, source_path: str) -> None:
work = session_dir(session_id) / "_work"
input_dir = work / "input"
input_dir.mkdir(parents=True, exist_ok=True)
# Wait for LTX's video to propagate to this container, then hold it out to
# 240 frames so InSpatio renders one continuous 10s pan (at 24fps).
source = Path(source_path)
if not wait_for_file(source):
raise FileNotFoundError(f"source video missing: {source}")
expand_to_frames(source, input_dir / "source.mp4", 240)
traj_path = work / "trajectory.txt"
traj_path.write_text(TRAJECTORY_TXT)
output_folder = work / "output" / "world"
output_folder.mkdir(parents=True, exist_ok=True)
print(f"InSpatio session {session_id}: gentle look-around")
cmd = [
"bash",
f"{INSPATIO_REPO}/run_test_pipeline.sh",
"--input_dir",
str(input_dir),
"--traj_txt_path",
str(traj_path),
"--checkpoint_path",
f"{INSPATIO_WEIGHTS}/InSpatio-World-1.3B/InSpatio-World-1.3B.safetensors",
"--config_path",
f"{INSPATIO_REPO}/configs/inference_1.3b.yaml",
"--da3_model_path",
f"{INSPATIO_WEIGHTS}/DA3",
"--florence_model_path",
f"{INSPATIO_WEIGHTS}/Florence-2-large",
"--output_folder",
str(output_folder),
"--disable_adaptive_frame", # one pose per frame, no bounce/subsample
]
result = subprocess.run(cmd, cwd=INSPATIO_REPO)
if result.returncode != 0:
raise RuntimeError(f"InSpatio pipeline exit code {result.returncode}")
world_src = next(iter(sorted(output_folder.rglob("*pred_video*.mp4"))), None)
if not world_src:
raise RuntimeError("InSpatio produced no world video")
transcode_to_web_mp4(world_src, session_dir(session_id) / "world.mp4")
shutil.rmtree(work, ignore_errors=True)
output_volume.commit()
```
## Web UI
A small [ASGI app](https://modal.com/docs/guide/webhooks) serves the frontend
and exposes the session lifecycle: start a session (spawn the LTX worker and
warm InSpatio), poll its status by reading the Volume, and serve the videos the
workers write there.
```python
web_image = (
modal.Image.debian_slim(python_version="3.12")
.uv_pip_install(
"jinja2==3.1.5", "fastapi[standard]==0.115.8", "python-multipart==0.0.20"
)
.add_local_dir(frontend_path, remote_path="/assets")
)
ASSET_NAMES = frozenset({"source.mp4", "world.mp4"})
@app.function(image=web_image, volumes={ARTIFACTS_PATH: output_volume})
@modal.concurrent(max_inputs=100)
@modal.asgi_app()
def ui():
import fastapi.staticfiles
import fastapi.templating
web_app = fastapi.FastAPI()
templates = fastapi.templating.Jinja2Templates(directory="/assets")
# `Volume.reload()` fails while any file on the Volume is open in this
# container, so this lock serializes reloads (and the asset copy-out below)
# across the many concurrent requests this single container handles.
volume_lock = asyncio.Lock()
@web_app.get("/")
async def read_root(request: fastapi.Request):
return templates.TemplateResponse(
"index.html",
{
"request": request,
"model_name": "World Model (LTX-2.3 + InSpatio)",
"default_prompt": "A serene mountain lake at sunrise, mist rising off the water",
},
)
@web_app.post("/api/sessions")
async def start_session(prompt: str = fastapi.Form(...)):
session_id = uuid.uuid4().hex[:12]
# Warm InSpatio in parallel with LTX generation; the LTX worker spawns
# the InSpatio run itself once its video is on the Volume.
await InSpatioInference().warmup.spawn.aio()
await LTXInference().run.spawn.aio(session_id=session_id, prompt=prompt)
return {"session_id": session_id}
@web_app.get("/api/sessions/{session_id}")
async def session_state(session_id: str):
async with volume_lock:
await output_volume.reload.aio()
if not session_dir(session_id).exists():
return fastapi.responses.JSONResponse(
{"error": "not found"}, status_code=404
)
state = session_status(session_id)
return fastapi.responses.JSONResponse(
state, status_code=200 if state["status"] == "done" else 202
)
@web_app.get("/api/assets/{session_id}/{filename}")
async def serve_asset(session_id: str, filename: str):
if filename not in ASSET_NAMES:
return fastapi.responses.JSONResponse({"error": "unknown"}, status_code=404)
vol_path = session_dir(session_id) / filename
if not vol_path.exists():
async with volume_lock:
await output_volume.reload.aio()
if not vol_path.exists():
return fastapi.responses.JSONResponse(
{"error": "not ready"}, status_code=404
)
stat = vol_path.stat()
local_path = (
Path("/tmp/asset_cache")
/ session_id
/ f"{stat.st_mtime_ns}_{stat.st_size}_{filename}"
)
if not local_path.exists():
async with volume_lock:
local_path.parent.mkdir(parents=True, exist_ok=True)
shutil.copy2(vol_path, local_path)
return fastapi.responses.FileResponse(
local_path, media_type="video/mp4", content_disposition_type="inline"
)
web_app.mount(
"/static", fastapi.staticfiles.StaticFiles(directory="/assets"), name="static"
)
return web_app
```
## Command line
Run the pipeline from your terminal with
```bash
modal run text_to_world.py --prompt "Cyberpunk dystopia where humans have been enslaved by sentient fungi"
```
This starts a session, watches the output Volume until the world video shows
up, and prints a link to the Volume dashboard where both videos can be viewed.
```python
@app.local_entrypoint()
def entrypoint(prompt: str | None = None):
if prompt is None:
prompt = "A serene mountain lake at sunrise, mist rising off the water"
session_id = uuid.uuid4().hex[:12]
print(f"Starting world session {session_id}")
print(f" prompt: {prompt}")
InSpatioInference().warmup.spawn()
LTXInference().run.spawn(session_id=session_id, prompt=prompt)
def list_session_files() -> set[str]:
try:
return {Path(e.path).name for e in output_volume.listdir(session_id)}
except Exception:
return set()
start, last_status = time.time(), None
while last_status != "done":
status = status_from_files(list_session_files())
if status != last_status:
print(f" [{time.time() - start:6.1f}s] {status}")
last_status = status
if status != "done":
time.sleep(10)
output_volume.hydrate()
print("\nWorld ready. View the videos on the Modal Volume dashboard:")
print(f" https://modal.com/id/{output_volume.object_id}")
print(f"This run's files live under {session_id}/ :")
print(f" {session_id}/source.mp4 (LTX video)")
print(f" {session_id}/world.mp4 (InSpatio world video)")
```
### Torch Profiling
# Tracing and profiling GPU-accelerated PyTorch programs on Modal

GPUs are high-performance computing devices. For high-performance computing,
tools for measuring and investigating performance are as critical
as tools for testing and confirming correctness in typical software.
In this example, we demonstrate how to wrap a Modal Function with PyTorch's
built-in profiler, which captures events on both CPUs & GPUs. We also show
how to host TensorBoard, which includes useful visualizations and
performance improvement suggestions.
For a live walkthrough, check out
[this video on our YouTube channel](https://www.youtube.com/watch?v=4cesQJLyHA8).
## Saving traces to a Modal Volume
Most tracing tools, including PyTorch's profiler, produce results as files on disk.
Modal Functions run in ephemeral containers in Modal's cloud infrastructure,
so by default these files disappear as soon as the Function finishes running.
We can ensure these files persist by saving them to a
[Modal Volume](https://modal.com/docs/guide/volumes).
Volumes are a distributed file system: files can be read or written from
by many machines across a network, in this case from inside any Modal Function.
To start, we just create a Volume with a specific name.
We'll also set a particular directory that we'll use for it
in our Functions below, for convenience.
```python
from pathlib import Path
from typing import Optional
import modal
traces = modal.Volume.from_name("example-traces", create_if_missing=True)
TRACE_DIR = Path("/traces")
```
## Setting up a Modal App with a GPU-accelerated PyTorch Function
We next set up the Modal Function that we wish to profile.
In general, we want to attach profiling tools to code that's already in place
and measure or debug its performance, and then detach it as easily as possible
so that we can be confident that the same performance characteristics pertain in production.
In keeping with that workflow, in this example we first define the Modal Function we want to profile,
without including any of the profiling logic.
That starts with the Function's environment: the Modal [App](https://modal.com/docs/guide/apps)
the Function is attached to, the container [Image](https://modal.com/docs/guide/custom-container)
with the Function's dependencies, and the hardware requirements of the Function, like a
[GPU](https://modal.com/docs/guide/cuda).
```python
app = modal.App("example-torch-profiling") # create an App
image = modal.Image.debian_slim( # define dependencies
python_version="3.11"
).uv_pip_install("torch==2.5.1", "numpy==2.1.3")
with image.imports(): # set up common imports
import torch
```
Here, we define the config as a dictionary so that we can re-use it here
and later, when we attach the profiler. We want to make sure the profiler is in the same environment!
```python
config = {"gpu": "a10g", "image": image}
```
The Function we target for profiling appears below. It's just some simple PyTorch logic
that repeatedly multiplies a random matrix with itself.
The logic is simple, but it demonstrates two common issues with
GPU-accelerated Python code that are relatively easily fixed:
1. Slowing down the issuance of work to the GPU
2. Providing insufficient work for the GPU to complete
We'll cover these in more detail once we have the profiler set up.
```python
@app.function(**config)
def underutilize(scale=1):
records = []
x = torch.randn( # 🐌 2: not enough work to keep the GPU busy
scale * 100, scale * 100, device="cuda"
)
for ii in range(10):
x = x @ x
class Record: # 🐌 1: heavy Python work in the hot loop
def __init__(self, value):
self.value = value
records.append(Record(ii))
x[0][0].cpu() # force a host sync for accurate timing
```
## Wrapping a Modal Function with a profiler
Now, let's wrap our `underutilize` Function with another Modal Function
that runs PyTorch's profiler while executing it.
This Function has the same environment `config` as `underutilize`,
but it also attaches a remote Modal Volume to save profiler outputs.
To increase the flexibility of this approach, we allow it to take the target Function's name
as an argument. That's not much use here where there's only one Function,
but it makes it easier to copy-paste this code into your projects to add profiling.
```python
@app.function(volumes={TRACE_DIR: traces}, **config)
def profile(
function,
label: Optional[str] = None,
steps: int = 3,
schedule=None,
record_shapes: bool = False,
profile_memory: bool = False,
with_stack: bool = False,
print_rows: int = 0,
**kwargs,
):
from uuid import uuid4
if isinstance(function, str):
try:
function = app.registered_functions[function]
except KeyError:
raise ValueError(f"Function {function} not found")
function_name = function.tag
output_dir = (
TRACE_DIR / (function_name + (f"_{label}" if label else "")) / str(uuid4())
)
output_dir.mkdir(parents=True, exist_ok=True)
if schedule is None:
if steps < 3:
raise ValueError("Steps must be at least 3 when using default schedule")
schedule = {"wait": 1, "warmup": 1, "active": steps - 2, "repeat": 0}
schedule = torch.profiler.schedule(**schedule)
with torch.profiler.profile(
activities=[
torch.profiler.ProfilerActivity.CPU,
torch.profiler.ProfilerActivity.CUDA,
],
schedule=schedule,
record_shapes=record_shapes,
profile_memory=profile_memory,
with_stack=with_stack,
on_trace_ready=torch.profiler.tensorboard_trace_handler(output_dir),
) as prof:
for _ in range(steps):
function.local(**kwargs) # <-- here we wrap the target Function
prof.step()
if print_rows:
print(
prof.key_averages().table(sort_by="cuda_time_total", row_limit=print_rows)
)
trace_path = sorted(
output_dir.glob("**/*.pt.trace.json"),
key=lambda pth: pth.stat().st_mtime,
reverse=True,
)[0]
print(f"trace saved to {trace_path.relative_to(TRACE_DIR)}")
return trace_path.read_text(), trace_path.relative_to(TRACE_DIR)
```
## Triggering profiled execution from the command line and viewing in Perfetto
We wrap one more layer to make this executable from the command line:
a `local_entrypoint` that runs
```bash
modal run torch_profiling.py --function underutilize --print-rows 10
```
```python
@app.local_entrypoint()
def main(
function: str = "underutilize",
label: Optional[str] = None,
steps: int = 3,
schedule=None,
record_shapes: bool = False,
profile_memory: bool = False,
with_stack: bool = False,
print_rows: int = 10,
kwargs_json_path: Optional[str] = None,
):
if kwargs_json_path is not None: # use to pass arguments to function
import json
kwargs = json.loads(Path(kwargs_json_path).read_text())
else:
kwargs = {}
results, remote_path = profile.remote(
function,
label=label,
steps=steps,
schedule=schedule,
record_shapes=record_shapes,
profile_memory=profile_memory,
with_stack=with_stack,
print_rows=print_rows,
**kwargs,
)
output_path = Path("/tmp") / remote_path.name
output_path.write_text(results)
print(f"trace saved locally at {output_path}")
```
Underneath the profile results, you'll also see the path at which the trace was saved on the Volume
and the path at which it was saved locally.
You can view the trace in the free online [Perfetto UI](https://ui.perfetto.dev).
### Improving the performance of our dummy test code
The `underutilize` demonstrates two common patterns that leads to unnecessarily low GPU utilization:
1. Slowing down the issuance of work to the GPU
2. Providing insufficient work for the GPU to complete
We simulated 1 in `underutilize` by defining a Python class in the middle of the matrix multiplication loop.
This takes on the order of 10 microseconds, roughly the same time it takes our A10 GPU to do the matrix multiplication.
Move it out of the loop to observe a small improvement in utilization. In a real setting,
this code might be useful logging or data processing logic, which we must carefully keep
out of the way of the code driving work on the GPU.
We simulated 2 in `underutilize` by providing a matrix that is too small to occupy the GPU for long.
Increase the size of the matrix by a factor of 4 in each dimension (a factor of 16 total),
to increase the utilization without increasing the execution time.
This is an untuitive feature of GPU programming in general: much work is done concurrently
and bottlenecks are non-obvious, so sometimes more work can be done for free or on the cheap.
In a server for large generative models, this might mean producing multiple outputs per user
or handling multiple users at the same time is more economical than it at first seems!
## Serving TensorBoard on Modal to view PyTorch profiles and traces
The TensorBoard experiment monitoring server also includes a plugin
for viewing and interpreting the results of PyTorch profiler runs:
the `torch_tb_profiler` plugin.
```python
tb_image = modal.Image.debian_slim(python_version="3.11").uv_pip_install(
"tensorboard==2.18.0", "torch_tb_profiler==0.4.3"
)
```
Because TensorBoard is a WSGI app, we can [host it on Modal](https://modal.com/docs/guide/webhooks)
with the `modal.wsgi_app` decorator.
Making this work with Modal requires one extra step:
we add some [WSGI Middleware](https://peps.python.org/pep-3333/) that checks the Modal Volume for updates
whenever the whole page is reloaded.
```python
class VolumeMiddleware:
def __init__(self, app):
self.app = app
def __call__(self, environ, start_response):
if (route := environ.get("PATH_INFO")) in ["/", "/modal-volume-reload"]:
try:
traces.reload()
except Exception as e:
print("Exception while re-loading traces: ", e)
if route == "/modal-volume-reload":
environ["PATH_INFO"] = "/" # redirect
return self.app(environ, start_response)
```
You can deploy the TensorBoard server defined below with the following command:
```bash
modal deploy torch_profiling
```
and you can find your server at the URL printed to the terminal.
```python
@app.function(
volumes={TRACE_DIR: traces},
image=tb_image,
max_containers=1, # single replica
scaledown_window=5 * 60, # five minute idle time
)
@modal.concurrent(max_inputs=100) # 100 concurrent request threads
@modal.wsgi_app()
def tensorboard():
import tensorboard
board = tensorboard.program.TensorBoard()
board.configure(logdir=str(TRACE_DIR))
(data_provider, deprecated_multiplexer) = board._make_data_provider()
wsgi_app = tensorboard.backend.application.TensorBoardWSGIApp(
board.flags,
board.plugin_loaders,
data_provider,
board.assets_zip_provider,
deprecated_multiplexer,
experimental_middlewares=[VolumeMiddleware],
)
return wsgi_app._create_wsgi_app()
```
### Trainer Script Grpo
# Training script for training a reasoning model using the verifiers library with sandboxed code execution
This script is used to train a model using GRPO. This is adapted from the [verifiers library](https://github.com/willccbb/verifiers/blob/main/verifiers/examples/math_python.py) example.
Here, we use a Modal Sandbox to execute python code during training. Modal Sandboxes offer an easy way to execute untrusted code in a completely isolated environment.
This is a more secure way to execute python code during training.
```python
import sys
import modal
import verifiers as vf
from verifiers.utils import load_example_dataset
```
We create a Modal app and a Modal sandbox.
```python
app = modal.App.lookup("example-trainer-script-grpo", create_if_missing=True)
sb = modal.Sandbox.create(app=app)
```
We create a function that will execute the python code in a Modal Sandbox.
```python
def sandbox_exec(code):
try:
process = sb.exec("python", "-c", code, timeout=10)
process.wait()
stdout = process.stdout.read()
stderr = process.stderr.read()
if stderr:
return f"Error: {stderr.strip()}"
output = stdout.strip() if stdout else ""
if len(output) > 1000:
output = output[:1000] + "... (truncated to 1000 chars)"
return output
except Exception as e:
return f"Error: {str(e)}"
```
We define the tool prompt for prompting the model. Then, we pass in our `sandbox_exec` function as a tool to the `ToolEnv` definition.
```python
TOOL_PROMPT = """
Think step-by-step inside ... tags in each message, then either call a tool inside ... tags, or give your final answer inside ... tags.
You have access to the following tools to help solve problems:
{tool_descriptions}
Tools can be called by writing a JSON command inside tags with:
- "name": the name of the tool to use
- "args": the arguments for the tool
Example usage:
{{"name": "python", "args": {{"code": "import sympy\\nx = sympy.symbols('x')\\nprint(sympy.solve(x**2 - 4, x))"}}}}
After concluding your message with a tool call,
you will then see the tool's output inside tags as a new message. \
You may call tools multiple times if needed. \
Tool state does not persist between calls. \
Always use tools to solve problems whenever possible, rather than using your own knowledge.
The ... tags should contain only your final answer as a numeric expression.
"""
dataset = load_example_dataset("math", split="train").select(range(128))
vf_env = vf.ToolEnv(
dataset=dataset,
system_prompt=TOOL_PROMPT,
few_shot=[],
tools=[sandbox_exec],
max_steps=3,
)
run_id = sys.argv[2]
model_name = "willcb/Qwen3-0.6B"
model, tokenizer = vf.get_model_and_tokenizer(model_name)
run_name = "math-grpo_" + model_name.split("/")[-1].lower()
```
These parameters are adapted to test the training script via an overfitting test. We will use 128 examples from the training set and overfit the model to them.
To learn more about the parameters, please refer to the [verifiers library](https://github.com/willccbb/verifiers/blob/main/verifiers/examples/math_python.py) example.
```python
training_args = vf.grpo_defaults(run_name=run_name)
training_args.num_iterations = 50
training_args.max_steps = 50
training_args.per_device_train_batch_size = 4
training_args.gradient_accumulation_steps = 4
training_args.num_generations = 12
training_args.learning_rate = 1e-3
training_args.logging_steps = 1
training_args.report_to = "wandb"
trainer = vf.GRPOTrainer(
model=model,
processing_class=tokenizer,
env=vf_env,
args=training_args,
)
trainer.train()
sb.terminate()
save_path = f"/root/math_weights/{run_id}"
trainer.save_model(save_path)
tokenizer.save_pretrained(save_path)
print(f"Model and tokenizer saved to {save_path}")
```
### Trtllm Latency
# Serve an interactive language model app with low-latency TensorRT-LLM (LLaMA 3 8B)
In this example, we demonstrate how to configure the TensorRT-LLM framework to serve
Meta's LLaMA 3 8B model at interactive latencies on Modal.
Many popular language model applications, like chatbots and code editing,
put humans and models in direct interaction. According to an
[oft-cited](https://lawsofux.com/doherty-threshold/)
if [scientifically dubious](https://www.flashover.blog/posts/dohertys-threshold-is-a-lie)
rule of thumb, computer systems need to keep their response times under 400ms
in order to match pace with their human users.
To hit this target, we use the [TensorRT-LLM](https://github.com/NVIDIA/TensorRT-LLM)
inference framework from NVIDIA. TensorRT-LLM is the Lamborghini of inference engines:
it achieves seriously impressive latency, but only if you tune it carefully.
We pair it with [Modal Servers](https://modal.com/docs/guide/servers) which routes requests
through a [new, low-latency proxy service](https://modal.com/blog/serverless-servers)
designed for latency-sensitive inference workloads,
minimizing the overhead between client and GPU.
These latencies were measured on a single NVIDIA H100 GPU
running LLaMA 3 8B on prompts and generations of a few dozen to a few hundred tokens.
Here's what that looks like in a terminal chat interface:
## Overview
This guide documents how to use recommendations from the
[TensorRT-LLM performance guide](https://github.com/NVIDIA/TensorRT-LLM/blob/b763051ba429d60263949da95c701efe8acf7b9c/docs/source/performance/performance-tuning-guide/useful-build-time-flags.md)
to optimize a [TensorRT-LLM engine](https://nvidia.github.io/TensorRT-LLM/llm-api) for low latency,
then serve it behind an OpenAI-compatible HTTP API with `trtllm-serve`.
Be sure to check out TensorRT-LLM's
[examples](https://nvidia.github.io/TensorRT-LLM/llm-api-examples)
for sample code beyond what we cover here, like low-rank adapters (LoRAs).
### What is a TRT-LLM engine?
The first step in running TensorRT-LLM is to build an "engine" from a model.
Engines have a large number of parameters that must be tuned on a per-workload basis,
so we carefully document the choices we made here and point you to additional resources
that can help you optimize for your specific workload.
Historically, this process was done with a clunky command-line-interface (CLI),
but things have changed for the better!
There is now a new-and-improved Python SDK for TensorRT-LLM, supporting
all the same features as the CLI -- quantization, speculative decoding, in-flight batching,
and much more.
## Set up the container image
To run code on Modal, we define [container images](https://modal.com/docs/guide/images).
All Modal containers have access to GPU drivers via the underlying host environment,
but we still need to install the software stack on top of the drivers, from the CUDA runtime up.
We start from an official `nvidia/cuda` container image,
which includes the CUDA runtime & development libraries
and the environment configuration necessary to run them.
On top of that, we add some system dependencies of TensorRT-LLM,
including OpenMPI for distributed communication, some core software like `git`,
and the `tensorrt_llm` package itself.
While we're at it, we import the dependencies we'll need both remotely and locally (for deployment).
```python
import asyncio
import json
import subprocess
import time
from pathlib import Path
import aiohttp
import modal
MINUTES = 60 # seconds
tensorrt_image = modal.Image.from_registry(
"nvidia/cuda:12.8.1-devel-ubuntu22.04",
add_python="3.12", # TRT-LLM requires Python 3.12
).entrypoint([]) # silence noisy NVIDIA license logging
tensorrt_image = tensorrt_image.apt_install(
"openmpi-bin", "libopenmpi-dev", "git", "git-lfs", "wget"
).uv_pip_install(
"tensorrt-llm==0.20.0", # 0.20+ adds trtllm-serve --extra_llm_api_options
"pynvml>=12", # required by tensorrt-llm 0.20
"flashinfer-python==0.2.5",
"cuda-python==12.9.1",
"onnx==1.19.1",
"mpmath==1.3.0",
"torch==2.7.0",
pre=True,
extra_index_url="https://pypi.nvidia.com",
)
```
Note that we're doing this by [method-chaining](https://quanticdev.com/articles/method-chaining/)
a number of calls to methods on the `modal.Image`. If you're familiar with
Dockerfiles, you can think of this as a Pythonic interface to instructions like `RUN` and `CMD`.
End-to-end, this step takes about five minutes on first run.
## Cache model weights in a Modal Volume
We serve [Meta's LLaMA 3 8B](https://huggingface.co/NousResearch/Meta-Llama-3-8B-Instruct),
downloading it to persistent storage and loading it quickly --
this is a latency-optimized example after all! For persistent, distributed storage, we use
[Modal Volumes](https://modal.com/docs/guide/volumes), which can be accessed from any container
with read speeds in excess of a gigabyte per second.
We also set the `HF_HOME` environment variable to point to the Volume so that the model
is cached there, and turn on
[high-performance downloads](https://huggingface.co/docs/hub/en/models-downloading#faster-downloads)
to get maximum throughput from the Hugging Face Hub.
```python
MODEL_ID = "NousResearch/Meta-Llama-3-8B-Instruct" # fork without repo gating
MODEL_REVISION = "53346005fb0ef11d3b6a83b12c895cca40156b6c" # pin to avoid surprises!
volume = modal.Volume.from_name(
"example-trtllm-inference-volume", create_if_missing=True
)
VOLUME_PATH = Path("/vol")
MODELS_PATH = VOLUME_PATH / "models"
tensorrt_image = tensorrt_image.uv_pip_install(
"huggingface_hub==0.36.0",
).env(
{
"HF_XET_HIGH_PERFORMANCE": "1",
"HF_HOME": str(MODELS_PATH),
"TORCH_CUDA_ARCH_LIST": "9.0 9.0a", # H100, silence noisy logs
}
)
```
## Configure for low latency
### Quantization
The amount of [GPU RAM](https://modal.com/gpu-glossary/device-hardware/gpu-ram)
on a single card is a tight constraint for large models:
RAM is measured in billions of bytes and large models have billions of parameters,
each of which is two to four bytes.
The performance cliff if you need to spill to CPU memory is steep,
so all of those parameters must fit in the GPU memory,
along with other things like the KV cache built up while processing prompts.
The simplest way to reduce LLM inference's RAM requirements is to make the model's parameters smaller,
fitting their values in a smaller number of bits, like four or eight. This is known as
[_quantization_](https://modal.com/llm-almanac/quant-formats).
NVIDIA's [Ada Lovelace/Hopper chips](https://modal.com/gpu-glossary/device-hardware/streaming-multiprocessor-architecture),
like the L40S and H100, are capable of native 8bit floating point calculations
in their [Tensor Cores](https://modal.com/gpu-glossary/device-hardware/tensor-core),
so we choose that as our quantization format.
These GPUs are capable of twice as many floating point operations per second in 8bit as in 16bit --
about two quadrillion per second on an H100 SXM.
Quantization buys us two things:
- faster startup, since less data has to be moved over the network onto CPU and GPU RAM
- faster inference, since we get twice the FLOP/s and less data has to be moved from GPU RAM into
[on-chip memory](https://modal.com/gpu-glossary/device-hardware/l1-data-cache) and
[registers](https://modal.com/gpu-glossary/device-hardware/register-file)
with each computation
We'll use TensorRT-LLM's `QuantConfig` to specify that we want `FP8` quantization.
[See their code](https://github.com/NVIDIA/TensorRT-LLM/blob/88e1c90fd0484de061ecfbacfc78a4a8900a4ace/tensorrt_llm/models/modeling_utils.py#L184)
for more options.
Quantization is a lossy compression technique. The impact on model quality can be
minimized by tuning the quantization parameters on even a small dataset. Typically, we
see less than 2% degradation in evaluation metrics when using `fp8`. We use the
`CalibConfig` class to specify the calibration dataset.
### Configure plugins
TensorRT-LLM is an LLM inference framework built on top of NVIDIA's TensorRT,
which is a generic inference framework for neural networks.
TensorRT includes a "plugin" extension system that allows you to adjust behavior,
like configuring the [CUDA kernels](https://modal.com/gpu-glossary/device-software/kernel)
used by the engine.
The [General Matrix Multiply (GEMM)](https://docs.nvidia.com/deeplearning/performance/dl-performance-matrix-multiplication/index.html)
plugin, for instance, adds heavily-optimized matrix multiplication kernels
from NVIDIA's [cuBLAS library of linear algebra routines](https://docs.nvidia.com/cuda/cublas/).
We specify a number of plugins for our engine implementation.
The first is
[multiple profiles](https://github.com/NVIDIA/TensorRT-LLM/blob/b763051ba429d60263949da95c701efe8acf7b9c/docs/source/performance/performance-tuning-guide/useful-build-time-flags.md#multiple-profiles),
which configures TensorRT to prepare multiple kernels for each high-level operation,
where different kernels are optimized for different input sizes.
The second is `paged_kv_cache` which enables a
[paged attention algorithm](https://arxiv.org/abs/2309.06180)
for the key-value (KV) cache.
The last two parameters are GEMM plugins optimized specifically for low latency,
rather than the more typical high arithmetic throughput,
the `low_latency` plugins for `gemm` and `gemm_swiglu`.
The `low_latency_gemm_swiglu_plugin` plugin fuses the two matmul operations
and non-linearity of the feedforward component of the Transformer block into a single kernel,
reducing round trips between GPU
[cache memory](https://modal.com/gpu-glossary/device-hardware/l1-data-cache)
and RAM. For details on kernel fusion, see
[this blog post by Horace He of Thinking Machines](https://horace.io/brrr_intro.html).
Note that at the time of writing, this only works for `FP8` on Hopper GPUs.
The `low_latency_gemm_plugin` is a variant of the GEMM plugin that brings in latency-optimized
kernels from NVIDIA's [CUTLASS library](https://github.com/NVIDIA/cutlass).
### A note on speculative decoding
Speculative decoding is a technique for generating multiple tokens per step,
avoiding the auto-regressive bottleneck in the Transformer architecture and
exposing more parallelism to the GPU. It works best for text with predictable
patterns, like code, but it's worth testing for any latency-critical workload.
We no longer configure it by hand here -- it's handled within the serving stack --
but it remains one of the most effective levers for cutting per-token latency.
### Set the build config
Finally, we specify the overall build configuration for the engine. This includes
the maximum input length, the maximum number of tokens
to process at once before queueing occurs, and the maximum number of sequences
to process at once before queueing occurs.
To minimize latency, we set the maximum number of sequences (the "batch size")
to just one and pair that with low per-container concurrency below,
trading throughput for the lowest possible per-request latency.
```python
N_GPUS = 1 # bumping this to 2 will improve latencies further but not 2x
GPU = f"H100:{N_GPUS}"
MAX_BATCH_SIZE = 1 # minimize latency by processing one request at a time
```
## Define the inference server and infrastructure
### Selecting infrastructure to minimize latency
Minimizing latency requires geographic co-location of clients and servers.
So for low latency LLM inference services on Modal, you must select a
[cloud region](https://modal.com/docs/guide/region-selection)
for both the GPU-accelerated containers running inference
and for the [internal Modal proxy system](https://modal.com/blog/serverless-servers)
that forwards requests to them as part of defining a Server.
Here, we assume users are mostly in the northern half of the Americas
and select the `us` cloud region with a nearby `us-west` proxy to serve them.
This should result in at most a few dozen milliseconds of round-trip time.
```python
REGION = "us"
PORT = 8000
PROXY_REGION = "us-west"
```
Latencies for multi-turn interactions with LLMs are
substantially cut when previous interaction turns are in the KV cache.
KV caches are stored in [GPU RAM](https://modal.com/gpu-glossary/device-hardware/gpu-ram),
so they aren't shared across replicas.
To improve cache hit rate, Modal Servers
includes sticky routing based on a client-provided header.
See [this code sample](https://modal.com/docs/examples/server_sticky)
for details.
For production-scale LLM inference services, there are generally
enough requests to justify keeping at least one replica running at all times.
Having a "warm" or "live" replica reduces latency by skipping slow initialization work
that occurs when a new replica boots up (a ["cold start"](https://modal.com/docs/guide/cold-start)).
For LLM inference servers, that latency runs from seconds to minutes.
To ensure at least one container is always available,
we can set the `min_containers` of our Modal Function to `1` or more.
However, since this is documentation code, we'll set it to `0`
to avoid surprise bills during casual use.
```python
MIN_CONTAINERS = 0 # set to 1 to ensure one replica is always ready
```
Finally, we set a target for the number of inputs to run on a single container
with [`modal.concurrent`](https://modal.com/docs/reference/modal.concurrent).
For details, see [the guide](https://modal.com/docs/guide/concurrent-inputs).
We keep concurrency low for minimum per-request latency.
```python
TARGET_INPUTS = 1 # low concurrency for minimum per-request latency
```
### Health check and warmup helpers
Modal considers a new replica ready to receive inputs once the `modal.enter` methods have exited
and the container accepts connections.
To ensure that we actually finish setting up our server before we are marked ready for inputs,
we poll the server's `/health` endpoint until it's ready,
then send a few warm-up requests so the first real request isn't slow.
We use the [`requests` library](https://requests.readthedocs.io/en/latest/)
to send ourselves these HTTP requests on
[`localhost`/`127.0.0.1`](https://superuser.com/questions/31824/why-is-localhost-ip-127-0-0-1).
```python
with tensorrt_image.imports():
import requests
def wait_ready(process: subprocess.Popen, timeout: int = 20 * MINUTES):
deadline = time.time() + timeout
while time.time() < deadline:
try:
check_running(process)
requests.get(f"http://127.0.0.1:{PORT}/health").raise_for_status()
return
except (
requests.exceptions.ConnectionError,
requests.exceptions.HTTPError,
):
time.sleep(5)
raise TimeoutError(f"TensorRT-LLM server not ready within {timeout} seconds")
def check_running(p: subprocess.Popen):
if (rc := p.poll()) is not None:
raise subprocess.CalledProcessError(rc, cmd=p.args)
def warmup():
payload = {
"model": MODEL_ID,
"messages": [{"role": "user", "content": "Hello, how are you?"}],
"max_tokens": 16,
}
for _ in range(3):
requests.post(
f"http://127.0.0.1:{PORT}/v1/chat/completions",
json=payload,
timeout=60,
).raise_for_status()
```
### Build the TRT-LLM engine and start the server
We use [`modal.enter/exit`](https://modal.com/docs/guide/lifecycle-functions) to manage
the server lifecycle. On the first container start, we build an optimized engine
using the TensorRT-LLM [Python API](https://nvidia.github.io/TensorRT-LLM/llm-api)
with FP8 quantization and low-latency plugins, then cache it in the Volume.
Subsequent starts load the cached engine in seconds and launch `trtllm-serve`
to expose an OpenAI-compatible HTTP API.
The key decorators are [`@app.server`](https://modal.com/docs/guide/servers),
[`@modal.enter`, and `@modal.exit`](https://modal.com/docs/guide/lifecycle-functions)
The code in the `enter` decorator needs to start a server process that listens on a port.
The `@app.server` decorator does a lot! We:
1. Attach our Image
2. Request a GPU
3. Attach our cache Volume
4. Specify the regions for the routing proxy and compute
5. Configure auto-scaling, concurrency, and timeouts
6. Configure authentication via [Proxy Tokens](https://modal.com/docs/guide/webhook-proxy-auth) (disabled here for demo purposes)
```python
app = modal.App("example-trtllm-low-latency")
@app.server(
image=tensorrt_image,
gpu=GPU,
volumes={VOLUME_PATH: volume},
compute_region=REGION,
routing_region=PROXY_REGION, # location of proxies, should be close to Cls region
min_containers=MIN_CONTAINERS,
target_concurrency=TARGET_INPUTS,
startup_timeout=20 * MINUTES,
port=PORT, # wrapped code must listen on this port
exit_grace_period=15, # seconds, time to finish up requests when closing down
unauthenticated=True, # no auth for this demo, see Servers guide/docs for auth details
)
class TRT:
@modal.enter()
def startup(self):
"""Download model, build/load the optimized engine, and start trtllm-serve."""
from huggingface_hub import snapshot_download
from tensorrt_llm import LLM, BuildConfig
from tensorrt_llm.llmapi import CalibConfig, QuantConfig
from tensorrt_llm.plugin.plugin import PluginConfig
model_path = str(MODELS_PATH / MODEL_ID)
engine_path = str(MODELS_PATH / MODEL_ID / "trtllm_engine" / "serve-0.20")
snapshot_download(
MODEL_ID,
local_dir=model_path,
ignore_patterns=["*.pt", "*.bin"], # using safetensors
revision=MODEL_REVISION,
)
if not Path(engine_path).exists():
print(f"building new engine at {engine_path}")
llm = LLM(
model=model_path,
quant_config=QuantConfig(quant_algo="FP8"),
calib_config=CalibConfig(
calib_batches=512,
calib_batch_size=1,
calib_max_seq_length=2048,
tokenizer_max_seq_length=4096,
),
build_config=BuildConfig(
plugin_config=PluginConfig.from_dict(
{
"multiple_profiles": True,
"paged_kv_cache": True,
"low_latency_gemm_swiglu_plugin": "fp8",
"low_latency_gemm_plugin": "fp8",
}
),
max_input_len=8192,
max_num_tokens=16384,
max_batch_size=MAX_BATCH_SIZE,
),
tensor_parallel_size=N_GPUS,
)
llm.save(engine_path)
llm.shutdown()
del llm
volume.commit()
else:
print(f"loading cached engine from {engine_path}")
# When serving a prebuilt TensorRT engine, `trtllm-serve` needs to be
# pointed at the original Hugging Face checkpoint for the tokenizer and
# its chat template, otherwise `/v1/chat/completions` returns a 400.
cmd = [
"trtllm-serve",
engine_path,
"--tokenizer",
model_path,
"--host",
"0.0.0.0",
"--port",
str(PORT),
]
self.process = subprocess.Popen(cmd)
wait_ready(self.process)
warmup()
@modal.exit()
def stop(self):
self.process.terminate()
```
## Deploy the server
To deploy the server on Modal, just run
```bash
modal deploy trtllm_latency.py
```
This will create a new App on Modal and build the container image for it if it hasn't been built yet.
## Interact with the server
Once it is deployed, you'll see a URL appear in the command line,
something like `https://your-workspace-name--example-trtllm-low-latency-trt.us-west.modal.direct`.
You can find [interactive Swagger UI docs](https://swagger.io/tools/swagger-ui/)
at the `/docs` route of that URL.
These docs describe each route and indicate the expected input and output
and translate requests into `curl` commands.
For simple routes, you can even send a request directly from the docs page.
Note: when no replicas are available, Modal will respond with
the [503 Service Unavailable status](https://developer.mozilla.org/en-US/docs/Web/HTTP/Reference/Status/503).
In your browser, you can just hit refresh until the docs page appears.
You can see the status of the application and its containers on your [Modal dashboard](https://modal.com/apps).
## Test the server
To make it easier to test the server setup, we also include a `local_entrypoint`
that hits the server with a simple client.
If you execute the command
```bash
modal run trtllm_latency.py
```
a fresh replica of the server will be spun up on Modal while
the code below executes on your local machine.
Think of this like writing simple tests inside of the `if __name__ == "__main__"`
block of a Python script, but for cloud deployments!
```python
@app.local_entrypoint()
async def test(test_timeout=10 * MINUTES, prompt=None, twice=True):
url = await TRT.get_url.aio()
system_prompt = {
"role": "system",
"content": "You are a helpful, harmless, and honest AI assistant.",
}
if prompt is None:
prompt = "What is the capital of France?"
content = [{"type": "text", "text": prompt}]
messages = [
system_prompt,
{"role": "user", "content": content},
]
await probe(url, messages, timeout=test_timeout)
if twice:
messages[0]["content"] = "You are a pirate."
print(f"Sending messages to {url}:", *messages, sep="\n\t")
await probe(url, messages, timeout=test_timeout)
```
This test relies on the two helper functions below,
which ping the server and wait for a valid response to stream.
The `probe` helper function specifically ignores
two types of errors that can occur while a replica
is starting up -- timeouts on the client and 5XX responses from the server.
Modal Servers returns the [503 Service Unavailable status](https://developer.mozilla.org/en-US/docs/Web/HTTP/Reference/Status/503)
when there are no live replicas.
We include a header with each request -- `Modal-Session-ID`.
The value associated with this key
is used to map requests onto containers such that
while the set of containers is fixed, requests with the same value
are sent to the same container.
Set this to a different value per multi-turn interaction
(prototypically, a user conversation thread with a chatbot)
to improve KV cache hit rates.
Note that this header is only compatible with Modal Servers.
```python
async def probe(url, messages=None, timeout=5 * MINUTES):
if messages is None:
messages = [{"role": "user", "content": "Tell me a joke."}]
client_id = str(0) # set per multi-turn interaction for sticky routing
headers = {"Modal-Session-ID": client_id}
deadline = time.time() + timeout
async with aiohttp.ClientSession(base_url=url, headers=headers) as session:
while time.time() < deadline:
try:
await _send_request_streaming(session, messages)
return
except asyncio.TimeoutError:
await asyncio.sleep(1)
except aiohttp.client_exceptions.ClientResponseError as e:
if e.status == 503:
await asyncio.sleep(1)
continue
raise e
raise TimeoutError(f"No response from server within {timeout} seconds")
async def _send_request_streaming(
session: aiohttp.ClientSession, messages: list, timeout: int | None = None
) -> None:
payload = {"model": MODEL_ID, "messages": messages, "stream": True}
headers = {"Accept": "text/event-stream"}
async with session.post(
"/v1/chat/completions", json=payload, headers=headers, timeout=timeout
) as resp:
resp.raise_for_status()
full_text = ""
async for raw in resp.content:
line = raw.decode("utf-8", errors="ignore").strip()
if not line:
continue
# Server-Sent Events format: "data: ...."
if not line.startswith("data:"):
continue
data = line[len("data:") :].strip()
if data == "[DONE]":
break
try:
evt = json.loads(data)
except json.JSONDecodeError:
# ignore any non-JSON keepalive
continue
delta = (evt.get("choices") or [{}])[0].get("delta") or {}
chunk = delta.get("content")
if chunk:
print(chunk, end="", flush="\n" in chunk or "." in chunk)
full_text += chunk
print() # newline after stream completes
```
### Trtllm Throughput
# Serverless TensorRT-LLM (LLaMA 3 8B)
In this example, we demonstrate how to use the TensorRT-LLM framework to serve Meta's LLaMA 3 8B model
at very high throughput.
We achieve a total throughput of over 25,000 output tokens per second on a single NVIDIA H100 GPU.
At [Modal's on-demand rate](https://modal.com/pricing) of ~$4/hr, that's under $0.05 per million tokens --
on auto-scaling infrastructure and served via a customizable API.
## Overview
This guide is intended to document two things:
the general process for building TensorRT-LLM on Modal
and a specific configuration for serving the LLaMA 3 8B model.
### Build process
Any given TensorRT-LLM service requires a multi-stage build process,
starting from model weights and ending with a compiled engine.
Because that process touches many sharp-edged high-performance components
across the stack, it can easily go wrong in subtle and hard-to-debug ways
that are idiosyncratic to specific systems.
And debugging GPU workloads is expensive!
This example builds an entire service from scratch, from downloading weight tensors
to responding to requests, and so serves as living, interactive documentation of a TensorRT-LLM
build process that works on Modal.
### Engine configuration
TensorRT-LLM is the Lamborghini of inference engines: it achieves seriously
impressive performance, but only if you tune it carefully.
We carefully document the choices we made here and point to additional resources
so you know where and how you might adjust the parameters for your use case.
## Installing TensorRT-LLM
To run TensorRT-LLM, we must first install it. Easier said than done!
In Modal, we define [container images](https://modal.com/docs/guide/custom-container) that run our serverless workloads.
All Modal containers have access to GPU drivers via the underlying host environment,
but we still need to install the software stack on top of the drivers, from the CUDA runtime up.
We start from an official `nvidia/cuda` image,
which includes the CUDA runtime & development libraries
and the environment configuration necessary to run them.
```python
from typing import Optional
import modal
import pydantic # for typing, used later
tensorrt_image = modal.Image.from_registry(
"nvidia/cuda:12.4.1-devel-ubuntu22.04",
add_python="3.10", # TRT-LLM requires Python 3.10
).entrypoint([]) # remove verbose logging by base image on entry
```
On top of that, we add some system dependencies of TensorRT-LLM,
including OpenMPI for distributed communication, some core software like `git`,
and the `tensorrt_llm` package itself.
```python
tensorrt_image = tensorrt_image.apt_install(
"openmpi-bin", "libopenmpi-dev", "git", "git-lfs", "wget"
).uv_pip_install(
"tensorrt_llm==0.14.0",
"pynvml<12", # avoid breaking change to pynvml version API
"cuda-python==12.9.1",
pre=True,
extra_index_url="https://pypi.nvidia.com",
extra_options="--index-strategy unsafe-best-match",
)
```
Note that we're doing this by [method-chaining](https://quanticdev.com/articles/method-chaining/)
a number of calls to methods on the `modal.Image`. If you're familiar with
Dockerfiles, you can think of this as a Pythonic interface to instructions like `RUN` and `CMD`.
End-to-end, this step takes five minutes.
If you're reading this from top to bottom,
you might want to stop here and execute the example
with `modal run trtllm_throughput.py`
so that it runs in the background while you read the rest.
## Downloading the Model
Next, we download the model we want to serve. In this case, we're using the instruction-tuned
version of Meta's LLaMA 3 8B model.
We use the function below to download the model from the Hugging Face Hub.
```python
MODEL_DIR = "/root/model/model_input"
MODEL_ID = "NousResearch/Meta-Llama-3-8B-Instruct" # fork without repo gating
MODEL_REVISION = "b1532e4dee724d9ba63fe17496f298254d87ca64" # pin model revisions to prevent unexpected changes!
def download_model():
import os
from huggingface_hub import snapshot_download
from transformers.utils import move_cache
os.makedirs(MODEL_DIR, exist_ok=True)
snapshot_download(
MODEL_ID,
local_dir=MODEL_DIR,
ignore_patterns=["*.pt", "*.bin"], # using safetensors
revision=MODEL_REVISION,
)
move_cache()
```
Just defining that function doesn't actually download the model, though.
We can run it by adding it to the image's build process with `run_function`.
The download process has its own dependencies, which we add here.
```python
MINUTES = 60 # seconds
tensorrt_image = ( # update the image by downloading the model we're using
tensorrt_image.uv_pip_install( # add utilities for downloading the model
"huggingface-hub==0.36.0",
"requests~=2.32.2",
)
.env( # hf-xet: faster downloads
{"HF_XET_HIGH_PERFORMANCE": "1"}
)
.run_function( # download the model
download_model,
timeout=20 * MINUTES,
)
)
```
## Quantization
The amount of GPU RAM on a single card is a tight constraint for most LLMs:
RAM is measured in billions of bytes and models have billions of parameters.
The performance cliff if you need to spill to CPU memory is steep,
so all of those parameters must fit in the GPU memory,
along with other things like the KV cache.
The simplest way to reduce LLM inference's RAM requirements is to make the model's parameters smaller,
to fit their values in a smaller number of bits, like four or eight. This is known as _quantization_.
We use a quantization script provided by the TensorRT-LLM team.
This script takes a few minutes to run.
```python
GIT_HASH = "b0880169d0fb8cd0363049d91aa548e58a41be07"
CONVERSION_SCRIPT_URL = f"https://raw.githubusercontent.com/NVIDIA/TensorRT-LLM/{GIT_HASH}/examples/quantization/quantize.py"
```
NVIDIA's Ada Lovelace/Hopper chips, like the 4090, L40S, and H100,
are capable of native calculations in 8bit floating point numbers, so we choose that as our quantization format (`qformat`).
These GPUs are capable of twice as many floating point operations per second in 8bit as in 16bit --
about two quadrillion per second on an H100 SXM.
```python
N_GPUS = 1 # Heads up: this example has not yet been tested with multiple GPUs
GPU_CONFIG = f"H100:{N_GPUS}"
DTYPE = "float16" # format we download in, regular fp16
QFORMAT = "fp8" # format we quantize the weights to
KV_CACHE_DTYPE = "fp8" # format we quantize the KV cache to
```
Quantization is lossy, but the impact on model quality can be minimized by
tuning the quantization parameters based on target outputs.
```python
CALIB_SIZE = "512" # size of calibration dataset
```
We put that all together with another invocation of `.run_commands`.
```python
QUANTIZATION_ARGS = f"--dtype={DTYPE} --qformat={QFORMAT} --kv_cache_dtype={KV_CACHE_DTYPE} --calib_size={CALIB_SIZE}"
CKPT_DIR = "/root/model/model_ckpt"
tensorrt_image = ( # update the image by quantizing the model
tensorrt_image.run_commands( # takes ~2 minutes
[
f"wget {CONVERSION_SCRIPT_URL} -O /root/convert.py",
f"python /root/convert.py --model_dir={MODEL_DIR} --output_dir={CKPT_DIR}"
+ f" --tp_size={N_GPUS}"
+ f" {QUANTIZATION_ARGS}",
],
gpu=GPU_CONFIG,
)
)
```
## Compiling the engine
TensorRT-LLM achieves its high throughput primarily by compiling the model:
making concrete choices of CUDA kernels to execute for each operation.
These kernels are much more specific than `matrix_multiply` or `softmax` --
they have names like `maxwell_scudnn_winograd_128x128_ldg1_ldg4_tile148t_nt`.
They are optimized for the specific types and shapes of tensors that the model uses
and for the specific hardware that the model runs on.
That means we need to know all of that information a priori --
more like the original TensorFlow, which defined static graphs, than like PyTorch,
which builds up a graph of kernels dynamically at runtime.
This extra layer of constraint on our LLM service is an important part of
what allows TensorRT-LLM to achieve its high throughput.
So we need to specify things like the maximum batch size and the lengths of inputs and outputs.
The closer these are to the actual values we'll use in production, the better the throughput we'll get.
Since we want to maximize the throughput, assuming we had a constant workload,
we set the batch size to the largest value we can fit in GPU RAM.
Quantization helps us again here, since it allows us to fit more tokens in the same RAM.
```python
MAX_INPUT_LEN, MAX_OUTPUT_LEN = 256, 256
MAX_NUM_TOKENS = 2**17
MAX_BATCH_SIZE = 1024 # better throughput at larger batch sizes, limited by GPU RAM
ENGINE_DIR = "/root/model/model_output"
SIZE_ARGS = f"--max_input_len={MAX_INPUT_LEN} --max_num_tokens={MAX_NUM_TOKENS} --max_batch_size={MAX_BATCH_SIZE}"
```
There are many additional options you can pass to `trtllm-build` to tune the engine for your specific workload.
You can find the document we used for LLaMA
[here](https://github.com/NVIDIA/TensorRT-LLM/tree/b0880169d0fb8cd0363049d91aa548e58a41be07/examples/llama),
which you can use to adjust the arguments to fit your workloads,
e.g. adjusting rotary embeddings and block sizes for longer contexts.
For more performance tuning tips, check out [NVIDIA's official TensorRT-LLM performance guide](https://nvidia.github.io/TensorRT-LLM/0.21.0rc1/performance/performance-tuning-guide/index.html).
To make best use of our 8bit floating point hardware, and the weights and KV cache we have quantized,
we activate the 8bit floating point fused multi-head attention plugin.
Because we are targeting maximum throughput, we do not activate the low latency 8bit floating point matrix multiplication plugin
or the 8bit floating point matrix multiplication (`gemm`) plugin, which documentation indicates target smaller batch sizes.
```python
PLUGIN_ARGS = "--use_fp8_context_fmha enable"
```
We put all of this together with another invocation of `.run_commands`.
```python
tensorrt_image = ( # update the image by building the TensorRT engine
tensorrt_image.run_commands( # takes ~5 minutes
[
f"trtllm-build --checkpoint_dir {CKPT_DIR} --output_dir {ENGINE_DIR}"
+ f" --workers={N_GPUS}"
+ f" {SIZE_ARGS}"
+ f" {PLUGIN_ARGS}"
],
gpu=GPU_CONFIG, # TRT-LLM compilation is GPU-specific, so make sure this matches production!
).env( # show more log information from the inference engine
{"TLLM_LOG_LEVEL": "INFO"}
)
)
```
## Serving inference at tens of thousands of tokens per second
Now that we have the engine compiled, we can serve it with Modal by creating an `App`.
```python
app = modal.App("example-trtllm-throughput", image=tensorrt_image)
```
Thanks to our custom container runtime system even this large, many gigabyte container boots in seconds.
At container start time, we boot up the engine, which completes in under 30 seconds.
Container starts are triggered when Modal scales up your infrastructure,
like the first time you run this code or the first time a request comes in after a period of inactivity.
Container lifecycles in Modal are managed via our `Cls` interface, so we define one below
to manage the engine and run inference.
For details, see [this guide](https://modal.com/docs/guide/lifecycle-functions).
```python
@app.cls(
gpu=GPU_CONFIG,
scaledown_window=10 * MINUTES,
image=tensorrt_image,
)
class Model:
@modal.enter()
def load(self):
"""Loads the TRT-LLM engine and configures our tokenizer.
The @enter decorator ensures that it runs only once per container, when it starts."""
import time
print(
f"{COLOR['HEADER']}🥶 Cold boot: spinning up TRT-LLM engine{COLOR['ENDC']}"
)
self.init_start = time.monotonic_ns()
import tensorrt_llm
from tensorrt_llm.runtime import ModelRunner
from transformers import AutoTokenizer
self.tokenizer = AutoTokenizer.from_pretrained(MODEL_ID)
# LLaMA models do not have a padding token, so we use the EOS token
self.tokenizer.add_special_tokens({"pad_token": self.tokenizer.eos_token})
# and then we add it from the left, to minimize impact on the output
self.tokenizer.padding_side = "left"
self.pad_id = self.tokenizer.pad_token_id
self.end_id = self.tokenizer.eos_token_id
runner_kwargs = dict(
engine_dir=f"{ENGINE_DIR}",
lora_dir=None,
rank=tensorrt_llm.mpi_rank(), # this will need to be adjusted to use multiple GPUs
max_output_len=MAX_OUTPUT_LEN,
)
self.model = ModelRunner.from_dir(**runner_kwargs)
self.init_duration_s = (time.monotonic_ns() - self.init_start) / 1e9
print(
f"{COLOR['HEADER']}🚀 Cold boot finished in {self.init_duration_s}s{COLOR['ENDC']}"
)
@modal.method()
def generate(self, prompts: list[str], settings=None):
"""Generate responses to a batch of prompts, optionally with custom inference settings."""
import time
if settings is None or not settings:
settings = dict(
temperature=0.1, # temperature 0 not allowed, so we set top_k to 1 to get the same effect
top_k=1,
stop_words_list=None,
repetition_penalty=1.1,
)
settings["max_new_tokens"] = (
MAX_OUTPUT_LEN # exceeding this will raise an error
)
settings["end_id"] = self.end_id
settings["pad_id"] = self.pad_id
num_prompts = len(prompts)
if num_prompts > MAX_BATCH_SIZE:
raise ValueError(
f"Batch size {num_prompts} exceeds maximum of {MAX_BATCH_SIZE}"
)
print(
f"{COLOR['HEADER']}🚀 Generating completions for batch of size {num_prompts}...{COLOR['ENDC']}"
)
start = time.monotonic_ns()
parsed_prompts = [
self.tokenizer.apply_chat_template(
[{"role": "user", "content": prompt}],
add_generation_prompt=True,
tokenize=False,
)
for prompt in prompts
]
print(
f"{COLOR['HEADER']}Parsed prompts:{COLOR['ENDC']}",
*parsed_prompts,
sep="\n\t",
)
inputs_t = self.tokenizer(
parsed_prompts, return_tensors="pt", padding=True, truncation=False
)["input_ids"]
print(f"{COLOR['HEADER']}Input tensors:{COLOR['ENDC']}", inputs_t[:, :8])
outputs_t = self.model.generate(inputs_t, **settings)
outputs_text = self.tokenizer.batch_decode(
outputs_t[:, 0]
) # only one output per input, so we index with 0
responses = [
extract_assistant_response(output_text) for output_text in outputs_text
]
duration_s = (time.monotonic_ns() - start) / 1e9
num_tokens = sum(map(lambda r: len(self.tokenizer.encode(r)), responses))
for prompt, response in zip(prompts, responses):
print(
f"{COLOR['HEADER']}{COLOR['GREEN']}{prompt}",
f"\n{COLOR['BLUE']}{response}",
"\n\n",
sep=COLOR["ENDC"],
)
time.sleep(0.05) # to avoid log truncation
print(
f"{COLOR['HEADER']}{COLOR['GREEN']}Generated {num_tokens} tokens from {MODEL_ID} in {duration_s:.1f} seconds,"
f" throughput = {num_tokens / duration_s:.0f} tokens/second for batch of size {num_prompts} on {GPU_CONFIG}.{COLOR['ENDC']}"
)
return responses
```
## Calling our inference function
Now, how do we actually run the model?
There are two basic methods: from Python via our SDK or from anywhere, by setting up an API.
### Calling inference from Python
To run our `Model`'s `.generate` method from Python, we just need to call it --
with `.remote` appended to run it on Modal.
We wrap that logic in a `local_entrypoint` so you can run it from the command line with
```bash
modal run trtllm_throughput.py
```
For simplicity, we hard-code a batch of 128 questions to ask the model,
and then bulk it up to a batch size of 1024 by appending seven distinct prefixes.
These prefixes ensure KV cache misses for the remainder of the generations,
to keep the benchmark closer to what can be expected in a real workload.
```python
@app.local_entrypoint()
def main():
questions = [
# Generic assistant questions
"What are you?",
"What can you do?",
# Coding
"Implement a Python function to compute the Fibonacci numbers.",
"Write a Rust function that performs binary exponentiation.",
"How do I allocate memory in C?",
"What are the differences between Javascript and Python?",
"How do I find invalid indices in Postgres?",
"How can you implement a LRU (Least Recently Used) cache in Python?",
"What approach would you use to detect and prevent race conditions in a multithreaded application?",
"Can you explain how a decision tree algorithm works in machine learning?",
"How would you design a simple key-value store database from scratch?",
"How do you handle deadlock situations in concurrent programming?",
"What is the logic behind the A* search algorithm, and where is it used?",
"How can you design an efficient autocomplete system?",
"What approach would you take to design a secure session management system in a web application?",
"How would you handle collision in a hash table?",
"How can you implement a load balancer for a distributed system?",
"Implement a Python class for a doubly linked list.",
"Write a Haskell function that generates prime numbers using the Sieve of Eratosthenes.",
"Develop a simple HTTP server in Rust.",
# Literate and creative writing
"What is the fable involving a fox and grapes?",
"Who does Harry turn into a balloon?",
"Write a story in the style of James Joyce about a trip to the Australian outback in 2083 to see robots in the beautiful desert.",
"Write a tale about a time-traveling historian who's determined to witness the most significant events in human history.",
"Describe a day in the life of a secret agent who's also a full-time parent.",
"Create a story about a detective who can communicate with animals.",
"What is the most unusual thing about living in a city floating in the clouds?",
"In a world where dreams are shared, what happens when a nightmare invades a peaceful dream?",
"Describe the adventure of a lifetime for a group of friends who found a map leading to a parallel universe.",
"Tell a story about a musician who discovers that their music has magical powers.",
"In a world where people age backwards, describe the life of a 5-year-old man.",
"Create a tale about a painter whose artwork comes to life every night.",
"What happens when a poet's verses start to predict future events?",
"Imagine a world where books can talk. How does a librarian handle them?",
"Tell a story about an astronaut who discovered a planet populated by plants.",
"Describe the journey of a letter traveling through the most sophisticated postal service ever.",
"Write a tale about a chef whose food can evoke memories from the eater's past.",
"Write a poem in the style of Walt Whitman about the modern digital world.",
"Create a short story about a society where people can only speak in metaphors.",
"What are the main themes in Dostoevsky's 'Crime and Punishment'?",
# History and Philosophy
"What were the major contributing factors to the fall of the Roman Empire?",
"How did the invention of the printing press revolutionize European society?",
"What are the effects of quantitative easing?",
"How did the Greek philosophers influence economic thought in the ancient world?",
"What were the economic and philosophical factors that led to the fall of the Soviet Union?",
"How did decolonization in the 20th century change the geopolitical map?",
"What was the influence of the Khmer Empire on Southeast Asia's history and culture?",
"What led to the rise and fall of the Mongol Empire?",
"Discuss the effects of the Industrial Revolution on urban development in 19th century Europe.",
"How did the Treaty of Versailles contribute to the outbreak of World War II?",
"What led to the rise and fall of the Mongol Empire?",
"Discuss the effects of the Industrial Revolution on urban development in 19th century Europe.",
"How did the Treaty of Versailles contribute to the outbreak of World War II?",
"Explain the concept of 'tabula rasa' in John Locke's philosophy.",
"What does Nietzsche mean by 'ressentiment'?",
"Compare and contrast the early and late works of Ludwig Wittgenstein. Which do you prefer?",
"How does the trolley problem explore the ethics of decision-making in critical situations?",
# Thoughtfulness
"Describe the city of the future, considering advances in technology, environmental changes, and societal shifts.",
"In a dystopian future where water is the most valuable commodity, how would society function?",
"If a scientist discovers immortality, how could this impact society, economy, and the environment?",
"What could be the potential implications of contact with an advanced alien civilization?",
"Describe how you would mediate a conflict between two roommates about doing the dishes using techniques of non-violent communication.",
"If you could design a school curriculum for the future, what subjects would you include to prepare students for the next 50 years?",
"How would society change if teleportation was invented and widely accessible?",
"Consider a future where artificial intelligence governs countries. What are the potential benefits and pitfalls?",
# Math
"What is the product of 9 and 8?",
"If a train travels 120 kilometers in 2 hours, what is its average speed?",
"Think through this step by step. If the sequence a_n is defined by a_1 = 3, a_2 = 5, and a_n = a_(n-1) + a_(n-2) for n > 2, find a_6.",
"Think through this step by step. Calculate the sum of an arithmetic series with first term 3, last term 35, and total terms 11.",
"Think through this step by step. What is the area of a triangle with vertices at the points (1,2), (3,-4), and (-2,5)?",
"Think through this step by step. Solve the following system of linear equations: 3x + 2y = 14, 5x - y = 15.",
# Facts
"Who was Emperor Norton I, and what was his significance in San Francisco's history?",
"What is the Voynich manuscript, and why has it perplexed scholars for centuries?",
"What was Project A119 and what were its objectives?",
"What is the 'Dyatlov Pass incident' and why does it remain a mystery?",
"What is the 'Emu War' that took place in Australia in the 1930s?",
"What is the 'Phantom Time Hypothesis' proposed by Heribert Illig?",
"Who was the 'Green Children of Woolpit' as per 12th-century English legend?",
"What are 'zombie stars' in the context of astronomy?",
"Who were the 'Dog-Headed Saint' and the 'Lion-Faced Saint' in medieval Christian traditions?",
"What is the story of the 'Globsters', unidentified organic masses washed up on the shores?",
"Which countries in the European Union use currencies other than the Euro, and what are those currencies?",
# Multilingual
"战国时期最重要的人物是谁?",
"Tuende hatua kwa hatua. Hesabu jumla ya mfululizo wa kihesabu wenye neno la kwanza 2, neno la mwisho 42, na jumla ya maneno 21.",
"Kannst du die wichtigsten Eigenschaften und Funktionen des NMDA-Rezeptors beschreiben?",
"¿Cuáles son los principales impactos ambientales de la deforestación en la Amazonía?",
"Décris la structure et le rôle de la mitochondrie dans une cellule.",
"Какие были социальные последствия Перестройки в Советском Союзе?",
# Economics and Business
"What are the principles of behavioral economics and how do they influence consumer choices?",
"Discuss the impact of blockchain technology on traditional banking systems.",
"What are the long-term effects of trade wars on global economic stability?",
"What is the law of supply and demand?",
"Explain the concept of inflation and its typical causes.",
"What is a trade deficit, and why does it matter?",
"How do interest rates affect consumer spending and saving?",
"What is GDP and why is it important for measuring economic health?",
"What is the difference between revenue and profit?",
"Describe the role of a business plan in startup success.",
"How does market segmentation benefit a company?",
"Explain the concept of brand equity.",
"What are the advantages of franchising a business?",
"What are Michael Porter's five forces and how do they impact strategy for tech startups?",
# Science and Technology
"Discuss the potential impacts of quantum computing on data security.",
"How could CRISPR technology change the future of medical treatments?",
"Explain the significance of graphene in the development of future electronics.",
"How do renewable energy sources compare to fossil fuels in terms of environmental impact?",
"What are the most promising technologies for carbon capture and storage?",
"Explain why the sky is blue.",
"What is the principle behind the operation of a microwave oven?",
"How does Newton's third law apply to rocket propulsion?",
"What causes iron to rust?",
"Describe the process of photosynthesis in simple terms.",
"What is the role of a catalyst in a chemical reaction?",
"What is the basic structure of a DNA molecule?",
"How do vaccines work to protect the body from disease?",
"Explain the significance of mitosis in cellular reproduction.",
"What are tectonic plates and how do they affect earthquakes?",
"How does the greenhouse effect contribute to global warming?",
"Describe the water cycle and its importance to Earth's climate.",
"What causes the phases of the Moon?",
"How do black holes form?",
"Explain the significance of the Big Bang theory.",
"What is the function of the CPU in a computer system?",
"Explain the difference between RAM and ROM.",
"How does a solid-state drive (SSD) differ from a hard disk drive (HDD)?",
"What role does the motherboard play in a computer system?",
"Describe the purpose and function of a GPU.",
"What is TensorRT? What role does it play in neural network inference?",
]
prefixes = [
"Hi! ",
"Hello! ",
"Hi. ",
"Hello. ",
"Hi: ",
"Hello: ",
"Greetings. ",
]
# prepending any string that causes a tokenization change is enough to invalidate KV cache
for ii, prefix in enumerate(prefixes):
questions += [prefix + question for question in questions[:128]]
model = Model()
model.generate.remote(questions)
# if you're calling this service from another Python project,
# use [`Model.lookup`](https://modal.com/docs/reference/modal.Cls#lookup)
```
### Calling inference via an API
We can use `modal.fastapi_endpoint` with `app.function` to turn any Python function into a web API.
This API wrapper doesn't need all the dependencies of the core inference service,
so we switch images here to a basic Linux image, `debian_slim`, and add the FastAPI stack.
```python
web_image = modal.Image.debian_slim(python_version="3.10").uv_pip_install(
"fastapi[standard]==0.115.4",
"pydantic==2.9.2",
"starlette==0.41.2",
)
```
From there, we can take the same remote generation logic we used in `main`
and serve it with only a few more lines of code.
```python
class GenerateRequest(pydantic.BaseModel):
prompts: list[str]
settings: Optional[dict] = None
@app.function(image=web_image)
@modal.fastapi_endpoint(
method="POST", label=f"{MODEL_ID.lower().split('/')[-1]}-web", docs=True
)
def generate_web(data: GenerateRequest) -> list[str]:
"""Generate responses to a batch of prompts, optionally with custom inference settings."""
return Model.generate.remote(data.prompts, settings=None)
```
To set our function up as a Web Function, we need to run this file --
with `modal serve` to create a hot-reloading development server or `modal deploy` to deploy it to production.
```bash
modal serve trtllm_throughput.py
```
The URL for the endpoint appears in the output of the `modal serve` or `modal deploy` command.
Add `/docs` to the end of this URL to see the interactive Swagger documentation for the endpoint.
You can also test the endpoint by sending a POST request with `curl` from another terminal:
```bash
curl -X POST url-from-output-of-modal-serve-here \
-H "Content-Type: application/json" \
-d '{
"prompts": ["Tell me a joke", "Describe a dream you had recently", "Share your favorite childhood memory"]
}' | python -m json.tool # python for pretty-printing, optional
```
And now you have a high-throughput, low-latency, autoscaling API for serving LLM completions!
## Footer
The rest of the code in this example is utility code.
```python
COLOR = {
"HEADER": "\033[95m",
"BLUE": "\033[94m",
"GREEN": "\033[92m",
"RED": "\033[91m",
"ENDC": "\033[0m",
}
def extract_assistant_response(output_text):
"""Model-specific code to extract model responses.
See this doc for LLaMA 3: https://llama.meta.com/docs/model-cards-and-prompt-formats/meta-llama-3/."""
# Split the output text by the assistant header token
parts = output_text.split("<|start_header_id|>assistant<|end_header_id|>")
if len(parts) > 1:
# Join the parts after the first occurrence of the assistant header token
response = parts[1].split("<|eot_id|>")[0].strip()
# Remove any remaining special tokens and whitespace
response = response.replace("<|eot_id|>", "").strip()
return response
else:
return output_text
```
### Unsloth Finetune
# Efficient LLM Finetuning with Unsloth
Training large language models is an incredibly compute-hungry process.
Open-source LLMs often require many GBs (or in extreme cases,
[one TB](https://github.com/MoonshotAI/Kimi-K2#2-model-summary)!) of
VRAM just to fit in memory. Finetuning models requires even more memory;
a common estimate for naive finetuning puts the VRAM requirements at roughly
4.2x the original model size:
1x for model weights + 1x for gradients + 2x for optimizer state + 20% for activations.
Parameter efficient methods like LoRA can improve matters significantly, since
this estimate now applies to just the LoRA modules' weights, rather than the entire
model's. Further gains can be made with quantization of each of the components mentioned
above, but doing so requires quantization-aware training, which can be tricky to
combine with methods like LoRA.
Unsloth provides optimized methods for LLM finetuning with LoRA and quantization,
leading to typical performance gains of 2x faster training with 70% less memory usage.
This example demonstrates using Unsloth to finetune a version of Qwen3-14B with the
FineTome-100k dataset on Modal using only a single GPU!
## Modal Infrastructure Setup
```python
import pathlib
from dataclasses import dataclass
from datetime import datetime
from typing import Optional
import modal
```
We create a Modal [App](https://modal.com/docs/guide/apps) to organize our functions
and shared infrastructure like container images and volumes.
```python
app = modal.App("example-unsloth-finetune")
```
### Container Image Configuration
We build a custom container image with Unsloth and all necessary dependencies.
The image includes the latest version of Unsloth (as of writing) with optimizations
for the latest model architectures. Once the image is defined, we can specify the
imports we'll need to write the rest of our training code. Importantly, we import
`unsloth` before the rest so that Unsloth's patches are applied to packages like
`transformers`, `peft`, and `trl`.
```python
train_image = (
modal.Image.debian_slim(python_version="3.11")
.uv_pip_install(
"accelerate==1.9.0",
"datasets==3.6.0",
"hf-transfer==0.1.9",
"huggingface_hub==0.34.2",
"peft==0.16.0",
"transformers==4.54.0",
"trl==0.19.1",
"unsloth[cu128-torch270]==2025.7.8",
"unsloth_zoo==2025.7.10",
"wandb==0.21.0",
)
.env({"HF_HOME": "/model_cache"})
)
with train_image.imports():
# unsloth must be first!
import unsloth # noqa: F401,I001
import datasets
import torch
import wandb
from transformers import TrainingArguments
from trl import SFTTrainer
from unsloth import FastLanguageModel
from unsloth.chat_templates import standardize_sharegpt
```
### Volume Configuration
Modal [Volumes](https://modal.com/docs/guide/volumes) provide storage that persists
between function invocations. We use separate volumes for different types of data to
enable efficient caching and sharing:
- A cache for [pretrained model weights](https://modal.com/docs/guide/model-weights) - reused across all experiments
- A cache for processed datasets - reused when using the same dataset
- Storage for training checkpoints and final models
```python
model_cache_volume = modal.Volume.from_name(
"unsloth-model-cache", create_if_missing=True
)
dataset_cache_volume = modal.Volume.from_name(
"unsloth-dataset-cache", create_if_missing=True
)
checkpoint_volume = modal.Volume.from_name(
"unsloth-checkpoints", create_if_missing=True
)
```
### Picking a GPU
We use L40S for its healthy balance of [VRAM](https://modal.com/gpu-glossary/device-hardware/gpu-ram),
[CUDA cores](https://modal.com/gpu-glossary/device-hardware/cuda-core), and clock speed.
The timeout provides an upper bound on our training time; if our training run finishes faster,
we won't end up using the full 6 hours. We also specify 3 retries, which will be useful
in case our training function gets [preempted](https://modal.com/docs/guide/preemption).
```python
GPU_TYPE = "L40S"
TIMEOUT_HOURS = 6
MAX_RETRIES = 3
```
## Data Processing
We'll be finetuning our model on the FineTome-100k dataset, which is
subset of [The Tome](https://huggingface.co/datasets/arcee-ai/The-Tome)
curated with [fineweb-edu-classifier](https://huggingface.co/HuggingFaceFW/fineweb-edu-classifier)
Below we define some helpers for processing this dataset.
```python
CONVERSATION_COLUMN = "conversations" # ShareGPT format column name
TEXT_COLUMN = "text" # Output column for formatted text
TRAIN_SPLIT_RATIO = 0.9 # 90% train, 10% eval split
PREPROCESSING_WORKERS = 2 # Number of workers for dataset processing
def format_chat_template(examples, tokenizer):
texts = []
for conversation in examples[CONVERSATION_COLUMN]:
formatted_text = tokenizer.apply_chat_template(
conversation, tokenize=False, add_generation_prompt=False
)
texts.append(formatted_text)
return {TEXT_COLUMN: texts}
def load_or_cache_dataset(config: "TrainingConfig", paths: dict, tokenizer):
dataset_cache_path = paths["dataset_cache"]
if dataset_cache_path.exists():
print(f"Loading cached dataset from {dataset_cache_path}")
train_dataset = datasets.load_from_disk(dataset_cache_path / "train")
eval_dataset = datasets.load_from_disk(dataset_cache_path / "eval")
else:
print(f"Downloading and processing dataset: {config.dataset_name}")
# Load and standardize the dataset format
dataset = datasets.load_dataset(config.dataset_name, split="train")
dataset = standardize_sharegpt(dataset)
# Split into training and evaluation sets with fixed seed for reproducibility
dataset = dataset.train_test_split(
test_size=1.0 - TRAIN_SPLIT_RATIO, seed=config.seed
)
train_dataset = dataset["train"]
eval_dataset = dataset["test"]
# Apply chat template formatting to convert conversations to text
print("Formatting datasets with chat template...")
train_dataset = train_dataset.map(
lambda examples: format_chat_template(examples, tokenizer),
batched=True,
num_proc=PREPROCESSING_WORKERS,
remove_columns=train_dataset.column_names,
)
eval_dataset = eval_dataset.map(
lambda examples: format_chat_template(examples, tokenizer),
batched=True,
num_proc=PREPROCESSING_WORKERS,
remove_columns=eval_dataset.column_names,
)
# Cache the processed datasets for future runs
print(f"Caching processed datasets to {dataset_cache_path}")
dataset_cache_path.mkdir(parents=True, exist_ok=True)
train_dataset.save_to_disk(dataset_cache_path / "train")
eval_dataset.save_to_disk(dataset_cache_path / "eval")
# Commit the dataset cache to the volume
dataset_cache_volume.commit()
return train_dataset, eval_dataset
```
## Loading the pretrained model
We can't finetune without a pretarined model! Since these models are
fairly large, we don't want to download them from scratch for each training run.
We solve this by caching the weights in a Volume on download, and then loading
from the Volume on subsequent runs.
```python
def load_or_cache_model(config: "TrainingConfig", paths: dict):
print(f"Downloading and caching model: {config.model_name}")
model, tokenizer = FastLanguageModel.from_pretrained(
model_name=config.model_name,
max_seq_length=config.max_seq_length,
dtype=None,
load_in_4bit=config.load_in_4bit,
load_in_8bit=config.load_in_8bit,
)
return model, tokenizer
```
## Training Configuration
First we'll define what layers our LoRA modules should target.
Generally, it's advisable to LoRA finetune every linear layer in the model,
so we target every projection matrix of each attention layer.
```python
LORA_TARGET_MODULES = [
"q_proj",
"k_proj",
"v_proj",
"o_proj",
"gate_proj",
"up_proj",
"down_proj",
]
```
We want to expose the different hyperparameters and optimizations that
Unsloth supports, so we wrap them into a `TrainingConfig` class. Later,
we'll populate this config with arguments from the command line.
```python
@dataclass
class TrainingConfig:
# Model and dataset selection
model_name: str
dataset_name: str
max_seq_length: int
load_in_4bit: bool
load_in_8bit: bool
# LoRA configuration for efficient finetuning
lora_r: int
lora_alpha: int
lora_dropout: float
lora_bias: str
use_rslora: bool
# Training hyperparameters
optim: str
batch_size: int
gradient_accumulation_steps: int
packing: bool
use_gradient_checkpointing: str
learning_rate: float
lr_scheduler_type: str
warmup_ratio: float
weight_decay: float
max_steps: int
save_steps: int
eval_steps: int
logging_steps: int
# Experiment management
seed: int
experiment_name: Optional[str] = None
enable_wandb: bool = True
# For testing purposes
skip_eval: bool = False
def __post_init__(self):
# Generate a unique experiment name if not provided
if self.experiment_name is None:
timestamp = datetime.now().strftime("%Y%m%d-%H%M%S")
model_short = self.model_name.split("/")[-1]
self.experiment_name = f"{model_short}-r{self.lora_r}-{timestamp}"
```
## Main Training Function
This function orchestrates the entire training process, from model loading
to final model saving. It's decorated with Modal function configuration
that specifies the compute resources, the volumes needed, and execution
details like timeout and retries.
```python
@app.function(
image=train_image,
gpu=GPU_TYPE,
volumes={
"/model_cache": model_cache_volume,
"/dataset_cache": dataset_cache_volume,
"/checkpoints": checkpoint_volume,
},
secrets=[modal.Secret.from_name("wandb-secret")],
timeout=TIMEOUT_HOURS * 60 * 60,
retries=modal.Retries(initial_delay=0.0, max_retries=MAX_RETRIES),
single_use_containers=True, # Ensure we get a fresh container on retry
)
def finetune(config: TrainingConfig):
# Get structured paths for organized file storage
paths = get_structured_paths(config)
# Initialize Weights & Biases for experiment tracking if enabled
if config.enable_wandb:
wandb.init(
project="unsloth-finetune",
name=config.experiment_name,
config=config.__dict__,
)
# Load or cache model and datasets with progress indicators
print("Setting up model and data...")
model, tokenizer = load_or_cache_model(config, paths)
train_dataset, eval_dataset = load_or_cache_dataset(config, paths, tokenizer)
# Configure the model for LoRA training
model = setup_model_for_training(model, config)
# Prepare checkpoint directory and check for existing checkpoints
checkpoint_path = paths["checkpoints"]
checkpoint_path.mkdir(parents=True, exist_ok=True)
resume_from_checkpoint = check_for_existing_checkpoint(paths)
# Create training configuration
training_args = create_training_arguments(config, str(checkpoint_path))
# Initialize the supervised finetuning trainer
print("Initializing SFTTrainer...")
trainer = SFTTrainer(
model=model,
tokenizer=tokenizer,
train_dataset=train_dataset,
eval_dataset=eval_dataset,
dataset_text_field=TEXT_COLUMN,
max_seq_length=config.max_seq_length,
dataset_num_proc=PREPROCESSING_WORKERS,
packing=config.packing, # Sequence packing for efficiency
args=training_args,
)
# Display training information for transparency
print(f"Training dataset size: {len(train_dataset):,}")
print(f"Evaluation dataset size: {len(eval_dataset):,}")
print(f"Total parameters: {sum(p.numel() for p in model.parameters()):,}")
print(
f"Trainable parameters: {sum(p.numel() for p in model.parameters() if p.requires_grad):,}"
)
print(f"Experiment: {config.experiment_name}")
# Start training or resume from checkpoint
if resume_from_checkpoint:
print(f"Resuming training from {resume_from_checkpoint}")
trainer.train(resume_from_checkpoint=resume_from_checkpoint)
else:
print("Starting training from scratch...")
trainer.train()
# Save the final trained model and tokenizer
print("Saving final model...")
final_model_path = checkpoint_path / "final_model"
model.save_pretrained(final_model_path)
tokenizer.save_pretrained(final_model_path)
# Clean up experiment tracking
if config.enable_wandb:
wandb.finish()
print(f"Training completed! Model saved to: {final_model_path}")
return config.experiment_name
```
Finally, we invoke our training function from an
[`App.local_entrypoint`](https://modal.com/docs/reference/modal.App#local_entrypoint).
Arguments to this function automatically get converted into CLI flags that
can be specified when we [`modal run`](https://modal.com/docs/reference/cli/run#modal-run)
our code. This allows us to do things like tweak hyperparameters directly
from the command line without modifying our source code.
To try this example, checkout the examples repo, install the Modal client, and run
```bash
modal run 06_gpu_and_ml/unsloth_finetune.py
```
You can also customize the training process by tweaking hyperparameters with command line
flags, e.g.
```bash
modal run 06_gpu_and_ml/unsloth_finetune.py --max-steps 10000
```
```python
@app.local_entrypoint()
def main(
# Model and dataset configuration
model_name: str = "unsloth/Qwen3-32B",
dataset_name: str = "mlabonne/FineTome-100k",
max_seq_length: int = 32768,
load_in_4bit: bool = True, # unsloth: use 4bit quant for frozen model weights
load_in_8bit: bool = False, # unsloth: use 8bit quant for frozen model weights
# LoRA hyperparameters for finetuning efficiency
lora_r: int = 16,
lora_alpha: int = 16,
lora_dropout: float = 0.0,
lora_bias: str = "none", # unsloth: optimized lora kernel
use_rslora: bool = False,
# Training hyperparameters for optimization
optim: str = "adamw_8bit", # unsloth: 8bit optimizer
batch_size: int = 16,
gradient_accumulation_steps: int = 1,
packing: bool = False,
use_gradient_checkpointing: str = "unsloth", # unsloth: optimized gradient offloading
learning_rate: float = 2e-4,
lr_scheduler_type: str = "cosine",
warmup_ratio: float = 0.06,
weight_decay: float = 0.01,
max_steps: int = 5, # increase!
save_steps: int = 2, # increase!
eval_steps: int = 2, # increase!
logging_steps: int = 1, # increase!
# Optional experiment configuration
seed: int = 105,
experiment_name: Optional[str] = None,
disable_wandb: bool = True,
skip_eval: bool = False,
):
# Create configuration object from command line arguments
config = TrainingConfig(
model_name=model_name,
dataset_name=dataset_name,
max_seq_length=max_seq_length,
load_in_4bit=load_in_4bit,
load_in_8bit=load_in_8bit,
lora_r=lora_r,
lora_alpha=lora_alpha,
lora_bias=lora_bias,
lora_dropout=lora_dropout,
use_rslora=use_rslora,
optim=optim,
batch_size=batch_size,
gradient_accumulation_steps=gradient_accumulation_steps,
packing=packing,
use_gradient_checkpointing=use_gradient_checkpointing,
learning_rate=learning_rate,
max_steps=max_steps,
lr_scheduler_type=lr_scheduler_type,
warmup_ratio=warmup_ratio,
weight_decay=weight_decay,
save_steps=save_steps,
eval_steps=eval_steps,
logging_steps=logging_steps,
seed=seed,
experiment_name=experiment_name,
enable_wandb=not disable_wandb,
skip_eval=skip_eval,
)
# Display experiment configuration for user verification
print(f"Starting finetuning experiment: {config.experiment_name}")
print(f"Model: {config.model_name}")
print(f"Dataset: {config.dataset_name}")
print(f"LoRA configuration: rank={config.lora_r}, alpha={config.lora_alpha}")
print(
f"Effective batch size: {config.batch_size * config.gradient_accumulation_steps}"
)
print(f"Training steps: {config.max_steps}")
# Launch the training job on Modal infrastructure
experiment_name = finetune.remote(config)
print(f"Training completed successfully: {experiment_name}")
```
## Utility Functions
These functions handle the core logic for model loading, dataset processing,
and training setup. They're designed to be hackable for new use cases.
```python
def get_structured_paths(config: TrainingConfig):
"""
Create structured paths within the mounted volumes for organized storage.
This function maps the configuration to specific directory paths that allow
multiple models, datasets, and experiments to coexist without conflicts.
"""
# Replace forward slashes in names to create valid directory names
dataset_cache_path = (
pathlib.Path("/dataset_cache")
/ "datasets"
/ config.dataset_name.replace("/", "--")
)
checkpoint_path = (
pathlib.Path("/checkpoints") / "experiments" / config.experiment_name
)
return {
"dataset_cache": dataset_cache_path,
"checkpoints": checkpoint_path,
}
def setup_model_for_training(model, config: TrainingConfig):
"""
Configure the model with LoRA adapters for efficient finetuning.
LoRA (Low-Rank Adaptation) allows us to finetune large models efficiently
by only training a small number of additional parameters. This significantly
reduces memory usage and training time.
"""
print("Configuring LoRA for training...")
model = FastLanguageModel.get_peft_model(
model,
r=config.lora_r, # LoRA rank - higher values = more parameters
target_modules=LORA_TARGET_MODULES, # Which layers to apply LoRA to
lora_alpha=config.lora_alpha, # LoRA scaling parameter
lora_dropout=config.lora_dropout, # Dropout for LoRA layers
bias=config.lora_bias, # Bias configuration
use_gradient_checkpointing=config.use_gradient_checkpointing, # Memory optimization
random_state=config.seed, # Fixed seed for reproducibility
use_rslora=config.use_rslora, # Rank-stabilized LoRA
loftq_config=None, # LoFTQ quantization config
)
return model
def create_training_arguments(config: TrainingConfig, output_dir: str):
"""
Create training arguments for the SFTTrainer.
These arguments control the training process, including optimization settings,
evaluation frequency, and checkpointing behavior.
"""
print("SKIP_EVAL", config.skip_eval)
return TrainingArguments(
# Core training configuration
per_device_train_batch_size=config.batch_size,
gradient_accumulation_steps=config.gradient_accumulation_steps,
learning_rate=config.learning_rate,
max_steps=config.max_steps,
warmup_ratio=config.warmup_ratio,
# Evaluation and checkpointing
eval_steps=config.eval_steps,
save_steps=config.save_steps,
eval_strategy="no" if config.skip_eval else "steps",
save_strategy="steps",
do_eval=not config.skip_eval,
# Optimization settings based on hardware capabilities
fp16=not torch.cuda.is_bf16_supported(), # Use fp16 if bf16 not available
bf16=torch.cuda.is_bf16_supported(), # Prefer bf16 when available
optim=config.optim,
weight_decay=config.weight_decay,
lr_scheduler_type=config.lr_scheduler_type,
# Logging and output configuration
logging_steps=config.logging_steps,
output_dir=output_dir,
report_to="wandb" if config.enable_wandb else None,
seed=config.seed,
)
def check_for_existing_checkpoint(paths: dict):
"""
Check if there's an existing checkpoint to resume training from.
This enables resumable training, which is crucial for long-running experiments
that might be interrupted by infrastructure issues or resource limits.
"""
checkpoint_dir = paths["checkpoints"]
if not checkpoint_dir.exists():
return None
# Look for the most recent checkpoint directory
checkpoints = list(checkpoint_dir.glob("checkpoint-*"))
if checkpoints:
latest_checkpoint = max(checkpoints, key=lambda p: int(p.name.split("-")[1]))
print(f"Found existing checkpoint: {latest_checkpoint}")
return str(latest_checkpoint)
return None
```
### Very Large Models
# Serve very large language models (DeepSeek V3, Kimi-K2, GLM 4.7/5)
This example demonstrates the basic patterns for serving language models on Modal
whose weights consume hundreds of gigabytes of storage.
In short:
- load weights into a Modal Volume ahead of server launch
- use random "dummy" weights when iteratively developing your server
- use two, four, or eight H200 or B200 GPUs
- use lower-precision weight formats (FP4 on Blackwell, FP8 on Hopper)
- default to using speculative decoding, especially if batches are in the few tens of sequences
For more tips on how to serve specific types of LLM inference at high performance,
see [this guide](https://modal.com/docs/guide/high-performance-llm-inference).
For a gentler introduction to LLM serving,
see [this example](https://modal.com/docs/examples/llm_inference).
```python
import asyncio
import json
import os
import subprocess
import time
from pathlib import Path
import aiohttp
import modal
here = Path(__file__).parent
```
## Set up the container image
We start by creating a Modal Image based on the Docker image
provided by the SGLang team.
This contains our Python and system dependencies.
Add more by chaining `.apt_install` and `.uv_pip_install`
or `.pip_install` method calls, as we do below with
`.entrypoint`.
See the [Modal Image guide](https://modal.com/docs/guide/images)
for details.
```python
image = modal.Image.from_registry("lmsysorg/sglang:v0.5.7").entrypoint(
[] # silence chatty logs on entry
)
```
### Load model weights
Large model weights take a long time to move around.
Model weight servers like Hugging Face will send weights
at a few hundred megabytes per second. For large models,
with weight sizes in the hundreds of gigabytes,
that means thousands of seconds (tens of minutes)
of model loading time.
After loading them we can cache these weights in a Modal
[Volume](https://modal.com/docs/guide/volumes)
so that they are loaded about 10x faster --
about one to three gigabytes per second.
```python
hf_cache_vol = modal.Volume.from_name("huggingface-cache", create_if_missing=True)
```
That still means minutes of startup time.
Both of these latencies kill productivity when you're iterating
on aspects besides model behavior, like server configuration.
For this reason, we recommend skipping model loading while you're developing
a server or configuration -- even when benchmarking, if you can!
You can still exercise the same code paths if you use the `dummy` model
loading format. In this sample code, we add an `APP_USE_DUMMY_WEIGHTS` environment variable
to control this behavior from the command line during iteration.
```python
USE_DUMMY_WEIGHTS = os.environ.get("APP_USE_DUMMY_WEIGHTS", "0").lower() in (
"1",
"true",
)
image = image.env(
{
"HF_XET_HIGH_PERFORMANCE": "1", # faster downloads
"APP_USE_DUMMY_WEIGHTS": str(int(USE_DUMMY_WEIGHTS)),
}
)
```
We download the model weights from Hugging Face by
running a Python function as part of the Modal Image build.
Note that command-line logging will be somewhat limited.
```python
def download_model(repo_id, revision=None):
from huggingface_hub import snapshot_download
snapshot_download(repo_id=repo_id, revision=revision)
```
To run the function, we need to pick a specific model to download.
We'll use Z.ai's GLM 4.7 in eight bit
[floating point quantization](https://modal.com/llm-almanac/quant-formats).
This model takes about thirty minutes to an hour to download from Hugging Face.
```python
REPO_ID = "zai-org/GLM-4.7-FP8"
if not USE_DUMMY_WEIGHTS: # skip download if we don't need real weights
image = image.run_function(
download_model,
volumes={"/root/.cache/huggingface": hf_cache_vol},
args=(REPO_ID,),
)
```
### Configure the inference engine
Running large models efficiently requires specialized inference engines like SGLang.
These engines are generally highly configurable.
For SGLang, there are three main sources of configuration values:
- _Environment variables_ for the process running `sglang`.
- _Command-line arguments_ for the command to launch the `sglang` process.
- _Configuration files_ loaded by the `sglang` process.
For deployments, we prefer to put information in configuration files where possible.
CLI arguments and configuration files can typically be interchanged.
CLI arguments are convenient when iterating, but configuration files are easier to share.
We use environment variables only as a last resort, typically to activate new or experimental features.
**Environment variables**
SGLang environment variables are prefixed with `SGL_` or `SGLANG_`.
The `SGL_` prefix is deprecated.
The snippet below adds any such environment variables
present during deployment to the Modal Image.
```python
def is_sglang_env_var(key):
return key.startswith("SGL_") or key.startswith("SGLANG_")
image = image.env(
{key: value for key, value in os.environ.items() if is_sglang_env_var(key)}
)
```
**YAML**
Configuration files can be passed in YAML format.
We include a default config in-line in the code here for ease of use.
It's designed to run GLM 4.7 FP8 at low to moderate concurrency.
In particular, it uses that model's built-in multi-token prediction speculative decoding to improve
[time per output token](https://modal.com/llm-almanac/how-to-benchmark).
```python
default_config = """\
# General Config
host: 0.0.0.0
log-level: debug # very noisy
# Model Config
tool-call-parser: glm47
reasoning-parser: glm45
trust-remote-code: true
# Memory
mem-fraction-static: 0.85
chunked-prefill-size: 32768
kv-cache-dtype: fp8_e4m3
# Observability
enable-metrics: true
collect-tokens-histogram: true
# Batching
max-running-requests: 32
cuda-graph-max-bs: 32
# SpecDec (speed up low/moderate concurrency)
speculative-algorithm: EAGLE # built into GLM 4.7, is just multi-token prediction
"""
```
You'll want to provide your own configuration file for other settings,
in particular if you change the model.
We add an environment variable, `APP_LOCAL_CONFIG_PATH`,
to change the loaded configuration.
```python
local_config_path = os.environ.get("APP_LOCAL_CONFIG_PATH")
if modal.is_local():
if local_config_path is None:
local_config_path = here / "config_very_large_models.yaml"
if not local_config_path.exists():
local_config_path.write_text(default_config)
print(
f"Using default config from {local_config_path.relative_to(here)}:",
default_config,
sep="\n",
)
image = image.add_local_file(local_config_path, "/root/config.yaml")
```
** Command-line arguments**
We launch our server by kicking off a subprocess.
The convenience function below encapsulates the command
and its arguments.
We pass a few key bits of configuration that are consumed
by other code here, rather than in a configuration file,
so that values stay in sync.
That includes:
- Model information, which is also used during weight cacheing
- GPU count, which is also used below when defining our Modal deployment
- the port to serve on, which is also used to connect up Modal networking
We also pass the `HF_HUB_OFFLINE` environment variable here,
so that our server will crash when trying to load the real model
if those weights are not in cache.
For smaller models, we can instead load weights dynamically on
server start (and cache them so later starts are faster).
But for large models, weight loading extends the first start latency
so much that downstream timeouts are triggered --
or need to be extended so much that they are no longer tight enough
on the happy path.
```python
def _start_server() -> subprocess.Popen:
"""Start SGLang server in a subprocess"""
cmd = [
f"HF_HUB_OFFLINE={0 if USE_DUMMY_WEIGHTS else 1}",
"python",
"-m",
"sglang.launch_server",
"--host",
"0.0.0.0",
"--port",
str(SGLANG_PORT),
"--model-path",
REPO_ID,
"--tp-size",
str(GPU_COUNT),
"--config",
"/root/config.yaml",
]
if USE_DUMMY_WEIGHTS:
cmd.extend(["--load-format", "dummy"])
print("Starting SGLang server with command:")
print(*cmd)
return subprocess.Popen(" ".join(cmd), shell=True, start_new_session=True)
```
Lastly, we import the `sglang` library as part of loading the Image on Modal.
This is a minor optimization, but it can shave a few seconds off cold start latencies
by providing better prefetching hints, and every second counts!
```python
with image.imports():
import sglang # noqa
```
## Configure infrastructure
Now, we wrap our configured SGLang server for our large model
in the infrastructure required to run and interact with it.
Infrastrucure in Modal is generally attached to an App.
Here, we'll attach our Modal Image as the default for
Modal Functions that run in the App.
```python
app = modal.App("example-serve-very-large-models", image=image)
```
Most importantly, we need to decide what hardware to run on.
[H200 and B200 GPUs](https://modal.com/blog/introducing-b200-h200)
have over 100 GB of [GPU RAM](https://modal.com/gpu-glossary/device-hardware/gpu-ram) --
141 GB and 180 GB, respectively.
The model's weights will be stored in this memory,
and they consume several hundred gigabytes of space,
so we will generally want several of these accelerators.
We also need space for the model's KV cache of activations
on input sequences.
In eight-bit precision, GLM 4.7 consumes ~350 GB of space,
so we use four H200s for 564 GB of RAM.
```python
GPU_TYPE = "H200"
GPU_COUNT = 4
```
We'll use a Modal Server to serve our model.
This reduces client latencies and provides for regionalized deployment.
You can read more about it in [this example](https://modal.com/docs/examples/sglang_low_latency).
To configure it, we need to pass in region information for the GPU workers
and for the load-balancing proxy.
```python
REGION = "us"
ROUTING_REGION = "us-east"
```
Lastly, we need to configure autoscaling parameters.
By default, Modal is fully serverless, and applications
scale to zero when there is no load.
But booting up inference engines for large models takes minutes,
which is generally longer than clients can tolerate waiting.
So a production deployment of large models that has clients with
per-request SLAs in the few or tens of seconds
generally needs to keep one replica up at all times.
In Modal, we achieve this with the `min_containers` parameter
of `App.cls` or `App.function`.
This can trigger substantial costs, so we leave the value at `0`
in this sample code.
```python
MIN_CONTAINERS = 0 # Set to 1 for production to keep a warm replica
```
Deployments of large models with a single node per replica can generally handle a few tens of requests
without queueing. When a particular replica has more requests than it can handle, we want to scale it up.
This behavior is configured by setting `target_concurrency` parameter to `target_inputs`.
```python
TARGET_INPUTS = 10 # Concurrent requests per replica before scaling
```
### Define the server
Now we're ready to put all of our infrastructure configuration
together into a Modal Server.
The Modal Server allows us to control
[container lifecycle](https://modal.com/docs/guide/lifecycle-functions).
In particular, it lets us define work that a replica should do before
and after it handles requests in methods decorated with `modal.enter`
and `modal.exit`, respectively.
```python
SGLANG_PORT = 8000
MINUTES = 60 # seconds
@app.server(
image=image,
gpu=f"{GPU_TYPE}:{GPU_COUNT}",
scaledown_window=20 * MINUTES, # how long should we stay up with no requests?
startup_timeout=30 * MINUTES, # how long should we wait for container start?
volumes={"/root/.cache/huggingface": hf_cache_vol},
compute_region=REGION,
min_containers=MIN_CONTAINERS,
port=SGLANG_PORT,
routing_region=ROUTING_REGION,
exit_grace_period=25, # time to finish requests on shutdown (seconds)
target_concurrency=TARGET_INPUTS,
unauthenticated=True,
)
class Server:
@modal.enter()
def start(self):
"""Start SGLang server process and wait for it to be ready"""
self.proc = _start_server()
wait_for_server_ready()
@modal.exit()
def stop(self):
"""Terminate the SGLang server process"""
self.proc.terminate()
self.proc.wait()
```
We called a `wait_for_server_ready` function in our `modal.enter` method.
That's defined below. It pings the `/health` endpoint until the server responds.
```python
def wait_for_server_ready():
"""Wait for SGLang server to be ready"""
import requests
url = f"http://localhost:{SGLANG_PORT}/health"
print(f"Waiting for server to be ready at {url}")
while True:
try:
resp = requests.get(url, timeout=5)
if resp.status_code == 200:
print("Server is ready!")
return
except requests.exceptions.RequestException:
pass
time.sleep(5)
```
## Test the server
You can deploy a fresh replica and test it
using the command
```bash
APP_USE_DUMMY_WEIGHTS=1 modal run very_large_models.py
```
which will create an ephemeral Modal App
and execute the `local_entrypoint` code below.
Because the weights are randomized, the outputs are also random.
Remove the `APP_USE_DUMMY_WEIGHTS` flag to test the trained model.
```python
@app.local_entrypoint()
async def test(test_timeout=20 * MINUTES, content=None, twice=True):
"""Test the model serving endpoint"""
url = await Server.get_url.aio()
if USE_DUMMY_WEIGHTS:
system_prompt = {"role": "system", "content": "This system produces gibberish."}
else:
system_prompt = {"role": "system", "content": "You are a helpful AI assistant."}
if content is None:
content = "Explain the transformer architecture in one paragraph."
messages = [system_prompt, {"role": "user", "content": content}]
print(f"Sending messages to {url}:", *messages, sep="\n\t")
await probe(url, messages, timeout=test_timeout)
if twice:
messages[1]["content"] = "What is the capital of France?"
print(f"Sending second request to {url}:", *messages, sep="\n\t")
await probe(url, messages, timeout=1 * MINUTES)
```
The unique client logic for Modal deployments is in the `probe` function below.
Specifically, when a Modal Server is spinning up,
i.e. before the `modal.enter` finishes for at least one replica,
clients will see a `503 Service Unavailable` status
and so should retry.
```python
async def probe(url, messages, timeout=20 * MINUTES):
"""Send request with retry logic for startup delays"""
deadline = time.time() + timeout
async with aiohttp.ClientSession(base_url=url) as session:
while time.time() < deadline:
try:
await _send_request_streaming(session, messages)
return
except asyncio.TimeoutError:
await asyncio.sleep(1)
except aiohttp.client_exceptions.ClientResponseError as e:
if e.status == 503: # Service Unavailable during startup
await asyncio.sleep(1)
continue
raise e
raise TimeoutError(f"No response from server within {timeout} seconds")
```
## Deploy the server
When you're ready, you can create a persistent deployment with
```bash
APP_USE_DUMMY_WEIGHTS=0 modal deploy very_large_models.py
```
And hit it with any OpenAI API-compatible client!
## Addenda
The `probe` function above uses this helper function
to stream response tokens as they become available.
```python
async def _send_request_streaming(
session: aiohttp.ClientSession, messages: list, timeout: int | None = None
):
"""Stream response from chat completions endpoint"""
payload = {
"messages": messages,
"stream": True,
"max_tokens": 1024 if USE_DUMMY_WEIGHTS else None,
}
headers = {"Accept": "text/event-stream"}
async with session.post(
"/v1/chat/completions", json=payload, headers=headers, timeout=timeout
) as resp:
resp.raise_for_status()
full_text = ""
async for raw in resp.content:
line = raw.decode("utf-8", errors="ignore").strip()
if not line:
continue
if not line.startswith("data:"):
continue
data = line[len("data:") :].strip()
if data == "[DONE]":
break
try:
evt = json.loads(data)
except json.JSONDecodeError:
continue
delta = (evt.get("choices") or [{}])[0].get("delta") or {}
chunk = delta.get("content") or delta.get("reasoning_content")
if chunk:
print(
chunk,
end="",
flush="\n" in chunk or "." in chunk or len(chunk) > 100,
)
full_text += chunk
print()
```
### Vllm Inference
# Run OpenAI-compatible LLM inference with Gemma and vLLM
In this example, we show how to run a vLLM server in OpenAI-compatible mode on Modal.
LLMs do more than just model language: they chat, they produce JSON and XML, they run code, and more.
This has complicated their interface far beyond "text-in, text-out".
OpenAI's API has emerged as a standard for that interface,
and it is supported by open source LLM serving frameworks like [vLLM](https://docs.vllm.ai/en/latest/).
This example is intended to demonstrate the basics of deploying LLM inference on Modal.
For more on how to optimize performance, see
[this guide](https://modal.com/docs/guide/high-performance-llm-inference)
and check out our
[LLM Engineer's Almanac](https://modal.com/llm-almanac).
Our examples repository also includes scripts for running clients and load-testing for OpenAI-compatible APIs
[here](https://github.com/modal-labs/modal-examples/tree/main/06_gpu_and_ml/llm-serving/openai_compatible).
## Set up the container image
Our first order of business is to define the environment our server will run in:
the [container `Image`](https://modal.com/docs/guide/custom-container).
vLLM can be installed with `uv pip`, since Modal [provides the CUDA drivers](https://modal.com/docs/guide/cuda).
```python
import json
from typing import Any
import aiohttp
import modal
vllm_image = (
modal.Image.from_registry("nvidia/cuda:12.9.0-devel-ubuntu22.04", add_python="3.12")
.entrypoint([])
.uv_pip_install("vllm==0.21.0")
.env(
{
"HF_XET_HIGH_PERFORMANCE": "1", # faster model transfers
"VLLM_LOG_STATS_INTERVAL": "1", # more frequent metrics logging
}
)
)
```
## Download the model weights
We'll be running a pretrained foundation model --
[Google's Gemma 4](https://blog.google/innovation-and-ai/technology/developers-tools/gemma-4/).
It can also take images, video, and audio as inputs,
though we won't use that here.
We'll use the 26BA4B variant, [`google/gemma-4-26B-A4B-it`](https://huggingface.co/google/gemma-4-26B-A4B-it).
This variant is trained with reasoning capabilities, which allow it to
enhance the quality of its generated responses.
It has `26B`illion parameters, of which `4B`illion are `A`ctive
in processing of each token.
You can swap this model out for another by changing the strings below,
though you might also need to adjust some of the server configuration as well.
A single H200 GPU has enough VRAM to store this 26,000,000,000 parameter model
along with a large KV cache.
```python
MODEL_NAME = "google/gemma-4-26B-A4B-it"
MODEL_REVISION = "47b6801b24d15ff9bcd8c96dfaea0be9ed3a0301" # avoid nasty surprises when repos update!
```
Although vLLM will download weights from Hugging Face on-demand,
we want to cache them so we don't do it every time our server starts.
We'll use [Modal Volumes](https://modal.com/docs/guide/volumes) for our cache.
Modal Volumes are essentially a "shared disk" that all Modal Functions can access like it's a regular disk.
For more on storing model weights on Modal, see
[this guide](https://modal.com/docs/guide/model-weights).
```python
hf_cache_vol = modal.Volume.from_name("huggingface-cache", create_if_missing=True)
```
We'll also cache some of vLLM's JIT compilation artifacts in a Modal Volume.
```python
vllm_cache_vol = modal.Volume.from_name("vllm-cache", create_if_missing=True)
```
## Configuring vLLM
### Trading off fast boots and token generation performance
vLLM has embraced dynamic and just-in-time compilation to eke out additional performance without having to write too many custom kernels,
e.g. via the Torch compiler and CUDA graph capture.
These compilation features incur latency in exchange for lowered latency and higher throughput during generation.
This latency is typically tens of seconds to a few minutes, reduced to about ten seconds when loaded from the cache.
We make this trade-off controllable with the `FAST_BOOT` variable below.
```python
FAST_BOOT = False
```
If you're running an LLM service that frequently scales from 0 (frequent ["cold starts"](https://modal.com/docs/guide/cold-start))
you might want to set this to `True`, or consider [GPU memory snapshots](https://modal.com/docs/guide/memory-snapshots).
It's also useful to set this when you're iterating on the server configuration.
If you're running an LLM service that usually has multiple replicas running, then set this to `False` for improved performance.
See the code below for details on the parameters that `FAST_BOOT` controls.
### Model-specific configuration
Almost all models require some amount of configuration via command-line flags,
especially to achieve optimal performance.
We set these flags in the code below, roughly following the
[usage guide from the vLLM docs](https://docs.vllm.ai/projects/recipes/en/latest/Google/Gemma4.html).
For instance, we turn off multimodal features to save on [GPU RAM](https://modal.com/gpu-glossary/device-hardware/gpu-ram),
and we activate the [built-in multi-token prediction (MTP)](https://blog.google/innovation-and-ai/technology/developers-tools/multi-token-prediction-gemma-4/)
speculative decoding for improved throughput at lower concurrencies.
```python
SPECULATIVE_MODEL_NAME = "google/gemma-4-26B-A4B-it-assistant"
SPECULATIVE_MODEL_REVISION = "f188f476dc11dd5bb3014dc861529d316bce49d3"
```
For more on the performance you can expect when serving your own LLMs, see
[our LLM engine performance benchmarks](https://modal.com/llm-almanac).
## Build a vLLM engine and serve it
The class below spawns a vLLM instance listening at port 8000, serving requests to our model.
We wrap it in the [`@app.server`](https://modal.com/docs/guide/servers) decorator
to connect it to the Internet.
The server runs in an independent process, via `subprocess.Popen`, and only starts accepting requests
once the model is spun up and the process is ready to listen on the configured port.
```python
app = modal.App("example-vllm-inference")
N_GPU = 1
MINUTES = 60 # seconds
VLLM_PORT = 8000
ROUTING_REGION = "us-east"
@app.server(
image=vllm_image,
gpu=f"H200:{N_GPU}",
scaledown_window=15 * MINUTES, # how long should we stay up with no requests?
startup_timeout=10 * MINUTES, # how long should we wait for container start?
volumes={
"/root/.cache/huggingface": hf_cache_vol,
"/root/.cache/vllm": vllm_cache_vol,
},
port=VLLM_PORT,
routing_region=ROUTING_REGION,
target_concurrency=100, # how many requests can one replica handle? tune carefully!
unauthenticated=True, # to make the endpoint publicly accessible
)
class Server:
@modal.enter()
def start(self):
import subprocess
cmd = [
"vllm",
"serve",
MODEL_NAME,
"--revision",
MODEL_REVISION,
"--served-model-name",
MODEL_NAME,
"llm",
"--host",
"0.0.0.0",
"--port",
str(VLLM_PORT),
"--uvicorn-log-level=info",
"--async-scheduling",
]
# enforce-eager disables both Torch compilation and CUDA graph capture
# default is no-enforce-eager. see the --compilation-config flag for tighter control
cmd += ["--enforce-eager" if FAST_BOOT else "--no-enforce-eager"]
# assume multiple GPUs are for splitting up large matrix multiplications
cmd += ["--tensor-parallel-size", str(N_GPU)]
# add model-specific configuration
cmd += [
# skip multimedia support, just language
"--limit-mm-per-prompt",
json.dumps({"image": 0, "video": 0, "audio": 0}),
# enable reasoning and tool use
"--enable-auto-tool-choice",
"--reasoning-parser",
"gemma4",
"--tool-call-parser",
"gemma4",
]
# add speculative decoding
cmd += [
"--speculative-config",
json.dumps(
{
"model": SPECULATIVE_MODEL_NAME,
"revision": SPECULATIVE_MODEL_REVISION,
"num_speculative_tokens": 4,
}
),
]
print(*cmd)
self.process = subprocess.Popen(cmd)
@modal.exit()
def stop(self):
self.process.terminate()
```
## Deploy the server
To deploy the API on Modal, just run
```bash
modal deploy vllm_inference.py
```
This will create a new app on Modal, build the container image for it if it hasn't been built yet,
and deploy the app.
## Interact with the server
Once it is deployed, you'll see a URL appear in the command line,
something like `https://your-workspace-name--example-vllm-inference-server.us-east.modal.direct`.
To interact with the API programmatically in Python, we recommend the `openai` library.
See the `client.py` script in the examples repository
[here](https://github.com/modal-labs/modal-examples/tree/main/06_gpu_and_ml/llm-serving/openai_compatible)
to take it for a spin:
```bash
# pip install openai==1.76.0
python openai_compatible/client.py
```
## Testing the server
To make it easier to test the server setup, we also include a `local_entrypoint`
that does a healthcheck and then hits the server. As opposed to Modal Functions, however
when a Server has no active containers, requests will be rejected with a 503 Service Unavailable status.
Therefore, we have to handle this manually in the client code.
If you execute the command
```bash
modal run vllm_inference.py
```
a fresh replica of the server will be spun up on Modal while
the code below executes on your local machine.
Think of this like writing simple tests inside of the `if __name__ == "__main__"`
block of a Python script, but for cloud deployments!
```python
@app.local_entrypoint()
async def test(test_timeout=15 * MINUTES, content=None, twice=True):
import asyncio
import time
url = await Server.get_url.aio()
system_prompt = {
"role": "system",
"content": "You are a pirate who can't help but drop sly reminders that he went to Harvard.",
}
if content is None:
content = "Explain the singular value decomposition."
messages = [ # OpenAI chat format
system_prompt,
{"role": "user", "content": content},
]
async with aiohttp.ClientSession(base_url=url) as session:
print(f"Running health check for server at {url}")
deadline = time.time() + test_timeout - 1 * MINUTES
while time.time() < deadline:
async with session.get(
"/health", timeout=aiohttp.ClientTimeout(total=60)
) as resp:
if resp.status == 200:
break
if resp.status == 503:
await asyncio.sleep(1)
continue
assert False, (
f"Failed health check for server at {url}: HTTP {resp.status}"
)
else:
assert False, f"Failed health check for server at {url}"
print(f"Successful health check for server at {url}")
print(f"Sending messages to {url}:", *messages, sep="\n\t")
await _send_request(session, "llm", messages)
if twice:
messages[0]["content"] = "You are Jar Jar Binks."
print(f"Sending messages to {url}:", *messages, sep="\n\t")
await _send_request(session, "llm", messages)
async def _send_request(
session: aiohttp.ClientSession, model: str, messages: list
) -> None:
# `stream=True` tells an OpenAI-compatible backend to stream chunks
payload: dict[str, Any] = {"messages": messages, "model": model, "stream": True}
# explicitly enable thinking for this model
payload["chat_template_kwargs"] = {"enable_thinking": True}
headers = {"Content-Type": "application/json", "Accept": "text/event-stream"}
async with session.post(
"/v1/chat/completions", json=payload, headers=headers
) as resp:
async for raw in resp.content:
resp.raise_for_status()
# extract new content and stream it
line = raw.decode().strip()
if not line or line == "data: [DONE]":
continue
if line.startswith("data: "): # SSE prefix
line = line[len("data: ") :]
chunk = json.loads(line)
assert (
chunk["object"] == "chat.completion.chunk"
) # or something went horribly wrong
delta = chunk["choices"][0]["delta"]
content = (
delta.get("content")
or delta.get("reasoning")
or delta.get("reasoning_content")
)
if content:
print(content, end="")
else:
print("\n", chunk)
print()
```
We also include a basic example of a load-testing setup using
`locust` in the `load_test.py` script [here](https://github.com/modal-labs/modal-examples/tree/main/06_gpu_and_ml/llm-serving/openai_compatible):
```bash
modal run openai_compatible/load_test.py
```
### Vllm Low Latency
# Low latency Qwen 3 8B with vLLM and Modal
In this example, we show how to serve [vLLM](https://docs.vllm.ai) at low latency on Modal.
This example is intended to demonstrate everything required to run
inference at the highest performance and with the lowest latency possible,
and so it includes advanced features of both vLLM and Modal.
For a simpler introduction to LLM serving, see
[this example](https://modal.com/docs/examples/llm_inference).
To minimize routing overheads, we use `@app.server`,
which uses a new, low-latency routing service on Modal designed for latency-sensitive inference workloads.
This gives us more control over routing, but with increased power comes increased responsibility.
We also include instructions for cutting cold start times by an order of magnitude using Modal's
[CPU + GPU memory snapshots](https://modal.com/docs/guide/memory-snapshot).
## Set up the container image
Our first order of business is to define the environment our server will run in:
the [container `Image`](https://modal.com/docs/guide/images).
We'll use the [vLLM inference server](https://docs.vllm.ai).
vLLM can be installed with `uv pip`, since Modal [provides the CUDA drivers](https://modal.com/docs/guide/cuda).
While we're at it, we import the dependencies we'll need both remotely and locally (for deployment).
```python
import asyncio
import json
import subprocess
import time
import aiohttp
import modal
from modal.server import Server
MINUTES = 60 # seconds
vllm_image = (
modal.Image.from_registry("nvidia/cuda:12.4.0-devel-ubuntu22.04", add_python="3.11")
.uv_pip_install("vllm==0.11.2", "huggingface-hub==0.36.0")
.env(
{
"VLLM_SERVER_DEV_MODE": "1",
"TORCH_CPP_LOG_LEVEL": "FATAL",
}
)
)
```
We also choose a [GPU](https://modal.com/docs/guide/gpu) to deploy our inference server onto.
We choose the [H100 GPU](https://modal.com/blog/introducing-h100),
which offers excellent price-performance
and supports 8bit floating point operations, which are the
lowest precision well-supported in the relevant [GPU kernels](https://modal.com/gpu-glossary/device-software/kernel)
across a variety of model architectures.
```python
GPU = "H100"
```
### Loading and caching the model weights
We'll serve [Alibaba's Qwen 3 LLM](https://www.alibabacloud.com/blog/alibaba-introduces-qwen3-setting-new-benchmark-in-open-source-ai-with-hybrid-reasoning_602192).
For lower latency, we pick a smaller model (8B params).
```python
MODEL_NAME = "Qwen/Qwen3-8B"
MODEL_REVISION = ( # pin revision id to avoid nasty surprises!
"b968826d9c46dd6066d109eabc6255188de91218" # latest commit as of 2025-12-16
)
```
We load the model [from the Hugging Face Hub](https://huggingface.co/collections/Qwen/qwen3),
so we'll need their Python package.
We don't want to load the model from the Hub every time we start the server.
We can load it much faster from a [Modal Volume](https://modal.com/docs/guide/volumes).
Typical speeds are around one to two GB/s.
```python
HF_CACHE_VOL = modal.Volume.from_name("huggingface-cache", create_if_missing=True)
HF_CACHE_PATH = "/root/.cache/huggingface"
MODEL_PATH = f"{HF_CACHE_PATH}/{MODEL_NAME}"
```
In addition to pointing the Hugging Face Hub at the path
where we mount the Volume, we also
[turn on "high performance" downloads](https://huggingface.co/docs/hub/en/models-downloading#faster-downloads),
which can fully saturate our network bandwidth.
```python
vllm_image = vllm_image.env(
{"HF_HUB_CACHE": HF_CACHE_PATH, "HF_XET_HIGH_PERFORMANCE": "1"}
)
```
## Define the inference server and infrastructure
### Selecting infrastructure to minimize latency
Minimizing latency requires geographic co-location of clients and servers.
So for low latency LLM inference services on Modal, you must select a
[cloud region](https://modal.com/docs/guide/region-selection)
for both the GPU-accelerated containers running inference
and for the internal Modal proxies that forward requests to them
as part of defining a `app.server`.
Here, we assume users are mostly in the northern half of the Americas
and select the `us-east` cloud region to serve them.
This should result in at most a few dozen milliseconds of round-trip time.
```python
REGION = "us-east"
```
Latencies for multi-turn interactions with LLMs are
substantially cut when previous interaction turns are in the KV cache.
KV caches are stored in [GPU RAM](https://modal.com/gpu-glossary/device-hardware/gpu-ram),
so they aren't shared across replicas.
To improve cache hit rate, `@app.server`
includes sticky routing based on a client-provided header.
See the client code below for details.
For production-scale LLM inference services, there are generally
enough requests to justify keeping at least one replica running at all times.
Having a "warm" or "live" replica reduces latency by skipping slow initialization work
that occurs when new replica boots up (a ["cold start"](https://modal.com/docs/guide/cold-start)).
For LLM inference servers, that latency runs from seconds to minutes.
To ensure at least one container is always available,
we can set the `min_containers` of our Modal Function
to `1` or more.
However, since this is documentation code, we'll set it to `0`
to avoid surprise bills during casual use.
```python
MIN_CONTAINERS = 0 # set to 1 to ensure one replica is always ready
```
Finally, we need to decide how we will scale up and down replicas
in response to load. Without autoscaling, users' requests will queue
when the server becomes overloaded. Even apart from queueing, responses
generally become slower per user above a certain minimum number of
concurrent requests.
So we set a target for the number of inputs to run on a single container
with [`target_concurrency`](https://modal.com/docs/reference/modal.concurrent) parameter.
```python
TARGET_INPUTS = 20
```
Generally, this choice needs to be made as part of
[LLM inference engine benchmarking](https://modal.com/llm-almanac/how-to-benchmark).
### Cutting cold starts with GPU memory snapshots
vLLM supports a sleep mode that allows us to leverage Modal's
[CPU + GPU memory snapshots](https://modal.com/docs/guide/memory-snapshot)
for dramatically faster cold starts.
When `enable_memory_snapshot=True` and `experimental_options={"enable_gpu_snapshot": True}`
are set on the class, Modal captures both CPU and GPU memory state.
The `@modal.enter(snap=True)` method runs before the snapshot is taken:
we start vLLM, wait for it to be ready, warm it up, then put it to sleep.
The `@modal.enter(snap=False)` method runs after restoring from snapshot:
we wake vLLM back up so it can serve requests immediately.
### Controlling container lifecycles with `modal.Server`
We wrap up all of the choices we made about the infrastructure
of our inference server into a number of Python decorators
that we apply to a Python class that encapsulates the logic
to run our server.
The key decorators are:
- [`@app.server`](https://modal.com/docs/guide/lifecycle-functions) to define the core of our service.
We attach our Image, request a GPU, attach our cache Volumes, specify the region, and configure auto-scaling.
This decorator also turns our python code into an HTTP server (i.e. fronting all of our containers with a proxy with a URL).
The wrapped code needs to eventually listen for HTTP connections on the provided `port`.
See [the reference documentation](https://modal.com/docs/reference/modal.App#server) for details.
- `target_concurrency` to specify how many
requests our server can handle before we need to scale up.
- [`@modal.enter` and `@modal.exit`](https://modal.com/docs/guide/lifecycle-functions) to indicate
which methods of the class should be run when starting the server and shutting it down.
The `snap=True`/`snap=False` distinction controls which methods run before/after a memory snapshot.
Modal considers a new replica ready to receive inputs once the `modal.enter` methods have exited
and the container accepts connections.
To ensure that we actually finish setting up our server before we are marked ready for inputs,
we define a helper function to check whether the server is finished setting up and to
send it a few test inputs.
We use the [`requests` library](https://requests.readthedocs.io/en/latest/)
to send ourselves these HTTP requests on
[`localhost`/`127.0.0.1`](https://superuser.com/questions/31824/why-is-localhost-ip-127-0-0-1).
```python
with vllm_image.imports():
import requests
PORT = 8000
def wait_ready(process: subprocess.Popen, timeout: int = 5 * MINUTES):
deadline = time.time() + timeout
while time.time() < deadline:
try:
check_running(process)
requests.get(f"http://127.0.0.1:{PORT}/health").raise_for_status()
return
except (
subprocess.CalledProcessError,
requests.exceptions.ConnectionError,
requests.exceptions.HTTPError,
):
time.sleep(5)
raise TimeoutError(f"vLLM server not ready within {timeout} seconds")
def check_running(p: subprocess.Popen):
if (rc := p.poll()) is not None:
raise subprocess.CalledProcessError(rc, cmd=p.args)
def warmup():
payload = {
"model": MODEL_NAME,
"messages": [{"role": "user", "content": "Hello, how are you?"}],
"max_tokens": 16,
}
for _ in range(3):
requests.post(
f"http://127.0.0.1:{PORT}/v1/chat/completions", json=payload, timeout=10
).raise_for_status()
def sleep(level: int = 1):
requests.post(f"http://127.0.0.1:{PORT}/sleep?level={level}").raise_for_status()
def wake_up():
requests.post(f"http://127.0.0.1:{PORT}/wake_up").raise_for_status()
```
With all this in place, we are ready to define our high-performance, low-latency
LLM inference server.
```python
APP_NAME = "example-server-vllm-low-latency"
app = modal.App(name=APP_NAME)
@app.server(
image=vllm_image,
gpu=GPU,
volumes={HF_CACHE_PATH: HF_CACHE_VOL},
enable_memory_snapshot=True,
experimental_options={"enable_gpu_snapshot": True},
compute_region=REGION,
min_containers=MIN_CONTAINERS,
startup_timeout=10 * MINUTES,
port=PORT, # wrapped code must listen on this port
routing_region=REGION, # location of proxies, should be same as Cls region
exit_grace_period=5, # seconds, time to finish up requests when closing down
target_concurrency=TARGET_INPUTS,
unauthenticated=True,
)
class VLLM:
@modal.enter(snap=True)
def startup(self):
"""Start the vLLM server and block until it is healthy, then warm it up and put it to sleep."""
cmd = [
"vllm",
"serve",
"--uvicorn-log-level",
"error",
MODEL_NAME,
"--revision",
MODEL_REVISION,
"--served-model-name",
MODEL_NAME,
"--host",
"0.0.0.0",
"--port",
f"{PORT}",
"--disable-uvicorn-access-log",
"--disable-log-requests",
"--enable-sleep-mode",
]
self.process = subprocess.Popen(cmd)
wait_ready(self.process)
warmup()
sleep(1)
@modal.enter(snap=False)
def restore(self):
"""Wake vLLM from sleep mode after restoring from a memory snapshot."""
wake_up()
@modal.exit()
def stop(self):
self.process.terminate()
```
## Deploy the server
To deploy the server on Modal, just run
```bash
modal deploy vllm_low_latency.py
```
This will create a new App on Modal and build the container image for it if it hasn't been built yet.
## Interact with the server
Once it is deployed, you'll see a URL appear in the command line,
something like `https://your-workspace-name--example-vllm-low-latency-vllm.us-east.modal.direct`.
You can find [interactive Swagger UI docs](https://swagger.io/tools/swagger-ui/)
at the `/docs` route of that URL, i.e. `https://your-workspace-name--example-vllm-low-latency-vllm.us-east.modal.direct/docs`.
These docs describe each route and indicate the expected input and output
and translate requests into `curl` commands.
For simple routes, you can even send a request directly from the docs page.
Note: when no replicas are available, Modal will respond with
the [503 Service Unavailable status](https://developer.mozilla.org/en-US/docs/Web/HTTP/Reference/Status/503).
In your browser, you can just hit refresh until the docs page appears.
You can see the status of the application and its containers on your [Modal dashboard](https://modal.com/apps).
## Test the server
To make it easier to test the server setup, we also include a `local_entrypoint`
that hits the server with a simple client.
If you execute the command
```bash
modal run vllm_low_latency.py
```
a fresh replica of the server will be spun up on Modal while
the code below executes on your local machine.
Think of this like writing simple tests inside of the `if __name__ == "__main__"`
block of a Python script, but for cloud deployments!
```python
@app.local_entrypoint()
async def test(test_timeout=10 * MINUTES, prompt=None, twice=True):
url = await VLLM.get_url.aio()
print(url)
system_prompt = {
"role": "system",
"content": "You are a pirate who can't help but drop sly reminders that he went to Harvard.",
}
if prompt is None:
prompt = "Explain the Singular Value Decomposition."
content = [{"type": "text", "text": prompt}]
messages = [ # OpenAI chat format
system_prompt,
{"role": "user", "content": content},
]
await probe(url, messages, timeout=test_timeout)
if twice:
messages[0]["content"] = "You are Jar Jar Binks."
print(f"Sending messages to {url}:", *messages, sep="\n\t")
await probe(url, messages, timeout=1 * MINUTES)
```
This test relies on the two helper functions below,
which ping the server and wait for a valid response to stream.
The `probe` helper function specifically ignores
two types of errors that can occur while a replica
is starting up -- timeouts on the client and 5XX responses from the server.
Modal returns the [503 Service Unavailable status](https://developer.mozilla.org/en-US/docs/Web/HTTP/Reference/Status/503)
when a Server has no live replicas.
We include a header with each request --
`Modal-Session-ID`.
The value associated with this key
is used to map requests onto containers such that
while the set of containers is fixed, requests with the same value
are sent to the same container.
Set this to a different value per multi-turn interaction
(prototypically, a user conversation thread with a chatbot)
to improve KV cache hit rates.
Note that this header is only compatible with
Modal Servers, not [Modal Web Functions](https://modal.com/docs/guide/webhooks).
```python
async def probe(url, messages=None, timeout=5 * MINUTES):
if messages is None:
messages = [{"role": "user", "content": "Tell me a joke."}]
client_id = str(0) # set this to some string per multi-turn interaction
# often a UUID per "conversation"
headers = {"Modal-Session-ID": client_id}
deadline = time.time() + timeout
async with aiohttp.ClientSession(base_url=url, headers=headers) as session:
while time.time() < deadline:
try:
await _send_request_streaming(session, messages)
return
except asyncio.TimeoutError:
await asyncio.sleep(1)
except aiohttp.client_exceptions.ClientResponseError as e:
if e.status == 503:
await asyncio.sleep(1)
continue
raise e
raise TimeoutError(f"No response from server within {timeout} seconds")
async def _send_request_streaming(
session: aiohttp.ClientSession, messages: list, timeout: int | None = None
) -> None:
payload = {"model": MODEL_NAME, "messages": messages, "stream": True}
headers = {"Accept": "text/event-stream"}
async with session.post(
"/v1/chat/completions", json=payload, headers=headers, timeout=timeout
) as resp:
resp.raise_for_status()
full_text = ""
async for raw in resp.content:
line = raw.decode("utf-8", errors="ignore").strip()
if not line:
continue
# Server-Sent Events format: "data: ...."
if not line.startswith("data:"):
continue
data = line[len("data:") :].strip()
if data == "[DONE]":
break
try:
evt = json.loads(data)
except json.JSONDecodeError:
# ignore any non-JSON keepalive
continue
delta = (evt.get("choices") or [{}])[0].get("delta") or {}
chunk = delta.get("content")
if chunk:
print(chunk, end="", flush="\n" in chunk or "." in chunk)
full_text += chunk
print() # newline after stream completes
print(full_text)
if __name__ == "__main__":
# after deployment, we can use the class from anywhere
vllm_server = Server.from_name(APP_NAME, "VLLM")
async def main():
url = await vllm_server.get_url.aio()
messages = [{"role": "user", "content": "Tell me a joke."}]
await probe(url, messages, timeout=10 * MINUTES)
print("calling inference server")
asyncio.run(main())
```
### Vllm Throughput
# Run LLM inference at maximum throughput
This example demonstrates some techniques for running LLM inference
at the highest possible throughput on Modal.
For more on other aspects of maximizing the performance of LLM inference, see
[our guide](https://modal.com/docs/guide/high-performance-llm-inference).
For a simpler introduction to LLM serving, see
[this example](https://modal.com/docs/examples/llm_inference).
As our sample application, we use an LLM to summarize thousands of filings with
the U.S. federal government's Securities and Exchange Commission (SEC),
made available to the public for free in daily data dumps
via the SEC's Electronic Data Gathering, Analysis, and Retrieval System
([EDGAR](https://www.sec.gov/submit-filings/about-edgar)).
We like to check out the [Form 4s](https://www.sec.gov/files/form4data.pdf),
which detail (legal) insider trading.
Using the Qwen 3 8B parameter LLM on this task,
which has inputs that average a few thousand tokens
and outputs that average a few hundred tokens,
we observe processing speeds of ~30,000 input tok/s
and ~2,000 output tok/s per H100 GPU,
as in the sample Modal Dashboard screenshot below.
Note the [100% GPU utilization](https://modal.com/blog/gpu-utilization-guide),
indicating the absence of [host overhead](https://modal.com/blog/host-overhead-inference-efficiency),
and the high [GPU power utilization](https://modal.com/docs/guide/gpu-metrics),
further indicating we are close to the hardware's physical limits.
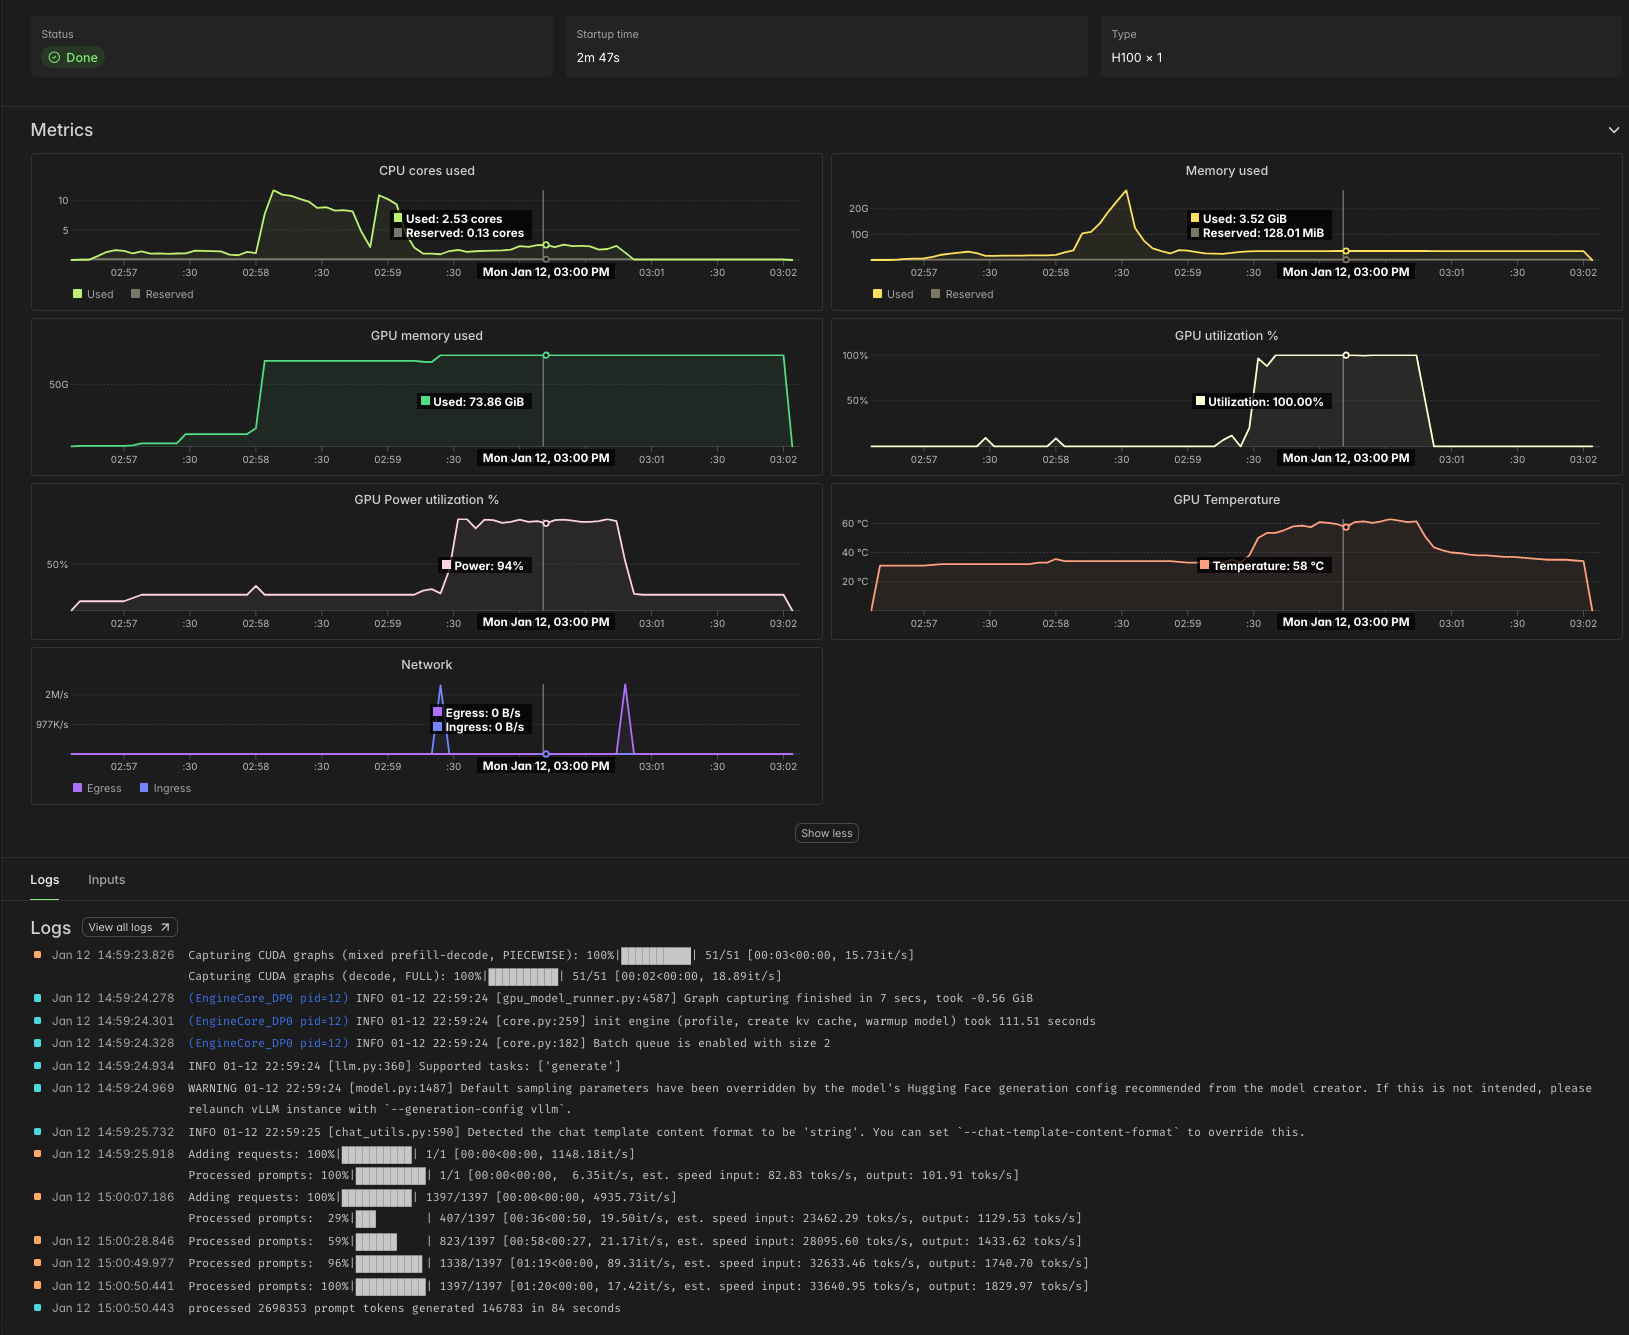
At Modal's [current rates](https://modal.com/pricing) as of early 2026,
that comes out to roughly 4¢ per million tokens.
[According to Artificial Analysis](https://artificialanalysis.ai/models/qwen3-8b-instruct),
API providers charge roughly five times as much for the same workload.
## Organizing a batch job on Modal
We start by defining a Modal [App](https://modal.com/docs/guide/apps),
which collects together the Modal resources our batch job uses.
While we're at it, we import a bunch of the libraries we will need later.
```python
import datetime as dt
import time
from dataclasses import dataclass
from datetime import datetime
from pathlib import Path
from zoneinfo import ZoneInfo
import modal
MINUTES = 60 # seconds
app = modal.App("example-vllm-throughput")
```
Many batch jobs work nicely as scripts -- code that is run
from a shell, ad hoc, rather than deployed.
For that, we define a `local_entrypoint` with code that runs
locally, when we pass our script to `modal run`,
and triggers/orchestrates remote execution.
We demonstrate two techniques for collecting the results of a batch job,
toggled by passing the `--wait-for-results`/`--no-wait-for-results`
flag via the command line.
When we `--wait-for-results`, we pass the `modal.FunctionCall` IDs
that make up our batch job to `FunctionCall.gather`, which
returns once our job is done. Here, we just print the results,
but in a more realistic setting you might save them to disk.
Instead of waiting for results, we can retrieve them asynchronously
based on the `FunctionCall` ID -- a simple string.
Results are stored in Modal for one week.
In the `local_entrypoint` below, these IDs are printed,
but you might store them in a file on disk, add them to your database,
or put them in a Modal
[Queue](https://modal.com/docs/guide/queues)
or [Dict](https://modal.com/docs/guide/dicts)
for later retrieval.
```python
@app.local_entrypoint()
def main(lookback: int = 5, wait_for_results: bool = True):
jobs = orchestrate.remote(lookback=lookback) # trigger remote job orchestration
if wait_for_results:
print("Collecting results locally")
batches = modal.FunctionCall.gather(*jobs)
for batch in batches:
print(*(result.summary for result in batch if result.form == "4"), sep="\n")
print("\n")
print("Done")
else:
print("Collect results asynchronously with modal.FunctionCall.from_id")
print("FunctionCall IDs:", *[job.object_id for job in jobs], sep="\n\t")
```
The meat of the work is done in our `orchestrate` function.
It manages the overall pipeline of execution,
starting with `extract`ing data from the raw data source,
followed by `transform`ing it into a cleaner format
and then `process`ing it with the LLM.
For both extraction and transformation, we use
[`.map`](https://modal.com/docs/guide/scale),
which fans out inputs over containers in parallel.
Each invocation handles at most 1,500 rows,
which leads to runtimes of about five minutes per call
By parallelizing the calls, we finish processing everything in about five minutes.
"Rechunking" our data from a list of filings by day
into a list of filings of fixed size requires a little
helper function:
```python
def rechunk(lists, size: int = 1_500):
from itertools import chain, islice
it = iter(chain.from_iterable(lists))
while chunk := list(islice(it, size)):
yield chunk
```
For the LLM call, we use
[`.spawn`](https://modal.com/docs/guide/job-queue),
which triggers asynchronous execution of the LLM, immediately
returning the `FunctionCall` that can later be used to `.get` the result
(or `.gather` several results).
We run it as a `.remote` Modal Function call
so that it can keep running even after our local client disconnects
(so long as we use `modal run --detach`).
In that case, we dump the `FunctionCall` IDs into the logs,
but you might also write them to an external store for later retrieval.
The `app.function` decorator below is all we need to set turn this Python function
into a remote Modal Function!
```python
@app.function(timeout=30 * MINUTES)
def orchestrate(lookback: int) -> list[modal.FunctionCall]:
llm = Vllm()
today = datetime.now(tz=ZoneInfo("America/New_York")).date() # Eastern Time
print(f"Loading SEC filing data for the last {lookback} days")
folders = list(extract.map(today - dt.timedelta(days=ii) for ii in range(lookback)))
folders = list(
filter( # drop days with no data (weekends, holidays)
lambda f: f is not None, folders
)
)
print("Transforming raw SEC filings for these dates:", *folders)
filing_batches = list(transform.map(folders))
n_filings = sum(map(len, filing_batches))
submission_batches_gen = rechunk(filing_batches)
print(f"Submitting {n_filings} SEC filings to LLM for summarization")
jobs = list(llm.process.spawn(batch) for batch in submission_batches_gen)
if jobs:
print("FunctionCall IDs:", *[job.object_id for job in jobs], sep="\n\t")
return jobs
```
Before going any further, we should agree on the format that our
`transform` and `llm.process` functions will use to communicate
individual elements.
We'll use a lightweight Python `dataclass` to represent
each SEC `Filing`.
For our task, we're going to take the `text` of a filing and produce
a `summary`. So the `text` is mandatory and the `summary` starts out empty (`None`),
to be filled in by the LLM.
We'll also keep a bit of metadata that should be included.
But we're not sure all of these fields will exist (API data is messy!),
so we reserve the right to set them to `None`.
```python
@dataclass
class Filing:
accession_number: str | None
form: str | None
cik: str | None
text: str
summary: str | None = None
```
With the basic orchestration set up,
let's implement each component in turn.
## Serving tokens at maximum throughput
First, the LLM service.
### Configuring vLLM for maximum throughput
We choose the [vLLM](https://vllm.ai)
inference engine. You might alternatively use [SGLang](https://docs.sglang.io).
In our experience, new models and other features
are implemented first in vLLM, and vLLM has a small edge in throughput
over SGLang, but either can work well.
```python
vllm_image = (
modal.Image.from_registry("nvidia/cuda:12.9.0-devel-ubuntu22.04", add_python="3.13")
.entrypoint([])
.uv_pip_install("vllm==0.13.0", "huggingface-hub==0.36.0")
.env({"HF_XET_HIGH_PERFORMANCE": "1"}) # faster model transfers
)
```
vLLM will automatically download the model for us and produce some compilation artifacts,
all of which are saved to disk.
Modal Functions are serverless and disks are ephemeral,
so we attach a [Modal Volume](https://modal.com/docs/guide/volumes)
to the locations where vLLM saves these files to ensure that they persist.
```python
hf_cache_vol = modal.Volume.from_name("huggingface-cache", create_if_missing=True)
vllm_cache_vol = modal.Volume.from_name("vllm-cache", create_if_missing=True)
```
Like a database or web server, an LLM inference engine
typically has a few knobs to twiddle to adjust performance
on different workloads.
First and foremost, you need to pick the hardware it will run on.
We'll be running a smaller model in 8bit floating point format.
Hopper and later GPUs have native support for this format.
To maximize throughput, we want to ensure our inference is
[compute-bound](https://modal.com/gpu-glossary/perf/compute-bound):
the bottleneck is not loading weights/KV cache from memory,
it's performing computations on those values.
Roughly speaking, we want to be able to put together a batch
whose size is within an order of magnitude of the
[ridge point arithmetic intensity](https://modal.com/gpu-glossary/perf/roofline-model)
of the GPU for our floating point format, which is
[~600 for an H100 SXM Tensor Code on FP8 data](https://modal.com/gpu-glossary/perf/arithmetic-intensity).
A single H100 GPU has enough
[GPU RAM](https://modal.com/gpu-glossary/device-hardware/gpu-ram)
for pretty large batches of this data for this model,
so we stick with one of those -- and just one!
Deploying onto multiple GPUs would increase throughput _per replica_,
but not throughput _per GPU_ and so not throughput _per dollar_.
```python
GPU = "h100"
```
The dictionary of arguments below cover the knobs we found it
important to tune in this case. Specifically, we
set a maximum sequence length, based on the data,
to give the engine more hints about how to pack batches.
We select [FlashInfer](https://github.com/flashinfer-ai/flashinfer)
as the provider of the attention kernels, which vLLM recommends
for higher throughput in offline serving. Finally, we
turn on the asynchronous batch scheduler, which gives a small boost
to throughput.
```python
vllm_throughput_kwargs = {
"max_model_len": 4096 * 4, # based on data
"attention_backend": "flashinfer", # best for throughput
"async_scheduling": True, # usually faster, but not all features supported
}
```
For details on these and other arguments, we recommend checking out the [vLLM docs](https://vllm.ai),
which include lots of recipes and recommendations for different workloads and models.
### Deploying vLLM on Modal
For offline, throughput-oriented serving,
we can use the `LLM` interface of the vLLM SDK.
This interface processes batches of inputs synchronously,
unlike the `AsyncLLM` or HTTP serving interfaces.
Dumping a large batch all at once exposes
the maximum amount of parallelism to the engine
and adds the least request management overhead,
so we can expect it to maximize throughput.
Critically, though, this means we don't get any results
until all of them are finished -- a key engineering degree of freedom
for throughput-oriented offline/batch jobs!
We use a Modal [Cls](https://modal.com/docs/guide/lifecycle-functions)
to control the spinup and shutdown logic for the `LLM` engine.
Specifically, we create it (and warm it up with a test request)
in a method decorated with `modal.enter`
and we shut it down in a method decorated with `modal.exit`.
The code in these methods will run only once per replica,
when it is created and destroyed, respectively.
In between, we run a batch of `Filings` through the engine,
adding the model's output text to the `summary` field.
```python
@app.cls(
image=vllm_image,
gpu=GPU,
timeout=10 * MINUTES,
volumes={
"/root/.cache/huggingface": hf_cache_vol,
"/root/.cache/vllm": vllm_cache_vol,
},
)
class Vllm:
@modal.enter()
def start(self):
import vllm
self.llm = vllm.LLM(model="Qwen/Qwen3-8B-FP8", **vllm_throughput_kwargs)
self.sampling_params = self.llm.get_default_sampling_params()
self.sampling_params.max_tokens = 1000
self.llm.chat([{"role": "user", "content": "Is this thing on?"}])
@modal.method()
def process(self, filings: list[Filing]) -> list[Filing]:
messages = [
[
{
"role": "user",
"content": f"/no_think Summarize this SEC filing in a single, short paragraph.\n\n{filing.text}",
}
]
for filing in filings
]
start = time.time()
responses = self.llm.chat(messages, sampling_params=self.sampling_params)
duration_s = time.time() - start
in_token_count = sum(len(response.prompt_token_ids) for response in responses)
out_token_count = sum(
len(response.outputs[0].token_ids) for response in responses
)
print(f"processed {in_token_count} prompt tokens in {int(duration_s)} seconds")
print(f"generated {out_token_count} output tokens in {int(duration_s)} seconds")
for response, filing in zip(responses, filings):
filing.summary = response.outputs[0].text
return filings
@modal.exit()
def stop(self):
del self.llm
```
And that's it for the LLM portion of the pipeline!
The remainder of this document is code and explanation
for the data loading and processing steps.
The details are mostly specific to this dataset,
but there are a few general Modal tips and tricks
for batch processing along the way.
## Transforming SEC filings for batch processing
We can avoid having to deal directly with the low-level
details of the SEC's data format by using the
[`edgartools` library](https://pypi.org/project/edgartools/).
And we can avoid worrying about compatibility with the other libraries
in our project by putting it in a separate container Image.
```python
data_proc_image = modal.Image.debian_slim(python_version="3.13").uv_pip_install(
# pin transitive deps to avoid surprises like this one:
# https://www.edgartools.io/pandas-3-0-and-edgartools/
"edgartools==5.8.3",
"httpx==0.28.1",
"httpxthrottlecache==0.3.0",
"pandas<3",
"pyrate-limiter==3.9.0",
)
```
Instead of hitting the SEC's EDGAR Feed API every time we want to run a job,
we'll cache the results for each day in a Modal Volume.
We use Modal's [v2 Volumes](https://modal.com/docs/guide/volumes#volumes-v2-overview),
which have no limit on the number of total stored files.
```python
sec_edgar_feed = modal.Volume.from_name(
"example-sec-edgar-daily", create_if_missing=True, version=2
)
data_root = Path("/data")
```
Note that v2 Volumes are still in beta, so data loss may be possible.
This is acceptable for most batch jobs, which extract data from an external
source of truth.
The `transform` function below operates on a folder containing data
with one filing per file
(in [NetCDF](https://en.wikipedia.org/wiki/NetCDF)/`.nc` format).
Loading thousands of filings with `edgartools` takes tens of seconds.
We can speed it up by running in parallel on Modal instead!
But running each file in a separate container would add too much overhead.
So we group up the files into `chunks` of ~100 and pass those to
the Modal Function that actually does the work.
Again, we use `map` to transparently scale out across containers.
```python
@app.function(
volumes={data_root: sec_edgar_feed}, timeout=10 * MINUTES, scaledown_window=5
)
def transform(folder: str | None) -> list[Filing]:
if folder is None:
return []
folder_path = data_root / folder
paths = [p for p in folder_path.iterdir() if p.is_file() and p.suffix == ".nc"]
print(f"Processing {len(paths)} filings")
chunks: list[list[Path]] = [paths[i : i + 100] for i in range(0, len(paths), 100)]
batches = list(_transform_filing_batch.map(chunks))
filings = [f for batch in batches for f in batch if f is not None]
print(f"Found documents for {len(filings)} filings out of {len(paths)}")
return filings
@app.function(
volumes={data_root: sec_edgar_feed},
scaledown_window=5,
image=data_proc_image,
timeout=10 * MINUTES,
)
def _transform_filing_batch(raw_filing_paths: list[Path]) -> list[Filing | None]:
from edgar.sgml import FilingSGML
out = []
for raw_filing_path in raw_filing_paths:
sgml = FilingSGML.from_source(raw_filing_path)
text = extract_text(sgml)
if text is None:
out.append(None)
continue
out.append(
Filing(
accession_number=sgml.accession_number,
form=sgml.form,
cik=sgml.cik,
text=text,
)
)
return out
```
Because these containers are cheap to scale up and are only needed for
a brief burst during the pipeline, we set the `scaledown_window` for the containers
to a much lower value than the default of five minutes -- here, five seconds.
## Loading filings from the SEC EDGAR Feed
We complete our reverse tour of the pipeline by loading the data from the original source:
the [SEC EDGAR Feed](https://www.sec.gov/Archives/edgar/Feed/),
an archive of daily filings going back over three decades.
We use the `requests` library to pull data from the API.
We'll be downloading large (maybe megabytes to few gigabytes)
files with low concurrency, so there's little benefit to running an asynchronous web client.
```python
scraper_image = modal.Image.debian_slim(python_version="3.13").uv_pip_install(
"requests==2.32.5"
)
```
Our concurrency is limited by the policies of the SEC EDGAR API.
The limit is 10 RPS, which we aim to stay under by setting the `max` number of `containers`
running our extraction to 10.
We add [retries](https://modal.com/docs/guide/retries)
via our Modal decorator as well, so that we can tolerate temporary outages or rate limits.
Note that we also attach the same Volume used in the `transform` Functions above
and we explicitly [`.commit`](https://modal.com/docs/reference/modal.Volume#commit) our writes
so that they will be visible to future containers running `transform`.
```python
@app.function(
max_containers=10,
volumes={data_root: sec_edgar_feed},
retries=5,
image=scraper_image,
scaledown_window=5,
)
def extract(day: dt.date) -> str | None:
target_folder = str(day)
day_dir = data_root / target_folder
daily_name = f"{day:%Y%m%d}.nc.tar.gz"
tar_path = day_dir / daily_name
# If the folder doesn't exist yet, try downloading the day's tarball
if not tar_path.exists():
print(f"Looking for data for {day} in SEC EDGAR Feed")
ok = _download_from_sec_edgar(day, day_dir)
if not ok:
return None
if not any(p.suffix == ".nc" for p in day_dir.iterdir()):
print(f"Loading data for {day} from {tar_path}")
_extract_tarfile(tar_path, day_dir)
sec_edgar_feed.commit()
print(f"Data for {day} loaded")
return target_folder
```
## Addenda
The remainder of this code consists of utility functions and boiler plate used in the
main code above.
### Utilities for transforming SEC Filings
The code in this section is used to transform, normalize, and otherwise munge
the raw filings downloaded from the SEC.
For LLM serving, the most important piece here is the function to truncate
documents. A maximum document length can be used to set a loose bound
on the sequence length in the LLM engine configuration.
```python
def normalize_text(text: str) -> str:
text = text.replace("\r\n", "\n").replace("\r", "\n")
text = clean_xml(text)
return text
def clean_xml(xml: str) -> str:
import re
_XMLNS_ATTR_RE = re.compile(r'\s+xmlns(:\w+)?="[^"]*"', re.I)
_XML_DECL_RE = re.compile(r"^\s*<\?xml[^>]*\?>\s*", re.I)
_EMPTY_TAG_RE = re.compile(r"<(\w+)([^>]*)>\s*", re.S)
_BETWEEN_TAG_WS_RE = re.compile(r">\s+<")
xml = xml.replace("\r\n", "\n").replace("\r", "\n").strip()
# drop xml declaration, remove xmlns attributes
xml = _XML_DECL_RE.sub("", xml)
xml = _XMLNS_ATTR_RE.sub("", xml)
# replace whitespace between tags with a single newline
xml = _BETWEEN_TAG_WS_RE.sub("><", xml).replace("><", ">\n<")
return xml.strip()
def truncate_head_tail(text: str, head: int = 13_000, tail: int = 2_000) -> str:
if len(text) <= head + tail:
return text
return text[:head].rstrip() + "\n\n[...TRUNCATED...]\n\n" + text[-tail:].lstrip()
def extract_text(sgml) -> str | None:
doc = sgml.xml()
return truncate_head_tail(normalize_text(doc)) if doc else None
```
### Utilities for loading filings from the SEC EDGAR Feed
The code in this section is used to load raw data from the Feed
section of SEC EDGAR.
Daily dumps are stored in [tar](https://www.math.utah.edu/docs/info/tar_4.html)
archives, which the code below extracts.
Archives for particular days are located by searching the SEC EDGAR Feed indices
for the appropriate URL.
For full compliance with SEC EDGAR etiquette,
we recommend updating the `SEC_USER_AGENT` environment variable
below with your name and email.
```python
def _download_from_sec_edgar(day: dt.date, day_dir: Path) -> bool:
import os
import requests
SEC_UA = os.environ.get("SEC_USER_AGENT", "YourName your.email@example.com")
session = requests.Session()
session.headers.update({"User-Agent": SEC_UA, "Accept-Encoding": "gzip, deflate"})
base = "https://www.sec.gov/Archives/edgar/Feed"
def quarter(d: dt.date) -> str:
return f"QTR{(d.month - 1) // 3 + 1}"
qtr = quarter(day)
daily_name = f"{day:%Y%m%d}.nc.tar.gz"
qtr_index = f"{base}/{day.year}/{qtr}/index.json"
if not check_index(session, qtr_index, daily_name):
print(f"no data for {day} in SEC EDGAR Feed")
return False
day_dir.mkdir(parents=True, exist_ok=True)
tar_path = day_dir / daily_name
if not tar_path.exists() or tar_path.stat().st_size == 0:
url = f"{base}/{day.year}/{qtr}/{daily_name}"
print(f"Downloading from {url}")
print("This can take several minutes")
_download_tar(session, url, tar_path)
return True
def _extract_tarfile(from_tar_path, to_dir):
import tarfile
with tarfile.open(from_tar_path, "r:gz") as tf:
for member in tf:
if not (member.isfile() and member.name.endswith(".nc")):
continue
dest = to_dir / Path(member.name).name
if dest.exists() and dest.stat().st_size > 0:
continue
f = tf.extractfile(member)
if f is None:
continue
dest.write_bytes(f.read())
def check_index(session, index_url, name) -> bool:
r = session.get(index_url, timeout=30)
if r.status_code == 404:
return False
r.raise_for_status()
for it in r.json().get("directory", {}).get("item", []):
if it.get("type") == "file" and it.get("name") == name:
return True
return False
def _download_tar(session, url, tar_path):
resp = session.get(url, timeout=500)
resp.raise_for_status()
tmp = tar_path.with_suffix(tar_path.suffix + ".part")
tmp.write_bytes(resp.content)
tmp.replace(tar_path)
```
### Web Job Queue Wrapper
# Create a web wrapper for job queue, submission, polling, & results
This simple tutorial shows you how to create an API endpoint that you can use
to poll the status of your request.
Let's first import `modal` and define an [`App`](https://modal.com/docs/reference/modal.App).
```python
import time
import modal
app = modal.App("example-web-job-queue-wrapper")
```
Next, we'll create a dummy backend service, in reality you may plug an a LLM or Diffusion model here.
We'll add artificial delays to simulate a cold boot and a long-running tasks.
```python
@app.cls()
class BackendService:
@modal.enter()
def enter(self):
print("begin cold booting")
time.sleep(10)
print("end cold booting")
@modal.method()
def run(self, input_val: str):
print(f"begin run with {input_val}")
time.sleep(5)
print(f"end run with {input_val}")
return input_val[::-1] # reverse the string
```
Then, we can define a Web Function that will submit a request to the backend service
as well as other API routes for polling or retrieving results.
To submit jobs asynchronously, we can use ['spawn'](https://modal.com/docs/reference/modal.Function#spawn),
which return a [`FunctionCall`](https://modal.com/docs/reference/modal.FunctionCall) object that represents
the submitted job.
Then we can poll for the job's status by calling
[`.get(timeout=0)`](https://modal.com/docs/reference/modal.FunctionCall#get) on the
`FunctionCall`, which returns immediately with the result if it's ready and otherwise
raises a `TimeoutError` while the job is still running.
```python
@app.function(
image=modal.Image.debian_slim().uv_pip_install("fastapi[standard]==0.116.0")
)
@modal.asgi_app()
@modal.concurrent(max_inputs=100)
def gateway():
from fastapi import FastAPI, Request
from modal.exception import OutputExpiredError
web_app = FastAPI()
service = BackendService()
@web_app.post("/run")
async def submit(request: Request):
"""Asynchronously submit a request to the backend service."""
input_val = (await request.json())["input_val"]
fc = service.run.spawn(input_val)
return {"request_id": fc.object_id}
@web_app.get("/requests/{request_id}/status")
async def status(request_id: str):
"""Get the status of the request by polling for a result without blocking."""
fc = modal.FunctionCall.from_id(request_id)
try:
await fc.get.aio(timeout=0)
return {"status": "SUCCESS"}
except OutputExpiredError:
return {"status": "EXPIRED"}
except TimeoutError:
return {"status": "PENDING"}
except Exception:
return {"status": "FAILURE"}
@web_app.get("/requests/{request_id}")
async def result(request_id: str):
fc = modal.FunctionCall.from_id(request_id)
return {"response": await fc.get.aio()}
return web_app
```
To test this you can do:
```bash
modal serve web_job_queue_wrapper.py
```
Or run the test locally:
```bash
modal run web_job_queue_wrapper.py::test_polling
```
```python
@app.local_entrypoint()
def test_polling():
"""Test the polling job queue by submitting a request and polling for results."""
import json
import urllib.parse
import urllib.request
# Get the deployed URL
url = gateway.get_web_url()
print(f"URL: {url}")
# Submit request
print("submitting request")
data = json.dumps({"input_val": "Hello, world!"}).encode("utf-8")
headers = {"Content-Type": "application/json"}
req = urllib.request.Request(
f"{url}/run", data=data, headers=headers, method="POST"
)
try:
with urllib.request.urlopen(req) as response:
result = json.loads(response.read().decode("utf-8"))
request_id = result["request_id"]
print(f"got request id: {request_id}, polling status")
except Exception as e:
print(f"Failed to submit request: {e}")
return
# Poll for status
while True:
try:
with urllib.request.urlopen(
f"{url}/requests/{request_id}/status"
) as response:
data = json.loads(response.read().decode("utf-8"))
if data["status"] == "SUCCESS":
print("request completed successfully")
break
else:
print(f"request result is {data['status']}")
except Exception as e:
print(f"poll failed: {e}")
time.sleep(1)
# Retrieve result
print("retrieving result")
try:
with urllib.request.urlopen(f"{url}/requests/{request_id}") as response:
result = json.loads(response.read().decode("utf-8"))
print(f"result is {result}")
print("done")
except Exception as e:
print(f"Failed to retrieve result: {e}")
```
### Webrtc Yolo
# Real-time object detection with WebRTC and YOLO
This example demonstrates how to architect a serverless real-time streaming application with Modal and WebRTC.
The sample application detects objects in webcam video with YOLO.
See the clip below from a live demo of this example in a course by [Kwindla Kramer](https://machine-theory.com/), WebRTC OG and co-founder of [Daily](https://www.daily.co/).
You can also try our deployment [here](https://modal-labs-examples--example-webrtc-yolo-webcamobjdet-web.modal.run).
## What is WebRTC?
WebRTC (Web Real-Time Communication) is an [IETF Internet protocol](https://www.rfc-editor.org/rfc/rfc8825) and a [W3C API specification](https://www.w3.org/TR/webrtc/) for real-time media streaming between peers
over internets or the World Wide Web.
What makes it so effective and different from other bidirectional web-based communication protocols (e.g. WebSockets) is that it's purpose-built for media streaming in real time.
It's primarily designed for browser applications using the JavaScript API, but [APIs exist for other languages](https://www.webrtc-developers.com/did-i-choose-the-right-webrtc-stack/).
We'll build our app using Pipecat's [`SmallWebRTCTransport`](https://docs.pipecat.ai/api-reference/server/services/transport/small-webrtc).
### What makes up a WebRTC application?
A simple WebRTC app generally consists of three players:
1. a peer that initiates the connection,
2. a peer that responds to the connection, and
3. a server that passes some initial messages between the two peers.
First, one peer initiates the connection by offering up a description of itself - its media sources, codec capabilities, Internet Protocol (IP) addressing info, etc - which is relayed to another peer through the server.
The other peer then either accepts the offer by providing a compatible description of its own capabilities or rejects it if no compatible configuration is possible.
This process is called "signaling" or sometimes the "negotiation" in the WebRTC world, and the server that mediates it is usually called the "signaling server".
Once the peers have agreed on a configuration there's a brief pause to establish communication... and then you're live.

A basic WebRTC app architecture
Obviously there’s more going on under the hood.
If you want to get into the details, we recommend checking out the [RFCs](https://www.rfc-editor.org/rfc/rfc8825) or a [more-thorough explainer](https://webrtcforthecurious.com/).
In this document, we'll focus on how to architect a WebRTC application where one or more peer is running on Modal's serverless cloud infrastructure.
If you just want to quickly get started with WebRTC for a small internal service or a hack project, check out
[our FastRTC example](https://modal.com/docs/examples/fastrtc_flip_webcam) instead.
## How do I run a WebRTC app on Modal?
Modal turns Python code into scalable cloud services.
When you call a Modal Function, you get one replica.
If you call it 999 more times before it returns, you have 1000 replicas.
When your Functions all return, you spin down to 0 replicas.
The core constraints of the Modal programming model that make this possible are that Function Calls are stateless and self-contained.
In other words, correctly-written Modal Functions don't store information in memory between runs (though they might cache data to the ephemeral local disk for efficiency) and they don't create processes or tasks which must continue to run after the Function Call returns in order for the application to be correct.
WebRTC apps, on the other hand, require passing messages back and forth in a multi-step protocol, and APIs spawn several "agents" (no, AI is not involved, just processes) which do work behind the scenes - including managing the peer-to-peer (P2P) connection itself.
This means that streaming may have only just begun when the application logic in our Function has finished.

Modal's stateless programming model (left) and WebRTC's stateful signaling (right)
To ensure we properly leverage Modal's autoscaling and concurrency features, we need to align the signaling and streaming lifetimes with Modal Function Call lifetimes.
The architecture we recommend for this appears below.
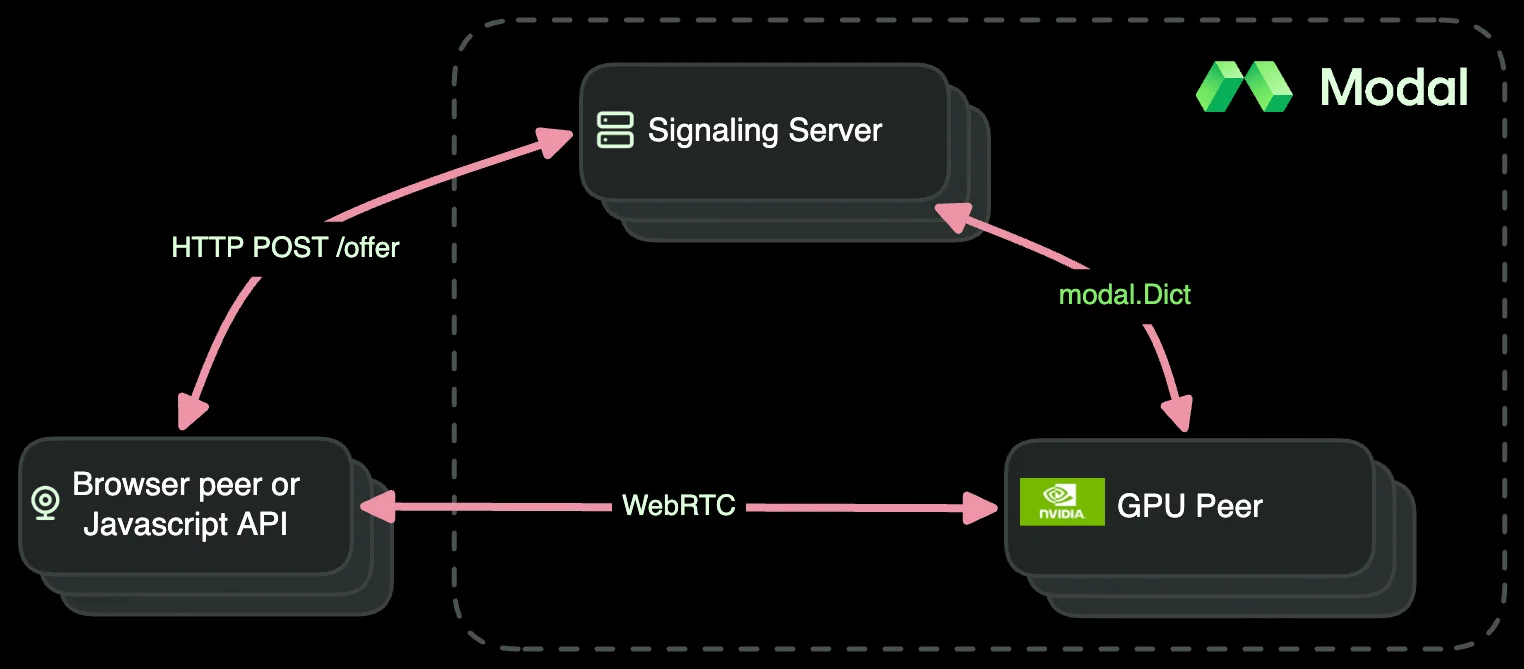
A clean architecture for WebRTC on Modal
It handles passing messages between the client peer and the signaling server using
HTTP (`POST /offer`) within a single Function Call.
(Modal's Web layer maps HTTP onto Function Calls, details [here](https://modal.com/blog/serverless-http)).
We [`.spawn`](https://modal.com/docs/reference/modal.Function#spawn) the cloud peer inside the `/offer` endpoint
and pass the SDP offer through a [`modal.Dict`](https://modal.com/docs/reference/modal.Dict).
The signaling request returns as soon as the GPU peer publishes an SDP _answer_.
And when the P2P connection has been _closed_, we'll return from the call to the cloud peer.
That way, our WebRTC application benefits from all the autoscaling and concurrency logic built into Modal
that enables users to deliver efficient cloud applications.
Since Pipecat's `SmallWebRTCTransport` handles the aiortc peer connection, ICE, and media tracks,
the application code only has to implement the logic to receive video frames, run YOLO, and send annotated frames back.
Decorate the GPU peer with [`app.cls`](https://modal.com/docs/reference/modal.App#cls) and Modal [lifetime hooks](https://modal.com/docs/guide/lifecycle-functions), and you're ready to deploy on Modal.
## Detecting objects in webcam footage
For our WebRTC app, we'll take a client's video stream, run a [YOLO](https://docs.ultralytics.com/tasks/detect/) object detector on it with an A100 GPU on Modal, and then stream the annotated video back to the client.
With this setup, we can achieve inference times between 2-4 milliseconds per frame and RTTs below video frame rates (usually around 30 milliseconds per frame).
Let's get started!
### Setup
We'll start with a simple container [Image](https://modal.com/docs/guide/images) and then
- set it up to properly use TensorRT and the ONNX Runtime, which keep latency minimal,
- install the necessary libs for processing video, `opencv` and `ffmpeg`, and
- install Pipecat's WebRTC extra plus the necessary Python packages.
```python
import asyncio
import os
import time
from pathlib import Path
import modal
py_version = "3.12"
tensorrt_ld_path = f"/usr/local/lib/python{py_version}/site-packages/tensorrt_libs"
VIDEO_WIDTH = 640
VIDEO_HEIGHT = 480
```
First-run YOLO download + ONNX/TRT graph build can take a few minutes on an
empty volume; cached cold starts are ~15-20s. Bound the /offer wait either way.
```python
ANSWER_TIMEOUT_SECS = 300.0
MINUTES = 60
video_processing_image = (
modal.Image.debian_slim(python_version=py_version) # matching ld path
# update locale as required by onnx
.apt_install("locales")
.run_commands(
"sed -i '/^#\\s*en_US.UTF-8 UTF-8/ s/^#//' /etc/locale.gen", # use sed to uncomment
"locale-gen en_US.UTF-8", # set locale
"update-locale LANG=en_US.UTF-8",
)
.env({"LD_LIBRARY_PATH": tensorrt_ld_path, "LANG": "en_US.UTF-8"})
# install system dependencies
.apt_install("python3-opencv", "ffmpeg")
.run_commands("printf 'onnxruntime\\n' > /tmp/onnxruntime-excludes.txt")
# install Python dependencies
.uv_pip_install(
"pipecat-ai[webrtc]==1.5.0",
"fastapi==0.115.12",
"huggingface-hub[hf_xet]==0.30.2",
"onnxruntime-gpu==1.21.0",
"opencv-python==4.11.0.86",
"tensorrt==10.9.0.34",
"torch==2.7.0",
extra_options="--excludes /tmp/onnxruntime-excludes.txt",
)
)
```
### Cache weights and compute graphs on a Volume
We also need to create a Modal [Volume](https://modal.com/docs/guide/volumes) to store things we need across replicas --
primarily the model weights and ONNX inference graph, but also a few other artifacts like a video file where
we'll write out the processed video stream for testing. For more on storing model weights on Modal, see
[this guide](https://modal.com/docs/guide/model-weights).
The very first time we run the app, downloading the model and building the ONNX inference graph will take a few minutes.
After that, we can load the cached weights and graph from the Volume, which reduces the startup time to about 15 seconds per container.
```python
CACHE_VOLUME = modal.Volume.from_name("webrtc-yolo-cache", create_if_missing=True)
CACHE_PATH = Path("/cache")
cache = {CACHE_PATH: CACHE_VOLUME}
app = modal.App("example-webrtc-yolo")
```
### Implement YOLO object detection as a Pipecat GPU peer
Our application needs to process an incoming video track with YOLO and return an annotated video track to the source peer.
To implement the GPU peer, we need to:
- Decorate our class with `@app.cls`. We provision it with an A100 GPU.
- Load YOLO in `@modal.enter()` so it happens once per container.
- Implement `run_pipeline`. This is where we wire Pipecat's `SmallWebRTCTransport`
to a `YOLOProcessor` that annotates each frame and returns it to the source peer.
The pipeline is three stages: `transport.input()` → `YOLOProcessor` → `transport.output()`.
We haven't talked about [TURN servers](https://datatracker.ietf.org/doc/html/rfc5766),
but just know that they're necessary if you want to use WebRTC across complex (e.g. carrier-grade) NAT or firewall configurations.
Free services have tight limits because TURN servers are expensive to run (lots of bandwidth and state management required).
[STUN](https://datatracker.ietf.org/doc/html/rfc5389) servers, on the other hand, are essentially just echo servers, and so there are many free services available.
If you don't provide TURN servers you can still serve your app on many networks using any of a number of free STUN servers for NAT traversal.
ICE servers are passed through the signaling `modal.Dict`.
STUN mode needs no credentials and works on many networks.
If STUN isn't enough, TURN mode uses the free
[Open Relay TURN server](https://www.metered.ca/tools/openrelay/) via a small CPU
Function that mounts a Modal [Secret](https://modal.com/docs/guide/secrets) called
`turn-credentials` (create the Secret [here](https://modal.com/secrets) after
signing up [here](https://dashboard.metered.ca/login?tool=turnserver)).
For production or stubborn NATs, consider a managed provider like [Daily](https://www.daily.co/) that operates TURN for you.
We also use the `@modal.concurrent` decorator to allow multiple instances of our peer to run on one GPU.
**Setting the Region**
Much of the latency in Internet applications comes from distance between communicating parties --
the Internet operates within a factor of two of the speed of light, but that's just not that fast.
To minimize latency under this constraint, the physical distance of the P2P connection
between the webcam-using peer and the GPU container needs to be kept as short as possible.
We'll use the `region` parameter of the `cls` decorator to set the region of the GPU container.
You should set this to the closest region to your users.
See the [region selection](https://modal.com/docs/guide/region-selection) guide for more information.
```python
@app.cls(
image=video_processing_image,
gpu="A100-40GB",
volumes=cache,
region="us-east", # set to your region
timeout=30 * MINUTES,
)
@modal.concurrent(
target_inputs=2, # try to stick to just two peers per GPU container
max_inputs=3, # but allow up to three
)
class ObjDet:
@modal.enter()
def load_model(self):
self.yolo_model = get_yolo_model(CACHE_PATH)
@modal.method()
async def run_pipeline(self, d: modal.Dict):
from pipecat.pipeline.pipeline import Pipeline
from pipecat.pipeline.worker import PipelineWorker
from pipecat.transports.base_transport import TransportParams
from pipecat.transports.smallwebrtc.connection import (
IceServer,
SmallWebRTCConnection,
)
from pipecat.transports.smallwebrtc.transport import SmallWebRTCTransport
from pipecat.workers.runner import WorkerRunner
offer = await d.get.aio("offer")
ice_servers = [
IceServer(**ice_server) for ice_server in await d.get.aio("ice_servers")
]
webrtc_connection = SmallWebRTCConnection(ice_servers)
await webrtc_connection.initialize(sdp=offer["sdp"], type=offer["type"])
transport = SmallWebRTCTransport(
webrtc_connection=webrtc_connection,
params=TransportParams(
audio_in_enabled=False,
audio_out_enabled=False,
video_in_enabled=True,
video_out_enabled=True,
video_out_is_live=True,
video_out_width=VIDEO_WIDTH,
video_out_height=VIDEO_HEIGHT,
),
)
pipeline = Pipeline(
[
transport.input(),
get_yolo_processor(self.yolo_model),
transport.output(),
]
)
# Pipecat defaults assume a voice agent (idle cancel on missing speech frames,
# RTVI to the client). This is a video-only pipeline with a plain browser client.
worker = PipelineWorker(
pipeline,
idle_timeout_secs=None,
enable_rtvi=False,
enable_turn_tracking=False,
)
async def end_session(reason: str):
print(f"Video Processor connection {webrtc_connection.pc_id}: {reason}")
await worker.cancel()
@transport.event_handler("on_client_connected")
async def on_client_connected(transport, client):
print(
f"Video Processor connection {webrtc_connection.pc_id}: client connected"
)
await transport.capture_participant_video("camera")
@transport.event_handler("on_client_disconnected")
async def on_client_disconnected(transport, client):
await end_session("client disconnected")
@webrtc_connection.event_handler("failed")
async def on_failed(connection):
await end_session("connection failed")
@webrtc_connection.event_handler("closed")
async def on_closed(connection):
await end_session("connection closed")
answer = webrtc_connection.get_answer()
if answer is None:
raise RuntimeError("Pipecat produced no SDP answer after initialize()")
await d.put.aio("answer", answer)
runner = WorkerRunner(handle_sigint=False)
await runner.add_workers(worker)
await runner.run()
```
### Implement a signaling server
The signaling server is much simpler.
It serves the browser UI and `POST /offer`. On each offer it spawns `ObjDet.run_pipeline`
and waits for the SDP answer on a [`modal.Dict`](https://modal.com/docs/reference/modal.Dict).
The server is the source of ICE config: clients POST `ice_server_type`
(`stun` or `turn`) with the SDP offer; the server builds ICE servers once for
the GPU peer and exposes the same list on `GET /ice-servers` for the browser.
We'll also mount a frontend which uses the WebRTC JavaScript API to stream a peer's webcam from the browser.
The JavaScript and HTML files are alongside this example in the [Github repo](https://github.com/modal-labs/modal-examples/tree/main/07_web/webrtc/frontend).
```python
this_directory = Path(__file__).parent.resolve()
server_image = (
modal.Image.debian_slim(python_version="3.12")
.uv_pip_install("fastapi[standard]==0.115.12")
.add_local_dir(this_directory / "frontend", remote_path="/frontend")
)
@app.cls(image=server_image, timeout=10 * MINUTES)
class WebcamObjDet:
@modal.asgi_app()
def web(self):
from fastapi import FastAPI, HTTPException, Request
from fastapi.responses import HTMLResponse
from fastapi.staticfiles import StaticFiles
web_app = FastAPI()
web_app.mount("/static", StaticFiles(directory="/frontend"))
@web_app.get("/")
async def root():
html = open("/frontend/index.html").read()
return HTMLResponse(content=html)
@web_app.get("/ice-servers")
async def ice_servers(mode: str = "stun"):
try:
return {
"ice_servers": await resolve_ice_servers(use_turn=(mode == "turn"))
}
except Exception as e:
raise HTTPException(status_code=503, detail=str(e)) from e
@web_app.post("/offer")
async def offer(request: Request):
body = await request.json()
sdp = body.get("sdp")
offer_type = body.get("type")
if not sdp or not offer_type:
raise HTTPException(status_code=400, detail="missing sdp or type")
use_turn = body.get("ice_server_type") == "turn"
try:
ice_servers = await resolve_ice_servers(use_turn=use_turn)
except Exception as e:
raise HTTPException(status_code=503, detail=str(e)) from e
async with modal.Dict.ephemeral() as d:
await d.put.aio("ice_servers", ice_servers)
await d.put.aio("offer", {"sdp": sdp, "type": offer_type})
call = await ObjDet().run_pipeline.spawn.aio(d)
deadline = time.monotonic() + ANSWER_TIMEOUT_SECS
try:
while True:
if await request.is_disconnected():
raise HTTPException(
status_code=499, detail="client disconnected"
)
answer = await d.get.aio("answer")
if answer is not None:
return answer
# Fail fast if the GPU peer exited; re-read answer first in case
# it was published in the gap between the get above and call.get.
peer_done = False
peer_error = None
try:
await call.get.aio(timeout=0)
except TimeoutError:
pass
except Exception as e:
peer_done = True
peer_error = e
else:
peer_done = True
if peer_done:
answer = await d.get.aio("answer")
if answer is not None:
return answer
if peer_error is not None:
raise HTTPException(
status_code=502,
detail=f"GPU peer failed before SDP answer: {peer_error}",
) from peer_error
raise HTTPException(
status_code=502,
detail="GPU peer finished without SDP answer",
)
if time.monotonic() >= deadline:
raise HTTPException(
status_code=504,
detail="timed out waiting for SDP answer",
)
await asyncio.sleep(0.1)
except BaseException:
await call.cancel.aio()
raise
return web_app
```
## Addenda
The remainder of this page is not central to running a WebRTC application on Modal,
but is included for completeness.
### ICE helpers
STUN is a public Google server. TURN credentials come from the `turn-credentials` Secret
via a small CPU Function so the signaling Cls itself doesn't need to know the credentials in STUN mode.
```python
def ice_servers_for_mode(use_turn: bool) -> list[dict]:
stun = [{"urls": "stun:stun.l.google.com:19302"}]
if not use_turn:
return stun
username = os.environ.get("TURN_USERNAME")
credential = os.environ.get("TURN_CREDENTIAL")
if not username or not credential:
raise RuntimeError(
"TURN mode needs Modal Secret 'turn-credentials' "
"(TURN_USERNAME, TURN_CREDENTIAL)"
)
creds = {"username": username, "credential": credential}
return [
{"urls": "stun:stun.relay.metered.ca:80"}, # STUN is free, no creds needed
# for TURN, sign up for the free service here: https://www.metered.ca/tools/openrelay/
{"urls": "turn:standard.relay.metered.ca:80"} | creds,
{"urls": "turn:standard.relay.metered.ca:80?transport=tcp"} | creds,
{"urls": "turn:standard.relay.metered.ca:443"} | creds,
{"urls": "turns:standard.relay.metered.ca:443?transport=tcp"} | creds,
]
@app.function(
image=modal.Image.debian_slim(python_version="3.12"),
secrets=[modal.Secret.from_name("turn-credentials")],
)
def lookup_turn_ice_servers() -> list[dict]:
return ice_servers_for_mode(use_turn=True)
async def resolve_ice_servers(*, use_turn: bool) -> list[dict]:
if use_turn:
return await lookup_turn_ice_servers.remote.aio()
return ice_servers_for_mode(use_turn=False)
```
### YOLO helper functions
The two helpers below set up the YOLO model and create our custom Pipecat frame processor.
The first, `get_yolo_model`, sets up the ONNXRuntime and loads the model weights.
We call this in the `@modal.enter()` method of `ObjDet`
so that it only happens once per container.
```python
def get_yolo_model(cache_path):
import onnxruntime
from .yolo import YOLOv10
onnxruntime.preload_dlls()
return YOLOv10(cache_path)
```
The second, `get_yolo_processor`, creates a custom Pipecat `FrameProcessor` that
performs object detection on each video frame.
We call this in `run_pipeline` so it happens once per peer connection.
Annotated frames leave the processor at the incoming frame size; the transport then
emits them at `VIDEO_WIDTH` × `VIDEO_HEIGHT`.
```python
def get_yolo_processor(yolo_model):
import cv2
import numpy as np
from pipecat.frames.frames import InputImageRawFrame, OutputImageRawFrame
from pipecat.processors.frame_processor import FrameProcessor
class YOLOProcessor(FrameProcessor):
conf_threshold = 0.15
def __init__(self, model):
super().__init__()
self.yolo_model = model
# this is the essential method we need to implement
# to create a custom FrameProcessor
async def process_frame(self, frame, direction):
await super().process_frame(frame, direction)
if not isinstance(frame, InputImageRawFrame):
await self.push_frame(frame, direction)
return
width, height = frame.size
image = np.frombuffer(frame.image, dtype=np.uint8).reshape(
(height, width, 3)
)
if frame.format == "RGB":
image = cv2.cvtColor(image, cv2.COLOR_RGB2BGR)
resized = cv2.resize(
image,
(self.yolo_model.input_width, self.yolo_model.input_height),
)
detected = self.yolo_model.detect_objects(resized, self.conf_threshold)
out = cv2.resize(detected, (width, height))
out_rgb = cv2.cvtColor(out, cv2.COLOR_BGR2RGB)
await self.push_frame(
OutputImageRawFrame(
image=out_rgb.tobytes(),
size=(width, height),
format="RGB",
)
)
return YOLOProcessor(yolo_model)
```
### Testing a WebRTC application on Modal
As any seasoned developer of real-time applications on the Web will tell you,
testing and ensuring correctness is quite difficult. We spent nearly as much time
designing and troubleshooting an appropriate testing process for this application as we did writing
the application itself!
You can find the testing code in the GitHub repository [here](https://github.com/modal-labs/modal-examples/tree/main/07_web/webrtc/webrtc_yolo_test.py).
### Webrtc Yolo Test
```python
import asyncio
import os
import time
import modal
from .webrtc_yolo import (
CACHE_PATH,
WebcamObjDet,
app,
cache,
lookup_turn_ice_servers,
)
```
## Testing WebRTC and Modal
First we define a `local_entrypoint` to run and evaluate the test.
Our test will stream an .mp4 file to the cloud peer and record the annotated video to a new file.
The test itself ensures that the new video is no more than five frames shorter than the source file.
The difference is due to dropped frames while the connection is starting up.
```python
@app.local_entrypoint()
def test():
input_frames, output_frames = run_video_processing_test.remote()
# allow a few dropped frames from the connection starting up
assert input_frames - output_frames < 5, (
f"Streaming failed. Frame difference: {input_frames} - {output_frames} = {input_frames - output_frames}"
)
```
Because our test will require Python dependencies outside the standard library,
we'll run the test itself in a container on Modal.
There are some details in here regarding the use of `aiortc`'s `MediaPlayer` and `MediaRecorder` classes that we won't cover here.
Just know that these are `aiortc` specific classes - not a WebRTC thing.
That said, using these classes does require us to manually `start` and `stop` streams.
We wait until the peer is `connected`, then start the recorder. We stop via the
track `on_ended` callback and again explicitly after `pc.close()` so the mp4 is finalized.
```python
test_image = (
modal.Image.debian_slim(python_version="3.12")
.apt_install("python3-opencv", "ffmpeg")
.uv_pip_install(
"aiortc==1.14.0",
"aiohttp==3.11.18",
"opencv-python==4.11.0.86",
)
)
TEST_VIDEO_SOURCE_URL = "https://modal-cdn.com/cliff_jumping.mp4"
TEST_VIDEO_RECORD_FILE = CACHE_PATH / "test_video.mp4"
```
extra time to run streams beyond input video duration
```python
VIDEO_DURATION_BUFFER_SECS = 5.0
```
allow time for container / YOLO cold start
```python
TEST_TIMEOUT = 300
ICE_GATHERING_TIMEOUT_SECS = 10.0
```
ICE/DTLS after setRemoteDescription
```python
CONNECTION_TIMEOUT_SECS = 30.0
@app.function(
image=test_image,
volumes=cache,
timeout=TEST_TIMEOUT,
)
async def run_video_processing_test() -> tuple[float, int]:
import urllib.request
import cv2
from aiohttp import ClientSession
from aiortc import (
RTCConfiguration,
RTCIceServer,
RTCPeerConnection,
RTCSessionDescription,
)
from aiortc.contrib.media import MediaBlackhole, MediaPlayer, MediaRecorder
# cache the source locally so MediaPlayer isn't held open on HTTP across the
# GPU cold-start wait before ICE connects
local_source = CACHE_PATH / "cliff_jumping_src.mp4"
if not local_source.exists():
urllib.request.urlretrieve(TEST_VIDEO_SOURCE_URL, local_source)
# get input video duration in frames / seconds
input_video = cv2.VideoCapture(str(local_source))
input_frames = input_video.get(cv2.CAP_PROP_FRAME_COUNT)
input_fps = input_video.get(cv2.CAP_PROP_FPS) or 30.0
input_duration = input_frames / input_fps
input_video.release()
if TEST_VIDEO_RECORD_FILE.exists():
os.remove(TEST_VIDEO_RECORD_FILE)
try:
turn_servers = await lookup_turn_ice_servers.remote.aio()
except Exception as e:
print(f"Skipping TURN credential check (unavailable): {e}")
else:
turn_urls = [entry["urls"] for entry in turn_servers]
if not any(str(url).startswith("turn") for url in turn_urls):
raise RuntimeError(f"TURN ICE list missing turn: URLs: {turn_urls}")
if not any(
entry.get("username") and entry.get("credential") for entry in turn_servers
):
raise RuntimeError("TURN ICE list missing username/credential")
base_url = await WebcamObjDet().web.get_web_url.aio()
offer_url = base_url.rstrip("/") + "/offer"
stun_ice_url = base_url.rstrip("/") + "/ice-servers?mode=stun"
async def _json_or_raise(resp, what: str):
# aiohttp ClientResponseError is not cloudpickle-safe; raise a plain error.
if resp.status >= 400:
body = (await resp.text())[:500]
raise RuntimeError(f"{what} failed: HTTP {resp.status}: {body}")
return await resp.json()
def _retriable_http(err: RuntimeError) -> bool:
# CI can steal the shared ephemeral webhook label mid-request (5xx), or
# leave the URL pointing at a stopped app (404).
msg = str(err)
return "HTTP 5" in msg or "HTTP 404" in msg
async def _get_json(session, url, what, attempts=3):
last_err = None
for attempt in range(attempts):
try:
async with session.get(url) as resp:
return await _json_or_raise(resp, what)
except RuntimeError as e:
last_err = e
if attempt + 1 == attempts or not _retriable_http(e):
raise
await asyncio.sleep(0.5 * (attempt + 1))
raise last_err
async with ClientSession() as session:
# fetch STUN ICE servers from the signaling server (same list the GPU peer uses)
ice_payload = await _get_json(
session, stun_ice_url, "GET /ice-servers?mode=stun"
)
ice_servers = [
RTCIceServer(
urls=entry["urls"],
username=entry.get("username"),
credential=entry.get("credential"),
)
for entry in ice_payload["ice_servers"]
]
pc = RTCPeerConnection(configuration=RTCConfiguration(iceServers=ice_servers))
player = MediaPlayer(str(local_source))
recorder = MediaRecorder(str(TEST_VIDEO_RECORD_FILE))
blackhole = MediaBlackhole()
try:
# src file has audio; MediaPlayer demux stalls if that track isn't read.
# drain it without sending; browser clients use video-only getUserMedia.
if player.audio:
blackhole.addTrack(player.audio)
# audio before video keeps media m-lines in the order Pipecat expects
pc.addTransceiver("audio")
# client-created datachannel required by Pipecat's SmallWebRTCConnection
pc.createDataChannel("modal-webrtc")
# setup video player and add track to peer connection
if player.video:
pc.addTrack(player.video)
# when we receive a track back from the video processing peer we record it
@pc.on("track")
def on_track(track):
if track.kind != "video":
return
# record track to file
recorder.addTrack(track)
@track.on("ended")
async def on_ended():
# stop recording when incoming track ends to finish writing video
await recorder.stop()
# set local description and send as offer to peer
offer = await pc.createOffer()
await pc.setLocalDescription(offer)
# wait for ICE gathering; proceed with partial SDP if it times out
deadline = time.monotonic() + ICE_GATHERING_TIMEOUT_SECS
while pc.iceGatheringState != "complete":
if time.monotonic() >= deadline:
print(
f"ICE gathering timed out after {ICE_GATHERING_TIMEOUT_SECS}s; "
"continuing with available candidates"
)
break
await asyncio.sleep(0.05)
last_err = None
answer = None
for attempt in range(3):
try:
async with session.post(
offer_url,
json={
"sdp": pc.localDescription.sdp,
"type": pc.localDescription.type,
"ice_server_type": "stun",
},
) as resp:
answer = await _json_or_raise(resp, "POST /offer")
break
except RuntimeError as e:
last_err = e
if attempt + 1 == 3 or not _retriable_http(e):
raise
await asyncio.sleep(0.5 * (attempt + 1))
else:
raise last_err
await blackhole.start()
await pc.setRemoteDescription(
RTCSessionDescription(sdp=answer["sdp"], type=answer["type"])
)
deadline = time.monotonic() + CONNECTION_TIMEOUT_SECS
while pc.connectionState not in ("connected", "failed", "closed"):
if time.monotonic() >= deadline:
raise RuntimeError(
f"timed out waiting for WebRTC connected; state={pc.connectionState}"
)
await asyncio.sleep(0.05)
if pc.connectionState != "connected":
raise RuntimeError(f"peer connection {pc.connectionState}")
# mediaRecorders need to be started manually
await recorder.start()
# run until sufficient time has passed
await asyncio.sleep(input_duration + VIDEO_DURATION_BUFFER_SECS)
finally:
await pc.close()
await blackhole.stop()
# finalize the mp4 even if track "ended" never fires after close.
await recorder.stop()
if player.audio:
player.audio.stop()
if player.video:
player.video.stop()
# wait for peer to finish processing video
await asyncio.sleep(5.0)
# compare output video length to input video length
output_video = cv2.VideoCapture(str(TEST_VIDEO_RECORD_FILE))
output_frames = int(output_video.get(cv2.CAP_PROP_FRAME_COUNT))
output_video.release()
return input_frames, output_frames
```
### Webscraper
# A simple web scraper
In this guide we'll introduce you to Modal by writing a simple web scraper.
We'll explain the foundations of a Modal application step by step.
## Set up your first Modal app
Modal Apps are orchestrated as Python scripts but can theoretically run
anything you can run in a container. To get you started, make sure to install
the latest `modal` Python package and set up an API token (the first two steps
[here](https://modal.com/docs/guide)).
## Scrape links locally
First, we create an empty Python file `webscraper.py`. This file will contain our
application code. Let's write some basic Python code to fetch the contents of a
web page and print the links (`href` attributes) it finds in the document:
```python
import re
import sys
import urllib.request
def get_links(url):
response = urllib.request.urlopen(url)
html = response.read().decode("utf8")
links = []
for match in re.finditer('href="(.*?)"', html):
links.append(match.group(1))
return links
if __name__ == "__main__":
links = get_links(sys.argv[1])
print(links)
```
Now obviously this is just pure standard library Python code, and you can run it
on your machine:
```bash
$ python webscraper.py http://example.com
['https://www.iana.org/domains/example']
```
## Run it on Modal
To make the `get_links` function run on Modal instead of your local machine, all
you need to do is
- Import `modal`
- Create a [`modal.App`](/docs/reference/modal.App) instance
- Add an `@app.function()` annotation to your function
- Replace the `if __name__ == "__main__":` block with a function decorated with
[`@app.local_entrypoint()`](/docs/reference/modal.App#local_entrypoint)
- Call `get_links` using `get_links.remote`
```python
import re
import urllib.request
import modal
app = modal.App(name="example-webscraper")
@app.function()
def get_links(url):
response = urllib.request.urlopen(url)
html = response.read().decode("utf8")
links = []
for match in re.finditer('href="(.*?)"', html):
links.append(match.group(1))
return links
@app.local_entrypoint()
def main(url):
links = get_links.remote(url)
print(links)
```
You can now run this with the Modal CLI, using `modal run` instead of `python`.
This time, you'll see additional progress indicators while the script is
running, something like:
```bash
$ modal run webscraper.py --url http://example.com
✓ Initialized.
✓ Created objects.
['https://www.iana.org/domains/example']
✓ App completed.
```
## Add dependencies
In the code above we make use of the Python standard library `urllib` library.
This works great for static web pages, but many pages these days use javascript
to dynamically load content, which wouldn't appear in the loaded html file.
Let's use the [Playwright](https://playwright.dev/python/docs/intro) package to
instead launch a headless Chromium browser which can interpret any javascript
that might be on the page.
We can pass [custom container images](/docs/guide/images) (defined using
[`modal.Image`](/docs/reference/modal.Image)) to the `@app.function()`
decorator. We'll make use of the `modal.Image.debian_slim` pre-bundled Image add
the shell commands to install Playwright and its dependencies:
```python
import modal
app = modal.App("example-webscraper")
playwright_image = modal.Image.debian_slim(python_version="3.10").run_commands(
"apt-get update",
"apt-get install -y software-properties-common",
"apt-add-repository non-free",
"apt-add-repository contrib",
"pip install playwright==1.42.0",
"playwright install-deps chromium",
"playwright install chromium",
)
```
Note that we don't have to install Playwright or Chromium on our development
machine since this will all run in Modal. We can now modify our `get_links`
function to make use of the new tools.
```python
@app.function(image=playwright_image)
async def get_links(cur_url: str) -> list[str]:
from playwright.async_api import (
TimeoutError as PlaywrightTimeoutError,
async_playwright,
)
async with async_playwright() as p:
browser = await p.chromium.launch()
page = await browser.new_page()
try:
await page.goto(cur_url, timeout=10_000) # ten seconds
except PlaywrightTimeoutError:
print(f"Timeout loading {cur_url}, skipping")
await browser.close()
return []
links = await page.eval_on_selector_all(
"a[href]", "elements => elements.map(element => element.href)"
)
await browser.close()
print("Links", links)
return list(set(links))
```
Since Playwright has a nice async interface, we'll redeclare our `get_links`
function as async (Modal works with both sync and async functions).
The first time you run the function after making this change, you'll notice that
the output first shows the progress of building the image you specified,
after which your function runs like before. This image is then cached so that on
subsequent runs of the function it will not be rebuilt as long as the image
definition is the same.
## Scale out
So far, our script only fetches the links for a single page. What if we want to
scrape a large list of links in parallel?
We can do this easily with Modal, because of some magic: the function we wrapped
with the `@app.function()` decorator is no longer an ordinary function, but a
Modal [Function](https://modal.com/docs/reference/modal.Function) object. This
means it comes with a `map` property built in, that lets us run this function
for all inputs in parallel, scaling up to as many workers as needed.
Let's change our code to scrape all urls we feed to it in parallel:
```python
@app.local_entrypoint()
def main():
urls = ["http://modal.com", "http://github.com"]
for links in get_links.map(urls):
for link in links:
print(link)
```
## Deploy it and run it on a schedule
Let's say we want to log the scraped links daily. We move the print loop into
its own Modal function and annotate it with a `modal.Period(days=1)` schedule -
indicating we want to run it once per day. Since the scheduled function will not
run from our command line, we also add a hard-coded list of links to crawl for
now. In a more realistic setting we could read this from a database or other
accessible data source.
```python
@app.function(schedule=modal.Period(days=1))
def daily_scrape():
urls = ["http://modal.com", "http://github.com"]
for links in get_links.map(urls):
for link in links:
print(link)
```
To deploy App permanently, run the command
```
modal deploy webscraper.py
```
Running this command deploys this function and then closes immediately. We can
see the deployment and all of its runs, including the printed links, on the
Modal [Apps page](https://modal.com/apps). Rerunning the script will redeploy
the code with any changes you have made - overwriting an existing deploy with
the same name ("example-webscraper" in this case).
## Add Secrets and integrate with other systems
Instead of looking at the links in the run logs of our deployments, let's say we
wanted to post them to a `#scraped-links` Slack channel. To do this, we can
make use of the [Slack API](https://api.slack.com/) and the `slack-sdk`
[PyPI package](https://pypi.org/project/slack-sdk/).
The Slack SDK WebClient requires an API token to get access to our Slack
Workspace, and since it's bad practice to hardcode credentials into application
code we make use of Modal's **Secrets**. Secrets are snippets of data that will
be injected as environment variables in the containers running your functions.
The easiest way to create Secrets is to go to the
[Secrets section of modal.com](https://modal.com/secrets). You can both create a
free-form secret with any environment variables, or make use of presets for
common services. We'll use the Slack preset and after filling in the necessary
information we are presented with a snippet of code that can be used to post to
Slack using our credentials, which looks something like:
```python
import os
slack_sdk_image = modal.Image.debian_slim(python_version="3.10").uv_pip_install(
"slack-sdk"
)
@app.function(
image=slack_sdk_image,
secrets=[
modal.Secret.from_name(
"scraper-slack-secret", required_keys=["SLACK_BOT_TOKEN"]
)
],
retries=3,
)
def bot_token_msg(channel, message):
import slack_sdk
client = slack_sdk.WebClient(token=os.environ["SLACK_BOT_TOKEN"])
print(f"Posting {message} to #{channel}")
client.chat_postMessage(channel=channel, text=message)
```
Notice the `retries` in the `@app.function` decorator.
That parameter adds automatic retries when Function calls fail
due to temporary issues, like rate limits. Read more [here](https://modal.com/docs/guide/retries)
Copy that code, then amend the `daily_scrape` function to call
`bot_token_msg`. We also add a per-URL `limit` for good measure.
```python
@app.function(schedule=modal.Period(days=1))
def daily_scrape(limit: int = 50):
urls = ["http://modal.com", "http://github.com"]
for links in get_links.map(urls):
for link in links[:limit]:
bot_token_msg.remote("scraped-links", link)
@app.local_entrypoint()
def main():
urls = ["http://modal.com", "http://github.com"]
for links in get_links.map(urls):
for link in links:
print(link)
```
Note that we are freely making function calls across completely different
container images, as if they were regular Python functions in the same program!
We keep the `local_entrypoint` the same so that we can still `modal run`
this script to test the scraping behavior without posting to Slack.
```bash
modal run webscraper.py # runs get_links.map via the local_entrypoint
```
If we want to test the `daily_scrape` or `bot_token_msg` Functions themselves, we can do that too!
We just add the name of the Function to the end of our `modal run` command:
```bash
modal run webscraper.py::daily_scrape --limit 1 # quick test
```
Now redeploy the script to overwrite the old deploy with our updated code, and
you'll get a daily feed of scraped links in your Slack channel 🎉
```bash
modal deploy webscraper.py
```
## Summary
We have shown how you can use Modal to develop distributed Python data
applications using custom containers. Through simple constructs we were able to
add parallel execution. With the change of a single line of code were were able
to go from experimental development code to a deployed application. We hope
this overview gives you a glimpse of what you are able to build using Modal.
### Webscraper Old
# Web Scraping on Modal
This example shows how you can scrape links from a website and post them to a Slack channel using Modal.
```python
import os
import modal
app = modal.App("example-webscraper")
playwright_image = modal.Image.debian_slim(
python_version="3.10"
).run_commands( # Doesn't work with 3.11 yet
"apt-get update",
"apt-get install -y software-properties-common",
"apt-add-repository non-free",
"apt-add-repository contrib",
"pip install playwright==1.42.0",
"playwright install-deps chromium",
"playwright install chromium",
)
@app.function(image=playwright_image)
async def get_links(url: str) -> set[str]:
from playwright.async_api import async_playwright
async with async_playwright() as p:
browser = await p.chromium.launch()
page = await browser.new_page()
await page.goto(url)
links = await page.eval_on_selector_all(
"a[href]", "elements => elements.map(element => element.href)"
)
await browser.close()
return set(links)
slack_sdk_image = modal.Image.debian_slim(python_version="3.10").uv_pip_install(
"slack-sdk==3.27.1"
)
@app.function(
image=slack_sdk_image,
secrets=[
modal.Secret.from_name(
"scraper-slack-secret", required_keys=["SLACK_BOT_TOKEN"]
)
],
)
def bot_token_msg(channel, message):
import slack_sdk
from slack_sdk.http_retry.builtin_handlers import RateLimitErrorRetryHandler
client = slack_sdk.WebClient(token=os.environ["SLACK_BOT_TOKEN"])
rate_limit_handler = RateLimitErrorRetryHandler(max_retry_count=3)
client.retry_handlers.append(rate_limit_handler)
print(f"Posting {message} to #{channel}")
client.chat_postMessage(channel=channel, text=message)
@app.function()
def scrape():
links_of_interest = ["http://modal.com"]
for links in get_links.map(links_of_interest):
for link in links:
bot_token_msg.remote("scraped-links", link)
@app.function(schedule=modal.Period(days=1))
def daily_scrape():
scrape.remote()
@app.local_entrypoint()
def run():
scrape.remote()
```
### Whisperx Transcribe
# WhisperX transcription with word-level timestamps
This example shows how to run [WhisperX](https://github.com/m-bain/whisperX) on
Modal for accurate, word-level timestamped transcription.
We’ll walk through the following steps:
1. Defining the container image with CUDA 12.8, cuDNN 8, FFmpeg and Python deps.
2. Persisting model weights to a [Modal Volume](https://modal.com/docs/reference/modal.Volume).
3. A [Modal Cls](https://modal.com/docs/reference/modal.App#cls) that loads WhisperX once per GPU instance.
4. A [local entrypoint](https://modal.com/docs/reference/modal.App#local_entrypoint) that uploads an audio file to the service.
## Defining image
We start from NVIDIA’s official CUDA 12.8 devel image, add cuDNN, FFmpeg, and
install the WhisperX Python package plus its numerical deps.
```python
import os
import tempfile
from typing import Dict
import modal
MODEL_CACHE_DIR = "/whisperx-cache"
image = (
modal.Image.from_registry(
"nvidia/cuda:12.8.0-cudnn-devel-ubuntu22.04",
add_python="3.12",
)
# ── System deps ─────────────────────────────────────────────────────────────
.apt_install("ffmpeg") # audio decoding / resampling
.apt_install("libcudnn8") # cuDNN runtime
.apt_install("libcudnn8-dev") # cuDNN headers (needed by torch wheels)
# ── Python deps ─────────────────────────────────────────────────────────────
.uv_pip_install(
"whisperx==3.4.0", # our ASR library
"numpy==2.0.2",
"scipy==1.15.0",
)
# Tell HF & Torch to cache inside our Volume
.env({"HF_HOME": MODEL_CACHE_DIR})
.env({"TORCH_HOME": MODEL_CACHE_DIR})
)
```
## Defining the app
Downloaded weights live in a [Modal Volume](https://modal.com/docs/reference/modal.Volume) so subsequent runs reuse them.
```python
app = modal.App("example-whisperx-transcribe", image=image)
models_volume = modal.Volume.from_name("whisperx-models", create_if_missing=True)
```
## Defining the inference service
We wrap WhisperX inference in a Modal Cls.
A single GPU container can serve multiple concurrent requests.
```python
@app.cls(
gpu="H100",
image=image,
volumes={MODEL_CACHE_DIR: models_volume},
timeout=30 * 60,
)
class WhisperX:
"""Serverless WhisperX service running on a single GPU."""
@modal.enter()
def setup(self):
print("🔄 Loading WhisperX model …")
import whisperx
self.model = whisperx.load_model(
"large-v2",
device="cuda",
compute_type="float16",
download_root=MODEL_CACHE_DIR,
)
print("✅ Model ready!")
@modal.method()
def transcribe(self, audio_data: bytes) -> Dict:
"""
Transcribe an audio file passed in as raw bytes.
Returns language, per-word segments, and total duration.
"""
import whisperx
with tempfile.NamedTemporaryFile(suffix=".wav", delete=False) as temp_audio:
temp_audio.write(audio_data)
temp_audio_path = temp_audio.name
try:
audio = whisperx.load_audio(temp_audio_path)
result = self.model.transcribe(audio, batch_size=16, language="en")
language = result.get("language", "en")
if result["segments"]:
try:
align_model, metadata = whisperx.load_align_model(
language_code=language,
device=self.device,
model_dir=MODEL_CACHE_DIR,
)
result = whisperx.align(
result["segments"], align_model, metadata, audio, self.device
)
except Exception as e:
print(f"⚠️ Alignment failed: {e} — falling back to segment-level")
return {
"language": language,
"segments": result["segments"],
"duration": len(audio) / 16_000, # audio is 16 kHz
}
finally:
if os.path.exists(temp_audio_path):
os.unlink(temp_audio_path)
```
## Command-line usage
We expose a [local entrypoint](https://modal.com/docs/reference/modal.App#local_entrypoint)
so you can run:
- using a local audio file
- using a link to an audio file
```bash
modal run whisperx_transcribe.py --audio-file audio.wav # uses a local audio file
modal run whisperx_transcribe.py --audio-link https://example.com/audio.wav # uses a link to an audio file
modal run whisperx_transcribe.py # uses a default public audio file
```
```python
@app.local_entrypoint()
def main(
audio_file: str = None,
audio_link: str = None,
):
import json
import time
import requests
if not audio_file and not audio_link:
print("No audio file or link provided, using default link")
audio_link = "https://modal-public-assets.s3.us-east-1.amazonaws.com/erik.wav"
if audio_file:
print(f"🔊 Reading {audio_file} …")
with open(audio_file, "rb") as f:
audio_data = f.read()
elif audio_link:
print(f"🔊 Reading {audio_link} …")
audio_data = requests.get(audio_link).content
transcriber = WhisperX()
print("📝 Transcribing …")
start = time.time()
result = transcriber.transcribe.remote(audio_data)
duration = time.time() - start
print(f"\n🌐 Detected language: {result['language']}")
print(f"⏱️ Audio duration: {result['duration']:.2f} s")
print(f"🚀 Time taken: {duration:.2f} s")
with open("transcription.json", "w") as f:
json.dump(result, f, indent=2)
print("\n💾 Saved transcription → transcription.json")
```